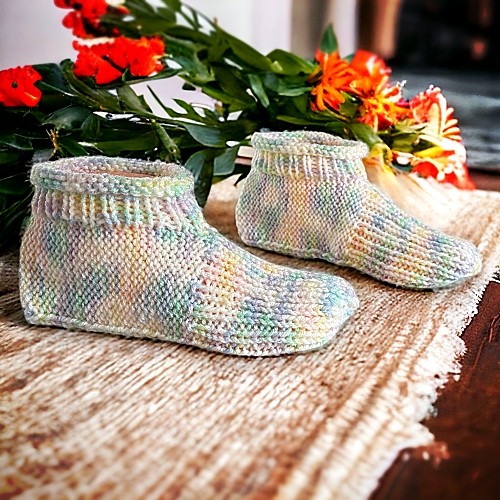
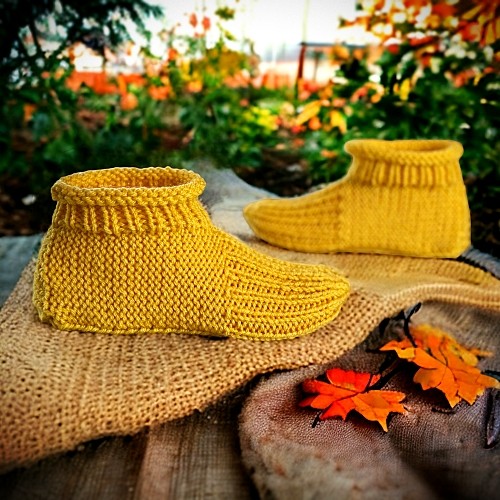
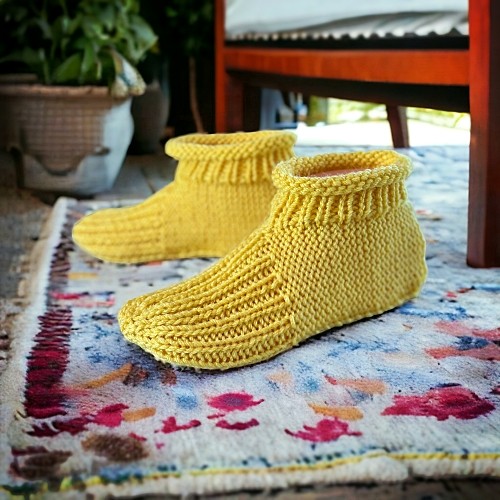
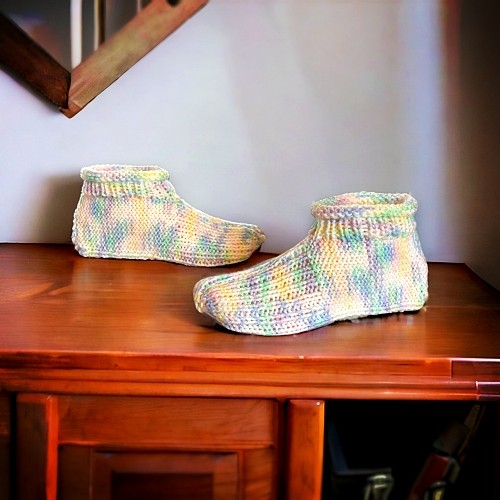
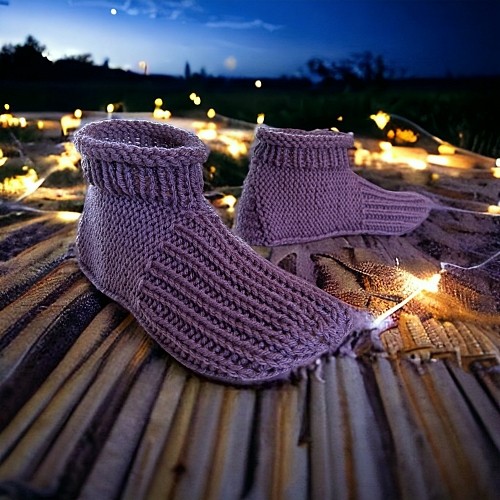
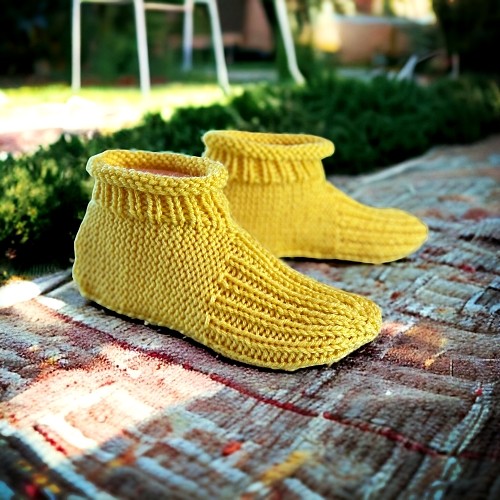
Learn how to knit cozy Grandma-style slippers with this free beginner-friendly pattern and full step-by-step video tutorial.

This is actually one of the very first patterns I ever made, way back over 10 years ago! The original slippers worked fine, but I wanted to update them to make everything easier to follow, especially for beginners. Plus, I wanted the sizing and instructions to be a bit clearer so anyone can make a cozy pair.


Now the pattern covers more sizes, from small women’s feet all the way up to men’s size 14. Even if larger sizes aren’t requested as often, it’s nice to know everyone can get a snug, comfy fit.
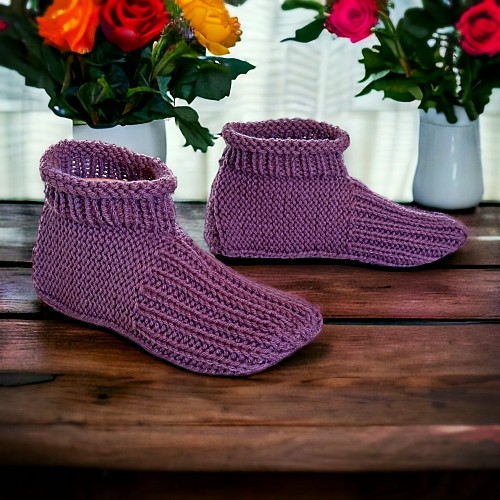
I also changed the sole from stockinette to garter stitch. This gives the slippers a thicker, sturdier sole that wears better and adds a little grip; perfect for walking around the house without slipping. It really gives these slippers that classic, “Grandma-made” feel.
To make it even easier, I’ve made a full YouTube tutorial showing every step. From casting on and shaping the heel to making the cuff and sewing everything together, the video walks you through it all. Even if you’ve never knitted slippers before, you’ll be able to follow along and make your own cozy pair.
If you are loving this and all my other free patterns, please help out financially by visiting my Help Support My Work Page. If you can’t give cash, and I get that not everyone can, please do your part and share this where you can. Every share on social media helps promote my work and expose it to even more people. I’ve made it super easy for everyone to do that. By clicking those links up there 👆🏼 you can share it nearly everywhere.
Not a fan of reading knitting patterns online or would prefer to print this off? I also have the PDF version of this pattern available as a free download from my site too. Click either of these links to get the ad free download for a small fee – KweenBee on Shopify, in my Etsy shop, Ravelry, LoveCrafts, CreativeFabrica and on Amazon.
Another way to avoid ads and pop-ups, get instant, PRINTABLE downloads of this pattern and others, is by becoming a Member. When you become a Website Supporter at $4/month, you’ll gain access to exclusive member only posts on Buy Me A Coffee. You can download as many patterns as you like for the same $4 each month. You can go to this page to learn more, become a member and support my work… Exclusive Member Area
Abbreviations
K – knit
P – purl
K2tog – knit 2 stitches together
st — stitch
sts — stitches
Things you need:
Click on any of the links below to get everything you need to make these slippers sent right to your door.
200 grams of worsted weight yarn
Pair of size 5 mm ( US size 8) knitting needles or whatever size to obtain correct gauge.
Set of 4 size 5 mm (US size 8) double pointed needles or whatever size to obtain correct gauge.
Darning or tapestry needle to sew seams and work in the ends.
Gauge
In stockinette stitch
9 sts – 5 cm (2″)
13 rows – 5 cm (2”)
Sizes are written as such:
Women 6-7 (8-9, 10-11, 12)
Men 6 (7-8, 9-10, 11-12, 13-14)
The Pattern
Cast on 38 (40, 44, 46, 46)
✬ Row 1: P13 (13, 15, 15, 15) K12 (14, 14, 16, 16) P13 (13, 15, 15, 15)
Row 2: K13 (13, 15, 15, 15) P1, K10 (12, 12, 14, 14) P1, K13 (13, 15, 15, 15) ✬
Repeat from ✬ to ✬ 13 (14,16, 17, 18) times more for a total of 28 (30, 34, 36, 38) rows.
Shape toe
❤︎ Next Row: With the RIGHT side facing, P1 ❂ K1 P1 ❂ Repeat from ❂ to ❂ 5 (5, 6, 6, 6) more times. K12 (14, 14, 16, 16) P1, ✿ K1 P1 ✿ Repeat from ✿ to ✿ 5 (5, 6, 6, 6) more times.
Next Row: ☻ K1 P1 ☻ Repeat from ☻ to ☻ 6 (6, 7, 7, 7) more times. K10 (12, 12, 14, 14) ☀︎ P1 K1 ☀︎ Repeat from ☀︎ to ☀︎ 6 (6, 7, 7, 7) more times.❤︎
Repeat from ❤︎ to ❤︎ 9 (10, 11, 12, 13) more times for a total of 20 (22, 24, 26, 28) rows for this section. You have a total of 48 (52, 58, 62, 66) rows from the cast on edge.
End Toe
Next Row: K2tog 10 times. K1 K2tog to the last st. P1.
Next Row: K1 P7 (7, 8, 8, 8). K 5(6, 6, 7, 7) P to the end of the row.
Next Row: K1 K2tog 5 times. K0 (1, 1, 0, 0) K2tog to the last st. P1.
Please share this page!
More FREE patterns
Click the pic to read online!!


![]()
![]()


FREE Knitting Graph Paper for Colorwork Knitting


Next Row: K1 P4 K2 (3, 4, 4, 4) P to the end of the row.
Draw through to pull the stitches together.
Heel and Cuff
If you need a little extra help with this part, the video will show you how to do it. You can either click this link – Making the Heel and Cuff. It starts at the correct spot in the video.
With the RIGHT side facing, pick up 12 (14, 14, 16, 16) stitches along the cast on edge
✦Next 2 Rows: K across.
Next Row: K2tog. K to last 2 sts. K2tog. ✦ Repeat from ✦ to ✦ until there are 4 sts on your needle.
Next Row: K2tog twice.
End with the yarn on the left side of the row when the right side of the slipper is facing you. You may need to knit one more row.
My stuff on Etsy:
You can make a widget like this for your blog or website, too.
Instructions are on my website here: How to Display Etsy Items on Your Website
Create cuff:
With the RIGHT side facing and your DPN’s, pick up 36 (38, 42, 44, 48) sts evenly around the edge of the slipper. You will now have 38 (40, 44, 46, 50) sts total.
Rounds 1-6: K1 P1 around.
Rounds 7-10: K around.
Cast off loosely.
Sew seams along the top of the foot and along the sides of the heel. Make another slipper to match.
Hints and Tips:
Be sure to cast your stitches off loosely when making the cuff. It needs to be able to stretch when going over the top of the foot and the heel. It’s the widest part the slipper has to pass over. The ribbing will snap it back to tighten up on its own.
When picking up stitches for the cuff, it doesn’t have to be the exact stitch count I give, but your final number of stitches on your needles MUST be an even number. Make sure your slippers have the same number of stitches around the cuff.
Make the cuff as long as you like with the K1 P1 ribbing. I made it 6 rows but you may want it longer, especially for the larger sizes.
When casting off for the heel, if you need an extra row to end it so the yarn ending on the left with the right side facing (if right you are handed), that’s ok. When knitting this part, I often lose track of how many rows I’ve knitted between the row with the decreases. I’ve never had a complaint yet.
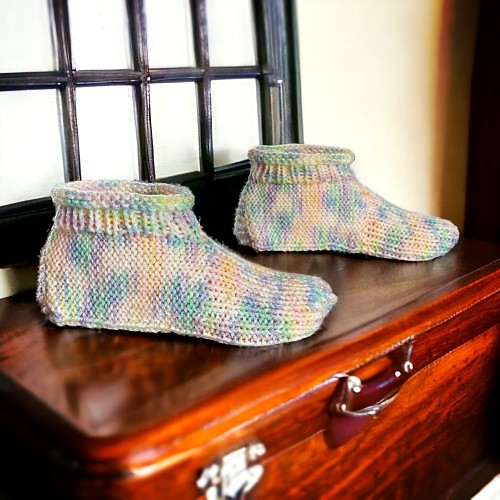
Don’t feel that the cuff needs to be the same colour as the slipper itself. A nice change is to make the cuff in a complimentary colour, especially if you have used variegated yarn. You can also use this pattern to use up some of your left over wool by making the toe (ribbed section) a different colour also.
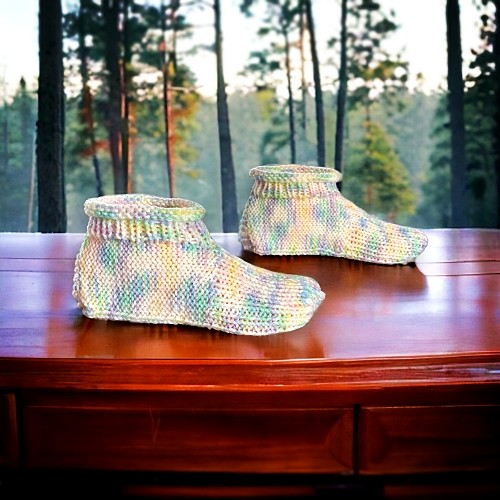
This is also a great pattern to use if you have a variegated or any other colour changing yarn. Because there isn’t any pattern created by the stitches, it allows to show off the colours really well.