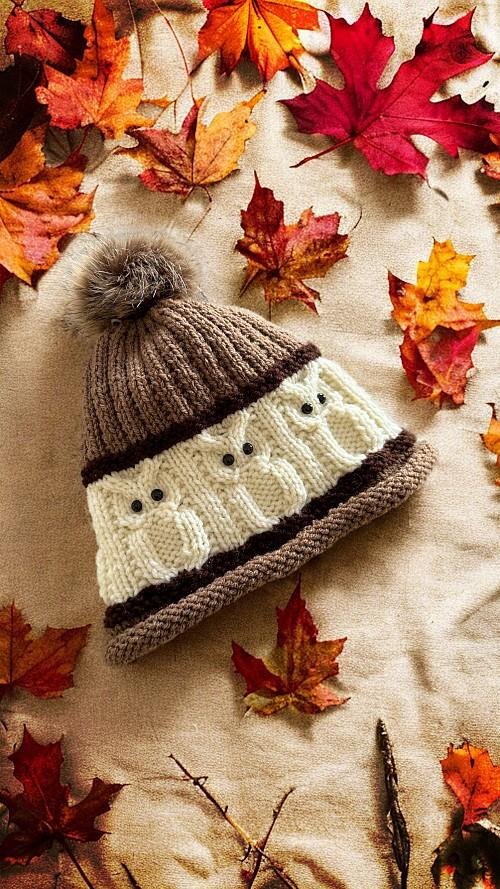
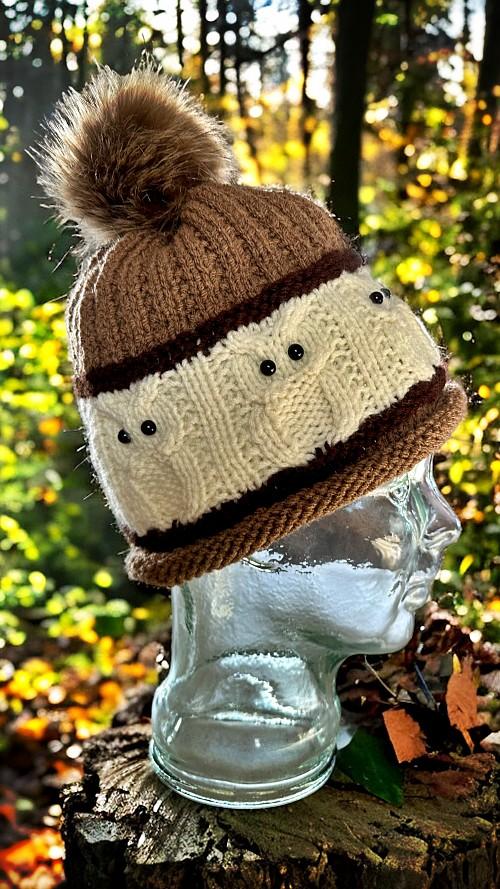
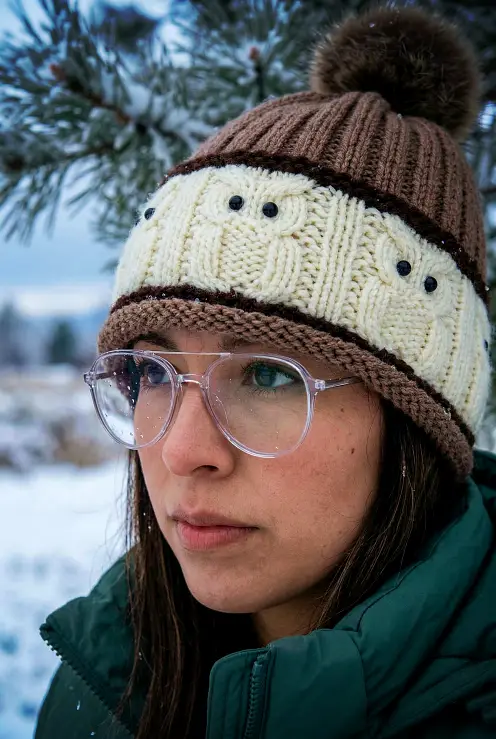
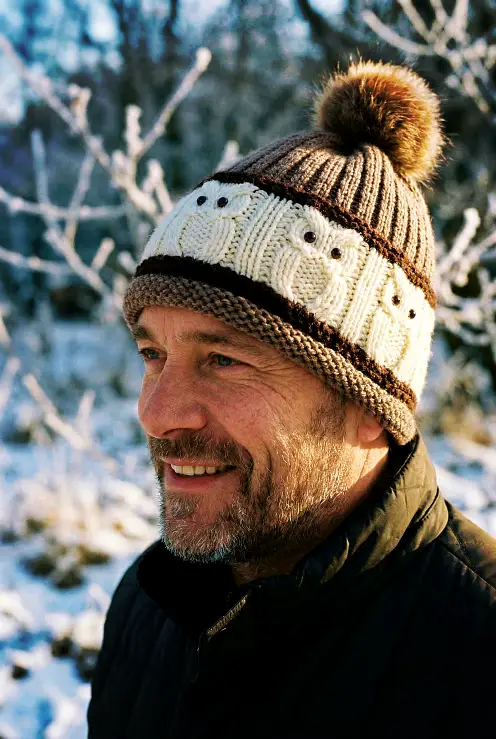
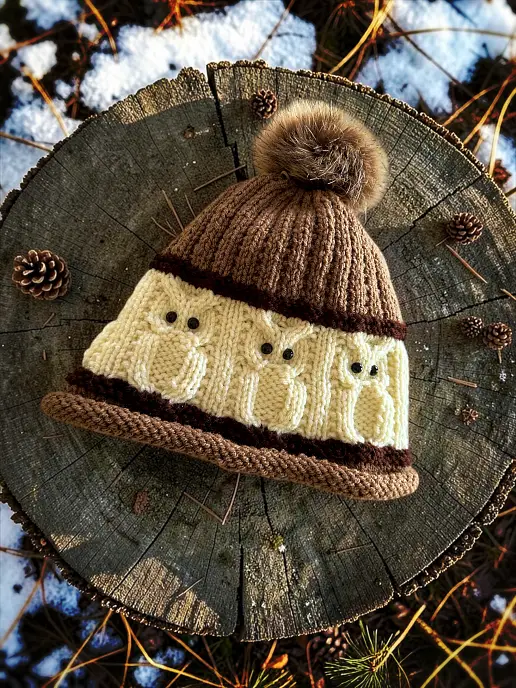
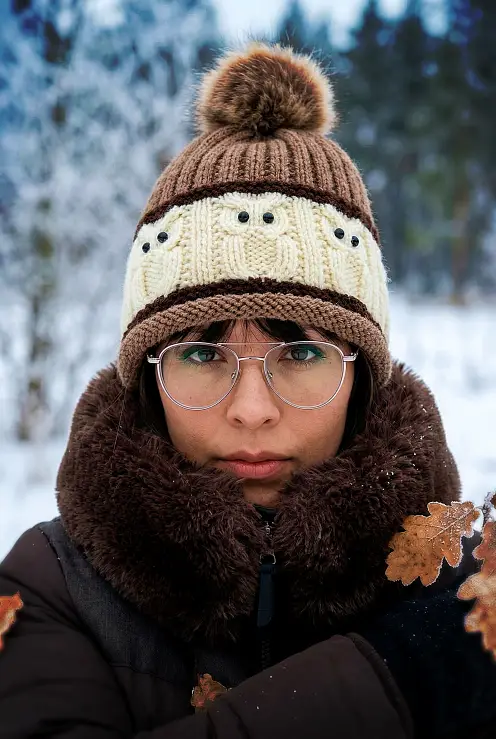
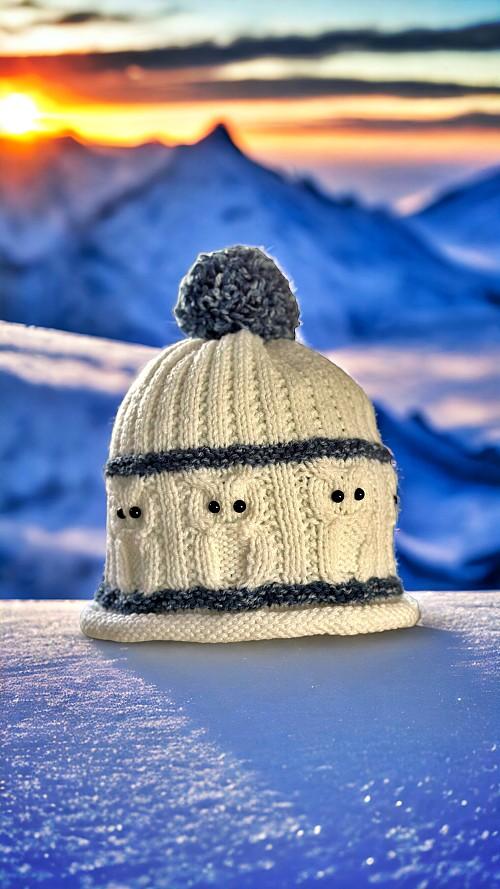
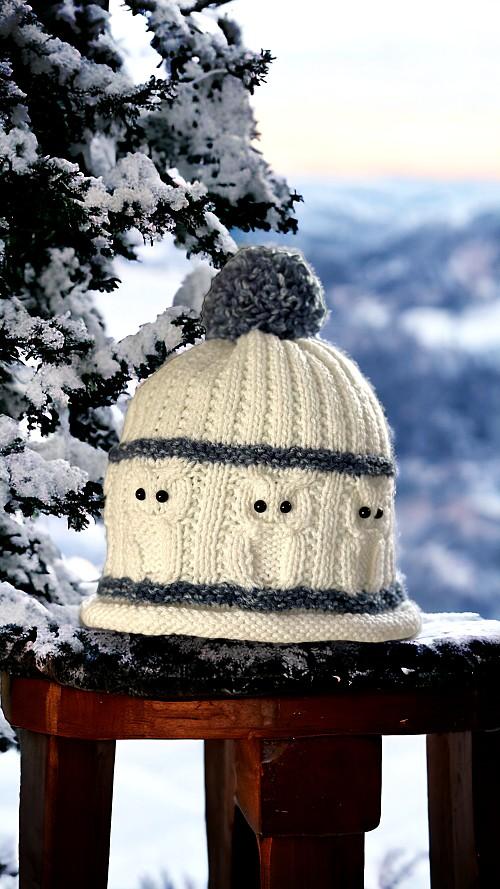
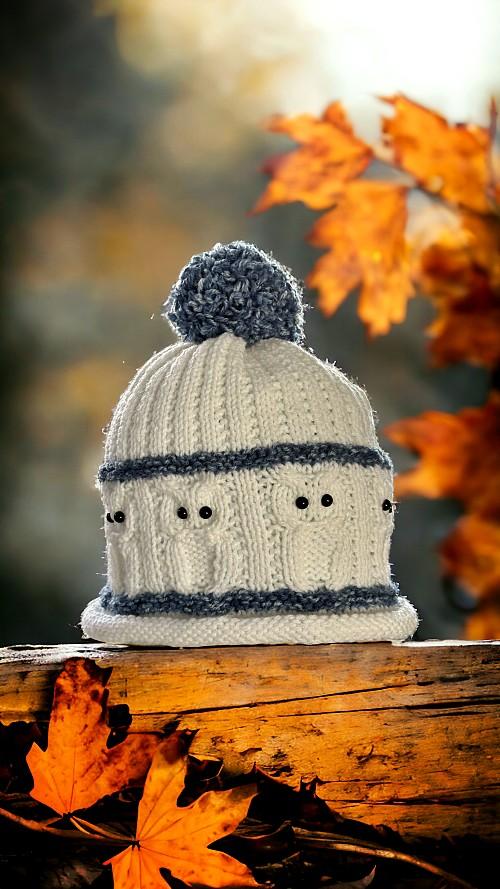
I really do like how well the owl motif worked on this hat! And surprisingly didn’t take much figuring or math once I wrote out the Basic Knit Flat Beanie. I did have to play around with how many rows tall to make the body and head. I didn’t figure it would stretch as much as it does but I’m happy with the final proportions.


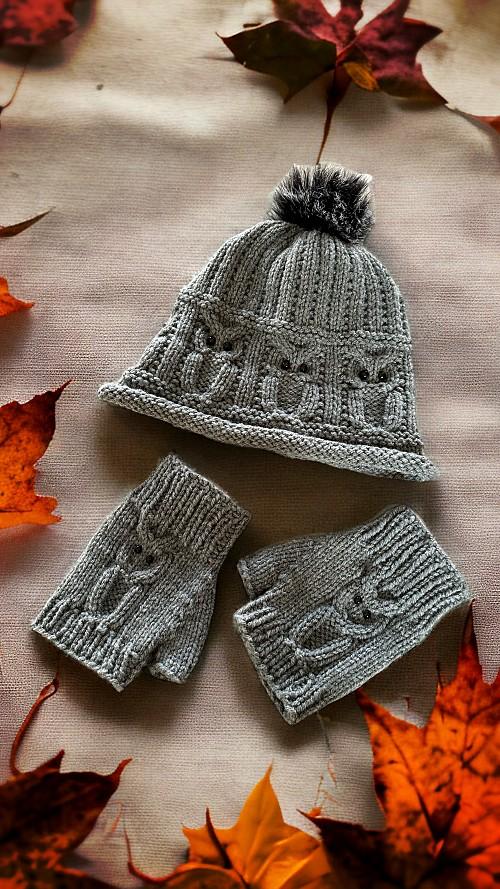


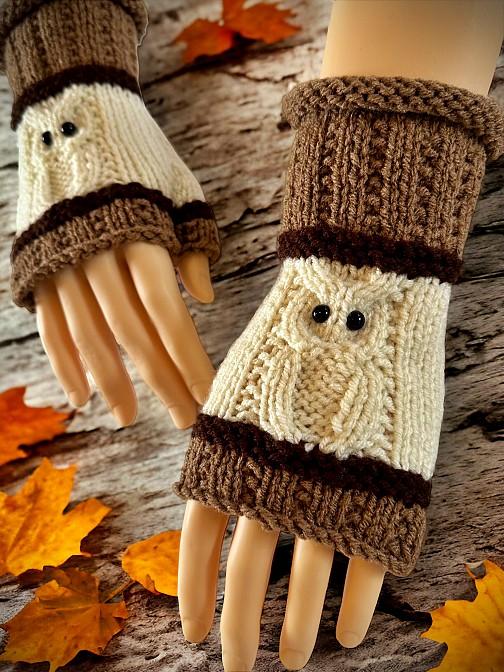
And in case you haven’t found it on the website yet, I have a pair of fingerless gloves that have the same owl motif. There is the knit flat owl gloves that were designed specifically to match this beanie. There is also owl gloves that are knit in the round. The cuffs aren’t a perfect match but are seamless if that’s what you prefer.
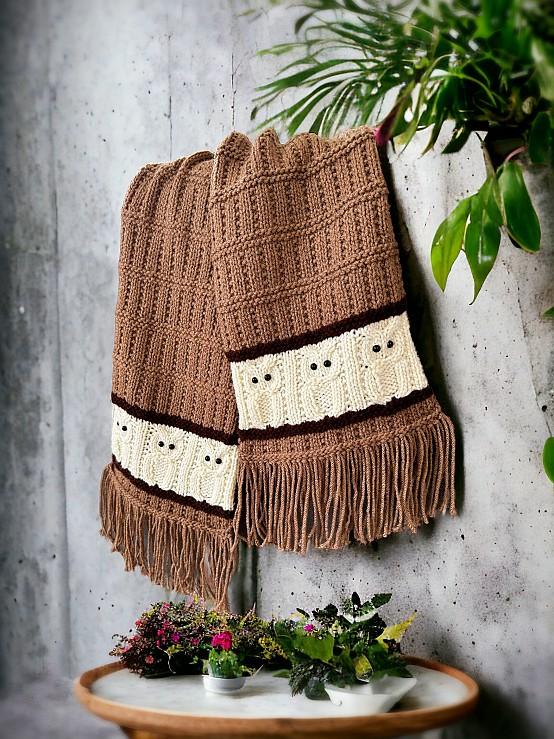
And happy day! The matching scarf pattern is done ☺️ If you would like to get started on the entire matching set, you can read the free, ad supported knitted scarf pattern here: How to Knit a Scarf – with OWLS! FREE Knitting Pattern
And for the last announcement, if you would like to make a beanie winter hat with mushrooms 🍄 instead of owls, I’ve got that too. Here’s that link – Mushroom Beanie Winter Hat
Click or tap on any photo below to read the pattern online.
👇🏼 👇🏼 👇🏼 👇🏼

This owl hat knit pattern is a fairly easy project to make if you have some knitting experience. I designed it to be flat, knit on 2 straight needles so more people would be comfortable in making it. Though the cabling can look intimidating, it really isn’t. I have videos on YouTube that will show you how if you’ve never done it before. I embedded videos in the pattern to help you along.
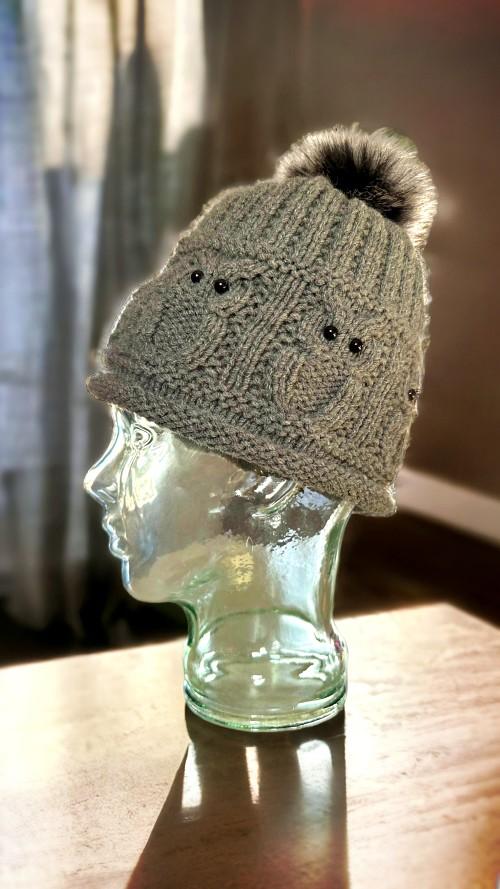
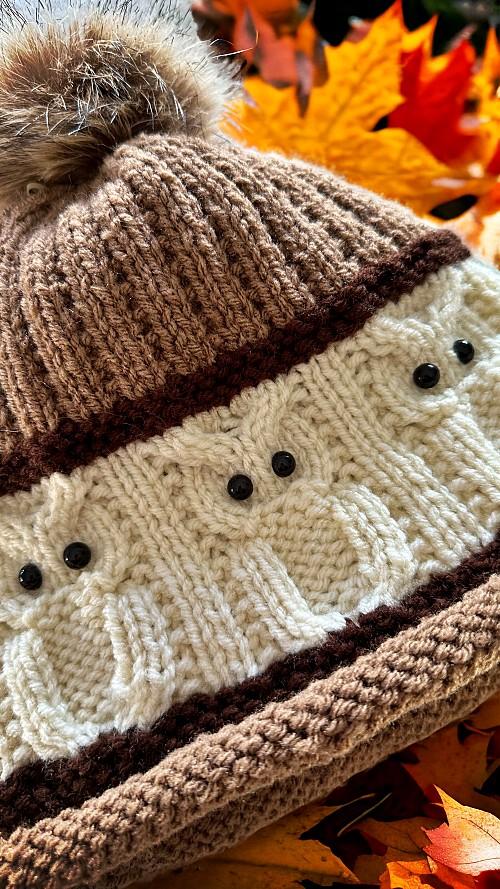
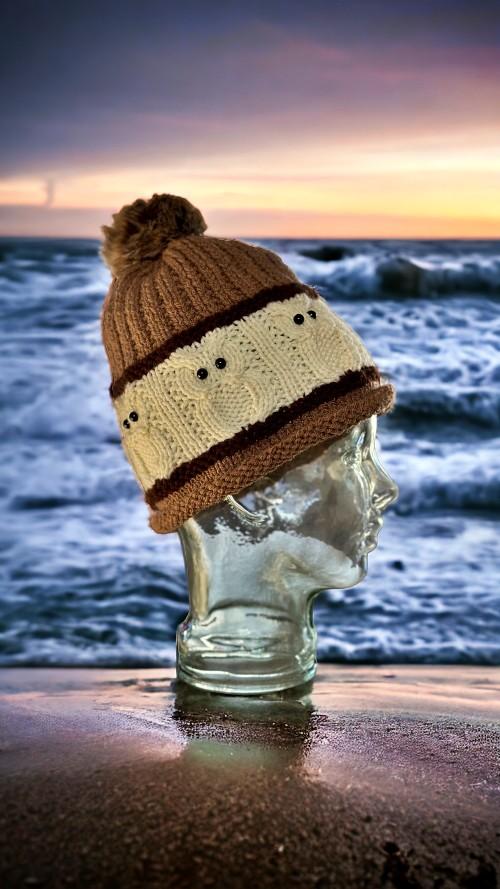
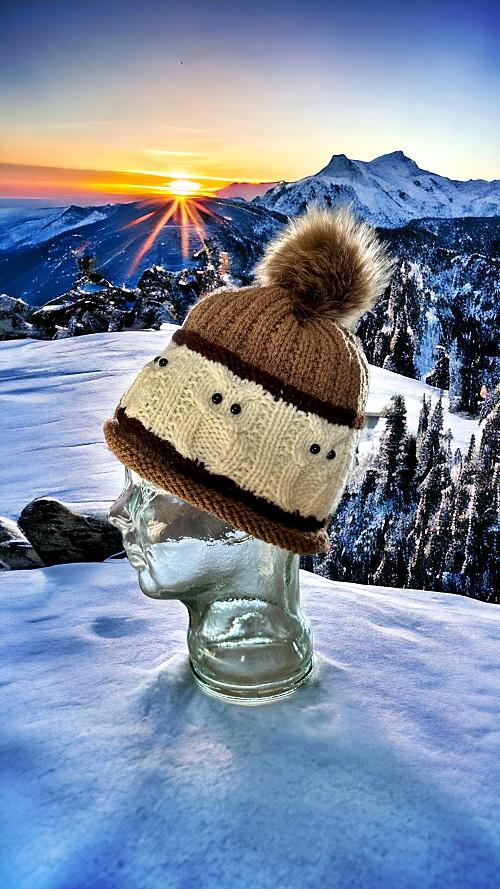
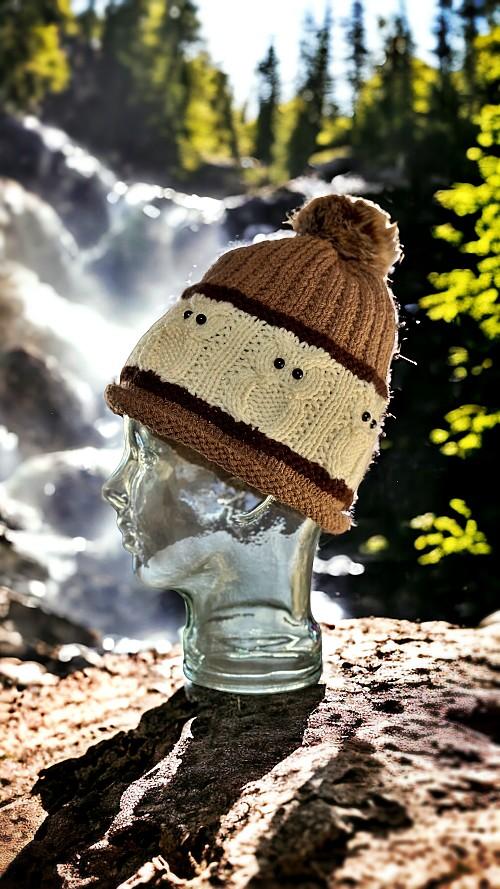
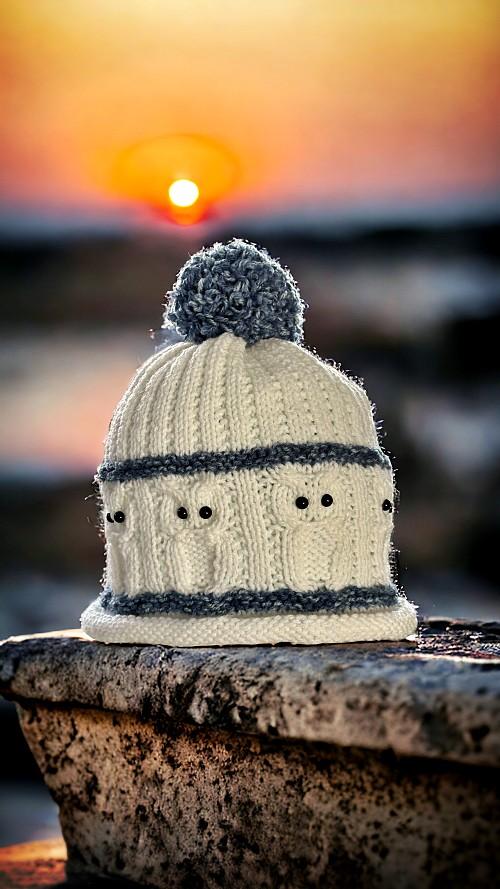
The choice of colour is yours as always. I included where to change colours if you would like to make one with 3 colours like I did for the brown and beige version I made. If you’re making a solid colour toque, you can ignore the notifications in the pattern.
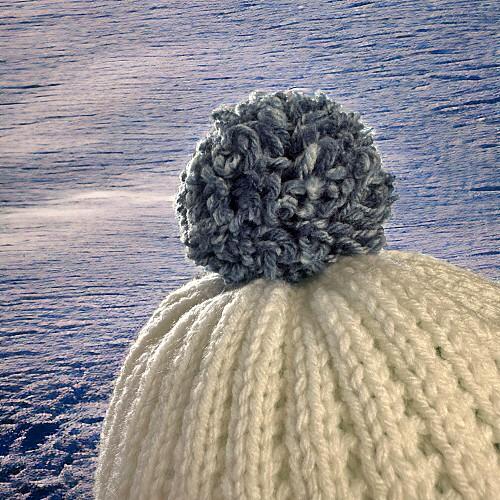
As far as the use of a pom pom on the top… Some love it, some hate it. I know for myself, if I have to put my hood up, I hate them, but aesthetically, they do have their charms NGL. I have more information in the Hints and Tips section about the pom pom on the white and blue beanie.
Things You Need
Worsted weight yarn (either complimentary colours or single colour)
5 mm (Size 8 US) single pointed knitting needles
Cable needle
Tapestry needle to sew seams and work in ends
14 or 16 buttons or jewels for eyes (see Hints and Tips)
Pom pom – you can make or buy these, or not use one at all.
Gauge
In stockinette
9 sts = 2 inches (5 cm)
12 rows = 2 inches (5 cm)
Sizes are written as such:
S-M (L-XL)
Small and medium = 21 inches (53 cm) around
Large and Extra large = 24.5 inches (62 cm) around
Uses about 160 meters or 180 yards. Does NOT include pom-pom.
This pattern makes either 7 or 8 owls around. Each owl motif is about 3.5 inches (8.9 cm) wide if you follow the gauge given. You can adjust your stitches accordingly to make larger or smaller sizes than what I’ve given. Each owl motif uses 12 stitches. So, if you wanted it smaller by one owl cast on 74 sts (86 – 12 = 74)
Another way to avoid ads and pop-ups, get instant, PRINTABLE downloads of this pattern and others, is by becoming a Member. When you become a Website Supporter at $4/month, you’ll gain access to exclusive member only posts on Buy Me A Coffee. You can download as many patterns as you like for the same $4 each month. You can go to this page to learn more, become a member and support my work… Exclusive Member Area
If you enjoy this pattern and my other free online knitting patterns, please consider making a small donation or helping me out by visiting my Help Support My Work page. If that’s not possible, that’s totally fine too! Even sharing this page on your social media helps me out immensely. You can use those buttons below to do so easily.
The Pattern
Cast on 86 (98) sts
♠ Row 1: Knit
Row 2: Purl ♠ Repeat from ♠ to ♠ for a total of 10 rows. (Change colour at the START of row 11 if desired.)
To save yourself time if you’re changing colours, I suggest that you Work in the Ends While Knitting. You can click that link or watch the video here.
Row 11-15: Knit (Change colour at the START of row 15 if desired.)
Row 16: ♦ P2 K1 P8 K1 ♦ Repeat from ♦ to ♦ until there are 2 sts. P2
Row 17: ♣ K3 C4B C4F K1 ♣ Repeat from ♣ to ♣ to the last 2 sts. K2
Please share this page!
More FREE patterns
Click the pic to read online!!


FREE Knitting Graph Paper for Colorwork Knitting


![]()
![]()


If you don’t know how to cable you can watch these videos to show you how.
Row 18: ♥ P2 K1 P2 K4 P2 K1 ♥ Repeat from ♥ to ♥ to the last 2 sts. P2
Row 19: K5 ☺ P4 K8 ☺ Repeat from ☺ to ☺ 5 (6) times more. P4 K5
Row 20: As row 18
Row 21: As row 19
Row 22: As row 18
Row 23: As row 19
Row 24: As row 18
Row 25: As row 19
Row 26: As row 18
Row 27: ♣ K3 C4B C4F K1 ♣ Repeat from ♣ to ♣ to the last 2 sts. K2
Row 28: ♦ P2 K1 P8 K1 ♦ Repeat from ♦ to ♦ until there are 2 sts. P2.
Row 29: Knit
Row 30: As row 28
Row 31: Knit
Row 32: As row 28
Row 33: Knit
Row 34: As row 28
Row 35: ♣ K3 C4B C4F K1 ♣ Repeat from ♣ to ♣ to the last 2 sts. K2
Row 36: as row 28 (Change colour at the START of row 37 if desired.)
Row 37 – 40: Knit (Change colour at the START of row 41 if desired.)
▲ Row 41: Knit
Row 42: ◘ P2 K1 ◘ Repeat from ◘ to ◘ tot he last 2 sts. P2 ▲ Repeat from ▲ to ▲ for a total
of 22 (26) rows.
Next row: ♣ K2tog K1 ♣ Repeat from ♣ to ♣ to the last 2 sts. K2tog
Next row: ◘ P1 K1 ◘ Repeat from ◘ to ◘ to the last st. P1
Next row: K2tog to the end of the row.
Next row: P across
Next row: K2tog to the last st. K1
Next row: P across
Break yarn and draw through. Sew the seam using the blanket stitch. Add a pom-pom to the top if you like.
More of my stuff on Etsy:
You can make a widget like this for your blog or website, too.
Instructions are on my website here: How to Display Etsy Items on Your Website
Hints and Tips
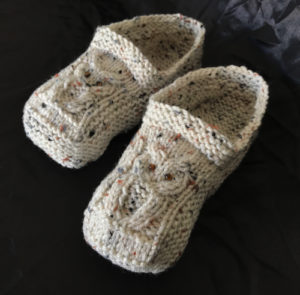
I used repurposed yarn for the pom pom on the white toque with the blue banding. Unraveling the slippers I had originally made, it left the wool in the crinkly state that occurs. I haven’t washed it so I don’t know if the fluffy/fuzzy look will stay, but I certainly do like the effect it gave to the final pom pom.
If you are using multiple colours for your toque, I suggest you Work in the Ends While You Knit. It saves you time in the long run. You can either click the link or take a photo of the QR code below to learn how.
Sew the seam using a blanket stitch to make it as invisible as possible. I added enough stitches along the sides so you can do this.
You can make the beanie fit closer to the crown of the head by not doing as many repeats of rows 41 and 42. You can also make it longer (taller and floppy) by doing more.
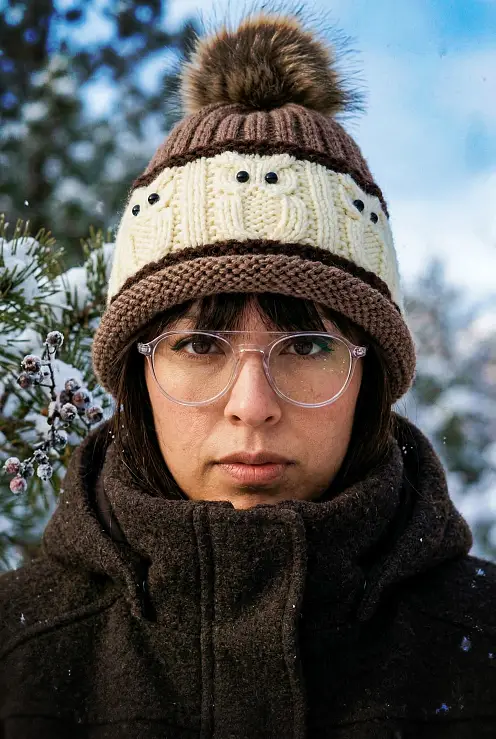
You can use whatever you like for eyes. Buttons will work. I used 8 mm flat back cabochons. They come in a variety of colours and sizes. I looked for more realistic owl eyes but all I could find were ones for taxidermy and they were too big, and expensive. I also recommend gluing them on as sewing will take a bit of time.
Abbreviations
k – knit
p – purl
k2tog – knit 2 sts together
st – stitch
sts – stitches
Side note: I use both versions of the terminology when it comes to cable stitches. I’ve been corrected that I’m using the wrong one for both occasions so it’s a no win for me. What I mean is that C4F is the same technique as C2F. Just like how C2B is the same as C4B. Do you think of it as the just the stitches you’re pulling or the number of stitches you’re using in total when you do it? It’s a personal choice, I guess.
C4F – Pick up the next 2 stitches with your cable needle. Pull the stitches to the FRONT of your work. Knit the next 2 stitches on your non-working needle. Knit the 2 stitches from the cable needle. Watch this video to see how. How to C4F or Cable 4 Forward.
C4B – Pick up the next 2 stitches with your cable needle. Pull the stitches to the BACK of your work. Knit the next 2 stitches on your non-working needle. Knit the 2 stitches from the cable needle. Watch this video to see how. How to C4B or Cable 4 Back


Thank you for the pattern. I also prefer knitting in the round. I made a chart, reversing the odd rows stitches from K to P and vice-versa. There is an added complexity because the body of the owl is purl, the outline of the body is K, the whole head is K, and the margins are in garter. That makes it pop. To simplify you could do the margins in Purl, then you only have to keep track of the cable rows; the rows in between will be the same. And yes, I think you won’t need the xtra 2 stitches.
Hi! I purchased all three patterns in pdf form from Ravelry (gloves, hat, scarf). I prefer to knit in the round. To adapt the hat for doing in the round, would I just join it and follow the pattern as written? Or will I need to drop the first and last stitch of the pattern and cast on two less stitches?
Thanks for any help you can give me about this. Can’t wait to get started!
It’s a completely different pattern when you knit it in the round. There is no longer a “wrong” side. Every even row switches from being read left to right to right to left. All knits become purls and the purls become knit stitches. If you are an experienced knitter, you may be able to do this, but it will be a challenge for sure.
absolutely LOVE!! which type of yarn did you use? Looking for these same brown colors.. 🙂