


The season is getting colder again, the few apples on my trees are turning red and my mind turns back towards knitting. And oh boy, am I coming up with a bunch of knitting designs! Now here’s to finding the time to publish them all. Work is also back to full-time so that’s great news ?
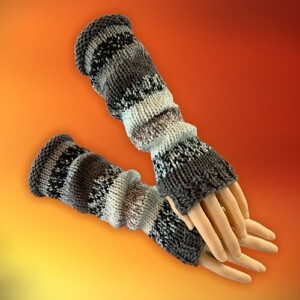
A couple of things about this knitting pattern before we grab our favourite worsted weight yarn, double pointed and cable needles and get to work. Like my Owl Fingerless Gloves pattern, I am keeping the stitch count the same and only changing the needles size to change the size of the glove. The pattern on the back of the hand stays proportional in size and placement on the glove remains the same for a better overall look.
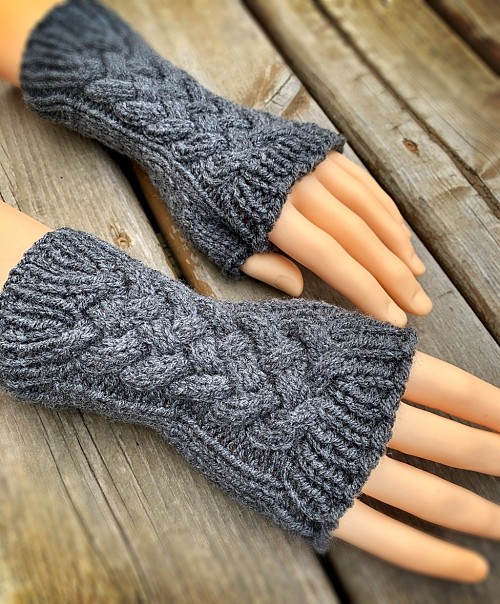
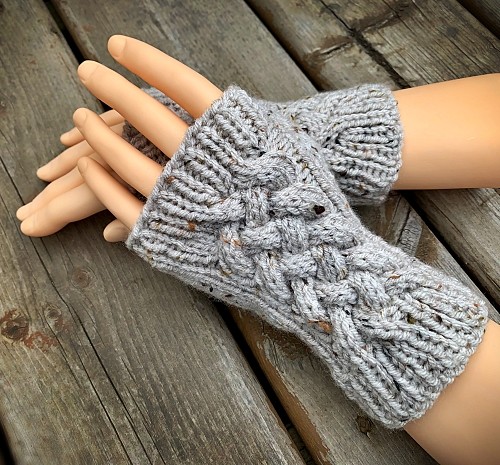
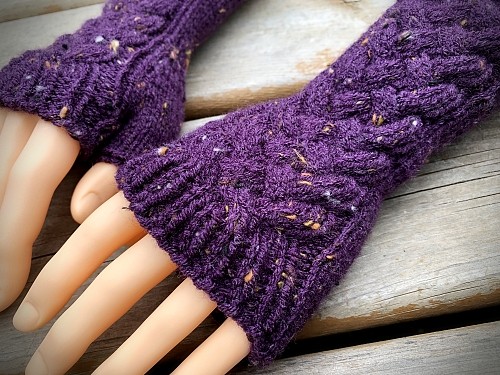
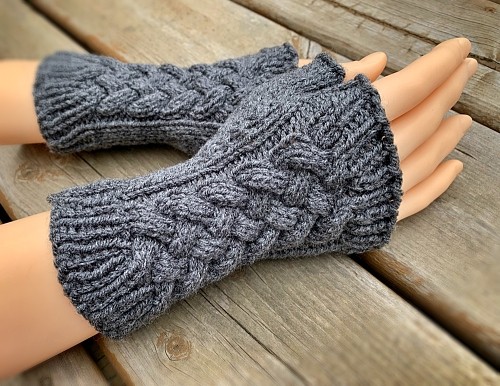
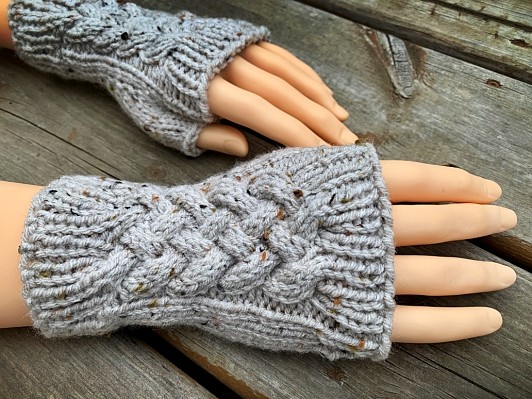
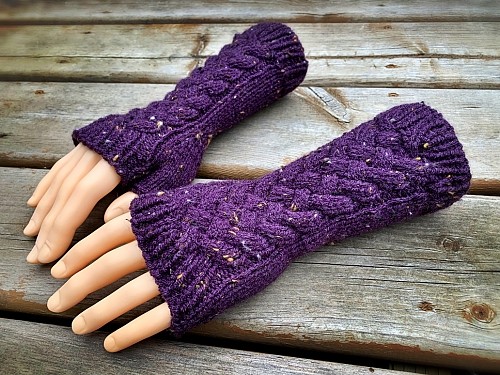
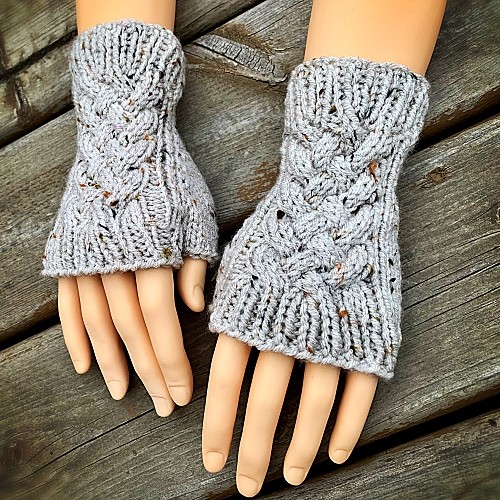
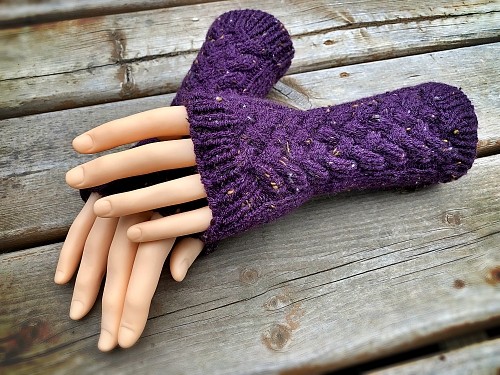
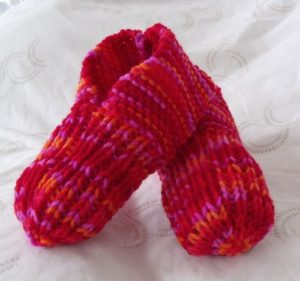
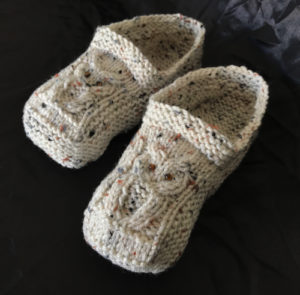
I made a number of different lengths of the glove too, for demonstrative purposes. The taupe with flecks (apparently it’s also known as tweed, who knew) is the pattern exactly as written. I repeated the cable pattern once for the grey pair and 4 times for the purple tweed/flecked. There’s a note in the pattern what rows make up the 5 plait cable pattern. Why do 3 cables when you can do 5? I’ve always been a bit of an overachiever ?
The downloadable PDF version is completed and uploaded it to all my distributors. You can find it on the following fine and upstanding websites – Etsy, Ravelry, LoveCrafts and this website.
Another way to avoid ads and pop-ups, get instant, PRINTABLE downloads of this pattern and others, is by becoming a Member on this website. When you become a Website Supporter for $3/month, you’ll gain access to exclusive member only posts. These posts contain one click downloads of the patterns. Simply click the Download & Print button. The PDF will automatically download to your computer or smart device. You can then read it on your device or print it at your leisure. You can download as many patterns as you like for the same $3 each month. You can go to this page to learn more, become a member and support my work… Exclusive Member Area
And here is the obligatory, shameless self promotion of this website so I have some reason to keep writing patterns. You can check out my Help Support My Work page to read more or you can click this link to Buy Me a Coffee. It’s a place where artists, podcasters and other creatives can go to get a quick, one time donation of support from fans. It’s pretty awesome and I’m always grateful for everything I get.
If you don’t want or can’t afford to give anything. I get it. You can give a shoutout or share on your social media instead. It’s free to do and will only take you a minute. Handy links are below
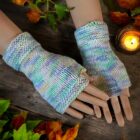
Want other knitted mitten patterns that are for texting or cover the ends of your fingers? I have those too. You can check out my How to Knit Texting Mittens and How to Knit Flip Mitts. And for those who actually take the time to read these long-winded intro’s, I also have – How to Knit Fingerless Gloves. It uses finer yarn, smaller needles and is sized with different stitch and row counts. It is very plain Jane and it’s the yarn that makes this one pop.
Ok. Enough of that. Let’s get knitting!!!
Things you will need:
worsted weight yarn – I used Red Heart worsted weight (AKA size 4 or 8 ply) yarn when designing the pattern but any kind will do.
Set of 4 double pointed needles (see note on sizing)
Tapestry needle to sew the hole by the thumb and work in ends
A Note on Sizing:
As I mentioned previously, the sizing for this pattern is done a little differently. Instead of different stitch counts which I normally do, I’m changing the size of the needles. Chances are good that if you know how to knit in the round, you already have these size needles anyways. If not, it’s a good excuse to go to your favourite yarn store to pick up the needles you’ll need. And since you’re there, check out the yarn sales. You’d be foolish not to.
My standard for sizing was my hand and designed the knitting pattern according to what kind of rubber gloves fit me comfortably. I wear a medium sized rubber glove and the medium sized glove fits perfectly. You may need to use different sized needles to get the correct gauge, but this pattern is very forgiving if you’re a bit off.
Small
- size 4 mm (US size 6) dpn
- 10 stitches every 2 inches (5 cm)
- 13 rows every 2 inches (5 cm)
Medium
- size 5 mm (US size 8) dpn
- 9 stitches every 2 inches (5 cm)
- 12 rows every 2 inches (5 cm)
Large
- size 6 mm (US size 10) dpn
- 8 stitches every 2 inches (5 cm)
- 11 rows every 2 inches (5 cm)
Left Hand
Cast on 36
Row 1-8: K1 P1 around
Row 9: K4 P1 K15 P1 K15
Row 10: K4 P1 C6F twice. K3 P1 K15 (you can click the blue link for a description of how to do a C6F or scroll to the abbreviations section)
Row 11 – 12: as row 9
Row 13: K4 P1 K3 C6B twice. P1 K15 (you can click the blue link for a description of how to do a C6B or scroll to the abbreviations section)
Row 14 – 15: as row 9
Rows 10 to 15 make the cable pattern. Repeat these rows to make the gloves longer as described earlier.
Next Row: K1 M1 K1 M1 K2 P1 C6F twice K3 P1 K15 (38 sts)
Next 2 Rows: K6 P1 K15 P1 K15
Next Row: K1 M1 K3 M1 K2 P1 K3 C6B twice P1 K15 (40 sts)
Next 2 Rows: K8 P1 K15 P1 K15
Next Row: K1 M1 K5 M1 K2 P1 C6F twice K3 P1 K15 (42 sts)
Next 2 Rows: K10 P1 K15 P1 K15
Next Row: K1 M1 K7 M1 K2 P1 K3 C6B twice P1 K15 (44 sts)
Next 2 Rows: K12 P1 K15 P1 K15
Next Row: K1 M1 K9 M1 K2 P1 C6F twice K3 P1 K15 (46 sts)
Next 2 Rows: K14 P1 K15 P1 K15
Please share this page!
More FREE patterns
Click the pic to read online!!


FREE Knitting Graph Paper for Colorwork Knitting


![]()
![]()


Next Row: K1 M1 K11 M1 K2 P1 K3 C6B twice P1 K15 (48 sts)
Next 2 Rows: K16 P1 K15 P1 K15
Next Row: K1 Pass the next 13 stitches onto a stitch holder. K2 P1 C6F twice K3 P1 K15 (35 sts)
Next Row: K3 P1 K15 P1 K15
Next Row: K1 P1 around to last 2 sts. P2tog
Next 4 Rows: K1 P1 around
Cast off loosely.
Make Thumb
Pick up the 13 stitches from the stitch holder. Work 3 rounds even. Cast off loosely.
More of my stuff on Etsy
You can make a widget like this for your blog or website, too.
Instructions are on my website here: How to Display Etsy Items on Your Website
Right Hand
Cast on 36
Row 1-8: K1 P1 around
Row 9: K18 P1 K15 P1 K1
Row 10: K18 P1 C6F twice K3 P1 K1
Row 11 – 12: as row 9
Row 13: K18 P1 K3 C6B twice P1 K1
Row 14 – 15: as row 9
Rows 10 to 15 make the cable pattern. Repeat these rows to make the gloves longer as described earlier.
Next Row: K1 M1 K1 M1 K16 P1 C6F twice K3 P1 K1 (38 sts)
Next 2 Rows: K20 P1 K15 P1 K1
Next Row: K1 M1 K3 M1 K16 P1 K3 C6B twice P1 K1 (40 sts)
Next 2 Rows: K22 P1 K15 P1 K1
Next Row: K1 M1 K5 M1 K16 P1 C6F twice K3 P1 K1 (42 sts)
Next 2 Rows: K24 P1 K15 P1 K1
Next Row: K1 M1 K7 M1 K16 P1 K3 C6B twice P1 K1 (44 sts)
Next 2 Rows: K26 P1 K15 P1 K1
Next Row: K1 M1 K9 M1 K16 P1 C6F twice K3 P1 K1 (46 sts)
Next 2 Rows: K28 P1 K15 P1 K1
Next Row: K1 M1 K11 M1 K16 P1 K3 C6B twice P1 K1 (48 sts)
Next 2 Rows: K30 P1 K15 P1 K1
Next Row: K1 Pass the next 13 stitches onto a stitch holder. K16 P1 C6F twice K3 P1 K1 (35 sts)
Next Row: K17 P1 K15 P1 K1
Next Row: K1 P1 around to last 2 sts. P2tog
Next 4 Rows: K1 P1 around
Cast off loosely.
Make Thumb
Pick up the 13 stitches from the stitch holder. Work 3 rounds even. Cast off loosely.
Hints and Tips
If you have too many stitches double check to make sure you haven’t picked up a stitch between the needles. If you don’t have enough stitches, did you drop one when you were making the cable? Yes, I do make typos sometimes but I double check and recheck before I publish these patterns and it is more likely you’ve made a slight error while knitting. I’ve given stitch counts at the end of every row to help you along. Please let me know if I legitly did make a mistake. But with saying that, it isn’t always my fault. Some of you get kinda nasty about this and you really need to stop. Here’s the email so you can complain to my manager if that last bit offended you – stfu@email.com. FYI Karens – I am the manager and that email address doesn’t work.
I cast all the stitches on one needle when I start. Then I divide them up between the 3 needles. This helps to avoid the twisting you can sometimes get when casting on to each needle.
I prefer to use bamboo dpn. I find that it helps to prevent that line you get between needles when knitting in the round.
You will probably need to adjust the number of stitches you have on each needle. I usually make one split between the purl and the start of the cable motif with one needle having 15 stitches. It gives more than 12 on one needle and less than 12 on the other, but it makes it easier to knit the cable.
If you like your ribbing to be a little more snug, you can use a smaller size needles to knit this portion. Stepping it down a half size; small – 3.5 mm, medium – 4.5 mm and large 5.5 mm should work. You may want to go smaller. I don’t do this because I always forget to switch back.
I haven’t tried this, but changing to even smaller needles and thinner yarn can make even smaller child sizes. Let me know if you try this and what gauge and needles give the right sizes. You can leave your findings in the comment section if it works. It’s been acting up since I switched hosting plans. Sorry.
Abbreviations:
C6F – Cable 6 forward. With your cable needle, slip 3 stitches off the needle and pull the stitches towards the front of your work. Knit the next 3 stitches. Knit the 3 stitches from the cable needle.
C6B – Cable 6 backward. With your cable needle, slip 3 stitches off the needle and pull the stitches to the back of your work. Knit the next 3 stitches. Knit the 3 stitches from the cable needle.
M1 – Make 1 stitch. Pull up a loop between the stitches and knit.
K – Knit
P – Purl
Sts – stitches
P2tog – Purl 2 together
Well, that wraps up this knitting pattern. I hope you liked it, have a lot of fun with it, and maybe even make a bit of money from what you make. Like all my patterns, you have my permission to sell or give away any gloves/mitts that you make from this pattern. You are NOT permitted to reproduce or republish this pattern in any form. Whether it be illegal screen shots of this page, a copy you print from this webpage, or multiple copies of the ONE pattern you paid for and subsequently give to your friends. Yes. All of those behaviours violate copyright laws. And every time you do that, it makes one less pair of eyeballs on my work that takes away from any ad revenue or other profits I may make from my hard efforts in designing and writing these patterns. I don’t work for free. I’m sure you don’t either.


Thanks.
Hey, look! The comments work.