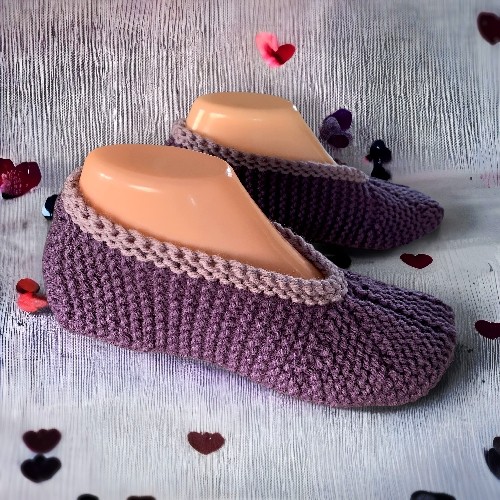
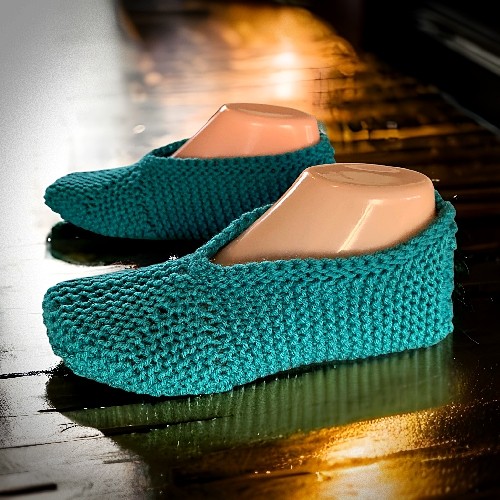
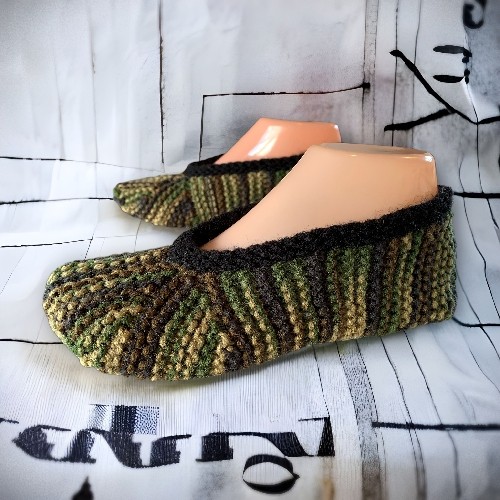
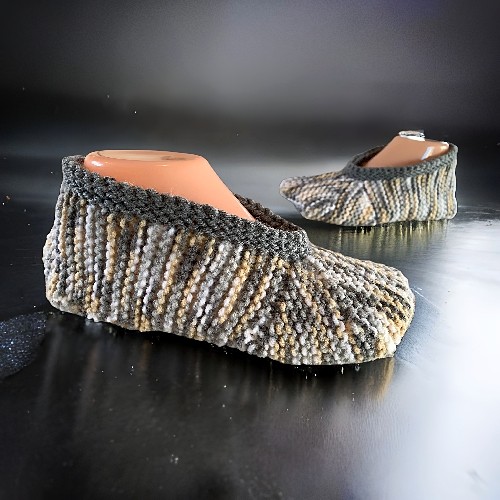
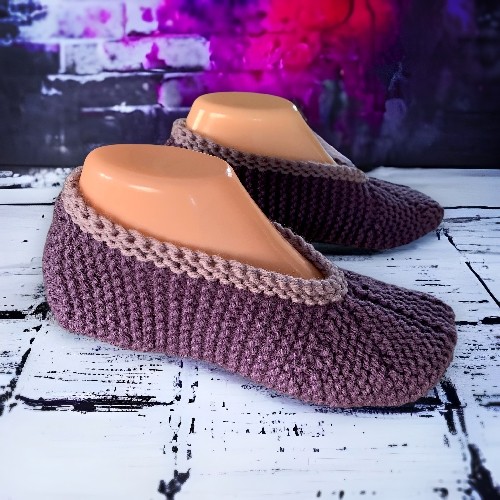
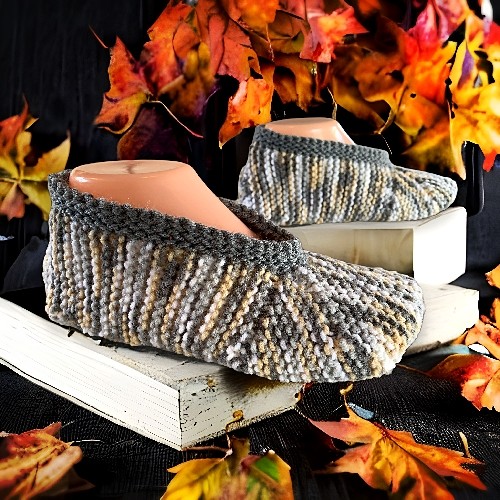
I’ve been looking to simplify my Adult Moccasin Slippers for some time now. I wanted to design a minimalist style slippers that were knit on a single set of knitting needles, without the sewing of seams (which I try to avoid at all costs, btw). I also wanted to keep any tricky techniques to a minimum. With this pattern, there are no additional sets of needles required, and no knitting in the round on double pointed needles (DPN) to make the edging.


And because there is a bit of starting and stopping when making the sections, this leaves a number of ends to sew in. I strongly recommend working in your ends while you knit. If you don’t know how to do that, you can check out How to Work in the Ends While Knitting on my website. For a quick how to: hold the yarn on the back of your work (the wrong side) and catch the yarn every other stitch. It totally works and in all the slippers I’ve made over the years, I’ve never had a single complaint about it coming undone.
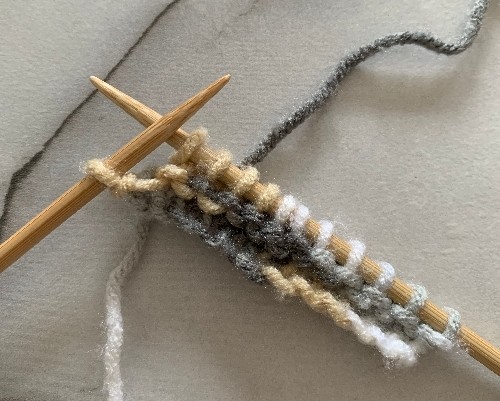
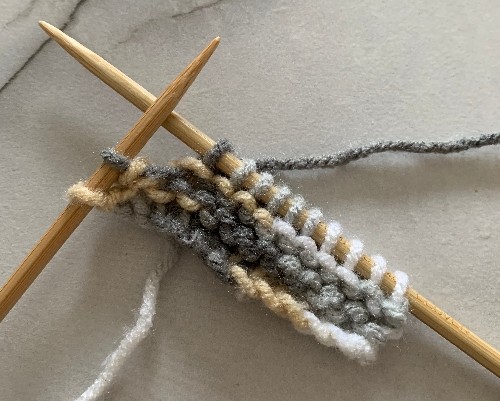
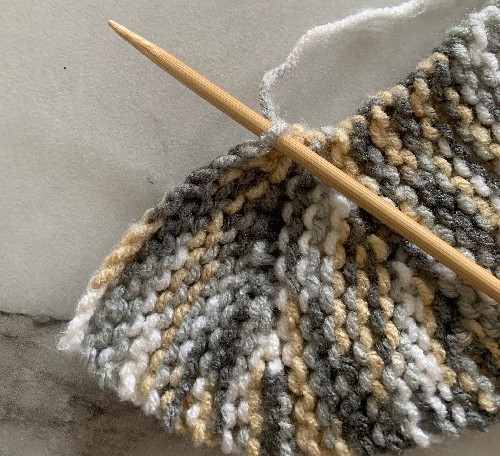
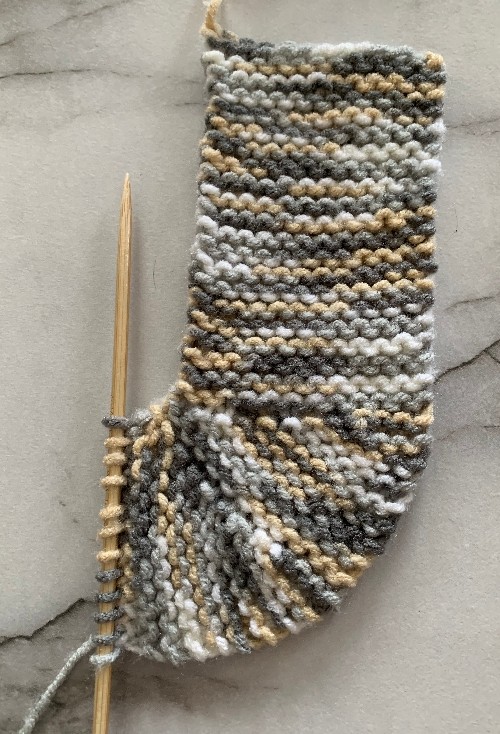
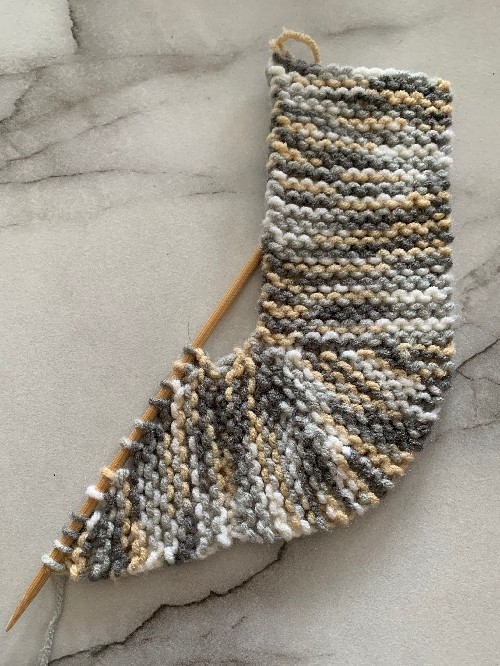
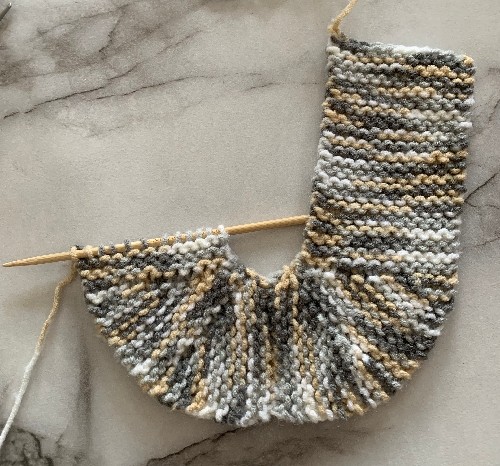
Please note that in some of the photos showing parts of the slipper, I used double pointed needles. These needles are NOT necessary. I just prefer to use shorter needles when knitting narrow pieces. Regular single pointed needles work just as well.
If you would prefer to print the pattern or have it available offline, you can purchase the PDF for a small fee. You can buy it from my Shopify shop – Minimalist Round Toe Knitted Slippers Pattern, LoveCrafts, and Etsy. I also have the ebook available on Google Books and both Kindle and the paperback version on Amazon. Make sure you go to your country if ordering from Amazon.
Another way to avoid ads and pop-ups, get instant, PRINTABLE downloads of this pattern and others, is by becoming a Member. When you become a Website Supporter at $4/month, you’ll gain access to exclusive member only posts on Buy Me A Coffee. You can download as many patterns as you like for the same $4 each month. You can go to this page to learn more, become a member and support my work… Exclusive Member Area
If you enjoy this pattern and my other free online knitting patterns, please consider making a small donation or helping me out by visiting my Help Support My Work page. If that’s not possible, that’s totally fine too! Even sharing this page on your social media helps me out immensely. You can use those buttons ?? to do so easily.
Things You Need
Size 6 US (4 mm) knitting needles
Worsted weight yarn – any standard ball of yarn will suffice. (I’m a fan of Red Heart and Bernat worsted weight as it is easy to find and economical.)
Tapestry needle – to work in the ends.
Abbreviations
K – knit
K2tog – knit 2 together
st – stitch
sts – stitches
Gauge
Make sure you match the gauge or sizing will be off.
18 stitches = 4 inches
24 rows = 4 inches
in stockinette
Sizes are written as such:
Women’s 6-7 (8-9, 10-11, 12)
Men’s 5-6 (7-8, 9-10, 11-12)
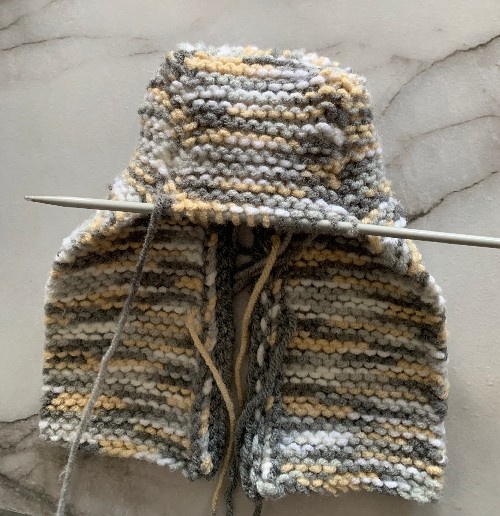
Starting the Quarter Circle and Side
Cast on 12 (13, 14, 15)
☺ Row 1 – 2: Knit across.
Row 3: K11 (12, 13, 14) Turn work. Leave last stitch unworked.
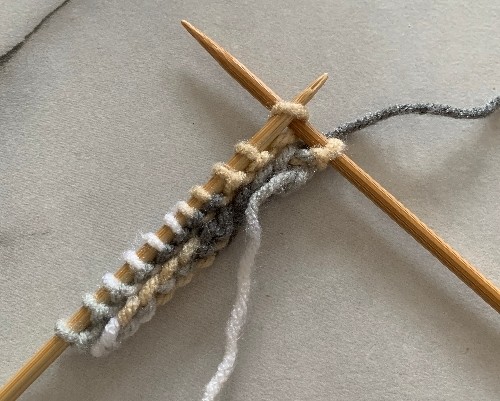
Row 4: K11 (12, 13, 14)
Row 5: K10 (11, 12, 13) Turn work. Leave last 2 stitches unworked.

Row 6: K10 (11, 12, 13)
Row 7: K9 (10, 11, 12) Turn work. Leave last 3 stitches unworked.
Row 8: K9 (10, 11, 12)
Row 9: K8 (9, 10, 11) Turn work. Leave last 4 stitches unworked.
Row 10: K8 (9, 10, 11)
Row 11: K7 (8, 9, 10) Turn work. Leave last 5 stitches unworked.
Row 12: K7 (8, 9, 10)
Row 13: K6 (7, 8, 9) Turn work. Leave last 6 stitches unworked.
Row 14: K6 (7, 8, 9)
Row 15: K5 (6, 7, 8) Turn work. Leave last 7 stitches unworked.
Please share this page!
More FREE patterns
Click the pic to read online!!


FREE Knitting Graph Paper for Colorwork Knitting


![]()
![]()


Row 16: K5 (6, 7, 8)
Row 17: K4 (5, 6, 7) Turn work. Leave last 8 stitches unworked.
Row 18: K4 (5, 6, 7)
Stop here for women’s size 6-7 and men’s size 5-6. Eighth of a circle completed. Go to instructions marked with ۞
Row 19: K0 (4, 5, 6) Turn work. Leave last 9 stitches unworked.
Row 20: K0 (4, 5, 6)
Stop here for women’s size 8-9 and men’s size 7-8. Eighth of a circle completed. Go to instructions marked with ۞
Row 21: K0 (0, 4, 5) Turn work. Leave last 10 stitches unworked.
Row 22: K0 (0, 4, 5)
Stop here for women’s size 10-11 and men’s size 9-10. Eighth of a circle completed. Go to instructions marked with ۞
Row 23: K0 (0, 0, 4) Turn work. Leave last 10 stitches unworked.
Row 24: K0 (0, 0, 4) ☺
Stop here for men’s size 11-12. Eighth of a circle completed.
۞ Come here when indicated to stop for the size you are making.
Repeat from ☺ to ☺ once to make another eighth of a circle.
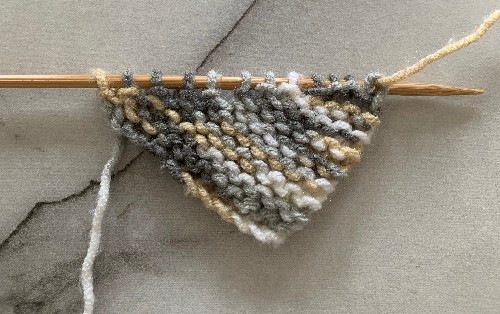
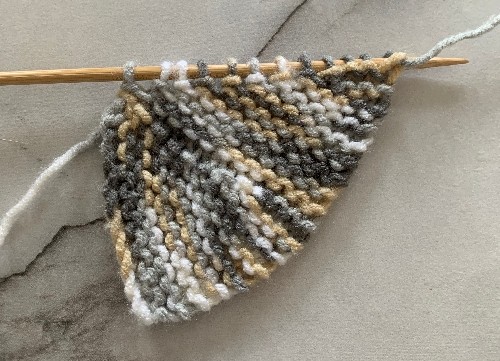
When you have made a quarter circle (1/8 + 1/8 = 1/4), start knitting rows as follows:
Next row: Knit across for 40 (42, 46, 50) rows total.
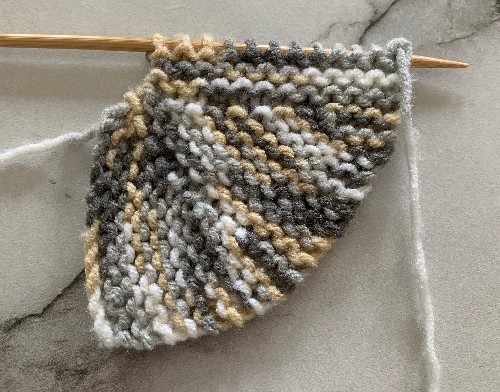
Cast off.
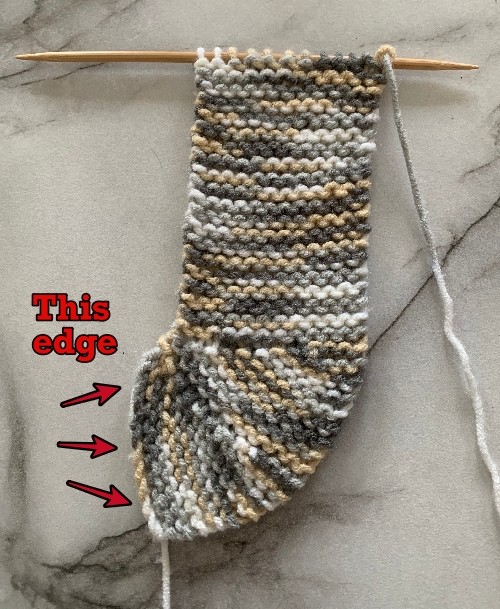
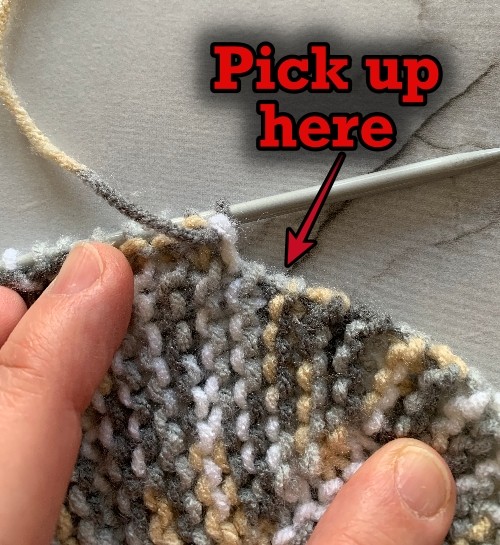
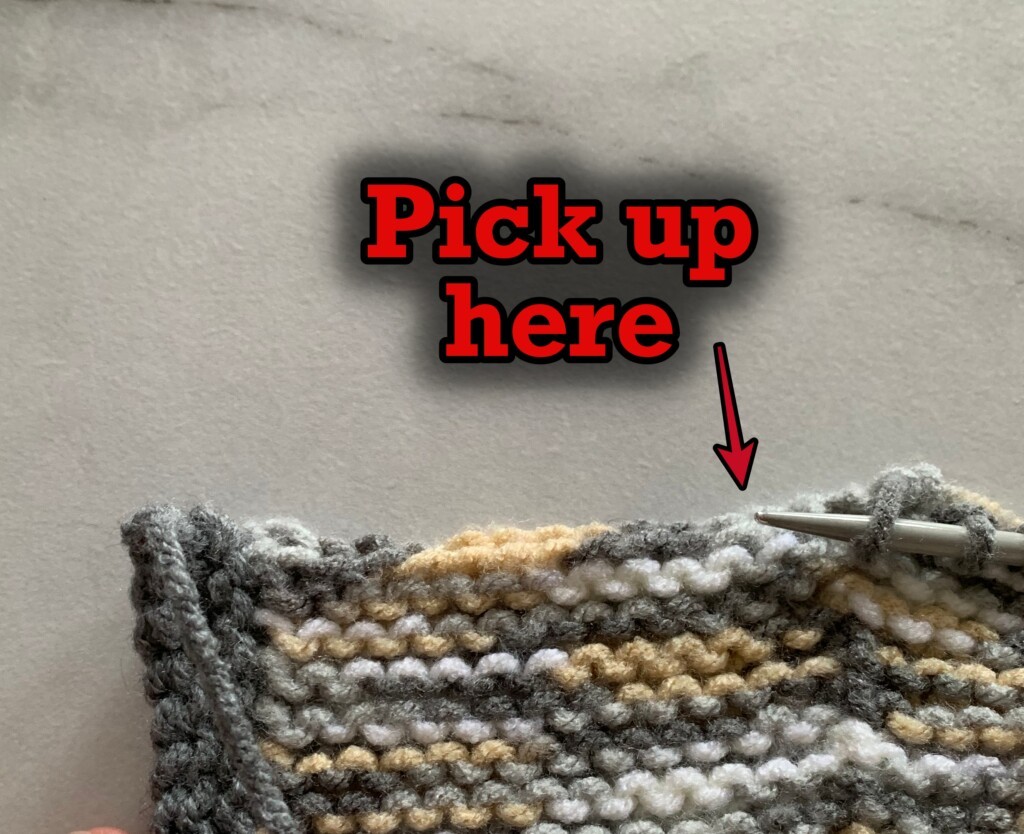
With the RIGHT side of your work facing you, pick up 12 (13, 14, 15) sts along the original cast on row.

Repeat from ☺ to ☺ twice.
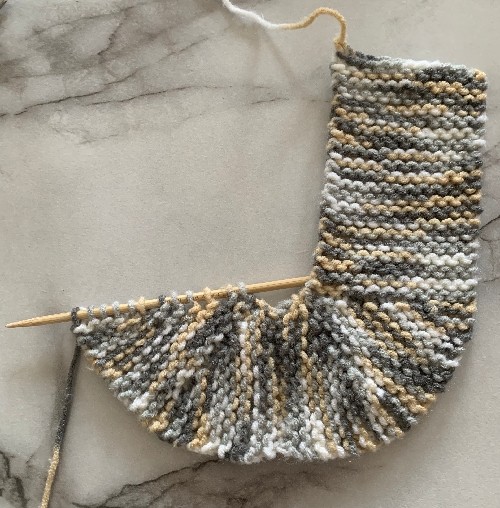
Knit across for 40 (42, 46, 50) rows total.
Cast off.
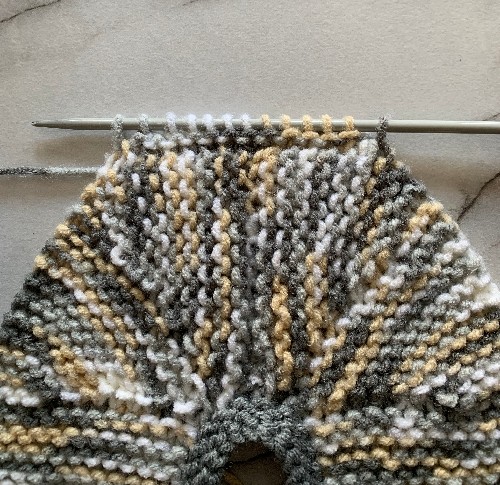
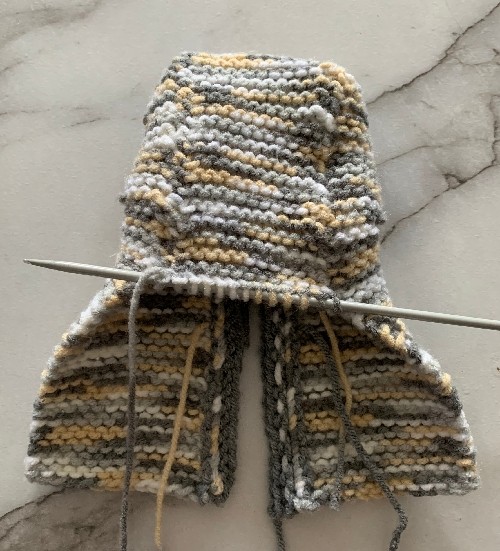
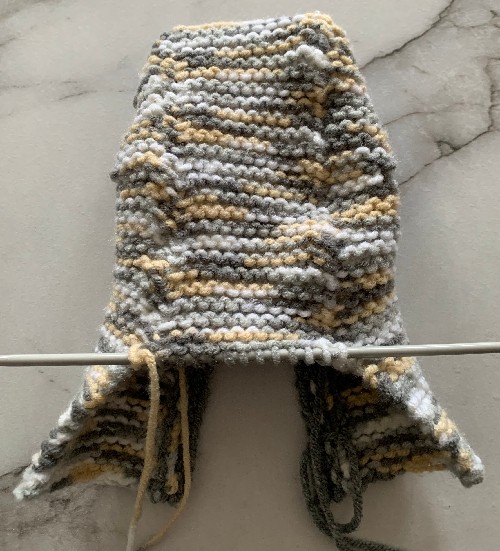
Edging (Done before sole)
I know it’s a little unconventional to add an edging at this point. This is usually something you do as a last step. But, to keep this slipper pattern as simple as possible, and to not need any other knitting needles or need to know how to knit in the round, we’ll make the edging now. You can use a complimentary colour or the same colour that you are already using. The choice is yours.
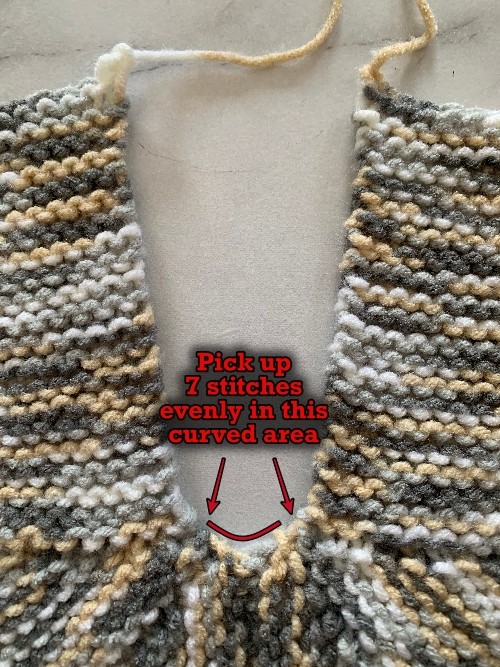
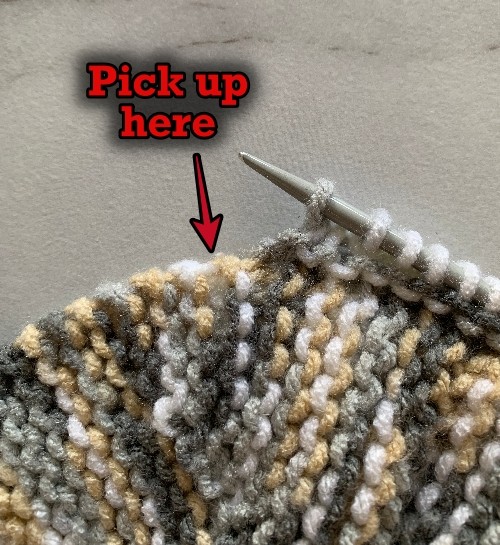
With the RIGHT side of your work facing you, pick up 20 (21, 23, 25) sts along the edge, 7 sts over the curve of the toe and 20 (21, 23, 25) sts along the other edge.
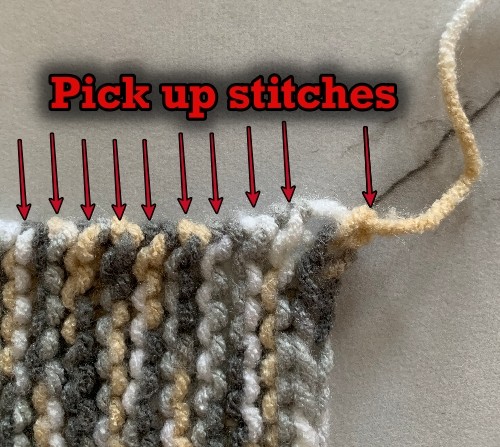

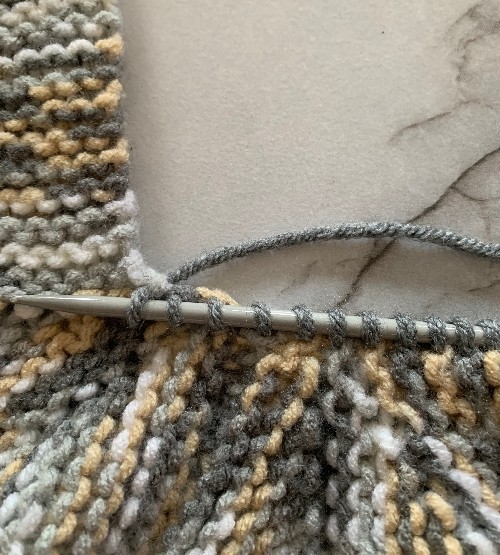

Knit 2 (4, 4, 4) rows over the picked up stitches. Cast off loosely on the WRONG side.
More of My Stuff on Etsy:
You can make a widget like this for your blog or website, too.
Instructions are on my website here: How to Display Etsy Items on Your Website
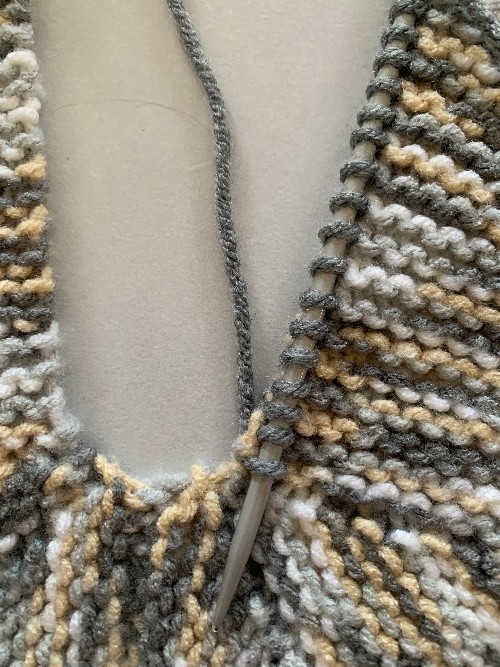
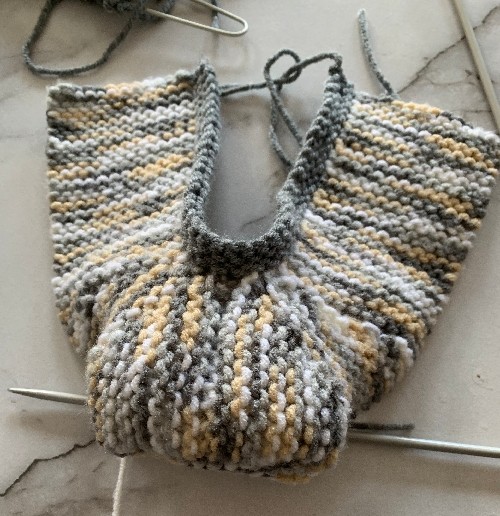
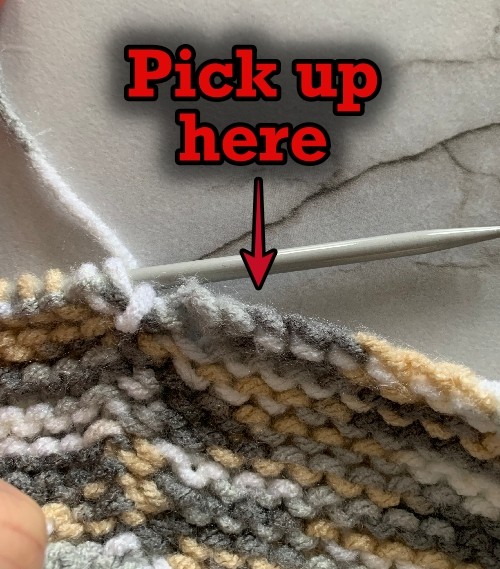
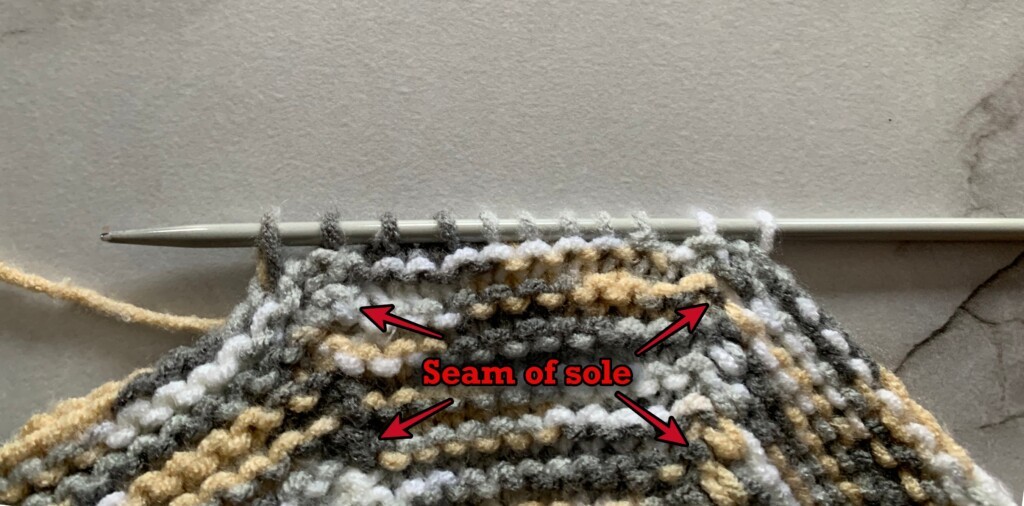
Making the Sole
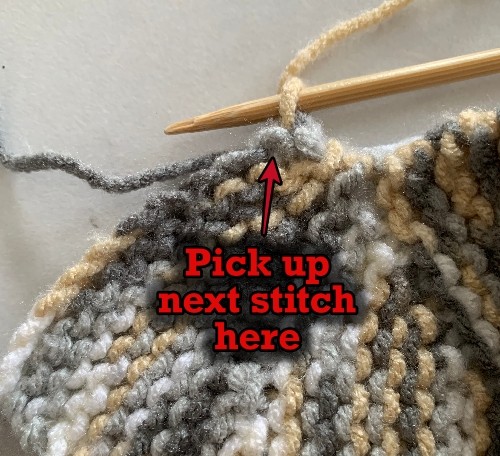
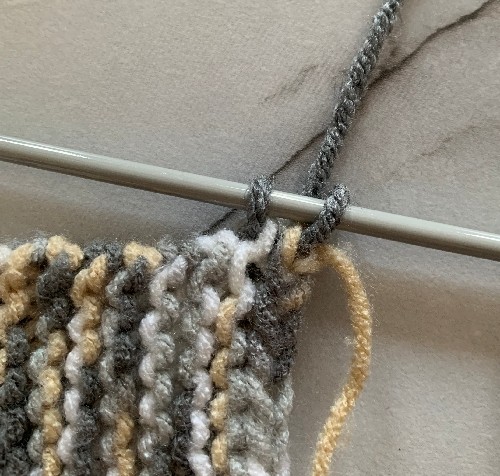
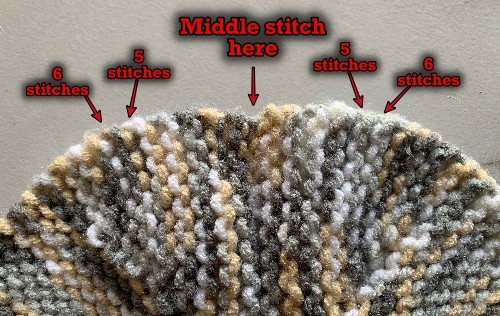
With the RIGHT side of your work facing you, find the middle seam of the toe. This is the line where you picked up the stitches the first time after making the first quarter section and side strip. Count over 5 (6, 6, 6) ridges. Pick up 11 (13, 13, 13) sts to start the sole. The middle stitch (the 6th (7th, 7th, 7th stitch) should be picked up in the middle seam.
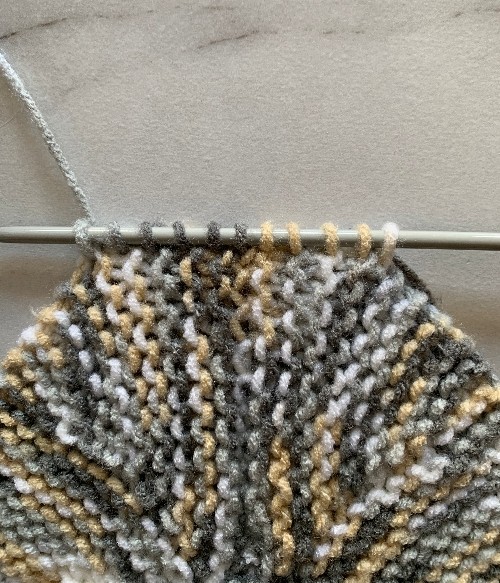
Next row: Knit across.
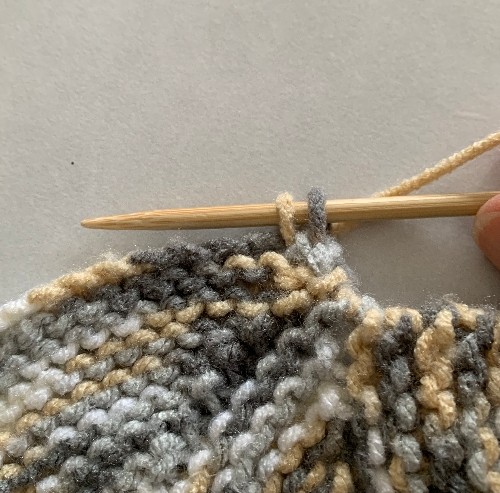
♥ Next row: With the RIGHT side facing, attach yarn and pick up a stitch in the ridges by the toe flap. K2tog. Knit to the last 2 stitches K2tog. Pick up a stitch in the ridges by the point of your needle. You now have 11 (13, 13, 13) stitches.
Next row: Knit across. ♥ Repeat from ♥ to ♥ down the length of the slipper until there are no ridges left.
Forming the Heel
I recently made a video showing how to do this. It’s how I make a lot of my slipper heels including this pattern. You can watch the video below to help you if the photos aren’t enough.
◘ Next row: With the RIGHT side facing, pick up a stitch in the cast off stitch closest to the sole of the slipper. K2tog twice. Knit to the last 4 stitches. K2tog twice. Pick up the cast off stitch on the other side.
Next row: Knit across.
Next Row: Pick up a stitch in the next cast off stitch. K2tog. Knit until the last 2 stitches. K2tog. Pick up the cast off stitch on the other side.
Next row: Knit across. ◘ Repeat from ◘ to ◘ until 7 stitches remain.
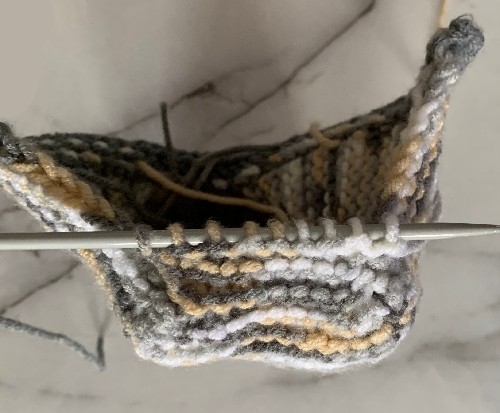
Next row: K2tog, Knit 3 stitches together, K2tog.
Next row: Knit the 3 stitches together.
Break yarn leaving a length of yarn long enough (8ish inches) to sew up the remaining seam.
Make another slipper.
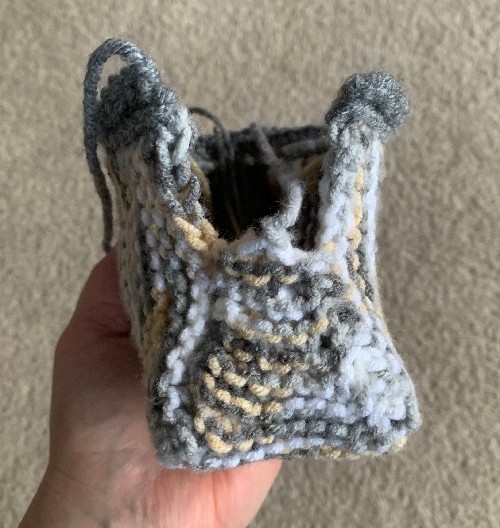
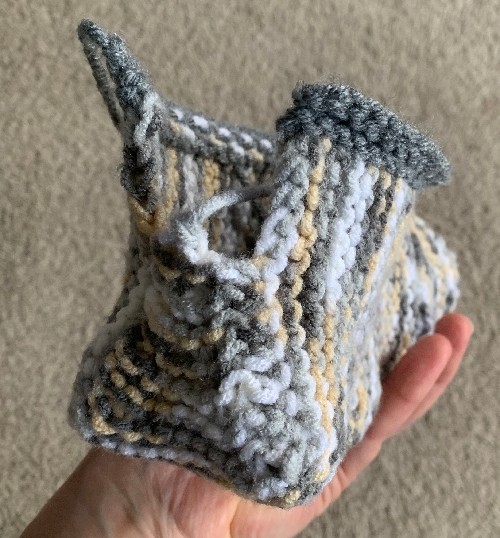
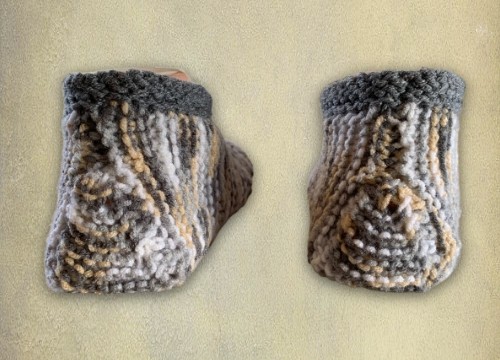
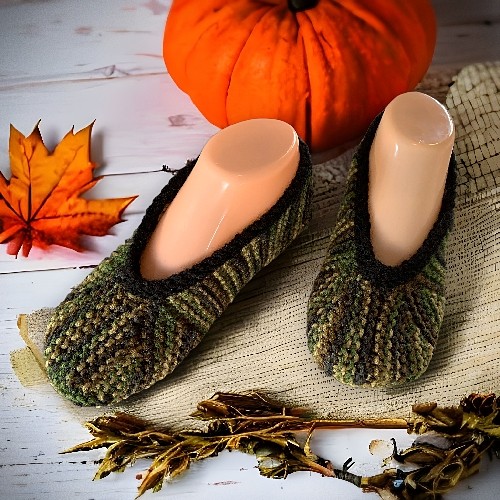
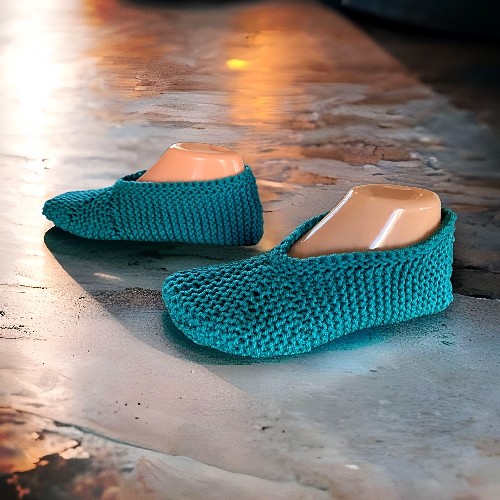
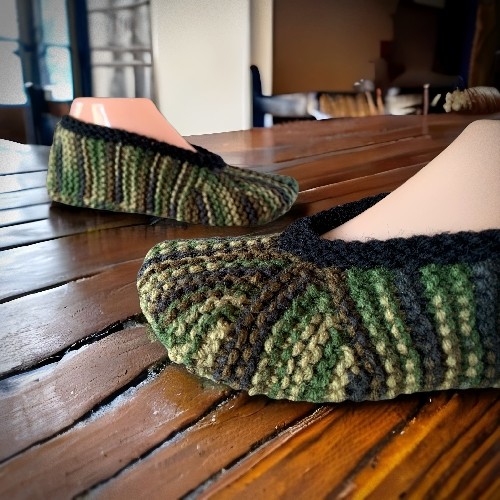
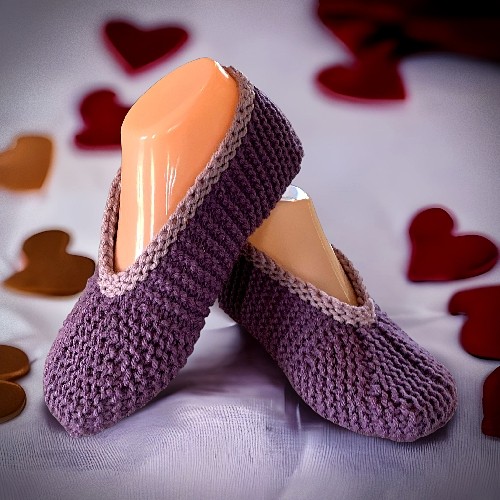
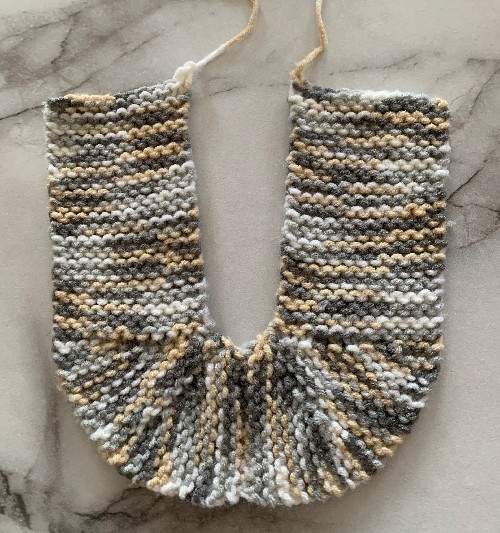
Yes, the toe does look a little boxy when they’re not on a foot. The stretch of the garter stitch allows these slippers to stretch around the contours of any foot easily.
Hints and Tips
If you are up in arms about sewing in the ends when you are done, there is away to avoid it. You can work in the ends on the back side of your work as you are knitting. Not sure how to do that? I have a photo tutorial on my website that will show you how – How to Work in the Ends While Knitting
You can add rows to the edging to make more of a cuff if you like. Or you could also do a K1 P1 ribbing over the stitches. I didn’t like how the slipper fit or looked when it was longer. That’s why I didn’t add any photos of it.
If you have picked up a different number of stitches on each side when making the sole, it’s not a big deal as long as it’s only a row or two. I suggest picking up 2 stitches in one row, rather than skipping a row. It’s less noticeable.
I designed this pattern to have a very minimalist feel to it. Of course, not everyone is into function only wearables. If you want to add pompoms, fancy large buttons or some other decorations, have at it! Be creative and add your personal touch to the design.
Like all of my patterns you have my permission to sell and/or give away the slippers that you make using this pattern. You are NOT permitted to reprint this pattern in any form unless you have obtained my written permission to do so.
If you have any questions, please feel free to leave a comment or send me your questions at kweenbee_crafts@hotmail.ca.


What does it mean with the pattern saying k0 (0,0,4)
What does that mean? And it is in multiple places. How can you knit 0?
You don’t knit anythin. You need to knit for the largest size only. It’s more consistent in the pattern to write how many sts to knit for each section than to just out of the blue say (Knit 4 sts for the largest size only). It happens in patterns all the time. Some sizes have sts worked while others have none. This isn’t an uncommon notation.