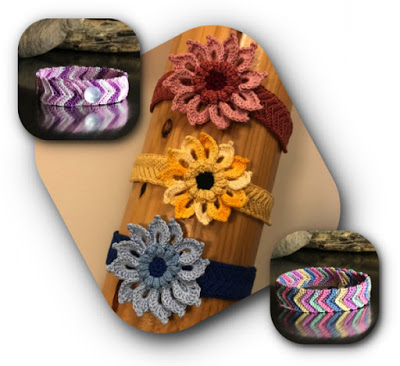
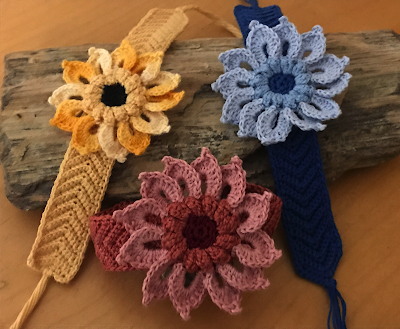
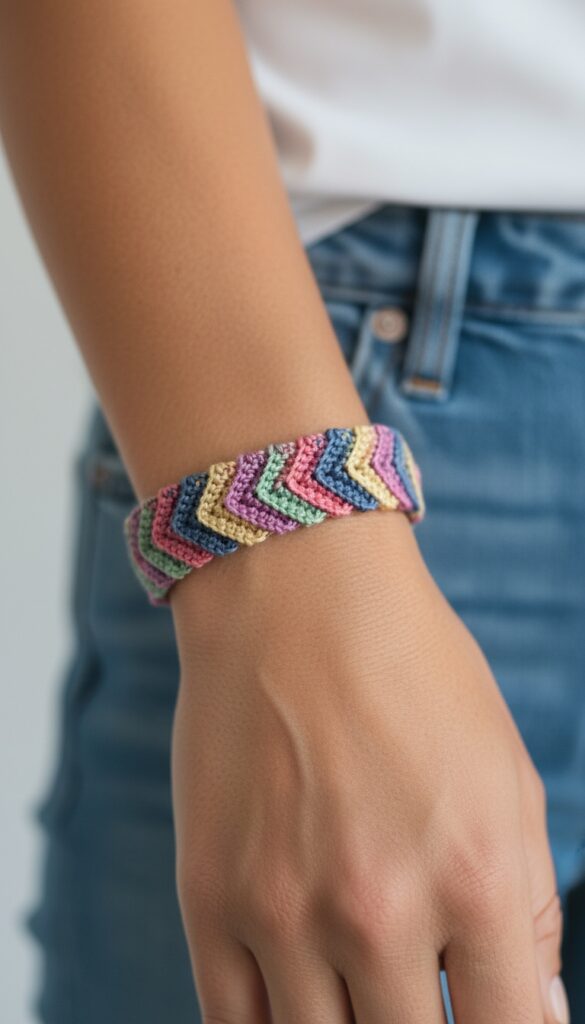
Back on the bracelet train! This time it’s for a beautiful flower that you can wear on your wrist. I really enjoy making these. It’s fun to see how the flower will turn out based on the colour choices you choose.

The bracelet itself is a very basic design and can easily be made as a stand alone item. Originally, I was going to publish the bracelet alone but figured if you wanted to make just the bracelet you could make that choice all on your own.
And if you are looking to make some extra cash and sell these, which I’m always cool with btw, the cost to make these is next to nothing. You can purchase crochet cotton thread for very reasonable costs at second hand stores and at many big box stores.
Like all my crochet patterns, if you would prefer to read this off line, you can also download the ad free, PDF version for a small fee from my regular retailers. The following link is through my Shopify shop – How to Crochet – Flower and Friendship Bracelet. If you’d prefer, you can also get the download through my Etsy Shop or on Ravelry. (You can click any of those blue links to download.)
The PDF is also available as a free downloadable pattern on Buy Me A Coffee if you support my work and are a member. If you’re not, you can also buy it there – Flower & Friendship Crochet Bracelet Pattern PDF | Easy Crochet Jewelry Tutorial
Another way to avoid ads and pop-ups, get instant, PRINTABLE downloads of this pattern and others, is by becoming a Member on this website. When you become a Website Supporter for $3/month, you’ll gain access to exclusive member only posts. These posts contain one click downloads of the patterns. Simply click the Download & Print button. The PDF will automatically download to your computer or smart device. You can then read it on your device or print it at your leisure. You can download as many patterns as you like for the same $3 each month. You can go to this page to learn more, become a member and support my work… Exclusive Member Area
If you are enjoying the free patterns and would like to see more, then please share my work! Those handy little icons down there 👇 let you do it easily and helps me so much. If you’d like more information on how you can keep things free, learn how you can Help Support My Work.
Things you need:
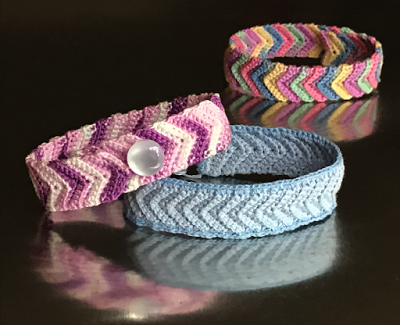
3 balls of complimentary colours of crochet cotton thread – (a darker one for center, a mid-range colour for the inner flower and a lighter colour for the outside petals. Choose one of these colours to make the bracelet. The yellow bracelet uses a dark center, medium colour for the interior flower and bracelet and a variegated thread colour for the outside petals. Mix it up with more thread colours if you like!).
Size 10 (1.3 mm) crochet hook
Gauge:
It’s not really important for this crochet project as there isn’t a specific length needed. Make the bracelet as long as you like, keeping in mind that the stitches will relax and stretch a bit over time. The flower shouldn’t be too floppy though. You want the stitches tight enough to hold the shape of the outside petals.
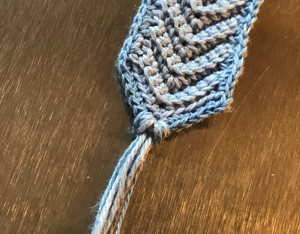
Bracelet:
Ch 10
Sc in 2nd chain from hook. 3 sc. 3 sc in next ch. 4 sc. Ch 1. Turn.
Next row: Skip the 1st st. Work the remaining sts in the back loop of the sts of the previous row (creates the ridge effect). 4 sc. 3 sc in the next st. 3 sc. Sc2tog. Ch 1. Turn.
Repeat this row until the bracelet is the length you want. Remember, it will stretch a bit over time!
Don’t turn your work when working the last row!
Edging (optional): If you are making the edging a different colour, don’t ch 1! Break your thread and rejoin with new colour in the last st you made.
1 sc in each row down the length of the bracelet. 3 sc in the corner st. 2 sc. Pull up a loop in the next 3 sts. Draw through all 3 loops on the hook. 2 sc. 3 sc in the corner st. 1 sc in each row down the length of the bracelet to the corner. 3 sc in the corner. Sl st in each st to the corner. Join to original corner.
More of my stuff on Etsy
You can make a widget like this for your blog or website, too.
Instructions are on my website here: How to Display Etsy Items on Your Website
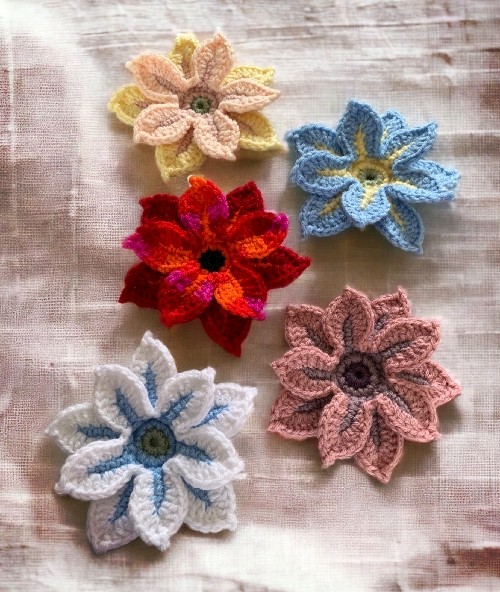
Flower:
Ch 2.
Round 1: 6 sc in 2nd ch from hook. Join with sl st to 1st sc.
Round 2: Ch 1. 2 sc in same st. 2 sc in each sc of previous round. Join with sl st in the back loop of 1st sc. (12 sc). Break thread.
Round 3 – Inner Flower (with mid-range colour): Work all of the following sts in the back loop of previous round. Ch 3 (counts as 1st dc). 3 trc. 1 dc. Drop the loop from hook. Insert hook through the top of the Ch 3 of this round and the loop you just dropped.
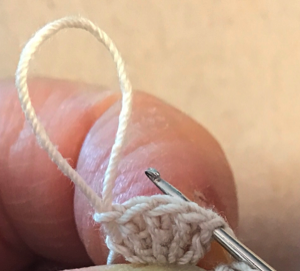

Draw the loop through the top of the ch 3.
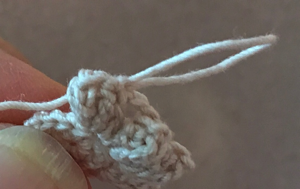
Ch 3. *1 dc, 3 trc, 1 dc. Drop the loop from hook. Insert hook through the top of the dc at the start of this petal and the loop you just dropped. Draw a loop through the top of the 1st dc of this petal. Ch 3.* Repeat from * to * around. Join with sl st to the top of starting ch 3 of this round. Break thread.
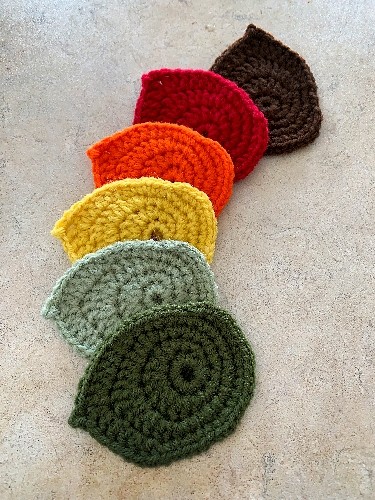
Round 4 – Base of Outer Petals (with lightest colour): *Ch 11. Sl st in 10th ch from hook. Sl st in the st behind next petal of previous round (the stitch you created when you dropped the loop and pulled it through the dc).* Repeat from * to * around. Join last sl st to 1st ch 1 of the round.
Round 5 – Outer Petals: *Make the stitches between these symbols { } in the 10 ch loop. {1 sc. 1 hdc. 4 dc. 2 trc. Ch 3. Sl st in top of last trc made (picot made). 2 trc. 4 dc. 1 hdc. 1 sc. Sl st.} Sl st in the space behind the next petal of the inner flower (dropped stitch space).* Repeat from * to * around. Join last sl st to base of first petal. Break thread. Work in ends.
Make Ties:
Cut 4 strands of thread approximately 8 inches long. They can be the same colour as the bracelet, one of the colours used for the flower or a combination of all the thread colours. Fold in half. Insert your crochet hook through the front of your bracelet. Catch the middle where folded and pull through to form a small loop. Feed the 8 ends of the thread through the loop. Pull tight. Trim ends so they are all the same length. Repeat for the other end.
Hints and Tips:
No matter what, don’t stretch out the bracelet before you are completely finished crocheting the entire piece! If you do, it won’t lay flat when you are done.
To save work of sewing in ends, work in the ends of the threads as you are making your project. Hold the thread behind your work and catch it as you make the next 4-5 stitches.
I decided to use ties to secure this bracelet so you can tighten it as the stitches relax and the bracelet loosens over time. This way, you can make it tighter to keep from spinning around the wrist when worn. It drives me nuts when bracelets do that ?
Instead of making ties, you can use a button to secure the bracelet. When making the edging, add the loop to pass over the button. I’ve also used a snap to secure it when making only the bracelet with no flower. If you decide to use a button or snap, it’s best to overlap the bracelet a bit by an inch or so. Make it longer than you would if using ties.
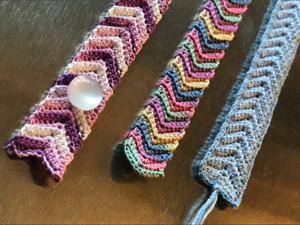
Using variegated thread for the bracelet and/or flower will give unique effects. In particular, it will make stripes on the bracelet and blotches of colour for the petals. You may need to play with it a bit to see what kind of effect you’ll get. Colour changing threads vary in how much change there is and how much thread is dyed the colours.
You can make the bracelet thicker than what is written here. You can easily add stitches. Make sure they’re equal on both sides. For example, this row could read… Skip the 1st st. Work the remaining sts in the back loop of the sts of the previous row (creates the ridge effect). 6 sc (instead of 4). 3 sc in the next st. 5 sc (instead of 3). Sc2tog. Ch 1. Turn. You’d chain 14 instead of 10 at the start. Just remember to keep the 3 sc in the middle, forming the point, the same.
Abbreviations:
ch – chain
Please share this page!
More FREE patterns
Click the pic to read online!!


![]()
![]()


FREE Knitting Graph Paper for Colorwork Knitting


sc – single crochet
hdc – half double crochet
dc – double crochet
trc – treble (or triple) crochet
sc2tog – single crochet 2 stitches together
sl st – slip stitch
st – stitch
sts – stitches
If you have any questions, please feel free to leave a comment or send me your questions here.