
This is a collection of posts that I’ve made over the years that knitters, and others may find useful. They don’t necessarily fit well into other categories but needed a one-stop place to find them. So if you are looking for knitting graph paper, a knitting calculator, knitting tips or techniques, you’ve come to the right place. And heck! You can even find code to add an auto generated link that connects to your Etsy shop! Great for ANY Etsy seller with a website or blog regardless of what you’re selling.
If you’re liking this page and find it useful, by all mean, please share it with others! I’d greatly appreciate the exposure and so will those who find it.
 Current List of Member Patterns
This is the current list of patterns available to download and print. Once you become a member on Buy Me A Coffee, you can print ALL of the patterns listed below for ONE monthly fee. You can become a member for as long or as short a time period as you like. Membership supports my work and is like a tip you give. As a thank you for the tip, you get to print ALL of the patterns listed below through the membership portal. Use this link here: 👇🏼👇🏼👇🏼👇🏼👇🏼👇🏼👇🏼👇🏼 The printable patterns are also for sale on Buy Me A Coffee. When you’re a member, the price turns to zero and you can downnload and print all the patterns as long as you are a member. The individual pattern links listed below connect to the FREE ad-supported versions that are NOT printable. You do NOT need to be a member if you stay online to read the patterns. All the patterns below are currently available at Buy Me A Coffee. New patterns are added to this list continually. All titles below are also clickable links to the online, ad-supported versions. Knitting Patterns Snug Slip-On Slippers – Easy Slippers to Knit on Straight Needles Diagonal Mosaic Scarf – Scrap Yarn Knitting Pattern Mosaic Scrap Yarn Beanie Knitting Pattern Cozy Cable Slippers Scrap Yarn Hat – Bobble Beanie & Fisherman Hat Vertical Striped Beanie Toque Easy Scrap Yarn Bobble Beanie 4 Row Lattice Dishcloth and Coasters Autum Leaves Knit Flat Mittens Autumn Leaf Winter Headband or Ear Warmer Crossed Stitch Dishcloth and Coasters Winter Headbands – Simple and Cable Top Leaves of the Shadow Glen Hat – Free Two Needle Knit Flat Pattern Cozy Cable Bobble Beanie F*ck Ice and Trump Beanie Cozy Cable Headband with How-to Videos! Cute AF Bows Dishcloth Pattern Cute AF Bows Dishcloth Pattern Woodland Wanderer Knit Hat – FREE Knitting Pattern Chevron Striped Moccasin Slippers Ribbed Moccasin Bootie Slippers for Adults Christmas Snowman Fingerless Gloves Easy to Knit Beginner Slipper Pattern – Knit Flat with Bulky Yarn on Straight Needles How to Knit a Pair of Flip Mittens or Fingerless Gloves Easy Knit Mittens for Children, Teens, and Adults Easy to Knit Slippers Double Thick Ear Warmer Headband Butterfly Fingerless Gloves Rudolph the Red Nosed Reindeer Christmas Fingerless Gloves Diamonds Dishcloth and Coasters Knit a Wolf! Reindeer Christmas Slippers Knit Flat Mushroom Beanie Winter Hat Mushroom Bucket Hat – Knit Flat! Knit Flat Mushroom Fingerless Gloves Quick and Easy to Knit Mittens Extra Thick And Quick to Knit Owl Mittens Stay-Put, Tie-up Knitted Slippers Knit Bucket Hat for Children and Adults Flat Knit Slippers with a Puffy Cuff – Simple & Cozy Knitting Pattern Owl Slippers with a Cuff Deer Slippers with a Cuff Knitted Slippers for Men Knitted Moccasin Bootie Slippers for Children – FREE Knitting Pattern Easy to Knit Bow Slippers How to Knit Fingerless Gloves – with OWLS! Knitted Slippers for Men Moccasin Style Slippers Easy Cable Fingerless Gloves Lattice Fingerless Gloves Zigzag Elegance – Fingerless Gloves Knit Flat Bucket Hat – with OWLS! Knit Fingerless Gloves – With OWLS! Knit a Scarf – With OWLS! Easy To Knit Fingerless Gloves – Knit Flat On Straight Needles Knit A Beanie Hat – With OWLS! Ultra Thick Slip-On Bootie Slippers Knitted Cozy Cuff Slippers Autumn Leaf Half Gloves – Fingerless Gloves Knit on Straight Needles How to Knit: Step-by-Step Beginners Video and Pattern to Knit Granny Slippers Bulky Yarn Slippers on Straight Needles – FREE Knitting Pattern How to Knit Children’s Slippers – Free Knitting Pattern How to Knit Spider Fingerless Gloves – Knit Flat on Two Needles Cable Knit Slippers Minimalist Round Toe Slippers Easy to Knit Rolled Cuff Slippers Super Simple Easy to Knit Slippers Easy to Knit Long Cuffed Slippers Adult Ribbed Booties Easy to Knit Owl Fingerless Gloves How to Knit Fingerless Gloves – with OWLS! How to Knit Fingerless Gloves Super Simple Fingerless Gloves Cable Fingerless Gloves or Mitts Fingerless Gloves or Arm Warmers with BOWS! Easy to Knit Textured Scarf, Dishcloth and Coasters Texting Mitts Coming Soon! Cozy Lace Up Slippers Basic Knit Flat Beanie Super Cute Hippo Fingerless Gloves or Mitts – FREE Knitting Pattern How to Knit a Way Cool Monster Purse Knit a Simple Dishcloth How to Knit Adult Slippers How to Knit Adult Bootie Slippers Basic Long Fingerless Gloves One Piece Knitted Dishcloth and Coasters Bars and Stripes Knitted Dishcloth The Beginner Knitter – Learn to Knit a Dishcloth Crochet Patterns Make a Victorian Steampunk Necklace and Bracelet Waves Bracelet – FREE Crochet Pattern Flower and Friendship Bracelet Easy to Crochet Ribbed Beanie Sunny Days Flower Bucket Hat Crochet Jar and Lid with Flowers and Leaves Crocheted Pumpkin Beanie Hat Crocheted Sun Hat and Bucket Hat Quick to Make Bracelet Fans Bracelet Beads and Ladders Bracelet – No free version here. Glad to see you here and considering becoming a member to support my work. I’m currently adding my patterns to this list, starting with my most popular. I also am writing new stuff all the time so be sure to check back often. I have a number of printable pattern purchase options on Shopify, my Etsy Shop, Ravelry, LoveCrafts and both digital and paperback versions on Amazon. Of course, you can read the ad supported versions on the website for free. There will always be a free version of this site for anyone who wants it. I believe in making my work as accessible as possible while still being able to pay my mortgage and feed my family each month. Member patterns and patterns on Buy Me a Coffee are available in English only. Only the ad supported, online versions of my patterns are translated into other languages.
Read more... Knitting Calculator – How to Increase Evenly Across the Row
It’s tough, and frustrating, to do the math to figure out how many stitches you need to knit to make your stitches even across the row. We’ve all been there and we all hate doing the math. Well, you’re in luck! I’ll do it for you ?. And if you don’t know how to M1 (make 1 or increase) scroll down the page or click this link to watch the video. Using the calculator below will give you evenly spaced increases across the length of your work. All you need to enter is the number of stitches you have on your needle and the number of stitches you need to increase. Everything is calculated for you with a single click! Enter the number of stitches you have: Enter the number of stitches you need to INCREASE: Calculate Click here if you need to calculate how many stitches to DECREASE across a row I know that sometimes the stitches are a little off on the ends. Adjust accordingly if it bothers you. I really was focused on the making the increases centered in the work with even spacing between the stitches. I want to be completely transparent in where this knitting calculator and the decreasing calculator originated. I did not write the code myself. After much tweaking of this query to ChatGPT, I’ve developed a stitch calculator to determine how to increase evenly across your work. I knew what I wanted, I just didn’t know how to write the code to make it happen. AI is useful after all! My notes I entered into ChatGPT to get the code to work. https://youtu.be/Pi8rq98zuOQ
Read more... FREE Knitting Graph Paper – Knitting Colorwork Paper – Printable PDF
Get your free knitting colorwork paper here! Perfect for all your intarsia motif design needs. No need to sign in, sign up or give away any personal information. Simply use the download button to download and print as many copies of the knitting graph paper as you like. It’s a PDF file meaning that you can easily open it on any device be it your computer, phone or tablet. View the paper onlineDownload If you think someone else could use this free knitting color work paper, please let them know and share it on social media. The knitting graph paper is to create patterns in the stockinette stitch. You can use it to either make stitch patterns, or use colours to create more intricate designs known as intarsia knitting. It’s fairly large so it will meet most of the requirements for your pattern. You can always tape sheets together if you need something larger. I’ve also included arrows along the side to show which way you will be knitting based on the shape of the stitch. I also include a very faint pink colour so you can easily determine the number of stitches. I’ve marked them off in 5 stitch and row sections. To help explain the process of designing your own intarsia motifs, there are photos and explanations on how to use the colorwork knitting paper included with the PDF you can download and print for free.
Read more... Knitting Calculator – Decrease Stitches Evenly Across the Row
The term, “decrease evenly across ? number of stitches” in any pattern can be an unpleasant sight to any knitter (me included). Whereas I try to do this calculation in the patterns I write, some don’t. Regardless, the stitch calculator below will help! Using this calculator will give you evenly spaced decreases over the length of your work. All you need to enter is the number of stitches you have on your needle and the number of stitches you need to decrease. Everything is calculated for you. Enter the number of stitches you have: Enter the number of stitches you need to DECREASE: Calculate Click here if you need to calculate how many stitches to INCREASE across a row Please note: If you have more or less stitches at the end of your work, go ahead and knit them. The number of decreases across the stitches is correct. I want to be completely transparent in where this increase and decrease knitting calculators originated. I did not write the code myself. After much tweaking of this query to ChatGPT, I’ve developed a stitch calculator to determine how to decrease evenly across your work. I knew what I wanted, I just didn’t know how to write the code to make it happen. AI is useful after all!
Read more...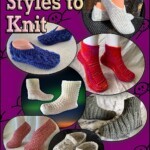 Seven Slipper Styles to Knit – A Knitting Pattern Collection
I don’t usually do posts like this but I thought I’d make it easier for everyone to get this knitting pattern collection. There is both a physical book you can get, a downloadable PDF that you can print and of course, all the individual patterns are free to read on this website if purchasing isn’t an option for you. A quick note on other places that you can get this collection from. Amazon does offer the Kindle version of the slipper pattern collection in all countries. I don’t think you can print the pattern off on a Kindle. That defeats the purpose of creating this post that helps you find where you can get a physical copy of the slipper patterns. Seven Slipper Styles to Knit – Paperback Version If you would like to purchase the paperback version of the slipper pattern collection, it’s available on Amazon only. It is very reasonably priced at $12.99 USD and shipping is included if you’re a prime member. The price is automatically converted into your county’s currency equivalent. Be sure that you order it from YOUR COUNTRY. If not you’ll be charged shipping. I’ve included the links from each country. Unfortunately, the paperback version isn’t available in very county. Canada USA United Kingdom If the patten collection isn’t available in your country or you would prefer a less expensive option and print it yourself, you can purchase the PDF Version from two places. Ravelry and LoveCrafts don’t allow for collections like this. Etsy – Seven Slipper Styles to Knit This website – Seven Slipper Styles to Knit – A Knitting Pattern Collection All of the included are FREE to read online. They are ad supported and can’t be printed. Clicking on the title will take you to the pattern page. I’ve listed the slipper patterns included in the publication below: Adult Moccasin Slippers Knitted Plaid Slippers Ribbed Bootie Slippers Owl Slippers Cable Knit Slippers Super Cozy Texture Bootie Slippers Super Simple Easy to Knit Slippers Eight Slipper Styles to Knit And in case you were unaware, I did another collection of my slipper patterns years ago. I never made it into a paperback (though if anyone was interested, please let me know). You can purchase the printable PDF from the following places: Etsy – Eight Slipper Styles to Knit This Website – Eight Slipper Styles to Knit
Read more... How to Work in the Ends While Knitting
This simple technique is something that I’ve been meaning to share for quite sometime. And since I’ve received a number of comments regarding the number of ends for my Owl Slippers and Moccasin Slippers, I realized I needed to get on this ASAP. I finally made the video! It shows how to work in the cast on end, work in the yarn at the start of the row if making stripes and how to join a new ball in the middle of a row and leave NO hole. I left the photo tutorial further down this page if you prefer that way of learning. https://youtu.be/1_zF6HAzsfY And I still don’t have instructions for left handed people. I’m so sorry about that. I’m right handed so it’s what I have to work with. Step 1: With the right side of your work facing you, put your needle through the stitch as if you were to knit. With the end at the back of your work, lay the end over your working needle. With your left hand, hold the end snug, not tight. Step 2: Place the working yarn over the needle as you normally would and knit the stitch. Do NOT catch or pull the end through while knitting the stitch. Drop the stitch from the non-working needle as you normally would. Please share this page! Step 3: Drop the end (or hold out of the way) and knit the next stitch. Repeat steps 1-3 for roughly 10 stitches. With this technique you are alternating in order to catch the end between the stitches at the back of your work as shown below. What it looks like from the wrong side. View from the front. Can’t see the end at all! When you are done, pull the end so it is snug. It’ll take up any slack that’s between the stitches you skipped. Before I trim it off, I always stretch the final piece to make sure there is just enough slack to ensure there’s no puckering. If you need a little more security, you can always give an additional back weave with a tapestry needle to catch the end of the end a bit, but I don’t. And yes, this does keep the yarn in place even with 100% acrylic yarn. I’ve made a number of slippers with the ends worked in this way and an afghan. I’ve washed the afghan a number of times with no issue whatsoever. I hope this helps speed up your work. I hate sewing in ends just as much as the next person and anything that lessens the number of them is worth a huge ?? in my books. And I also haven’t had much success doing this with purl stitches. If you have any ideas, by all means, let us know in the comment section. The K1 P1 ribbing that I do for the cuffs of my Owl Fingerless Gloves works well using this method, too. Catch the end on your knit stitch and purl the purl stitch as you normally would. Because it is right on the cuff and needs to stretch and contract, I do catch the end a bit with a tapestry needle just to give it a little extra security.
Read more... How to Display Etsy Items on Your Website
I’m not sure if you’ve seen this before, but this is a widget that Etsy offered its users years ago. It gives clickable thumbnails directly linking to your Etsy shop and automatically updates as you upload and sell items. It’s a handy little widget to add to your blog or website. Go ahead and give it a click. It’ll take you from this site but you can use your browser’s BACK button to return. I originally added it to my blog on blogspot and just kept it there. I recopied it onto my blog posts ever since. Today I realized I need to share it. To do this you will need to have some very basic coding skills. Literally adding a html block and pasting the code in it if you’re running a Wordpress site like this one. There will be something similar on all web building sites I imagine. There’s a bunch of tutorials that can help you do this for whatever you’re using. And for the record, I am not affiliated or endorsed by Etsy to do this. This is their code originally and for some reason, they got rid of it years ago. As long as they’re cool with this post, I’ll leave this info up. If I’m told to delete, it I will. But back to this widget; I can’t tell you how awesome this little piece of wonder is. It automatically updates as you sell items (though this can take a while), plus you can have it show the 4 most important items in your shop. Those are the items you have featured in your listings section. See this link on Etsy to find out how to do that – Featuring Items. Those items are then followed by your most recent listings. You don’t have to feature items for this to work. It will automatically pull the first items you have in your shop otherwise. Below is my automatic Etsy Mini with the settings set at 5 columns and 1 row showing. The first 4 items are those featured in my shop (marked with a star when on my listing on Etsy), with the last item being my latest listing. It’s always changing based on what is selling and what I’m listing. Go ahead and give it a click. It’ll take you from this site but you can use your browser’s BACK button to return. Setting Up Your Etsy Mini Copy and paste this code where you want it to appear on your website or blog post. <script src=”https://www.etsy.com/assets/js/etsy_mini_shop.js” type=”text/javascript”></script><script type=”text/javascript”>new Etsy.Mini(*******,’thumbnail’,3,1,1,’https://www.etsy.com’);</script> The ******* is your Etsy ID number. Finding this is actually really easy. It’s a part of every photo that you upload to your listings. I use a Mac so the process may differ slightly with a PC. Go to any of your photos in any of your listings. Right click and select “open image in a new tab” or “open image in a new window”. It’ll be something like that. Do what you need to do to open an image on your web browser. This is NOT the same steps as saving a photo. That won’t work. Go to the address bar at the top of the page Your Etsy ID number is what is shown in red. (It is white in the address bar but I made it a different colour so you can easily see where it is). I looked at a number of different photos and tried out their numbers. All I saw was 7 digits and they all worked. It may be more or less for you. How the code will look with the Etsy Id number replaced: <script src=”https://www.etsy.com/assets/js/etsy_mini_shop.js” type=”text/javascript”></script><script type=”text/javascript”>new Etsy.Mini(1234567,’thumbnail’,3,6,1,’https://www.etsy.com’);</script> Please share this post with these handy links: Changing the Display Once you replace all of the ******* with your Etsy ID number, you can play with what you would like to display. The numbers after the word ‘thumbnail’ adjust what is displayed. The first number is the columns. The second number is the rows. I honestly don’t know what the 3rd number does. I always leave it alone. Let me know in the comments if you figure it out. For example, the Etsy Mini below is set at 3 column and 6 rows. The code for the display above (without an id number): <script src=”https://www.etsy.com/assets/js/etsy_mini_shop.js” type=”text/javascript”></script><script type=”text/javascript”>new Etsy.Mini(*******,’thumbnail’,3,6,1,’https://www.etsy.com’);</script> The maximum number of items the code displays is 25. So the number of rows and columns you choose have to equal or be less than that amount. Center Your Etsy Mini If you want to center your display like the one below, you can easily add the <p align=”center”> </p> tags around the code like this. <p align=”center”> <script src=”https://www.etsy.com/assets/js/etsy_mini_shop.js” type=”text/javascript”></script><script type=”text/javascript”>new Etsy.Mini(*******,’thumbnail’,3,6,1,’https://www.etsy.com’);</script> </p> There you go. I’m not a coder by any stretch and tried to explain this the best way I could. I hope you get a lot of use out of this. I’ll try to help and answer your questions as I have time. I work full time and run my own Etsy shop. I can only do so much. My comments sometimes work and sometimes don’t. I’ve been having issues with it. Please log in to add comments or help answer anyone that may be having troubles. Good luck! Sell a bunch ?
Read more...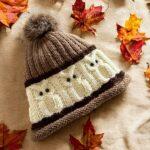 How To Knit A Beanie Hat – With OWLS! – FREE Knitting Pattern
I really do like how well the owl motif worked on this hat! And surprisingly didn’t take much figuring or math once I wrote out the Basic Knit Flat Beanie. I did have to play around with how many rows tall to make the body and head. I didn’t figure it would stretch as much as it does but I’m happy with the final proportions. Make the beanie and gloves! And in case you haven’t found it on the website yet, I have a pair of fingerless gloves that have the same owl motif. There is the knit flat owl gloves that were designed specifically to match this beanie. There is also owl gloves that are knit in the round. The cuffs aren’t a perfect match but are seamless if that’s what you prefer. And happy day! The matching scarf pattern is done ☺️ If you would like to get started on the entire matching set, you can read the free, ad supported knitted scarf pattern here: How to Knit a Scarf – with OWLS! FREE Knitting Pattern And for the last announcement, if you would like to make a beanie winter hat with mushrooms 🍄 instead of owls, I’ve got that too. Here’s that link – Mushroom Beanie Winter Hat Click or tap on any photo below to read the pattern online. 👇🏼 👇🏼 👇🏼 👇🏼 This owl hat knit pattern is a fairly easy project to make if you have some knitting experience. I designed it to be flat, knit on 2 straight needles so more people would be comfortable in making it. Though the cabling can look intimidating, it really isn’t. I have videos on YouTube that will show you how if you’ve never done it before. I embedded videos in the pattern to help you along. The choice of colour is yours as always. I included where to change colours if you would like to make one with 3 colours like I did for the brown and beige version I made. If you’re making a solid colour toque, you can ignore the notifications in the pattern. As far as the use of a pom pom on the top… Some love it, some hate it. I know for myself, if I have to put my hood up, I hate them, but aesthetically, they do have their charms NGL. I have more information in the Hints and Tips section about the pom pom on the white and blue beanie. Things You Need Worsted weight yarn (either complimentary colours or single colour) 5 mm (Size 8 US) single pointed knitting needles Cable needle Tapestry needle to sew seams and work in ends 14 or 16 buttons or jewels for eyes (see Hints and Tips) Pom pom – you can make or buy these, or not use one at all. Gauge In stockinette 9 sts = 2 inches (5 cm) 12 rows = 2 inches (5 cm) Sizes are written as such: S-M (L-XL) Small and medium = 21 inches (53 cm) around Large and Extra large = 24.5 inches (62 cm) around Uses about 160 meters or 180 yards. Does NOT include pom-pom. This pattern makes either 7 or 8 owls around. Each owl motif is about 3.5 inches (8.9 cm) wide if you follow the gauge given. You can adjust your stitches accordingly to make larger or smaller sizes than what I’ve given. Each owl motif uses 12 stitches. So, if you wanted it smaller by one owl cast on 74 sts (86 – 12 = 74) If you would prefer a PDF printable version of the pattern, you can download it from my Shopify shop here – Knit Owl Beanie Hat. You can also get it at a number of other online retailers such as Ravelry, LoveCrafts, and Etsy. The Kindle and Paperback version is also on Amazon. You can also get it on Buy Me A Coffee, and if you are a supporter of my work, it’s free. If you enjoy this pattern and my other free online knitting patterns, please consider making a small donation or helping me out by visiting my Help Support My Work page. If that’s not possible, that’s totally fine too! Even sharing this page on your social media helps me out immensely. You can use those buttons below to do so easily. The Pattern Cast on 86 (98) sts ♠ Row 1: Knit Row 2: Purl ♠ Repeat from ♠ to ♠ for a total of 10 rows. (Change colour at the START of row 11 if desired.) To save yourself time if you’re changing colours, I suggest that you Work in the Ends While Knitting. You can click that link or watch the video here. https://youtu.be/1_zF6HAzsfY Row 11-15: Knit (Change colour at the START of row 15 if desired.) Row 16: ♦ P2 K1 P8 K1 ♦ Repeat from ♦ to ♦ until there are 2 sts. P2 Row 17: ♣ K3 C4B C4F K1 ♣ Repeat from ♣ to ♣ to the last 2 sts. K2 If you don’t know how to cable you can watch these videos to show you how. https://youtu.be/Tj-x_cf_fEc https://youtu.be/XcyQfDmwGZs Row 18: ♥ P2 K1 P2 K4 P2 K1 ♥ Repeat from ♥ to ♥ to the last 2 sts. P2 Row 19: K5 ☺ P4 K8 ☺ Repeat from ☺ to ☺ 5 (6) times more. P4 K5 Row 20: As row 18 Row 21: As row 19 Row 22: As row 18 Row 23: As row 19 Row 24: As row 18 Row 25: As row 19 Row 26: As row 18 Row 27: ♣ K3 C4B C4F K1 ♣ Repeat from ♣ to ♣ to the last 2 sts. K2 Row 28: ♦ P2 K1 P8 K1 ♦ Repeat from ♦ to ♦ until there are 2 sts. P2. Row 29: Knit Row 30: As row 28 Row 31: Knit Row 32: As row 28 Row 33: Knit Row 34: As row 28 Row 35: ♣ K3 C4B C4F K1 ♣ Repeat from ♣ to ♣ to the last 2 sts. K2 Row 36: as row 28 (Change colour at the START of row 37 if desired.) Row 37 – 40: Knit (Change colour at the START of row 41 if desired.) ▲ Row 41: Knit Row 42: ◘ P2 K1 ◘ Repeat from ◘ to ◘ tot he last 2 sts. P2 ▲ Repeat from ▲ to ▲ for a total of 22 (26) rows. Next row: ♣ K2tog K1 ♣ Repeat from ♣ to ♣ to the last 2 sts. K2tog Next row: ◘ P1 K1 ◘ Repeat from ◘ to ◘ to the last st. P1 Next row: K2tog to the end of the row. Next row: P across Next row: K2tog to Read more…
Read more...

