
Since slippers seem to be one of my “things” that I tend to design a lot of, I figured I’d make it easier for everyone and Step into cozy comfort with this collection of free slipper knitting patterns for adults and kids. These patterns include easy and quick designs for slippers that can be knit flat on straight needles, perfect for beginners or experienced knitters looking for a relaxing project. From snug slip-ons and moccasins to warm, extra-thick slippers, each pattern comes with step-by-step instructions, helpful photos, and optional video tutorials to guide you every row of the way.
Explore the collection below to find free knitted slippers patterns for all ages, styles, and skill levels. Click the photos to start your next cozy project. And the best part, no printing needed! Just follow along on your phone or tablet.
Love the patterns and want to help me out? Please share this page on social media! Use the tabs below to quickly share.


How to Knit Adult Slippers – FREE Knitting Pattern
I’ve decided to share one of my most favourite things to knit…slippers just like my mom used to make. I’ve given the pattern so anyone can create them for adults from a woman’s size 7-12 or a man’s 6-11. This is one my most popular patterns (this honour has recently been captured by my Easy to Knit Owl Fingerless Gloves). This slipper pattern has been dowloaded and viewed thousands of times through various online channels. Adult slippers – Free knitting patternFree slipper patternHow to knit adult slippers – free knitting patternHow to knit adult slippers – free knitting patternFree slipper pattern If you’re not a fan of being online, you can also download the ad free PDF version of the pattern directly from my Shopify shop – How to Knit Adult Slippers. If that is too much of a hassle, you can also find it in my Etsy shop or Ravelry for the same small fee. Become a Member As my latest addition, I’ve also converted this pattern to children’s sizes. You can use this link to see my FREE children’s knitted slippers pattern. Both of these patterns are great to practice if you are a new knitter. Make sure you maintain the correct gauge! The sizing for the slippers is based on it. If you match your gauge to mine then the sizing should work out correctly. I’ve also added all of the the videos for the necessary knitting stitches you’ll need to make these slippers.You can watch them right on this site by clicking this link – Basic Knitting Stitches. I’ve also embedded the complete step-by-step video showing how to make these. Scroll down or click here to the end of the page to watch it right here. FYI – all the links on this page open in a new page so you won’t lose this one. I’ve also added links to the specific stitches that you need within the pattern itself. For example, if you forget how to gather stitches to form the toe, there’s a link right there to go to the video. Things you will need: If you are uncertain or having trouble finding what you need to make these slippers, clicking any of the links below will show you exactly what you need. And if you decide to order through Amazon, it will be delivered right to your door and help support the hosting costs of the website (I do get a small commission from sales through Amazon). 200 gr of worsted weight yarn (this is an estimate. One large ball from any retailer will do.) Set of 2 size 5 (US size 8) knitting needles or whatever size to obtain correct gauge. Darning needle to sew the seams. Gauge: 12 rows stockinette = 2″ 9 stitches stockinette = 2″ Be sure to check your gauge to obtain correct sizing! Slippers are given for a woman’s size 7-8 (9-10, 11-12) or a man’s sizes 6-7 (8-9, 10-11). The foot lengths of a man’s size 6-7 are about the same as that of a woman’s size 7-8 and so on. The Complete How- to Video: https://youtu.be/u87aKaGUs9I The Pattern: Cast on 40 sts Row 1: Knit across. Row 2: K13 P1 K12 P1 K13 Repeat rows 1 and 2 for 36 (42, 48) more times TOTAL. Shape toe: Next Row: With right side of work facing you P1 *(K1 P1) Repeat from * 5 more times K14 *(P1 K1) Repeat from * 5 more times. P1 {This is K1 P1 Ribbing.} Next Row: With wrong side facing you *(K1 P1) Repeat from * 6 more times K12 *(P1 K1) Repeat from * 6 more times. Repeat these 2 rows for 22 (26, 30) more rows. 24 (28, 32) rows ribbed TOTAL. Next Row: With right side facing K2tog 12 times. K1. K2tog 7 times P1. 21 stitches remaining. Next Row: P8 K6 P7 Next Row: K2tog 10 times. K1. 11 stitches. Next Row: P5 K3 P3. Last Row: Draw yarn through loops (AKA gather stitches) and pull together to form toe. Sew seam up to start of ribbed stitches. More of my stuff on Etsy To form back flap of heel: With right side of work facing you pick up 14 stitches between the fold lines that mark the sole of the slipper. A lot of people have messaged me over the years not knowing how to do this. I made a video! It’s actually for another pattern but is exactly the same as this. Here’s the link to the video – Picking up Stitches for the Heel Row 1: Knit across. Row 2: Knit across. Row 3: K2tog K10 K2tog. 12 stitches Row 4: Knit across. Row 5: Knit across. Row 6: K2tog K8 K2tog. 10 stitches. Row 7: Knit across. Row 8: Knit across. Row 9: K2tog K6 K2tog. 8 stitches Row 10: Knit across. Row 11: Knit across. Row 12: K2tog K4 K2tog. 6 stitches. Row 13: Knit across. Row 14: Knit across. Row 15: K2tog K2 K2tog. 4 stitches Row 16: Knit across. Row 17: Knit across. Row 18: K2tog twice. 2 stitches. Row 19: Knit across. Bind off Sew up seems for heel flap. Work in ends. Make another to match. Like all of my patterns you have my permission to sell and/or give away the slippers that you make using this pattern. You are NOT permitted to reprint this pattern in any form, physical or digital, unless you have obtained my written permission to do so. If you would like to link back, that always awesome and feel free to do so. Happy knitting!! https://youtu.be/u87aKaGUs9I
Read more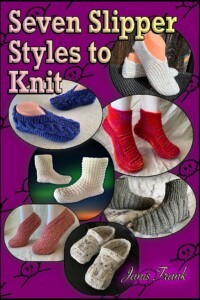
Seven Slipper Styles to Knit – A Knitting Pattern Collection
I don’t usually do posts like this but I thought I’d make it easier for everyone to get this knitting pattern collection. There is both a physical book you can get, a downloadable PDF that you can print and of course, all the individual patterns are free to read on this website if purchasing isn’t an option for you. A quick note on other places that you can get this collection from. Amazon does offer the Kindle version of the slipper pattern collection in all countries. I don’t think you can print the pattern off on a Kindle. That defeats the purpose of creating this post that helps you find where you can get a physical copy of the slipper patterns. Seven Slipper Styles to Knit – Paperback Version If you would like to purchase the paperback version of the slipper pattern collection, it’s available on Amazon only. It is very reasonably priced at $12.99 USD and shipping is included if you’re a prime member. The price is automatically converted into your county’s currency equivalent. Be sure that you order it from YOUR COUNTRY. If not you’ll be charged shipping. I’ve included the links from each country. Unfortunately, the paperback version isn’t available in very county. Canada USA United Kingdom If the patten collection isn’t available in your country or you would prefer a less expensive option and print it yourself, you can purchase the PDF Version from two places. Ravelry and LoveCrafts don’t allow for collections like this. Etsy – Seven Slipper Styles to Knit This website – Seven Slipper Styles to Knit – A Knitting Pattern Collection All of the included are FREE to read online. They are ad supported and can’t be printed. Clicking on the title will take you to the pattern page. I’ve listed the slipper patterns included in the publication below: Adult Moccasin Slippers Knitted Plaid Slippers Ribbed Bootie Slippers Owl Slippers Cable Knit Slippers Super Cozy Texture Bootie Slippers Super Simple Easy to Knit Slippers Eight Slipper Styles to Knit And in case you were unaware, I did another collection of my slipper patterns years ago. I never made it into a paperback (though if anyone was interested, please let me know). You can purchase the printable PDF from the following places: Etsy – Eight Slipper Styles to Knit This Website – Eight Slipper Styles to Knit
Read more
Stay-Put Tie-Up Slippers – Handmade House Slippers You’ll Love!
Looking for a knitting pattern to make cozy hand-knit house slippers that actually stay on your feet? These handmade slippers are easy and quick to make, perfect for beginners who want a simple hand-knitting project with great results. Designed with a unique tie-up feature, they hug your feet for a snug, secure fit—no more slipping off while you walk! Whether you’re knitting for yourself or making a thoughtful gift, this pattern works up fast and can be customized with your favorite colors. Grab your needles and let’s get started! You can download it from a number of places. In particular, my Shopify shop here – Stay-Put Tie-Up Knitted Slippers for Men and Women.You can also get it at a number of other online book retailers such as Buy Me A Coffee, Ravelry, and Etsy. If you enjoy this pattern and my other free online knitting patterns, please consider making a small donation or helping me out by visiting my Help Support My Work page. If that’s not possible, that’s totally fine too! Even sharing this page on your social media helps me out immensely. You can use the buttons below to do so easily. Things You Need 1 MAIN colour of worsted weight yarn (average 260 yard, 5 oz or 141 gram ball will be more than enough). I used Red Heart worsted weight yarn when designing the pattern but any worsted weight yarn will suffice. 1 COMPLIMENTARY colours of worsted weight yarn for the tie (optional). 1 set of size 4 mm (US size 6) single point knitting needles. Stitch holder Tapestry needle to sew in ends. You can also use this handy tutorial to show you how to work in the ends while knitting these slippers. A new page will open so you won’t lose this one. Gauge With size 4 mm (US size 6) needles or whatever size you need to obtain the correct number of stitches and rows. Be sure to check your gauge otherwise the sizing won’t be correct. In garter stitch 4” = 18 sts 4” = 36 rows Sizes (are written as such) Women’s 6-7 (8-9, 10-11, 12-13) Men’s 5-6 (7-8, 9-10, 11-12) The Pattern Cast on 41(43, 47, 49) Ϫ Row 1 (rolled cuff edging): Knit across Row 2 (hole spaces for tie-up lace): Purl across Ϫ Repeat from Ϫ to Ϫ for a total of 6 rows. Row 7 (: K2 (3, 5, 5). ▲Cast off one stitch, K1▲ Repeat from ▲ to ▲ 4 times more. Cast off one stitch, K4 (4, 4, 6) ▲Cast off one stitch, K1▲ Repeat from ▲ to ▲ 4 times more. Cast off one stitch. K1 (2, 4, 4). (29, 31, 35, 37 sts. Problem with the st count? Go to Hints and Tips section for details.) Cast off as you normally would Space left from casting off the single st. This is the smallest size with cast off spaces. Larger sizes have more sts at the end and in the middle. Row 8: P2 (3, 5, 5). ◊ Cast on one stitch, P2 ◊ Repeat from ◊ to ◊ 4 times more. Cast on one stitch, P5 (5, 5, 7). ◊ Cast on one stitch, P2 ◊ Repeat from ◊ to ◊ 4 times more. Cast on one stitch. P2 (3, 5, 5). (41, 43, 47, 49 sts) Flip the work with the RIGHT side facing you. Cast on as you normally would. Stitch cast on. Flip your work to the WRONG side and continue with the pattern. Lace up holes made and back to original number of sts cast on. Row 9-10: K across. Row 11: K3 (4, 6, 6) *INC, K4 (4, 4, 3)* Repeat from * to * 6 (6, 6, 8) more times. INC, K2 (3, 5, 6). (49, 51, 55, 59 sts) Row 12: K across Row 13: K3 (4, 6, 7) *INC, K5 (5, 5, 4)* Repeat from * to * 6 (6, 6, 8) more times. INC, K3 (4, 6, 6). (57, 59, 63, 69 sts) Row 14-15: K across Row 16: K26 (27, 29, 32) ♫ P1 M1 ♫ Repeat from ♫ to ♫ 3 more times P1 K26 (27, 29, 32). (61, 63, 67, 73 sts) Row 17: K across Row 18: K26 (27, 29, 32) ◘ P1 INC ◘ Repeat from ◘ to ◘ 3 more times P1 K26 (27, 29, 32). (65, 67, 71, 77 sts) Row 19: K across Row 20: K26 (27, 29, 32) ☼ P1 K2 ☼ Repeat from ☼ to ☼ 3 times more P1 K26 (27, 29, 32). Row 21: K27 (28, 30, 33) ♠ INC, K2♠ Repeat from ♠ to ♠ 3 more times. K26 (27, 29, 32). (69, 71, 75, 81 sts) Row 22: K26 (27, 29, 32) □ P1 K3 □ Repeat from □ to □ 3 times more P1 K26 (27, 29, 32). Row 23: K across Row 24: As row 22. Row 25: K27 (28, 30, 33) ☺ K, INC, K2☺ Repeat from ☺ to ☺ 3 more times. K26 (27, 29, 32). (73, 75, 79, 85 sts) Row 26: K26 (27, 29, 32) ♣ P1 K4 ♣ Repeat from ♣ to ♣ 3 times more P1 K26 (27, 29, 32). Row 27: K across. Row 28: As row 26 Row 29: K27 (28, 30, 33) ♪ K, INC, K3 ♪ Repeat from ♪ to ♪ 3 more times. K26 (27, 29, 32) . (77, 79, 83, 89 sts) Row 30: K26 (27, 29, 32) ♯ P1 K5 ♯ Repeat from ♯ to ♯ 3 times more P1 K26 (27, 29, 32) . For Women’s sizes 6-7 and men’s 6 Row 31: Knit across Row 32: Cast off 36 sts. K4. Cast off 36 sts. There are 5 sts remaining on your needle. Continue on to knit the Sole For Women’s sizes 8-9 and Men’s size 7-8 Row 31: K28, ♪ K2, INC, K3 ♪ Repeat from ♪ to ♪ 3 more times. K27. (83 sts) Row 32: K27 # P1 K6 # Repeat from ♯ to ♯ 3 times more P1 K27. Row 33: K across Row 34: Cast off 39 sts. K4. Cast off 39 sts. There are 5 sts remaining on your needle. Continue on to knit the Sole For Women’s size (10-11, 12) and men’s sizes (9-10, 11-12) Row 31: K across Row 32: As row 30. Row 33: K (30, 33) ♪ K2, INC, K3 ♪ Repeat from ♪ to ♪ 3 more times. K (30, 32). (87, 93 sts). Row 34: K (30, 32) ♯ P1 K6 ♯ Repeat from ♯ to ♯ 3 times more. P1 K (30, 32). Row 35: K across Row 36: Cast off (41, 44) sts. K4. Cast off (41, 44) sts. There are 5 sts remaining on your needle. Continue on to knit the Sole Making the Sole Next row: With the RIGHT side facing, attach yarn and knit the first cast off stitch by the 5 sts remaining of the last row (cast off stitch on the right by the point of the needle). Work along these cast off sts on both sides. Pick up a st here. Top view. Working needle inserted to pick up st. K2tog K1 K2tog. Pick up the cast off stitch by the point of your needle. (5 stitches). Pick up this st. Quick tip – wrap the yarn counterclockwise around your needle and turn it down to pull the yarn through the cast off stitch on the right. If you have a hard time doing this, you can also use a crochet hook to pull the loop through and place that loop on your working needle. You now are working back and forth along the bottom of the foot picking up one cast Read more
Read more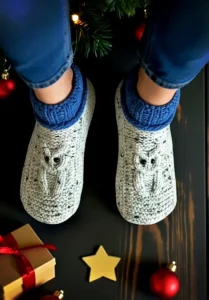
Free Pattern: Knitted Owl Slippers with Cozy Cuff for Adults
Get ready to knit a pair of slippers that are as cozy as they are charming! This knitting pattern brings together the best of warmth and whimsy, featuring a delightful owl motif perched right on top of the foot. These adult-sized slippers have been crafted with both style and function in mind, thanks to a fitted cuff that hugs your ankle for extra warmth and coziness. Perfect for chilly mornings or relaxed evenings, these slippers will be a go-to pair for any owl lover. This pattern is designed for knitters with a bit of experience—if you’re comfortable with basic stitches, you’ll be able to follow along with ease. And don’t worry, you won’t be left to navigate the trickier parts alone! I’ve included detailed, how-to videos to help guide you through each step, ensuring that even challenging sections feel doable. Before you know it, you’ll have a cozy, owl-adorned pair of slippers that are sure to turn heads and keep feet warm. You can download it from a number of places. In particular, my Shopify shop – Owl Slippers with a Cuff – Knitting Pattern. You can also get it at a number of other online retailers such as Ravelry, LoveCrafts, Buy Me A Coffee (free if you’re a member 😉) and Etsy. It is also available as paperback and as a Kindle book on Amazon. I think that’s enough options to make nearly everyone happy 🥰. If you enjoy this pattern and my other free online knitting patterns, please consider making a small donation or helping me out by visiting my Help Support My Work page. If that’s not possible, that’s totally fine too! Even sharing this page on your social media helps me out immensely. You can use the buttons below to do so easily. if you are a lover of owls, then you are in LUCK! I have a number of patterns with owls including fingerless gloves, owl beanie, owl bucket hat, and an owl scarf. All are knit flat on 2 needles and are FREE to read on this website. Click any of the links or photos below and a new window will open with the entire pattern there for you to enjoy. Tap this button to see all of the patterns I’ve added this same owl motif to. ALL Owl Patterns Happy Knitting! Things You Need 1 ball of worsted weight yarn (average 260 yard, 5 oz or 141 gram ball will be more than enough). You can use a second colour for the cuff. 2 sets of size 4 mm (US size 6) single point knitting needles. Stitch holder Cable Needle Tapestry needle to sew in ends. You can also use this handy video tutorial to show you how to work in the ends while knitting these slippers. The embedded video is in the Abbreviations section Gauge With size 4 mm (US size 6) needles or whatever size you need to obtain the correct number of stitches and rows. Be sure to check your gauge otherwise the sizing won’t be correct. In garter stitch 2” = 9 sts 2” = 18 rows Sizes (are written as such) Women’s 6-7 (8-9, 10-11, 12-13) Men’s 5-6 (7-8, 9-10, 11-12) Cuff With CUFF colour Cast on 36 (38, 40, 42) loosely Row 1: K across Row 2: With the RIGHT side facing you, (K1 P2) across. Maintain this pattern with any remaining sts at the end of the row. Repeat from to 10 (12, 14, 16) times more for a total of 12 (14, 16, 18) rows Next Row: With the RIGHT side facing, P across. Next Row: K across. If cuff colour differs from the MAIN colour, break yarn now. Start the new colour when done knitting this row. Next Row: K across for 13 (15, 17, 19) rows. Break yarn. Toe Flap Next Row: With the MAIN colour and the WRONG side of the ribbing facing you, transfer the first 11 (12, 13, 14) stitches to a stitch holder. Reattach the yarn and knit the next 14 stitches (the start of the toe flap with the owl motif). Leave the remaining 11 (12, 13, 14) stitches on the needle unworked. https://youtu.be/wv_dKrKuyOg The following rows are worked back and forth on the 14 toe flap stitches only! Knit across for 7 (9, 9, 11) rows. Next Row (with the RIGHT side of the ribbing facing you): K3 P2 K4 P2 K3 Next Row (with the WRONG side of the ribbing facing you): K2 P1 K8 P1 K2 Next Row: K3 P8 K3 ♦ Next Row: K2 P1 C4F C4B P1 K2 https://youtu.be/XcyQfDmwGZs https://youtu.be/Tj-x_cf_fEc Next Row: K3 P8 K3 ♥ Next Row: K2 P1 K8 P1 K2 Next Row: K3 P8 K3 ♥ Repeat from ♥ to ♥ 2 more times Next Row: Repeat row marked with ♦ Next Row: K3 P2 K4 P2 K3 ♪ Next Row: K2 P1 K2 P4 K2 P1 K2 Next Row: K3 P2 K4 P2 K3 ♪ Repeat from ♪ to ♪ 3 more times Next Row: Repeat row marked with ♦ Next Row: K across for 5 (7, 7, 9) rows. More of My Stuff on Etsy Sides of Foot This is where you’re going to need the extra set of knitting needles. You’ll be knitting back and forth in rows but the turn around the toe is too tight to use circular needles. For this, you’ll put the 14 toe flap stitches on one of your extra needles. It’s a little unconventional, but it works. Next Row: With the RIGHT side facing, transfer the 11 (12, 13, 14) stitches from the stitch holder onto one of your needles. Attach your yarn and knit the 11 (12, 13, 14) stitches. Pick up 21 (22, 23, 24) stitches evenly along the edge of the toe flap. (All of these stitches are on ONE needle. (32, 34, 36, 38) stitches on this needle) With another needle, knit the 14 stitches of the toe flap. (14 stitches on this needle) With another needle, pick up 21 (22, 23, 24) stitches evenly along the side of the toe flap. Knit the remaining 11 (12, 13,14) stitches on the next needle. (32, 34, 36, 38) stitches on this needle) You should now have 3 needles holding stitches with all the points pointing as shown below when laid flat. You also have one spare needle to knit with. You are now going to knit in rows, back and forth with these three needles. Once you finish knitting all the stitches on one needle, move on to the next needle (the point of the needle is right there) until you complete the Read more
Read more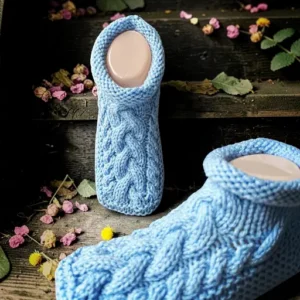
Cozy Cable Slippers – FREE Knitting Pattern for Comfy Feet
If you love cozy handmade slippers and are ready to take on a knitting project with a little more detail, this cable slipper knitting pattern is a beautiful challenge. These adult knitted slippers feature a classic cable design that adds texture, warmth, and a handmade touch. This pattern is not designed for beginners, but if you are comfortable following a pattern and want to build your skills, it’s a rewarding project to try. To help you along the way, I’ve included step-by-step photos and video tutorials for the trickier sections of the pattern. You’ll have extra guidance as you work through the cable details and shape these cozy slippers. Grab your favorite yarn, settle in, and enjoy creating a pair of warm, comfortable knitted slippers that you’ll love wearing or gifting. You can download it from a number of places. In particular, my Shopify site here – Cozy Cable Slippers. You can also get it at a number of other online book retailers such as Ravelry, and Etsy. I also have versions available on Amazon as a paperback and for Kindle. Click the area you are in if you’d like to get the paperback – United States, United Kingdom, Canada, Australia. ☺️ Don’t forget, it’s on Buy Me A Coffee, too! If you enjoy this pattern and my other free online knitting patterns, please consider making a small donation or helping me out by visiting my Help Support My Work page. If that’s not possible, that’s totally fine too! Even sharing this page on your social media helps me out immensely. You can use the buttons below to do so easily. Things you need Worsted weight yarn 2 sets of size 4 mm (US size 6) single pointed needles Cable needle Stitch holder Tapestry needle ( to work in ends) Gauge With size 4 mm (US size 6) needles or whatever size you need to obtain the correct number of stitches and rows. Be sure to check your gauge otherwise the sizing won’t be correct. In garter st 17 sts = 4 inches or 10 cm 34 rows = 4 inches or 10 cm Sizes (are written as such) Women’s 6-7 (8-9, 10-11, 12-13) Men’s 5-6 (7-8, 9-10, 11-12) Top of Toe Cast on 21 Row 1: P1 K4 P1 K9 P1 K4 P1 Row 2 (and all even rows for the toe): K1 P4 K1 P9 K1 P4 K1 * Row 3: P1 C4F P1 C6F K3 P1 C4B P1 Row 5: as row 1 Row 7: P1 C4F P1 K3 C6B P1 C4B P1 Row 9: as row 1 Row 10: as row 2 * Repeat from * to * 2 (2, 2, 3) times more Next row: repeat row 3 Side Cables With the wrong side facing you Next row: K1 P4 K1. Transfer the remaining 15 sts onto a stitch holder (You can also leave the sts on your needle and leave the sts unworked for this and any other st transfers). Turn. Next row: Working on the the 6 sts remaining on your needle, P1 K4 P1 Next row: K1 P4 K1 You can place a st marker hereto know how many repeats you’ve done ♦ Next row: P1 C4B P1 Next row: K1 P4 K1 Next row: P1 K4 P1 Next row: K1 P4 K1 ♦ Repeat from ♦ to ♦ 4 (5, 6, 6) times more. Next row: P1 C4B P1 Next row: K1 P4 K1. Sts not cast off yet. Cast off these 6 sts. Break yarn. Transfer the sts from the st holder back onto your needle. Next row: With the WRONG side facing you, P9 K1 P4 K1 Next row: P1 K4 P1. Transfer the next 9 sts back on to your st holder. Turn. Next row: Working on the the 6 sts remaining on your needle, K1 P4 K1 ♥ Next row: P1 C4F P1 Next row: K1 P4 K1. Next row: P1 K4 P1 Next row: K1 P4 K1 ♥ Repeat from ♥ to ♥ 4 (5, 6, 6) times more. Next row: P1 C4F P1 Next row: K1 P4 K1. Sts not cast off yet. You’ll end with a single st at the arrow. Cast off these 6 sts. Do NOT Break yarn. Leave the single st on the needle and pick up sts along the first edge as instructed. Top Edging With the right side facing you, pick up 13 (15, 17, 19) sts evenly along the top edge of the cable strip. There is now 14 (16, 18, 20) sts on your needle. Transfer the middle 9 sts back onto a needle. Knit these 9 sts. Pick up 14 (16, 18, 20) sts evenly along the top edge of the cable strip on the other side. (37, 41, 45, 49 sts) Sts picked up along the first edge. Sts transferred back to a needle. All sts picked up. Next row: (wrong side facing): P across. Next row: K17 (19, 21, 23), C6B K14 (16, 18, 20). Next row: P across. Next row: K across. Next row: P across. Next row: K14 (16, 18, 20), C6F K K17 (19, 21, 23). ♠ Next row: P across. Next row: K across. ♠ Repeat from ♠ to ♠ 4 times more for a total of 10 rows. With the WRONG side facing you, cast off loosely. Break yarn. Making the Sides of the Slipper This is where you’re going to need the extra set of knitting needles. You’ll be knitting back and forth in rows but the turn around the toe is too tight to use circular needles. For this, you’ll put the 14 toe flap stitches on one of your extra needles. It’s a little unconventional, but it works. Next row: With the RIGHT side facing you, pick up 32 (34, 36, 38) sts evenly along the bottom edge of the cable strip. With the second needle, pick up 14 along the bottom edge of the the cables. With another needle, pick up 32 (34, 36, 38) sts evenly along the bottom edge of the cable strip on the other side. You should now have 3 needles holding stitches with all the points pointing as shown below when laid flat. You also have one spare needle to knit with. You are now going to knit in rows, back and forth with these three needles. Once you finish knitting all the stitches on one needle, move on to Read more
Read more
Cable Knit Slippers for Children and Adults – FREE Knitting Pattern
Learn to knit a beautiful pair of slippers for children and adults with this free knitting pattern.
Read more
How to Knit Ribbed Bootie Slippers for Adults – FREE Knitting Pattern
Learn how to knit cozy ribbed adult booties with this free slipper knitting pattern! This easy knitting project is perfect for beginners who know the basics. If you can knit, purl, cast on, and cast off, you can make these warm and stretchy slippers in no time. These handmade booties are soft, comfortable, and great for lounging around the house. The ribbed design helps them fit snugly and keeps your feet toasty all year long. If you’re just learning how to knit, don’t worry—there are full video tutorials that walk you through each stitch including how to do the knit stitch, purl stitch, k2tog, INC, cast on and cast off. It’s an ideal beginner knitting pattern for anyone who wants to make practical, cozy slippers that actually get worn. If you need help with the stitches scroll down to the Videos section for the quick and easy to follow how-to videos. And if you’re looking for an ad free pattern you can download to your computer, tablet or phone you can get that here – KweenBee on Shopify or my Etsy shop or Ravelry for a small fee. The pattern is written to fit feet from a ladies size 6 – 12 and a man’s 5 – 12. I’m still on the fence as whether to design these to fit children. The sizing involves a lot of math and knitting sample sizes and I’m really not too excited about taking on either of those tasks. Let me know if you want it for kids. If there’s enough of you out there, I’ll do it. If you are enjoying the free videos and patterns, then please share my work! Those handy little icons down there ?? let you do it easily and helps me immensely ?. If you’d like more information on how you can keep things free, learn how you can Help Support My Work. Things You Need Click any link below to get everything you need to make these slippers mailed right to your door. Size 8 US (5 mm) knitting needles (or whatever size you need to get the correct gauge.) Darning Needle to sew in ends Yarn – any standard ball of 200+ yards (220 m) of worsted weight yarn will do. Gauge Gauge is in stockinette (Be sure to check to obtain correct sizing!) 18 sts = 4 inches 26 rows = 4 inches Sizes are written for women’s size 6-7 (8-9, 10-11, 12) and for a men’s 5-6 (7-8, 9-10, 11-12) Heel Flap Cast on 3 Row 1: Knit Row 2: K, inc in next stitch, K (4 sts) Row 3: Knit Row 4: Inc in first stitch, K2, inc in last stitch (6 sts) Row 5: Knit Row 6: Inc in first stitch, K4, inc in last stitch (8 sts) Row 7: Knit Row 8: Inc in first stitch, K6, inc in last stitch (10 sts) Row 9: Knit Row 10: Inc in first stitch, K8, inc in last stitch (12 sts) Starting the Ankle and Foot Row 11: K12. Cast on 23 (26, 26, 29). You now have 35 (38, 38, 41 sts total) Row 12: Knit across. Cast on 23 (26, 26, 29). You now have 58 (64, 64, 70 sts) Row 13: K10 (12, 12, 14), P13 (14, 14, 15), K12, P13 (14, 14, 15), K10 (12, 12, 14) Row 14: Knit Row 15: K10 (12, 12, 14), P13 (14, 14, 15), K12, P13 (14, 14, 15), K10 (12, 12, 14) Row 16: K10 (12, 12, 14), P13 (14, 14, 15), K12, P13 (14, 14, 15), K10 (12, 12, 14) *Row 17: Knit Row 18: K10 (12, 12, 14), P13 (14, 14, 15), K12, P13 (14, 14, 15), K10 (12, 12, 14) Row 19: K10 (12, 12, 14), P13 (14, 14, 15), K12, P13 (14, 14, 15), K10 (12, 12, 14) Row 20: Knit Row 21: K10 (12, 12, 14), P13 (14, 14, 15), K12, P13 (14, 14, 15), K10 (12, 12, 14) Row 22: K10 (12, 12, 14), P13 (14, 14, 15), K12, P13 (14, 14, 15), K10 (12, 12, 14)* Repeat from * to * 2 (3, 4, 5) more times. Please note: Repeat rows 17 and 18 for every size. More of my stuff on Etsy Decreasing for the Foot Next row: Cast off K10 (12, 12, 14), P12 (13, 13, 14), K12, P13 (14, 14, 15), K10 (12, 12, 14). You now have 48 (52, 52, 56 sts total). Next row: Cast off K10 (12, 12, 14). Knit remaining stitches. You now have 38 (40, 40, 42 sts total). Next row: P13 (14, 14, 15), K12, P13 (14, 14, 15). Next row: P13 (14, 14, 15), K12, P13 (14, 14, 15). ✪ Next row: Knit Next row: P13 (14, 14, 15), K12, P13 (14, 14, 15). Next row: P13 (14, 14, 15), K12, P13 (14, 14, 15). Next row: Knit Next row: P13 (14, 14, 15), K12, P13 (14, 14, 15). Next row: P13 (14, 14, 15), K12, P13 (14, 14, 15).✪ Repeat from ✪ to ✪ 3 more times for every size. End of Toe Next row: K2tog across. 19 (20, 20, 21 sts) Next row: P7 (7, 7, 8) K6 P6 (7, 7, 7) Next row: K2tog across. Knit the last stitch for ladies’ size 6-7 and 12 or men’s size 5-6 and 11-12. Break yarn and pull through or gather stitches. Make another slipper to match. Sew seams and work in ends. Abbreviations st – stitch sts – stitches K – knit P – purl INC – increase in the next stitch. Knit in the front and back of one stitch. K2tog – knit 2 stitches together Videos I’ve included the video showing how to do every stitch for this pattern. Simply click and the video will play. Please note that some of these are the first videos I ever made but they still work to show you how to knit. I have redone some of them but not all. https://youtu.be/26gWYsnje-A https://youtu.be/qpTdFmpHht4 https://youtu.be/CSgEJNVUV_8?si=6M2cuB0gtvuSfwVz https://youtu.be/_YjBe0Hc7b0 https://youtu.be/-TtkocipKnA https://youtu.be/75cCkYgk6uo https://youtu.be/ciWqGsP7Nf8 Hints and Tips When starting the slipper, leave a long length of yarn when casting on. You can use this length to sew up the back seam of the slipper and will give less ends to sew in when done. Work in the ends and don’t just knot them off. The knots will rub on the wearer’s foot and make them decidedly uncomfortable. When sewing the seams, be sure to yank on them a bit before working in the ends. You want as much yarn securing the seams so that the seam will stretch the length of the foot and the ankle. When casting off for the ankle, be sure to do so loosely. It will allow the seam to stretch. In case you’re not sure what part of the slipper you are making and how it goes together, I’ve added some pictures that will help. How Read more
Read more
Family Reindeer Christmas Slippers – FREE Knitting Pattern
Bring a little extra cheer to your holiday season with this free knitting pattern for Christmas reindeer slippers! Designed with a bright red nose and a snug, cozy fit, these handmade knit slippers are the perfect way to keep your feet warm while celebrating the holidays. With slipper sizes for kids and adults, you can make a pair for nearly the whole family and enjoy matching reindeer slippers that are just as fun to knit as they are to wear. They also make wonderful handmade Christmas gifts and are small enough to tuck into stockings as cozy holiday stocking stuffers. I’ll also be adding more reindeer-themed knitting patterns to go along with these slippers. At the time of writing this, I’m now done on a pair of knitted fingerless gloves. I’m working on a pair of mitts as of writing this. Keep an eye out, or do a quick search above to see if they’re ready, along with plenty of other free knitting patterns for slippers, gloves, hats, and holiday gift ideas you can knit for friends and family. You can tap on the photo to see the fingerless gloves pattern. It’s in adult sizes only, but if you’d like smaller sizes, let me know in the comments below. Here’s the link too – Rudolf Fingerless Gloves This is not a beginner-friendly pattern, so you’ll need a solid understanding of knitting techniques before starting. You should be comfortable using a cable needle, working with color changes, and carrying yarn behind your work when switching colors. While there isn’t a video tutorial for this pattern specifically, all the stitches are explained in the Abbreviations section, complete with helpful videos. If you are looking for a similar slipper without Rudolph the Red Nosed Reindeer, I have that too! You can click this link to make it for adults and this one to make it for children. If you would to prefer to support my work and have access to a printable, ad-free version of this pattern, I offer that too. To get the downloadable pattern for a small fee you can get it in my Etsy Shop, LoveCrafts, Buy Me A Coffee and from the shop section in my Shopify shop – KweenBee on Shopify. If you would prefer to order a Kindle or printed paperback version from Amazon, you can now do so! Shipping is free if you are an Amazon Prime member. Make sure you select the country you are in to take advantage of the free shipping. Click the following link for your country – United States, United Kingdom, Canada, and Australia. The Kindle download and paperback versions are available in English only. Don’t forget to share this page! Things You Need WORSTED weight yarn in the following colours The amount for the main colour depends on the size. Adult sizes will take less than one standard ball (482 yards/ 440 m) MC – main colour DFC – deer face colour AC – antler colour CC – cuff colour 2 sets of 4 mm knitting needles Cable needle googly eyes pom poms Gauge In garter stitch 34 rows – 4 inches 18 sts – 4 inches Size are written as such: Sizes Child and Women 7-8 (9-10, 11-12, 13-1, 2-3, 4-5, 6-7, 8-9, 10-11, 12) Men x(x, x, x, x, x, 6, 7-8, 9-10, 11-12) Men’s sizes are one size smaller than women. A woman size 7 is the same as a man’s size 6, a woman size 11 is the same as a man’s size 10, and so forth.) Toe Flap With MC Cast on 10 (10, 10, 10, 12, 12, 14, 14, 14, 14) * Row 1: Knit across Row 2: Knit across * Repeat from * to * for a total of 8 (10, 10, 10, 12, 12, 14, 14, 14, 16) rows Next row: K4 (4, 4, 4, 5, 5, 6, 6, 6, 6) In DFC (K3 into one stitch) twice. Turn. Working the following rows into the 6 stitches in the two stitches, P6, turn, K1, M1 K4 M1, K1 turn, P8, turn, K8, turn, P8, turn, K8 (do NOT turn). In MC K4 (4, 4, 4, 5, 5, 6, 6, 6, 6). Next row: In MC K4 (4, 4, 4, 5, 5, 6, 6, 6, 6). In DFC P8. In MC K4 (4, 4, 4, 5, 5, 6, 6, 6, 6). Next row: In MC K4 (4, 4, 4, 5, 5, 6, 6, 6, 6). In DFC K8. In MC K4 (4, 4, 4, 5, 5, 6, 6, 6, 6). Next row: In MC K4 (4, 4, 4, 5, 5, 6, 6, 6, 6). In DFC P8. In MC K4 (4, 4, 4, 5, 5, 6, 6, 6, 6). Next row: In MC K4 (4, 4, 4, 5, 5, 6, 6, 6, 6). In DFC TWK2tog. K4 K2tog. In MC K4 (4, 4, 4, 5, 5, 6, 6, 6, 6). Next row: In MC K4 (4, 4, 4, 5, 5, 6, 6, 6, 6). In DFC P6. In MC K4 (4, 4, 4, 5, 5, 6, 6, 6, 6). Next row: In MC K4 (4, 4, 4, 5, 5, 6, 6, 6, 6). In DFC TWK2tog. K2 K2tog. In MC K4 (4, 4, 4, 5, 5, 6, 6, 6, 6). Next row: In MC K4 (4, 4, 4, 5, 5, 6, 6, 6, 6). In DFC P4. In MC K4 (4, 4, 4, 5, 5, 6, 6, 6, 6). Next row: K3 (3, 3, 3, 4, 4, 5, 5, 5, 5). In DFC K3 into one stitch by alternating knitting into the front, the back and the front of the stitch, turn. Working the following rows into the 3 stitches in the one stitch, P3, turn, K3, turn, P3, turn, TWK3tog (do NOT turn). In AC TWK2tog K2tog. In DFC K3 into one stitch by alternating knitting into the front, the back and the front of the stitch, turn. Working the following rows into the 3 stitches in the one stitch, P3, turn, K3, turn, P3, turn, K3tog (do NOT turn). In MC K3 (3, 3, 3, 4, 4, 5, 5, 5, 5). Break DFC yarn. Next row: In MC K4 (4, 4, 4, 5, 5, 6, 6, 6, 6). In AC P2 In MC K4 (4, 4, 4, 5, 5, 6, 6, 6, 6). Next row: In MC K3 (3, 3, 3, 4, 4, 5, 5, 5, 5). Pick up the next st with the cable needle. Pull the st BACK. In AC K the st on the non-working needle. In MC K the st on the cable needle. Pick up the next st with the cable needle. Pull the st FORWARD. In MC K the st on the non-working needle, In AC K the st on the cable needle. In MC K3 (3, 3, 3, 4, 4, 5, 5,5, 5). Next row: In MC K3 (3, 3, 3, 4, 4, 5, 5, 5, 5). In AC P. In MC K2. In AC P. In MC K3 (3, 3, 3, 4, 4, 5, 5, 5, 5). Next row: In MC K2 (2, 2, 2, 3, 3, 4, 4, 4, 4) Pick up the next st with the cable needle. Pull the st BACK, In AC K the st on the non-working needle, IN MC K the st on the cable needle. In AC pick up and K the st BELOW (see photos). In MC K2 . In AC pick up and K in the 2nd st BELOW. Pick up the next st with the cable needle. Pull the st FORWARD. In MC K the st on the non-working needle, In AC K the st on the cable needle. In MC K2 (2, 2, 2, 3, 3, 4, 4, 4, 4). Read more
Read more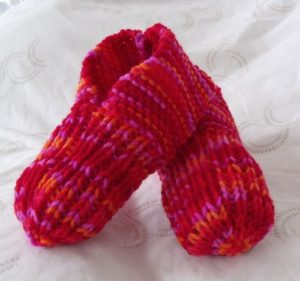
How to Knit Children’s Slippers – Free Knitting Pattern
Because it seemed wrong to not have the children’s version of this knitting pattern, I did all the math and here it is! I’ve made the pattern fit children’s feet from a small size 5 up to a teen size 5. That means you can make a slipper to fit feet that measure 5 1/4″ to 9″ long. Anything larger than that can be made with my other free pattern entitled How to Knit a Pair of Adult Slippers. And just like that pattern, I’ve included links to all the knitting stitches you need to make the slippers. By clicking the links you’ll go to my YouTube channel and I will show you how to do the required stitch or technique. The ad free download for this pattern is available here for a very small fee from this website – How to Knit Children’s Slippers, Etsy and Ravelry. Like the free videos and patterns? Then please share my work on social media! Those handy little icons above let you do it easily and help me so much. If you’d like more information on how you can keep things free, learn how you can Help Support My Work and keep the site free for everyone. A couple of quick notes before you get started…be sure to use the correct size when ending the toe. The number of stitches knitted together differ depending on the size. Be sure to find the one that is for the size of slipper you are making. Scroll down the page to find the size you need. The same holds true for forming the heel flap. Be sure you pick up the right number of stitches or the heel flap won’t be the right length. Without further ado, let’s get knitting! And in case you need a little extra help, there’s a complete step-by-step instructional video here: https://youtu.be/u87aKaGUs9I Things you will need: If you are uncertain or having trouble finding what you need to make these slippers, clicking any of the links below will show you exactly what you need. And if you decide to order through Amazon, it will be delivered right to your door and help support the hosting costs of the website (I do get a small commission from sales through Amazon). You can try this product to keep your slippers from sliding on slick floors. 200 gr of worsted weight yarn (usually this is a lot less but better to have too much. I like to use Red Heart because of price, wearability, ease of maintenance, and it’s easy to find online and IRL). Set of 2 size 5 mm (US size 8) knitting needles or whatever size to obtain correct gauge. Darning needle to sew up seams and work in the ends Gauge: 12 rows stockinette = 2″9 stitches stockinette = 2″ Be sure to check your gauge to obtain correct sizing! I’ve also provided a basic size guide for the slippers. Child shoe size Foot length 5-6 5 1/4” 7-8 6” 9-10 6 9/16” 11-12 7 1/4” 13-1 8” 2-3 8 9/16” 4-5 9” Sizes are listed for children’s sizes as follows: 5-6 (7-8, 9-10, 11-12, 13-1, 2-3, 4-5) Cast on 23 (23, 28, 28, 33, 33, 36) Row 1: Knit across. Row 2: Knit 7 (7, 9, 9, 11, 11, 11) P1 Knit 7 (7, 8, 8, 9, 9, 12) P1 Knit 7 (7, 9, 9, 11, 11, 11). Repeat rows 1 and 2 for 22 (24, 26, 28, 30, 32, 34) rows TOTAL. More of my stuff on Etsy Shape toe: Next Row: With right side of work facing you P1 *(K1 P1) Repeat from *2 (2, 3, 3, 4, 4, 4) more times K9 (K9, K10, K10, K11, K11, K14) *(P1 K1) Repeat from *2 (2, 3, 3, 4, 4, 4) more times. P1 {This is K1 P1 Ribbing.} Next Row: With wrong side facing you *(K1 P1) Repeat from *3(3, 4, 4, 5, 5, 5) more times K7 (K7, K8, K8, K9, K9, K12) *(P1 K1) Repeat from *3 (3, 4, 4, 5, 5, 5) more times. Repeat these 2 rows for 12 (12, 16, 16, 18, 18, 20) more rows. 14 (14, 18, 18, 20, 20, 22) rows ribbed TOTAL. End toe for size 5-6 and 7-8 Next Row: With right side facing K2tog 11 times. K1. (12 stitches remaining) Next Row: P5 K3 P4 Next Row: K2tog 6 times. (6 stitches. remaining) Next Row: P3 K1 P2 Last Row: Draw yarn through loops (AKA gather stitches) and pull together to form toe. Sew seam up to start of ribbed stitches. End toe for sizes 9-10, and 11-12 Next Row: With right side facing K2tog 7 times. K1. K2tog 6 times. K1. (15 stitches remaining) Next Row: P6 K4 P5 Next Row: K2tog 7 times K1. (8 stitches remaining) Next Row: P4 K2 P2 Last Row: Draw yarn through loops (AKA gather stitches) and pull together to form toe. Sew seam up to start of ribbed stitches. End toe for size 13-1 and 2-3 Next Row: With right side facing K2tog 16 times. K1. (17 stitches remaining) Next Row: P7 K4 P6 Next Row: K2tog 8 times K1. (9 stitches remaining) Next Row: P4 K2 P3 Last Row: Draw yarn through loops (AKA gather stitches)and pull together to form toe. Sew seam up to start of ribbed stitches. End toe for sizes 4-5 Next Row: With right side facing K2tog 9 times. K1. K2tog 8 times K1. (19 stitches remaining) Next Row: P7 K6 P6 Next Row: K2tog 9 times K1. (10 stitches remaining) Next Row: P4 K3 P3 Last Row: Draw yarn through loops (AKA gather stitches)and pull together to form toe. Sew seam up to start of ribbed stitches. To form back flap of heel: For sizes 5-6, 7-8, 9-10, 11-12 With right side of work facing you pick up 10 sts between the fold lines that mark the sole of the slipper. Row 1: Knit across. Row 2: Knit across. Row 3: K2tog K6 K2tog. Row 4: Knit across. Read more
Read more
FREE Knitting Pattern – Adult & Child Knitted Slippers…With BOWS!!
Knit a pair of cute bow slippers for kids and adults. Includes pics to show how to knit the bows and links to videos showing all the stitches used.
Read more
Snug Slip-On Slippers – Easy Slippers to Knit on Straight Needles – FREE Knitting Pattern
A great pattern for someone just learning to knit. If you know how to purl, knit, K2tog, M1 and cast on, you will be able to make these slippers. And if you don’t, don’t worry. I’ve included links to the videos that show you exactly how to do the stitches. These minimal cuff, snug fitting slippers for adults fit folks up to a men’s size 14. Big enough to fit nearly everyone. Knit flat on a pair of straight needles, you don’t need any extra supplies to get these done. If you are an experienced knitter, you’ll be able to whip these up in no time. Like all my patterns, you have my permission to sell or give away any of the patterns that you make. All I ask that you respect the hard work that goes into designing and publishing a pattern and not violate my copyright. If you would prefer a printable or ad free version of this pattern, you can get it in all the usual places including my Shopify shop – Snug Slip-On Slippers, through my Etsy shop, LoveCrafts, Amazon, Ravelry, or Creative Fabrica. It is also listed as a FREE member pattern in my Buy Me A Coffee shop here – Easy Slip-On Slippers Knitting Pattern Become a Member Love the free patterns? You can say thanks by sharing this pattern through social media. It is a great way to help out too! The links below are a super easy way for you to do so. Things You will Need 7oz (198 g) worsted weight yarn. Any standard ball of yarn you can get at craft or big box stores will be more than enough with yarn to spare. Set of size 6 US (4 mm) single pointed knitting needles Tapestry needle – to sew seams and work in ends. Gauge In garter stitch 2” (10 cm) – 9 stitches 2” (10 cm) – 18 rows Sizes are written as such: Women 6-7 (8-9, 10-11, 12) Men 6 (7-8, 9-10, 11-12, 13-14) Abbreviations If you need help with any of the stitches, you can go to my how-to video page. Here’s the link – Learn to Knit With Videos. A new page will open so you’re sure to not lose this one. K – knit P – purl K2tog – knit 2 together M1 – Make 1. Increase one stitch between stitches. st – stitch sts – stitches Heel Flap Cast on 4 K across for 10 (10, 12, 12, 14) rows. * Next row: K1 M1. K across to last st. M1. K1. Next 3 rows: K across * Repeat from * to * until there are 14 (14, 14, 16, 16) sts. Make sure to knit the 3 rows after the increase row. Cast on an additional 14 (15, 16, 17, 18) sts. 28 (29, 30, 33, 34) sts total. Next row: K across. Cast on another 14 (15, 16, 17, 18) sts. 42 (44, 46, 50, 52) sts total. Next row: K5 P9 (10, 11, 12, 13) K14 (14, 14, 16, 16) P9 (10, 11, 12, 13) K5. ♠ Next row: K across. Next row: K5 P9 (10, 11, 12, 13) K14 (14, 14, 16, 16) P9 (10, 11, 12, 13) K5 ♠ Repeat from ♠ to ♠ 12 (13, 14, 15, 16) times more for a total of 28 (30, 32, 34, 36) rows. More of my stuff on Etsy: Form Toe ♦ Next row: K2tog. K across to the last 2 sts. K2tog. Next row: K4 P9 (10, 11, 12, 13) K14 (14, 14, 16, 16) P9 (10, 11, 12, 13) K4. Next row: Repeat row marked with ♦. Next row: K3 P9 (10, 11, 12, 13) K14 (14, 14, 16, 16) P9 (10, 11, 12, 13) K3. Next row: Repeat row marked with ♦. Next row: K2 P9 (10, 11, 12, 13) K14 (14, 14, 16, 16) P9 (10, 11, 12, 13) K2. Next row: Repeat row marked with ♦. Next row: K1 P9 (10, 11, 12, 13) K14 (14, 14, 16, 16) P9 (10, 11, 12, 13) K1. ♣ Next row: K across. Next row: P10 (11, 12, 13, 14) K14 (14, 14, 16, 16) P10 (11, 12, 13, 14). ♣ Repeat from ♣ to ♣ 7 (7, 7, 8, 9) times morefor a total of 16 (16, 16, 18, 20) rows. End Toe Next row: K0 (1, 0, 1, 0) K2tog to last st (if there is one). K0 (1, 0, 1, 0) Next row: P5 (6, 6, 7, 7) K7 (7, 6, 7, 8 ) P5 (6, 6, 7, 7). Next row: K1 (0, 0, 1, 1) K2 tog 4 (5, 5, 5, 5) times, K1, K2tog to last st (if there is one). K1 (0, 0, 0, 0). Next row: P3 (3, 3, 4, 3) K4 P3 (3, 3, 4, 4). Break yarn and draw through. Flip up the triangle-ish shaped flap in the back of the slipper to form the heel. Sew along the sides of the heel flap to form the back of the slipper. Make another slipper to match. Hints and Tips When ending the toe, due to the differing number of stitches for the various sizes, there may or may not be an extra stitch that needs working at the ends. I’ve marked the sizes accordingly. The heel flap may not match up perfectly with the sides of the slipper but it will be close. Hold the garter edges at the top to make sure it lines up to form the cuff. Leave a length of yarn when casting on and after you draw the yarn through when forming the toe. You can use it to sew the seams along one of the sides of the heel and along the top of the toe.
Read more
Two Styles of Knitted Slippers with One FREE Knitting Pattern
These two slipper styles are actually the same knitting pattern but showcase one side of the work or the other. They are easily made with the same basic knitting stitches and if you can make one style, you can make the other! The pattern is for slippers from a men’s size 6 to 13 and for a women’s 6 to 13. I’ve also provided direct links in the pattern to my YouTube videos demonstrating the knitting stitches required if you need a little help. If you have never picked up stitches or knitted in the round, this is a great pattern to learn. I made a YouTube video showing how to do this for another pattern (you can read that pattern here – How to Knit Adult Booties), but the technique is similar. You can watch the video snippet right here – Picking up Stitches to Make the Heel the Cuff. The stitch pattern used this video is different, but would still look ok when done the final project. If you’re loving the free patterns on this site, please consider a small donation to help with the hosting costs of the site. You can learn more about how you can help by going to my page Help Support My Work. If you’re not in the position to help financially, which is totally ok btw, please share this pattern with anyone you think may like it. You can use these handy links ?????? to share on social media or send it as an email to your friends and family. And if you’re wanting to get off the internet and would prefer to have this on your phone, tablet or computer, you can download this pattern from my website here – Two Slipper Styles with One Pattern. You can also purchase this pattern through my Etsy shop or through Ravelry. The download is a PDF that you can read on any device or even print if you so desire. Things you will need: Click any of the links below to have everything you need to make these slippers sent right to your door. 200 grams of worsted weight yarn Set of 2 size 5 mm ( US size 8) knitting needles or whatever size needed to obtain correct gauge. Set of 4 size 5 (US size 8) double pointed knitting needles or whatever size needed to obtain the correct gauge. Darning needle to sew up seams and work in ends. Two Styles with One Knitting Pattern Gauge: 12 rows stockinette = 2″9 stitches stockinette = 2″Be sure to check your gauge to obtain correct sizing! The Pattern: Cast on 42 sts. Row 1: P3 K1 P3 K1 P3 K1 P3 K12 P3 K1 P3 K1 P3 K1 P3 Row 2: K3 P1 K3 P1 K3 P1 K3 K12 K3 P1 K3 P1 K3 P1 K3 Repeat these two rows until slippers measures as shown in the chart below. End with row 2. Shoe Size (North America)LengthMen’s 6 – 78″ (20 cm)Men’s 8 – 98 ½” (21 cm)Men’s 10 – 119″ (22.5 cm)Men’s 12 – 139 ½” (24 cm)Women’s 6 – 77 ½” (18 cm)Women’s 8 – 98″ (20 cm)Women’s 10 – 118 ½” (21 cm)Women’s 12 – 139″ (22.5 cm) Slipper A End Toe – Slipper “A” Row 1: *(P2tog K2tog) repeat from * 3 times more. K2tog twice K1 K2tog 3 times *(P2tog K2tog) repeat from * 2 times more P2tog P1Row 2: K2 *(P1 K1) repeat from * two more times. K7 *(K1 P1) repeat from * two more times. K1 Row 3: K2tog 11 timesRow 4: P11Draw yarn through loops and pull tight. Slipper B End Toe – Slipper “B” Row 1: K1 (K2tog) 10 times K1 (K2tog) 10 times.Row 2: P8 K6 P8 Row 3: (K2tog) 5 times K1 (K2tog) 5 times K1Row 4: P4 K3 P4Draw yarn through loops and pull tight. Slipper A Heel and Cuff – Slipper “A” With right side facing pick up 14 stitches. Row 1: Knit across Row 2: Knit across Repeat the two rows one more time Row 5: K2tog K10 K2 tog Row 6: K12 Row 7: K12 Row 8: K2tog K8 K2tog Row 9: K10 Row10: K10 Row 11: K2tog K6 K2 tog Row 12: K8 Row 13: K8 Row 14: K2tog K4 K2tog Row 15: K6 Row 16: K6 Row 17: K2tog K2 K2tog Row 18: K4 Start Cuff: With double pointed needles, pick up 18 sts over half of one side, 18 sts on the other, and transfer the 4 stitches created when making the heel. Pick up the stitches over the first half of the slipper and leave the rest for the toe. Fold the sides of the slipper together to give an approximate of where to start picking up stitches on the other side of the slipper. You can also count back 18 stitches along the edge for a starting point. Row 1- 6: P3 K1 repeat 9 more times for total of 40 sts. Rows 7 – 10: K around Bind off loosely. Sew seams and work in ends of the yarn. Slipper B Heel and Cuff – Slipper “B” With right side facing pick up 14 stitches. Row 1: Knit across Row 2: Knit across Repeat the two rows one more time Row 5: K2tog K10 K2 tog Row 6: K12 Row7: K12 Row 8: K2tog K8 K2tog Row 9: K10 Row10: K10 Row 11: K2tog K6 K2 tog Row 12: K8 Row 13: K8 Row 14: K2tog K4 K2tog Row 15: K6 Row 16: K6 Row 17: K2tog K2 K2tog Row 18: K4 Start Cuff: With double pointed needles, pick up 18 sts over half of one side, 18 sts on the other, and transfer the 4 stitches created when making the heel. Pick up the stitches over the first half of the slipper and leave the rest for the toe. Fold the sides of the slipper together to give an approximate of where to start picking up stitches on the other side of the slipper. You can also count back 18 Read more
Read more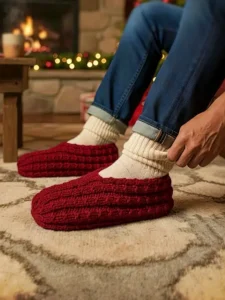
Easy to Knit Slippers – Great Beginner FREE Knitting Pattern
Great knitting pattern for beginners. Easy to follow instructions and links to how-to knitting videos demonstrating every stitch.
Read more
How to Knit Adult Bootie Slippers
I’ve been asked by a number of people to knit them slippers that are a little more snug. A surprising number of people like to sleep with slippers on and have a difficult time finding ones the don’t keep coming off. Now, I can’t guarantee that these will stay on your feet all night but with the extended cuff, these knitted adult bootie slippers will stay on much better than any of the other knitted slippers that I make. This particular knitted slipper design fits feet that are a woman’s size 6 – 11 and a man’s size 5 – 10. I was going to make them for larger and smaller sizes, but there was no demand for it ? Don’t forget to show your support and share this pattern with your friends and family on social media. These links make it super easy to do. This is also a great pattern to practice your knitting stitches. In particular, picking up stitches and working on double pointed needles, AKA working in the round. Double pointed needles seems very intimidating but really it’s the same as regular knitting needles; you just don’t flip your work back and forth. If you’ve never done it before, don’t worry! In the tutorial below I show every single step including how to pick up the stitches for the heel and cuff. Once you watch how it’s done you’ll wonder why you never did it before. https://youtu.be/cWHkfvvuFlU If you need a more detailed video that shows you each step from casting on to sewing in the ends, scroll to the bottom of the page. You can watch the video without leaving this page. You can also download the ad free version of this pattern from my Shopify shop here – How to Knit Adult Booties, on Ravelry or from my Etsy Shop. And if you are member on Buy Me A Coffee, this pattern is now in my shop there too! You can get it here – Adult Bootie Slippers. If you are member, it’s free 😊 Things you will need: 250 gr of worsted weight yarn (usually this is less but better to have too much). Size 5 mm (US size 8) single pointed knitting needles or whatever size to obtain correct gauge. Set of four size 5 mm (US size 8) double pointed needles or same size as the single pointed needles. darning needle to sew up seams Gauge: 12 rows stockinette = 2″ 9 stitches stockinette = 2″ Be sure to check your gauge to obtain correct sizing! Slippers are given for a woman’s size 6-7 (8-9, 10-11) or a man’s 5-6 (7-8, 9-10). Cast on 42 (42, 42) sts Row 1: K3 *P2 K2* Repeat from *to* 2 more times. K14 *P2 K2* Repeat from *to* 1 more time. P2 K3. Row 2: P3 *K2 P2* Repeat from *to* 2 more times. K12 *P2 K2* Repeat from *to* 2 more times. P3. Repeat rows 1 and 2 for 26 (30, 34) rows total. Next row: K2tog K1 *P2 K2* Repeat from *to* 2 more times. K14 *P2 K2* Repeat from *to* 1 more time. P2 K1 K2tog. (40 sts) ☺Next row: *P2 K2* Repeat from * to* 2 more times. P2 K12 *P2 K2* Repeat from * to* 2 more times. P2. Next row: K2 *P2 K2* Repeat From *to* 2 more times. K14 *P2 K2* Repeat from *to* 1 more time. P2 K2. ☺ Repeat from ☺ to ☺ for 20 (22, 24) rows total. More of my stuff on Etsy Shape Toe: Row 1: *K2tog P2tog* Repeat From *to* 2 more times. K2tog 8 times. *P2tog K2tog* Repeat from * to* 1 more time. P2tog K2tog. (20 sts) Row 2: *P1 K1* Repeat from *to* 2 more times. P1 K6 *P1 K1* Repeat from *to* 2 more times. P1. Row 3: K1 K2tog 4 times K1 K2tog 5 times. (11 sts) Row 4: P4 K3 P4. Break yarn and draw yarn through the stitches to form the toe. Form Heel: Need a bit of extra help with the heel and cuff? Scroll to the top of the page for a shorter video demonstrating where and how to do it. With right side of the slipper facing you, pick up 14 sts on one of your double pointed needles along the sole of the slipper. Work the stitches with another of your double pointed needles. Row 1-4: Knit across. Row 5: K2tog K10 K2tog. (12 sts) Row 6-7: Knit across. Row 8: K2tog K8 K2tog. (10 sts) Row 9-10: Knit across. Row 11: K2tog K6 K2tog. (8 sts) Row 12-13: Knit across. Row 14: K2tog K4 K2tog. (6 sts) Row 15-16: Knit across. Row 17: K2tog K2 K2tog. (4 sts) Row 18-19: Knit across. Row 20: K2tog twice. (2 sts) Row 21-22: Knit across. Keeping the two stitches on your double pointed needle, pick up 36(36, 36) stitches to form the cuff. Pick up 17 stitches down one side, evenly spaced, along the length to where you knitted two together. Starting at where you knitted two together along the other edge, pick up another 17 stitches, evenly spaced. There will be 36 stitches total. Row 1-10: *K2 P2* Repeat from *to* 7 more times. 8 times total for matching ribbed effect. Row 11-13: Knit around. Cast off loosely. Make another slipper to match. Sew up seams and work in ends. If you like the free videos and patterns, then please share my work on social media! Those handy little icons along the top of the page and embedded in this and all my patterns let you do it easily. It’s quick and easy for you and helps me immensely! ? If you’d like more information on how you can keep things free, learn how you can Help Support My Work. https://youtu.be/X-0JhBZBYHY
Read more
Knitted Cozy Cuff Slippers – FREE Knitting Pattern
I have a number of slippers that I’ve designed over the years and this basic design is one of my all time favourites. I’ve done a number of different styles including my Granny Slippers and Adult Bootie Slipeprs that are made the exact same way, but look slightly different because of the ribbing. This pattern is a great place to start if you are ok with your basic knitting stitches, but want to try something new. If you’ve been toying with the idea of trying to knitting in the round, this is a great place to start. If you would like to learn with this pattern, I’ve embedded how-to videos into the pattern that demonstrate how easy it actually is. If you are a seasoned knitter, then these slippers will be super quick for you to make as there is nothing complicated about them. If you would like to purchase a copy of this pattern that you can download and print, I have a number of options for you. You can buy the pattern on this website – Knitted Cozy Cuff Slippers– with How-to VIDEOS, Ravelry, Etsy, LoveCrafts, Creative Fabrica, Google Books and Amazon. Amazon has the book in both paperback and Kindle formats. Use these 👇🏼 to share on social media 🥰
Read more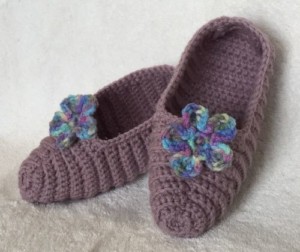
How to Crochet Slippers for Children and Adults – FREE Crochet Pattern!
Free crocheted slipper pattern for children, women and men. Includes instruction for an optional crochet flower and photos to help you along.
Read more
FREE Knitting Pattern – Minimalist Round Toe Slippers
A knitted slipper pattern using only basic knitting stitches! This knitting tutorial includes TONS of photos to help you along. Great for newbie knitters!
Read more
Bulky Yarn Slippers on Straight Needles – FREE Knitting Pattern
If you’ve run across any of my slipper patterns before this, one thing you’ll be very familiar with is my unreasonable dislike for sewing seams on projects. I equally dislike working in ends (go to How to Work in Ends While Knitting for more on this). I have a embarrassing amount of nearly finished projects that collect in a box with unsewn seams and dangling ends. Yes. I just admitted that to everyone. No shame in my game. This is another attempt to make this happen. It’s quite difficult to make something seamless when the design calls for it to be knit flat on 2 needles. This automatically means there are going to be ends that need to meet at some point. The idea is to make them meet as you knit so they are permanently fixed together with no extra work. Don’t forget to share this pattern with your family and friends! You can use these buttons☝🏼☝🏼☝🏼 This pattern starts with the cast on stitches going around the foot (sans heel). You’ll then work your way up to the top cuff. I’ve pointed out where we’re starting in this photo. I have a bunch of other slipper patterns you can read right here on my website. If you go to this page – FREE Slipper Patterns, you can see everything I have written to date. If you’re looking for other extra thick slippers like this, I’ve written another entitled Easy to Knit Beginner Slipper Pattern – Knit Flat with Bulky Yarn. As always, if you would prefer a printable paper version of this pattern, you can purchase and download the PDF from all of my usual sites. You can make a purchase from my Shopify shop. You can also purchase a download from my other online retailers which are LoveCrafts, Etsy, Buy Me a Coffee, and Ravelry. Things You Need Worsted weight yarn – 2 (two) standard balls of yarn (215 yards/197 m). Any colours of your choosing. or Super Bulky yarn – 2 standard balls of ONE colour with matching lot numbers (90 yards/82 m). One ball makes one slipper. There will be some yarn left over from each ball. Size 5 mm (size 8 US) knitting needles (or whatever you require to get the correct gauge). Tapestry needle to sew the seam and work in the ends. Gauge In stockinette stitch 8 sts – 5 cm (2″) 7 rows – 5 cm (2”) Sizes are written as such: Women 6-7 (8-9, 10-11, 12) Men 6 (7-8, 9-10, 11-12) The Pattern Cast on 56 (60, 64, 68) Knit across for 6 (6, 8, 8) rows. Next Row: K26 (28, 30, 32) K2tog. Sl 1 as if to knit. K1 PSSO. K26 (28, 30, 32). Next Row: P25 (27, 29, 31) P2tog TBL. P2tog. P25 (27, 29, 31). Next Row: K24 (26, 28, 30) K2tog. Sl 1 as if to knit. K1 PSSO. K24 (26, 28, 30). Next Row: P23 (25, 27, 29) P2tog TBL. P2tog. P23 (25, 27, 29). Next Row: K22 (24, 26, 28) K2tog. Sl 1 as if to knit. K1 PSSO. K22 (24, 26, 28). Next Row: P21 (23, 25, 27) P2tog TBL. P2tog. P21 (23, 25, 27). Next Row: K20 (22, 24, 26) K2tog. Sl 1 as if to knit. K1 PSSO. K20 (22, 24, 26). Next Row: P19 (21, 23, 25) P2tog TBL. P2tog. P19 (21, 23, 25). Next Row: K18 (20, 22, 24) K2tog. Sl 1 as if to knit. K1 PSSO. K18 (20, 22, 24). Next Row: P17 (19, 21, 23) P2tog TBL. P2tog. P17 (19, 21, 23). Next Row: K16 (18, 20, 22) K2tog. Sl 1 as if to knit. K1 PSSO. K16 (18, 20, 22). Next Row: P15 (17, 19, 21) P2tog TBL. P2tog. P15 (17, 19, 21). Next Row: K14 (16, 18, 20) K2tog. Sl 1 as if to knit. K1 PSSO. K14 (16, 18, 20). Next Row: P13 (15, 17, 19) P2tog TBL. P2tog. P13 (15, 17, 19). If making women’s size 6-7 or men’s size 6, go to the row marked with ☺. *Next Row: K4 M1. K0 (10, 12, 14). K2tog. Sl 1 as if to knit. K1 PSSO. K0 (10, 12, 14). M1 K4. Next Row: P2 PM1. P0 (12, 14, 16). P2tog TBL. P2tog. P0 (12, 14, 16). PM1 P2.* Repeat from * to * 0 (1, 2, 3) times more. ☺Knit across for 6 (6, 8, 8) rows. Cast off loosely. Making the Sole This photo will help you in how and where to pick up the following stitches. Hold your work so it looks like this with the pointy end up. The RED arrow is for right handed knitters. Pick up 6 sts at the toe in bottom loop of cast on stitches. (3 sts on either side of middle clearly marked with p2tog line.) Next Row: Knit across. Next Row: Pick up a stitch in the bottom loop of the cast on stitches. K6. Pick up a stitch in the bottom loop of the cast on stitches. Next Row: Knit across. Next Row: Pick up a stitch in the bottom loop of the cast on stitches. K8. Pick up a stitch in the bottom loop of the cast on stitches. Next Row: Knit across. If you are making women’s sizes 6-9 or men’s sizes 6-8, skip to row marked with ♥ For all other sizes continue as follows: Next Row: Pick up a stitch in the bottom loop of the cast on stitches. K10. Pick up a stitch in the bottom loop of the cast on stitches. Next Row: Knit across. ♥ ☼ Next Row: Pick up a stitch in the bottom loop of the cast on stitches. K2tog. Knit to last 2 sts. K2tog. Pick up a stitch in the bottom loop of the cast on stitches. Next Row: Knit across. ☼ Repeat rows marked with ☼ to ☼ down the length of the sole. You will ALWAYS have 10 (10, 12, 12) sts on your needle. Forming the Heel There are two ways to do this. The easiest way is to make a small triangle. Using the 10 (10, 12, 12) sts on your needle. ♦ Next 2 Rows: Knit across. Next Row: K2tog. Knit to last 2 sts. K2tog. Next Row: Knit across. ♦ Repeat from ♦ to ♦ until 5 (5, 6, 6) sts If making women’s sizes 6-9 or men’s sizes 6-8: Next Row: K2tog K1 K2tog. Next Row: K3tog. Cut yarn and draw yarn through last st. Leave a length of yarn long enough to sew the remaining seam. If making women’s sizes 10-12 or men’s sizes 9-12: Read more
Read more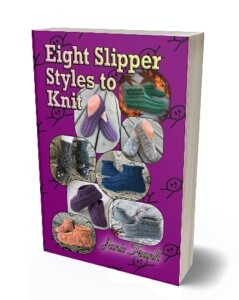
Eight Slipper Styles to Knit
Knit slippers for adults and children with this collection of 8 different slipper styles.
Read more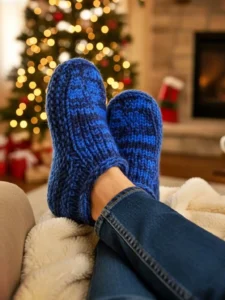
FREE Knitting Pattern – Ultra Thick Slip-On Bootie Slippers
The ultimate thick slipper knit with super bulky yarn on straight needles. These booties for adults (up to a man’s size 14) knit up quicker than the average slipper and are super cozy and long-lasting for the wearer. Who could ask for anything more? Ummmm, maybe a finished pair??? You can order a custom colour and size here – Double Thick Hand Knit Slippers This pattern is the extra thick version of my Adult Moccasin Slippers pattern that has been so popular over the years. As a seller of slippers, many of my customers wanted extra thick versions. Who doesn’t want their slippers to last as long as possible, am I right? So I busted out my knitting needles and a pencil to redo the math. Now you can make the slippers with either 2 strands of worsted weight yarn, or one strand of super bulky yarn. Take your pick. But please note, you don’t need both. Choose one or the other. And a note about the toe flap, this version uses a stockinette toe flap instead of a garter stitch. It was too thick and lumpy to be a garter stitch. But to make my life easier, I repurposed the photos from my original Moccasin Slipper pattern that has the toe flap as a garter stitch. I’m sorry if it causes any confusion. The technique to pick up stitches along he sides is exactly the same for both versions. If you would prefer a PDF printable version of the pattern, you can download it for a small fee/donation from a number of places. In particular, my Shopify site here – Ultra Thick Slip-On Bootie Slippers. You can also get it at a number of other online book retailers such as Ravelry, LoveCrafts, Creative Fabrica and Etsy. The paperback and Kindle version are also on Amazon. And don’t forget what is guaranteed to be your best deal, the pattern on Buy Me A Coffee. If you enjoy this pattern and my other free online knitting patterns, please consider making a small donation or helping me out by visiting my Help Support My Work page. If that’s not possible, that’s totally fine too! Even sharing this page on your social media helps me out immensely. You can use those buttons below to do so easily. This isn’t a pattern for beginners, but if you know how to knit a stitch, pick up stitches and knit two stitches together, you should be okay. I used a very different technique involving multiple sets of needles. I included photos and a how-to video to demonstrate how I’m using the extra set and it totally works! Trust me. You can use this link – How to Knit Moccasin Slippers. The only differences between this pattern and the demo video is the toe flap is done in stockinette and of course, double thick (or extra thick) yarn. The techniques are all the same. There is a lot of breaking and reconnecting the yarn to create the different portions of the slipper: the cuff, toe, sides and sole. I’ve created a very succinct picture tutorial showing how to work in the ends as you go so there are fewer to sew in at the end. If you do it right, you’ll only have one, and that’s the length you leave at the end to sew up the heel seam. Here’s the link to see how – Working in the Ends While Knitting. This also a handy skill to have when knitting just about anything, tbh. https://youtu.be/1_zF6HAzsfY Table of Contents Things You NeedGaugeAbbreviationsTo BeginToe FlapMaking the Sides of the SlipperMaking the SoleMaking the HeelHints and Tips Things You Need And because this pattern is so basic with no pattern of any sort, it’s a great knitting pattern to highlight the colour of your yarn. I have a weakness for variegated/shaded yarns. Don’t ask me why… My grandma did too. It must be genetic. I find the self-striping looks terrible and give it a 1/10. Would not recommend. Worsted weight yarn – 2 (two) standard balls of yarn (215 yards/197 m). Any colours of your choosing. or Super Bulky yarn – 2 standard balls of ONE colour with matching lot numbers (90 yards/82 m). One ball makes one slipper. There will be yarn left over from each ball. 2 sets of size 5 mm (size 8 US) knitting needles (or whatever you require to get the correct gauge). Tapestry needle – to sew the seam and work in the ends. Stitch holder Gauge In stockinette stitch 13 sts – 10 cm (4″) 22 rows – 10 cm (4”) Sizes are written as such: Women 6-7 (8-9, 10-11, 12) Men 6 (7-8, 9-10, 11-12, 13-14) Abbreviations k – knit p – purl k2tog – knit 2 together st – stitch sts – stitches Like all of my patterns you have my permission to sell and/or give away the slippers that you make using this pattern. You are NOT permitted to reprint this pattern in any form unless you have obtained my written permission to do so. To Begin Cast on 32 (34, 36, 38, 40) ᴥ Row 1: Knit across Row 2: Purl across ᴥ Repeat from ᴥ to ᴥ for 6 times more for a total of 8 rows. ☺ Row 9: Knit across Row 10: Knit 11 (12, 13, 14,15) P10 Knit 11 (12, 13, 14, 15) ☺ Repeat from ☺ to ☺ one more time for a total of 4 rows. Toe Flap Row 13: With RIGHT side facing, transfer the first 11 (12, 13, 14, 15) stitches to a stitch holder. Reattach the yarn and knit the next 10 stitches (the start of the toe flap). Leave the remaining 11 (12, 13, 14, 15) stitches on the needle unworked. The following rows are worked back and forth on the 10 toe flap stitches only! ♠ Next row: Knit across Next row: Purl across ♠ Repeat from ♠ to ♠ 10 (11, 12, 13, 14) times more for 22 (24, 26, 28, 30) rows total. Break yarn. You’ll have the 10 stitches of the toe flap on your needle and the 11 (12, 13, 14, 15) stitches you left on the needle when you started making the toe flap. Making the Sides of the Slipper This is where you’re going to need the extra set of knitting needles. You’ll be knitting back and forth in rows Read more
Read more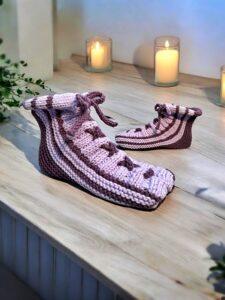
Cozy Knitted Lace Up Slippers – FREE Knitting Pattern
Perfect for new knitters, these slippers are knit flat on just two needles, making them an ideal project for beginners or anyone looking for a straightforward, relaxing knit. These charming slippers feature a lace-up design at the front, adding a delightful touch of customization and ensuring a snug fit. You can easily adjust the colours to match your personal style or to use up those leftover yarns in your stash. Whether you’re knitting for yourself, a loved one, a thoughtful handmade gift, or to sell, these slippers are sure to bring warmth and comfort to any pair of feet. So, gather your materials, find a cozy spot, and let’s get started on creating your very own pair of Cozy Lace-Up Slippers! If you are not a fan of ads or following a pattern online, I also have printable PDF version for sale for a small fee. You can purchase and download the pattern from this website – Cozy Knitted Lace Up Slippers, from my Etsy shop, Ravelry, LoveCrafts and the Kindle and paperback versions are available on Amazon. If you enjoy this pattern and my other free online knitting patterns, please consider making a small donation or helping me out by visiting my Help Support My Work page. If that’s not possible, that’s totally fine too! Even sharing this page on your social media helps me out immensely. You can use the buttons below to do so easily. Things You Need 1 ball of worsted weight yarn (average 354 yard, 7 oz or 324 m, 198 gram ball will be more than enough to make single colour slippers). Size 4 mm (US size 6) single point knitting needles. Tapestry needle to sew in ends. If you are using multiple colours, you can also use this handy tutorial to show you how to work in the ends while knitting these slippers. https://youtu.be/1_zF6HAzsfY Gauge With size 4 mm (US size 6) needles or whatever size you need to obtain the correct number of stitches and rows. Be sure to check your gauge otherwise the sizing won’t be correct. In garter stitch 4” = 16 sts 4” = 40 rows Sizes (are written as such) Women’s size 6-7 (8-9, 10-11, 12) Men’s size 6 (7-8, 9-10, 11-12) The Pattern Unlike most knitting patterns, this pattern’s right side and wrong side are reversed. All ODD numbered rows are the WRONG side and all the EVEN numbered rows are the RIGHT side. If you need help with the M1, there is a video in the Hints and Tips section. With lace up section colour, cast on 52 (60, 60, 68) sts. Leave a longer length to sew the top of the toe (about 18 inches). Row 1 (wrong side): K8 (P2 K2) to the last 4 sts. P4 Row 2 (right side): K4 (P2tog YO K2) to last 8 sts. P8 Row 3: As row 1 Row 4: K4 (P2 K2) to last 8 sts. P8 Row 5: As row 1 Row 6: As row 4 Row 7: As row 1 Change to other colour – This is the 12 row section you can use to create your colour design. (ie. red, orange, yellow, green, blue, purple). See Hints and Tips section for more information. ♠ Row 8: K to last 8 sts. P8 Row 9: K across ♠ Repeat from ♠ to ♠ 5 more times or a total of 12 rows. (each colour is one repeat if making the rainbow colours) Change to colour for heel section. ♦ ☺ Row 20: K to last 8 sts. P8 Row 21: K across ☺ Row 22: K to last 8 sts. M1 P8 Row 23: As row 21 ♦ Repeat from ♦ to ♦ 3 more times. (56, 64, 64, 72 sts) Repeat from ☺ to ☺ 0 (1, 2, 3) times more for an additional 0 (2, 4, 6) rows. ♫ Next row: K to the last 8 sts. P8 Next row: K across Next row: K to the last 10 sts. K2tog. P8 Next row: K across ♫ Repeat from ♫ to ♫ 3 more times. (52, 60, 60, 68) Change to other colour – This is the 12 row section you can use to create your colour design. Remember to knit the rows in the reverse order you did originally (ie. purple, blue, green, yellow, orange, red) ♣ Next row: As row 8 Next row: As row 9 ♣ Repeat from ♣ to ♣ 5 more times or a total of 12 rows. (each colour is one repeat if making the rainbow colours) Change to lace up section colour Next row: K to the last 8 sts. P8 Next row: K8 (P2 K2) to the last 4 sts. P4 Next row: As row 4 Next row: As row 1 Next row: As row 4 Next row: As row 1 Next row: K4 (P2tog YO K2) to last 8 sts. P8 (As row 2) Next row: Repeat row 1 Cast off Make another slipper to match. More of My Stuff On Etsy Slipper Laces (make 2) If you know how to crochet, you can use a size 5 mm (US size 8) and chain as many sts to make it 3 times the length of the slipper. Slip stitch in every chain. Tie off. Stretch out the lace when done. If you want to knit it instead, cast on 140 (160, 1600, 180) sts. Cast off. Stretch out the lace when done. You can also braid 3 lengths of yarn to form the lace. I’m not sure how long of lengths you’ll need to do this. How I laced up the slipper. The lace up areas are sewn together but you don’t have to. Hints and Tips There are 12 rows (6 ridges) that form the pattern on the side of the slipper after the lace up area. You can change colours any way you would like for this section. I’ve shown a number of combinations: 1 colour (beige), 2 colour alternating (purple), 3 colour lighter to darker (browns), 6 colour (rainbow), but you may want to try something else. The 6 colours are 2 rows each for a total of 12 rows. To sew the seams, use a simple whip stitch for the toe and the lace up section. You don’t want thick seams for these slippers. And speaking of the lace up section, you don’t have to sew it all the way. Up part way, past the toes, will work. I sewed mine Read more
Read more
Easy to Knit Long Cuffed Slippers – FREE Knitting Pattern
This easy to knit slipper pattern is a variation of my Rolled Cuff Slipper pattern. This pattern has the same foot design, but I know that some people prefer a longer cuff to help keep their ankles warm. Like my previous slipper pattern, this was written to avoid any difficult techniques, specifically, picking up stitches. That is why this pattern is done in one piece; starting at the heel flap and working towards the toe. Also, the extended cuff is worked in one piece as you knit the slipper. I’ve given instructions and included photos to show how you’ll need to flip the slipper so the seam for the folded down section is on the right side. When folded, the seam disappears. You can read more about that when you go to the Hints and Tips section at the end of this post. If you don’t want to or are unable to make a financial donation, sharing this pattern through social media is a great way to help out too! The links below are a super easy way for you to do so. If you would like to avoid the ads on this page or would like to print the pattern, you can purchase the PDF through my Etsy shop or on Ravelry. You can also get the PDF for FREE if you are a member on Buy Me A Coffee. Things You Need Yarn (a standard ball of worsted weight yarn such as this will be more than enough) Size 5 mm (US 8 ) single pointed needles Tapestry needle to sew seams and work in ends Gauge 18 stitches = 4 inches 24 rows = 4 inches in stockinette Sizes are written as such: Women’s 6-7 (8-9, 10-11, 12) Men’s 6 (7-8, 9-10, 11-12, 13) Heel Flap Cast on 2 Row 1: Knit across. Row 2: Increase in each stitch. (4 sts) Row 3 – 4 : Knit across. Row 5: Increase in the first stitch. K until one stitch remains. Increase in this stitch. (6 sts) Row 6 – 7: Knit across. Row 8: Increase in the first stitch. K until one stitch remains. Increase in this stitch. (8 sts) Row 9 – 10: Knit across. Row 11: Increase in the first stitch. K until one stitch remains. Increase in this stitch. (10 sts) Row 12 – 13: Knit across. Row 14: Increase in the first stitch. K until one stitch remains. Increase in this stitch. (12 sts) Row 15 – 16: Knit across. PLEASE NOTE: The following rows are for sizes Women’s size 12 and Men’s sizes 11, 12 and 13 ONLY: Next row: Increase in the first stitch. K until one stitch remains. Increase in this stitch (14 sts) Next 2 rows: Knit across. Continue the pattern for all sizes. Next row: Cast on 29 stitches. (Yes, you already have 12 (12, 12, 14, 14) stitches on your needle. After casting on, you’ll have 41 (41, 41, 43, 43) sts on your needle). The following is worked over the stitches you just cast on and the stitches from the heel. K8 P1 Knit to the end of the row. As you worked those stitches, your work was transferred onto the other needle. Cast on another 29 sts onto this needle. (You now have 70 (70, 70, 72, 72 sts) on your needle) Next row: K16 P1 *K3 P1* Repeat from * to * 2 more times. K12 (K12, K12, K14, K14) *P1 K3* Repeat from * to * 2 more times. P1 K16. ♥ ☺ Next row: P9 K52 (K52, K52, K54, K54) P9 Next row: K16 P1 *K3 P1* Repeat from * to * 2 more times. K12 (K12, K12, K14, K14) *P1 K3* Repeat from * to * 2 more times. P1 K16. Next row: K8 P1 K52 (K52, K52, K54, K54) P1 K8. Next row: K16 P1 *K3 P1* Repeat from * to * 2 more times. K12 (K12, K12, K14, K14) *P1 K3* Repeat from * to * 2 more times. P1 K16. ♥ Repeat from ♥ to ♥ 6 (6, 7, 7, 8) times more for 30, (30, 34, 34, 38) rows total. Please note – Repeat the row marked with ☺ once to maintain the pattern. Shaping Toe Next row: Cast off 15 sts. P1 *K3 P1* Repeat from * to * 2 more times. K12 (K12, K12, K14, K14) *P1 K3* Repeat from * to * 2 more times. P1 K16. Next row: Cast of 15 sts. Knit across. ◊ ♫ Next row: P2 *K3 P1* Repeat from * to * 2 times more. K12 (12, 12, 14, 14). ◘ P1 K3 ◘ Repeat from ◘ to ◘ 2 times more. P2. Next row: Knit across. ◊ Repeat from ◊ to ◊ 9 (10, 10, 11, 11) times more for 22 (24, 24, 26, 26) rows total. Please note – Repeat the row marked with ♫ once to maintain the pattern. End Toe Next row: K2tog 10 (10, 10, 11, 11) times. K1 K2tog to last 3 sts. K1 K2tog. Next row: P1 K2 *P1 K1* Repeat from * to * once P1 K6 (6, 6, 7, 7) *P1 K1* Repeat from * to * 2 time more. P1. Next row: K1 K2tog 4 (4, 4, 5, 5) times. K1 (1, 1, 0, 0). K2tog until last st. K1 Next row: P1 K1 P3 K3 P4. Break yarn and pull through. Pull tight to draw loops together. Hints and Tips Leave a longer length of yarn when you first start the slipper. You can use this piece to sew one of the seams along the heel flap. When you end the slipper, leave that yarn length longer too. You can use the length to sew the toe seam. When sewing the seams to form the cuff, when you get to the part that folds over, be sure to turn the slipper inside out so the seam is on the RIGHT side. The sizing of these slippers is very forgiving. The garter stitch used throughout helps the slipper to stretch both width and length wise. If your gauge is off by a row or a stitch, you should be able to get the size of slipper you want. Abbreviations K – Knit P – Purl K2tog – knit 2 together sts – stitches st – stitch The use of this pattern allows you to make and sell the slippers you make, but you may not redistribute or resell this pattern.
Read more
Super Simple Easy to Knit Slippers – Free Knitting Pattern – Now with a Complete How-to Video!
These slippers are perfect for a beginner! If you know how to cast on, knit, purl, K2tog, M1, and draw through (or gather) stitches you will be able to make these slippers. Don’t know how? I have a full online video tutorial to show you how to do it!. If you’re looking for the pattern, keep scrolling down the page. It’s written out in full below. https://youtu.be/DQu8OlCuva8 Happy days! Because I was asked by a number of people to make a printable version this pattern, I made up the PDF! You can get it in all my usual places including my Shopify shop – Super Simple Easy to Knit Slippers – Great Knitting Pattern for Beginners. You can also find it in my Etsy shop, Love Crafts and onRavelry. If you like Amazon, you can also get the Kindle version there. Loving the free patterns on this site? You can always help me out by sharing this with people you think may like it. A share on social media is always appreciated. You can use the links below. Financial donations are always welcome, too! I recently started a profile on Buy Me a Coffee. It’s a one time donation that is a simple thanks for all the hard work I put into my patterns and this website. Things You Will Need: Worsted weight yarn (aka 4 or Aran weight or 10 ply) I like acrylic. It washes and wears well. It’s also easy to find and rather inexpensive. Size 4 mm (US size 6) knitting needles Tapestry needle (to sew seams and work in the ends) Abbreviations If you’re unsure how to do any of the following, click the link to watch the video demo. Cast on – cast on K – knit P – purl K2tog – knit 2 stitches together M1 – Make one (Makes one stitch increase) draw through (or gather) stitches Gauge With size 4 mm (US size 6) needles or whatever size needles you need to create the number of stitches and rows. Be sure to check your gauge or the sizing could be off. But even in saying that, this is a very forgiving pattern. If you’re off a bit, it’ll be okay. 4″ = 16 stitches 4″ = 40 rows Sizes are written as follows: Women 6-7 (8-9, 10-11,12-13) Men’s 5-6 (7-8, 9-10, 11-12) It’s only the numbers of rows that are going to change with the sizing. To Begin – Making the Heel Flap Cast on 3 stitches (I’m counting the cast on as row 1 only because I mis-numbered the rows when I originally posted this knitting pattern. It was easier to change it at the beginning than renumbering the entire pattern.) Rows 2 – 3: Knit across Row 4: K1 M1 K2. (4 sts) Rows 5 – 6: Knit across Row 7: K1 M1 K2 M1 K1 (6 sts) Rows 8 – 9: Knit across Row 10: K1 M1 K4 M1 K1 (8 sts) Rows 11 – 12: Knit across Row 13: K1 M1 K6 M1 K1 (10 sts) Rows 14 – 15: Knit across Row 16: K1 M1 K8 M1 K1 (12 sts) Rows 17 – 18: Knit across Row 19: K1 M1 K10 M1 K1 (14 sts) Rows 20 – 21: Knit across Row 22: K1 M1 K12 M1 K1 (16 sts) Row 23 – 24: Knit across https://youtu.be/DQu8OlCuva8?t=161 If you are having difficulties with casting on the stitches, the video above ???? starts exactly at that spot. If you know how to do that, keep on going with the pattern. Row 25: Cast on 14 sts. (Yes, you already have 16 stitches on your needle. Don’t break your yarn. Simply cast on. The next stitches are knit into the stitches you cast on and the original 16 that were there). * P1 K1 * Repeat from * to * 6 more times. P1 K14 P1. (30 sts) Row 26: Cast on 14 sts. (Yes again.) ⟡ K1 P1 ⟡ Repeat from ⟡ to ⟡ 6 more times. K16 ⦷ P1 K1 ⦷ Repeat for ⦷ to ⦷ 6 more times. (44 sts) ⧭ Row 27: ⧱ P1 K1 ⧱ Repeat from ⧱ to ⧱ 6 more times. P1 K14 P1. ⨳ K1 P1 ⨳ Repeat from ⨳ to ⨳ 6 more times (44 sts) Row 28: ⋚ K1 P1 ⋚ Repeat from ⋚ to ⋚ 6 more times. K16 ⨈ P1 K1 ⨈ Repeat from ⨈ to ⨈ 6 more times.⧭ Repeat ⧭ to ⧭ 28 (31, 34, 37) times. Another way to think of it, you will have knit 56 (62, 68, 74) rows TOTAL. *** END WITH ROW 27 *** This maintains the pattern. More of my stuff on Etsy: Ending the Toe Like with the casting on, some people have difficulties with forming the toe. The video below starts exactly at that point. https://youtu.be/DQu8OlCuva8?t=506 Next row: K1 K2tog 12 times. K1 K2tog to the end of the row. Next row: P8 K7 P8 Next row: K2tog across. Knit the last stitch. Next row: P5 K3 P4. Pull the yarn through or draw stitches together. Cut the yarn leaving 12″ or so. Finishing Sew up the seam from where you gathered the toe stitches to roughly 2/3 up the foot. Flip up the heel flap and sew up the seams on the back of the heel. Work in your ends. Hints and Tips It’s important to sew the toe seam close to 2/3 of the way from the toe to the ankle. Any less and it will feel a bit sloppy on the wearer’s foot. Any further and it will be too tight for the wearer to get over their heel. You can lay it out and measure it or simply eyeball it. It’s not rocket science. If you want to pick up stitches to add the heel flap after instead of how I did it in one piece, cast on 44 sts to start and then start at row 27. This is a Read more
Read more
Ribbed Moccasin Bootie Slippers for Adults – FREE Knitting Pattern
Shocker. Another slipper design 😂 I really do like this style of slipper but after designing the basic moccasin slipper, I was thinking of ways that I can gussy it up a bit if you will. I liked the idea of doing ribbing around it, simply for the additional visual appeal. When I started I didn’t realize how complicated it would be to make the ribbing line up regardless of the sizing. But I gave it some thought, did the math and tahdah! The ribbed moccasins slippers have arrived. Like the original design, this style of slipper is knit flat on straight needles. The only catch is that it use 2 sets of needles. Don’t worry though. I’ve added a number of photos to help you along. There’s even a few videos for specific stitches and techniques on YouTube if you need extra help. If you would prefer a printable, ad-avoiding version, you can download the PDF version of this pattern for a small fee/donation. You can download it from a number of places. In particular, my site here – Ribbed Moccasin Bootie Slippers for Adults. You can also get it at a number of other online retailers such as Ravelry, CreativeFabrica, and Etsy. There is also the Kindle and Paperback versions available on Amazon. If you enjoy this pattern and my other free online knitting patterns, please consider making a small donation or helping me out by visiting my Help Support My Work page. If that’s not possible, that’s totally fine too! Even sharing this page on your social media helps me out immensely. You can use the buttons below to do so easily. Things You Need 1 ball of worsted weight yarn (average 260 yard, 5 oz or 141 gram ball will be more than enough). 2 sets of size 4 mm (US size 6) single point knitting needles. Stitch holder Tapestry needle to sew in ends. You can also use this handy tutorial to show you how to work in the ends while knitting these slippers. (You can watch the embedded video in the Hints and Tips section too). Gauge With size 4 mm (US size 6) needles or whatever size you need to obtain the correct number of stitches and rows. Be sure to check your gauge otherwise the sizing won’t be correct. In garter stitch 4” = 16 sts 4” = 40 rows Sizes (are written as such) Women’s 6-7 (8-9, 10-11, 12-13) Men’s 5-6 (7-8, 9-10, 11-12) The Pattern Cast on 42 (46, 46, 50) ♠ Row 1: P across Row 2: K across ♠ Repeat from ♠ to ♠ for a total of 8 rows ♫ Row 9: K2 (0, 0, 2) ♦ P2, K2 ♦ Repeat from ♦ to ♦ 9 (10, 10, 11) times more. P0 (2, 2, 0). Row 10: K across ♫ Repeat from ♫ to ♫ for a total of 10 (10, 12, 12) rows. Next Row: Repeat row 9. Toe Flap Next Row: Pass the next 14 (16, 16, 18) sts on to a stitch holder. K1 M1 K12 M1 K1. Leave the remaining sts unworked on your non-working needle. Turn ♣ ☺ Next Row: P3 ◘ K2 P2 ◘ Repeat from ◘ to ◘ two times more. P1 Next Row: K across. ♣ Repeat from ♣ to ♣ 12 (12, 14, 14) times more. Repeat the row marked with ☺. 28 (28, 36, 36) rows for the toe flap. Making the Sides Next Row: Put the sts on the stitch holder back on a knitting needle. With the RIGHT side facing and with your first needle, K14 (16, 16, 18). Pick up 16 (16, 20, 20) sts evenly along the toe flap. Be sure to pick up a st in the first st of the stockinette stripe and in the M1. Right side of slipper With your second needle along the sts of the toe flap, K2tog (To make it blend more into the slipper, pick up the first st as if to knit, twist this st and place it back on your non-working needle. Knit this and the next st together going from RIGHT to LEFT. You can also knit the 2 sts together as you normally would if you want.) K12 K2tog (as you normally would). With your third needle, pick up 16 (16, 20, 20) sts evenly along the toe flap. Be sure to pick up a st in the M1 and the first st of the stockinette stripe. K14 (16, 16, 20). Left side of the slipper. (I accidentally dropped the next 2 sts when taking the photo) Your 3 needles will look like this ♥ Next Row: K2 (0, 0, 2) ♦ P2, K2 ♦ Repeat from ♦ to ♦ 17 (18, 20, 21) times more. P0 (2, 2, 0). Next Row: K across ♥ Repeat from ♥ to ♥ 2 (3, 4, 5). With the WRONG side facing you, cast off 30 (32, 36, 38) sts. (Maintain the P2 K2 pattern while casting off) P1 ◘ K2 P2 ◘ Repeat from ◘ to ◘ two times more. Cast off the remaining sts maintaining the P2 K2 pattern. Bind off More of My Stuff on Etsy Making the Sole If you need more help than the photos provide below, you can watch the how-to video embedded here. The video starts in the correct section. No need to find the spot. I already have it cued up for you. The video is for a different style of slipper, but it is made EXACTLY the same way. https://youtu.be/ZZ93FyF4qDI?si=6rTVsO8zBLgvFa2Y&t=511 Next Row: With the RIGHT side facing, attach yarn and knit the first stitch of the cast off stitches by the toe flap (cast off stitch on the right by the point of the needle). Your slipper will look like the slipper above. (I’m using a similar design to more clearly show the cast off stitches.) Pick up this stitch at the start of the row. K2tog. Knit to the last 2 stitches K2tog. Pick up the cast off stitch by the point of your needle. (14 stitches). Pick up this stitch at the end of the row. Quick tip – wrap the yarn counterclockwise around your needle and turn it down to pull the yarn through the cast off stitch on the right. If you have a hard time doing this, you can Read more
Read more
Flat Knit Slippers with a Puffy Cuff – Simple & Cozy Knitting Pattern
Keep your feet warm and cozy with this slipper pattern! Designed to be knit flat on two sets of needles, this knitting pattern is perfect for those who prefer straight needle knitting. The plush, rolled cuff adds extra warmth around the ankles, and you can customize the length to make them as short or as tall as you like. Whether you’re looking for a quick project or a comfy gift idea, these slippers are a great choice. To make things even easier, I’ve included plenty of step-by-step photos to guide you through every part of the process. The construction is simple but creates a nearly seamless fabric that keeps your feet toasty. So grab your yarn and needles, and let’s knit up a pair of slippers that will keep your toes warm all season long! You can download it from a number of places. In particular, my site here – Flat Knit Slippers with a Puffy Cuff – Simple & Cozy Knitting Pattern. You can also get it at a number of other online book retailers such as Ravelry, LoveCrafts, and Etsy. It is also available as paperback and as a Kindle book on Amazon. If you enjoy this pattern and my other free online knitting patterns, please consider making a small donation or helping me out by visiting my Help Support My Work page. If that’s not possible, that’s totally fine too! Even sharing this page on your social media helps me out immensely. You can use the buttons below to do so easily. Things You Need 1 MAIN colour of worsted weight yarn (average 260 yard, 5 oz or 141 gram ball will be more than enough). I used Red Heart worsted weight yarn when designing the pattern but any worsted weight yarn will suffice. 1 or more COMPLIMENTARY colours of worsted weight yarn. How many colours is up to you. 2 sets of size 4 mm (US size 6) single point knitting needles. Stitch holder Tapestry needle to sew in ends. You can also use this handy tutorial to show you how to work in the ends while knitting these slippers. https://youtu.be/1_zF6HAzsfY Gauge With size 4 mm (US size 6) needles or whatever size you need to obtain the correct number of stitches and rows. Be sure to check your gauge otherwise the sizing won’t be correct. In garter stitch 4” = 16 sts 4” = 32 rows Sizes (are written as such) Women’s 6-7 (8-9, 10-11, 12-13) Men’s 5-6 (7-8, 9-10, 11-12) To Begin – Cuff Cast on 36 (38, 40, 42) loosely With first colour for the puffy portion of the cuff (COMPLIMENTARY colour) * Row 1: P across Row 2: K across * Repeat from * to * 3 more times for a total of 8 rows. ☺ ♠ Row 9: Change to MAIN colour of slipper. K across Row 10: P across ♠ Repeat from ♠ to ♠ 1 more times for a total of 4 rows. Change to next COMPLIMENTARY colour (if applicable) for puffy portion of the cuff. Row 14: K across. (Yes, knit) Row 15: K across. (Yes. Knit again). ♦ Row 16: P across Row 17: K across ♦ Repeat from ♦ to ♦ 1 more time (There are 6 rows for the puffy band). ☺ Repeat from ☺ to ☺3 more times or how every many colours or puffy portions you would like. As written, it will give you 5 puffy bands. The rainbow slippers are 6 with a total of 4 repeats. Next row: Change to MAIN colour of slipper. K across Next row: P across. The remainder of the slipper is done in the MAIN colour. Toe Flap Next row: With RIGHT side facing, transfer the first 11 (12, 13, 14) stitches to a stitch holder. Reattach the yarn and knit the next 14 stitches (the start of the toe flap). Leave the remaining 11 (12, 13, 14) stitches on the needle unworked. The following rows are worked back and forth on the 14 toe flap stitches only! ♥ Next row: Knit across. Next row: Purl across. ♥ Repeat from ♥ to ♥ 13 (14, 15, 16) times more for a total of 28 (30, 32, 34) rows total. Break yarn. You’ll have the 14 stitches of the toe flap on your needle and the 11 (12, 13, 14) stitches you left on the needle when you started making the toe flap. Making the Sides of the Slipper This is where you’re going to need the extra set of knitting needles. You’ll be knitting back and forth in rows but the turn around the toe is too tight to use circular needles. For this, you’ll put the 14 toe flap stitches on one of your extra needles. It’s a little unconventional, but it works. Next row: With the RIGHT side facing, transfer the 11 (12, 13, 14) stitches from the stitch holder onto one of your needles. Attach your yarn and knit the 11 (12, 13, 14) stitches. Pick up evenly 21 (22, 23, 24) stitches evenly along the edge of the toe flap. To avoid a hole, make sure the first st you pick up is in this specific st as shown. All of these stitches are on ONE needle. (32, 34, 36, 38) stitches on this needle. This stitch With another needle, knit the 14 stitches of the toe flap. (14 stitches on this needle) With another needle, pick up evenly 21 (22, 23, 24) stitches evenly along the side of the toe flap. To avoid a hole, make sure the last st you pick up a stitch in this specific st as shown. Knit the remaining 11 (12,13, 14) stitches on the next needle. (32, 34, 36, 38) stitches on this needle). This stitch You should now have 3 needles holding stitches with all the points pointing as shown below when laid flat. You also have one spare needle to knit with. You are now going to knit in rows, back and forth with these three needles. Once you finish knitting all the stitches on one needle, move on to the next needle (the point of the needle is right there) until you complete the row. This is the basic moccasin slipper but the technique is exactly the same.I used a double pointed needle to work my 14 stitchesfor the toe only because it was handy. A regular needle works! Next row: K32 (34, 36, 38) stitches on the first Read more
Read more
How to Knit: Step-by-Step Beginners Video and Pattern to Knit Granny Slippers – FREE Knitting Pattern!
Learn how to knit cozy Grandma-style slippers with this free beginner-friendly pattern and full step-by-step video tutorial. This is actually one of the very first patterns I ever made, way back over 10 years ago! The original slippers worked fine, but I wanted to update them to make everything easier to follow, especially for beginners. Plus, I wanted the sizing and instructions to be a bit clearer so anyone can make a cozy pair. Now the pattern covers more sizes, from small women’s feet all the way up to men’s size 14. Even if larger sizes aren’t requested as often, it’s nice to know everyone can get a snug, comfy fit. I also changed the sole from stockinette to garter stitch. This gives the slippers a thicker, sturdier sole that wears better and adds a little grip; perfect for walking around the house without slipping. It really gives these slippers that classic, “Grandma-made” feel. To make it even easier, I’ve made a full YouTube tutorial showing every step. From casting on and shaping the heel to making the cuff and sewing everything together, the video walks you through it all. Even if you’ve never knitted slippers before, you’ll be able to follow along and make your own cozy pair. https://youtu.be/OZ-0hnKxF-M If you are loving this and all my other free patterns, please help out financially by visiting my Help Support My Work Page. If you can’t give cash, and I get that not everyone can, please do your part and share this where you can. Every share on social media helps promote my work and expose it to even more people. I’ve made it super easy for everyone to do that. By clicking those links up there 👆🏼 you can share it nearly everywhere. Not a fan of reading knitting patterns online or would prefer to print this off? I also have the PDF version of this pattern available as a free download from my site too. Click either of these links to get the ad free download for a small fee – KweenBee on Shopify, in my Etsy shop, Ravelry, LoveCrafts, CreativeFabrica and on Amazon. Abbreviations K – knit P – purl K2tog – knit 2 stitches together st — stitch sts — stitches Things you need: Click on any of the links below to get everything you need to make these slippers sent right to your door. 200 grams of worsted weight yarn Pair of size 5 mm ( US size 8) knitting needles or whatever size to obtain correct gauge. Set of 4 size 5 mm (US size 8) double pointed needles or whatever size to obtain correct gauge. Darning or tapestry needle to sew seams and work in the ends. Gauge In stockinette stitch 9 sts – 5 cm (2″) 13 rows – 5 cm (2”) Sizes are written as such: Women 6-7 (8-9, 10-11, 12) Men 6 (7-8, 9-10, 11-12, 13-14) The Pattern Cast on 38 (40, 44, 46, 46) ✬ Row 1: P13 (13, 15, 15, 15) K12 (14, 14, 16, 16) P13 (13, 15, 15, 15) Row 2: K13 (13, 15, 15, 15) P1, K10 (12, 12, 14, 14) P1, K13 (13, 15, 15, 15) ✬ Repeat from ✬ to ✬ 13 (14,16, 17, 18) times more for a total of 28 (30, 34, 36, 38) rows. Shape toe ❤︎ Next Row: With the RIGHT side facing, P1 ❂ K1 P1 ❂ Repeat from ❂ to ❂ 5 (5, 6, 6, 6) more times. K12 (14, 14, 16, 16) P1, ✿ K1 P1 ✿ Repeat from ✿ to ✿ 5 (5, 6, 6, 6) more times. Next Row: ☻ K1 P1 ☻ Repeat from ☻ to ☻ 6 (6, 7, 7, 7) more times. K10 (12, 12, 14, 14) ☀︎ P1 K1 ☀︎ Repeat from ☀︎ to ☀︎ 6 (6, 7, 7, 7) more times.❤︎ Repeat from ❤︎ to ❤︎ 9 (10, 11, 12, 13) more times for a total of 20 (22, 24, 26, 28) rows for this section. You have a total of 48 (52, 58, 62, 66) rows from the cast on edge. End Toe Next Row: K2tog 10 times. K1 K2tog to the last st. P1. Next Row: K1 P7 (7, 8, 8, 8). K 5(6, 6, 7, 7) P to the end of the row. Next Row: K1 K2tog 5 times. K0 (1, 1, 0, 0) K2tog to the last st. P1. Next Row: K1 P4 K2 (3, 4, 4, 4) P to the end of the row. Draw through to pull the stitches together. Heel and Cuff If you need a little extra help with this part, the video will show you how to do it. You can either click this link – Making the Heel and Cuff. It starts at the correct spot in the video. https://youtu.be/OZ-0hnKxF-M?t=1057 With the RIGHT side facing, pick up 12 (14, 14, 16, 16) stitches along the cast on edge ✦Next 2 Rows: K across. Next Row: K2tog. K to last 2 sts. K2tog. ✦ Repeat from ✦ to ✦ until there are 4 sts on your needle. Next Row: K2tog twice. End with the yarn on the left side of the row when the right side of the slipper is facing you. You may need to knit one more row. My stuff on Etsy: Create cuff: With the RIGHT side facing and your DPN’s, pick up 36 (38, 42, 44, 48) sts evenly around the edge of the slipper. You will now have 38 (40, 44, 46, 50) sts total. Rounds 1-6: K1 P1 around. Rounds 7-10: K around. Cast off loosely. Sew seams along the top of the foot and along the sides of the heel. Make another slipper to match. Hints and Tips: Be sure to cast your stitches off loosely when making the cuff. It needs to be able to stretch when going over the top of the foot and the heel. It’s the widest part the slipper has to pass over. The ribbing will snap Read more
Read more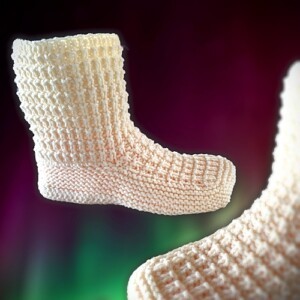
Super Cozy Textured Adult Bootie Slippers – FREE Knitting Pattern
Make a pair of adult moccasin bootie slippers with this FREE Knitting Pattern. Knit a pair of Ugg inspired classic slouch booties today!
Read more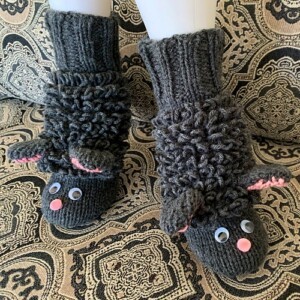
Adorable Sheep Slippers – FREE Knitting Pattern
Learn to knit a pair of adorable sheep sippers for adults!
Read more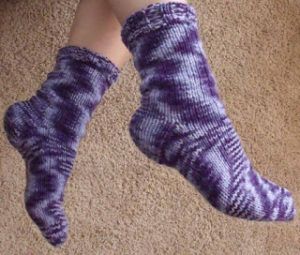
How to Knit Socks & Graft a Toe – With Photos
Socks are one of those things that you can make as individual as you are. Made in the round on 4 double pointed needles, it may seem intimidating at first, but really it’s not. And with a little practise you’ll get just as hooked as me. If you are just getting started one standard ball of yarn, like the kind you can get at Walmart, should be enough to make a pair of ankle socks as pictured above. Choose an acrylic yarn or a blended worsted weight. You can use wool, but cleaning them may be a hassle (shrinkage) and cotton yarn doesn’t stretch enough to make a comfortable pair of socks. It also gets up your nose when working with it. Just want full disclosure here ? To cast on, I cast all the stitches on one needle, then take the first 1/3 of the stitches and slip them onto a free needle, then take the last 1/3 of the stitches and put those on another needle, leaving the remaining 1/3 on the original needle.This method helps me to not twists my stitches. I then start to knit in the round. Included with this pattern are photos of every step showing how to graft the toe, or sewing the toe stitches together. Not only does this technique work for socks, but it is the same procedure for grafting the stitches for mittens. If sone correctly, it makes for a nearly perfect seam. Keep scrolling down the page to see the instructions and pics. This pattern is available as a read online only. No download is available. Sorry. There are so many sock patterns already, I’m sure a quick search will find one you can download. A quick tip about working with double pointed needles (DPN). I find that using wood or bamboo a bit better than working with the metal needles. Sometimes, when working with the metal needles, you’ll find that you get a line that runs the length of your sock where you start working on a new needle. For some reason, and for me, using bamboo prevents this. Also, check your tension first! I use a size Size 7 needle (Size 4.5 if your Canadian) with worsted weight yarn and with the tension of: If you are loving the free patterns, please consider making a small donation to Help Support My Work! If you are unable to do so, I totally understand. Sharing this and other patterns you like with others on your social media or through email, helps me too. I’ve provided handy links above to help you do just that ? 10 stitches = 2 inches 14 rows = 2 inches Depending on how tight you knit you may need larger or smaller needles. If you’ve knitted before you probably have a good idea of what needles you need. Things You Need: Size 4.5 mm (Size 7 US) double pointed knitting needles Worsted weight yarn Large eyed needle for grafting toe and sewing in the ends. Abbreviations: K = Knit P = Purl K2tog = Knit 2 stitches together P2tog = Purl 2 stitches together Cast on 36 stitches loosely. There needs to be some stretch to be able to get them on. Rounds 1-15: K2 P2 Rounds 16-17: Knit Heel flap: Slip last 9 stitches from round 17 to free needle, knit next 9 stitches from next needle onto needle with the 9 slipped stitches from round 17. You will have four needles and will look like this: Transfer the three stitches on the two needles onto the back needle. Split these 18 stitches between two needles. It will look like this: You will work these split 18 stitches later to form the top of the foot. Turn your work. You are now creating the heel flap from the slipped stitches and will work in rows along the 18 stitches that are on the single needle. With the wrong side (Purl side) facing you. Purl the row. Turn. With the right side (Knit side) facing you. Knit the row. Turn. Repeat stocking knit (Purl one row, Knit one row) until the flap measure approximately 2 1/2 inches ending with a Purl row. Turn. With right side (Knit side) facing you K8 stitches, K2 tog, K8. Turn. (17 stitches on the needle) Next row: P8, P2 tog, P1. Leave remaining stitches unworked. Turn. Next row: K1, K2 tog, K1. Leave remaining stitches unworked. Turn. Next row: P2 , P2 tog, P1. Leave remaining stitches unworked. Turn. Next row: K3, K2 tog, K1. Leave remaining stitches unworked. Turn. Next row: P4, P2 tog, P1. Leave remaining stitches unworked. Turn. Next row: K5, K2 tog, K1. Leave remaining stitches unworked. Turn. Next row: P6, P2 tog, P1. Leave remaining stitches unworked. Turn. Next row: K7, K2 tog, K1. You will now start knitting around. Pick up 10 stitches along heel flap to form the gusset. Transfer the 18 held stitches to one needle. Knit the 18 held stitches. Pick up 10 stitches along heel flap to form gusset. K4 stitches of heel. Slip remaining 5 stitches onto next needle. It will look like this: Your needles will hold: 15 stitches side of foot 18 stitches top of foot 14 stitches side of foot Next 2 rounds: Knit. Next round: K12, K2tog K1 K18 K1 K2tog K11. Next 2 rounds: K45 Next round: K11, K2tog K1 K18 K1 K2tog K10. Next 2 rounds: K43 Next round: K10, K2tog K1 K18 K1 K2tog K9. Next 2 rounds: K41 Next round: K9, K2tog K1 K18 K1 K2tog K8. Next 2 rounds: K39 Next round: K8, K2tog K1 K18 K1 K2tog K7. Next 2 rounds: K37 Next round: K7, K2tog K1 K18 K1 K2tog K6. Next round: K35 Repeat the last round (K35) until measures the length you want less 2 1/2 inches. To measure lay the sock flat and measure from the needle holding the side gusset stitches to the back of the heel. More of my stuff on Etsy Toe: Round 1: K1, K2 tog, K11, K2tog, K2, K2tog, K12, K2tog, K1 Rounds 2-3: Knit Round 4: K1, K2 tog, K9, K2tog, K2, K2tog, K10, K2tog, K1 Rounds 5-6: Knit Round 7: K1, K2 tog, K7, K2tog, K2, K2tog, K8, K2tog, K1 Rounds 8-9: Knit Read more
Read more
Free Knitted Slipper Pattern – With Owls!
Awesome cozy knitted slippers for women and men with a delightful cabled owl motif. The inspiration came to me while scrolling through the wonders of the internet and stumbling on other knitted slippers that were made in one piece on circular needles but back and forth. I couldn’t for the life of me figure it out, the pattern wasn’t in English, so I decided to design my own! I came up with a very basic knitted slipper design, but then was inspired to make the top of the toe something special. I loved the look of a knitted cable owls on hats, mitts and scarves and next thing you know, this pattern was born! But also realize not everyone wants owls. That’s why I’ve written another pattern with no owls. You can see that pattern here – Free Knitted Slipper Pattern Like most of my knitting patterns, this one is available for download, ad free, for a very small fee here – Knitted Owl Slipper Pattern or from my Etsy Shop. If you enjoy this pattern and my other free online knitting patterns, please consider making a small donation or helping me out by visiting my Help Support My Work page. If that’s not possible, that’s totally fine too! Even sharing this page on your social media helps me out immensely. You can use those buttons ?? to do so easily. Please be warned, this is not a pattern for beginners. I used a very different technique involving multiple sets of needles. I included photos to demonstrate how I’m using the extra set and it totally works! Trust me. Things You Need If you are uncertain or having trouble finding what you need to make these slippers, clicking any of the links below will show you exactly what you need. And if you decide to order through Amazon, it will be delivered right to your door and help support the hosting costs of the website (I do get a small commission from sales through Amazon). 1 ball of worsted weight yarn (average 260 yard, 5 oz or 141 gram ball will be more than enough). I used Red Heart worsted weight yarn when designing the pattern. 2 sets of size 4 mm (US size 6) single point knitting needles. Stitch holder Cable needle 4 – 4 mm beads for eyes. You can use larger ones or very small buttons, too. Needle and thread to sew on eyes Tapestry needle to sew in ends. You can also use this handy tutorial to show you how to work in the ends while knitting these slippers. Gauge With size 4 mm (US size 6) needles or whatever size you need to obtain the correct number of stitches and rows. Be sure to check your gauge otherwise the sizing won’t be correct. Instockinette 4” = 20 sts 4” = 30 rows Sizes (are written as such) Women’s 6-7 (8-9,10-11, 12-13) Men’s 5-6 (7-8, 9-10, 11-12) To Begin Cast on 44 (48, 54, 58) Row 1- 6: Knit across. Break yarn when completed row 6. Toe Flap Row 7: With RIGHT side facing, transfer the first 15 (17, 20, 22) stitches to a stitch holder. Reattach the yarn and knit the next 14 stitches (the start of the toe flap with the owl motif). Leave the remaining 15 (17, 20, 22) stitches on the needle unworked. The following rows are worked back and forth on the 14 toe flap stitches only! Row 8: Purl across (14 stitches; wrong side) Row 9: Knit across. (Right side) Row 10: Purl across. Row 11: Knit across. Row 12: Purl across. Row 13: K2 P1 K8 P1 K2 Row 14: P2 K1 P8 K1 P2 Row 15: K2 P1 C4F C4B P1 K2 Row 16: As row 14 (Wrong side) Row 17: As row 13 Row 18: As row 14 Row 19: As row 13 Row 20: As row 14 Row 21: As row 15 (Cables; Right side) Row 22: P2 K1 P2 K4 P2 K1 P2 Row 23: K2 P1 K2 P4 K2 P1 K2 Row 24: As row 22 Row 25: As row 23 (Right side) Row 26: As row 22 Row 27: As row 23 Row 28: As row 22 Row 29: As row 15 (Cables; Right side) Row 30: P2 K10 P2 (Wrong side) Row 31: Knit across. Row 32: Purl across. Break yarn. You’ll have the 14 stitches of the toe flap on your needle and the 15 (17, 20, 22) stitches you left on the needle when you started making the toe flap. Making the Sides of the Slipper This is where you’re going to need the extra set of knitting needles. You’ll be knitting back and forth in rows but the turn around the toe is too tight to use circular needles. For this, you’ll put the 14 toe flap stitches on one of your extra needles. It’s a little unconventional, but it works. Row 33: With the RIGHT side facing, transfer the 15 (17, 20, 22)stitches from the stitch holder onto one of your needles. Attach your yarn and knit the 15 (17, 20,22) stitches. Pick up 13 stitches evenly along the edge of the toe flap. (All of these stitches are on ONE needle. (28, 30, 33, 35) stitches on this needle) With another needle, knit the 14 stitches of the toe flap. Leave the remaining 15 (17, 20, 22) stitches on the other needle unworked for now. (14 stitches on this needle) With another needle, pick up 13 stitches evenly along the side of the toe flap. Knit the remaining 15 (17, 20, 22) stitches on the next needle. (28, 30, 33, 35 stitches on this needle) You should now have 3 needles holding stitches with all the points pointing as shown below when laid flat. You also have one spare needle to knit with. You are now going to knit in rows, back and forth with these three needles. Once you finish knitting all the stitches on one needle, move on to the next needle (the point of the needle is right there) until you complete the row. Another way to say it for the following rows, knit all the stitches forming the side of the slipper, knit the 14 Read more
Read more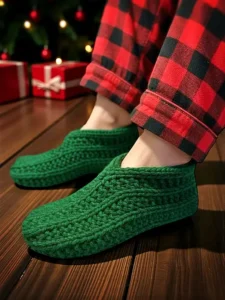
Easy to Knit Beginner Slipper Pattern – Knit Flat with Bulky Yarn on Straight Needles – FREE Knitting Pattern
Knit fast and keep your feet toasty warm with this quick to knit pattern. Made with 2 strands of worsted weight yarn, or choose to use super bulky yarn, these extra thick, super quick slippers are sure to be a hit with you and anyone that wears the slippers. I had a number of people over the years ask about faster to knit and thicker versions of my slippers using either 2 strands of worsted weight yarn or using the thicker yarns that are available. I decided to do the math and come up with something simple and quick for anyone to make. I decided on the thicker version of my Easy to Knit Rolled Cuff Slippers that I published a while back. It’s simple and made one piece. This lent itself well to a rewrite of the pattern taking into account the new gauge of the yarn. A word on yarn. You can use super bulky yarn. This is equal to 14 ply or No. 6 yarn. How it’s referenced depends on where you live. This pattern also works well, and for our purposes, equals to a double strand of worsted weight yarn (10 ply or No. 4 yarn). As long as the gauge is the same, the sizing of the slippers should be consistent. I found that using size 5 mm (US 8) knitting needles worked for both the super bulky and the double strand of worsted weight giving the same stitches and rows per inch for both. A note on super bulky yarn selections. Make sure what you are using is the one that is like regular worsted weight yarn but only thicker. Using any of the blanket yarns (the ones that are similar to a terry towel type texture) don’t stretch the way they should. It’s easier to use 2 separate balls of yarn when using two strands of worsted weight yarn for this project. It also lets you play with colour a bit. Using colours that are in the same colour family or have a slightly different shade can make for some interesting variations. Mixing a solid colour with a variegated yarn can also make for unique effects. It really is up to you how you want to blend the colours. Of course, you can use the same colour for both strands. The choice is yours. If you want to help support my work, sharing this pattern through social media is a great way to help out too! The links below are a super easy way for you to do so. If you would like to avoid the ads on this page or would like to print the pattern, you can purchase the PDF for a small fee from this website at Easy to Knit Beginner Slipper Pattern – Knit Flat with Bulky Yarn, through my Etsy shop, LoveCrafts or on Ravelry. The printable version is also available in my shop on Buy Me A Coffee. If you are a monthly supporter, the price turns to zero and you can download and print it for free. You can see that here – Slippers Knit Flat on Straight Needles – Bulky Yarn Knitting Pattern – Knitted Slippers Beginner Knitting. If you would prefer the paperback or Kindle version, I have that too!. Click on the country you are in, or closest to. If you have Amazon Prime, the shipping is free – United States, Canada, United Kingdom and Australia. The Kindle versions are available at the same link. Things You Need Worsted weight yarn – 2 (two) standard balls of yarn (215 yards/197 m). Any colours of your choosing. or Super Bulky yarn – 2 standard balls of ONE colour with matching lot numbers (90 yards/82 m). One ball makes one slipper. There will be some yarn left over from each ball. Size 5 mm (size 8 US) knitting needles (or whatever you require to get the correct gauge). Tapestry needle to sew the seam and work in the ends. Gauge In garter stitch 8 sts – 5 cm (2″) 7 rows – 5 cm (2”) The sizing for this pattern is written as such: Women 6-7 (8-9, 10-11, 12) Men 6 (7-8, 9-10, 11-12) Abbreviations K – knit P – purl K2tog – knit 2 stitches together P2tog – purl 2 stitches together st – stitch sts – stitches The Pattern Cast on 2 Row 1-2: Knit across. Row 3: Increase in both stitches. (4 sts) Row 4-5: Knit across. Row 6: Increase in the first st. K to the last st. Increase in the last st. (6 sts) Row 7-8: Knit across. Row 9: Increase in the first st. K to the last st. Increase in the last st. (8 sts) Row 10-11: Knit across. Row 12: Increase in the first st. K to the last st. Increase in the last st. (10 sts) Row 13-14: Knit across. Go to the row marked with ◘ for women’s sizes 6-9 and for men’s sizes 6-8. Continue for all larger sizes as follows: Next row: Increase in the first st. K to the last st. Increase in the last st. (12 sts) Next 2 rows: Knit across. ◘ Next row: Cast on 12 (12, 15, 15). 22 (22, 27, 27 sts) Next row: P3 *K2 P1* Repeat from * to * 2 (2, 3, 3) times more. K 10 (10, 12, 12). Next row: Cast on 12 (12, 15, 15) Knit across. 34 (34, 42, 42 sts) ♥ Next row: P3 *K2 P1* Repeat from * to * 2 (2, 3, 3) times more. K 10 (10, 12, 12). *P1 K2* Repeat from * to * 2 (2, 3, 3) times more. P3. Next row: Knit across. ♥ Repeat from ♥ to ♥ 11 (12, 13, 14) more times for a total of 24 (26, 28, 30) rows. Next row: P2tog P1*K2 P1* Repeat from * to * 2 (2, 3, 3) times more. K 10 (10, 12, 12). *P1 K2* Repeat from * to * 2 (2, 3, 3) times more. P1 P2 tog. 32 (32, 40, 40 sts) ☻ Next row: Knit across. Next row: P2 *K2 P1* Repeat from * to * 2 (2, 3, 3) times more. K 10 (10, 12, 12). *P1 K2* Repeat from * to * 2 (2,3, 3) times more. P2.☻ Repeat from ☻ to ☻ 10 (11, 10, 11) more times for a total of 22 (24, 22, 24) rows. More of my stuff on Etsy: Ending the Toe Next row: *K2tog K1* Repeat from * to * 3 (3, 4, 4) times more. Read more
Read more
Knitted Moccasin Bootie Slippers for Children – FREE Knitting Pattern and How-to Video!
After a bit of math and a little tweaking of the results, the child sizes of the FREE Knitted Slipper Pattern is finally available! (You can click that link if you need the adult sizes). Because these are made for little feet, they often don’t need much yarn. This makes them a great way to use up the smaller leftover bits from larger projects. Not to mention, these tend to sell like hotcakes at local farmers’ markets, craft fairs and consignment shops. The smaller pairs are “so cute” making for an easy sale and the return on the investment of your time is great! They’re quick to make and since the yarn has already been bought for a larger project, anything made from the leftovers, like these child shippers, is gravy, baby! Click here for ADULT sizes If you stumbled upon this post looking for a finished pair of slippers, I have them for sale in my Etsy shop. Prices vary depending on size. You can use this link – CUSTOM MADE Hand Knit Camo House Slippers – Slippers for Children – Kids Moccasin Booties – Slippers with a Cuff – Handcrafted House Shoes If you enjoy this pattern and my other free online knitting patterns, please consider making a small donation or helping me out by visiting my Help Support My Work page. If you can’t help financially, I totally get it. Sharing on your social media is the next best thing. And yes, you have my permission to sell or give away anything you make from my patterns. You’re just not allow to redistribute any of the patterns themselves in any form. Linking to and sharing is always welcome though! You can use those buttons 👇🏼 to do so easily. Please note, this isn’t a pattern for beginners, but if you know how to knit a stitch, pick up stitches and knit two stitches together, you should be okay. I used a very different technique involving multiple sets of needles, but no worries! I included photos and now a how-to video demonstrating how I’m using the extra set and it totally works! Trust me. https://youtu.be/ZZ93FyF4qDI And if you are concerned with the number of ends you’ll need to weave in when done, I’ve also created a tutorial to help you with that too! It’s so much easier to work the ends in as you go, though there will be a few you’ll have to do (i.e. when you sew up the seam for the heel), but if you are interested in easing your work load, here’s the link showing you How to Weave in the Ends While Knitting. A new window will open so you won’t lose this page 😊. https://youtu.be/1_zF6HAzsfY If you don’t want to read it online and want to print it, this knitting pattern is available in all the usual places including my Shopify shop – Knitted Moccasin Bootie Slippersfor Children, Ravelry, in my Etsy shop, LoveCrafts, a paperback on Amazon, and for Kindle. You can also get the pattern on Buy Me A Coffee here – Moccasin Slippers with a Cuff for Children. It’s FREE to download and print if you’re a member. Abbreviations k – knit k2tog – knit 2 together st – stitch sts – stitches Things You Need If you are uncertain or having trouble finding what you need to make these slippers, clicking any of the links below will show you exactly what you need. And if you decide to order through Amazon, it will be delivered right to your door and help support the hosting costs of the website (I do get a small commission from sales through Amazon). And because this pattern is so basic with no pattern of any sort, it’s a great knitting pattern to highlight the colour of your yarn. I have a weakness for variegated/shaded yarns. I really enjoying watching how the colours pool on the finished project. Little weird, I know… And In case you were thinking of trying self-striping yarn. Don’t. It looks terrible. 1 ball of worsted weight yarn (average 260 yard, 5 oz or 141 gram ball will be more than enough). I used Red Heart and Bernat worsted weight yarn when designing the pattern but any worsted weight yarn will suffice. 2 sets of size 4 mm (US size 6) single point knitting needles. Stitch holder Tapestry needle to sew in ends. You can also use this handy tutorial to show you how to work in the ends while knitting these slippers. Gauge With size 4 mm (US size 6) needles or whatever size you need to obtain the correct number of stitches and rows. Be sure to check your gauge otherwise the sizing won’t be correct. In garter stitch 4” = 16 sts 4” = 40 rows Sizes (are written as such) Child’s 1-2 (3-4, 5-6, 7-8, 9-10, 11-12, 13-1, 2-3, 4-5) I’m using a colour code to denote the number of stitches for the various sizes. I hope this helps when making the sizes of slippers. SizeLength 1-24 inches10 cm3-44.5 inches11.4 cm5-65 inches12.5 cm7-85 3/4 inches14.5 cm9-106 inches15 cm11-126 3/4 inches17 cm13-17 1/4 inches18.5 cm2-38 1/4 inches21 cm4-58 3/4 inches22 cmAll measurements are approximate. Knitted slippers are very forgiving for size and foot shape. To Begin Cast on 18 (20, 22, 24, 26, 28, 30, 32, 34) Knit across for 10 (12, 12, 14, 14, 16, 18, 20, 20) rows. Break yarn when completed last row. Toe Flap Next Row: With RIGHT side facing, transfer the first 6 (7, 7, 8, 8, 9, 10, 10, 11) stitches to a stitch holder. Reattach the yarn and knit the next 6 (6, 8, 8, 10, 10, 10, 12, 12) to create the toe flap. Leave the remaining 6 (7, 7, 8, 8, 9, 10, 10, 11) stitches on the needle unworked. The following rows are worked back and forth on the 6 (6, 8, 8,10, 10, 10, 12, 12) toe flap stitches only! Knit across for 18 (20, 22, 24, 26, 30, 32, 36, 40) rows. Break yarn. You’ll have the 6 (6, 8, 8, 10, 10, Read more
Read more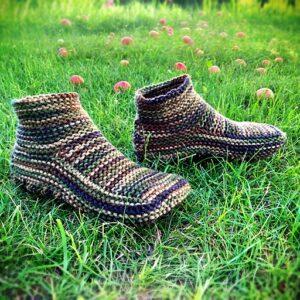
FREE Knitted Slipper Pattern – Moccasin Style – Now with a How-to VIDEO!
Learn to knit a pair of slippers with a cuff. Very stretchy and guaranteed to fit every foot to a man’s size 12.
Read more
Knit Flat Slippers with a Cuff – Free PDF Knitting Pattern
Knit a pair of moccasin style bootie slippers with this FREE knitting pattern. Knit slippers for adults from size 5 – 14.
Read more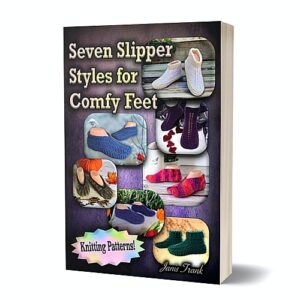
Seven Slipper Styles for Comfy Feet – A Knitting Pattern Collection
As the title suggests, this is my latest knitting pattern compilation. This is the 3rd one I’ve done! I sometimes can’t believe how many slipper patterns I’ve written. It’s a bit crazy. If you’re interested you can see both my Seven Slipper Patterns and Eight Slipper Patterns. Click either of those links if you would like to read more. Keep scrolling for where to get this knitting collection including AMAZON! This collection is nearly all of my latest slipper patterns. I am always designing, so depending on when you read this there may be many more. In short, the following patterns are included here: Snug Slip-On Slippers Nearly Seamless Cuffed Booties – Extra Thick! Bulky Yarn Slippers – Extra Thick! Minimalist Round Toe Slippers Chevron Striped Moccasin Slippers Rolled Cuff Slippers Long Cuffed Slippers All of the pattern listed above are free to read on my website. You can click any title and it will take you directly to the pattern. And now for why I really made this post. You can now purchase this knitting compilation from a variety of sources! Of course you can always get the printable PDF version from the ever trusted Etsy – Seven Slipper Styles for Cozy Feet – Knitting Patterns Please be warned that when you print it yourself it’s 74 pages long. Not my longest but it is a bit. You can also buy the pattern here from my website. It’s the same PDF as the one on Etsy but I understand that some people feel sketched out buying from websites. Anywho, you can find that here – Seven Slipper Styles for Comfy Feet – Knitting Patterns If you would like to have the paperback version sent to you, I have it available to my readers on Amazon! If you have Amazon Prime your shipping is FREE as long as you make sure you order it from your correct country. Be sure that you click on the country closest to you from the list below: United States United Kingdom Canada Unfortunately, this isn’t available in Australia yet. It’s a new listing and sometimes it take a while for me to be able to sell my paperbacks there. I don’t get it either but it’s what I have to work with. I do sell through another paperback distributor that helps to get my work onto other websites like Walmart and Target and into libraries and such. Once I have those links, I’ll post them here.
Read more
Easy to Knit Rolled Cuff Slippers – FREE Knitting Pattern
I’ve written a number of slipper patterns over the years with a couple of goals in mind, two goals to be specific. The first is to never have any seams to sew. This pattern didn’t meet this requirement. I offer a heartfelt apology for this. The other goal is to make them as easy as possible so new knitters or those with not as much experience, can knit something that gives a great final product. This pattern was written specifically to avoid any difficult techniques, specifically, picking up stitches. That is why this pattern is done in one piece; starting at the heel and working towards the toe. The cuff is made as you knit the piece. Because of the stitches used, it automatically rolls back up on itself giving a nice finished edge without adding any additional stitches or work. I also made a longer cuffed version of this pattern. It fits more like a bootie. You can use this link to check out that slipper design – Easy to Knit – Long Cuffed Slippers. There is also a thicker version of this slipper using 2 strands of yarn. It’s quicker to make and extra thick – Easy to Knit Beginner Slipper Pattern – Knit Flat with Bulky Yarn on Straight Needles – FREE Knitting Pattern Love the free patterns? You can say thanks in a couple of ways. You can read more about how you can Support My Work by clicking that link or make a small donation and Buy Me a Coffee. ?? That is a website where you can make a one time donation as a thanks. (FYI I have some great offers if you would like to buy me multiple coffees. You can see those by clicking on the Extras tab or you can click this link Janis Frank Extras). If you don’t want to or are unable to make a financial donation, sharing this pattern through social media is a great way to help out too! The links below are a super easy way for you to do so. If you would like to avoid the ads on this page or would like to print the pattern, you can purchase the PDF for a small fee from this website at Easy to Knit Rolled Cuff Slippers , through my Etsy shop or on Ravelry. Another way to avoid ads and pop-ups, get instant, PRINTABLE downloads of this pattern and others, is by becoming a Member on this website. When you become a Website Supporter for $3/month, you’ll gain access to exclusive member only posts. These posts contain one click downloads of the patterns. Simply click the Download & Print button. The PDF will automatically download to your computer or smart device. You can then read it on your device or print it at your leisure. You can download as many patterns as you like for the same $3 each month. You can go to this page to learn more, become a member and support my work… Exclusive Member Area Become a Member Things You Need Yarn (a standard ball of worsted weight yarn will be more than enough) Size 5 mm (US 8 ) single pointed needles Tapestry needle to sew seams and work in ends Gauge(in stockinette) 18 stitches = 4 inches 24 rows = 4 inches Sizes are written as such: Women’s 6-7 (8-9, 10-11, 12) Men’s 6 (7-8, 9-10, 11-12, 13) Heel Flap Cast on 2 Row 1: Knit across. Row 2: Increase in each stitch. (4 sts) Row 3 – 4 : Knit across. Row 5: Increase in the first stitch. K until one stitch remains. Increase in this stitch. (6 sts) Row 6 – 7: Knit across. Row 8: Increase in the first stitch. K until one stitch remains. Increase in this stitch. (8 sts) Row 9 – 10: Knit across. Row 11: Increase in the first stitch. K until one stitch remains. Increase in this stitch. (10 sts) Row 12 – 13: Knit across. Row 14: Increase in the first stitch. K until one stitch remains. Increase in this stitch. (12 sts) Row 15 – 16: Knit across. PLEASE NOTE: The following rows are for sizes Women’s 10, 11 and 12 and Men’s sizes 9, 10, 11, 12 and 13 ONLY: Next row: Increase in the first stitch. K until one stitch remains. Increase in this stitch (14 sts) Next 2 rows: Knit across. Continue the pattern for all sizes. Next row: Cast on 16 stitches. (Yes, you already have 12 (12, 14, 14, 14) stitches on your needle. After casting on, you’ll have 28 (28, 30, 30, 30) sts on your needle). The following is worked over the stitches you just cast on and the stitches from the heel. P4 *K3 P1* Repeat from * to * 2 times more. K12 (12, 14, 14, 14). As you worked those stitches, your work was transferred onto the other needle. Cast on another 16 sts onto this needle. (You now have 44 (44, 46, 46, 46 sts) on your needle) ♥ Next row: Knit across. Next row: P4 *K3 P1* Repeat from * to * 2 times more. K12 (12, 14, 14, 14). ◘ P1 K3 ◘ Repeat from ◘ to ◘ 2 times more. P4. ♥ Repeat from ♥ to ♥ 11 (12, 13, 14, 15) times more for 24, (26, 28, 30, 32) rows total. Shaping Toe Next row: K2tog K to the last 2 sts K2tog. (42 (42, 44, 44, 44) sts) Next row: P3 *K3 P1* Repeat from * to * 2 times more. K12 (12, 14, 14, 14). ◘ P1 K3 ◘ Repeat from ◘ to ◘ 2 timesmore. P3. Next row: K2tog K to the last 2 sts K2tog. (40 (40, 42, 42, 42) sts) Next row: P2 *K3 P1* Repeat from * to * 2 times more. K12 (12, 14, 14, 14). ◘ P1 K3 ◘ Repeat from ◘ to ◘ 2 timesmore. P2. ☺ Next row: Knit across. Next row: P2 *K3 P1* Repeat from * to * 2 times more. K12 (12, 14, 14, 14). ◘ P1 K3 ◘ Repeat from ◘ to ◘ 2 timesmore. P2. ☺ Repeat from ☺ to ☺ 12 (13, 14, 15, 16) times more for 26 (28, 30, 32, 34) rows total. End Toe Next row: K2tog 10 (10, 11, 11, 11) times. K1 K2tog to last 3 sts. K1 K2tog. Next row: P1 K2 *P1 K1* Repeat from * to * once P1 K6 (6, 7, 7, 7) *P1 K1* Repeat from * to * 2 time more. P1. Next row: K1 K2tog 4 (4, 5, 5, 5) times. K1 (1, 0, 0, 0) times. K2tog until last st. K1 Next row: P1 K1 P3 K3 P4. Break yarn Read more
Read more
Knitted Slippers for Men and Women – FREE Knitting Pattern
These slippers are a perfect blend of comfort, style, and simplicity! Whether you’re a knitting novice or a seasoned pro, this pattern is designed to be approachable and fun for everyone. If you’re more experienced, you’ll find that these slippers practically knit themselves, coming together in no time. For beginners, it’s a wonderful way to build confidence while creating something cozy and practical. The beauty of these slippers lies in their simplicity. The stitches and techniques are basic, but the finished product looks effortlessly elegant. As long as you know how to cast on, knit, purl, K2tog (knit two together), and increase (by knitting two stitches in one), you’ve got everything you need to bring these slippers to life. Don’t worry if you’re still working on perfecting these skills—this project is forgiving and a fantastic way to practice. Plus, there’s nothing quite like the satisfaction of slipping your feet into something handmade by you. So, grab your needles and yarn, and let’s knit up some cozy magic! If you would prefer a PDF printable version of the pattern, you can download it for a small fee from a number of places. In particular, my site here – Knitted Slippers for Men and Women with a Plaid Pattern. You can also get it at a number of other online ebook retailers such as Buy Me A Coffee, Ravelry, LoveCrafts, Creative Fabrica and my Etsy Shop. The Kindle and Paperback version is also on Amazon. If you enjoy this pattern and my other free online knitting patterns, please consider making a small donation or helping me out by visiting my Help Support My Work page. If that’s not possible, that’s totally fine too! Even sharing this page on your social media helps me out immensely. You can use those buttons below to do so easily. Happy knitting! Things You Need Worsted weight yarn Any standard ball of yarn (283 g/10 oz, 471 meters/515 yards) will do. 4 mm (Size 6 US) single pointed knitting needles Cable needle Tapestry needle to sew seams and work in ends Gauge With size 4 mm (US size 6) needles or whatever size you need to obtain the correct number of stitches and rows. Be sure to check your gauge otherwise the sizing won’t be correct. In stockinette 4” = 20 sts 4” = 30 rows Sizes (are written as such) Women’s 6-7 (8-9, 10-11, 12-13) Men’s 5-6 (7-8, 9-10, 11-12) Heel Flap Cast on 2 sts Row 1-3: Knit across. Row 4: K2 in each st (4 sts). This is also known as INC. See the Abbreviations section for help and a video link. Row 5-7: Knit across. Row 8: K2 in the first st. Knit across to the last st. K2 in the last stitch. (6 sts) Row 9-11: Knit across. Row 12: K2 in the first st. Knit across to the last st. K2 in the last stitch. (8 sts) Row13 -15: Knit across. Row 16: K2 in the first st. Knit across to the last st. K2 in the last stitch. (10 sts) Row 17-19: Knit across. Row 20: K2 in the first st. Knit across to the last st. K2 in the last stitch. (12 sts) Row 21-23: Knit across. Row 24: K2 in the first st. Knit across to the last st. K2 in the last stitch. (14 sts) Row 25-27: Knit across. Row 28: K2 in the first st. Knit across to the last st. K2 in the last stitch. (16 sts) Row 29-30: Knit across. Forming the Foot Row 31: Knit across. Cast on 15 sts. (31 sts) Row 32: K4 P1 K2 P3 K2 P3 K16 Cast on 15 (46 sts) Row 33: K5 P2 K3 P2 K3 P1 K14 P1 K3 P2 K3 P2 K5 Row 34: K4 P1 K2 P3 K2 P3 K16 P3 K2 P3 K2 P1 K4 Row 35: Repeat row 33. Row 36: K4 P3 K3 P2 K22 P2 K3 P3 K4 Row 37: K7 P3 K2 P4 K14 P4 K2 P3 K7 Row 38: Repeat row 36 Row 39: Repeat row 37 * Row 40: K4 P1 K2 P3 K2 P3 K16 P3 K2 P3 K2 P1 K4 Row 41: K5 P2 K3 P2 K3 P1 K14 P1 K3 P2 K3 P2 K5 Row 42: Repeat row 40 Row 43: Repeat row 41 Row 44: K4 P3 K3 P2 K22 P2 K3 P3 K4 Row 45: K7 P3 K2 P4 K14 P4 K2 P3 K7 Row 46: Repeat row 44 Row 47: Repeat row 45 * Repeat from * to * 1 (2, 2, 3) more times. More of My Stuff On Etsy Shaping Toe Next row: K2tog K2 P1 K2 P3 K2 P3 K16 P3 K2 P3 K2 P1 K2 K2tog (44 sts) Next row: K4 P2 K3 P2 K3 P1 K14 P1 K3 P2 K3 P2 K4 Next row: K2tog K1 P1 K2 P3 K2 P3 K16 P3 K2 P3 K2 P1 K1 K2tog (42 sts) Next row: K3 P2 K3 P2 K3 P1 K14 P1 K3 P2 K3 P2 K3 ❤ Next row: K2 P3 K3 P2 K22 P2 K3 P3 K2 ❀ Next row: K5 P3 K2 P4 K14 P4 K2 P3 K5 Next row: Repeat row marked with ❤ Next row: Repeat row marked with ❀ ✪ ✬ Next row: K2 P1 K2 P3 K2 P3 K16 P3 K2 P3 K2 P1 K2 ❈ Next row: K3 P2 K3 P2 K3 P1 K14 P1 K3 P2 K3 P2 K3 Next row: Repeat row marked with ✬ Next row: Repeat row marked with ❈ ❤ Next row: K2 P3 K3 P2 K22 P2 K3 P3 K2 ❀ Next row: K5 P3 K2 P4 K14 P4 K2 P3 K5 Next row: Repeat row marked with ❤ Next row: Repeat row marked with ❀ ✪ Repeat from ✪ to ✪ once. End Toe For women’s size 6-7 and 10-11 ONLY and men’s sizes 5-6 and 9-10 ONLY Do not knit the following 4 rows for the other sizes! Next row: Knit across. ☺ Next row: K13 P1 K14 P1 K13 Next row: Knit across. Next row: Repeat row marked with ☺ Knit the following rows for ALL sizes. Next row: K2tog. Knit to last 2 sts. K2tog. (40 sts) Next row: K12 P1 K14 P1 K12 Next row: K2tog. Knit to last 2 sts. K2tog. (38 sts) Next row: K11 P1 K14 P1 K11 Next row: K2tog across. (19 sts) Next row: Knit across. Next row: K2tog across. K last st. (10 sts) Next row: Knit across. Draw yarn through loops. Make another slipper to match. Flip up the heel flap triangle and sew the edges of the triangle to Read more
Read more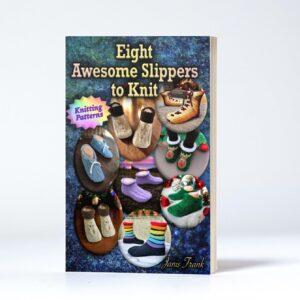
Eight Awesome Slippers to Knit
Knit slippers for adults and children with this collection of 8 different slipper styles.
Read more
Knitted Deer Slippers with a Cuff – FREE Knitting Pattern
I’ve always wanted to design a pair of slippers that had a bit more character and substance—something that not only looks good but fits snugly and keeps you cozy. The deer motif on top of the foot gives these slippers a rustic charm, while the substantial cuff provides extra warmth and a secure fit. These slippers are great for knitters who are comfortable with basic stitches and ready to dive into something a bit more intricate. This pattern is packed with various cable stitches, so you’ll get plenty of practice with your cable needle. The cables vary—sometimes you’ll be knitting the stitches on the cable needle, sometimes purling, and the number of stitches will also change. To keep things simple, I explain how to work each cable stitch as you go along, so you won’t need to constantly check the Abbreviations section. This isn’t a beginner pattern, but if you’re familiar with the basics of knitting and feel comfortable using a cable needle, you’ll be able to handle this. I’ve included lots of helpful photos to guide you through the deer motif, so you’ll have plenty of visual aids as you knit. You can download it from a number of places. In particular, you can get it at a number of other online book retailers such as KraftiNook, my Shopify shop, CreativeFabrica and Etsy. It is also available as paperback and as a Kindle book on Amazon. I think that’s enough options to make nearly everyone happy 🥰. If a link isn’t working, I either haven’t formatted it for the distributor or I’m waiting for approval. Another way to avoid ads and pop-ups, get instant, PRINTABLE downloads of this pattern and others, is by becoming a Member on this website. When you become a Website Supporter for $3/month, you’ll gain access to exclusive member only posts. These posts contain one click downloads of the patterns. Simply click the Download & Print button. The PDF will automatically download to your computer or smart device. You can then read it on your device or print it at your leisure. You can download as many patterns as you like for the same $3 each month. You can go to this page to learn more, become a member and support my work… Exclusive Member Area Become a Member Become a Patron on Patreon If you enjoy this pattern and my other free online knitting patterns, please consider making a small donation or helping me out by visiting my Help Support My Work page. If that’s not possible, that’s totally fine too! Even sharing this page on your social media helps me out immensely. You can use the buttons below to do so easily. Happy Knitting! Things You Need 1 ball of worsted weight yarn (average 260 yard, 5 oz or 141 gram ball will be more than enough) 2 sets of size 4 mm (US size 6) single point knitting needles. Stitch holder Cable Needle Tapestry needle to sew in ends. You can also use this handy video tutorial to show you how to work in the ends while knitting these slippers. The embedded video is in the Abbreviations section Gauge With size 4 mm (US size 6) needles or whatever size you need to obtain the correct number of stitches and rows. Be sure to check your gauge otherwise the sizing won’t be correct. In garter stitch 2” = 9 sts 2” = 18 rows Sizes (are written as such) Women’s 6-7 (8-9, 10-11, 12-13) Men’s 5-6 (7-8, 9-10, 11-12) Toe Flap Cast on 14 sts 🦌 Row 1: P across Row 2: K across 🦌 Repeat from 🦌 to 🦌 2 (3, 4, 5) times more for a total of 6 (8, 10, 12) rows Next Row: P6 K2 P6 Next Row: K5 Pick up the next st with the cable needle. Pull the st FORWARD, P the next st. P the st on the cable needle. Pick up the next st with the cable needle. Pull the st BACK, P the next st. P the st on the cable needle. K5 🌼 Next Row: P5 K4 P5 Next Row: K5 P4 K5 🌼 Repeat from 🌼 to 🌼 one more time Next Row: P4 Pick up the next st with the cable needle. Pull the st BACK, K the next st. K the st on the cable needle. K2 Pick up the next st with the cable needle. Pull the st FORWARD, K the next st. K the st on the cable needle. P4 Next Row: K4 P6 K4 Next Row: P4 K6 P4 Next Row: K4 P6 K4 Next Row: P3 Pick up the next st with the cable needle. Pull the st BACK, K the next 2 sts. K the st on the cable needle. K2 Pick up the next 2 sts with the cable needle. Pull the st FORWARD, K the next st. K the 2 sts on the cable needle. P3 Next Row: K3 P8 K3 Next Row: P3 K2 P1 K1 PM1 K1 P1 K2 P3 (15 sts) Next Row: K3 P2 K1 P1 K1 M1 P1 K1 P2 K3 (16 sts) Next Row: P3 K2tog (When making this stitch, pick up a stitch as if to knit. Twist the stitch and place it back on your non-working needle. Knit the 2 stitches together from right to left.) P1 K1 P2 K1 P1 K2tog (as you normally would left to right) P3 (14 sts) This video shows how to knit the first K2tog. It’s for the leaf but it’s done the same way. https://www.youtube.com/watch?v=Vkf6E35cAK8 Next Row: K5 P1 K2 P1 K5 Next Row: P4 Pick up the next st with the cable needle. Pull the st BACK, K1 in the st BELOW (see photos). P1 the st on the cable needle. K1 P2 K1 P1 K1 in the 2nd st BELOW (knit this st in the knit st you made before the P1 as shown in the photos). P4 (16 sts) Knit in the stitch below Pull up a loop knit-wise like this. After purling the st from the cable needle,knit the next st on your non-working needle The other antler.You already knitted the st so it needs to be2 sts down as Read more
Read more

