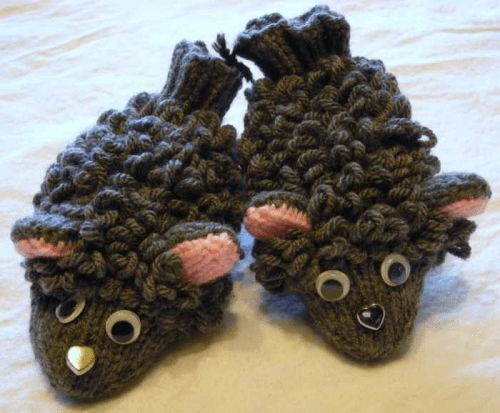
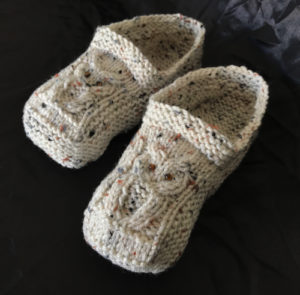
Aren’t these the cutesiest things! This is one of my first patterns I ever wrote and I still make these for anyone who wants a pair.

A few basics before we start…to make these you need to know how to knit on double pointed needles and knit in the round. This is not a beginner project! It’s not tough to make these slippers, but you may need to practice a bit first. There is a FREE sock tutorial on my blog which is an excellent place to learn to make a basic pair of socks so you can master the technique.
To cast on, I cast all the stitches on one needle, then take the first 1/3 of the stitches and slip them onto a free needle, then take the last 1/3 of the stitches and put those on another needle, leaving the remaining 1/3 on the original needle. This method helps me to not twists my stitches. I then start to knit.
If you appreciate the free knitting patterns and how-to videos, please consider helping to off-set the cost of the web hosting for this site. You can go to my Help Support My Work page to make a one time donation or subscribe to give a little every month. Can’t contribute financially? That’s cool too! Sharing this page with everyone you know will help me immensely. You can use the links I’ve provided below.
Not wanting to read this behemoth online and would prefer to download the ad free version this knitting pattern for a small fee/donation? You can read it here – How to Knit Adult Sheep Slippers. You can also download the PDF from my Etsy Shop or from Ravelry.
Things You Need:
Clicking any links below to get everything you need to make these slippers sent right to your door.
Worsted weight yarn (I’m a fan of Red Heart only because of it’s price, it’s easy to find, wears and washes well).
Size 8 US double pointed needles (Size 5.00 mm if you’re Canadian) aka – dpn
Felt ( For ears and optional)
2 small buttons or small pom poms for the nose.
Darning needle to work in ends
Gauge:
Also, check your tension first! With worsted weight yarn, you’ll need a tension of:
10 stitches = 2 inches
14 rows = 2 inches
The abbreviations are standard:
K = Knit
P = Purl
K2 tog = Knit 2 stitches together
P2 tog = Purl 2 stitches together
FS = Fluff Stitch. This is the loop stitch and is described in detail here. There is also a complete how-to video at the end of this pattern. You can watch that here – Fluff or Loop Stitch Video
Depending on how tight you knit you may need larger or smaller needles. If you’ve knitted before you probably have a good idea of what needles you need.
So let’s go…
Cast on 36 stitches
Rounds 1-15: *K2 P2; repeat from * around
Round 16 – 20: Knit
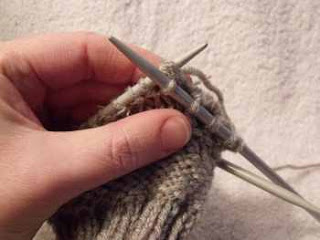
Heel flap:
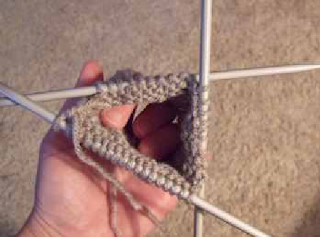
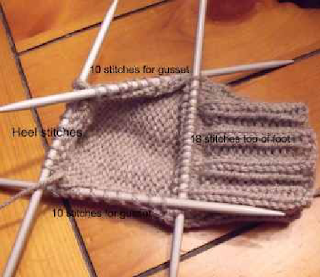
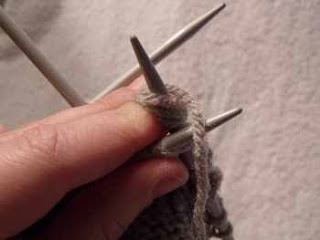
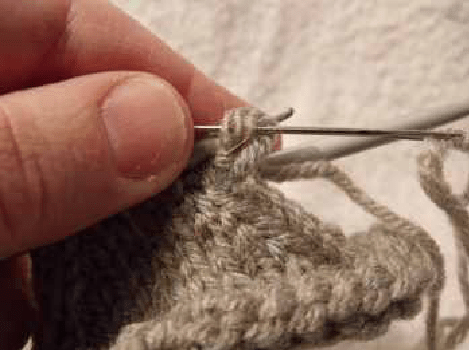
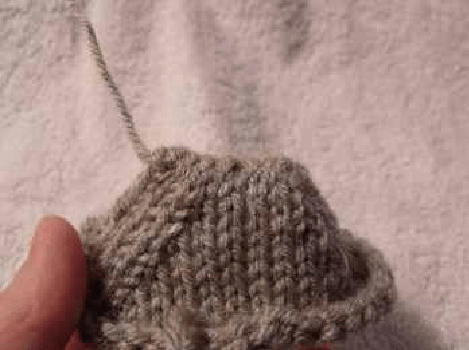
Slip last 9 stitches from round 17 to free needle, knit next 9 stitches from next needle onto needle with the 9 slipped stitches from round 17. You will have four needles and will look like this:
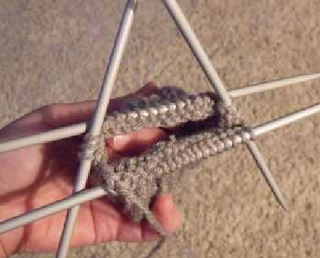
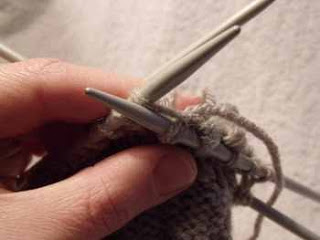
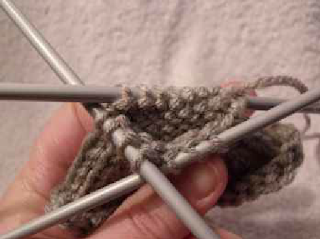
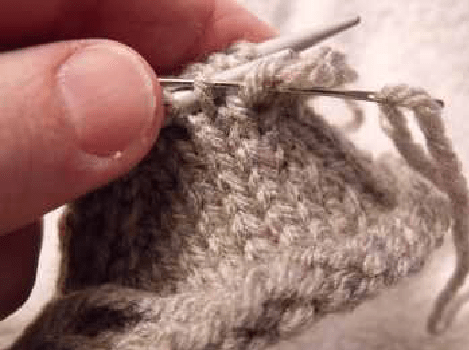
Transfer the three stitches on the two needles onto the back needle. Split these 18 stitches between two needles. It will look like this:
You will work these split 18 stitches later to form the top of the foot.
Turn your work. You are now creating the heel flap from the slipped stitches and will work in rows along the 18 stitches that are on the single needle.
With the wrong side (Purl side) facing you. Purl the row. Turn.
With the right side (Knit side) facing you. Knit the row. Turn.
Repeat stocking knit (Purl one row, Knit one row) until the flap measure approximately 2 1/2 inches ending with a Purl row. Turn.
With right side (Knit side) facing you K8 stitches, K2 tog, K8. Turn. (17 stitches on the needle)
Next row: P8, P2 tog, P1. Leave remaining stitches unworked. Turn.
Next row: K1, K2 tog, K1. Leave remaining stitches unworked. Turn.
Please share this page!
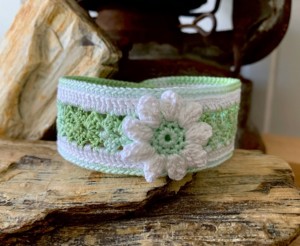
More FREE patterns
Click the pic to read online!!


FREE Knitting Graph Paper for Colorwork Knitting


![]()
![]()


Next row: P2 , P2 tog, P1. Leave remaining stitches unworked. Turn.
Next row: K3, K2 tog, K1. Leave remaining stitches unworked. Turn.
Next row: P4, P2 tog, P1. Leave remaining stitches unworked. Turn.
Next row: K5, K2 tog, K1. Leave remaining stitches unworked. Turn.
Next row: P6, P2 tog, P1. Leave remaining stitches unworked. Turn.
Next row: K7, K2 tog, K1.
You will now start knitting around.
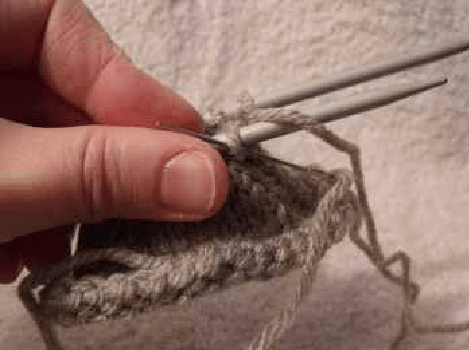
Pick up 10 stitches along heel flap to form the gusset. Transfer the 18 held stitches to one needle. Knit the 18 held stitches. Pick up 10 stitches along heel flap to form gusset.
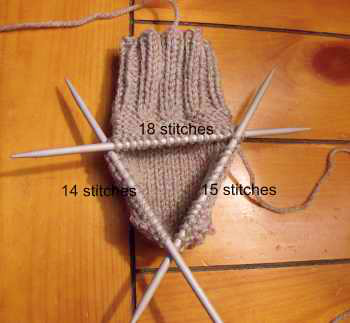
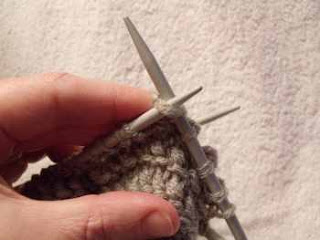
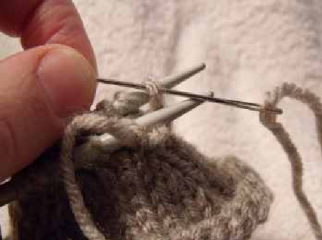
K4 stitches of heel. Slip remaining 5 stitches onto next needle. It will look like this:
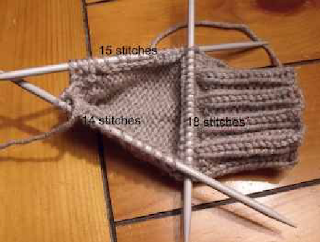
Your needles will hold:
15 stitches side of foot
18 stitches top of foot
14 stitches side of foot
Next round: Knit. Knit another 15 sts until you are at the start of the 18 sts that make up the top of the foot.
Next round: Turn your work inside out!
With wrong side facing you (Purl side). P1, P2tog. P23 P2tog. P1.
Top of foot (over the 18 stitches): P1. FS16
To make the Fluff stitch (FS): *Insert needle into to next stitch as if to KNIT. Wrap the yarn (up
To make the Fluff stitch (FS): Insert needle into to next stitch as if to KNIT. Wrap the yarn (up & over) CLOCKWISE around the needle and the index finger of your LEFT hand TWICE. Leave these loops on your finger until you are finished knitting the entire stitch!
Wrap the yarn ONCE around the needle only.
Pull all 3 loops of yarn through stitch as knitting a regular stitch.
Insert the needle in your LEFT hand through these three loops and transfer these 3 loops onto the LEFT hand needle.
Insert you RIGHT hand needle through these three loops as if to knit.
Insert you RIGHT hand needle through these three loops as if to knit.

The stitch is now completed.
Pattern continued…. P1 in the last remaining stitch from the needle that was holding the 18 stitches that formed the top of the foot.
Next round: P45
Next round: P1, P2 tog, P21, P2 tog, P2, FS16, P1.
Next round: P43
Next round: P1, P2 tog, P19, P2 tog, P2, FS16, P1.
Next round: P41
Next round: P1, P2 tog, P17, P2 tog, P2, FS16, P1.
Next round: P39
Next round: P1, P2 tog, P15, P2 tog, P2, FS16, P1.
Next round: P37
Next round: P1, P2 tog, P13, P2 tog, P2, FS16, P1.
*Next round: P35
Next round: P18, FS16, P1. * Repeat from * to * until measures the length you want less 2 1/2 inches. To measure lay the sock flat and measure from the needle holding the side gusset stitches to the back of the heel.
| Women’s | Men’s | ||
| Sizes (USA) | In Inches | Size (USA) | In Inches |
| 5 | 8 11/16 | 7 | 9 11/16 |
| 5 ½ | 8 13/16 | 7½ | 9 13/16 |
| 6 | 9 | 8 | 10 |
| 6½ | 9 3/16 | 8½ | 10 3/16 |
| 7 | 9 5/16 | 9 | 10 5/16 |
| 7½ | 9 ½ | ||
| 8 | 9 11/16 | ||
| 8½ | 9 13/16 | ||
| 9 | 10 | ||
| 9½ | 10 3/16 | ||
| 10 | 10 5/16 |
Next round: P35
Next round: P17. Flip your work right side out! With Knit side facing.
Toe:
Rounds 1-10: Knit (35 stitches)
Round 11: K1, K2 tog, K11, K2tog, K2, K2tog, K12, K2tog, K1
Round 12: Knit
Round 13: K1, K2 tog, K9, K2tog, K2, K2tog, K10, K2tog, K1
Round 14: Knit
Round 15: K1, K2 tog, K7, K2tog, K2, K2tog, K8, K2tog, K1
Round 16: Knit
Round 17: K1, K2 tog, K5, K2tog, K2, K2tog, K6, K2tog, K1
Round 18: Knit
Round 19: K1, K2 tog, K3, K2tog, K2, K2tog, K4, K2tog, K1
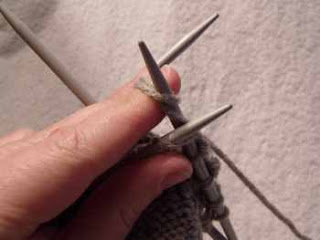
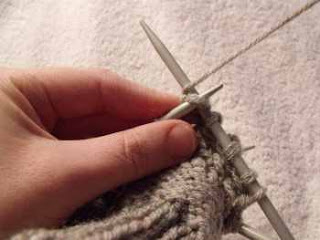
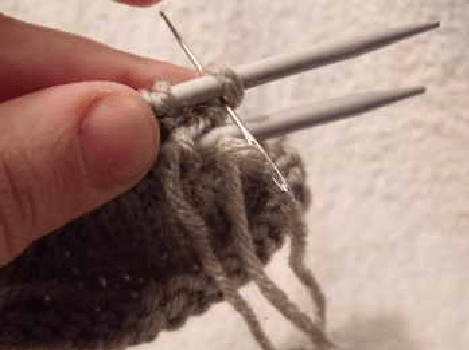
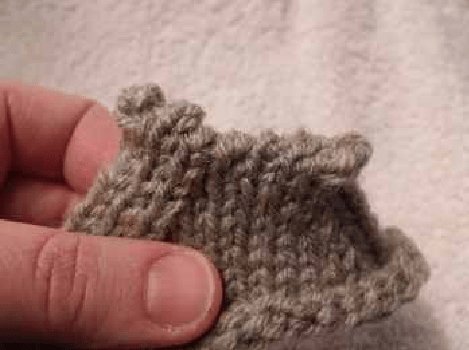
Your needles will look like this:
Transfer stitches onto two needles. 7 stitches and 8 stitches on each needle.
Break yarn leaving enough to graft toe and sew in ends. 12 inches is plenty.
Graft toe:
With a darning needle, insert the needle through the front loop of the first needle as if to PURL.
Insert needle through the stitch on the back needle as shown.
Insert the needle through the back loop of the first stitch AND through the stitch of the next stitch as if to PURL. Drop the first stitch.
Insert the needle through the stitch on the back needle as if to PURL. Drop this stitch.
? Insert the needle through the back loop of the next stitch on the front needle and the front loop of the next stitch as if to PURL. Drop the first stitch.
Insert the needle through the stitch on the back needle as if to PURL. Drop this stitch. ?

Repeat from ? to ? until there are no stitches left on either needle.
Pull the yarn tight.
Toe is now grafted.
Make another slipper to match!
Extra Knitting Tips:
Check your tension first! There’s nothing more disappointing than putting a bunch of effort into a project and then having it turn out to be the wrong size. The gauge of the rows is not so important for this project as you can make it to fit any size foot. The number of stitches per inch is VERY important! Make sure your gauge is correct.
Work in your ends instead of just knotting them off. Knots can make your foot sore when you step on them or if they rub on your toe.
This pattern can make any size slipper up to about a man’s size 9 or a woman’s size 10. If you want a bigger size make sure your increase the heel flap length and pick up more stitches when you make the gusset of the sock.
You don’t have to use googly eyes and pompoms for the face but I like to. I’ve also used buttons and they have also turned out well. I prefer to use Beacon Quick Grip glue to stick on the eyes and noses. It’s water proof and it works. I even tested it in my washing machine and dryer and everything remained in place. It didn’t discolour or become unglued.
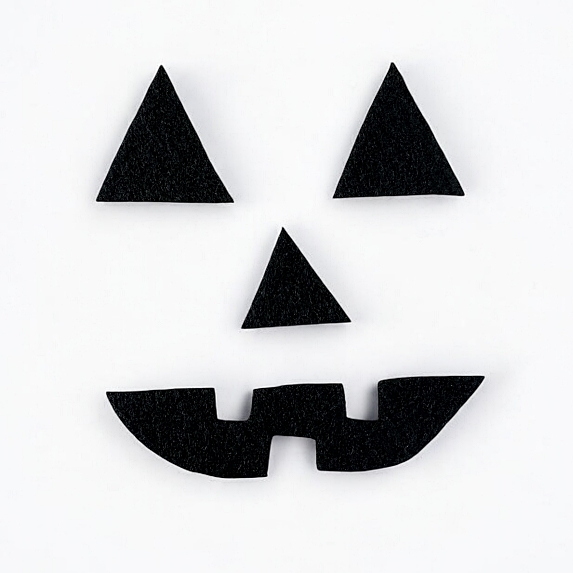
If you would like to make the ears out of felt like I did, make a template from paper first and see if you like the size and how it fits. Cut a second template smaller than the main colour for the inside of the ear. I glued the pieces together and then sewed the ears to the second row in from face. Fiddle around with it to see where you like the placement best.
You can also make knitted ears with a bit of pink yarn, if you have it, or out of the yarn you knitted the slippers with originally. I made triangles and sewed them together. The inside pink was 2 stitches cast on less than the outside white portion. For example, Cast on 12 sts for the white and 10 sts for the pink.
If you have any questions, please feel free to leave a comment or send me your questions through my contact page.