
Are you just learning to knit? Tired of making dishcloths and scarves and want to make something awesome? Here is something that will make you look like a pro when it comes to knitting. A total brag-worthy design that any knitting newbie can make.

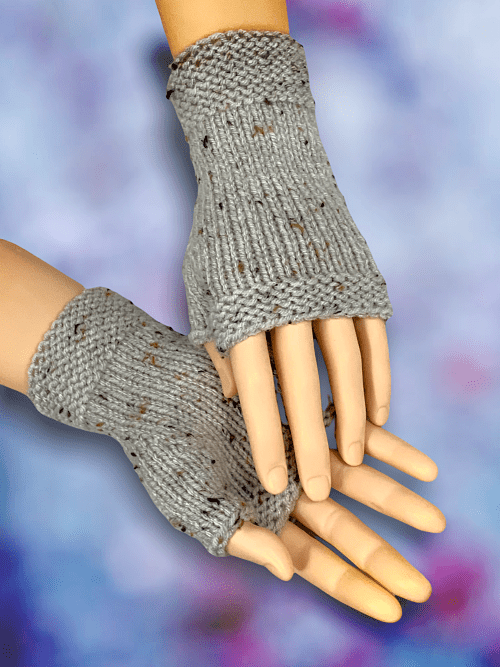
I’ve written a bunch of beginner patterns for slippers, but never for fingerless gloves. It was a common request, but for some reason, I never felt compelled to do so. After a bit of false starts and redesigns, I’ve finally come up with a fingerless glove pattern that I am happy with. I’ve kept the seams to a minimum and placed the seam along the outside of the hand and inside of the thumb. If you’re not a fan of seams my other fingerless gloves and mitts knitted on dpn can be found here – Fingerless Gloves – with OWLS, How to Knit Texting Mittens, How to Knit Fingerless Gloves and How to Knit Flip Mitts.
I’ve also jazzed up this basic design a bit. If you want to knit owl gloves flat on 2 needles just like this pattern is, You can use this link – Easy to Knit Owl Fingerless Gloves to read the free knitting pattern online. I also made another variation of this pattern. This time it’s for a pair with a butterfly on the back of the hand – Butterfly Fingerless Gloves – Easy Knit Flat Fingerless Mitts Pattern. The video how’s you how to make the 🦋 butterfly.
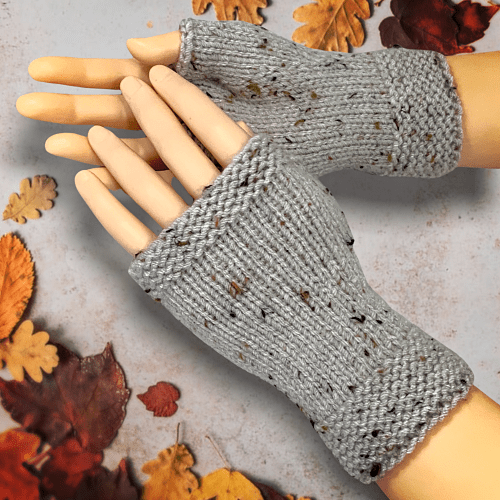


These mitts are knitted completely flat, on 2 needles and are perfect for the beginner. There is use of a stitch holder and picking up those stitches to complete the thumb, but it isn’t difficult. Slide them on to the holder, slide them back on the needle when instructed and knit them like any other set of stitches.
And finally, after much procrastinating, the complete how-to video is done! I even show how to sew up the seams and work in the ends. I know there have been a few of you out there that don’t like how their seams turn out. This is how I make mine flat and even.
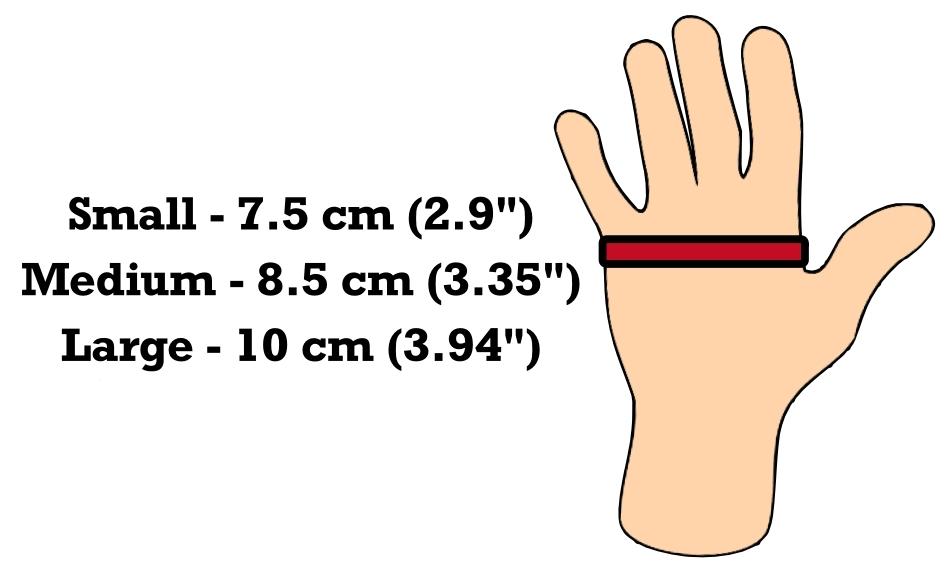
I’ve also written the pattern to fit different sizes – small, medium and large. Once again I’ll use the analogy of what fits my hand. I wear a medium rubber glove and the medium size fits my hand perfectly. I wash dishes and scrub my toilets. I wear gloves when I do. If you never wear rubber or latex gloves, this won’t make any sense to you, I guess. I’m only saying this because I have had complaints about my sizing references. I don’t live in a gloveless kind of world but I’m glad some people do. It always amazes me what some “Karens” feel the need to bitch about. If you want to go to a specific size you can try these links. If I’ve done my code correctly, it should take you to the right point on the webpage:
I’ve made a PDF download for this pattern. I didn’t think it was going to be this long until I wrote it out. I made the decision to write each size and hand out separately to make it even easier for the new knitters out there who want to give this pattern a go. And btw, you can totally do it! To get the downloadable pattern for a small fee you can get it in my Etsy Shop, Ravelry, LoveCrafts, Buy Me A Coffee and from this website – KweenBee.com.
If you would prefer to order a printed paperback version from Amazon, you can now do so! Shipping is free if you are an Amazon Prime member. Make sure you select the country you are in to take advantage of the free shipping. Click the following link for your country – United States, United Kingdom, Canada, and Australia. Available in English only.
Another way to avoid ads and pop-ups, get instant, PRINTABLE downloads of this pattern and others, is by becoming a Member. When you become a Website Supporter at $4/month, you’ll gain access to exclusive member only posts on Buy Me A Coffee. You can download as many patterns as you like for the same $4 each month. You can go to this page to learn more, become a member and support my work… Exclusive Member Area
Love the free patterns? You can say thanks in a couple of ways. You can read more about how you can Support My Work by clicking that link or make a small donation and Buy Me a Coffee. 👈🏼 That is a website where you can make a one time donation as a thanks. If you don’t want or are unable to make a financial donation, sharing this pattern through social media is a great way to help out too! The links below are a super easy way for you to do so.
Gauge
This is important to follow for correct sizing.
2″ (5 cm) = 10 sts
2″ (5 cm) – 16 rows
If You Need Help with the M1 or P1
Scroll down to the end of the page to watch quick how-to videos showing how to do these simple stitches. There’s a video showing how to use a stitch holder too!
Things You Need:
Worsted weight yarn – one regular ball will be more than enough
Size 6 US (4 mm) knitting needles
Stitch holder – It looks like a big safety pin
Tapestry needle
Small
Right Hand
Cast on 31
Rows 1-14: Knit across
Row 15: Knit across
Row 16: Purl across
Row 17: Knit across
Row 18: Purl across
Row 19: Knit across
Row 20: Purl across
Row 21: Knit across
Row 22: Purl across
Row 23: K18 M1 K1 M1 K12
Row 24: Purl across
Row 25: Knit across
Row 26: P12 PM1 P3 PM1 P18
Row 27: Knit across
Row 28: Purl across
Please share this page!
More FREE patterns
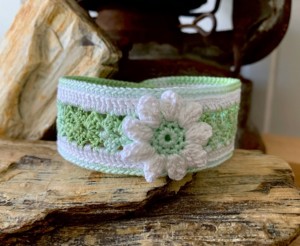
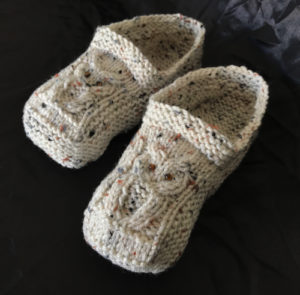
Click the pic to read online!!


![]()
![]()


FREE Knitting Graph Paper for Colorwork Knitting


Row 29: K18 M1 K5 M1 K12
Row 30: Purl across
Row 31: Knit across
Row 32: P12 PM1 P7 PM1 P18
Row 33: Knit across
Row 34: Purl across
Row 35: K18 M1 K9 M1 K12
Row 36: Purl across
Row 37: K18. Slip the next 11 stitches onto a stitch holder. K12.
Row 38: Purl across
Row 39: Knit across
Row 40: Purl across
Row 41-48: Knit across
Cast off.
Making the Thumb
Pick up the 11 stitches on the stitch holder
Row 1: Knit across
Row 2: Purl across
Row 3: Knit across
Row 4: Purl across
Cast off.
Sew seam along the side of the glove and the inside of the thumb. Work in ends.
Left Hand
Cast on 31
Rows 1-14: Knit across
Row 15: Knit across
Row 16: Purl across
Row 17: Knit across
Row 18: Purl across
Row 19: Knit across
Row 20: Purl across
Row 21: Knit across
Row 22: Purl across
Row 23: K12 M1 K1 M1 K18
Row 24: Purl across
Row 25: Knit across
Row 26: P18 PM1 P3 PM1 P12
Row 27: Knit across
Row 28: Purl across
Row 29: K12 M1 K5 M1 K18
Row 30: Purl across
Row 31: Knit across
Row 32: P18 PM1 P7 PM1 P12
Row 33: Knit across
Row 34: Purl across
Row 35: K12 M1 K9 M1 K18
Row 36: Purl across
Row 37: K12. Slip the next 11 stitches onto a stitch holder. K18.
Row 38: Purl across
Row 39: Knit across
Row 40: Purl across
Row 41-48: Knit across
Cast off.
Making the Thumb
Pick up the 11 stitches on the stitch holder
Row 1: Knit across
Row 2: Purl across
Row 3: Knit across
Row 4: Purl across
Cast off.
Sew seam along the side of the glove and the inside of the thumb. Work in ends.
Now that you know you can make fingerless gloves, why not try a winter hat or beanie? Or if you’re like me, you call it a toque. 😊 You can watch the how to video below. and read the pattern for FREE right here on the website too! Just click the button…
Medium
Right Hand
Cast on 33
Rows 1-14: Knit across
Row 15: Knit across
Row 16: Purl across
Row 17: Knit across
Row 18: Purl across
Row 19: Knit across
Row 20: Purl across
Row 21: Knit across
Row 22: Purl across
Row 23: K19 M1 K1 M1 K13
Row 24: Purl across
Row 25: Knit across
Row 26: P13 PM1 P3 PM1 P19
Row 27: Knit across
Row 28: Purl across
Row 29: K19 M1 K5 M1 K13
Row 30: Purl across
Row 31: Knit across
Row 32: P13 PM1 P7 PM1 P19
Row 33: Knit across
Row 34: Purl across
Row 35: K19 M1 K9 M1 K13
Row 36: Purl across
Row 37: Knit across
Row 38: P13 PM1 P11 PM1 P19
Row 39: Knit across
Row 40: Purl across
Row 41: K19. Slip the next 13 stitches onto a stitch holder. K13.
Row 42: Purl across
Row 43: Knit across
Row 44: Purl across
Row 45-52: Knit across
Cast off.
Making the Thumb
Pick up the 13 stitches on the stitch holder
Row 1: Knit across
Row 2: Purl across
Row 3: Knit across
Row 4: Purl across
Cast off.
Sew seam along the side of the glove and the inside of the thumb. Work in ends.
More of my Stuff on Etsy
You can make a widget like this for your blog or website, too.
Instructions are on my website here: How to Display Etsy Items on Your Website
Left Hand
Cast on 33
Rows 1-14: Knit across
Row 15: Knit across
Row 16: Purl across
Row 17: Knit across
Row 18: Purl across
Row 19: Knit across
Row 20: Purl across
Row 21: Knit across
Row 22: Purl across
Row 23: K13 M1 K1 M1 K19
Row 24: Purl across
Row 25: Knit across
Row 26: P19 PM1 P3 PM1 P13
Row 27: Knit across
Row 28: Purl across
Row 29: K13 M1 K5 M1 K19
Row 30: Purl across
Row 31: Knit across
Row 32: P19 PM1 P7 PM1 P13
Row 33: Knit across
Row 34: Purl across
Row 35: K13 M1 K9 M1 K19
Row 36: Purl across
Row 37: Knit across
Row 38: P19 PM1 P11 PM1 P13
Row 39: Knit across
Row 40: Purl across
Row 41: K13. Slip the next 13 stitches onto a stitch holder. K19.
Row 42: Purl across
Row 43: Knit across
Row 44: Purl across
Row 45-52: Knit across
Cast off.
Making the Thumb
Pick up the 13 stitches on the stitch holder
Row 1: Knit across
Row 2: Purl across
Row 3: Knit across
Row 4: Purl across
Cast off.
Sew seam along the side of the glove and the inside of the thumb. Work in ends.
Large
Right Hand
Cast on 35
Rows 1-14: Knit across
Row 15: Knit across
Row 16: Purl across
Row 17: Knit across
Row 18: Purl across
Row 19: Knit across
Row 20: Purl across
Row 21: Knit across
Row 22: Purl across
Row 23: K20 M1 K1 M1 K14
Row 24: Purl across
Row 25: Knit across
Row 26: P14 PM1 P3 PM1 P20
Row 27: Knit across
Row 28: Purl across
Row 29: K20 M1 K5 M1 K14
Row 30: Purl across
Row 31: Knit across
Row 32: P14 PM1 P7 PM1 P20
Row 33: Knit across
Row 34: Purl across
Row 35: K20 M1 K9 M1 K14
Row 36: Purl across
Row 37: Knit across
Row 38: P14 PM1 P11 PM1 P20
Row 39: Knit across
Row 40: Purl across
Row 41: K20 M1 13 M1 K14
Row 42: Purl across
Row 43: K20. Slip the next 15 stitches onto a stitch holder. K14.
Row 44: Purl across
Row 45: Knit across
Row 46: Purl across
Row 47-54: Knit across
Cast off.
Making the Thumb
Pick up the 15 stitches on the stitch holder
Row 1: Knit across
Row 2: Purl across
Row 3: Knit across
Row 4: Purl across
Cast off.
Sew seam along the side of the glove and the inside of the thumb. Work in ends.
Left Hand
Cast on 35
Rows 1-14: Knit across
Row 15: Knit across
Row 16: Purl across
Row 17: Knit across
Row 18: Purl across
Row 19: Knit across
Row 20: Purl across
Row 21: Knit across
Row 22: Purl across
Row 23: K14 M1 K1 M1 K20
Row 24: Purl across
Row 25: Knit across
Row 26: P20 PM1 P3 PM1 P14
Row 27: Knit across
Row 28: Purl across
Row 29: K14 M1 K5 M1 K20
Row 30: Purl across
Row 31: Knit across
Row 32: P20 PM1 P7 PM1 P14
Row 33: Knit across
Row 34: Purl across
Row 35: K14 M1 K9 M1 K20
Row 36: Purl across
Row 37: Knit across
Row 38: P20 PM1 P11 PM1 P14
Row 39: Knit across
Row 40: Purl across
Row 41: K14 M1 13 M1 K20
Row 42: Purl across
Row 43: K14. Slip the next 15 stitches onto a stitch holder. K20.
Row 44: Purl across
Row 45: Knit across
Row 46: Purl across
Row 47-54: Knit across
Cast off.
Making the Thumb
Pick up the 15 stitches on the stitch holder
Row 1: Knit across
Row 2: Purl across
Row 3: Knit across
Row 4: Purl across
Cast off.
Sew seam along the side of the glove and the inside of the thumb. Work in ends.
Hints and Tips
Make your seams as narrow as possible when sewing them. The bulkier the seam the more noticeable and possibly uncomfortable for the wearer.
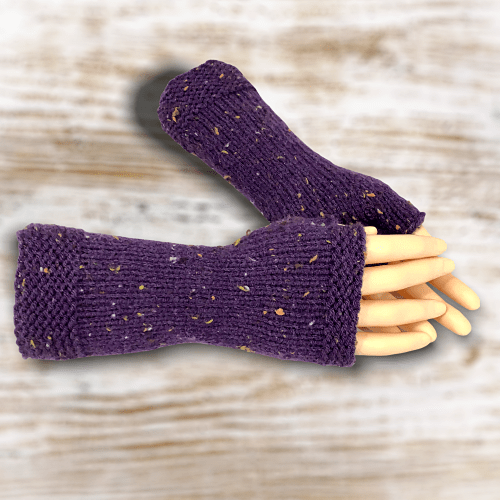
The purple fingerless mitts have 60 rows total between the garter stitch cuff and the start of the thumb gusset (Row 15 – 22). I don’t think I would increase much further than that. The glove itself isn’t very stretchy and won’t fit further up the forearm. Too much bunching may also make the glove push its way further down and off the fingers.
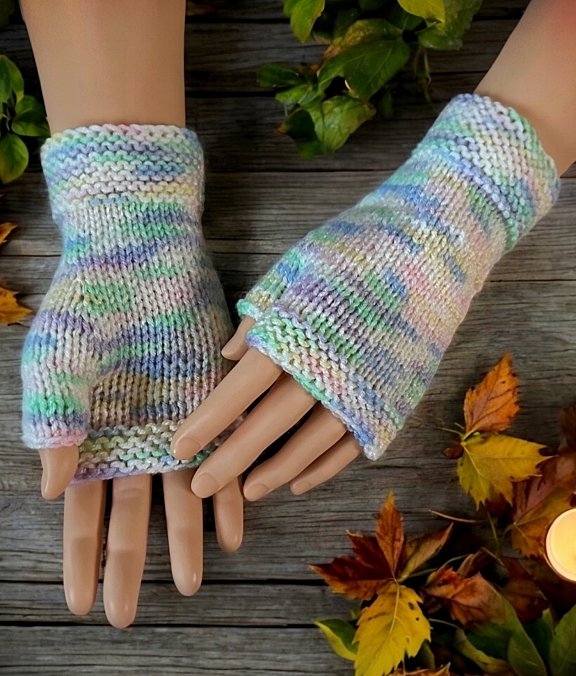
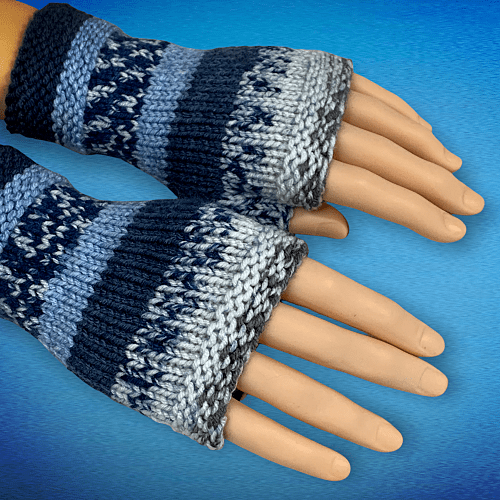
I used some self-striping yarn to make these. Not all striping yarn is created equal. Some of them are designed to stripe for larger projects and don’t really work for smaller projects like this. Though with saying that, you could always cut the yarn and start a new colour where you choose. You will have more ends to deal with, but I have a post that shows you How to Work in the Ends While Knitting. ?? This link will take you right there.
Abbreviations
K – knit
P – purl
M1 – Make one (knit wise). Increase one stitch between the stitches. Pick up the yarn between the stitches. Twist slightly. Place it on your non-working needle. Knit the stitch. Watch this video below to see how.
PM1- Make one (purl wise). Pick up the stitch as you did for M1, but purl the stitch as you regularly would. You can watch the video below.
And for those of you who are unsure of how to use a stitch holder, I made a quick little video that shows you how to do it without cutting the yarn. It’s a time saver for sure. No one likes working in ends if they can avoid it.


