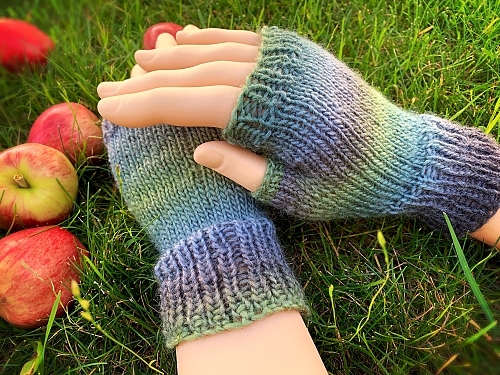
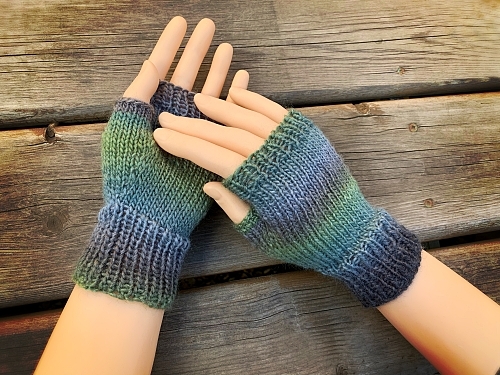
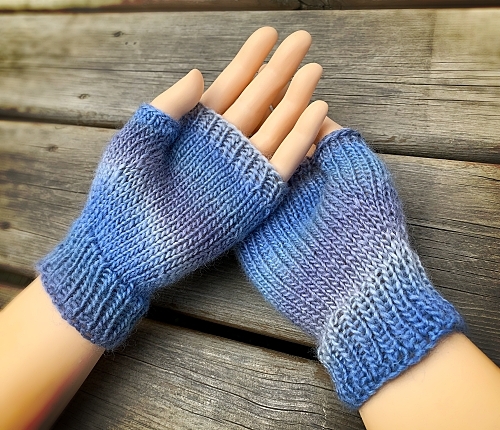
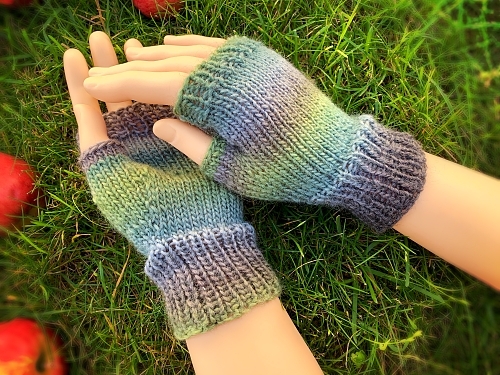
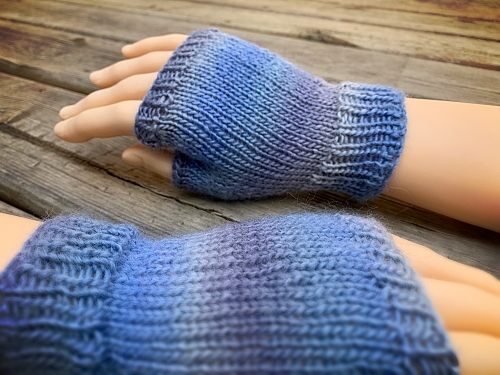
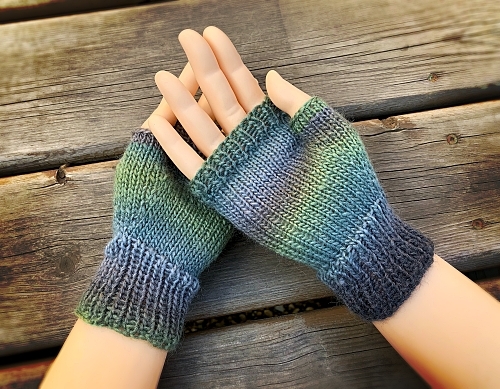
I’m not sure if this happens to anyone else, but I found some fantastic yarn on clearance that I absolutely had to have. Of course, I had no idea what to do with it. Then I got on my fingerless glove kick. I have written other patterns in the past such as my Owl Fingerless Gloves, Flip Mitts, and Texting Mitts, but they were all made with standard worsted weight yarn. The yarn I couldn’t leave behind was light weight; 3 as by North American terminology. So, a redesign of my gloves was in order! I absolutely love that these are a lighter, more delicate version of my previous patterns. AND I can use colour changing yarn and it works! If this is your first time using one of my patterns, I kinda got a thing for shaded yarns…just sayin’.

And if you were looking to buy a pair of these beauties but accidentally wound up here, click this link Hand Knit Fingerless Gloves and you can purchase a finished pair from my website. Or if you prefer to order through Etsy, you can get them there too – Fingerless Gloves by KweenBee on Etsy.

Like my other fingerless mitts, these are knitted on double point needles, also known as DPN. Though this sounds intimidating, it really is very simple. This is definitely not a beginner’s knitting project, but knitting in the round is the same as knitting flat. Only difference is you don’t flip your work back in forth; it’s done a continuous circle.
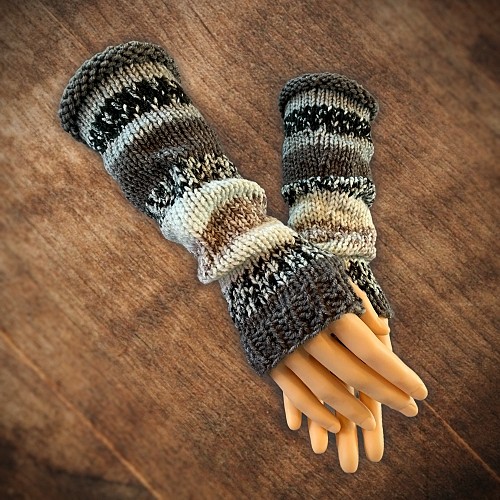
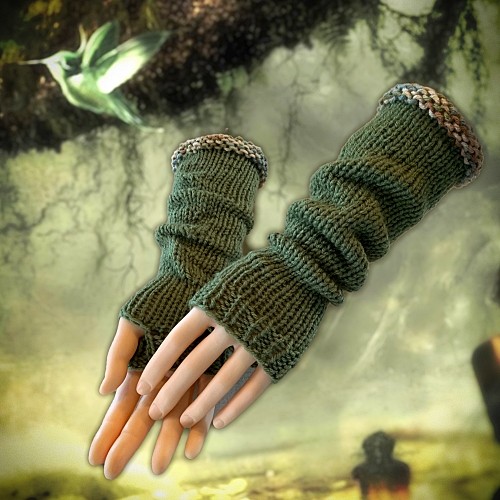
If you are looking to make a pair of longer fingerless mitts, I can help you with that too! The striped fingerless glove pattern is basically the same as this one, but I’ve worked out the decreases to make them go all the way up to the elbow. You can click this link (or the photos) to read the pattern online.
And they don’t need to be striped. For the pair in the photo I used self-striping yarn so no ends to work in. But you can also make a more plain style like the green ones.
The sizing for mittens, like socks or slippers, is somewhat general. The small size will fit someone with a smaller hand. Think a younger teenager. A medium is an average lady’s hand. I’m a medium when it comes to rubber gloves and I designed the medium mitt to fit my hand. Large is for a larger size hand. Each size is written out in full as the row and stitch counts differ for each.
Enjoying the free patterns and would like to Help Support My Work, GREAT! Please give what you can and like, share and follow me on social media. You can use the links above to easily do so.
The PDF is also available for your viewing pleasure. If you are tired of the ad supported version, you can download the PDF for a small fee from my website – How to Knit Fingerless Gloves, Ravelry or Etsy. All are the same price no matter where you get it from.
Another way to get instant, PRINTABLE downloads of this pattern and more, is by becoming a Member on this website. When you become a Website Supporter for $3/month, you’ll gain access to exclusive member only posts. These posts contain one click downloads of the patterns. Simply click the Download & Print button. The PDF will automatically download to your computer or smart device. You can then read it on your device or print it at your leisure. You can download as many patterns as you like for the same $3 each month. You can go to this page to learn more, become a member and support my work… Exclusive Member Area
Things you need
Yarn (a standard ball of light weight yarn (3 weight) will be more than enough)
Size 4 mm (US size 6) double pointed needles (or whatever size needles you need to get the correct gauge).
Gauge
11 stitches = 2 inches
17 rows = 2 inches
Small
The Mitt
Cast on 32 sts (loosely). Divide these evenly as possible on three of the double pointed needles.
Round 1 – 12: K1, P1 (Creates knit 1 purl 1 ribbing).
Round 13 – 15: Knit
Round 16: K1, M1, K1, M1, K30.
Round 17 – 18: Knit
Round 19: K1, M1, K3, M1, K30.
Round 20 – 21: Knit
Round 22: K1, M1, K5, M1, K30.
Round 23 – 24: Knit
Round 25: K1, M1, K7, M1, K30.
Round 26 – 27: Knit
Round 28: K1, M1, K9, M1, K30.
Round 29 – 30: Knit
Round 31: K1, M1, K11, M1, K30.
Round 32 – 33: Knit
Round 34: K1, place next 13 sts onto the stitch holder. K30.
Round 35 – 42: K around.
Round 43 – 47: K2tog, P1, *K1, P1* Repeat from * to * around.
Bind off loosely.
The Thumb
Worked over the 13 sts on the stitch holder.
Please share this page!
More FREE patterns
Click the pic to read online!!


FREE Knitting Graph Paper for Colorwork Knitting


![]()
![]()


Pick up and divided the 13 sts on the stitch holder between the 3 double pointed needles. One of the needles will have more sts than the others.
Round 1 – 3: Knit
Bind off loosely.
Medium
The Mitt
Cast on 36 sts (loosely). Divide these evenly as possible on three of the double pointed needles.
Round 1 – 15: K1, P1 (Creates knit 1, purl 1 ribbing).
Round 16 – 18: Knit
Round 19: K1, M1, K1, M1, K34.
Round 20 – 21: Knit
Round 22: K1, M1, K3, M1, K34.
Round 23 – 24: Knit
Round 25: K1, M1, K5, M1, K34.
Round 26 – 27: Knit
Round 28: K1, M1, K7, M1, K34.
Round 29 – 30: Knit
Round 31: K1, M1, K9, M1, K34.
Round 32 – 33: Knit
Round 34: K1, M1, K11, M1, K34.
Round 35 – 36: Knit
Round 37: K1, M1, K13, M1,K34.
Round 38 – 39: Knit
Round 40: K1, place next 15 sts onto the stitch holder. K34.
Round 41 – 49: K around.
Round 50 – 54: K2 tog. P1, *K1, P1* Repeat from * to * around.
Bind off loosely.
The Thumb
Worked over the 15 sts on the stitch holder.
Pick up and divided the 15 sts on the stitch holder between the 3 double pointed needles. One of the needles will have more sts than the others.
Round 1 – 3: Knit
Bind off loosely.
Large
The Mitt
Cast on 40 sts (loosely). Divide these evenly as possible on three of the double pointed needles.
Round 1 – 18: K1, P1 (Creates knit 1, purl 1 ribbing).
Round 19 – 20: Knit
Round 21: K1, M1, K1, M1, K38.
Round 22 – 23: Knit
Round 24: K1, M1, K3, M1, K38.
Round 25 – 26: Knit
Round 27: K1, M1, K5, M1, K38.
Round 28 – 29: Knit
Round 30: K1, M1, K7, M1, K38.
Round 31 – 32: Knit
Round 33: K1, M1, K9, M1, K38.
Round 34 – 35: Knit
Round 36: K1, M1, K11, M1, K38.
Round 37 – 38: Knit
Round 39: K1, M1, K13, M1, K38.
Round 40 – 41: Knit
Round 42: K1, M1, K15, M1,K38.
Round 43 – 44: Knit
Round 45: K1, place next 17 sts onto the stitch holder. K38.
Round 46 – 57: K around.
Round 58 – 63: K2tog, P1, *K1, P1* Repeat from * to * around.
Bind off loosely.
The Thumb
Worked over the 17 sts on the stitch holder.
Pick up and divided the 17 sts on the stitch holder between the 3 double pointed needles. One of the needles will have more sts than the others.
Round 1 – 5: Knit
Bind off loosely.
More of my stuff on Etsy
You can make a widget like this for your blog or website, too.
Instructions are on my website here: How to Display Etsy Items on Your Website
Abbreviations
K – Knit
P – Purl
M1 – Make 1 stitch. Pull up a loop between the stitches and knit.
K2tog – knit 2 together
sts – stitches
st – stitch
Helpful Hints
You don’t need a stitch holder. Even a piece of yarn will work.
Customise this pattern as you see fit. If you want the cuff longer, do so. If you need a longer thumb, add more rows. As long as your stitch counts stay the same, it should work out fine.
Some folks like to felt their mittens as it can help stop the wind from blowing through the stitches. Be careful though because felting shrinks your work! It’s hard to guess how much shrinkage will happen as there are so many variables involved, from temperature of the water to how much agitation occurs during the felting process. You can give it a try but make sure you use PURE wool! Anything that is a blend won’t felt properly. My last attempt at felting a pair of mittens for myself resulted in my young son getting a new pair of mitts. At least they didn’t go to waste :-/
If you have any questions or comments you can reach me here.
Like always, you can sell or give away whatever you make from my patterns. Don’t be a douche and try to pass this pattern off as your own in any way or form (physical or digital). See how handy fingerless gloves can be ?


I’m working on your owl fingerless gloves pattern, thank you so much for sharing. I’m a bit confused. I’m not sure if there’s a rule for knitting in the round that needle 1 stays needle 1? I placed my marker so I know where I started, the pattern calls for increases. I noticed that the pattern will say knit 18 to the end and then a new row will start but I’m not done with the 4th needle. Do I just start following the directions after the 18 stitches as indicated even though it’s the 4th needle and not where I originally started? I was thinking that the next row would start when I got to the first needle again
Needle 1 does remain needle one all the time, though that’s not what your problem is. You’re picking up extra stitches somewhere. I have no way of knowing why or where. Could be an extra overlap of the yarn on the start of a needle you’re thinking is a stitch? The stitch counts are correct. You should have 18 stitches at the end of the row.
One fix if you’re getting too many stitches is to just knit to the end of the last row, but be consistent as to how many extra stitches there are when making both mitts.
Why is the downloaded version (which I was able to see for only a few minutes) different from the one above?
I’m very confused by what you are asking. How is the pattern different from the downloaded version? I literally copy and pasted one version from the other.
I’m not sure what you mean by “see for only a few minutes”. Did your download not work after you purchased it?? If it didn’t download fully that may be why. Once you pay for any pattern on my site there are unlimited downloads. Simply download it again. It may not have downloaded properly due to server issues or a poor internet connection.
Are you referring to the owl fingerless gloves? Or the flip mitts? I have a number of different glove/mitten patterns if that’s what you’re referring to.
And I’m still trying to make sense by what you meant by seeing it for only a few minutes? If there was an vignette ad placed by google you can always hit the back button. The ads are what makes the online readable versions free. If you don’t like the ads, I’ve made the downloads available at a very reasonable fee.
Please clarify further if this doesn’t answer your questions.