
What every overly pretentious bottle of wine needs – a hipster sweater! Dress up that cheap bottle of $8 wine for your next hoity-toity dinner party. I’m nearly certain no one will notice you cheaped out and the sweater alone will wow them into a false sense ostentatiousness!

While this project looks complicated, in truth, cable stitches aren’t that difficult to master. It’s VERY repetitive as you can see by the instructions below. Once you see the pattern forming, you’ll know when to pull your stitches either to the front or the back of your work. That’s all you do with a cable needle. It’s a smaller needle that holds, then let’s you work the stitches in a different order to form braids, or in this instance, cable patterns. If you’re not sure how to cable, I provided a simple explanation how to do it and linked the abbreviations C2B C2F, TS, etc. to these descriptions. There are also a couple videos I added showing how to do the stitches. I’m assuming this isn’t your first knitting project and know knitting basics.
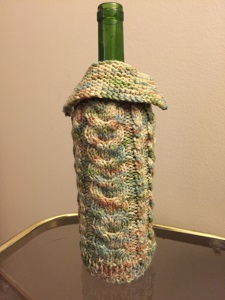
I made this a free pattern because it’s a simple project to learn how to cable knit if you’ve never done it before. It uses less than a standard ball of worsted weight yarn and buttons are optional. The cozy doesn’t have button holes and is simply sewn up to form a tube. You can add buttons if you wish. Being of the lazy ilk, I glued mine on ?.
Also, leave a long length of yarn when starting to cast on. Eighteen inches or so should suffice. You can use this extra yarn to sew up the cozy and save on sewing in ends. No matter how long I’ve been knitting and crocheting I still hate sewing in ends and will try to save everyone from this tedious task whenever possible.
Like the majority of the patterns I’ve written, this pattern is available as an instant download on my website. You can download the PDF version for free at this link: Hipster Wine Cozy or Koozie.
If you are enjoying the free videos and patterns, then please share my work! Those handy little icons along the side or bottom of the page let you do it easily and help me more than words can say! If you’d like more information on how you can keep things free, learn how you can Help Support My Work.
Things you will need
4.5 mm (size 7 US) knitting needles
5 buttons (optional)
Needle to sew seam
The Pattern
With the 4.5 cm knitting needles
Cast on 53
Row 1: K3 (P1 K1) repeat 22 times more. P1 K3.
Row 2: Sl 1 K3 (P1 K1) repeat 22 times more. P1 K3.
Row 3: Sl 1 K3 (P1 K1) repeat 22 times more. P1 K3.
Row 4: Repeat row 2.
Row 5: Repeat row 3.
Row 6: repeat row 2.
Row 7: Sl 1 K2 P2 K2. In next st P2 (increase made). (K8 P2 K2 P2) repeat 2 times more. K3 (54 sts)
Row 8: Sl 1 K4 (P2 K2 P8 K2) repeat 2 times more. P2 K5.
Row 9: Sl 1 K2 (P2 TS P2 K8) Repeat 2 times more. P2 TS P2 K3.
Row 10: Repeat row 8. (Repeat this row for all even rows until forming the neck of the wine cozy.)
Row 11: Sl 1 K2 (P2 K2 C2B C2F) repeat 2 times more. P2 K2 P2 K3.
Row 12: Repeat row 8.
Row 13: Repeat row 9.
Row 14: Repeat row 8.
Row 15: Sl 1 K2 (P2 K2 P2 K8) repeat 2 times more. P2 K2 P2 K3.
Row 16: Repeat row 8.
Row 17: Sl 1 K2 (P2 TS P2 C2B C2F) repeat 2 times more. P2 TS P2 K3.
Row 18: Repeat row 8.
Row 19: Repeat row 15.
Row 20: Repeat row 8.
Row 21: Repeat row 9.
Please share this page!
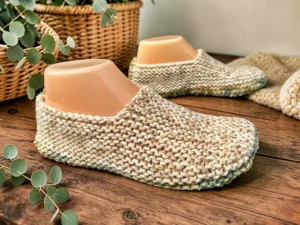
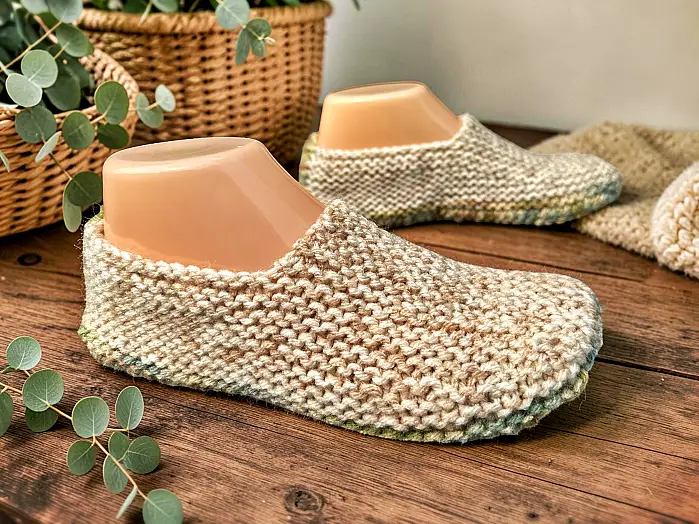
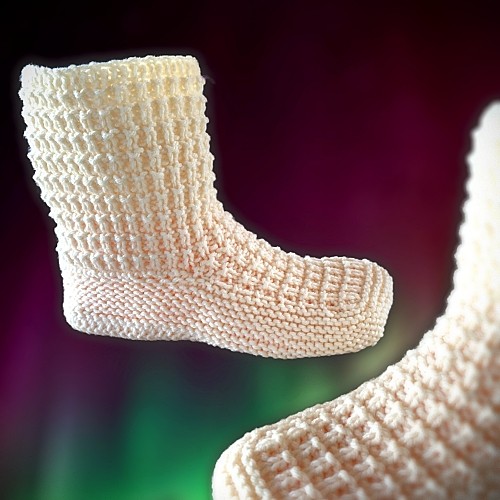
More FREE patterns
Click the pic to read online!!


FREE Knitting Graph Paper for Colorwork Knitting


![]()
![]()


Row 22: Repeat row 8.
Row 23: Repeat row 11.
Row 24: Repeat row 8.
Row 25: Repeat row 9.
Row 26: Repeat row 8.
Row 27: Repeat row 15.
The pattern continues with rows 16-27. Repeat these 12 rows 3 times more.
Repeat rows 16-20 once.
Shaping the bottle neck
Next row: Sl 1 K2 (P2 Sl St K1 PSSO P2 K8) repeat 2 times more. P2 Sl St K1 PSSO P2 K3.
Next row : Sl 1 K4 (P1 K2 P8 K2) repeat 2 times more. K5.
Next row: Sl 1 K2 (P2 P2tog P1 C2B C2F) repeat 2 times more. P2 P2tog P1 K3.
Next row: Sl 1 K6 (p8 K4) repeat 2 times more. K3.
Next row: Sl 1 K2 (P2tog twice K8) repeat 2 times more. P2tog twice. K3.
Next row: Sl 1 K4 (P8 K2) repeat 2 times more. K3.
Next row: Sl 1 K2 (P2tog K8) repeat 2 times more. P2 K3.
Next row: Sl 1 K3 (P8 K1) repeat 2 times more. K3.
Next row: Sl 1 K2 (P1 C2B C2F) repeat 2 times more. P1 K3.
Next row: Sl 1 K3 (P8 K1) repeat 2 times more. K3.
Next row: Sl 1 K2 (P1 Sl St K1 PSSO K4 K2tog) repeat 2 times more. P1 K3.
Next row: Sl 1 K3 (P6 K1) repeat 2 times more. K3
Next row: Sl 1 K2 (P1 Sl St K1 PSSO K2 K2tog) repeat 2 times more. P1 K3.
Next row: Sl 1 K3 (P4 K1) repeat 2 times more. K3.
Next row: Sl 1 K2 (P1 Sl St K1 PSSO K2 tog) repeat 2 times more. P1 K3.
Next row: Sl st K3 (P2 K1) repeat 2 times more. K3.
More of my stuff on Etsy
You can make a widget like this for your blog or website, too.
Instructions are on my website here: How to Display Etsy Items on Your Website
Make collar
Next row: K3. Pick up a stitch (increase made). K10. Pick up a stitch. K3.
Next row: Knit across.
Next row: K4. Pick up a stitch. K10. Pick up a stitch. K4.
Next row: Knit across.
Next row: K5. Pick up a stitch. K10. Pick up a stitch. K5.
Next row: Knit across.
Next row: K6. Pick up a stitch. K10. Pick up a stitch. K6.
Next row: Knit across.
Next row: K7. Pick up a stitch. K10. Pick up a stitch. K7.
Next row: Knit across.
Next row: K8. Pick up a stitch. K10. Pick up a stitch. K8.
Next row: Knit across.
Next row: K9. Pick up a stitch. K10. Pick up a stitch. K9.
Next row: Knit across.
Next row: K10. Pick up a stitch. K10. Pick up a stitch. K10.
Next row: Cast off.
TS – Twist Stitch
Transfer the next stitch onto a cable needle and hold the stitch to the FRONT of your work. Knit the next stitch. Knit the stitch from the cable needle.
C2B – Cable 2 Back
Transfer the next 2 stitches onto a cable needle and hold the stitches to the BACK of your work. Knit the next 2 stitches. Knit the two stitches from the cable needle. For photos showing how to do this, click this link. Scroll to the bottom of the page.
C2F – Cable 2 Forward
Transfer the next 2 stitches onto a cable needle and hold the stitches to the FRONT of your work. Knit the next 2 stitches. Knit the two stitches from the cable needle. For photos showing how to do this, click this link. Scroll to the bottom of the page.
Sl St K1 PSSO – Slip Stitch Knit 1 Pass Slipped Stitch Over
Transfer the next stitch onto your other knitting needle. Knit the next stitch. Pass the held stitch over the stitch you just made. Kind of like lassoing the stitch you just made with the stitch you transferred over to the other needle.
Pick up a stitch
Pick up the strand of yarn between the two needles and place it on the needle you are knitting your stitches from (If you’re right handed it’s the needle in your left hand. If you’re left handed it the needle in your right hand). Knit this new stitch. You can see pics of how to do this here – Picking up Stitches.


Just curious, how much yarn is recommended to make an average sized wine bottle koozie – did I miss it? I know it’s worsted weight yarn
I never weighed it when I wrote this years ago so I honestly can’t tell you. I know that any ball of red heart, bernat or loops and threads will be more than enough with lots left over.
Your patterns are so well written – Thank you
Like!! I blog frequently and I really thank you for your content. The article has truly peaked my interest.