If you’ve run across any of my slipper patterns before this, one thing you’ll be very familiar with is my unreasonable dislike for sewing seams on projects. I equally dislike working in ends (go to How to Work in Ends While Knitting for more on this). I have a embarrassing amount of nearly finished projects that collect in a box with unsewn seams and dangling ends. Yes. I just admitted that to everyone. No shame in my game.

This is another attempt to make this happen. It’s quite difficult to make something seamless when the design calls for it to be knit flat on 2 needles. This automatically means there are going to be ends that need to meet at some point. The idea is to make them meet as you knit so they are permanently fixed together with no extra work.


Don’t forget to share this pattern with your family and friends! You can use these buttons☝🏼☝🏼☝🏼
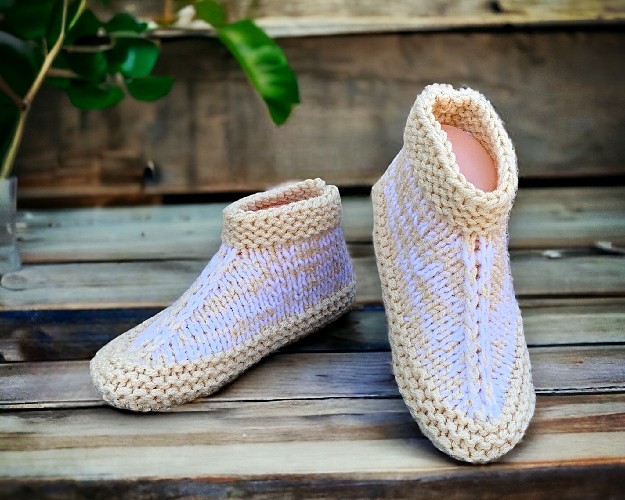
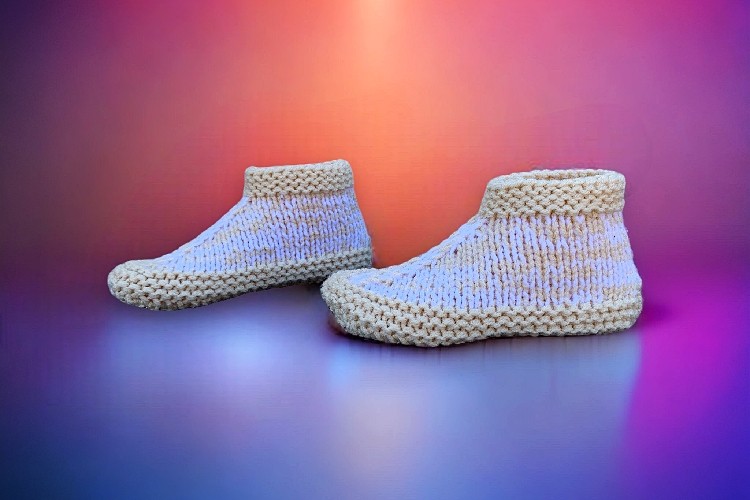
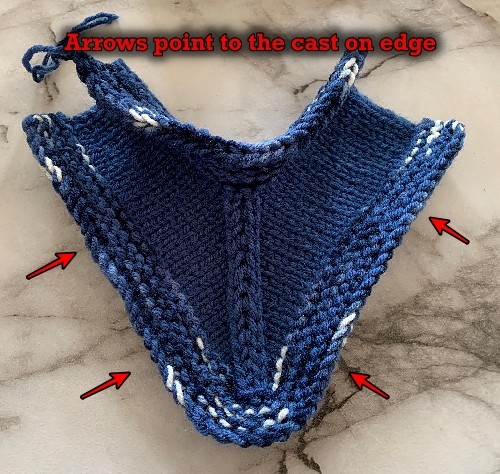
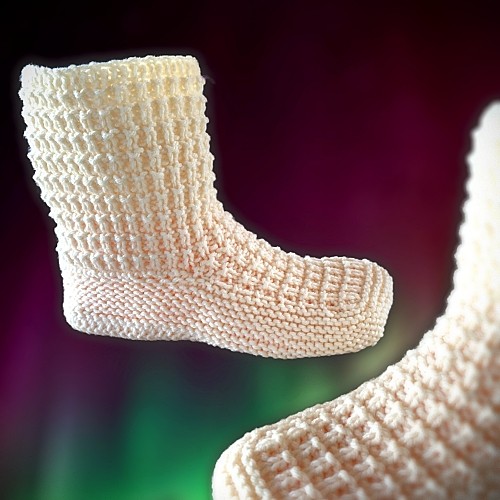
This pattern starts with the cast on stitches going around the foot (sans heel). You’ll then work your way up to the top cuff. I’ve pointed out where we’re starting in this photo.
I have a bunch of other slipper patterns you can read right here on my website. If you go to this page – FREE Slipper Patterns, you can see everything I have written to date. If you’re looking for other extra thick slippers like this, I’ve written another entitled Easy to Knit Beginner Slipper Pattern – Knit Flat with Bulky Yarn.
As always, if you would prefer a printable paper version of this pattern, you can purchase and download the PDF from all of my usual sites. You can make a purchase from my Shopify shop. You can also purchase a download from my other online retailers which are LoveCrafts, Etsy, Buy Me a Coffee, and Ravelry.
Another way to avoid ads and pop-ups, get instant, PRINTABLE downloads of this pattern and others, is by becoming a Member. When you become a Website Supporter at $4/month, you’ll gain access to exclusive member only posts on Buy Me A Coffee. You can download as many patterns as you like for the same $4 each month. You can go to this page to learn more, become a member and support my work… Exclusive Member Area
Things You Need
Worsted weight yarn – 2 (two) standard balls of yarn (215 yards/197 m). Any colours of your choosing.
or
Super Bulky yarn – 2 standard balls of ONE colour with matching lot numbers (90 yards/82 m).
One ball makes one slipper. There will be some yarn left over from each ball.
Size 5 mm (size 8 US) knitting needles (or whatever you require to get the correct gauge).
Tapestry needle to sew the seam and work in the ends.
Gauge
In stockinette stitch
8 sts – 5 cm (2″)
7 rows – 5 cm (2”)
Sizes are written as such:
Women 6-7 (8-9, 10-11, 12)
Men 6 (7-8, 9-10, 11-12)
The Pattern
Cast on 56 (60, 64, 68)
Knit across for 6 (6, 8, 8) rows.
Next Row: K26 (28, 30, 32) K2tog. Sl 1 as if to knit. K1 PSSO. K26 (28, 30, 32).
Next Row: P25 (27, 29, 31) P2tog TBL. P2tog. P25 (27, 29, 31).
Next Row: K24 (26, 28, 30) K2tog. Sl 1 as if to knit. K1 PSSO. K24 (26, 28, 30).
Next Row: P23 (25, 27, 29) P2tog TBL. P2tog. P23 (25, 27, 29).
Next Row: K22 (24, 26, 28) K2tog. Sl 1 as if to knit. K1 PSSO. K22 (24, 26, 28).
Next Row: P21 (23, 25, 27) P2tog TBL. P2tog. P21 (23, 25, 27).
Next Row: K20 (22, 24, 26) K2tog. Sl 1 as if to knit. K1 PSSO. K20 (22, 24, 26).
Next Row: P19 (21, 23, 25) P2tog TBL. P2tog. P19 (21, 23, 25).
Next Row: K18 (20, 22, 24) K2tog. Sl 1 as if to knit. K1 PSSO. K18 (20, 22, 24).
Next Row: P17 (19, 21, 23) P2tog TBL. P2tog. P17 (19, 21, 23).
Next Row: K16 (18, 20, 22) K2tog. Sl 1 as if to knit. K1 PSSO. K16 (18, 20, 22).
Next Row: P15 (17, 19, 21) P2tog TBL. P2tog. P15 (17, 19, 21).
Next Row: K14 (16, 18, 20) K2tog. Sl 1 as if to knit. K1 PSSO. K14 (16, 18, 20).
Please share this page!
More FREE patterns
Click the pic to read online!!


FREE Knitting Graph Paper for Colorwork Knitting


![]()
![]()


Next Row: P13 (15, 17, 19) P2tog TBL. P2tog. P13 (15, 17, 19). If making women’s size 6-7 or men’s size 6, go to the row marked with ☺.
*Next Row: K4 M1. K0 (10, 12, 14). K2tog. Sl 1 as if to knit. K1 PSSO. K0 (10, 12, 14). M1 K4.
Next Row: P2 PM1. P0 (12, 14, 16). P2tog TBL. P2tog. P0 (12, 14, 16). PM1 P2.*
Repeat from * to * 0 (1, 2, 3) times more.
☺Knit across for 6 (6, 8, 8) rows.
Cast off loosely.
Making the Sole
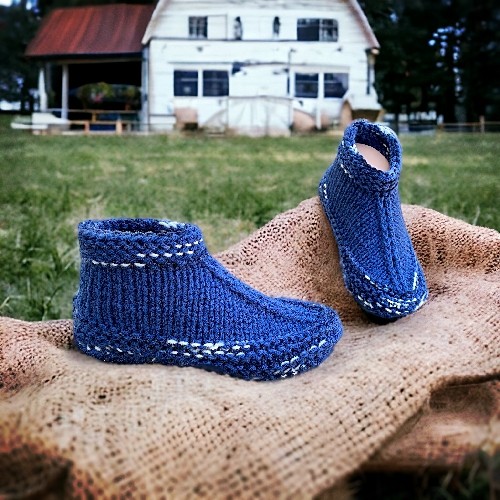
This photo will help you in how and where to pick up the following stitches. Hold your work so it looks like this with the pointy end up. The RED arrow is for right handed knitters.
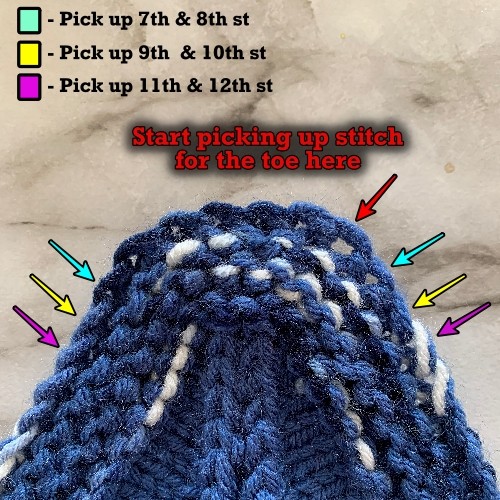
Pick up 6 sts at the toe in bottom loop of cast on stitches. (3 sts on either side of middle clearly marked with p2tog line.)
Next Row: Knit across.
Next Row: Pick up a stitch in the bottom loop of the cast on stitches. K6. Pick up a stitch in the bottom loop of the cast on stitches.
Next Row: Knit across.
Next Row: Pick up a stitch in the bottom loop of the cast on stitches. K8. Pick up a stitch in the bottom loop of the cast on stitches.
Next Row: Knit across.
If you are making women’s sizes 6-9 or men’s sizes 6-8, skip to row marked with ♥
For all other sizes continue as follows:
Next Row: Pick up a stitch in the bottom loop of the cast on stitches. K10. Pick up a stitch in the bottom loop of the cast on stitches.
Next Row: Knit across.
♥ ☼ Next Row: Pick up a stitch in the bottom loop of the cast on stitches. K2tog. Knit to last 2 sts. K2tog. Pick up a stitch in the bottom loop of the cast on stitches.
Next Row: Knit across. ☼
Repeat rows marked with ☼ to ☼ down the length of the sole. You will ALWAYS have 10 (10, 12, 12) sts on your needle.
Forming the Heel
There are two ways to do this. The easiest way is to make a small triangle.
Using the 10 (10, 12, 12) sts on your needle.
♦ Next 2 Rows: Knit across.
Next Row: K2tog. Knit to last 2 sts. K2tog.
Next Row: Knit across. ♦
Repeat from ♦ to ♦ until 5 (5, 6, 6) sts
If making women’s sizes 6-9 or men’s sizes 6-8:
Next Row: K2tog K1 K2tog.
Next Row: K3tog. Cut yarn and draw yarn through last st. Leave a length of yarn long enough to sew the remaining seam.
If making women’s sizes 10-12 or men’s sizes 9-12:
Next Row: K2tog 3 times.
Next Row: K3tog. Cut yarn and draw yarn through last st. Leave a length of yarn long enough to sew the remaining seam.
For all sizes:
Flip up the triangle to fit into the back of the heel. Sew seams along sides of triangle and up the back of the slipper.
Or
Make the seams as you go:
I recently made a video showing how to do this. It’s how I make a lot of my slipper heels including this pattern. You can watch the video below to help you if the photos aren’t enough.
Using the 10 (10, 12, 12) sts on your needle,
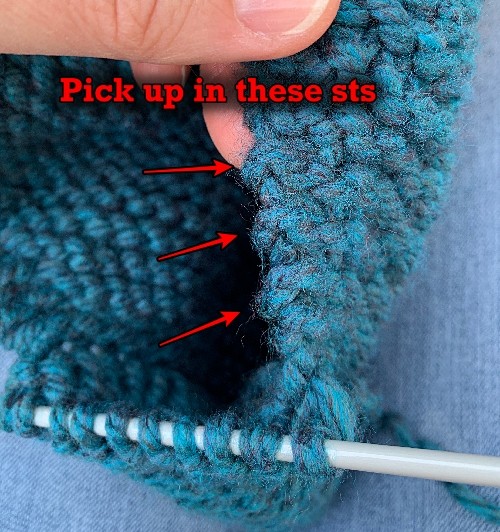
♦ Next Row: Pick up a st along side of the slipper. K2tog twice. Knit to last 4 sts. K2tog twice. Pick up a st along side of the slipper and work in the ends.
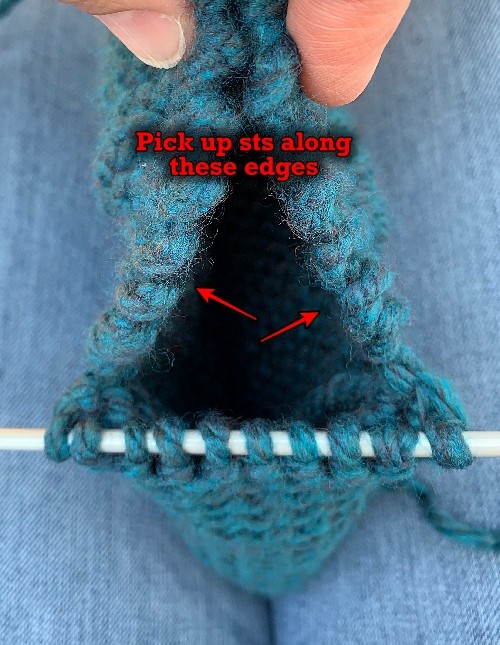
Next Row: Knit across. ♦
Repeat from ♦ to ♦ until 6 (6, 8, 8) sts.
§ Next Row: Pick up a st along side of the slipper. K2tog across. Pick up a st along side of the slipper.
Next Row: Knit across. §
If making women’s sizes 10-12 or men’s sizes 9-12, repeat from § to § once.
Next Row: Pick up a st along side of the slipper. K2tog, K1, K2tog. Pick up a st along side of the slipper.
Next Row: K2tog, K1, K2tog.
Next Row: K3tog. Cut yarn and draw yarn through last st. Leave a length of yarn long enough to sew the remaining seam. Sew the seam up the back of the slipper and work in the ends.
More of my stuff on Etsy
You can make a widget like this for your blog or website, too.
Instructions are on my website here: How to Display Etsy Items on Your Website
Abbreviations
st – stitch
sts – stitches
sl – slip the stitch
PSSO – pass slipped stitch over.
K – knit
P – purl
PM1 – Make one (purl wise). Increase one stitch between the stitches. Pick up the yarn between the stitches. Twist it slightly and place it on your non-working needle. Purl the stitch. Watch this video on How to PM1 or Purl Make 1 to see how.
M1 – Make one (knit wise). Increase one stitch between the stitches. Pick up the yarn between the stitches. Twist it slightly and place it on your non-working needle. Knit the stitch. Watch this video on How to M1 or Make 1 to see how.
K2tog – knit 2 stitches together
K3tog – knit 3 stitches together
P2tog – purl 2 stitches together
P2tog TBL – purl 2 together through the back loop. I did this on a mushroom design I made years later. Here’s how. I call it TBLP2tog in the video, but it’s done the EXACT say way. Sometimes I change notations. What can I say 🤷🏻♀️😬
Hints and Tips
You can make the slippers truly seamless when you are making the seamed triangle for the back of the heel. Continue picking up stitches on each side while working up the heel seam. Continue doing this using the 5 sts and repeating as follows:
Next Row: Pick up a st along side of the slipper. K2tog, K1, K2tog. Pick up a st along side of the slipper.
Next Row: Knit across.
I didn’t include it in the instructions because… I didn’t. It was already complicated enough for the heel.
If you are up in arms about how many ends there are to sew in, you can work the ends in while you are knitting. I have a video to show you how.
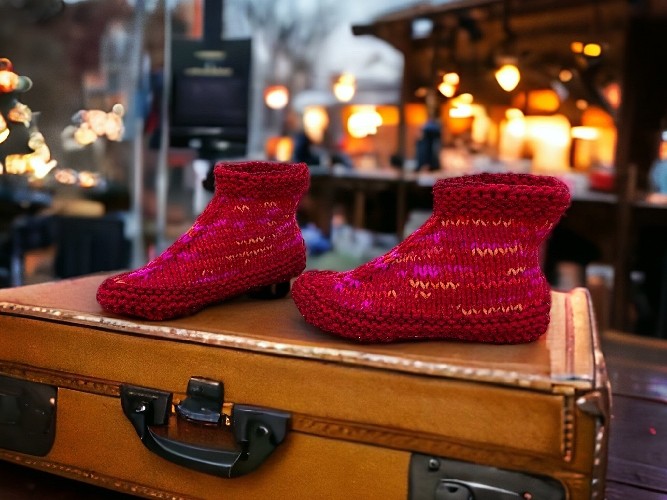
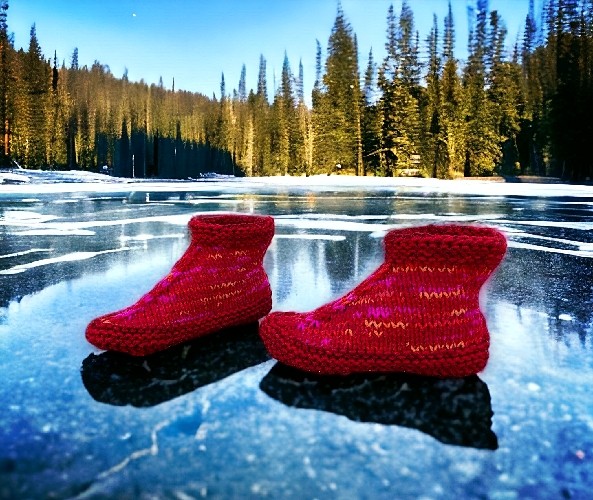
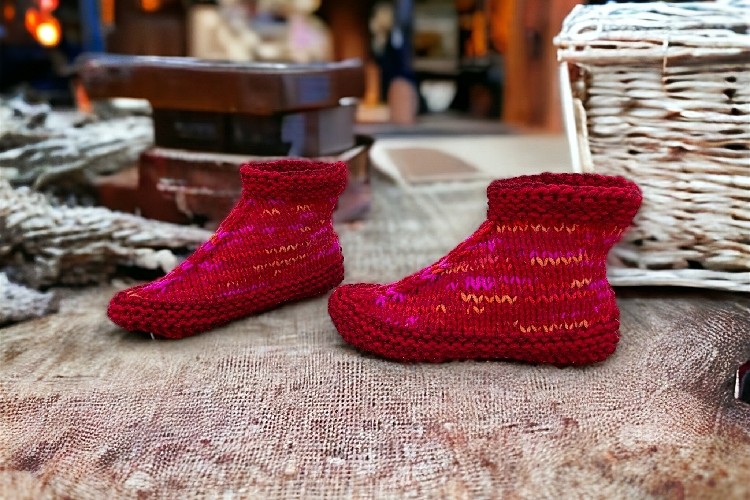
Play around with the colours you choose if you’re using worsted weight yarn. You can get some neat effects by blending a solid colour with a variegated one, or by using colours that are the same colour but a different tone. I used both of these techniques for the red booties.
Like all of my patterns you have my permission to sell and/or give away the physical items that you make using this pattern. You are NOT permitted to reprint or duplicate this pattern in any form unless you have obtained my written permission to do so.
If you have any questions, please feel free to leave a comment or send me your questions at kweenbee_crafts@hotmail.ca.


too many adds, too complicated and couple mistakes.
The ads are what enable you to read it for free. Too complicated? Sounds like this pattern might be beyond your current skill level. I’ve provided many photos and video links to help with any ticker parts. Did you watch the videos? Mistakes? Please elaborate. I can’t fix it if you don’t tell me where or what is wrong. This pattern has been published for nearly 2 years. I’ve sold it hundreds of times on ravelery, etsy, lovecrafts and amazon. Yours is the first complaint that there are mistakes. Combine that with the “too complicated” remark and well…Maybe it isn’t the pattern. Just saying is all.
I’m trying to make this and the pattern seems off.
1. It would help if perhaps you gave finished measurements for portions of the slipper as I cannot get the row gauge the same as you specified at all. I’m comfortable making adjustments to achieve the correct size.
2. When “making the sole”,
a. Do you mean pick up and knit? Or just pickup?
b. I’m not happy with picking up stitches on each end of the row you are knitting. It doesn’t seem to work. My working yarn is in the wrong place if I do that. Maybe if you pick up a stitch, knit across, turn and then pick up a stitch and knit across it would work. Can you explain with more pictures, or video or text?
Thanks! These really are cute!
I figured out why the gauge was off. It should have been in stockinette and not garter. That’s why your stitches were correct but the rows were off. It was a simple copy and paste error I didn’t catch. I’ve since fixed it here and uploaded corrected versions to all my distributors.
And where it’s says pick up. Pick up. No need to read more into the pattern than what is written.
And when making the sole, it is telling you to pick up a stitch, knit across and pick up a stitch. It says back loop because that what you are knitting into. You knit into the stitch as usual when making the top.
I don’t understand what’s missing? The photo included at the outset of the section shows where you should be picking up on both sides for the first three times. I’m not sure what is missing or could be added to the explanation.
And yes the picking up stitches works. I’ve used this technique to make soles and heels for a variety of slipper styles and it works for them all. Not to mention the numerous pairs I’ve made and sold.
As far as adding extra photos, the pattern already is very long and detailed. I won’t be adding more. As far as a video, that’s the plan for all my patterns but they take a very long time to edit, plus I don’t really like doing it.
The pattern itself is correct though. No need to reconfigure the pattern. The stitch and row counts are right for each size. It was only a mistake in what to use as the gauge measurement that was wrong.