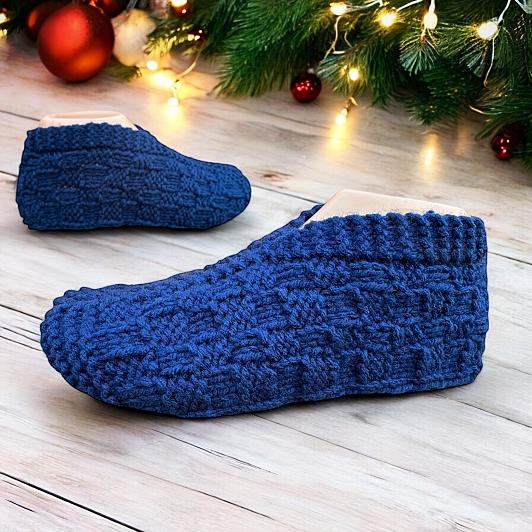
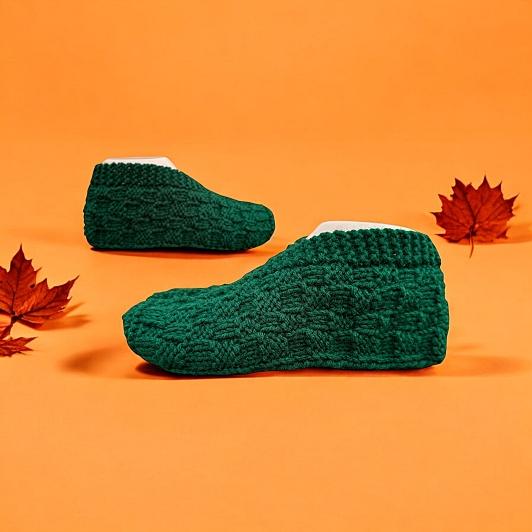
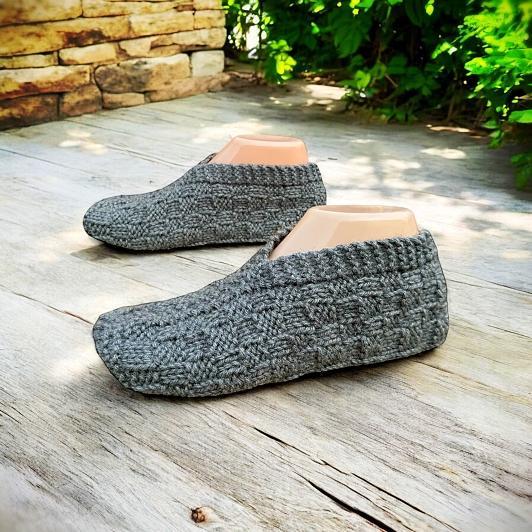
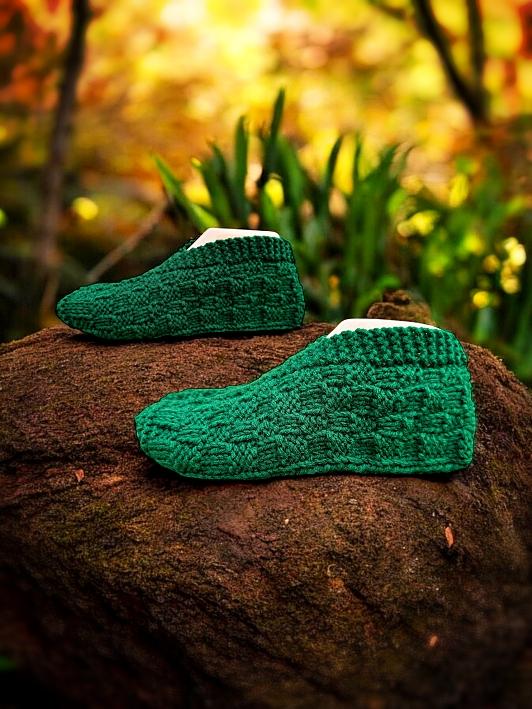
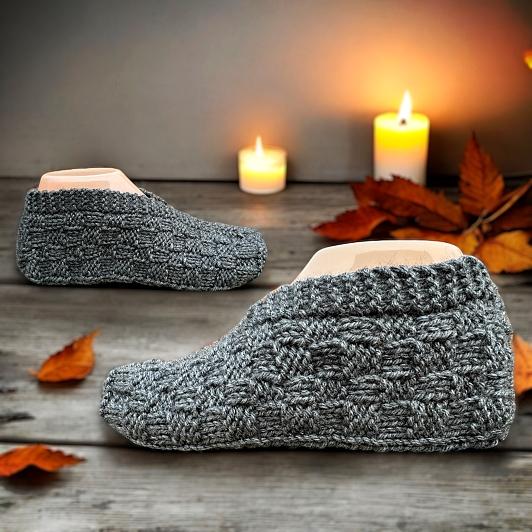
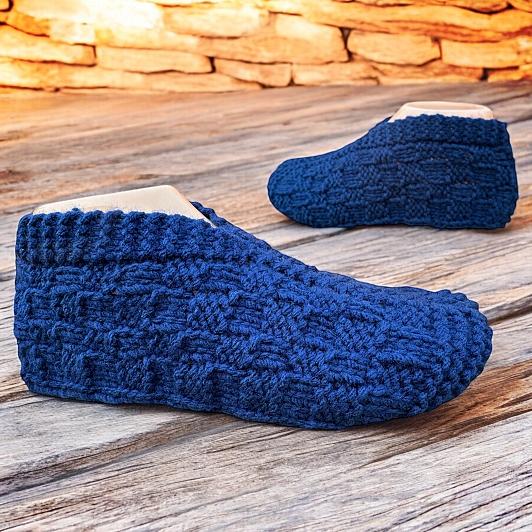
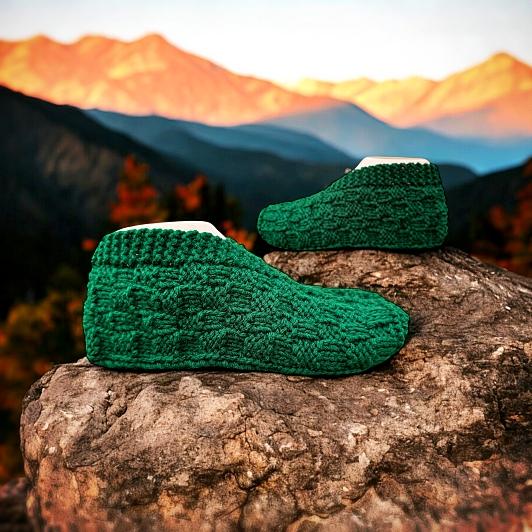
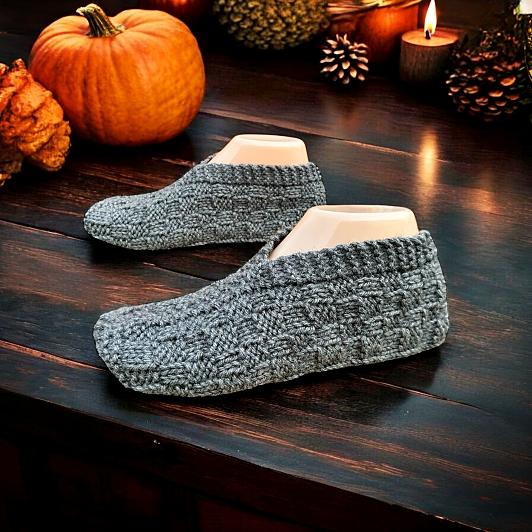
These slippers are a perfect blend of comfort, style, and simplicity! Whether you’re a knitting novice or a seasoned pro, this pattern is designed to be approachable and fun for everyone. If you’re more experienced, you’ll find that these slippers practically knit themselves, coming together in no time. For beginners, it’s a wonderful way to build confidence while creating something cozy and practical.

The beauty of these slippers lies in their simplicity. The stitches and techniques are basic, but the finished product looks effortlessly elegant. As long as you know how to cast on, knit, purl, K2tog (knit two together), and increase (by knitting two stitches in one), you’ve got everything you need to bring these slippers to life.
Don’t worry if you’re still working on perfecting these skills—this project is forgiving and a fantastic way to practice. Plus, there’s nothing quite like the satisfaction of slipping your feet into something handmade by you. So, grab your needles and yarn, and let’s knit up some cozy magic!


Another way to avoid ads and pop-ups, get instant, PRINTABLE downloads of this pattern and others, is by becoming a Member. When you become a Website Supporter at $4/month, you’ll gain access to exclusive member only posts on Buy Me A Coffee. You can download as many patterns as you like for the same $4 each month. You can go to this page to learn more, become a member and support my work… Exclusive Member Area
If you enjoy this pattern and my other free online knitting patterns, please consider making a small donation or helping me out by visiting my Help Support My Work page. If that’s not possible, that’s totally fine too! Even sharing this page on your social media helps me out immensely. You can use those buttons below to do so easily.
Happy knitting!
Things You Need
Worsted weight yarn Any standard ball of yarn (283 g/10 oz, 471 meters/515 yards) will do.
4 mm (Size 6 US) single pointed knitting needles
Cable needle
Tapestry needle to sew seams and work in ends
Gauge
With size 4 mm (US size 6) needles or whatever size you need to obtain the correct number of stitches and rows. Be sure to check your gauge otherwise the sizing won’t be correct.
In stockinette
4” = 20 sts
4” = 30 rows
Sizes (are written as such)
Women’s 6-7 (8-9, 10-11, 12-13)
Men’s 5-6 (7-8, 9-10, 11-12)
Heel Flap
Cast on 2 sts
Row 1-3: Knit across.
Row 4: K2 in each st (4 sts). This is also known as INC. See the Abbreviations section for help and a video link.
Row 5-7: Knit across.
Row 8: K2 in the first st. Knit across to the last st. K2 in the last stitch. (6 sts)
Row 9-11: Knit across.
Row 12: K2 in the first st. Knit across to the last st. K2 in the last stitch. (8 sts)
Row13 -15: Knit across.
Row 16: K2 in the first st. Knit across to the last st. K2 in the last stitch. (10 sts)
Row 17-19: Knit across.
Row 20: K2 in the first st. Knit across to the last st. K2 in the last stitch. (12 sts)
Row 21-23: Knit across.
Row 24: K2 in the first st. Knit across to the last st. K2 in the last stitch. (14 sts)
Row 25-27: Knit across.
Row 28: K2 in the first st. Knit across to the last st. K2 in the last stitch. (16 sts)
Please share this page!
More FREE patterns
Click the pic to read online!!


FREE Knitting Graph Paper for Colorwork Knitting


![]()
![]()


Row 29-30: Knit across.
Forming the Foot
Row 31: Knit across. Cast on 15 sts. (31 sts)
Row 32: K4 P1 K2 P3 K2 P3 K16 Cast on 15 (46 sts)
Row 33: K5 P2 K3 P2 K3 P1 K14 P1 K3 P2 K3 P2 K5
Row 34: K4 P1 K2 P3 K2 P3 K16 P3 K2 P3 K2 P1 K4
Row 35: Repeat row 33.
Row 36: K4 P3 K3 P2 K22 P2 K3 P3 K4
Row 37: K7 P3 K2 P4 K14 P4 K2 P3 K7
Row 38: Repeat row 36
Row 39: Repeat row 37
* Row 40: K4 P1 K2 P3 K2 P3 K16 P3 K2 P3 K2 P1 K4
Row 41: K5 P2 K3 P2 K3 P1 K14 P1 K3 P2 K3 P2 K5
Row 42: Repeat row 40
Row 43: Repeat row 41
Row 44: K4 P3 K3 P2 K22 P2 K3 P3 K4
Row 45: K7 P3 K2 P4 K14 P4 K2 P3 K7
Row 46: Repeat row 44
Row 47: Repeat row 45 *
Repeat from * to * 1 (2, 2, 3) more times.
More of My Stuff On Etsy
You can make a widget like this for your blog or website, too.
Instructions are on my website here: How to Display Etsy Items on Your Website
Shaping Toe
Next row: K2tog K2 P1 K2 P3 K2 P3 K16 P3 K2 P3 K2 P1 K2 K2tog (44 sts)
Next row: K4 P2 K3 P2 K3 P1 K14 P1 K3 P2 K3 P2 K4
Next row: K2tog K1 P1 K2 P3 K2 P3 K16 P3 K2 P3 K2 P1 K1 K2tog (42 sts)
Next row: K3 P2 K3 P2 K3 P1 K14 P1 K3 P2 K3 P2 K3
❤ Next row: K2 P3 K3 P2 K22 P2 K3 P3 K2
❀ Next row: K5 P3 K2 P4 K14 P4 K2 P3 K5
Next row: Repeat row marked with ❤
Next row: Repeat row marked with ❀
✪ ✬ Next row: K2 P1 K2 P3 K2 P3 K16 P3 K2 P3 K2 P1 K2
❈ Next row: K3 P2 K3 P2 K3 P1 K14 P1 K3 P2 K3 P2 K3
Next row: Repeat row marked with ✬
Next row: Repeat row marked with ❈
❤ Next row: K2 P3 K3 P2 K22 P2 K3 P3 K2
❀ Next row: K5 P3 K2 P4 K14 P4 K2 P3 K5
Next row: Repeat row marked with ❤
Next row: Repeat row marked with ❀ ✪
Repeat from ✪ to ✪ once.
End Toe
For women’s size 6-7 and 10-11 ONLY
and men’s sizes 5-6 and 9-10 ONLY
Do not knit the following 4 rows for the other sizes!
Next row: Knit across.
☺ Next row: K13 P1 K14 P1 K13
Next row: Knit across.
Next row: Repeat row marked with ☺
Knit the following rows for ALL sizes.
Next row: K2tog. Knit to last 2 sts. K2tog. (40 sts)
Next row: K12 P1 K14 P1 K12
Next row: K2tog. Knit to last 2 sts. K2tog. (38 sts)
Next row: K11 P1 K14 P1 K11
Next row: K2tog across. (19 sts)
Next row: Knit across.
Next row: K2tog across. K last st. (10 sts)
Next row: Knit across.
Draw yarn through loops.
Make another slipper to match. Flip up the heel flap triangle and sew the edges of the triangle to the cast on edges. Sew the seam at the top of the foot to the first decreases and work in the ends.
Abbreviations
K – knit
INC – increase a stitch or knit 2 sts in one stitch
P – purl
K2tog – knit 2 stitches together
st- stitch
sts – sts
Hints and Tips
If your K2tog for the second to last row is off, no worries. If there’s 2 stitches, knit them together. It’s not a big deal and it won’t make a noticeable difference.
If you need a larger size slipper than what I’ve written for, you can add more knitting rows onto the end of the toe. If your gauge is correct, 4 rows of knitting will add approximately 1/2” or 1.75cm.
Like all of my patterns you have my permission to sell and/or give away the physical items that you make using this pattern. You are NOT permitted to reprint this pattern in any form unless you have obtained my written permission to do so. You will NOT get that permission, btw.
If you have any questions, please feel free to leave a comment or send me your questions at kweenbee_crafts@hotmail.ca.


Thank you so much for doing the job here, everyone will certainly like your post.
Best regards
A wonderful article that I have shared.
What a wonderful post! This is so chock full of useful information I can’t wait to dig deep and start using the resources you’ve given me.
King regards,
Demir Valenzuela