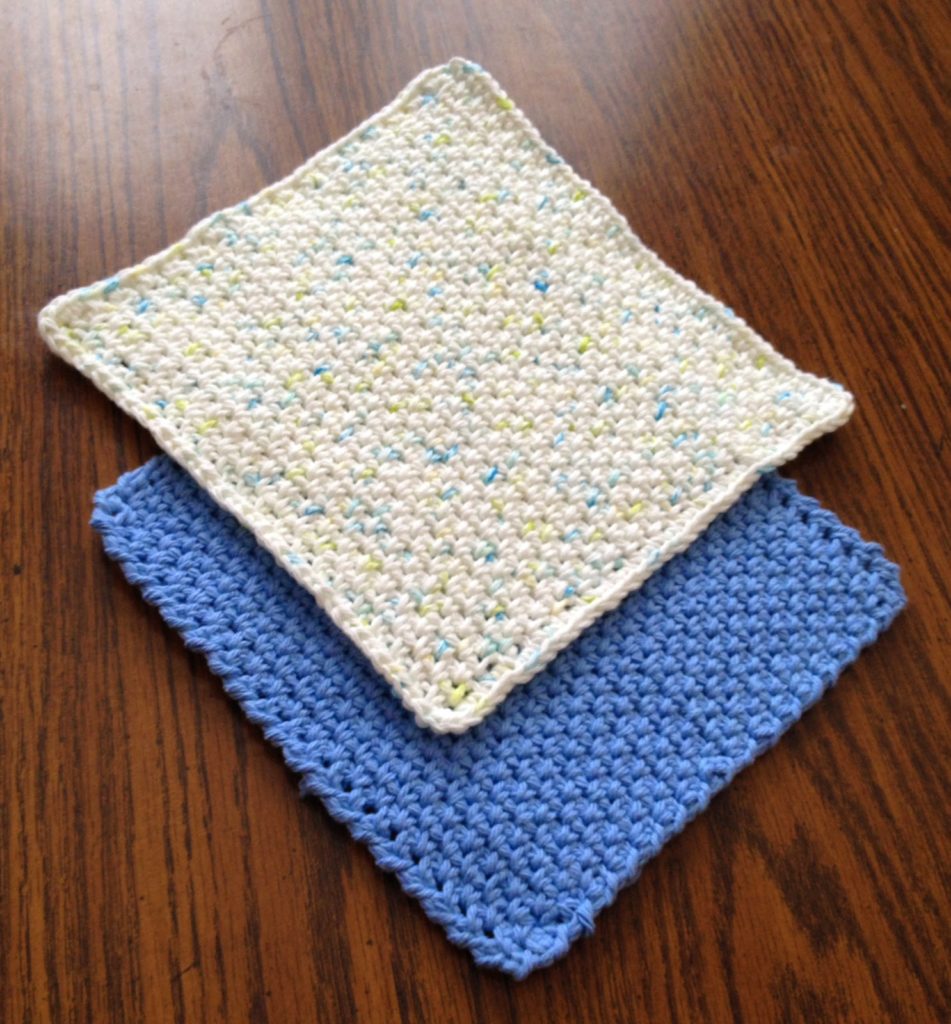
The pattern itself is very easy to do and definitely one that a person new to crocheting could follow. I’ve also provided the pattern with two different edges. My personal preference is to end it with a backwards single crochet, but a single crochet in each stitch and row will also work.

If you are new to crocheting, I’ve included links to points in the video to help you with specific rows and stitches. If you’d like to watch the video from the beginning you can use this link: Crochet a Dishcloth or you can scroll down to watch the video from this page. If you’d like to download the ad free version of this crochet pattern, you can download it for a small fee/donation from my website: Crochet a Dishcloth.
To help you with some of the more tricky parts, all the rows (and a few of the stitches) are clickable links that will take you to the correct point in the video that demonstrates exactly how to do it. The links will take you off this site and on to YouTube. If you want to watch the video here, scroll to the bottom of the page to view it.
If you like this crochet pattern, be sure to check out my crochet skull dishcloth.
Enjoying the free videos and patterns and would like to see more? Then please share my work! Those handy little icons along the side or bottom of the page let you do it easily and help me immensely ?. If you’d like more information on how you can keep things free, learn how you can Help Support My Work.
Things you will need:
50 gr (1 3/4 oz) ball of crochet cotton (Click that link to see what I mean. It’s NOT the regular acrylic yarn but 100% cotton.)
Row 1: Sc in 4th ch from the hook. *Ch 1, skip a ch, sc in next ch.* Repeat from * to * until the end of the chain. Ch 2, turn. (20 sc) If you have too many chains see how to fix that here: How to Undo Chain Stitches.
Row 2: Sc in the ch 1 space. *Ch 1, sc in next ch 1 space.* Repeat from * to * until the end of the row. Sc in the ch 4 space from the beginning chain. Ch 2, turn.
Row 3: Sc in the ch 1 space. *Ch 1, sc in next ch 1 space.* Repeat from * to * until the end of the row. Sc in the ch 2 space from the previous row. Ch 2, turn.
Repeat row 3 until the dishcloth is square or the desired length.
Edging:
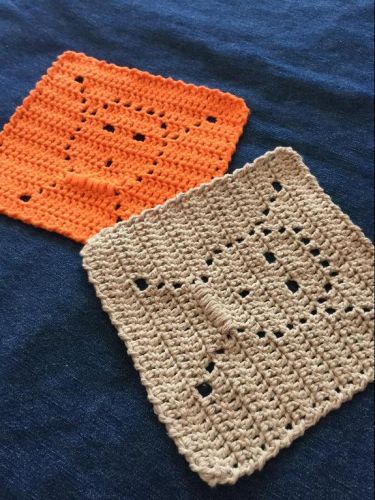
Single Crochet (White dishcloth as shown above):
Row 1: Sc in each row along the left edge of the dishcloth. 3 sc in the corner st. 1 sc in each sc along bottom edge. 3 sc in corner st. Sc in each row along the right edge of the dishcloth. 3 sc in the corner st. 1 sc in each sc along top edge. Finish off.
More of my patterns on Etsy
You can make a widget like this for your blog or website, too.
Instructions are on my website here: How to Display Etsy Items on Your Website
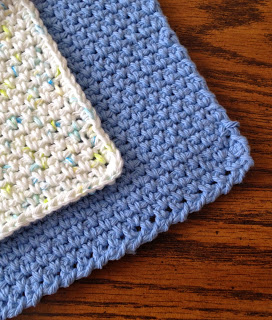
Backwards Single Crochet (Purple dishcloth as shown above):
Row 1: Complete 1 bsc (backwards single crochet) in every 2nd stitch of the row you just made. 1 bsc in the corner st. 1 bsc in every 2nd row along the right edge of the dishcloth. 1 bsc in the corner st. 1 bsc in every 2nd st along the bottom edge of the dishcloth. 1 bsc in the corner st. 1 bsc in every 2nd row along the left edge. 1 bsc in the corner st. Finish off.
How to do a bsc (backwards single crochet):
Here’s the video that can show you how. Keep scrolling down the page to see the pictorial how-to.
Unlike regular crochet stitches and instead of working from right to left in regular crochet (if you’re right handed), you’re going to work from left to right.
Step 1: Insert the hook from front to back in the next st.
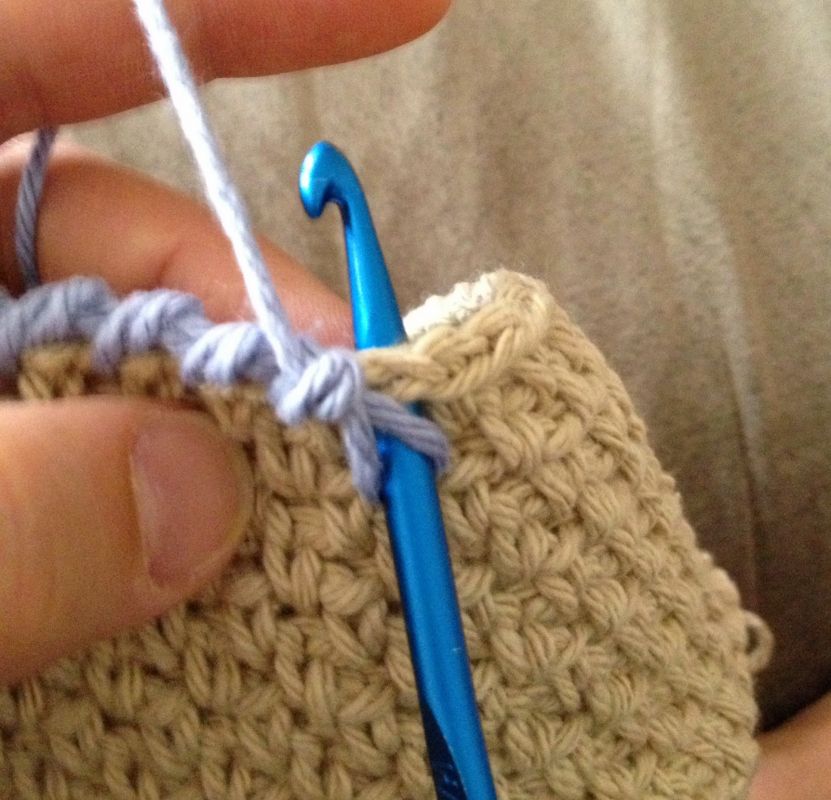
Step 2: Hook the yarn and draw the loop through the front of your work.
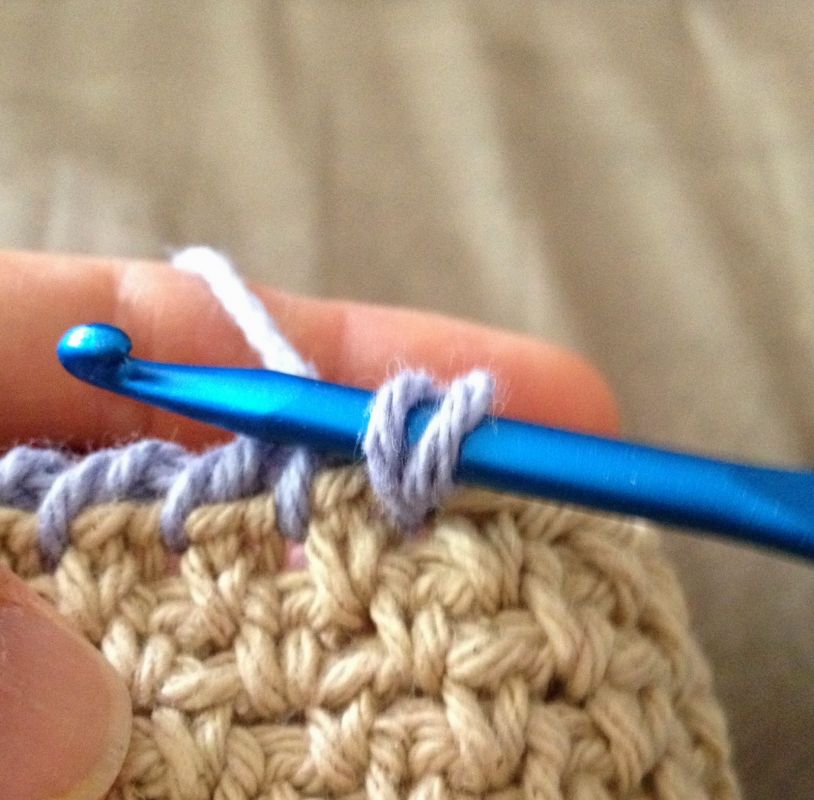
Step 3: Hook the yarn and draw through the two loops. Pretty simple, huh?

You can adjust the size as you see fit. I prefer a smaller dishcloth but you may like it larger. You can either add more chains at the start of the cloth or you can make more rows. Either way will work but remember to buy more yarn if you want it larger. You can also use a larger size hook to make the stitches looser.
And as promised, here is the complete step-by-step video for you to watch.


A big THANK YOU for showing how to end and finish project with CRAB STITCH. I like your pattern better than other ones showing how to work the ‘moss stitch’. I like to make a hanging loop when I finish up the final corner. Maybe 12 stitches, bring back down in
the cloth and go back in each stitch for reinforcing, then back down and end off with small tail to weave in. I even make these with ‘left over yarn’ from give away cloths for myself, what I made yesterday. I am not picky.
Now I can look at other patterns on KWEENBEE. I am also BISTITUAL knit and crochet.
THANK YOU.:)