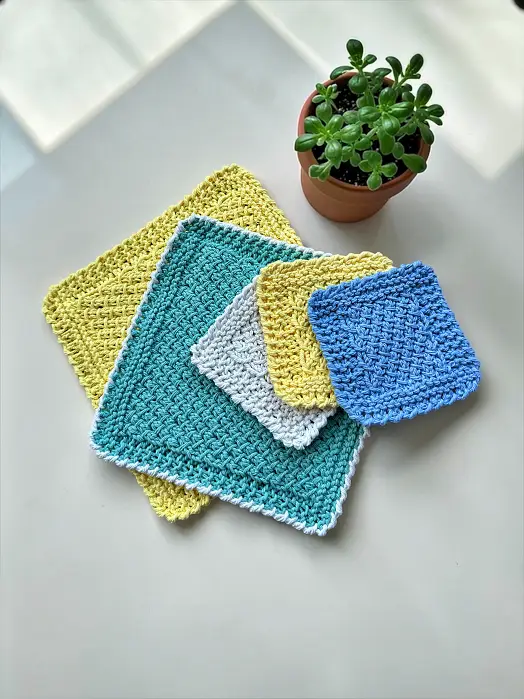
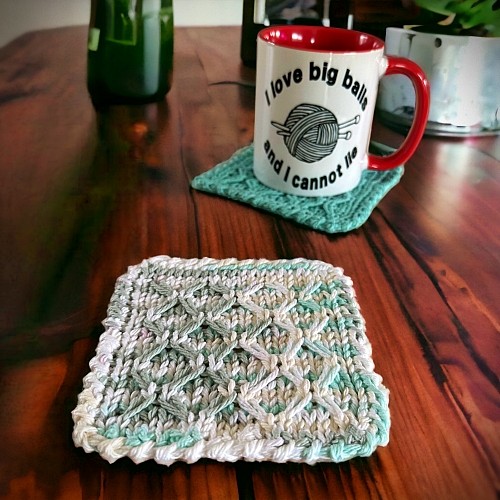
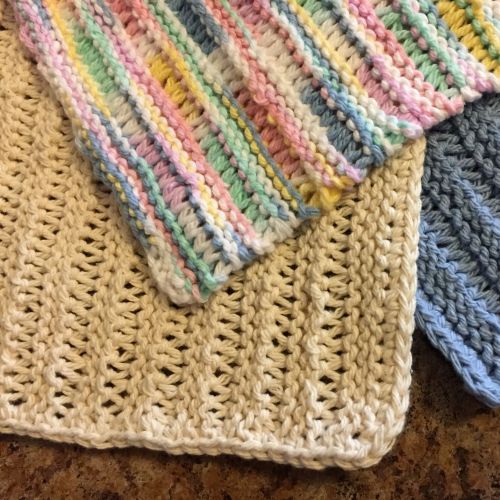
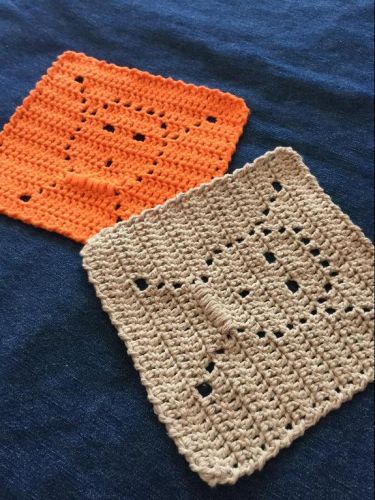
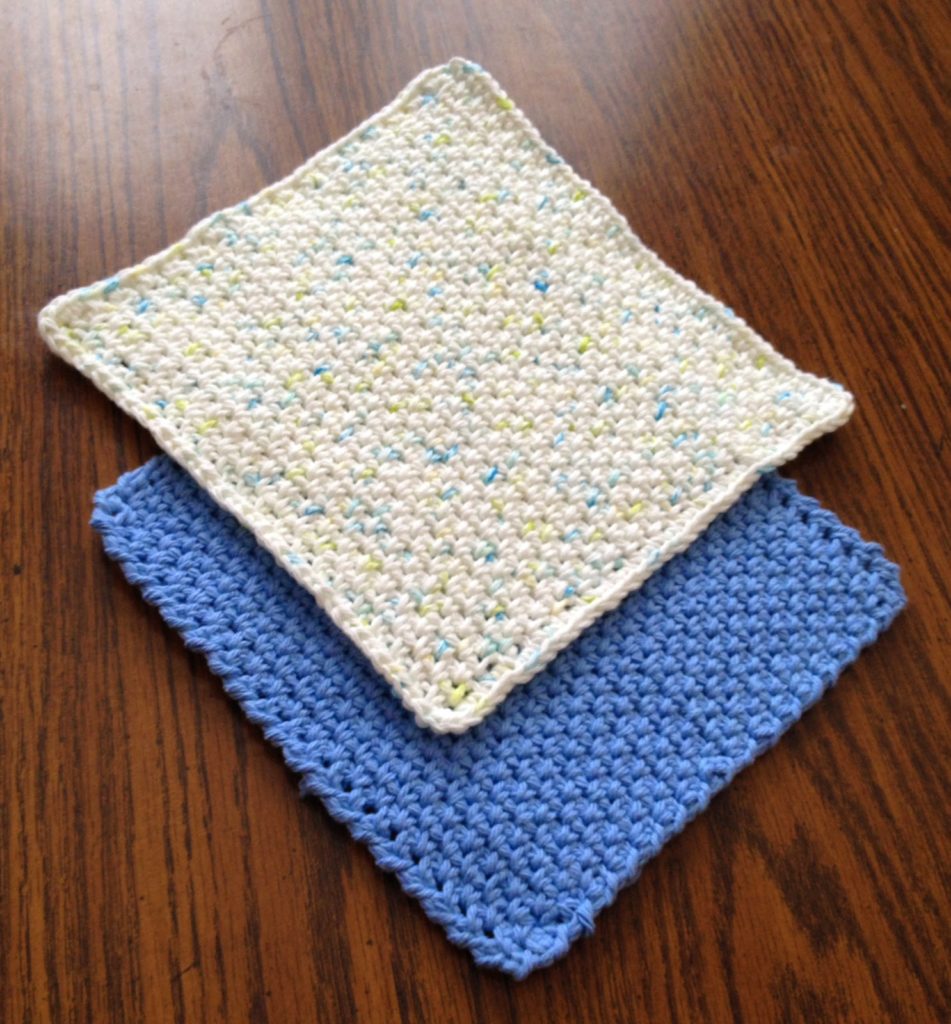
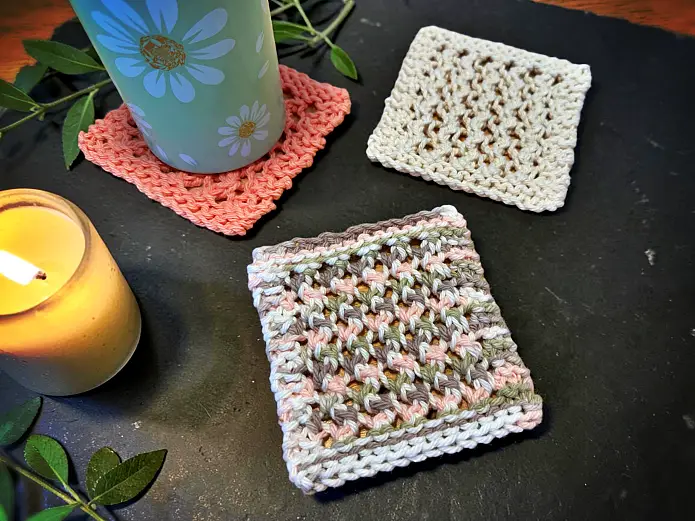
Posted on Leave a comment

Tidy Treasures – Seven Knitted Dishcloth Designs

Tidy Treasures - Seven Knitted Dishcloth Designs

I went ahead and did it again! Combined all of my current genre of patterns into a single collection. I find that this is a really good way to get my work out there. People seem to be more inclined to buy a collection of multiple patterns, especially when buying a paperback book, than single patterns. It makes sense. You get more value for your buck.

So in this latest collection, I’m offering seven of my dishcloth patterns. When the virus time was running its course years ago, I went on a bit of a dishcloth design rampage. That’s when I came up with a bunch of these.

All the dishcloths included with this publication

This summer, I realized it was time to update some of my pattern photos. They were looking a bit dated and now that AI has made taking good photos easier than ever before, it seemed like a no brainer. Like always, a quick update turned into expansions. Some of the patterns were made into other things like scarves, and smaller things like coasters or scrubbies. A few even got updated videos embedded into them. I kinda just went with it.

Don’t forget to SHARE this page 👆🏼

To get the collection, you can go to a number of places. These are all the where you download the PDF of the patterns and print it yourself. The Amazon links are for both the Kindle (which you can’t print) and for the paperback version. Make sure you order the paperback from your country. You’ll save on shipping and duty fees this way.

Tidy Treasures - Seven Knitted Dishcloth Designs

Etsy

This Website

Google Books

Amazon

If you get it from Amazon make sure you select the correct country. Each country/region is linked to it’s selling zone:

United States, Canada, United Kingdom, Australia

Like always, the patterns are all still free to read online. All of them are also available for sale individually through all my retailers like Etsy, Ravelry, Amazon, and this website. The titles listed below are also clickable links that will take you to the FREE versions here online.

Learn to Knit a Dishcloth

Knit a Simple Dishcloth

Bars and Stripes Dishcloth

Textured Dishcloth, Scarf or Coasters

The One Piece Dishcloth and Coasters

Cute AF Bows Dishcloth

Diamonds Dishcloth and Coasters

I hope you enjoy this collection and happy knitting!

Posted on 1 Comment

Knit a Simple Dishcloth – GREAT Knitting Pattern for Beginners!

Beginner knitting pattern - make a dishcloth

This is a great project for anyone who is just learning how to knit. It’s not an overly complicated project and the yarn is easy to find and not too expensive. Best of all the final result gives you something you can use, even if it doesn’t turn out perfectly ?

If you are a new knitter, I’ve added links demonstrating how to do each of the stitches necessary for this project. I would recommend that getting the basics down first with a swatch or two, then getting into this project.

I am trying something new with this pattern. Years ago I tried to offer my patterns for free to download. I was taken advantage of at that time. People would download the patterns to never return. I can now embed scannable QR codes in my work and want to see if people come back to the website once they’ve downloaded the pattern and printed it off for themselves. We’ll see how it goes. If it turns out that people do come back and share this pattern with their followers on social media, I may do this with other patterns.

Use these 👇🏼 to share on social media 🥰

If you are loving this and all my other free patterns, please help out financially by visiting my Help Support My Work Page. If you can’t give cash, and I get that not everyone can, please do your part and share this where you can. Every share on social media helps promote my work and expose it to even more people. I’ve made it super easy for everyone to do that. By clicking those links up there 👆🏼 you can share it nearly everywhere.


The Pattern

If you would like to read the pattern online, keep scrolling down the page. Otherwise, you can download this FREE knitting pattern right here. 🥰

Easy to knit dishcloth - great for beginners

👆🏼👆🏼👆🏼👆🏼👆🏼👆🏼

If you like how this pattern opens and how easy it is to download, this is exactly how the patterns available through my Member Area works. Becoming a member is like being a patron of the arts. By supporting me for a small fee every month, you help support me to create more patterns for you to use. You also get access to the patterns in the members area. You can see how many pattern there are currently available in my Current List of Member Patterns. For more information on how you can support me and become a member, click the button below.

I use a size 5 mm (US size 8) knitting needles but this can be done with whatever size you like. The size of you needles will determine the final size of your dishcloth. You will also need one ball (42.5 g or 1.5 oz.) of crafter 100% cotton yarn. They are available in a variety of colours just about everywhere. Look for sales or buy a big ball if you plan on making a lot of dishcloths. And don’t forget about Amazon! There’s always a great selection of 100% cotton yarn there. 

More of my stuff on Etsy:

ALL patterns on Etsy are
40% off
until March 31


You can make a widget like this for your blog or website, too.
Instructions are on my website here: How to Display Etsy Items on Your Website

The dishcloth itself is knit along the diagonal, like how TVs are measured. You can make it as big as you want, but I find 45 to 50 stitches makes for a good sized cloth. If you would like it larger, you will need to buy more balls of yarn. Make sure that your lot numbers on the balls you select are the same or else the colours may be off.

Cast on 3

Row 1: Knit

Row 2: Knit

Row 3: K1, YO, Knit to end of row. Repeat this row until there are 48 stitches on your needle.

Next Row: K1, YO, K2tog, K to last 4 stitches, K2tog, K2. Repeat this row until there are 6 stitches remaining.

Next Row: K1, YO, (K2tog) twice. K1

Next Row: K1, K2tog twice. 

Cast off.

Work in ends.

You can make variations of this basic pattern by making wider edging: Instead of K1 before the YO you can K2 or K3. You could also make the center as a stocking knit stitch (purl one row then knit the next).

Feel free to use this pattern to make your own dishcloths to sell or give away. Just don’t reprint this pattern in any form without my permission, but linking to it and sharing is always appreciated!

If you are enjoying the free videos and patterns, then please share my work! Those handy little icons along the side or bottom of the page let you do it easily. If you’d like more information on how you can keep things free, learn how you can Help Support My Work.

Posted on 15 Comments

Diamonds Dishcloth and Coasters – FREE Knitting Pattern

Knit Diamonds Dishcloth and Coasters - FREE Knitting Pattern

The dishcloth obsession continues, though I am getting a bit weary of these. Time to get around to making more art pieces.

So I’m providing this in two sizes – roughly 7 inches square and 8 inches square. The smaller size seemed almost a smidgen too small but the larger one seemed a bit larger than I would like. I suppose it could have easily been fixed with changing needle sizes but I figured I’d let others deal with that. With that said, this knitting pattern is written accordingly. The larger size repeat counts are in brackets.


It’s important to note that for this specific knitting pattern, odd rows are NOT the right side of your work. The dropping and picking up stitches happens on what would be usually considered the WRONG side or all even rows. So in short, the right side of your work is all the EVEN rows.

Also, I’ve included a bunch of photos to help you along with YO, dropping stitches, slipping stitches and making the crossed over stitches. The YO, slipping and dropping stitches are standard stitches and if you’re an experienced knitter, you probably won’t need the photos. I’ve included the photos as you go along in the pattern, but if you already feel comfortable with these stitches, the pattern is also written without the photos further down the post here – the pattern without the photos.

If you would like to print this pattern or read it without the ads, there are a few options. You can buy it from my website here – Diamonds Dishcloth and Coaster Printable Knitting Pattern, or purchase it from my Etsy shop, Ravelry, LoveCrafts, for your Kindle and as a paperback from Amazon. I’m also trying a new retailer called CreativeFabrica. Let me know what you think!

If you would like to show your continued support of my work and this website, for only $3 you can become a Website Member. This is an easy way for you to support my work and get a bunch of other patterns you can easily print off. As of the writing there are 34 patterns I’ve added to this list. I also have a Patreon option available too, but there aren’t as many patterns over there. You can use either of the links below to check out supporting my work.

If you are loving the free patterns, please consider helping me out offsetting the hosting costs of the website. You can learn more by going to this page – Help Support My Work. If you can’t make a small donation, that’s OK ?. Instead, you can help others see my work by using the share buttons. It’s such an easy thing to do and helps me so much.


Things you will need

Click any of the links below to get everything you need to make this dishcloth.

Size 5 mm (size 8 US) single point knitting needles

1 ball of crochet cotton yarn (the 1.5 oz balls are more than enough)

Darning needle to work in the ends

Cable needle – VERY optional and only necessary if dropped stitch is unraveling.

Size 3.75 mm (size 5 US) crochet hook (for edging. You may need larger or smaller depending on your tension)

Pattern With the Photos

Cast on 34 (40 sts)

Row 1: Purl across (wrong side)

Row 2: Knit across (right side)

☺︎ Row 3: P2 YO ♠︎ P5 YO P1 YO ♠︎ Repeat from♠︎ to ♠︎ 3 (4) more times. P5 YO P3

Row 4: K2 SL1

Slipping a stitch
Arrow points to YO stitch. Stitch on the right is the one you slip onto the working needle.
Slipping the stitches
Slipping the stitch from your needle onto your working needle. Do NOT work this stitch!

Drop the YO

Drop this stitch
Let this stitch fall off your needle. Do NOT work it in any way!
YO dropped

K4 ☼ SL1, Drop the YO, SL1, Drop the YO, K4 ☼ Repeat from ☼ to ☼ 3 (4) more times. SL1, Drop the YO, K2

Row 5: P2 SL1 P4 ☆ SL2 P4 ☆ Repeat ☆ to ☆ 3 (4) more times. SL1 P2

Row 6: K2 ♣︎ Drop the next stitch

Drop this stitch
This is the stitch you’re going to drop.
Stitch dropped
Stitch dropped.

K2. Pick up the dropped stitch with the non-working needle.

Pick up dropped stitch

Knit this stitch.

Pick up the dropped stitch
Drop stitch knitted.

SL2.

Slip these two stitches onto your working needle.

Drop the next stitch.

Two stitches passed over and stitch dropped.

Pass the 2 slipped stitches back to the non-working needle.

Stitches passed back to non-working needle.

Pick up and knit the dropped stitch.

Picking up the stitch.
Working the stitch.
Stitch knitted. Cross over complete.

K2 ♣︎ Repeat from ♣︎ to ♣︎ 4 (5) more times. K2

Row 7: ✙ P4 YO P1 YO P1 ✙ Repeat from ✙ to ✙ 4 (5) more times. P4

Row 8: ♥︎ K4, SL1, Drop the YO, SL1, Drop the YO ♥︎ Repeat ♥︎ to ♥︎ 4 (5) more times. K4

Row 9: ♦︎ P4 SL2 ♦︎ Repeat from ♦︎ to ♦︎ 4 (5) more times. P4

Row 10: K2 ▲ SL2, Drop the next stitch. Pass the 2 slipped stitches back to the non-working needle. Pick up the dropped stitch with the non-working needle and knit this stitch. K2. Drop the next stitch. K2. Pick up and knit the dropped stitch. ▲ Repeat from ▲ to ▲ 4 (5) more times. K2. ☺︎

Repeat from ☺︎ to ☺︎ 4 (5) more times. (Rows 3 – 10 make up one repeat of the diamond motif).

Next row: Purl across

Next row: Cast off. Do NOT cut the yarn, unless you are making the edging a different colour.

Edging

To make things as easy as possible, I’ve embedded the (very) old video I made demonstrating how to do this technique. It’s basically a backwards single crochet (Bsc) that creates a more ropey kind of look.

You may have to play around a bit with the size of hook that’s going to work the best for you. For me, based on my tension for knitting the dishcloth and tension for how I crochet, a 3.75 mm crochet hook worked best.

Row 1: With right side facing, and in the first cast off stitch that you can easily insert your hook, Bsc (backwards single crochet) around edge. Bsc in every 2nd cast off stitch along the top and bottom edges

Skip every other stitch.
Insert your hook like this.
Hook the yarn and pull through.
Hook the yarn again and pull through the two loops. Stitch made.

Bsc in every other row along the sides.

Insert hook in this stitch when working along the rows.

Join to the start of the row. Work in ends.

I found there is enough slack that you don’t need multiple stitches in the corner.

Pattern Without the Photos

Cast on 34 (40 sts)

Row 1: Purl across (wrong side)

Row 2: Knit across (right side)

☺︎ Row 3: P2 YO ✿ P5 YO P1 YO ✿ Repeat from ✿ to ✿ 3 (4) more times. P5 YO P3

Row 4: K2 SL1, Drop the YO, K4 ◆ SL1, Drop the YO, SL1, Drop the YO, K4 ◆ Repeat from ◆ to ◆ 3 (4) more times. SL1, Drop the YO, K2

Row 5: P2 SL1 P4 ♠︎ SL2 P4 ♠︎ Repeat ♠︎ to ♠︎ 3 (4) more times. SL1 P2

Row 6: K2 ♣︎ Drop the next stitch, K2. Pick up the dropped stitch with the non-working needle. Knit this stitch. SL2 Drop the next stitch. Pass the 2 slipped stitches back to the non-working needle. Pick up and knit the dropped stitch. K2 ♣︎ Repeat from ♣︎ to ♣︎ 4 (5) more times. K2

Row 7: ♥︎ P4 YO P1 YO P1 ♥︎ Repeat from ♥︎ to ♥︎ 4 (5) more times. P4

Row 8: ♦︎ K4, SL1, Drop the YO, SL1, Drop the YO ♦︎ Repeat ♦︎ to ♦︎ 4 (5) more times. K4

Row 9: ✦ P4 SL2 ✦ Repeat from ✦ to ✦ 4 (5) more times. P4

Row 10: K2 ⚽︎ SL2, Drop the next stitch. Pass the 2 slipped stitches back to the non-working needle. Pick up the dropped stitch with the non-working needle and knit this stitch. K2. Drop the next stitch. K2. Pick up and knit the dropped stitch. ⚽︎ Repeat from ⚽︎ to ⚽︎ 4 (5) more times. K2. ☺︎.

Repeat from ☺︎ to ☺︎ 4 (5) more times. (Rows 3 – 10 make up one repeat of the diamond motif).

Next row: Purl across

Next row: Cast off

Edging

The edging is a backwards single crochet (Bsc) that creates a more ropey kind of look.

You may have to play around a bit with the size of hook that’s going to work the best for you. For me, based on my tension for knitting the dishcloth and tension for how I crochet, a 3.75 mm crochet hook worked best.

Row 1: With right side facing, and in the first cast off stitch that you can easily insert your hook, Bsc (backwards single crochet) around edge. Bsc in every 2nd cast off stitch along the top and bottom edges. Bsc in every other row along the sides.

Join to the start of the row. Work in ends.

I found there is enough slack that you don’t need multiple stitches in the corner.

Hints and Tips

You may have to play around a bit with the size of the crochet hook you use.

I haven’t had any problem with the dropped stitch unraveling while knitting other stitches. If you do, you can use a cable needle to hold it in place.

Try a variation in colours too! You could make each diamond repeat a different colour. What’s marked with ? to ?. And you can also make the edging a different colour like I did. It would be a great way to use up the extra bits of cotton yarn you have.

Abbreviations

Non-working needle – Left needle if you are right handed. Right needle if you are left handed)

YO – Yarn Over. When doing a YO for the purl stitch, pull your yarn to the back of your work (like you were going to knit) and purl the next stitch. The yarn will form an extra stitch on your needle.

How to YO when purling.
Starting the yarn over
How to YO when purling.
Pull the yarn to the back of your work
How to yarn over (YO) when purling.
Pull your yarn forward and work the stitch. Increase made.
The yarn over (increased stitched)

K – Knit

P – Purl

SL – Slip the next stitch, without working it, onto your working needle. (Right needle if you’re right handed. Left needle if you’re left handed).

Bsc – Backwards single crochet.

Posted on 3 Comments

Textured Easy to Knit Scarf, Dishcloth and Coaster Pattern – 3 in 1 FREE Knitting Pattern

How to knit scarf, dishcloth and coasters

If you have ever made one of my dishcloths in the past, it really bothers me when one side of a dishcloth doesn’t look the same way on the reverse side. To me, a dishcloth should be reversible. I know, it’s weird and really isn’t that important, but we all have these random, arbitrary rules we like to follow. Well, this one hits that same-both-side requirement! Yay! My mildly OCD brain is happy.

There’s not a whole lot to say about this one. If you make it 50 stitches wide, you’ll end up making a dishcloth that is approximately 9 inches (23 cm) square. Here are links if you’re interested in making any of my other dishcloths. I have a number of them now… Diamonds Dishcloth, Cute AF Bows Dishcloth, Bars and Stripes Dishcloth, Knit a Simple Dishcloth, and Knitting for Beginners Dishcloth.


Want to make the scarf or the coasters instead? It’s easy peasy! Follow the pattern below shows which rows to repeat when making the scarf. And when making the coasters, only make it about 26 stitches wide instead of the 50 stitches for the dishcloth. Any even number will work for the width regardless if you’re making the scarf, dishcloth or the coasters.

As always, if you would prefer a printable paper version of this pattern, you can purchase and download the PDF from all of my usual sites. You can make a purchase from this website here – Textured Knitted Scarf, Dishcloth and Coasters Pattern. You can also purchase a download from my other online retailers which are LoveCraftsEtsy and Ravelry. If the link isn’t working I haven’t upload the pattern to the site yet.

Want to make a monthly contribution, avoid ads and pop-ups, and get instant, PRINTABLE downloads of my patterns? Become a Member on this website! When you become a Website Supporter for $3/month, you’ll gain access to exclusive member only posts. These posts contain one click downloads of the patterns. Simply click the Download & Print button. The PDF will automatically download to your computer or smart device. You can then read it on your device or print it at your leisure. You can download as many patterns as you like for the same $3 each month. You can go to this page to learn more, become a member and support my work… Exclusive Member Area

Abbreviations

K – knit

P – purl

Increase in the first stitch – knit in the front and back of the stitch.

K2tog – knit 2 together

Gauge

Gauge doesn’t really matter for this. It’s a dishcloth. The smaller the needle the tighter the knit. If it’s a bit looser of a knit, it’ll still work.

Things You Need

You can click any link below to see what you need.

Size 6 US (4 mm) knitting needles

Worsted weight yarn – I always use cotton yarn for dishcloths. You can use something else if you are going to make a scarf with this pattern. The amount of yarn you’ll need depends on how long and wide you want a scarf. If making dishcloths or coasters, one standard ball will be enough.

Tapestry needle – to work in the ends.

Making the Dishcloth

Cast on 5

Row 1: K across

Row 2: Increase in the first knit stitch. K across.

Row 3: Increase in the first knit stitch. K1 P1 K3

Row 4: Increase in the first knit stitch. K1 P1 K1 P1 K2

Row 5 – 6: Increase in the first knit stitch. K across.

★ Row 7: Increase in the first knit stitch. K1 *P1 K1* Repeat from * to * to the last 4 stitches P1 K3.

Row 8: Increase in the first knit stitch. K1 *P1 K1* Repeat from * to * to the last 3 stitches P1 K2.

Row 9 – 10: Increase in the first knit stitch. K across. ★ Repeat from ★ to ★ until you have 50 stitches total.

♥︎ Next row: K2 *P1 K1* Repeat from * to * to the last 4 stitches P1 K3.

Next row: K2 *P1 K1* Repeat from * to * to the last 4 stitches P1 K3.

Next 2 rows: K across. ♥︎

If you are making a scarf, repeat from ♥︎ to ♥︎ until it’s the length you want. If NOT making a scarf, continue with the pattern as follows…

♦︎ Next row: K2tog *P1 K1* Repeat from * to * to the last 4 stitches P1 K3.

Next row: K2tog *P1 K1* Repeat from * to * to the last 3 stitches P1 K2. 

Next 2 rows: K2tog. K across. ♦︎ Repeat from ♦︎ to ♦︎ until down to 8 stitches. You will have finished the first knit across row when there are 8 stitches on your needle.

Next row: K2tog. K the next stitch. Pass the K2tog loop on your working needle over the stitch you just knitted (AKA Cast off). Continue to cast off until there are 2 stitches on your non-working needle. K2tog these 2 stitches. You now have 2 stitches on your working needle. Pass the stitch over the the K2tog loop (the loop on the right over the loop on the left, if you are right handed). 

Work in the ends.

More of my stuff on Etsy:


You can make a widget like this for your blog or website, too.
Instructions are on my website here: How to Display Etsy Items on Your Website

Hints and Tips

This pattern can easily be made into a scarf of any width. I used fringe on the point for my scarf but you could attach tassels if you so desire. If you want to make this into a scarf, repeat the rows in the middle marked with the ?. It’s always 4 rows for one repeat of the pattern. The scarf in the photos is 26 stitches wide.

Not a fan of the scarf but could use some coasters? This pattern could easily be made smaller following the pattern exactly as written for the dishcloth but only making the coaster 26 stitches wide.

Make this as wide or as narrow as you like. If you feel 50 stitches are too wide, or not wide enough, do what you wish. Just always end on the second row of the knitting across rows to maintain the pattern texture.

If you want a more finished edge, you can easily do a single crochet around the edge of the dishcloth. The lighter beige dishcloth has the single crocheted edge if you’d like to see an example. I found that 2 stitches at each of the corners maintained a spaced out edging that lays flat.

Like all of my patterns you have my permission to sell and/or give away the slippers that you make using this pattern. You are NOT permitted to reprint this pattern in any form unless you have obtained my written permission to do so. 

If you have any questions, please feel free to leave a comment or send me your questions at [email protected].

Help Support My Work!

Follow me on TikTokInstagramTwitterFacebookPinterest and YouTube. Every follow, subscribe, thumbs up, like, heart and share help increase my popularity on the web and get more viewers to my work. It costs you nothing but helps me sooooo much! 

If you would like to help a little more, you can always support me on Patreon or you can make a single time donation at Buy Me a Coffee.

And just to see how many people read the entirety of a blog post…

For even more FREE knitting and crochet patterns, be sure to check out my newest website – KweenBee.ca I add new patterns regularly.

If you are a fibre artist and have a pattern you would like to share, I’d love to show case your work! Paid or free, on your own website, in your Etsy shop, on Ravelry or anywhere else, you can add your pattern. Go to – KweenBee.ca The service is free for anyone to use. I’m trying to generate a safe space for everyone to share their work that isn’t related to any of the social media sites.

Posted on 1 Comment

One Piece Knitted Dishcloth and Coasters – FREE Knitting Pattern for Beginners

Easy knitting pattern for beginners - coaster dishcloth

This knitting pattern is very versatile and can be made to be any size of square. For myself, I like it as a dishcloth. But when I started to knit up samples for the photos I realized that this design could transfer into any thing that can be square. Regardless of the size, because of the method of making it, it will always be square regardless of how many, or few, stitches are cast on at the outset. 

And no need to worry about picking up stitches or any other difficult techniques. If you can knit and cast on and cast off, you can make this. It’s not complicated at all.

For myself, I found that 32 stitches made for the perfect size dishcloth and used a little less than one of the smaller balls of cotton yarn. I like mine to be bigger but not unmanageably so. I also found that making a coaster or mini face scrubber, took about 18 stitches. These are just approximate cast on stitch counts. I found that there is some variation in the worsted weight (medium 4) yarn thickness. You may need to add 2 or 3 more cast on stitches if it’s on the thinner side.

I’ve written the pattern to make a dishcloth so started with 32 stitches cast on. A quick tip, if you use a size smaller needle (4 mm or US 6) to cast on, then switch back to the 5 mm (US 8) the starting edge looks a bit more finished and tight.

Another plus about this pattern, I finally designed something that really highlights variegated yarn. I have a great appreciation for the colour changing yarns that are available (I do not have similar feelings towards self striping yarn, but that’s a rant for another time). I found that the variegated yarn did really well with smaller size squares, though I like the pooling of colours when making the larger sized dishcloths as well.

And to sooth my quest for sameness, these washcloths are the same on both sides!! Both sides look pretty much the same. I know in the scheme of things this matters very little, but it somehow screams “correct” to me. I’m weird. I know. 

If you’re looking for an ad free pattern you can download to your computer, tablet or phone you can get that here – this website at One Piece Knitted Dishcloth and Coasters – Great Knitting Pattern for Beginners, LoveCrafts, my Etsy shop or Ravelry for a small fee. It is also available on Amazon Kindle and as a paperback.

Another way to avoid ads and pop-ups, get instant, PRINTABLE downloads of this pattern and others, is by becoming a Member on this website. When you become a Website Supporter for $3/month, you’ll gain access to exclusive member only posts. These posts contain one click downloads of the patterns. Simply click the Download & Print button. The PDF will automatically download to your computer or smart device. You can then read it on your device or print it at your leisure. You can download as many patterns as you like for the same $3 each month. You can go to this page to learn more, become a member and support my work… Exclusive Member Area

And, yes. I know this pattern becomes very obvious in how to make it once you start knitting. I wrote it out in full regardless, as some people (the few but very vocal) have a tendency to contact me if even the most obvious thing is not mentioned in my patterns. I’m trying to avoid these critical emails, just so you know.

It’s so obvious that you may be able to knit this without the pattern at all. That’s why I made the video. I’m sure some of the more experienced knitters out there will watch the first couple minutes of the video below and be like, “Ya. I got this.”

Things You Need


Size 8 US (5 mm) knitting needles

1 3/4 oz (42g) ball of 100% cotton worsted weight yarn

Large sewing needle (for working in the ends)

Gauge isn’t really important for this project as sizing is approximate.

Abbreviations

K – Knit

st – stitch

That’s it! This is a VERY simple pattern.

The Pattern

Cast on 32 (You will always have 32 stitches on your needle when the right side is facing you)

Row 1 – 2: Knit across

Row 3: K31. Leave the last stitch unworked. Turn.

Leave a stitch
Flip and knit
Back side of work always looks like normal knitting when the row is completed

Row 4: K31.

Row 5: K30. Leave the last 2 stitches unworked. Turn.

leave 2 stitches unworked

Row 6: K30.

Row 7: K29. Leave the last 3 stitches unworked. Turn.

Row 8: K29.

Row 9: K28. Leave the last 4 stitches unworked. Turn.

Row 10: K28.

Row 11: K27. Leave the last 5 stitches unworked. Turn.

Row 12: K27.

Row 13: K26. Leave the last 6 stitches unworked. Turn.

Row 14: K26.

Row 15: K25. Leave the last 7 stitches unworked. Turn.

Row 16: K25.

Row 17: K24. Leave the last 8 stitches unworked. Turn.

Row 18: K24.

Row 19: K23. Leave the last 9 stitches unworked. Turn.

Row 20: K23.

Row 21: K22. Leave the last 10 stitches unworked. Turn.

Row 22: K22.

Row 23: K21. Leave the last 11 stitches unworked. Turn.

Row 24: K21.

Row 25: K20. Leave the last 12 stitches unworked. Turn.

Row 26: K20.

Row 27: K19. Leave the last 13 stitches unworked. Turn.

Row 28: K19.

Row 29: K18. Leave the last 14 stitches unworked. Turn.

Row 30: K18.

Row 31: K17. Leave the last 15 stitches unworked. Turn.

Row 32: K17.

Row 33: K16. Leave the last 16 stitches unworked. Turn.

Row 34: K16.

Row 35: K15. Leave the last 17 stitches unworked. Turn.

More of my stuff on Etsy:


You can make a widget like this for your blog or website, too.
Instructions are on my website here: How to Display Etsy Items on Your Website

Row 36: K15.

Row 37: K14. Leave the last 18 stitches unworked. Turn.

Row 38: K14.

Row 39: K13. Leave the last 19 stitches unworked. Turn.

Row 40: K13.

Row 41: K12. Leave the last 20 stitches unworked. Turn.

Row 42: K12.

Row 43: K11. Leave the last 21 stitches unworked. Turn.

Row 44: K11.

Row 45: K10. Leave the last 22 stitches unworked. Turn.

Row 46: K10.

Row 47: K9. Leave the last 23 stitches unworked. Turn.

Row 53: K6. Leave the last 26 stitches unworked. Turn.

Row 48: K9.

Row 49: K8. Leave the last 24 stitches unworked. Turn.

Row 50: K8.

Row 51: K7. Leave the last 25 stitches unworked. Turn.

Row 52: K7.

Row 54: K6.

Row 55: K5. Leave the last 27 stitches unworked. Turn.

Row 56: K5.

Row 57: K4. Leave the last 28 stitches unworked. Turn.

Row 58: K4.

Row 59: K3. Leave the last 29 stitches unworked. Turn.

Row 60: K3.

Row 61: K2. Leave the last 30 stitches unworked. Turn.

Row 62: K2.

Row 63: K1. Leave the last 31 stitches unworked. Turn.

Two colour knitted square

Halfway Point

If you would like the other half of your square to use a different colour like shown above, attach it now.

Row 64: K1.

Row 65: K2. Leave the last 30 stitches unworked. Turn.

Row 66: K2.

Row 67: K3. Leave the last 29 stitches unworked. Turn.

Row 68: K3.

Row 69: K4. Leave the last 28 stitches unworked. Turn.

Row 70: K4.

Row 71: K5. Leave the last 27 stitches unworked. Turn.

Row 72: K5.

Row 73: K6. Leave the last 26 stitches unworked. Turn.

Row 74: K6.

Row 75: K7. Leave the last 25 stitches unworked. Turn.

Row 76: K7.

Row 77: K8. Leave the last 24 stitches unworked. Turn.

Row 78: K8.

Row 79: K9. Leave the last 23 stitches unworked. Turn.

Row 80: K9.

Row 81: K10. Leave the last 22 stitches unworked. Turn.

Row 82: K10.

Row 83: K11. Leave the last 21 stitches unworked. Turn.

Row 84: K11.

Row 85: K12. Leave the last 20 stitches unworked. Turn.

Row 86: K12.

Row 87: K13. Leave the last 19 stitches unworked. Turn.

Row 88: K13.

Row 89: K14. Leave the last 18 stitches unworked. Turn.

Row 90: K14.

Row 91: K15. Leave the last 17 stitches unworked. Turn.

Row 92: K15.

Row 93: K16. Leave the last 16 stitches unworked. Turn.

Row 94: K16.

Row 95: K17. Leave the last 15 stitches unworked. Turn.

Row 96: K17.

Row 97: K18. Leave the last 14 stitches unworked. Turn.

Row 98: K18.

Row 99: K19. Leave the last 13 stitches unworked. Turn.

Row 100: K19.

Row 101: K20. Leave the last 12 stitches unworked. Turn.

Row 102: K20.

Row 103: K21. Leave the last 11 stitches unworked. Turn.

Row 104: K21.

Row 105: K22. Leave the last 10 stitches unworked. Turn.

Row 106: K22.

Row 107: K23. Leave the last 9 stitches unworked. Turn.

Row 108: K23.

Row 109: K24. Leave the last 8 stitches unworked. Turn.

Row 110: K24.

Row 111: K25. Leave the last 7 stitches unworked. Turn.

Row 112: K25.

Row 113: K26. Leave the last 6 stitches unworked. Turn.

Row 114: K26.

Row 115: K27. Leave the last 5 stitches unworked. Turn.

Row 116: K27.

Row 117: K28. Leave the last 4 stitches unworked. Turn.

Row 118: K28.

Row 119: K29. Leave the last 3 stitches unworked. Turn.

Row 120: K29.

Row 121: K30. Leave the last 2 stitches unworked. Turn.

Row 122: K30.

Row 123: K31. Leave the last stitch unworked. Turn.

Row 124: K31.

Row 125: K32. 

Cast off on the WRONG side.

Hints and Tips

If you would like to make smaller squares for coasters or pot scrubbers, cast on fewer stitches. The basic idea for the pattern is to always leave one less stitch done every other row. Once you’re down to one stitch, knit one extra stitch every other row.

I know I mentioned this in the intro but it deserves repeating. If you use a size smaller needle (4 mm or US 6) to cast on, then switch back to the 5 mm (US 8) the starting edge looks a bit more finished and tight.

You don’t have to use cotton yarn if you’re going to make coasters. An acrylic or wool blend would also work well. And you can also use up some of your yarn stash this way too. Great little things to sell at a garage sale, or craft fair and recoup a little of the money already spent on the yarn.

Use these squares for anything! As long as your yarn is the same thickness and type, all acrylic let’s say, you could easily use up your last little yarn bits to make an afghan or throw blanket. I don’t quilt but I know that triangles and squares make up a good portion of quilt designs. Knitting squares that are two colours along the diagonal put together the solid coloured squares could make some very interesting patterns.

These also make good trivets or pot holders for taking things out of the oven, but only if… they are NOT wet and are made of 100% cotton. Any acrylic or polyester blend will melt to the pot and possible fingers, counter tops or tables. And ain’t nobody got time for that!!

Like all my work, you are permitted to sell, give away or keep whatever physical items you make using this pattern. You do NOT have permission to copy or redistribute this pattern (or any of my patterns) in any form either digitally or physically. That includes printed copies of the pattern either as photos or any file format.

Posted on 5 Comments

Knitting for Beginners – How to Knit a Dishcloth

Lacey Dishcloth

If you wanted to learn how to knit, this is the perfect project! Using only 3 basic stitches and including a complete step-by-step video embedded on the bottom of this page, you can make a beautiful lace like dishcloth. If you’d prefer to download the pattern so you can take it wherever you go, the download is available on this website – Dishcloth Pattern, Etsy, Ravelry and LoveCrafts. If the links aren’t working, I haven’t uploaded it to that retailer yet.

And here’s a bit more info for you. Not only can you use the pattern create a dishcloth, but if you add more rows, you can easily use the same pattern to make a scarf!

This is exactly what a newbie knitter needs to get his or her knit on! For more the seasoned knitter, this pattern doesn’t require a gauge as it’s a dishcloth and sizing isn’t important. Also, if you want to make a larger dishcloth, increase the number of initial stitches cast on and increase the number of repeated rows to make it square.

free Knitting Pattern - Lacey Dishcloth

Want to make a monthly contribution, avoid ads and pop-ups, and get instant, PRINTABLE downloads of my patterns? Become a Member on this website! When you become a Website Supporter for $3/month, you’ll gain access to exclusive member only posts. These posts contain one click downloads of the patterns. Simply click the Download & Print button. The PDF will automatically download to your computer or smart device. You can then read it on your device or print it at your leisure. You can download as many patterns as you like for the same $3 each month. You can go to this page to learn more, become a member and support my work… Exclusive Member Area

Things you need:

Size 3 US (3 or 3.25 mm) knitting needles

1 3/4 oz (50g) ball of 100% cotton worsted weight yarn

Size 8 US (5 mm) crochet hook – this is optional

Large sewing needle


Cast on 35 sts

Row 1 – 5: Knit across

* Row 6: Lace knit stitch across.

To make this stitch, simply wrap the yarn twice around the knitting needle and work as any knit stitch. (Watch the how-to for this stitch at the bottom of this post.)

Row 7 – 11: Knit across.* Repeat from * to * more times. There will be 9 lace rows.

Cast off

If you want to make a scarf simply repeat from * to * as many times as you like until you knit the length you want.

More of my stuff on Etsy


You can stop here if you choose to not crochet the edge. If you prefer a more finished edge for your dishcloth, single crochet evenly around the edge. Make 2 sc in each set of 5 rows, 1 sc in the lace knit row, 3 sc in each corner, and 1 sc in each knitted stitch along the cast on edge and the cast off edge.


That’s it! Like I said before, this is a very repetitive pattern that enables the newbie knitter to master a few basic stitches while still making something they can be proud of. A more experienced knitter can make these in a few hours or less and great to whip up if you want to give them as a gift, sell them online or at a local market, or even if you need a dishcloth for yourself. An let’s be honest, can you ever have too many dishcloths? Or is that just me…


Posted on 11 Comments

Cute AF Bows Dishcloth – FREE Knitting Pattern

Knitted Dishcloth Pattern - With Bows!

So social distancing and forced unemployment seems to be going well for me…or at least incredibly productive as far as my pattern designing goes. Sigh! It certainly is a weird time. Anywho…

If you’ve done a little knitting before and are looking for something that’s a bit more challenging, why not give this knitted dishcloth pattern a whirl! It’s not overly complicated and looks awesome when you’re done. If you know knitting basics, you can easily get this done in an evening over the course of a couple of hours. If you are just learning how to knit or need to brush up on your knitting skills, I’ve also included links in the pattern to videos that show you how to do all the basic stitches including: casting onknit stitchpurl, and bind off.


I really like this bow motif. In case you haven’t run across my other use of these cute AF bows, check out my Easy to Knit Bows Slippers knitting pattern. The bows themselves are made as you go and guaranteed to never fall off. For convenience, I’ve included the same pictorial showing how you knit them. If you’ve already made enough bows to choke a small horse, I have the pattern written in full without all the photos – The Whole Damn Pattern Written Without the Photos.


If you are enjoying the free patterns, please consider helping out financially by going to my page Help Support My Work. If you’re not in the position to make a small donation, please help me out by sharing this pattern with anyone you think may enjoy it. I’ve include these handy buttons ?? to make it super easy. All you have to do is click!

Due to the popularity of other PDF’s I’ve been creating, I finally got around to making the downloadable version of this pattern. For a minimal cost , you can download the ad free version. You can get it directly from this website here – How to Knit a Cute AF Bows Dishcloth. If you would prefer to use another online retailer to download from, you can also find and download this pattern on LoveCrafts, Ravelry or Etsy.

Want to make a monthly contribution, avoid ads and pop-ups, and get instant, PRINTABLE downloads of my patterns? Become a Member on this website! When you become a Website Supporter for $3/month, you’ll gain access to exclusive member only posts. These posts contain one click downloads of the patterns. Simply click the Download & Print button. The PDF will automatically download to your computer or smart device. You can then read it on your device or print it at your leisure. You can download as many patterns as you like for the same $3 each month. You can go to this page to learn more, become a member and support my work… Exclusive Member Area

Make sure you check out my other dishcloth patterns on this site. You may be interested in checking out: Diamonds Dishcloth (No download available, yet), Bars and Stripes Knitted Dishcloth Pattern, Knit a Simple Dishcloth, and How to Knit a Dishcloth (great for beginners and has a complete how-to video). There are other crochet dishcloth patterns on my site, too.

Free Knitted Dishcloth Pattern - With Bows!

Things you will need

Click on any of the links below to get exactly what you need for this project sent right to your door.

1 ball of worsted weight cotton yarn (usually you’ll use less than one whole small 1.5 oz ball like those shown below).

Size 4.5 mm (US 7) knitting single point knitting needles or whatever size to obtain correct gauge.

Darning needle to sew seams and work in the ends

Gauge

Doesn’t really matter for this project. If you use a larger needle it will be a looser knit and may use more than one small ball of cotton yarn.

The Pattern

Cast on 35

Row 1 – 7: K1 across.

Row 8: K5 P25 K5

☺︎ Row 9: K5 ♠︎ P1. Hold the yarn in front of your work. Pass the next 3 stitches over to the other needle (Strand made).

Purl the next stitch.

How to knit a bow

How to knit a bow

How to knit a bow

K5 ♠︎ Repeat from ♠︎ to ♠︎ 2 more times.

(Row 9 rewritten without photos: K5 ♠︎ P1. Hold the yarn in front of your work. Pass the next 3 stitches over to the other needle (Strand made). Purl the next stitch. K5 ♠︎ Repeat from ♠︎ to ♠︎ 2 more times.

Row 10: K5 ♣︎ K1 P3 K1 P5 ♣︎ Repeat from ♣︎ to ♣︎ 1 more time. K1 P3 K6

Row 11: Repeat row 9.

Row 12: Repeat row 10.

Row 13: Repeat row 9.

Row 14: Repeat row 10. The bow portion will look like this.

 How to knit a bow

Row 15: K5 ♦︎ P1 K1 Pick up the three strands from the bottom up.

How to knit a bow

Knit the next stitch.

How to knit a bow

Pull the loop down through the 3 strands (Bow completed).

How to knit a bow

How to knit a bow

K1 P1 K5 ♦︎. Repeat from ♦︎ to ♦︎ 2 more times.

(Row 15 rewritten without photos: K5 ♦︎ P1 K1 Pick up the three strands from the bottom up. Knit the next stitch and pull the loop down through the 3 strands (Bow completed). K1 P1 K5 ♦︎ Repeat from ♦︎ to ♦︎ 2 more times.

The bow portion will look like this.

How to knit a bow

Row 16: As row 10

Row 17: K across

Row 18: As row 8.

Row 19: K10 ⚽︎ P1. Hold the yarn in front of your work. Pass the next 3 stitches over to the other needle (Strand made). Purl the next stitch. K5 ⚽︎ Repeat from ⚽︎ to ⚽︎ once. K5.

Row 20: K5 P5 ✦ K1 P3 K1 P5 ✦ Repeat from ✦ to ✦ 1 more time. K5.

Row 21: As row 19.

Row 22: As row 20.

Row 23: As row 19

Row 24: As row 20

Row 25: K10. ☆ P1 K1 Pick up the three strands from the bottom up. Knit the next stitch and pull the loop down through the 3 strands (Bow completed). K1 P1 K5 ☆ Repeat from ☆ to ☆ 1 more time. K5

Row 26: Repeat row 20.

Row 27: Knit across.

Row 28: As row 8. ☺︎ Repeat ☺︎ to ☺︎ (row 9 to row 28 make the pattern.)

Repeat rows 9 -17 once.

Knit across 5 rows.

Cast off


The Pattern Without Any Photos

It’s actually very repetitive like most simple knitted dishcloth patterns.

Cast on 35

Row 1 – 7: K1 across.

Row 8: K5 P25 K5

☺︎ Row 9: K5 ♠︎ P1. Hold the yarn in front of your work. Pass the next 3 stitches over to the other needle (Strand made). Purl the next stitch. K5 ♠︎ Repeat from ♠︎ to ♠︎ 2 more times.

Row 10: K5 ♣︎ K1 P3 K1 P5 ♣︎ Repeat from ♣︎ to ♣︎ 1 more time. K1 P3 K6

Row 11: Repeat row 9.

Row 12: Repeat row 10.

Row 13: Repeat row 9.

Row 14: Repeat row 10. The bow portion will look like this.

Row 15: K5 ♥︎ P1 K1 Pick up the three strands from the bottom up. Knit the next stitch. Pull the loop down through the 3 strands (Bow completed). K1 P1 K5 ♥︎. Repeat from ♥︎ to ♥︎ 2 more times.

Row 16: As row 10

Row 17: K across

Row 18: As row 8.

Row 19: K10 ♦︎ P1. Hold the yarn in front of your work. Pass the next 3 stitches over to the other needle (Strand made). Purl the next stitch. K5 ♦︎ Repeat from ♦︎ to ♦︎ once. K5.

Row 20: K5 P5 ⚽︎ K1 P3 K1 P5 ⚽︎ Repeat from ⚽︎ to ⚽︎ 1 more time. K5.

Row 21: As row 19.

Row 22: As row 20.

Row 23: As row 19

Row 24: As row 20

Row 25: K10. ✦ P1 K1 Pick up the three strands from the bottom up. Knit the next stitch and pull the loop down through the 3 strands (Bow completed). K1 P1 K5 ✦ Repeat from ✦ to ✦ 1 more time. K5

Row 26: Repeat row 20.

Row 27: Knit across.

Row 28: As row 8. ☺︎ Repeat ☺︎ to ☺︎ (row 9 to row 28 make the pattern.)

Repeat rows 9 -17 once.

Knit across 5 rows.

Cast off

Like all of my patterns, the viewing of this patterns allows for you to give away or sell any of the physical items you make from this pattern. You are not allowed to claim this pattern as your own, give it away, sell it or redistribute it in ANY form without my WRITTEN consent. That includes Printing this webpage.

And to those who think it doesn’t matter… meh. It’s theft of my intellectual property (ip) and it makes you look like a douche. Just sayin’.

Posted on 8 Comments

Bars and Stripes Knitted Dishcloth Pattern – Learn How to Knit

Bars and Stripes Knitted Dishcloth Pattern

I only use hand knit dishcloths and have for years. I can’t express the superiority of these things! Regardless of the style, and I have designed a few, they last forever, have fabulous scrubbing power and double as a great heat protector when setting a hot pan on the counter or grabbing something out of the oven. They wash well and it’s nice to have something on hand that reminds you of how truly crafty you are ?


Not only are these great to have around, but this is another great project for anyone learning how to knit. This knitting pattern uses very basic stitches and I’ve made a complete how-to video showing every single step! Learn to cast on, knit, purl, cast off and work in the ends when you are finished. All you need to do is press the ▶️ button to start watching.

Learn how to knit and make a lovely dishcloth!

If you’re learning how to knit, this is a great project to learn on. Even if it doesn’t turn out perfectly, you still have a useable item. And if you do know how to knit already, it’s a great way to use up the left overs from your stash. And who couldn’t use an extra dishcloth or two anyways.

Want to make a monthly contribution, avoid ads and pop-ups, and get instant, PRINTABLE downloads of my patterns? Become a Member on this website! When you become a Website Supporter for $3/month, you’ll gain access to exclusive member only posts. These posts contain one click downloads of the patterns. Simply click the Download & Print button. The PDF will automatically download to your computer or smart device. You can then read it on your device or print it at your leisure. You can download as many patterns as you like for the same $3 each month. You can go to this page to learn more, become a member and support my work… Exclusive Member Area

If you are loving this and all the other free knitting patterns on this site, please consider checking out Help Support My Work page. If you can’t afford to help out financially, which I’m totally cool with btw, please consider sharing this pattern with everyone you think may be interested. I’ve included these handy dandy share buttons below. You can help promote this site with a few simple clicks!


This pattern is now available for download for a small fee/donations. You can download the ad free, printable version from a number of online retailers. You can download it from my website – Bars and Stripes Knitted Dishcloth, my Etsy shop, and Ravelry.

Things you will need

The Pattern

The repeat signs are different in this pattern than what is mentioned in the video. If you haven’t watched the video, then you can ignore the unicorn and teddy bear comments written below.

FYI – this image ♠︎ replaces in the video
This image ♦︎ replaces in the video

Cast on 39 sts.

Row 1 – 6: Knit across

♠︎ ♦︎ Row 7: K4 P1 *(K4 P1)* Repeat from * to * 5 times more. K4

Row 8: K5 *(P4 K1)* Repeat from * to * 5 times more. K4 ♦︎

Repeat from ♦︎ to ♦︎ 2 more times.

Next row: Repeat row 7

Next row: Knit across ♠︎

Repeat from ♠︎ to ♠︎ 5 more times.

Knit across the next 4 rows.

Cast off.

My stuff on Etsy

ALL patterns on Etsy are
40% off
until March 31


You can make a widget like this for your blog or website, too.
Instructions are on my website here: How to Display Etsy Items on Your Website

Hints and Tips

I’ve made the pattern so it is a square as I could get it. If you feel it’s too long (or short) add or take away ♠︎ to ♠︎ repeats. It’s a washcloth, not rocket science. The final piece can be however you like it.

I know some people (Me. I’m some people) like things to have the same motif on both sides. This isn’t one of those things. The backside isn’t terrible, just different from the front. It’s either going to offend you to the core of your being or you won’t give a fµ€k. It’s your call.

If you hold the cast on end to the back of your work and catch the yarn every other stitch, you’ll have one less end to sew in. I’ve made a quick photo tutorial showing you how to do it. You can see it here – How to Work in Ends While Knitting. I hate sewing in ends and this is a great technique to learn.

If you have any questions or comments you can send me an email through my contact page. The comment section at the bottom of this pattern is also great to post your questions. I answer them ASAP.

This pattern grants you the pleasure and profit of selling or giving away anything that you make. It does NOT give you permission to publish, print or distribute it in any format. You are NOT permitted to claim this pattern as your own. Please respect mine, and other author’s rights. You’re a huge jerky jerk if you do this and I’m certain puppy dogs don’t like you because you’re such a horrible person. How can you live with yourself???

Posted on Leave a comment

Crochet a Skull and Crossbones Dishcloth

crochet skull and crossbones dishcloth

Because even pirates and rock stars need to do the dishes, I’ve created the coolest dishcloth known to man.  That’s right! A crocheted dishcloth that’s reversible with a skull and crossbones on it. Now who DOESN’T want that in their kitchen! Crazy people, that’s who.

crochet skull dishcloth

This dishcloth is very easy to make and a great project for beginners as it uses very basic crochet stitches that are easy to master. For the tougher points, like making the teeth (simply an elongated double crochet) and the edging, there are photos and a video to help you along. Or you can keep scrolling down the page to watch it here.

I also have made this pattern available for download here – Download the Skull and Crossbones pattern


Get the PDF version of the pattern from my website. A PDF file will work on any device (iPad, tablet, smartphone, computer, etc.) however you will need Adobe Reader to open and view the file. This is a free program which can be downloaded here – http://get.adobe.com/reader/

Liking the free patterns and would like to see more? Consider supporting my work with a small donation through PayPal or by making a purchase of any of my hand made items. You can do both by going to this page – Help Support My Work. Clicking and sharing this pattern, and my other patterns, on social media also helps me out immensely. I’ve provided links above that enable you to do so easily.

Things you need:

Size 4.25 crochet hook (Size doesn’t really matter but if you use a larger hook, the dishcloth will be larger, and with a smaller hook, it will be smaller)

50 gr (1 3/4 oz) ball of cotton yarn (you’ll have leftovers).

Darning needle (to work in ends)

Ch 34

Dc in 3rd ch from hook and remaining 32 ch. Ch 2 (counts as 1st dc of next row), turn. (33 sts)

Row 2: Dc in each dc. Ch 2, turn.

Row 3: 7 dc, ch 2, skip next 2 sts, 13 dc, ch 2, skip next 2 sts, 8 dc. Ch 2, turn.

Row 4: 9 dc, ch 1, skip next st, 11 dc, ch 1 skip next st, 10 dc. Ch 2, turn.

Row 5: 10 dc, ch 1, skip next st, 9 dc, ch 1 skip next st, 11 dc. Ch 2, turn.

Row 6: 11 dc, ch 1, skip next st, 7 dc, ch 1 skip next st, 12 dc. Ch 2, turn.

Row 7: 11 dc, ch 1, skip next st, 7 dc in each dc (click that link or scroll down the page to see photos to help you along) st below, ch 1 skip next st, 12 dc. Ch 2, turn.

Row 8: 9 dc, ch 1, skip next st, 11 dc, ch 1 skip next st, 10 dc. Ch 2, turn.

Row 9: 8 dc, ch 1, skip next st, 6 dc, ch 1, skip next st, 6 dc, ch 1 skip next st, 9 dc. Ch 2, turn.

Row 10-11: 8 dc, ch 1, skip next st, 13 dc, ch 1, skip next st, 9 dc. Ch 2, turn.

Row 12: 8 dc, ch 1, skip next st, 3 dc, ch 2, skip next 2 sts, 3 dc, ch 2, skip next 2 sts, 3 dc, ch 1, skip next st, 9 dc. Ch 2, turn.

Row 13: 7 dc, ch 1, skip next stitch, 1 dc, ch 1, skip next stitch, 11 dc, ch 1, skip next stitch, 1 dc, ch 1, skip next stitch, 8 dc. Ch 2, turn.

Row 14: 6 dc, ch 1, skip next st, 3 dc, ch 1, skip next st, 9 dc, ch 1, skip next st, 3 dc, ch 1, skip next st, 7 dc. Ch 2, turn.

Row 15: 5 dc, ch 1, skip next st, 5 dc, *ch 1, skip next st, dc* (repeat from * to * 4 times more) 4 dc, ch 1, skip next st, 6 dc. Ch 2, turn.

Row 16: 3 dc, ch 2, skip next 2 sts, 21 dc, ch 2, skip next 2 sts, 4 dc. Ch 2, turn.

Row 17: Dc in each dc. Ch 2, turn.

Row 18: Dc in each dc. Ch 1.


Edging:

With right side facing, Bsc (backwards single crochet) around edge. Bsc between every 2nd dc along the top and bottom edges and around each dc and ch 2 post along the sides. Not sure how to do a backwards single crochet? Watch my how-to video on YouTube here: Crochet Edging for Dishcloths.

Hints and tips:

Use any cotton yarn that you like. Cotton only! Acrylic doesn’t work well for dish washing, and wool will felt and look pretty disgusting after a while. Also, I’ve written the pattern to use less than one ball of the most common cotton yarns available in big box stores (one starts with a “W”). These make great gifts that are extremely affordable to make.

When skipping a stitch you may be making a dc in either a ch or a dc. St is used regardless to make the pattern easier to read.

Hold the starting yarn end behind the your work when making the edging. That way you only have the final end to sew in when done.

You can make the edging in a different colour for a bit of extra pizzazz. I don’t because I strongly dislike sewing in ends. An extra colour means extra work ?

Find more of my stuff on Etsy:


You can make a widget like this for your blog or website, too.
Instructions are on my website here: How to Display Etsy Items on Your Website

Abbreviations:

ch – chain

dc – double crochet

Bsc – backwards single crochet


dc in dc below –

Instead of passing the hook through the top of the stitch, pass the hook through the bottom.


Hook the yarn and pull it through the hole. Pull the yarn up and level with the previous stitches.


Hook your yarn and pull through the first two loops.


Hook the yarn and pull through the last two loops.


Posted on 1 Comment

How to Crochet a Dishcloth – A Beginner’s Pattern

How to crochet a dishcloth - Free pattern

The pattern itself is very easy to do and definitely one that a person new to crocheting could follow.  I’ve also provided the pattern with two different edges.  My personal preference is to end it with a backwards single crochet, but a single crochet in each stitch and row will also work.

If you are new to crocheting, I’ve included links to points in the video to help you with specific rows and stitches. If you’d like to watch the video from the beginning you can use this link: Crochet a Dishcloth or you can scroll down to watch the video from this page. If you’d like to download the ad free version of this crochet pattern, you can download it for a small fee/donation from my website: Crochet a Dishcloth.


To help you with some of the more tricky parts, all the rows (and a few of the stitches) are clickable links that will take you to the correct point in the video that demonstrates exactly how to do it. The links will take you off this site and on to YouTube. If you want to watch the video here, scroll to the bottom of the page to view it.

If you like this crochet pattern, be sure to check out my crochet skull dishcloth.

Enjoying the free videos and patterns and would like to see more? Then please share my work! Those handy little icons along the side or bottom of the page let you do it easily and help me immensely ?. If you’d like more information on how you can keep things free, learn how you can Help Support My Work.

Things you will need:

Size 8 (5 mm) crochet hook

50 gr (1 3/4 oz) ball of crochet cotton (Click that link to see what I mean. It’s NOT the regular acrylic yarn but 100% cotton.)

Ch 42

Row 1: Sc in 4th ch from the hook.  *Ch 1, skip a ch, sc in next ch.*  Repeat from * to * until the end of the chain.  Ch 2, turn. (20 sc)  If you have too many chains see how to fix that here: How to Undo Chain Stitches.

Row 2: Sc in the ch 1 space.  *Ch 1, sc in next ch 1 space.*  Repeat from * to * until the end of the row.  Sc in the ch 4 space from the beginning chain.  Ch 2, turn.

Row 3: Sc in the ch 1 space.  *Ch 1, sc in next ch 1 space.*  Repeat from * to * until the end of the row.  Sc in the ch 2 space from the previous row.  Ch 2, turn.

Repeat row 3 until the dishcloth is square or the desired length.

How to crochet a dishcloth

Edging:

Single Crochet (White dishcloth as shown above):

Row 1: Sc in each row along the left edge of the dishcloth.  3 sc in the corner st.  1 sc in each sc along bottom edge.  3 sc in corner st.  Sc in each row along the right edge of the dishcloth.  3 sc in the corner st.  1 sc in each sc along top edge.  Finish off.

More of my patterns on Etsy


You can make a widget like this for your blog or website, too.
Instructions are on my website here: How to Display Etsy Items on Your Website

Backwards Single Crochet (Purple dishcloth as shown above):

Row 1: Complete 1 bsc (backwards single crochet) in every 2nd stitch of the row you just made. 1 bsc in the corner st.  1 bsc in every 2nd row along the right edge of the dishcloth.  1 bsc in the corner st.  1 bsc in every 2nd st along the bottom edge of the dishcloth.  1 bsc in the corner st.  1 bsc in every 2nd row along the left edge. 1 bsc in the corner st.  Finish off.

How to do a bsc (backwards single crochet):

Here’s the video that can show you how.  Keep scrolling down the page to see the pictorial how-to.

Unlike regular crochet stitches and instead of working from right to left in regular crochet (if you’re right handed), you’re going to work from left to right.

Step 1:  Insert the hook from front to back in the next st.

How to crochet a dishcloth

Step 2: Hook the yarn and draw the loop through the front of your work.

Unlike regular crochet stitches and instead of working from right to left in regular crochet (if you're right handed), you're going to work from left to right. Step 1: Insert the hook from front to back in the next st.

Step 3:  Hook the yarn and draw through the two loops.  Pretty simple, huh?

Unlike regular crochet stitches and instead of working from right to left in regular crochet (if you're right handed), you're going to work from left to right. Step 1: Insert the hook from front to back in the next st.

You can adjust the size as you see fit.  I prefer a smaller dishcloth but you may like it larger. You can either add more chains at the start of the cloth or you can make more rows. Either way will work but remember to buy more yarn if you want it larger. You can also use a larger size hook to make the stitches looser.

And as promised, here is the complete step-by-step video for you to watch.