
Find cozy knit hat patterns, winter beanie patterns, warm toques, and handmade caps that are perfect for cold weather. All of my free knitting patterns are free to read online, including beginner friendly knitting patterns and easy step by step knitting projects. Many patterns come with full how to videos, making them ideal for anyone learning how to knitor looking for simple knitting tutorials. Whether you want an easy knitted hat pattern, a free beanie knitting pattern with video instructions, or a winter toque pattern you can finish fast, you will find plenty of free and easy knitting patterns with videos for all skill levels. Perfect for knitters searching for free knitting patterns with how to videos that teach every stitch.
Do you know someone who would enjoy these knitted washcloth patterns? Be sure to share this page with the handy links below.
And now for the patterns. The list is all my current hat and beanie patterns available to read for free on the website. It automatically updates as I write and post new knitted dishcloth patterns so be sure to check back often.


Free Knitting Pattern: Scrap Yarn Hat – Bobble Beanie & Fisherman Hat
This is a free knitting pattern for a scrap busting beanie, featuring two hat styles: a bobble beanie and a fisherman-style hat. Knit flat with an easy 14-row repeat, it’s a simple, beginner-friendly project that’s perfect for scrap yarn or a clean two-colour finish. Inspired by my original Easy Scrap Yarn Bobble Beanie, this pattern also works beautifully with planned colour combinations. The slim highlight stripes between sections help pull everything together into a neat, finished look, whether you go scrappy or coordinated. I made a video showing how I catch the yarn ends while knitting so they’re worked in automatically as you go. No going back later trying to weave in a hundred little tails. If you do it correctly, there are only 2 ends left to sew in when you’re done: the cast-on tail and the yarn tail left after sewing the seam. You can watch how to do that below. https://youtu.be/1_zF6HAzsfY If you would prefer the printable version of the pattern, I have a number of online retailers you can buy it from including online at KweenBee on Shopify, Etsy, Ravelry and Buy Me A Coffee. I also have the paperback booklet and Kindle versions available on Amazon. Don’t forget to share this pattern with anyone you think may like it on your social media accounts. It’s free for everyone to use and it’s a great way to support my work without paying a single cent. I even included the handy share button right here 👇🏼 This isn’t my first winter hat I’ve designed. It’s have many more than what’s listed here. Clicking any of the photos below will take you right to the FREE pattern to make it. Click Me for ALL Hats and Beanies! Things You Will Need Set of 4 mm (6 US) single pointed needles Tapestry needle to sew the seams and work in ends Worsted weight yarn scraps or 2 coordinated colours. Any standard ball of yarn bought at a big box store will be enough. The amount of scrap yarn you’ll need for each section will differ depending on the size you make. For the largest size, the scrap ball needs to be the size of a bottom of a pop or soda can. There will be a bit leftover. The ball of yarn on the bottom of a soda can for comparison. Gauge In stockinette stitch. Gauge is not overly important for this. The garter stitch used makes it very stretchy. size 4 mm (US size 6) single pointed needles 10 stitches every 2 inches (5 cm) 14 rows every 2 inches (5 cm) Sizing Sizing is written as such: Small (Medium, Large, X-Large) All age and sizing references in this pattern are estimates and based on the measurement around the head (circumference). Small – Kids 1-5 years (18 inches or 46 cm) Medium – Kids 6-10 (20 inches or 50 cm) Large – Kids ages 11 to small adults (22 inches or 56 cm) X-Large – People 24 inches or 61 cm and up Colour Notations I had to use something to delineate between colour changes. You will have more colours than what I list here if using scrap yarn. Depending in the size, it could be 10 – 13 colours. OC – other colour (scrap yarn colours or main colour) HC – highlight colour (colour between sections) Please note, this is a VERY forgiving pattern with a LOT of stretch. Short Fisherman’s Beanie This beanie is made in sections that are knit from the crown of the head down toward the forehead, not in rows going around the head like a traditional beanie. Cast on 38 (42, 45, 47) with OC ♥ Row 1: HC K1. OC K28 (31, 33, 34) P9 (10 , 11, 12) Row 2: P8 (9, 10, 11). K29 (32, 34, 35). Turn. Leave remaining 1 st unworked. Row 3: HC K2. OC K26 (29, 31, 32) P9 (10 , 11, 12) Row 4: P8 (9, 10, 11). K27 (30, 32, 33). Turn. Leave remaining 3 sts unworked. Row 5: HC K2. OC K24 (27, 29, 30) P9 (10 , 11, 12) Row 6: P8 (9, 10, 11). K25 (28, 30, 31). Turn. Leave remaining 5 sts unworked. Row 7: HC K2. OC K22 (25, 27, 28) P9 (10 , 11, 12) Row 8: P8 (9, 10, 11). K23 (26, 28, 29). Turn. Leave remaining 7 sts unworked. Row 9: HC K2. OC K20 (23, 25, 26) P9 (10 , 11, 12) Row 10: P8 (9, 10, 11). K21 (24, 26, 27). Turn. Leave remaining 9 sts unworked. Row 11: HC K2. OC K18 (21, 23, 24) P9 (10 , 11, 12) Row 12: P8 (9, 10, 11). K19 (22, 24, 25). Turn. Leave remaining 11 sts unworked. If changing to a new colour, break OC now. If making the hat 2 colours do NOT break. Row 13: HC K18 (21, 23, 24) P9 (10 , 11, 12) Row 14: K9 (10 , 11, 12). P29 (32, 34, 35). ♥ Repeat from ♥ to ♥ 8 (9, 10, 11) times more for 9 (10, 11, 12) sections total. More of My Stuff On Etsy! Tall Bobble Beanie This beanie is made in sections that are knit from the crown of the head down toward the forehead, not in rows going around the head like a traditional beanie. Cast on 42 (47, 52, 57) with OC ♦ Row 1: HC K1. OC K32 (36, 40, 44) P9 (10 , 11, 12) Row 2: P8 (9, 10, 11). K33 (37, 41, 45). Turn. Leave remaining 1 st unworked. Row 3: HC K2. OC K30 (34, 38, 42) P9 (10 , 11, 12) Row 4: P8 (9, 10, 11). K31 (35, 39, 43). Turn. Leave remaining 3 sts unworked. Row 5: HC K2. OC K28 (32, 36, 40) P9 (10 , 11, 12) Row 6: P8 (9, 10, 11). K29 (33, 37, 41). Turn. Leave remaining 5 sts unworked. Row 7: HC K2. OC K26 (30, 34, 38) P9 (10 , 11, 12) Row 8: P8 (9, 10, 11). K27 (31, 35, 49). Turn. Leave remaining 7 sts unworked. Row 9: HC K2. OC K24 (28, 32, 36) P9 (10 , 11, 12) Row 10: P8 (9, 10, 11). K25 (29, 33, 37). Turn. Leave remaining 9 sts unworked. Row 11: HC K2. OC K22 (26, 30, 34) P9 (10 , 11, 12) Row 12: P8 (9, 10, 11). K23 (27, 31, 35). Turn. Leave remaining 11 sts unworked. If changing to a new colour, break OC now. If making the hat 2 colours do NOT break. Row 13: HC K22 (26, 30, 34) P9 (10 , 11, 12) Row 14: K9 (10 , 11, 12). P33 (37, 41, 45). ♦ Repeat from ♦ to ♦ 8 (9, 10, 11) times more for 9 (10, 11, 12) sections total. Hints and Tips Each section measures approximately 2 inches (5 cm) wide if your gauge is similar to what is given. Use yarns with different textures and variegated colours to create truly unique beanies! Make Read more
Read more
Leaves of the Shadow Glen Hat – Free Two Needle Knit Flat Pattern
Knit flat on 2 straight needles, the Leaves of the Shadow Glen Hat is worked in an unconventional way that sets it apart from a traditional beanie. This is not a beginner pattern, but for knitters ready for a rewarding challenge, the journey is well worth it. The construction unfolds gradually, with cables forming flowing stems and sculpted leaves emerging as you work. If the shaping feels unexpected at first, trust the process. Each step builds toward a warm, fitted hood-style beanie with striking texture and depth. Clear photos and step by step video tutorials guide you through the cabling and leaf techniques, giving you the support you need as the design comes together into something truly distinctive. If you love the leaf design but would prefer a more traditional beanie shape to your hat, you can take a peak at this pattern. It’s my Autumn Leaf Winter Beanie Hat – FREE Knitting Pattern. There is also a similar hat I designed but the leaves are a standard cable pattern. It’s called Woodland Wanderer Knit Hat – FREE Knitting Pattern Not a fan of reading things online or would like to print this pattern? You can download the ad free PDF version of this pattern from my Shopify shop, Buy Me A Coffee or from my Etsy Shop. If you shop on Amazon I also have the Kindle and paperback versions. Links coming soon! Love the pattern and want to let other people know about it? I’ve added these super easy share buttons. Simply tap and share anywhere you are on social media. Things you need Worsted weight (AKA – 4 or medium) yarn – one standard ball (515 yards / 471 m) will be more than enough with yarn left over. 1 set of size 4 mm (US size 6) single pointed needles Cable needle Tapestry needle (to work in ends) Bobble or pom pom of your choice. You can make or purchase one. Gauge With size 4 mm (US size 6) needles or whatever size you need to obtain the correct number of stitches and rows. Be sure to check your gauge. It doesn’t need to be exact but the closer the better. In garter st 17 sts = 4 inches or 10 cm 34 rows = 4 inches or 10 cm Sizing One size fit most ADULTS Band The band can be made as long as you like. I found 7 leaves were a good length for most adult heads. Each leaf, when matching the gauge as given, is about 2.25 inches (5.75 cm long). If you want a smaller child size, make less leaves, and pick up less stitches when making the hat top. If larger, make an extra leaf and pick up more stitches. Cast on 19 Row 1: K4 P9 K5 P1 Row 2: K1 P4 C1B K8 P4 Row 3: C4F P7 C1B P1 C4B P1 ♥ Row 4: K1 P4 K2 C1B K6 P4 Row 5: K4 P4 P2tog M1 K1 M1 P3 K4 P1 (the photos show the second M1 in this row). Row 6: K1 P4 K3 P3 K5 P4 Row 7: C4F P3 P2tog K1 YO K1 YO K1 P3 PM1 C4B P1 Row 8: K1 P4 K4 P5 K4 P4 Row 9: K4 P4 K2 YO K1 YO K2 P4 K4 P1 Row 10: K1 P4 K4 P7 K4 P4 Row 11: C4F P2 P2tog K3 YO K1 YO K3 P4 PM1 C4B P1 Row 12: K1 P4 K5 P9 K3 P4 Row 13: K4 P3 TWK2tog K5 K2tog P5 K4 P1 Row 14: K1 P4 K5 P7 K3 P4 Row 15: C4F P1 P2tog TWK2tog K3 K2tog P5 PM1 C4B P1 Row 16: K1 P4 K6 P5 K2 P4 Row 17: K4 P2 TWK2tog K1 K2tog P6 K1 M1 K3 P1 Row 18: K1 P4 C1B K5 P3 K2 P4 Row 19: C4F P2 Pick up the st as if to knit. K2tog PSSO. P4 C1B P1 C4B P1 ♥ Repeat from ♥ to ♥ 6 more times for a total of 7 leaves. Please note: To end with a complete leaf and no stem (you don’t have to but it looks more finished) end the final leaf with a complete Row 16 and continue as follows. Row 17: K4 P2 TWK2tog K1 K2tog P6 K4 P1 Row 18: K1 P4 K6 P3 K2 P4 Row 19: C4F P2 Pick up the st as if to knit. K2tog PSSO. P6 C4B P1 Row 20: K1 P4 K9 P4 Cast off. Band done. More of My Stuff on Etsy Hat Top With the RIGHT side of the band facing you and the PURL sts at the top, Pick up 60 sts along the edge of the cable band. Row 1: Purl across ♥ Row 2: K2 M1 K to the last 2 sts. M1 K2 Row 3: P2 PM1 P to the last 2 sts. PM1 P2 ♥ Repeat from ♥ to ♥ until you have 100 sts. ☼ Row 22: K across Row 23: P across Row 24: K2tog. K to the last 2 sts. K2tog. Row 25: P across ☼ Repeat from ☼ to ☼ until you have 88 sts. Row 50: K3 * K2tog K7 K2tog K1 * Repeat form * to * 6 more times. K1 (74 sts) Row 51: P across Row 52: K3 * K2tog K5 K2tog K1 * Repeat form * to * 6 more times. K1 (60 sts) Row 53: P across Row 54: K3 * K2tog K3 K2tog K1 * Repeat form * to * 6 more times. K1 (46 sts) Row 55: P across Row 56: K3 * K2tog K1 K2tog K1 * Repeat form * to * 6 more times. K1 (32 sts) Row 58: P across Row 59: K2tog across (16 sts) Row 60: P across Row 61: K2tog across. Break yarn. Draw through. Sew the seam up to the point formed by Row 22 before you move on to the finishing edge. Sew this seam along the back of the hat.. up to this point. Now that the seam is sewn, pick up sts along the back of the hat. Finishing Edge With the RIGHT side facing you and starting at the cast off edge of the front band, pick up 3 sts in the C4F cable, 7 sts in the leaf section, and 3 sts Read more
Read more
Knit Flat Bucket Hat – with OWLS! Free Knitting Pattern
This is an old riff on a new design. As you may know, I have a thing for owls. I’m also starting to develop a thing for hats. In particular, bucket hats. I have a crochet version and a double thick knit version done thus far. With this hat, the owls can easily be replaceable with any design. And yes, I will be replacing it with various stitch patterns, colours and the like. I may even redesign it so it’s knit in the round on multiple needles so there’s no seam. If you would like that pattern, let me know in the comments. Unlike my other plain knitted bucket hat, this one doesn’t require anything beyond a single pair of knitting needles and a cable needle. If you’ve made my other owl projects like the scarf, fingerless gloves and the beanie hat, then you’ll be able to make this up in no time. If you are enjoying the free patterns, please consider helping out financially by going to my page Help Support My Work. If you’re not in the position to make a small donation, please help me out by sharing this pattern with anyone you think may enjoy it. I’ve include these handy buttons to make it super easy. All you have to do is click! Not a fan of reading things online or would like to print this pattern? You can download the ad free PDF version of this pattern here – Knit Owl Bucket Hat, from Ravelry, LoveCrafts, my Etsy Shop or as a Kindle or paperback from Amazon. You can also get it on Buy Me A Coffee. More about that… Things You Need Worsted weight yarn (either complimentary colours or single colour) 4 mm (Size 6 US) single pointed knitting needles Cable needle Tapestry needle to sew seams and work in ends 16 buttons or jewels for eyes Gauge In stockinette 10 sts = 2 inches (5 cm) 13 rows = 2 inches (5 cm) Sizes are written as such: S-M (L-XL) Top With main colour Cast on 5 Row 1: INC across (10 sts) If there are any stitches that you don’t know how to make, please go to the Abbreviations section at the end of the pattern. I embedded the how-to YouTube videos for you to watch there. 😊 Row 2: P across (always P across for every even row, or WRONG side, until told otherwise directed in the instructions) Row 3: *K1 M1 * Repeat from * to * until last 2 sts. K2 (18 sts) Row 5: ♠ K2 M1 ♠ Repeat from ♠ to ♠ until last 2 sts. K2 (26 sts) Row 7: ♦ K3 M1 ♦ Repeat from ♦ to ♦ until last 2 sts. K2 (34 sts) Row 9: ♥ K4 M1 ♥ Repeat from ♥ to ♥ until last 2 sts. K2 (42 sts) Row 11: ♪ K5 M1 ♪ Repeat from ♪ to ♪ until last 2 sts. K2 (50 sts) Row 13: ▲ K6 M1 ▲ Repeat from ▲ to ▲ until last 2 sts. K2 (58 sts) Row 15: ☼ K7 M1 ☼ Repeat from ☼ to ☼ until last 2 sts. K2 (66 sts) Row 17: ⌂ K8 M1 ⌂ Repeat from ⌂ to ⌂ until last 2 sts. K2 (74 sts) Row 19: ∞ K9 M1 ∞ Repeat from ∞ to ∞ until last 2 sts. K2 (82 sts) Row 21: ♣ K10 M1 ♣ Repeat from ♣ to ♣ until last 2 sts. K2 (90 sts) Stop here if making the sm/med size hat. Go to row marked with ■ and skip row 23 and 24. Row 23: ◄ K11 M1 ◄ Repeat from ◄ to ◄ until last 2 sts. K2 (98 sts) Owl Band ■ Change colour for top stripe. Next 4 rows: K across. Change colour for owls. Next row (right side): K across. Next row (wrong side): K1 * K2 P2 K4 P2 K1(2) * Repeat from * to * 7 times more. K1 Next row (right side): P1 ♠ P1(2) K2 P4 K2 P2 ♠ Repeat from ♠ to ♠ 7 times more. P1 Next row: K1 ɵ K2 P2 K4 P2 K1(2) ɵ Repeat from ɵ to ɵ 7 times more. K1 Next row (right side): P1 ɸ P1(2) C4F C4B P2 ɸ Repeat from ɸ to ɸ 7 times more. P1 Next row: K1 Ʊ K2 P8 K1(2) Ʊ Repeat from Ʊ to Ʊ 7 times more. K1 ☺Next row (right side): P1 ¤ P1(2) K8 P2 ¤ Repeat from ¤ to ¤ 7 times more. P1 Next row: K1 ɚ K2 P8 K1(2) ɚ Repeat from ɚ to ɚ 7 times more. K1 ☺ Repeat from ☺ to ☺ 2 times more. Next row: P1 ☻ P1(2) C2F C2B P2 ☻ Repeat from ☻ to ☻ 7 times more. P1 Next row: K1 * K2 P2 K4 P2 K1 (2) * Repeat from * to * 7 times more. K1 ◊ Next row (right side): P1 ♠ P1 (2) K2 P4 K2 P2 ♠ Repeat from ♠ to ♠ 7 times more. P1 Next row: K1 ȸ K2 P2 K4 P2 K1 (2) ȸ Repeat from ȸ to ȸ 7 times more. K1 ◊ Repeat from ◊ to ◊ 4 times more. Change colour for bottom stripe. Next row: K1 ∆ K1(2) C4F C4B K2 ∆ Repeat from ∆ to ∆ 7 times more. K1 Next 3 rows: K across More of my stuff on Etsy Brim Change to main colour. Next row: * K2 M1 K1* Repeat across. K0(2). (120 (162 sts) ۞ Next row: K0(2) ♥ P3 K1 ♥ Repeat from ♥ to ♥ across Next row: K across Next row: Repeat row marked with ۞ Next row: ♫ INC K3 ♫ Repeat from ♫ to ♫ across. K0(2). (150 (162 sts) Next row: K0(2) ɷ P3 K2 ɷ Repeat from ɷ to ɷ across § Next row: K across Next row: K0(2) ɷ P3 K2 ɷ Repeat from ɷ to ɷ across § Repeat from § to § 2 more times. Cast off. Hints and Tips Unlike the other knit bucket hat I have, there is nothing overly tricky about this one. It knits flat on one set of needles making it much easier to make. Blocking your final project is always up to you. Most things I make I never block. I did with the smaller version (yellow with the yarn eyes) so it would fit the mannequin head better. I cannot recommend a steamer enough! There are a variety on Amazon for fairly cheap. These use nothing but steam, and even when using acrylic yarn, it still holds its shape while relaxing the stitches and doesn’t squash the knitting like a standard iron will. I also decided to try embroidering on the eyes for the owls. I’m also running out of the half cabochons for eyes so I kinda had to. Do I love it? I don’t hate it and prefer the half cabs but that’s just me. All I did was run a single strand of yarn behind the owls and embroider over the stitches in the eye position. You can see the yarn running behind a bit. If it was a lighter yarn behind a darker colour it would look better. I also left enough yarn between eyes to stretch with the hat. Make sure it’s not too tight if Read more
Read more
FREE Knitting Pattern – Winter Beanie Toque or Touque or Tuque with Vertical Stripes
It wasn’t until this very moment in my life that I realized that naming a knitting pattern for winter headgear was going to be complicated. For those that don’t know about the internet and how information is found, writers have to write around keywords so web crawlers can find the information. I won’t bore you any further with that, but it does cause some, indecision, shall we say, when it comes to naming this knitting pattern. As it so happens, there are at least 3 ways to spell what I know as a touque. I’m Canadian. That’s what we call it and how I have always spelled it. My autocorrect on the other hand, is calling me a doofus and insists that it’s toque. In a state of mild rage I went to the internet to see what’s what in regard to this winter hat dilemma. Turns out there is a third option: tuque. What the actual “f”?! I do realize that a lot of people generally refer to winter headwear as beanies. TBH that to me is a more tight fitting winter hat that conforms to the shape of your head and NEVER has a pom pom. These are the manly toques worn under hooded things like hoodies and winter jackets, especially when it gets really cold outside. This pattern is different from most touque patterns I’ve seen and knit up over the years. I’m a little obsessed with short rows this last couple of months. So far I’ve made dishcloths and coasters and slippers using this technique. Instead of casting on all the stitches you’ll need to go around the head, this touque is knit from the forehead to the crown or top of the head. It’s still knit flat, with the shaping of the head being worked as you go. It also gives a neat vertical striping effect if you’re using self striping yarn. And just so you know, the smaller the stripes the narrower the stripes on the toque. If you would prefer a printed copy of this pattern, there are a couple options for you. No, you don’t need to message me how you’re up in arms that you can’t print this webpage. You can keep scrolling down this page and read the pattern row by row on your phone or tablet in the comfort of your chair as you knit. A printed copy is a preference but not necessary to read and use this pattern. If you would like a formatted, printable copy, you can purchase it from this website – Easy Knitting Pattern – Winter Beanie Toque/Touque/Tuque with Vertical Stripes, my Etsy shop, Ravelry, Google Books, Love Crafts and from Amazon for Kindle and as a paperback. Be sure you pick the correct country so shipping for your paperback is free if you are an Amazon Prime member. Click Here to Become a Member If you like the vertical stripes but have no self striping yarn, I’ve marked in the pattern where to change the colours. This makes this touque a great project to use up all those left over bits of yarn from other projects. I keep them too. I just can’t bring myself to throw out those bits. I always feel I’ll find a use for them. But enough. You’re here to knit… Things You Need: Worsted weight yarn – a standard ball of yarn (215 yards/197 m). It may need to be more if you want a big, dense and fluffy pom pom. Size 5 mm (size 8 US) knitting needles or whatever you need to acquire the correct gauge. Tapestry needle to sew the seam and work in the ends Pom pom maker – or you can use the two pieces of cardboard method. I’m sure there’s a video on YouTube showing how to do this. Gauge In stockinette 9 sts – 5 cm (2″) 12 rows – 5 cm (2”) Sizes are for small, medium and large and are written as such sm (med, lg). Small – 21 inches Medium – 22.5 inches Large – 24 inches Sizing is always general for knitting as it has a fair amount of stretch to it and tends to contract and expand as needed. Abbreviations K – knit P – purl st – stitch sts – stitches Starting the Toque, Touque, Tuque, Beanie….*Sigh* I give up SMH Cast on 39 (45, 48) Row 1: P9 (12, 12) K30 (33, 36) Row 2: P30 (33, 36) K9 (12, 12) ♥ Row 3: K37 (43, 46) (leave last 2 sts unworked. Turn). Leave last 2 stitches unworked Flip and knit Row 4: P28 (31, 34) K9 (12, 12) Row 5: P9 (12, 12) K27 (30, 33) (leave last 3 sts unworked. Turn). Row 6: P27 (30, 33) K9 (12, 12) Row 7: K35 (41, 44) (leave last 4 sts unworked. Turn). Row 8: P26 (29, 32) K9 (12, 12) Row 9: P9 (12, 12) K25 (28, 31) (leave last 5 sts unworked. Turn). ** Break yarn and change colour here if desired. Row 10: P25 (28, 31) K9 (12, 12) Row 11: K35 (41, 44) (leave last 4 sts unworked. Turn). Row 12: P26 (29, 32) K9 (12, 12) Row 13: P9 (12, 12) K27 (30, 33) (leave last 3 sts unworked. Turn). Row 14: P27 (30, 33) K9 (12, 12) Row 15: K37 (43, 46) (leave last 2 sts unworked. Turn). Row 16: P28 (31, 34) K9 (12, 12) Row 17: P9 (12, 12) K30 (33, 36) **Break yarn and change colour here if desired. (No need to colour change if this is the last of your repeats. Stop here and cast off on the wrong side if all repeats are complete.) Row 18: P30 (33, 36) K9 (12, 12) ♥ Repeat from ♥ to ♥ 6 times more for a total of 7 times. You’ll have 7 lines dividing the sections when you look at the toque from the top. The seven sections. Stitches around the top hole are NOT drawn together. Sew up the seams, draw the top center stitches together. You don’t need to add a pom pom, but I think it looks a lot better with one. More of my stuff on Etsy Hints and Tips Any type of yarn will work for this project. Read more
Read more
Autumn Leaf Winter Headband or Ear Warmer – FREE Knitting Pattern
This free knit flat headband pattern features a cozy autumn leaf design, perfect for knitters looking for a warm and stylish accessory without using circular needles. The double thick fabric provides extra warmth, while the textured leaf motif adds a beautiful seasonal detail. This pattern is worked flat on straight needles, making it a great choice for those who prefer simple construction methods. This is not a beginner knitting pattern, but it is ideal for knitters who know the basics and are ready to try a more advanced knit flat ear warmer or headband project. The pattern includes detailed written instructions, along with step by step photos and video tutorials to help guide you through the more challenging sections with confidence. If you need help with sts, check the Abbreviations section. I’ve included descriptions of how to make them and embedded videos where I could. Scroll down the page or use the Table of Contents. If you would prefer the printable version of the pattern, I have a number of online retailers you can buy it from including my online KweenBee on Shopify, Etsy, and Buy Me A Coffee. I also have the paperback booklet and Kindle versions available on Amazon. Don’t forget to share this pattern with anyone you think may like it on your social media accounts. It’s free for everyone to use and it’s a great way to support my work without paying a single cent. I even included the handy share button right here 👇🏼 This pattern is inspired by 3 patterns that I previously wrote. I’m in a habit of combining different elements of my patterns together to make a completely new thing. This is a bringing together of my Easiest Beanie You’ll Ever Knit, Autumn Leaf Fingerless Gloves, and my Autumn Leaf Winter Beanie Hat. You can see by the photos below, how the elements have come together. I’m also thinking of remaking the fingerless gloves to mitts that will match and a scarf, but those will be a while in coming. Let me know if you’d like me to get on that ASAP. Clicking on any of the pics will take you to the pattern 😉 Things you need Worsted weight (AKA – 4 or medium) yarn – one standard ball (515 yards / 471 m) will be more than enough with yarn left over. 1 set of size 4 mm (US size 6) single pointed needles Cable needle Tapestry needle (to work in ends) Bobble or pom pom of your choice. You can make or purchase one. Gauge With size 4 mm (US size 6) needles or whatever size you need to obtain the correct number of stitches and rows. Be sure to check your gauge. It doesn’t need to be exact but the closer the better. In garter st 17 sts = 4 inches or 10 cm 34 rows = 4 inches or 10 cm Sizing Notes First things first: let’s figure out how big to make the hat. When you’re going by age and gender, the measurements are only approximate – especially for kids. Adult sizes are more standardized: small, medium, large, and extra large. If the person’s head is handy, measuring it directly is always best. That said, knitting isn’t an exact science. It stretches and contracts as needed, especially with the garter stitch inside that this ear warmer uses. Child Sizing Data is based on World Health Organization and pediatric growth standards. You can also do an online search for sizing if you believe it to be inaccurate. Other organizations located in the USA, UK, etc give sizes as being slightly larger. A gentle reminder that this is knitting and it does stretch to accommodate close measurements. Close IS usually good enough in this case. This design is for children (5 ish) and older. The band is wide-ish and a heads any smaller than 20 inches (51 cm) will be too wide to fit comfortably on the forehead. Adult Sizing Small/Medium – 21 to 22 inches (53.5 – 56 cm) Large/Extra Large – 23 to 24 inches (57 – 61 cm) Band The band can be made as long as you like. It is what goes around the circumference of the head. Each leaf, when matching the gauge as given, is about 2.25 to 2.5 inches (5.71 to 6.35 cm) long. I found 8 leaves were a good length for a small/medium adult hat with 9 leaves fitting large/ex-large adult heads. Adjust accordingly for smaller sizes. Cast on 34 Row 1: K6 P2 K4 P9 K5 P2 K6 Row 2: K8 P4 C1B K8 P4 K8 If you need help with any of the stitches, there are videos in the Abbreviationssection to show you. Click this link – Helpful Video Tutorials Row 3: K6 P2 C4F P7 C1B P1 C4B P2 K6 ♥ Row 4: K8 P4 K2 C1B K6 P4 K8 Row 5: K6 P2 K4 P4 P2tog M1 K1 M1 P3 K4 P2 K6 (the photos show the second M1 in this row) Row 6: K8 P4 K3 P3 K5 P4 K8 Row 7: K6 P2 C4F P3 P2tog K1 YO K1 YO K1 P3 PM1 C4B P2 K6 Row 8: K8 P4 K4 P5 K4 P4 K8 Row 9: K6 P2 K4 P4 K2 YO K1 YO K2 P4 K4 P2 K6 Row 10: K8 P4 K4 P7 K4 P4 K8 Row 11: K6 P2 C4F P2 P2tog K3 YO K1 YO K3 P4 PM1 C4B P2 K6 Row 12: K8 P4 K5 P9 K3 P4 K8 Row 13: K6 P2 K4 P3 TWK2tog K5 K2tog P5 K4 P2 K6 Row 14: K8 P4 K5 P7 K3 P4 K8 Row 15: K6 P2 C4F P1 P2tog TWK2tog K3 K2tog P5 PM1 C4B P2 K6 Row 16: K8 P4 K6 P5 K2 P4 K8 Row 17: K6 P2 K4 P2 TWK2tog K1 K2tog P6 K1 M1 K3 P2 K6 Row 18: K8 P4 C1B K5 P3 K2 P4 K8 Row 19: K6 P2 C4F P2 Pick up the st as if to knit. K2tog PSSO. P4 C1B P1 C4B P2 K6 ♥ Repeat from ♥ to ♥ For as many times as required to achieve your desired length. End on Read more
Read more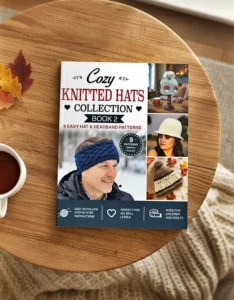
Cozy Knitted Hat Collection: Book 2
I’ve just finished and released Cozy Knitted Hat Collection Book 2, a new knitting pattern collection filled with easy hat and headband designs. This collection includes 9 knitting patterns for hats, beanies, headbands, and winter accessories, all designed to be worked flat on straight needles. If you enjoy knit flat hat patterns, easy beanie knitting patterns, and simple straight needle knitting projects, this collection keeps things relaxed, practical, and beginner-friendly. If you’ve already seen Book 1, you can find that here – Cozy Knitted Hat Collection: Book 1, this is the next collection in the series. It follows the same easy-to-follow style with a fresh set of cozy, wearable designs. If purchasing is NOT an option for you, that’s ok! Keep scrolling down the page. You can read ALL of the patterns for FREE on my website. Each one is listed further down the page. Inside you’ll find a mix of classic everyday hats and creative projects, including textured beanies, warm winter headbands, a bucket hat, and stash-busting scrap yarn designs. Each pattern includes clear instructions, and video tutorials are included to help guide you through the steps. If you are looking to purchase, please make sure that you go to your correct region. If you are an Amazon Prime member then shipping is free and will get to you in days. Immediately if you order the Kindle version. United States Canada United Kingdom Australia If you are outside of those regions you may still be able to get it. Please let me know. If you would prefer the lesser cost of printing it yourself, you can buy from my usual online retailers. You can buy this on Etsy and in my Shopify shop. *Attention – Buy Me A Coffee Members* If you are a member and support my work on Buy Me A Coffee, you can download the PDF of this book with all 9 patterns for FREE along with Book 1 of this series. There’s a lot more patterns there, as you probably know, but this makes it a bit more convenient for you to get. Click the button below to get started on your download. Make sure you’re logged in, add it to your cart and make your “purchase”. The cost turns to zero and you can check out with no additional charge. Buy Me A Coffee Not a member, it’s super easy to become one. Click one of the buttons below. And if none of these are a viable option for you, I get it, money is tight these days, all of my patterns including these, are free to read right here on my website. Tap the photo and start knitting!
Read more
Cozy Cable Headband – FREE Knitting Pattern – with How-to Videos!
This double thick cable knit headband pattern is designed for cold weather warmth, comfort, and durability. Featuring a bold five strand cable knit running up the center, this cozy knitted ear warmer is thick enough to keep ears and forehead warm in winter while staying sturdy for everyday wear. The sizing is flexible and works well for kids ages 5 and up through adults, making it a practical and versatile knitting pattern for children and adults alike. This free cable knit headband pattern includes everything you need to knit the project from start to finish, with clear written instructions, sizing guidance, and step by step video tutorials for the cable technique. It’s an ideal project for knitters looking for an easy cable knitting pattern, a warm winter accessory, or a handmade gift. Whether you call it a knit headband or ear warmer, this pattern creates a cozy, wearable piece you’ll reach for again and again. Due to the demand for the printable version of this pattern, I’m now offering the printable PDF in all my usual places. You can buy it in my Etsy shop, my online shop, Creative Fabrica, Ravelry, and on Buy Me a Coffee. The PDF includes links to the full how-to video and the specific sections showing how to do the cables. If you enjoy the free patterns, please help me out by sharing this pattern with anyone you think may enjoy it. I’ve include these handy buttons to make it super easy. All you have to do is click! Now that you know how easy it is to make cables, you may want to check out some of my other cable knit projects like the Woodland Wanderer Hat, Cable Slippers, Cable Fingerless Gloves, or Cable Scarf. Click any of the photos to read the patterns for free on this website. Things you need Worsted weight yarn – one standard ball (515 yards / 471 m) will be more than enough. 1 set of size 4 mm (US size 6) single pointed needles Cable needle Tapestry needle (to work in ends) Gauge With size 4 mm (US size 6) needles or whatever size you need to obtain the correct number of stitches and rows. Be sure to check your gauge. It doesn’t need to be exact but the closer the better. In garter st 17 sts = 4 inches or 10 cm 34 rows = 4 inches or 10 cm The Complete How-to Video The video below includes the full pattern worked row by row. It is a complete tutorial, and the video on its own is enough to make the project from start to finish. https://youtu.be/b5JaDFxbq7o Child Sizing Data is based on World Health Organization and pediatric growth standards. You can also do an online search for sizing if you believe it to be inaccurate. Other organizations located in the USA, UK, etc give sizes as being slightly larger. A gentle reminder that this is knitting and it does stretch to accommodate close measurements. Close IS usually good enough in this case. This design is for children (5 ish) and older. The headband is quite thick and a heads any smaller than 20 inches (51 cm) will be too wide to fit comfortably on the forehead. Adult Sizing Small/Medium – 21 to 22 inches (53.5 – 56 cm) Large/Extra Large – 23 to 24 inches (57 – 61 cm) The Pattern If you need help in making the cables, i’ve included how-to videos in the Abbreviations section at the end of this page. Cast on 45 Row 1: K7 P2 K4 P2 K15 P2 K4 P2 K7 Row 2 (and ALL even rows): K9 P4 K2 P15 K2 P4 K9 ♥ Row 3: K7 P2 C4F P2 C6F twice K3 P2 C4B P2 K7 Row 5: as row 1 Row 7: K7 P2 C4F P2 K3 C6B twice P2 C4B P2 K7 Row 9: as row 1 Row 10: as Row 2 ♥ Repeat from ♥ to ♥ until the headband measures 2 to 2 ½ inches less than the head measurement. So if the head measurement is 24 inches, make it 22 – 21 ½ inches long. Measure the length of the MIDDLE 5-strand cable. End on any EVEN row (wrong side). Cast off on the RIGHT side. Sew seam on back side of the headband and around the edges to join. More of My Stuff On Etsy Hints and Tips When sewing the long seam to make this into a tube, make sure you stretch the yarn out from end to end. If the seam is pulled tight, all the stretch from the garter stitch won’t work. Stretch it out as you sew. Watch the video below to learn how to sew the seam. It automatically starts at casting off and continues on to sewing the seams. https://youtu.be/b5JaDFxbq7o?si=wo-CTghG_0bCX8Fb&t=696 Abbreviations Keep scrolling down the page for helpful how-to videos that show how to make the cables. k – knit p – purl st – stitch sts – stitches Side note: I use both versions of the terminology when it comes to cable stitches. I’ve been corrected that I’m using the wrong one for both occasions so it’s a no win for me. What I mean is that C4F is the same technique as C2F. Just like how C2B is the same as C4B. Do you think of it as the just the stitches you’re pulling or the number of stitches you’re using in total when you do it? It’s a personal choice, I guess. C4F – Pick up the next 2 stitches with your cable needle. Pull the stitches to the FRONT of your work. Knit the next 2 stitches on your non-working needle. Knit the 2 stitches from the cable needle. Watch this video to see how. https://youtu.be/XcyQfDmwGZs?si=iS0dsMgCzD27QJ9Y C4B – Pick up the next 2 stitches with your cable needle. Pull the stitches to the BACK of your work. Knit the next 2 stitches on your non-working needle. Knit the 2 stitches from the cable needle. Watch this video to see how. https://youtu.be/Tj-x_cf_fEc C6F – This is made the same way as a C4B but is made over 6 sts. Pick up the next 3 stitches with your cable needle. Pull the stitches to the Read more
Read more
Knit Bucket Hat for Children and Adults – FREE Knitting Pattern
Looking for something to keep the sun off this summer? Why not try a knitted bucket hat. You can even make them for the whole family! Made with thick yarn, this bucket hat works up faster than most knitted hats. And the stitches are tight. The brim can hold its shape to keep the sun out of your eyes. Because it is knitted you can fold or roll it up to fit any small space in your luggage, pack or bag. Upon arrival, it will look great once you put it on. For this pattern, I use a very different technique involving multiple needles. Why the extra needles? Round things don’t like to be flat and the stitches get tight if not separated on multiple needles. I included photos to demonstrate how I’m using the extra set and it totally works! Trust me. Where you end with one needle, the tip of the next needle is there for you to continue on knitting. By doing it this way, the hat is knit flat and NOT in the round. Click any photo below for all of my knit and crochet summer hats. Like this one, the patterns are FREE to read on my website and you can sell, keep or give away any of the hats that you make from my patterns. If you would like to ad free versions that you can download and print, there are a couple options. You can purchase it from my Shopify shop – Knit Bucket Hat Pattern for Adults and Children. You can also get the pattern from Buy Me a Coffee, Ravlery, my Etsy Shop or get the paperback and Kindle version from Amazon. Don’t forget to support my work with a share! Letting people know about my patterns is the easiest way for you to help me. You can also find this pattern in one of my latest publications. You can learn more by clicking this link – Cozy Knitted Hat Collection: Book 2. Things You Will Need 2 balls of worsted weight yarn or 1 ball of Super Bulky Yarn – The standard large size balls (360 yards of worsted weight) will do and you’ll have a lot left over. When using 2 strands of yarn use either the same colour or 2 colours. Combining shades, colours and textures can give interesting effects. (Acrylic, blends and cotton all work) One set of size US 8 (5 mm) straight (single point) knitting needles One set of size US 8 (5 mm) dpn (double pointed) knitting needles – We’re using these needles a single pointed needles. These usually come with 5 in a set, are shorter and are less unwieldy when knitting. You can use stitch stoppers at one end of each needle or wrap the end with an elastic band to keep the stitches from slipping off the end. 2 Size US 8 (5 mm) circular needles (optional) – The last rows of the brim for the largest size has a large number of stitches. It can be easier to use circular needles to knit these when used as a regular single pointed needle. Stitch stoppers (optional) – for the ends of the dpn’s or circular needles to make them single pointed needles. Elastics wrapped around the end of the dpn’s or circular needles work just as well. Tapestry needle – To sew the seam and work in ends. How to Use the Needles The rows work back and forth like every other flat thing you’ve knitted. The only difference with the hat is you are going to be adding stitches for each section and these additional stitches are going to make it round. To help you visualize what you’re going to make I’ve include the following graphic. The hat is divided into 5 sections, each divided with knit stitches. You work back and forth, from one needle to the next, until you have the correct number of stitches for the size hat you are making. You don’t need to use 5 separate needles with one working needle. 2 or sometimes 3 sections will fit on one needle before the stitches become to tight to knit. Switch to a new needle when it suits you. There is no right or wrong time to add a new needle. The stitches at the start of the hat need to be split between at least 2 needles with one additional working needle. The stitches quickly become too tight to work with a single straight needle. You can also use 2 sets of circular needles when you get further along in the hat. Use each needle as a long and flexible single pointed needle. You can wrap an elastic band or use a stitch stopper at the end so the stitches don’t slide off the end. Sizing Every 3 sts equals approximately 1 inch. When making the child hat, you can make it slightly bigger by adding additional M1 sts to each section past what is written in Row 11. If you need an inch larger, when knitting the next increase row, evenly add one M1 st in 3 of the 5 sections (ie section 1, 3, and 5). If 2 inches, 2 M1 sts in 3 sections. The ribbing for the brim will work for every inch (or 3 M1 sts) you add. If you need a smaller hat, when making Row 11, knit 3 M1 sts less in 3 sections. You’ll have a total of 52 sts. If you are adjusting for size, only knit an additional 18 rows instead of 20. If adding or subtracting M1 sts, the number of repeats and stitch counts for the child size for the brim will be off. Adjust accordingly. More of my Stuff on Etsy Gauge With 2 strands of worsted weight yarn or 1 strand of super bulky yarn in stockinette 6 sts = 2 inches (5 cm) 11 rows = 2 inches (5 cm) Measurements for the sizes: child = 18.5 inches (47 cm) sm/med adult = 21.5 inches (54.5 cm) lg/x-lg adult = 23.5 Read more
Read more
Winter Headbands – FREE Knit Flat Knitting Patterns
Knit a simple headband or ear warmer. Perfect for new knitters, the simple version uses very basic stitches and include how-to videos to show you how to knit 2 stitches together and make one (make an increase). It’s very plain and great for those who want a practical and thinner ear warmer to wear under something like a hoodie or a hard hat. I’m looking at you patch and construction workers 😉 If you want something a little fancier, I have the same basic headband but with a cable top edging. It can add a bit of a crown-like feature if you are anything but basic. It still has a fairly flat profile so can be worn under other hoods if necessary. Regardless of which style you choose to make, they are both very quick projects. Made with 2 strands of worsted weight yarn, they work up fast. Great for a last minute gift and perfect to sell at craft fairs and online and IRL markets. The pattern is very repetitive and I’ve written out the rows as necessary. You can place stitch markers, like the ones shown in the plain headband demo photo, to help keep track of rows and the increase and decrease sections. They’re helpful, but not required. Not a fan of reading things online or would like to print this pattern? You can download the ad free PDF version of this pattern from my Shopify shop, from Buy Me A Coffee or from my Etsy Shop. If you shop on Amazon I also have the Kindle and paperback versions. Love the pattern and want to let other people know about it? I’ve added these super easy share buttons. Simply tap and share anywhere you are on social media. Things You Need You can make the mittens with either 2 strands of worsted weight yarn, or one strand of super bulky yarn. Take your pick. But please note, you don’t need both. Choose one or the other. Worsted weight yarn – 2 (two) balls of yarn (215 yards/197 m). You’ll have leftover yarn. or Super Bulky yarn – (186 yards/170 m) like Bernat or Lion brand. Not all super bulky yarn is as thick as others. A Bulkyyarn may also work if it’s on the thicker side. As long as your gauge is the same your sizing will be accurate. 5 mm (8 US) knitting needles Cable needle Tapestry needle – to sew seams and work in ends Stitch markers – optional Gauge In garter stitch 16 stitches every 4 inches (10 cm) 26 rows every 4 inches (10 cm) Sizes are written as such: sm/m (lg/xlg) 20 – 21 inches (22-24 inches) Simple Style Headband If you need help with K2tog or M1, there are videos in the Abbreviations section to show you how. Cast on 14 sts K across for 28 (34) rows Next row: K1 K2tog K11 Next 5 rows: Knit across Next row: K1 K2tog K10 Next 5 rows: Knit across Next row: K1 K2tog K9 Next 5 rows: Knit across Next row: K1 K2tog K8 Next 5 rows: Knit across Next row: K1 K2tog K7 Next 5 rows: Knit across Next row: K1 M1 K8 Next 5 rows: Knit across Next row: K1 M1 K9 Next 5 rows: Knit across Next row: K1 M1 K10 Next 5 rows: Knit across Next row: K1 M1 K11 Next 5 rows: Knit across Next row: K1 M1 K12 K across for 28 (34) rows Cast off on the WRONG side. Break yarn and sew seam. What the headband looks like before seam is sewn. More of My Stuff On Etsy Cable Top Headband If you need help with any sts like the C6F, there is a video showing you how in the Abbreviations section. Cast on 17 sts ♠ Row 1: K10 P1 K6 Row 2: P6 K11 (and all even rows) Row 3: K10 P1 K6 Row 5: K10 P1 C6F Row 6: P6 K11 ♠ Repeat from ♠ to ♠ 3 (4) times more. Next row: K10 P1 K6 ♦ Next row: P6 K to the end of the row. Next row: K10 P1 K6 Next row: As row marked with ♦ Next row: K1 K2tog K7 P1 C6F Next row: As row marked with ♦ Next row: K9 P1 K6 Next row: As row marked with ♦ Next row: K9 P1 K6 Next row: As row marked with ♦ Next row: K1 K2tog K6 P1 C6F Next row: As row marked with ♦ Next row: K8 P1 K6 Next row: As row marked with ♦ Next row: K8 P1 K6 Next row: As row marked with ♦ Next row: K1 K2tog K5 P1 C6F Next row: As row marked with ♦ Next row: K7 P1 K6 Next row: As row marked with ♦ Next row: K7 P1 K6 Next row: As row marked with ♦ Next row: K1 K2tog K4 P1 C6F Next row: As row marked with ♦ Next row: K6 P1 K6 Next row: As row marked with ♦ Next row: K6 P1 K6 Next row: As row marked with ♦ Next row: K1 K2tog K3 P1 C6F Next row: As row marked with ♦ Next row: K5 P1 K6 Next row: As row marked with ♦ Next row: K5 P1 K6 Next row: As row marked with ♦ Next row: K1 M1 K4 P1 C6F Next row: As row marked with ♦ Next row: K6 P1 K6 Next row: As row marked with ♦ Next row: K6 P1 K6 Next row: As row marked with ♦ Next row: K1 M1 K5 P1 C6F Next row: As row marked with ♦ Next row: K7 P1 K6 Next row: As row marked with ♦ Next row: K7 P1 K6 Next row: As row marked with ♦ Next row: K1 M1 K6 P1 C6F Next row: As row marked with ♦ Next row: K8 P1 K6 Next row: As row marked with ♦ Next row: K8 P1 K6 Next row: As row marked with ♦ Next row: K1 M1 K7 P1 C6F Next row: As row marked with ♦ Next row: K9 P1 K6 Next row: As row marked with ♦ Next row: K9 P1 K6 Next row: As row marked with ♦ Next row: K1 M1 K8 P1 C6F Next row: As row marked with ♦ ♪ Next row: K10 P1 K6 Next row: As row marked with ♦ Next row: K10 P1 K6 Next row: As row marked with ♦ Next row: K10 P1 C6F Next row: As row marked with ♦ ♪ Repeat from ♪ to ♪ 3 (4) Read more
Read more
Cozy Double Thick Ear Warmer Headband – Free Knitting Pattern for Winter
Stay warm this winter with this free knitted ear warmer headband pattern! It’s double-thick, soft, and designed to cover your ears and forehead for extra warmth. This is a great first knitting project for beginners to learn the basics, and a fast, satisfying knit for experienced knitters. The pattern is free to read online and includes a complete how-to video tutorial, showing you every step from cast on to bind off to sewing the seam. This cozy winter headband makes a thoughtful handmade gift or a simple cold-weather project an experienced knitter can make in an evening. For now, I’m going to make just this PDF version available to my supporters on Buy Me a Coffee and for sale on KraftiNook.com. You can use this either button to download and print it now. Take me to KraftiNook.com I’d Prefer Buy Me A Coffee If you enjoy the free patterns, please help me out by sharing this pattern with anyone you think may enjoy it. I’ve include these handy buttons to make it super easy. All you have to do is click! Once you’ve mastered all the stitches, you can easily move on to some other projects. Both my Easiest Beanie Winter Hat and Super Simple Fingerless Gloves use the same stitches and both have complete how-to videos to show you how to make them. If you are a lover of headband, you can try my Cozy Cable Headband. It also has a full how-to video! You can either click the links or the photo below to see the videos and patterns. Table of Contents Things You Need Worsted weight yarn 4 mm (US 6) knitting needles. Tapestry needles – to sew the seam and work in ends Gauge In stockinette 10 sts = 2 inches (5 cm) 13 rows = 2 inches (5 cm) Sizing I’ve included this handy chart showing how many stitches you need to cast on for every head size. Watch the Video Watch the full how-to video to make this pattern. All sections are divided by title cards to make it easy to find the help you need by scrolling through the video. https://youtu.be/2_kInQ3hero Pattern Cast on according to chart Row 1: Knit across for (9, 9, 11, 11, 11, 13, 13, 13, 13, 13, 15) rows. Next row: P across Next row: K1 * P2 K1 * Repeat from * to * to end of the row. ♫ Next row: P1 ♥ K2 P1 ♥ Repeat from ♥ to ♥ to the end of the row. Next row: K1 * P2 K1 * Repeat from * to * to end of the row. ♫ Repeat from ♫ to ♫ (16, 16, 20, 20, 20, 24, 24, 24, 24, 24, 28) more times for a total of (19, 19, 23, 23, 23, 27, 27, 27, 27, 27, 31) rows for the ribbed section. Next row: With the RIGHT side of the ribbing facing you. P across. Next row: Knit across for (9, 9, 11, 11, 11, 13, 13, 13, 13, 13, 15) rows. Cast off loosely. Hints and Tips When sewing the seams, please watch the video! You want the seam to be a slim as it can be. Anything bulky will rub on the head and be annoying after a while. https://youtu.be/2_kInQ3hero?si=FL4N7QFnnNR7MB-K&t=702 Make sure you STRETCH the seam along the length as you sew! This will be be the limit of the stretch of the final piece. If you sew the seam tight, there won’t be enough stretch to fit around the head. The measurements for child ages are based on UN head size standards and are approximate common measurements for heads throughout the world. If you know the measurement of the head, use that instead of what I’ve given. I’ve designed this pattern to fit nearly everyone. I didn’t go any younger because it’s my experience that babies rarely keep anything on their heads, let alone any headbands. They’re cute but completely impractical. I have not done this, but if you want to make the head bands windproof, no knitting ever is, you can try putting felt, or another windproof material between the ribbing and garter stitch sections when you sew it up. You can either make it one long piece, taking into account the extra material to accommodate the stretch, or patches to go over the ear only. I’ve thought about whether to tack it in place for the ears, or just let it float around in there once you sandwich it together. I’m not sure which method would work better. Let me know if you try this. Even if your headband doesn’t turn out perfectly and this is your first knitting project, don’t be discouraged! Keep going. You can still be proud of what you made and it still usable. Abbreviations K – knit P – purl st – stitch sts – stitches
Read more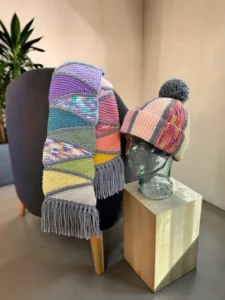
Free Scrap Yarn Hat & Scarf Knitting Pattern Set
Looking for free scrap yarn knitting patterns? This matching scarf and beanie set is the perfect way to turn leftover yarn into a cozy handmade winter accessory you’ll love to wear or give as a gift. Both patterns are knit flat on straight needles, making them a great choice for knitters who prefer working without circular needles. Whether you’re trying to use up your yarn stash, create one-of-a-kind colour combinations, or simply enjoy relaxing knitting projects, these free knitting patterns make every skein count. The matching scarf and beanie were designed to work beautifully together while letting your creativity shine. No two projects will ever be exactly alike, making this set ideal for stash busting, charity knitting, handmade gifts, and craft fair inventory. Knit the scarf, the beanie, or both to create a colourful winter hat and scarf set that’s warm, practical, and uniquely yours. If you prefer an ad-free experience, a printable PDF of the complete matching set is also available. Tap the button or photo below to read the pattern in full on this website! Diagonal Mosaic Scrap Scarf A relaxing knit that creates a bold geometric design while helping you use up small amounts of leftover yarn. Click Me! Mosaic Scrap Beanie A warm knit-flat beanie that coordinates perfectly with the scarf and is ideal for using even more scraps from your yarn stash. Click Me! Together they create a cozy matching winter set that’s perfect for everyday wear, handmade gifts, charity knitting, and selling finished items at craft fairs. If you prefer to knit without advertisements or want both patterns together in one convenient download, a printable PDF version of the complete matching set is also available. You can buy it online at KweenBee on Shopify, Etsy and Buy Me A Coffee. I also have the paperback booklet and Kindle versions available on Amazon. You can find it here – United States, Canada, United Kingdom, and Australia. Don’t forget to share this pattern set with anyone you think may like it on your social media accounts. They are free for everyone to use and sharing is a great way to support my work without paying a single cent. I even included the handy share button right here 👇🏼
Read more
Autumn Leaf Winter Beanie Hat – FREE Knitting Pattern
This beanie is not worked using standard hat construction. Instead, it’s intentionally designed to unfold in a different way, allowing the cables, shaping, and fit to develop gradually as you knit. If the construction feels unusual at first, that’s okay. Follow the instructions, trust the process, and keep going. Once all the steps come together, the design reveals itself as a warm, well-fitted cable knit beanie with a comfortable double-thick brim that adds both structure and extra insulation. If you need help with sts, check the Abbreviations section. I’ve included descriptions of how to make them and embedded videos where I could. Scroll down the page or use the Table of Contents. If you would prefer the printable version of the pattern, I have a number of online retailers you can buy it from including my online KweenBee on Shopify, Etsy, and Buy Me A Coffee. I also have the paperback booklet and Kindle versions available on Amazon. Don’t forget to share this pattern with anyone you think may like it on your social media accounts. It’s free for everyone to use and it’s a great way to support my work without paying a single cent. I even included the handy share button right here 👇🏼 This pattern is inspired by 3 patterns that I previously wrote. I’m in a habit of combining different elements of my patterns together to make a completely new thing. This is a bringing together of my Easiest Beanie You’ll Ever Knit, Autumn Leaf Fingerless Gloves, and my Cozy Cable Brim Bobble Beanie. You can see by the photos below, how the elements have come together. Clicking on any of the pics will take you to the pattern 😉 I also wrote another hat pattern with the leaf pattern after I published this one. You can see my Leaves of the Shadow Glen Hat by tapping the photo below. I’m currently working on a headband with the same leaf motif. Hopefully that will get done soon. I’m also thinking of remaking the fingerless gloves to mitts that will match and a scarf. But those will be a while in coming. Things you need Worsted weight (AKA – 4 or medium) yarn – one standard ball (515 yards / 471 m) will be more than enough with yarn left over. 1 set of size 4 mm (US size 6) single pointed needles Cable needle Tapestry needle (to work in ends) Bobble or pom pom of your choice. You can make or purchase one. Gauge With size 4 mm (US size 6) needles or whatever size you need to obtain the correct number of stitches and rows. Be sure to check your gauge. It doesn’t need to be exact but the closer the better. In garter st 17 sts = 4 inches or 10 cm 34 rows = 4 inches or 10 cm Sizing Notes First things first: let’s figure out how big to make the hat. When you’re going by age and gender, the measurements are only approximate – especially for kids. Adult sizes are more standardized: small, medium, large, and extra large. If the person’s head is handy, measuring it directly is always best. That said, knitting isn’t an exact science. It stretches and contracts as needed, especially with the garter stitch inside the brim this hat uses. Child Sizing Data is based on World Health Organization and pediatric growth standards. You can also do an online search for sizing if you believe it to be inaccurate. Other organizations located in the USA, UK, etc give sizes as being slightly larger. A gentle reminder that this is knitting and it does stretch to accommodate close measurements. Close IS usually good enough in this case. This design is for children (5 ish) and older. The band around the brim is quite thick and a heads any smaller than 20 inches (51 cm) will be too wide to fit comfortably on the forehead. Adult Sizing Small/Medium – 21 to 22 inches (53.5 – 56 cm) Large/Extra Large – 23 to 24 inches (57 – 61 cm) Band The band can be made as long as you like. It is what goes around the circumference of the head and naturally folds back on itself at the purl line between the garter section and cable portion. Each leaf, when matching the gauge as given, is about 2.25 inches (5.75 cm long). I found 9 leaves were a good length for a small/medium adult hat with 10 leaves fitting large/ex-large adult heads. Adjust accordingly for smaller sizes. Cast on 28 Row 1: K9 P1 K4 P9 K5 Row 2: P4 C1B K8 P4 K1 P1 K8 If you need help with any of the stitches, there are videos in the Abbreviations section to show you. Click this link – Helpful Video Tutorials Row 3: K9 P1 C4F P7 C1B P1 C4B ♥ Row 4: P4 K2 C1B K6 P4 K1 P1 K8 Row 5: K9 P1 K4 P4 P2tog M1 K1 M1 P3 K4 (the photos show the second M1 in this row). Row 6: P4 K3 P3 K5 P4 K1 P1 K8 Row 7: K9 P1 C4F P3 P2tog K1 YO K1 YO K1 P3 PM1 C4B Row 8: P4 K4 P5 K4 P4 K1 P1 K8 Row 9: K9 P1 K4 P4 K2 YO K1 YO K2 P4 K4 Row 10: P4 K4 P7 K4 P4 K1 P1 K8 Row 11: K9 P1 C4F P2 P2tog K3 YO K1 YO K3 P4 PM1 C4B Row 12: P4 K5 P9 K3 P4 K1 P1 K8 Row 13: K9 P1 K4 P3 TWK2tog K5 K2tog P5 K4 Row 14: P4 K5 P7 K3 P4 K1 P1 K8 Row 15: K9 P1 C4F P1 P2tog TWK2tog K3 K2tog P5 PM1 C4B Row 16: P4 K6 P5 K2 P4 K1 P1 K8 Row 17: K9 P1 K4 P2 TWK2tog K1 K2tog P6 K1 M1 K3 Row 18: P4 C1B K5 P3 K2 P4 K1 P1 K8 Row 19: K9 P1 C4F P2 Pick up the st as if to knit. K2tog PSSO. P4 C1B P1 C4B ♥ Repeat from ♥ to ♥ For as many times as required to achieve your desired length. Read more
Read more
How to Knit a Mushroom Beanie Winter Hat – Knit Flat On 2 Needles – Free Knitting Pattern
Stay warm and whimsical this winter with my adult-sized winter mushroom hat knitting pattern! This fun and cozy design is the cold-weather companion to my popular Mushroom Bucket Hat, and it pairs perfectly with my Mushroom Fingerless Gloves. The beanie features seven adorable toadstools knit into the body of the hat, making it a great project if you love woodland-inspired fashion, fairycore or cottagecore aesthetics, or just want to knit something a little different for the colder months. Whether you’re making it for yourself, as a handmade gift, or to sell at craft fairs or online, this toadstool toque is sure to turn heads. The hat is knit flat on two straight needles (no circulars or double-points needed) and seamed at the back—ideal for knitters who prefer working flat. It uses worsted weight yarn, and I’ve included detailed instructions along with how-to videos showing exactly how to make the mushrooms. If you’ve already made the brimmed version of this hat for spring or summer, this is the perfect follow-up for your fall and winter wardrobe. It’s a cozy, cute way to bring a bit of whimsy into the cold months. To get the mushrooms to pop against the background, you’ll need to catch the yarn at the back when switching colours. Just carry the yarn behind the work and pick it up when knitting on the right side. It’s the same technique as regular colourwork. The video shows you how to pull it tighter for the gloves, but for the hat, your usual tension will work just fine. The video is queued to the right spot for each row as you knit the mushrooms. I originally showed how to make the toadstools on gloves but kept the video general enough to apply to anything. You can watch the video by clicking the video below. It will automatically play from the start for the gloves with the intro. https://youtu.be/UlRMP-b_w8o I’ve made this hat to only fit adults as I got tired of making hats. I ran out of patience and desire to do the math and make the samples of smaller hats. If you want me to work up child sized versions, let me know. You can leave me a comment below. If you are a fan of mushrooms and cottage core, I have other mushroom patterns you’ll like. Just like this pattern, they are knit flat with straight needles. Click either the link or the photos to read the patterns for Knit Flat Mushroom Bucket Hat and Knit Flat Mushroom Fingerless Gloves. For ease of knitting this hat, I generally used one colour for the mushrooms on my sample hat. There is nothing stopping you from making each mushroom unique with its individual coloured stem and cap. It would be a great way to use up some of those small leftovers of yarn that really aren’t good for much more than a single stripe on a scarf. If you would to prefer to support my work and have access to a printable, ad-free version of this pattern, I offer that too. To get the downloadable pattern for a small fee you can get it in my Etsy Shop, Ravelry, LoveCrafts, Buy Me A Coffee and from the shop section on this website – KweenBee.com. If you would prefer to order a Kindle or printed paperback version from Amazon, you can now do so! Shipping is free if you are an Amazon Prime member. Make sure you select the country you are in to take advantage of the free shipping. Click the following link for your country – United States, United Kingdom, Canada, and Australia. The Kindle download and paperback versions are available in English only. Things You Need Worsted weight yarn in 3 colours: Main Colour (MC): approx. 175 g (one standard ball of big box store yarn will be enough). Stem Colour (SC): small amount. Each stem uses about 120 cm (47 inches) Cap Colour (CC): approx. 30 g Each cap uses about 275 cm (108 inches) 1 set of 4 mm (US 6) single pointed knitting needles 1 set of 3.25 or 3.5 mm (US 3 or 4) single pointed knitting needles (optional) Tapestry needle – to sew the seam and work in the ends. Pom pom for the top (optional) Gauge In stockinette 9 sts = 2 inches (5 cm) 12 rows = 2 inches (5 cm) Sizes are written as such: S-M (L-XL) 21-22 inches (23-24 inches) 53.5 – 56 cm (57 – 61 cm) Brim With MC cast on 92 (98) sts with the 3.25 or 3.5 mm knitting needles. You can use the 4 mm needles but smaller needles will make a tighter brim edge. Switch to the 4 mm (US 6) for the remainder of the pattern. ♥ Row 1: ♫ K2 P1♫ Repeat from ♫ to ♫ to the last 2 sts. K2 Row 2: *P2 K1* Repeat from * to * until the last 2 sts. P2 ♥ Repeat from ♥ to ♥ for a total of 4 rows Row 9: K across. Row 10: P across. Row 11: K across to the last 2 sts. K2tog. (91, 97 sts) Row 12: As row 10 Mushroom Band or Crown Row 13: K5. With SC K1 M1 K1 M1 K1, Turn. Leave remaining sts unworked. P5. Turn. K5. Turn. P5. Turn. K5. ♠ With MC K10 (11). With SC K1 M1 K1 M1 K1, Turn. Leave remaining sts unworked. P5. Turn. K5. Turn. P5. Turn. K5. ♠ Repeat from ♠ to ♠ 5 times more. With MC K5. (105, 111 sts) https://youtu.be/UlRMP-b_w8o?si=yf9bDA9xrbYcSE6Ku0026t=135 Row 14: P5. With SC P5. ◊ With MC K10 (11). With SC P5.◊ Repeat from ◊ to ◊ 5 times more. With MC P5. Row 15: K5. With SC TWK2tog. K1. K2tog. ◘ With MC K10 (11). With SC TWK2tog. K1. K2tog. ◘ Repeat from ◘ to ◘ 5 times more. With MC K5.(91, 97 sts) https://youtu.be/UlRMP-b_w8o?si=xLy1M7TXOJhXRctdu0026t=345 Row 16: P5. With SC P3. ☺ With MC P10 (11). With SC P3. ☺ Repeat from ☺ to ☺ 5 times more. With MC P5. Row 17: K5. With SC K3. ◘ With MC K10 (11). With SC K3. ◘ Repeat from ◘ to ◘ 5 times more. With MC K5. Row 18: As row 22 Row 19: K3. With CC K1 M1 K1 M1 K1 M1 K1 M1 K1 M1 K1 M1 K1. Turn. Leave remaining sts unworked. P13. Turn. K13. Turn. P13. Turn K13. ₪ With MC K6 (7). With CC K1 M1 K1 M1 K1 Read more
Read more
Cozy Cable Bobble Beanie – FREE Knitting Pattern
I first came up with this cable while designing another hat, my Woodland Wanderer Cable Hat. That design actually started as a riff on a pair of slippers, then wandered its way into a couple of headbands too. One idea tends to lead to another around here. I eventually realized that not everyone loves winter headbands. Some people are firmly in the winter hat or toque camp. I already had a super easy winter hat pattern, so it only made sense to bring the cable and the hat together. And voilà! That’s how my cozy cable bobble hat came to be. I’ve kept this pattern very basic, which makes it a great choice if you’ve never tried cables before and want to learn. To make things even easier, I’ve included links and QR codes in the Abbreviations section to helpful how-to videos that walk you through anything you might need a little extra guidance on. If you would prefer the printable version of the pattern, I have a number of online retailers you can buy it from including my online KweenBee on Shopify, Etsy, Ravelry, and Buy Me A Coffee. I also have the paperback booklet and Kindle versions available on Amazon. Loving the patterns and want to support my work but don’t want to become a member. That’s cool with me! I totally get it. If you still want to help, please share this pattern with your friends and family you think may enjoy making it. Use the handy buttons below to share on social media or send it to them directly, If you have discovered a new love for cables, I’ve got you covered! Click any of the photos below to start on any of my other free cable patterns I have on this website. Taupe Fingerless Gloves free knitting pattern – cable knit slippers Things you need Worsted weight (AKA – 4 or medium) yarn – one standard ball (515 yards / 471 m) will be more than enough with yarn left over. 1 set of size 4 mm (US size 6) single pointed needles Cable needle Tapestry needle (to work in ends) Bobble or pom pom of your choice. You can make or purchase one. Sizing Notes First things first: let’s figure out how big to make the hat. When you’re going by age and gender, the measurements are only approximate – especially for kids. Adult sizes are more standardized: small, medium, large, and extra large. If the person’s head is handy, measuring it directly is always best. That said, knitting isn’t an exact science. It stretches and contracts as needed, especially with the garter stitch inside the brim this hat uses. Gauge With size 4 mm (US size 6) needles or whatever size you need to obtain the correct number of stitches and rows. Be sure to check your gauge. It doesn’t need to be exact but the closer the better. In garter st 17 sts = 4 inches or 10 cm 34 rows = 4 inches or 10 cm Child Sizing Data is based on World Health Organization and pediatric growth standards. You can also do an online search for sizing if you believe it to be inaccurate. Other organizations located in the USA, UK, etc give sizes as being slightly larger. A gentle reminder that this is knitting and it does stretch to accommodate close measurements. Close IS usually good enough in this case. This design is for children (5 ish) and older. The band around the brim is quite thick and a heads any smaller than 20 inches (51 cm) will be too wide to fit comfortably on the forehead. Adult Sizing Small/Medium – 21 to 22 inches (53.5 – 56 cm) Large/Extra Large – 23 to 24 inches (57 – 61 cm) Band Cast on 31 Row 1: K8 P2 K4 P2 K9 P2 K4 Row 2 (and all EVEN rows): P4 K2 P9 K2 P4 K10 * Row 3: K8 P2 C4F P2 C6F K3 P2 C4B Row 5: as row 1 Row 7: K8 P2 C4F P2 K3 C6B P2 C4B Row 9: as row 1 Row 10: as row 2 * Repeat from * to * until desired length shown in the chart. End on ANY even row. It doesn’t have to be Row 10. Row 2, 4, 6, or 8 will also work. Cast off on the RIGHT side. Break yarn. Band complete. More of My Stuff On Etsy Hat Top With the RIGHT side of the hat facing you (the garter stitches at the top), pick up stitches along the edge. Pick up one stitch in the nub of each garter “ridge”, and for every group of five stitches picked up, pick up an extra stitch between the nubs. If you need a little help with picking up the stitches, the video is cued up to the right spot in the video to help you out. https://youtu.be/O3GLJXrP8js?si=d8Mj5TiESPte0Riz&t=114 Work your way down the length picking up a st in every 5 nubs, and picking up a st between the nubs. Knit whatever remaining sts remain after picking up between the ridge nubs (ie 4, 3, 2 or 1 st). The number of sts picked up will vary depending on the size. The number isn’t overly important. It’s still just knitting and stretches, after all. More detail is in the Hints and Tips section further down the page. ♥ Next row: Knit across Next row: Purl across ♥ Repeat from ♥ to ♥ for the length calculated below. Use the table below to determine the length you need. The measurement includes the stockinette AND the garter sections. ♦ Next row: K2tog across. Knit any single remaining sts. Next row: Purl across Next row: Knit across Next row: Purl across.♦ Repeat from ♦ to ♦ until you have 12 sts or less. End when you complete the K2tog row with the correct number of sts. Break the yarn. Leave a length of yarn long enough to sew the seam. Draw through all remaining sts. Sew seam. Hints and Tips Think of picking up the sts as this math equation. For every 5 sts you need one extra st. So for as many groups of 5 “ridges” you have of garter st for the band, that’s how Read more
Read more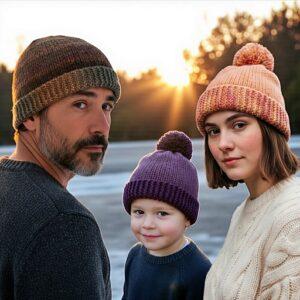
The Easiest Beanie Hat Pattern You’ll Ever Knit – Perfect Winter Hat for Beginners!
This knit beanie pattern is about as easy as it gets — no complicated charts or weird stitches here. You just need to know knit, purl, and a simple decrease, plus how to pick up stitches (but don’t stress, the pick-up joins are totally hidden even if you’re not perfect at it). Best part? This hat fits anyone. Seriously. Whether you’re making one for yourself, your son or daughter, niece or nephew, husband or wife, the whole family or someone else entirely, everyone gets a great fit without the headache of resizing or guessing. Ready to make your new favorite go-to hat? Let’s do this! Don’t forget to share this with your friends and family with the icons below! 🙏🏽 🥰 If you are looking for something quicker to make, or need to learn to knit, this is the pattern for you! It also has a full, how-to video and the pattern is also free to read online here – Cozy Double Thick Ear Warmer Headband Things You Need Worsted weight (AKA – 4, medium, or 10 ply) yarn – One standard 5 oz (141 gram) ball will work. Play with colour and texture for unique final products. Please note: pom-pom will require more yarn than estimate given. Size 5 mm (US size 8) single point knitting needles or whatever size you need to acquire the correct gauge. Tapestry needle – Sew seams and work in ends. If you want to watch the how-to video showing how to use this website and knit the beanie, you can watch it from the start right here 😊 https://youtu.be/O3GLJXrP8js Gauge In stockinette 23 rows = 4 inches (10 cm) 17 sts = 4 inches (10 cm) Sizing Notes First things first: let’s figure out how big to make the hat. When you’re going by age and gender, the measurements are only approximate – especially for kids. Adult sizes are more standardized: small, medium, large, and extra large. If the person’s head is handy, measuring it directly is always best. That said, knitting isn’t an exact science. It stretches and contracts as needed, especially with the garter stitch brim this hat uses. Child Sizing Data is based on World Health Organization and pediatric growth standards. You can also do an online search for sizing if you believe it to be inaccurate. Other organizations located in the USA, UK, etc give sizes as being slightly larger. A gentle reminder that this is knitting and it does stretch to accommodate close measurements. Close IS usually good enough in this case. Select gender: Boy Girl Enter age (in years): Calculate Reset Adult Sizing Small/Medium – 21 to 22 inches (53.5 – 56 cm) Large/Extra Large – 23 to 24 inches (57 – 61 cm) Enter the head measurement you computed or selected above. The calculator will instantly show how many stitches to cast on and what rows to knit. Select units: Inches Centimeters Enter head measurement (in inches): Calculate Reset Cast off all sts. Band complete. With the RIGHT side of the hat facing you (the single line of stitches is visible and the closest to the top), pick up stitches along the edge. Pick up one stitch in the nub of each garter “ridge”, and for every group of five stitches picked up, add an extra stitch between the nubs. If you need a little help with picking up the stitches, the video is cued up to the right spot in the video to help you out. https://youtu.be/O3GLJXrP8js?si=d8Mj5TiESPte0Riz&t=114 Work your way down the length repeating pick up a st in every 5 nubs, pick up a st between the nubs. Knit whatever remaining sts remain after picking up between the ridge nubs (ie 4, 3, 2 or 1 st). The number of sts picked up will vary depending on the size. The number isn’t overly important. It’s still just knitting and stretches afterall. More detail is in the Hints and Tips section further down the page. 🍄 Next row: Knit across Next row: Purl across 🍄 Repeat from 🍄 to 🍄 for the length calculated below. Use the calculator below to determine the length of the stockinette portion you need. The repeated rows between 🍄 to 🍄 Select units: Inches Centimeters Enter head measurement: Calculate Reset 🌸 Next row: K2tog across. Knit any single remaining sts. Next row: Purl across Next row: Knit across Next row: Purl across. 🌸 Repeat from 🌸 to 🌸 until you have 12 sts or less. End when you complete the K2tog row with the correct number of sts. Break the yarn. Leave a length of yarn long enough to sew the seam. Draw through all remaining sts. Sew seam. Done! Told you this was easy 😊 You are welcome to sell, gift, or keep any physical items you make using this pattern. However, the pattern itself is protected by copyright. You may not reproduce, distribute, share, or recreate this pattern, in whole or in part, in any form or format without my written permission. Hints and Tips Think of picking up the sts as this math equation. For every 5 sts you need one extra st. So for as many groups of 5 “ridges” you have of garter st for the band, that’s how many extra sts you need to pick up evenly. So say you have 114 rows to knit for the band. Divide that by 2. The number you get (the number of garter “ridges”) is then divided by 5. You have 11 groups of 5. Add 11 (the number of groups) to the number of garter “ridges”. Add the number of sts left over (the remainder from dividing, in this case 2. That’s roughly the number of sts you need to pick up evenly across the edge. Being off by 1 or 2 sts won’t make a difference. 114 ÷ 2 = 57 (you can also just count the number of “ridges” you have. 57 ÷ 5 = 11.4 round to 11 57 + 11 = 68 Read more
Read more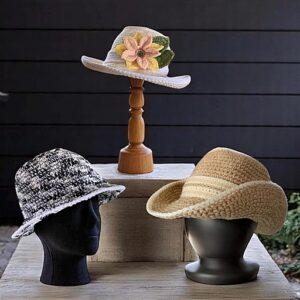
Crocheted Sun Hat and Bucket Hat – FREE Crochet Pattern
Gussy it up or wear it plain, this crocheted hat pattern is extremely versatile and makes hats for nearly anyone. Anyone but my 14 year old son apparently, who said, with his usual unenthusiastic honesty, “I don’t like it but it fits OK”. How do I know this? I needed to borrow his head to see how the smaller size fit and felt when wearing, so I guess it’s at least fit approved ¯\_(‘~’)_/¯ crochet sun hat – FREE crochet pattern If you would prefer to have a KNITTED version of the bucket hat, I have that too! Click this link – Knit Bucket Hat for Children and Adults – FREE Pattern to start making hats for the entire family, kids included! I recently added mushrooms to the bucket hat! You can read that pattern here – Knit Flat Mushroom Bucket Hat for Adults. This hat can be made a number of ways, either as a wider brimmed sun hat with a flower, plain with the brim shaped similar to a cowboy/cowgirl hat, or with a narrower brim to be a bucket hat. Any way you choose is going to be a success! It’s easy to make, and as long as you know the basics of crochet. Literally if you know how to chain, single crochet (sc) and do a slip stitch (sl st), you’ll be able to make the hat. The flower can be a bit more tricky but I’ve included many photos and detailed descriptions to help you along. The hat is made with 2 strands worsted weight yarn (or one strand of super bulky yarn) and a larger crochet hook. The stitches need to be fairly tight so the hat will hold it’s shape. Anything larger than the gauge given will make it floppy and the sizing may not work out as written. But, like all my patterns, play with it! If you want a floppy hat, no one said you can’t. There aren’t any specific measurements for the hat sizing. It’s all very general as there is some stretch to the hat when finished and will form to fit the head it’s covering. If you want your hat to fit a little looser, go for the bigger size. The way I thought of it when I was designing this hat, if it fit the glass head, it’s a small/medium size. In other words, a regular sized head. If it fits me and looks a little too big on the glass head, it’s a large/extra large. Let me put it this way. I know I have a big head. If you have ever thought you too might have a big head because hats don’t always fit you, hello fellow large head! If this statement makes no sense to you, go for the small/medium. If you are looking to make the flower and the leaves, they each have their own page on the website. This pattern turned into a bit of a beast as it is. Both patterns are included with the printable PDF version of the sun and bucket hat. Crochet Flower Pattern Crochet Leaf Pattern If you don’t want to or are unable to make a financial donation, sharing this pattern through social media is a great way to help out too! The links below are a super easy way for you to do so. If you would like to avoid the ads on this page or would like to print the pattern, you can purchase the PDF for a small fee from mu Shjopify shop here – Sun Hat with Gorgeous Flower or Simple Bucket Hat – Printable Crochet Pattern, through my Etsy shop, LoveCrafts or on Ravelry. You can also purchase the paperback on Amazon or the Kindle version. You can also get the PDF for FREE if you are a member on Buy Me A Coffee. More about that below. Like all of my patterns you have my permission to sell and/or give away the physical items that you make using this pattern. You are NOT permitted to reprint this pattern in any form unless you have obtained my written permission to do so. Small/Medium Large/Extra Large Abbreviations Ch – chain sc – single crochet sl st – slip stitch hdc – half double crochet dc – double crochet trc – treble crochet st – stitch sts – stitches Things You Need: 6 mm (US 10 or J) crochet hook (or what ever size hook you need to get the correct gauge) 3.5 mm (US 4 or E) crochet hook for top edging, flowers and leaves (all optional) 2 balls Worsted Weight yarn or 1 ball Super Bulky yarn (for the hat itself) For the sun hat you’l need: 106 gr or 3.7 oz each of the worsted weight colours (216 m or 237 yards) or 173 gr or 6 oz Super Bulky yarn (170 m or 185 yards) of course it’s less yarn for the bucket hat. Worsted weight yarn (for band, flowers, leaves and edging) Stitch markers (at least 8 but it never hurts to have more. See Hints and Tips section) Tapestry needle (to sew band and flowers, work in the ends) Gauge With 2 strands of worsted weight yarn or 1 strand of super bulky yarn 13 sts = 4” 14 rows = 4” Check your gauge to obtain correct sizing and density of the final fabric created. The stitching needs to be tight to hold the hat shape. Small/Medium With 2 strands of worsted weight yarn or 1 strand of super bulky yarn and your 6 mm (US 10 or J) crochet hook… Ch 2 (make the first chain large enough to fit in all the stitches for Round 1) Round 1: 12sc around. Do NOT join. The following rounds are worked without joining. Round 2: Sc in first sc of previous round. 2sc in the next stitch. *Sc in next stitch. 2sc in the next stitch.* Repeat from * to * around. Place stitch marker. (18 sts) Round 3: *2sc. 2sc in the next stitch.* Repeat from * to * Read more
Read more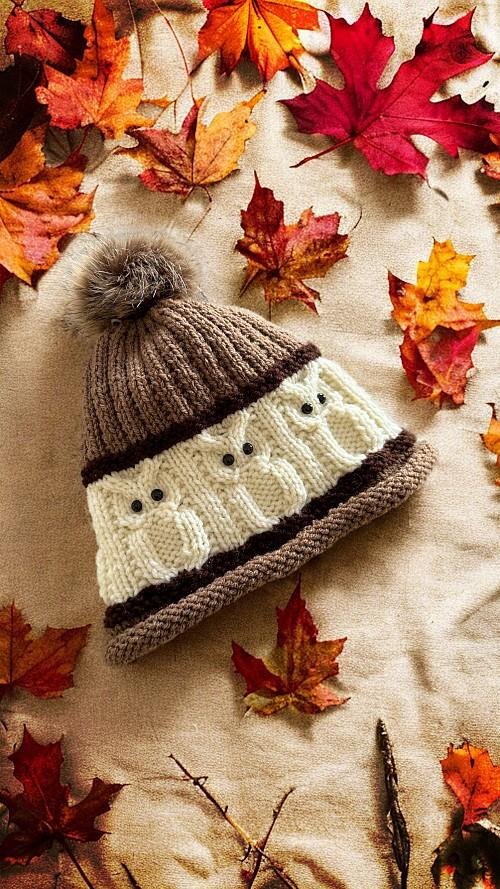
How To Knit A Beanie Hat – With OWLS! – FREE Knitting Pattern
I really do like how well the owl motif worked on this hat! And surprisingly didn’t take much figuring or math once I wrote out the Basic Knit Flat Beanie. I did have to play around with how many rows tall to make the body and head. I didn’t figure it would stretch as much as it does but I’m happy with the final proportions. Make the beanie and gloves! And in case you haven’t found it on the website yet, I have a pair of fingerless gloves that have the same owl motif. There is the knit flat owl gloves that were designed specifically to match this beanie. There is also owl gloves that are knit in the round. The cuffs aren’t a perfect match but are seamless if that’s what you prefer. And happy day! The matching scarf pattern is done ☺️ If you would like to get started on the entire matching set, you can read the free, ad supported knitted scarf pattern here: How to Knit a Scarf – with OWLS! FREE Knitting Pattern And for the last announcement, if you would like to make a beanie winter hat with mushrooms 🍄 instead of owls, I’ve got that too. Here’s that link – Mushroom Beanie Winter Hat Click or tap on any photo below to read the pattern online. 👇🏼 👇🏼 👇🏼 👇🏼 This owl hat knit pattern is a fairly easy project to make if you have some knitting experience. I designed it to be flat, knit on 2 straight needles so more people would be comfortable in making it. Though the cabling can look intimidating, it really isn’t. I have videos on YouTube that will show you how if you’ve never done it before. I embedded videos in the pattern to help you along. The choice of colour is yours as always. I included where to change colours if you would like to make one with 3 colours like I did for the brown and beige version I made. If you’re making a solid colour toque, you can ignore the notifications in the pattern. As far as the use of a pom pom on the top… Some love it, some hate it. I know for myself, if I have to put my hood up, I hate them, but aesthetically, they do have their charms NGL. I have more information in the Hints and Tips section about the pom pom on the white and blue beanie. Things You Need Worsted weight yarn (either complimentary colours or single colour) 5 mm (Size 8 US) single pointed knitting needles Cable needle Tapestry needle to sew seams and work in ends 14 or 16 buttons or jewels for eyes (see Hints and Tips) Pom pom – you can make or buy these, or not use one at all. Gauge In stockinette 9 sts = 2 inches (5 cm) 12 rows = 2 inches (5 cm) Sizes are written as such: S-M (L-XL) Small and medium = 21 inches (53 cm) around Large and Extra large = 24.5 inches (62 cm) around Uses about 160 meters or 180 yards. Does NOT include pom-pom. This pattern makes either 7 or 8 owls around. Each owl motif is about 3.5 inches (8.9 cm) wide if you follow the gauge given. You can adjust your stitches accordingly to make larger or smaller sizes than what I’ve given. Each owl motif uses 12 stitches. So, if you wanted it smaller by one owl cast on 74 sts (86 – 12 = 74) If you would prefer a PDF printable version of the pattern, you can download it from my Shopify shop here – Knit Owl Beanie Hat. You can also get it at a number of other online retailers such as Ravelry, LoveCrafts, and Etsy. The Kindle and Paperback version is also on Amazon. You can also get it on Buy Me A Coffee, and if you are a supporter of my work, it’s free. If you enjoy this pattern and my other free online knitting patterns, please consider making a small donation or helping me out by visiting my Help Support My Work page. If that’s not possible, that’s totally fine too! Even sharing this page on your social media helps me out immensely. You can use those buttons below to do so easily. The Pattern Cast on 86 (98) sts ♠ Row 1: Knit Row 2: Purl ♠ Repeat from ♠ to ♠ for a total of 10 rows. (Change colour at the START of row 11 if desired.) To save yourself time if you’re changing colours, I suggest that you Work in the Ends While Knitting. You can click that link or watch the video here. https://youtu.be/1_zF6HAzsfY Row 11-15: Knit (Change colour at the START of row 15 if desired.) Row 16: ♦ P2 K1 P8 K1 ♦ Repeat from ♦ to ♦ until there are 2 sts. P2 Row 17: ♣ K3 C4B C4F K1 ♣ Repeat from ♣ to ♣ to the last 2 sts. K2 If you don’t know how to cable you can watch these videos to show you how. https://youtu.be/Tj-x_cf_fEc https://youtu.be/XcyQfDmwGZs Row 18: ♥ P2 K1 P2 K4 P2 K1 ♥ Repeat from ♥ to ♥ to the last 2 sts. P2 Row 19: K5 ☺ P4 K8 ☺ Repeat from ☺ to ☺ 5 (6) times more. P4 K5 Row 20: As row 18 Row 21: As row 19 Row 22: As row 18 Row 23: As row 19 Row 24: As row 18 Row 25: As row 19 Row 26: As row 18 Row 27: ♣ K3 C4B C4F K1 ♣ Repeat from ♣ to ♣ to the last 2 sts. K2 Row 28: ♦ P2 K1 P8 K1 ♦ Repeat from ♦ to ♦ until there are 2 sts. P2. Row 29: Knit Row 30: As row 28 Row 31: Knit Row 32: As row 28 Row 33: Knit Row 34: As row 28 Row 35: ♣ K3 C4B C4F K1 ♣ Repeat from ♣ to ♣ to the last 2 sts. K2 Row 36: as row 28 (Change colour at the START of row 37 if desired.) Row 37 – 40: Knit (Change colour at the START of row 41 if desired.) ▲ Row 41: Knit Row 42: ◘ P2 K1 ◘ Repeat from ◘ to ◘ tot he last 2 sts. P2 ▲ Repeat from ▲ to ▲ for a total of 22 (26) rows. Next row: ♣ K2tog K1 ♣ Repeat from ♣ to ♣ to the last 2 sts. K2tog Next row: ◘ P1 K1 ◘ Repeat from ◘ to ◘ to the last st. P1 Next row: K2tog to the end of the row. Next row: P across Next row: K2tog to Read more
Read more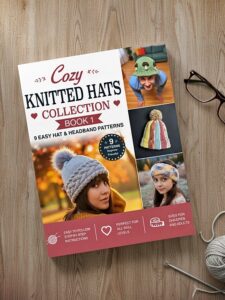
Cozy Knitted Hat Collection: Book 1
If you’re looking for a knitting book filled with easy-to-follow projects, the paperback edition of Cozy Knitted Hat Collection: Book 1 brings together 9 knit-flat hat and headband patterns in one convenient volume. This 8 x 10 paperback is designed for knitters who enjoy straightforward construction, wearable accessories, and projects that fit easily into busy days. If purchasing is NOT an option for you, that’s ok! Keep scrolling down the page. You can read ALL of the patterns for FREE on my website. Each one is listed further down the page. Inside you’ll find a mix of seasonal designs, including cozy winter beanies, lightweight bucket hats, and warm ear warmer headbands. All the patterns are worked flat on straight needles, making them approachable for beginners while still offering satisfying projects for more experienced knitters. The collection also includes a scrap-yarn hat pattern, perfect for stash busting, charity knitting, craft fairs, and handmade gifts. And did I mention Cozy Knitted Hat Collection: Book 2 is now done! If you are looking to purchase, please make sure that you go to your correct region. If you are an Amazon Prime member then shipping is free and will get to you in days. Immediately if you order the Kindle version. United States Canada United Kingdom Australia If you are outside of those regions you may still be able to get it. Please let me know. If you would prefer the lesser cost of printing it yourself, you can buy from my usual online retailers. You can buy this on Etsy and in my Shopify shop. *Attention – Buy Me A Coffee Members* If you are a member and support my work on Buy Me A Coffee, you can download the PDF of this book with all 9 patterns for FREE! And now that Book 2 is done, you can get even more! Click the button below to get started on your download. Make sure you’re logged in, add it to your cart and make your “purchase”. The cost turns to zero and you can check out with no additional charge. Buy Me A Coffee Not a member, it’s super easy to become one. Click one of the buttons below. And if none of these are a viable option for you, I get it, money is tight these days, all of my patterns including these, are free to read right here on my website. Tap the photo and start knitting!
Read more
Basic Knit Flat Beanie or Toque – FREE Hat Knitting Pattern for Straight Needles
I have wandered into the vastness of toque and/or beanie design once before. I designed the previous rendition a bit differently than the standard touque and used short rows. If you’re so inclined you can click this link to see the pattern – Winter Beanie Toque or Touque or Tuque with Vertical Stripes. The reason for this very basic, knit flat on 2 needles design is because I want to add my spider, hippo and owl motifs to a toque. But to do that, I needed to create the base design to get the fit and style right. FYI I’m already working on the owls now that this knitting design is complete. It’s coming along swimmingly btw ☺. I’ve added some notes to the end of the pattern to help you along if you want to do some basic modifications to the beanie like make it longer, bigger, smaller. Head size and taste varies from person to person and this may need a bit of tweaking to fit want you need or want. I added links to how-to videos to help you along if you are a new knitter or just need a bit of extra help. (Click the link in the pattern to open a new window and watch. You won’t lose this page.) This pattern uses very basic stitches and has an easy seam to sew at the end making it a great pattern for newbies and super quick for those with more experience. If you would prefer a PDF printable version of the pattern, you can download it for a small fee/donation from a number of places. In particular, my Shopify shop here – Basic Knit Flat Beanie. You can also get it at a number of other online pattern retailers such as Ravelry, LoveCrafts, Creative Fabrica and Etsy. The Kindle version is also on Amazon. You can also get it on Buy Me A Coffee here – Easy Knit Flat Beanie Pattern for Straight Needles. If you support my work, the PDF is FREE! If you enjoy this pattern and my other free online knitting patterns, please consider making a small donation or helping me out by visiting my Help Support My Work page. If that’s not possible, that’s totally fine too! Even sharing this page on your social media helps me out immensely. You can use those buttons below to do so easily. Things You Need Worsted weight yarn – 1 standard ball of yarn (215 yards/197 m) US Size 8 (5 mm) knitting needles (or whatever you require to get the correct gauge). Tapestry needle to sew up seams Pom-pom is optional (I found mine on Amazon but you can make yarn ones too). Gauge In stockinette stitch 9 sts – 5 cm (2″) 13 rows – 5 cm (2”) Sizes are written as such: S-M (L-XL) Small and medium = 21.5 inches (55 cm) around Large and Extra large = 23.5 inches (60 cm) around The Pattern Cast on 86 (92) ♠ Row 1: K across Row 2: P across ♠ Repeat from ♠ to ♠ for a total of 10 rows. ♥ Row 11: K across Row 12: ♦ P2 K1 ♦ Repeat from ♦ to ♦ to the last 2 sts. P2 ♥ Repeat from ♥ to ♥ for a total of 44 (48) rows. Next row: ♣ K2tog K1 ♣ Repeat from ♣ to ♣ to the last 2 sts. K2tog Next row: ◘ P1 K1 ◘ Repeat from ◘ to ◘ to the last st. P1 Next row: ☺ K1 K2tog ☺ Repeat from ☺ to ☺ to the end of the row. Next row: P across Next row: K2tog to the last st. K1 Next row: P across Break yarn and draw through and gather stitches. Sew the seam using the blanket stitch. Add a pom-pom to the top if you like. Hints and Tips If you want a longer touque, add more rows than what is mentioned in the pattern. Make more rows than the total of rows 11 and 12. If you want a beanie that’s more slouchy with a looser weave, you can try using a larger size knitting needle (US size 10 or 6 mm for example). This changes the gauge making it bigger around the head. You’ll have to play with it a bit to figure out how many stitches you’ll need to cast on so it still fits the person’s head. In saying that, if the hat is too small or too big, any combo of stitches 3x+2 will work. For example, if you need less stitches cast on because you want a looser weave, you may only need 74 sts. You get that with the following equation 3(24)+2=74. Twenty four repeats of the ribbing P2 K1 pattern (on the WRONG side) plus 2 extra P sts. Compare this to the large size that is 30 repeats of the P2 K1 ribbing pattern plus 2 stitches (total of 92 sts). If you want to make this in child sizes, that’s also possible. As a quick reference, each rib section is about one inch or 2.5 cm if you match the gauge given for this pattern. I’ve added the 2 stockinette stitches along the side so you can sew the seam easily using the blanket stitch and make it blend in to almost disappear. Abbreviations K – knit P – purl K2tog – knit 2 sts together st – stitch sts – stitches Like all of my patterns, you have my permission to sell and/or give away the physical items that you make using this pattern. You are NOT permitted to reprint this pattern in any form unless you have obtained my written permission to do so.
Read more
Mosaic Scrap Yarn Beanie Knitting Pattern – Free Knit Flat Pattern
Turn your leftover yarn into a beautiful winter hat with this Diagonal Mosaic Scrap Yarn Knitting Pattern. Designed for knitters who love making the most of every skein, these coordinating scrap yarn knitting patterns create eye-catching diagonal mosaic designs that are as fun to knit as they are to wear. With endless colour possibilities, no two sets will ever be exactly alike, making every project a unique reflection of your yarn stash. Perfect for stash busting, charity knitting, thoughtful handmade gifts, and craft fair bestsellers, this pattern helps you transform leftover yarn into a stylish, practical accessory. Whether you plan your colours or enjoy the surprise of knitting with scraps, you’ll create a cozy hat that’s truly one of a kind. And if you’re in the mood, this is a part of a set! You can also make the matching scarf 😊 It’s free to read on this website. Tap the photo or button to start reading it now. Diagonal Mosaic Scarf – Scrap Yarn Knitting Pattern Click here to read Will there be ends to sew in? Not if you catch the ends as you knit! I have a video that shows you how to do it when making knit stitches. That video is here: https://youtu.be/1_zF6HAzsfY If you would prefer the printable version of the pattern (it also includes the matching scarf pattern), I have a number of online retailers you can buy it from including online at KweenBee on Shopify, Etsy and Buy Me A Coffee. I also have the paperback booklet and Kindle versions available on Amazon. You can find it here – United States, Canada, United Kingdom, and Australia. Don’t forget to share this pattern with anyone you think may like it on your social media accounts. It’s free for everyone to use and it’s a great way to support my work without paying a single cent. I even included the handy share button right here 👇🏼 Things You Will Need Set of 4 mm (6 US) single pointed needles Tapestry needle to sew the seams and work in ends Worsted weight yarn scraps or 2 coordinated colours. Any standard ball of yarn bought at a big box store will be enough. The amount of scrap yarn you’ll need for each section is about the size of a bottom of a pop or soda can. There will be a bit leftover. Pom pom varies on how big you make yours. Gauge In garter stitch. Gauge is not overly important. The garter stitch used makes it very stretchy. 9 stitches every 2 inches (5 cm) 16 rows every 2 inches (5 cm) Colour Notations I had to use something to delineate between colour changes. You will have more colours than what I list here if using scrap yarn. The hat needs 9 (8 scrap, 1 highlight) colours OC – other colour (scrap yarn colours or main colour) HC – highlight colour (colour between sections) Sizing One size fits most ADULTS. For more scrap hat knitting patterns in both children’s and adult sizes, visit KweenBee.com/Scrap. Please note, this is a VERY forgiving pattern with a LOT of stretch. This beanie is made in sections that are knit from the crown of the head down toward the forehead, not in rows going around the head like a traditional beanie. You’ll also need to decide if you prefer a rounded or pointy top to your hat. Choose ONE section of rows 21 to 24 to repeat for the entire hat. Cast on 47 with HC Row 1: With HC K35 P12 Row 2: P11 K36 ♥ Row 3: With HC K1. With OC K34 P12 Row 4: P11. K35. Turn. Leave remaining 1 st unworked. Row 5: With HC K2. With OC K32 P12 Row 6: P11. K33. Turn. Leave remaining 3 sts unworked. Row 7: With HC K2. With OC K30 P12 Row 8: P11. K31. Turn. Leave remaining 5 sts unworked. Row 9: With HC K2. With OC K28 P12 Row 10: P11. K29. Turn. Leave remaining 7 sts unworked. Row 11: With HC K2. With OC K26 P12 Row 12: P11. K27. Turn. Leave remaining 9 sts unworked. Row 13: With HC K2. With OC K24 P12 Row 14: P11. K25. Turn. Leave remaining 11 sts unworked. Row 15: With HC K2. With OC K22 P12 Row 16: P11. K23. Turn. Leave remaining 13 sts unworked. Row 17: With HC K2. With OC K20 P12 Row 18: P11. K21. Turn. Leave remaining 15 sts unworked. Row 19: With HC K2. With OC K18 P12 Row 20: P11. K19. Turn. Leave remaining 17 sts unworked. If changing to a new colour, break OC now. If making the hat 2 colours do NOT break. If Making A POINTY Top Pointy version Rows worked evenly create more rows Row 21: With HC K18 P12 When knitting this row, and if using scrap yarn, catch the end behind your work. Using the video in the intro Row 22: P11. K to the end of the row. Row 23: K35 P12. When knitting this row, and if using the same colour for OC, catch the yarn behind your work to carry it to the start of the row. Row 24: P11. K to the end of the row. ♥ Repeat from ♥ to ♥ 7 times more for a total of 8 sections. End with Row 22. Cast off with the RIGHT side facing you. Cut a longer length of yarn to sew seam and draw top together. If Making A ROUNDED Top Rounded version Short rows make less rows meeting at the top Row 21: With HC K18 P12 When knitting this row, and if using scrap yarn, catch the end behind your work. Using the video in the intro. Row 22 (wrong side): P11. K 27. Make a wrapped short row as follows: Pull the yarn to the front of your work. Pass the next st on the non-working needle to your working needle. Wrap your yarn around the st and pull the yarn to the back of your work. Pass the wrapped st back on to your non-working needle. Leave this st and 8 remaining sts unworked. Turn. RIGHT side of your work Knit the next st as you normally would. St complete. Continue to work row 23. (The st just made is a part of the 26 sts.) Row 23: K26 P12. When knitting this row, and if using the same colour for OC, catch the yarn behind your work to carry it to the start of the row. Row 24: P11. K to the end of the row. ♥ Repeat from ♥ to ♥ 7 times more for a total of 8 sections. Read more
Read more
Woodland Wanderer Knit Hat – FREE Knitting Pattern
The Woodland Wanderer’s Hat is a cozy, timeless knit with a traditional fantasy feel, perfect for grand adventures, epic quests, untamed paths, and journeys worth remembering… or just keeping your ears warm while grabbing a coffee before your Zoom meeting. I designed this beanie for knitters who enjoy texture and classic details. This adult size winter hat is knit flat on two straight needles using worsted weight yarn, making it a comfortable project if you prefer not to knit in the round. The band is worked separately and features cables for added warmth and visual interest, then joined to form the hat. Helpful step by step photos are included throughout the pattern, along with a few optional video tutorials to guide you through select techniques. This knit flat hat pattern is perfect for creating a warm, everyday slouchy bobble hat with a timeless look. Not a fan of reading things online or would like to print this pattern? You can download the ad free PDF version of this pattern from my Shopify shop, from Buy Me A Coffee or from my Etsy Shop. If you shop on Amazon I also have the Kindle and paperback versions. Love the pattern and want to let other people know about it? I’ve added these super easy share buttons. Simply tap and share anywhere you are on social media. If you like the cables of this hat I have even more that you may be interested in my other cable patterns like the Cozy Cable Headband, Cable Slippers, Cable Fingerless Gloves, or Cable Scarf. Click any of the photos to read the patterns for free on this website. Things you need Worsted weight yarn – one standard ball (515 yards / 471 m) will be more than enough. 1 set of size 4 mm (US size 6) single pointed needles Cable needle Tapestry needle (to work in ends) Pom pom – any size and optional Gauge With size 4 mm (US size 6) needles or whatever size you need to obtain the correct number of stitches and rows. Be sure to check your gauge. It doesn’t need to be exact but the closer the better. In garter st 17 sts = 4 inches or 10 cm 34 rows = 4 inches or 10 cm Sizing One size fit most ADULTS Band Cast on 20 Row 1: K4 P1 K9 P1 K4 P1 Row 2 (and all EVEN rows): K1 P4 K1 P9 K1 P4 * Row 3: C4F P1 C6F K3 P1 C4B P1 Row 5: as row 1 Row 7: C4F P1 K3 C6B P1 C4B P1 Row 9: as row 1 Row 10: as row 2 * Repeat from * to * 13 times more Next row: repeat row 3 Cast off on the WRONG side. Break yarn. More of My Stuff on Etsy Hat Top With the RIGHT side of the band facing you and the PURL sts at the top, Pick up 60 sts along the edge of the cable band. Row 1: Purl across ♥ Row 2: K2 M1 K to the last 2 sts. M1 K2 Row 3: P2 PM1 P to the last 2 sts. PM1 P2 ♥ Repeat from ♥ to ♥ until you have 100 sts. ☼ Row 22: K across Row 23: P across Row 24: K2tog. K to the last 2 sts. K2tog. Row 25: P across ☼ Repeat from ☼ to ☼ until you have 88 sts. Row 50: K3 * K2tog K7 K2tog K1 * Repeat form * to * 6 more times. K1 (74 sts) Row 51: P across Row 52: K3 * K2tog K5 K2tog K1 * Repeat form * to * 6 more times. K1 (60 sts) Row 53: P across Row 54: K3 * K2tog K3 K2tog K1 * Repeat form * to * 6 more times. K1 (46 sts) Row 55: P across Row 56: K3 * K2tog K1 K2tog K1 * Repeat form * to * 6 more times. K1 (32 sts) Row 58: P across Row 59: K2tog across (16 sts) Row 60: P across Row 61: K2tog across. Break yarn. Draw through. Sew the seam up to the point formed by Row 22 before you move on to the finishing edge. Sew this seam along the back of the hat.. up to this point. Now that the seam is sewn, pick up sts along the back of the hat. Finishing Edge With the RIGHT side facing you and starting at the cast off edge of the front band, pick up 3 sts in the C4F cable, 1 st in the purl space, 7 sts in the 9 st cable, 1 st in the purl space, and 3 sts in the C4B cable, in every second row along the back and 3 sts in the C4B cable, 1 st in the purl space, 7 sts in the 9 st cable, 1 st in the purl space, and 3 sts in the C4F cable. Row 1: K across Row 2: K2 Cast off 1 st. K to the last 3 sts. Cast off 1 st. K1 Row 3: K2 Cast on 1. K to the cast off st. Cast on 1. K2 Row 4: K across Cast off with the WRONG side facing you. Break yarn. Hints and Tips If you want a more slouchy hat, when you’re done row 25, work more knit and purl rows to make the 88 st section longer. You can easily make this hat in 2 colours if you like. Because the band is made separately, you could make it and the pom pom complimentary colours. To pick up sts evenly along the purl row, divide the length in half. You now need to pick up 30 sts evenly. Still too hard to space them out? Divide the half into a quarter. You now need to space 15 sts evenly in the 1/4 section. You can use spare pieces of yarn or st markers to divide the sections smaller and smaller for even spacing. If you’re off by a st or 2 when picking up sts along the band, it won’t make a huge difference. Your st counts later will be off, but that’s no a big Read more
Read more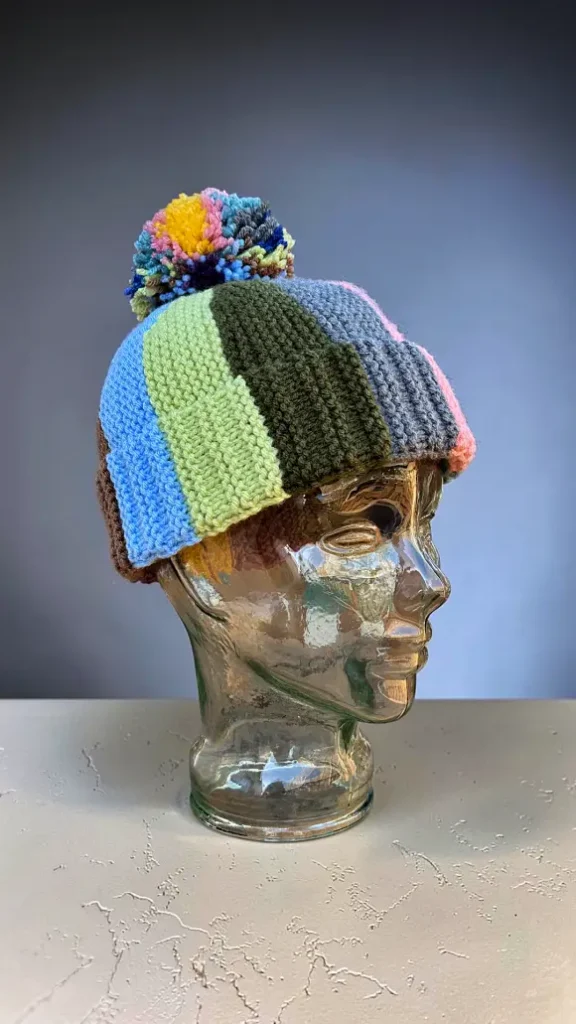
Easy Scrap Yarn Bobble Beanie Free Knitting Pattern
This easy bobble beanie knitting pattern is the perfect scrap yarn project for using up leftover yarn from bigger knits instead of letting it sit forgotten in a basket or closet forever. Knit flat on straight needles, this cozy winter hat can be made in sizes from children to adults and is a fun way to mix colours and create unique combinations with your yarn stash. No two hats ever turn out the same. These scrap yarn beanies are great for gifting, craft sales, or charity knitting because they use yarn you already have on hand, making them an affordable and practical knit. And before anyone says it… no, you won’t be stuck weaving in a million yarn ends afterward. I made a tutorial showing how I work in yarn ends while knitting so they’re caught automatically as you go. If done correctly, there are only 2 ends left to sew in when the hat is finished – the cast on end and the end used to sew the seam. You can watch the full tutorial below. https://youtu.be/1_zF6HAzsfY If you would prefer the printable version of the pattern, I have a number of online retailers you can buy it from including online at KweenBee on Shopify, Etsy, Ravelry and Buy Me A Coffee. I also have the paperback booklet and Kindle versions available on Amazon. Links coming soon! Don’t forget to share this pattern with anyone you think may like it on your social media accounts. It’s free for everyone to use and it’s a great way to support my work without paying a single cent. I even included the handy share button right here 👇🏼 This isn’t my first winter hat I’ve designed. It’s have many more including a crocheted version. Clicking any of the photos below will take you right to the FREE pattern to make it. Make it in crochet. Fits everyone! And has a full how to video. I wrote another scrap hat. This one is even easier to make and looks a bit more refined. Click Me for ALL Hats and Beanies! Things You Will Need Set of 4 mm (6 US) single pointed needles Tapestry needle to sew the seams and work in ends Worsted weight yarn scraps. The amount of yarn you’ll need for each section will differ depending on the size you make. For the largest size, the ball needs to be the size of a bottom of a pop or soda can. There will be a bit leftover. The ball of yarn on the bottom of a soda can for comparison. Gauge In stockinette stitch. Gauge is not overly important for this. The garter stitch used makes it very stretchy. size 4 mm (US size 6) single pointed needles 10 stitches every 2 inches (5 cm) 14 rows every 2 inches (5 cm) I had to use something to delineate between colour changes. You will have more colours than what I list here. Depending in the size, it could be 9 – 12 colours. FC – first colour NC – next colour AOC – another colour Sizing Sizing is written as such: Small (Medium, Large, X-Large) All age and sizing references in this pattern are estimates and based on the measurement around the head (circumference). Small – Kids 1-5 years (18 inches or 46 cm) Medium – Kids 6-10 (20 inches or 50 cm) Large – Kids ages 11 to small adults (22 inches or 56 cm) X-Large – People 24 inches or 61 cm and up Please note, this is a VERY forgiving pattern with a LOT of stretch. And here is the video on how to work in the ends as you knit, in case you missed it earlier 😊 https://youtu.be/1_zF6HAzsfY The Pattern This beanie is made in sections that are knit from the crown of the head down toward the forehead, not in rows going around the head like a traditional beanie. Cast on 38 (42, 45, 47) with FC Row 1: With NC K1. FC K28 (31, 33, 34) P1 K8 (9, 10, 11) Row 2: K37 (41, 44, 46). Turn. Leave last st unworked. Row 3: With NC K2. FC K26 (29, 31, 32) P1 K8 (9, 10, 11) Row 4: K35 (39, 42, 44). Turn. Leave remaining 3 sts unworked. Row 5: NC K2. FC K24 (27, 29, 30) P9 (10, 11, 12) Row 6: K33 (37, 40, 42). Turn. Leave remaining 5 sts unworked. Row 7: NC K2. FC K22 (25, 27, 28) P1 K8 (9, 10, 11) Row 8: K31 (35, 38, 40). Turn. Leave remaining 7 sts unworked. Row 9: NC K2. FC K20 (23, 25, 26) P1 K8 (9, 10, 11) Row 10: K29 (33, 36, 38). Turn. Leave remaining 9 sts unworked. Row 11: NC K2. FC K18 (21, 23, 24) P9 (10, 11, 12). Row 12: K27 (31, 34, 36). Turn. Leave remaining 11 sts unworked. Row 13: NC K2. FC K16 (19, 21, 22) P1 K8 (9, 10, 11) Row 14: K25 (29, 32, 34). Turn. Leave remaining 13 sts unworked. Row 15: NC K2 FC K14 (17, 19, 20) P1 K8 (9, 10, 11) Row 16: K23 (27, 31, 32). Turn. Leave remaining 15 sts unworked. Break FC. Row 17: NC K14 (17, 19, 20) P9 (10, 11, 12) Row 18: P8 (9, 10, 11) K30 (33, 35, 36). More of My Stuff On Etsy ♥ Row 19: AOC K1. NC K28 (31, 33, 34) P1 K8 (9, 10, 11) Row 20: K37 (41, 44, 46). Turn. Leave remaining 1 st unworked. Row 21: AOC K2. NC K26 (29, 31, 32) P9 (10, 11, 12). Row 22: K35 (39, 42, 44). Turn. Leave remaining 3 sts unworked. Row 23: AOC K2. NC K24 (27, 29, 30) P1 K8 (9, 10, 11) Row 24: K33 (37, 40, 42).Turn. Leave remaining 5 sts unworked. Row 25: AOC K2. NC K22 (25, 27, 28) P1 K8 (9, 10, 11) Row 26: K31 (35, 38, 40). Turn. Leave remaining 7 sts unworked. Row 27: AOC K2. NC K20 (23, 25, 26) P9 (10, 11, 12) Row 28: K29 (33, 36, 38). Turn. Leave remaining 9 sts unworked. Row 29: AOC K2. NC K18 (21, 23, 24) P1 K8 (9, 10, 11) Row 30: K27 (31, 34, 36). Turn. Leave remaining 11 sts unworked. Row 31: AOC K2. NC K16 (19, 21, 22) P1 K8 (9, 10, 11) Row 32: K25 (29, 32, 34). Turn. Leave remaining 13 sts unworked. Break NC yarn. Row 33: AOC K16 (19, 21, 22) P9 (10, 11, 12). Row 34: P8 (9, 10, 11) K30 (33, 35, 36) ♥ Repeat from ♥ to ♥ 7 (8, 9, 10) more times for a total of 9 (10, 11, 12) sections. When making your last section, the K1 colour at the start of row 19 should be the same colour of your first section. Continue to make all the K2 sts that are not worked this colour as well. The side on Read more
Read more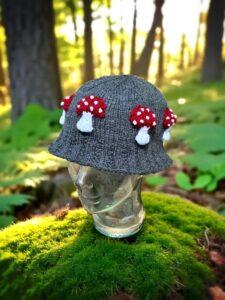
Knit Flat Mushroom Bucket Hat – Free Knitting Pattern for Cottagecore Style
I do like fungi and I do like hats. So what better than to combine the 2 and make a hat with mushrooms! Is it to everyone’s taste? Heck, no. And I knew that when I designed it. And boy was it a challenge. It took me 9 complete hats to get the design to work and sit on the head right. It started as a single mushroom, smack dab in the front, but it just didn’t work no matter what I did. Now there are 7 toadstools all around the hat. For this pattern, you’ll need to pull the stitches together so the mushroom stands out from the background. To do this, pass the yarn behind your work and catch it when knitting on the right side. It’s done the same way you do any colour work when knitting. The video has you pull it tighter for the gloves, but for the hat, how you normally do it will work. The video is queued to the right spot for each row as you knit the mushrooms. I originally showed how to make the toadstools on gloves but kept the video general enough to apply to anything. You can watch the video by clicking the video below. It will automatically play from the start for the gloves with the intro. https://youtu.be/UlRMP-b_w8o I’ve made this hat to only fit adults as I got tired of making hats. I ran out of patience and desire to do the math and make the samples of smaller hats. If you want me to work up child sized versions, let me know. You can leave me a comment below. If you would like to make a plain bucket hat that is designed to fit the whole family, be sure to check out this one. Knit flat with straight needles and 2 strands of worsted weight yarn, it works up super fast! Here’s the link to read that pattern – Knitted Bucket Hat for Children and Adults For ease of knitting this hat, I generally used one colour for the mushrooms on my sample hat. There is nothing stopping you from making each mushroom unique with its individual coloured stem and cap. It would be a great way to use up some of those small leftovers of yarn that really aren’t good for much more than a single stripe on a scarf. If you would to prefer to support my work and have access to a printable, ad-free version of this pattern, I offer that too. To get the downloadable pattern for a small fee you can get it in my Etsy Shop, Ravelry, LoveCrafts, Buy Me A Coffee and from the shop section on this website – KweenBee.com. If you would prefer to order a Kindle or printed paperback version from Amazon, you can now do so! Shipping is free if you are an Amazon Prime member. Make sure you select the country you are in to take advantage of the free shipping. Click the following link for your country – United States, United Kingdom, Canada, and Australia. The Kindle download and paperback versions are available in English only. Things You Need Worsted weight yarn in 3 colours: Main Colour (MC): approx. 100 g (3.5 oz) Stem Colour (SC): small amount. Each stem uses about 120 cm (47 inches) Cap Colour (CC): approx. 30 g Each cap uses about 275 cm (108 inches) 1 set of 4 mm (US 6) single pointed knitting needles 1 set of 3.25 or 3.5 mm (US 3 or 4) single pointed knitting needles (optional) Tapestry needle – to sew the seam and work in the ends. Gauge In stockinette 9 sts = 2 inches (5 cm) 12 rows = 2 inches (5 cm) Sizes are written as such: S-M (L-XL) 21-22 inches (23-24 inches) 53.5 – 56 cm (57 – 61 cm) Brim With MC cast on 122 (130) sts with the 3.25 or 3.5 mm knitting needles. You can use the 4 mm needles but smaller needles will make a tighter brim edge. Switch to the 4 mm (US 6) for the remainder of the pattern. ♥ Row 1: K across Row 2: *K2 P2* Repeat from * to * until the last 2 sts. K2 ♥ Repeat from ♥ to ♥ for a total of 8 rows Row 9: K4 🍄 K2tog K6 Repeat from 🍄 to 🍄 to the last 6 sts. K2tog K4 (107, 114 sts) Row 10: K2 P2 🐿️ K1 P2 K2 P2 🐿️ Repeat from 🐿️ to 🐿️ to the last 5 sts. K1 P2 K2 Row 11: K across Row 12: As row 10 Row 13: ♦ K2tog K5 ♦ Repeat to the last 2 sts. K2tog. (91, 97 sts) Row 14: ♪ K1 P2 ♪ Repeat to the last st. K1 Mushroom Band or Crown ☼ Row 15: K across Row 16: P across ☼ Repeat from ☼ to ☼ one more time. Row19: K5. With SC K1 M1 K1 M1 K1, Turn. Leave remaining sts unworked. P5. Turn. K5. Turn. P5. Turn. K5. ♠ With MC K10 (11). With SC K1 M1 K1 M1 K1, Turn. Leave remaining sts unworked. P5. Turn. K5. Turn. P5. Turn. K5. ♠ Repeat from ♠ to ♠ 5 times more. With MC K5. (105, 111 sts) https://youtu.be/UlRMP-b_w8o?si=yf9bDA9xrbYcSE6K&t=135 Row 20: P5. With SC P5. ◊ With MC K10 (11). With SC P5.◊ Repeat from ◊ to ◊ 5 times more. With MC P5. Row 21: K5. With SC TWK2tog. K1. K2tog. ◘ With MC K10 (11). With SC TWK2tog. K1. K2tog. ◘ Repeat from ◘ to ◘ 5 times more. With MC K5.(91, 97 sts) https://youtu.be/UlRMP-b_w8o?si=xLy1M7TXOJhXRctd&t=345 Row 22: P5. With SC P3. ☺ With MC P10 (11). With SC P3. ☺ Repeat from ☺ to ☺ 5 times more. With MC P5. Row 23: K5. With SC K3. ◘ With MC K10 (11). With SC K3. ◘ Repeat from ◘ to ◘ 5 times more. With MC K5. Row 24: As row 22 Row 25: K3. With CC K1 M1 K1 M1 K1 M1 K1 M1 K1 M1 K1 M1 K1. Turn. Leave remaining sts unworked. P13. Turn. K13. Turn. P13. Turn K13. ₪ With MC K6 (7). With CC K1 M1 K1 M1 K1 M1 K1 M1 K1 M1 K1 M1 K1. Turn. Leave remaining sts unworked. P13. Turn. K13. Turn. P13. Turn K13. ₪ Repeat from ₪ to ₪ 5 times more. With MC K3. ( 133, 139 sts) https://youtu.be/UlRMP-b_w8o?si=F2AVVNseleDgb09e&t=477 Row 26: P3. With CC P2tog P9 TBLP2tog. † With MC P6 (7). With CC P2tog P9 TBLP2tog. † Repeat from † to † 5 times more. Read more
Read more
F*ck Ice and Trump Beanie Knitting Pattern – FREE Download!
This is a very simple pattern knit flat on two needles, using straightforward colorwork. Intarsia charts are included, along with a blank chart so you can design and knit any message you want. If this pattern offends you, that’s a bonus. I share my work freely for everyone, and I refuse to let people who support this regime benefit from my labor. I saw what I saw, and I stand by it. This pattern was designed and written quickly and was not test-knit. Please be kind if you spot mistakes, and feel free to adapt as needed. Keep warm. Keep safe. Rise up. Never stop. If you would prefer the printable version of the pattern, I have a number of online retailers you can get it from including my online Ravelry and Buy Me A Coffee. You can also download it right here: Read the pattern onlineDownload Please share this page with as many like minded individuals as you can. You can use these share icons below. Things You Need 2 colours of worsted weight (AKA – 4, medium, or 10 ply) yarn – standard 5 oz (141 gram) balls will work. Please note: pom-pom will require more yarn than estimate given. Size 5 mm (US size 8) single point knitting needles or whatever size you need to acquire the correct gauge. Tapestry needle – Sew seams and work in ends. Gauge In stockinette 23 rows = 4 inches (10 cm) 17 sts = 4 inches (10 cm) Sizing Notes One size fits most adults. There are no child sizes given for this pattern. The Band Cast on 27 ♦ Row 1: K across Row 2: K3 P11 K3 P1 K9 ♦ Repeat from ♦ to ♦ 6 times total if making “F*CK ICE + TRUMP”. (6 + 35 + 4 + 21 + 4 + 6 + 4 + 41 + 6 = 127 rows) ** Make more rows before starting the lettering to make the seam centred in the back if making other combinations: Repeat from ♦ to ♦ 34 times total if making “F*CK ICE”. (34 + 35 + 4 + 21 + 34 = 128 rows) Repeat from ♦ to ♦ 24 times total if making “F*CK TRUMP”. (24 + 35 + 4 + 41 + 24 = 128 rows) Following the given pattern for the rows, the lettering is made in the 11 st stockinette section. Start the lettering with the right side of the stockinette facing you (I added in one extra row of red in the charts to show the design.) When making the “F” in the 11 st stockinette section, knit the first st in red, then knit 9 sts in white, 1 st in red, continue with the pattern. There are 2 rows between letters and 4 rows between words. I don’t have any advice or help to offer on how to make intarsia or colour work. There are a lot of videos on YouTube that can help you with this. The band is made sideways. You start at the edge of the “F” and work your way up. If you need to fix a mistake, you’ll have less to take apart when made like this. If making “F*CK ICE + TRUMP” repeat row 2 one more time so you end with the right side facing you. Repeat from ♦ to ♦ 6 times total if making “F*CK ICE + TRUMP”. Repeat from ♦ to ♦ 34 times total if making “F*CK ICE”. Repeat from ♦ to ♦ 24 times total if making “F*CK TRUMP” Cast off all sts. Band complete. Hat Top With the RIGHT side of the hat facing you (the garter stitches at the top), pick up stitches along the edge. Pick up one stitch in the nub of each garter “ridge”, and for every group of five stitches picked up, pick up an extra stitch between the nubs. If you need a little help with picking up the stitches, the video is cued up to the right spot in the video to help you out by clicking this link How to Pick up stitches on the Easy Beanie https://youtu.be/O3GLJXrP8js?si=d8Mj5TiESPte0Riz&t=114 Work your way down the length picking up a st in every 5 nubs, and picking up a st between the nubs. Knit whatever remaining sts remain after picking up between the ridge nubs (ie 4, 3, 2 or 1 st). The number of sts picked up will be about 76 sts. The number isn’t overly important as long as you’re close. It’s still just knitting and stretches, after all. ♥ Next row: Knit across Next row: Purl across ♥ Repeat from ♥ to ♥ for 7 inches or longer. The measurement includes the stockinette AND the garter sections before the purl line where the natural fold occurs. ♪ Next row: K2tog across. Knit any single remaining sts. Next row: Purl across Next row: Knit across Next row: Purl across. ♪ Repeat from ♪ to ♪ until you have 12 sts or less. End when you complete the K2tog row with the correct number of sts. Break the yarn. Leave a length of yarn long enough to sew the seam. Draw through all remaining sts. Sew seam. Hints and Tips The “ U ” is also in the word Trump if you would like the replace the “ * ” in f*ck. Just saying is all. The U is 4 rows shorter than the asterisk but 4 rows shouldn’t make much difference to how it fits. Think of picking up the sts as this math equation. For every 5 sts you need one extra st. So for as many groups of 5 “ridges” you have of garter st for the band, that’s how many extra sts you need to pick up evenly. If you need a larger hat, make the band longer on each end. Pick up more sts to make the top, but still one extra for every 5, and make the stockinette portion for the top longer. If you want to make the hat more floppy on the top, have at it. Make it longer than what is given. Changing colours to make the lettering can leave holes if not done correctly. I’m good at a lot of things but intarsia is not one of them. Do your best. My beanie isn’t my best work either but Read more
Read more

