
The Woodland Wanderer’s Hat is a cozy, timeless knit with a traditional fantasy feel, perfect for grand adventures, epic quests, untamed paths, and journeys worth remembering… or just keeping your ears warm while grabbing a coffee before your Zoom meeting.


I designed this beanie for knitters who enjoy texture and classic details. This adult size winter hat is knit flat on two straight needles using worsted weight yarn, making it a comfortable project if you prefer not to knit in the round. The band is worked separately and features cables for added warmth and visual interest, then joined to form the hat. Helpful step by step photos are included throughout the pattern, along with a few optional video tutorials to guide you through select techniques. This knit flat hat pattern is perfect for creating a warm, everyday slouchy bobble hat with a timeless look.
Not a fan of reading things online or would like to print this pattern? You can download the ad free PDF version of this pattern from my Shopify shop, from Buy Me A Coffee or from my Etsy Shop. If you shop on Amazon I also have the Kindle and paperback versions.
Another way to avoid ads and pop-ups, get instant, PRINTABLE downloads of this pattern and others, is by becoming a Member. When you become a Website Supporter at $4/month, you’ll gain access to exclusive member only posts on Buy Me A Coffee. You can download as many patterns as you like for the same $4 each month. You can go to this page to learn more, become a member and support my work… Exclusive Member Area
Love the pattern and want to let other people know about it? I’ve added these super easy share buttons. Simply tap and share anywhere you are on social media.
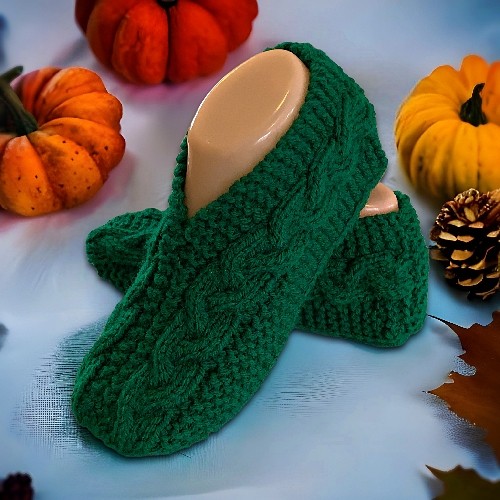
If you like the cables of this hat I have even more that you may be interested in my other cable patterns like the Cozy Cable Headband, Cable Slippers, Cable Fingerless Gloves, or Cable Scarf. Click any of the photos to read the patterns for free on this website.


Things you need
Worsted weight yarn – one standard ball (515 yards / 471 m) will be more than enough.
1 set of size 4 mm (US size 6) single pointed needles
Cable needle
Tapestry needle (to work in ends)
Pom pom – any size and optional
Gauge
With size 4 mm (US size 6) needles or whatever size you need to obtain the correct number of stitches and rows. Be sure to check your gauge. It doesn’t need to be exact but the closer the better.
In garter st
17 sts = 4 inches or 10 cm
34 rows = 4 inches or 10 cm
Sizing
One size fit most ADULTS
Band
Cast on 20
Row 1: K4 P1 K9 P1 K4 P1
Row 2 (and all EVEN rows): K1 P4 K1 P9 K1 P4
* Row 3: C4F P1 C6F K3 P1 C4B P1
Row 5: as row 1
Row 7: C4F P1 K3 C6B P1 C4B P1
Row 9: as row 1
Row 10: as row 2 * Repeat from * to * 13 times more
Next row: repeat row 3
Cast off on the WRONG side. Break yarn.
More of My Stuff on Etsy
You can make a widget like this for your blog or website, too.
Instructions are on my website here: How to Display Etsy Items on Your Website
Hat Top
With the RIGHT side of the band facing you and the PURL sts at the top, Pick up 60 sts along the edge of the cable band.
Row 1: Purl across
♥ Row 2: K2 M1 K to the last 2 sts. M1 K2
Row 3: P2 PM1 P to the last 2 sts. PM1 P2 ♥ Repeat from ♥ to ♥ until you have 100 sts.
☼ Row 22: K across
Row 23: P across
Row 24: K2tog. K to the last 2 sts. K2tog.
Please share this page!
More FREE patterns
Click the pic to read online!!


FREE Knitting Graph Paper for Colorwork Knitting


![]()
![]()


Row 25: P across ☼ Repeat from ☼ to ☼ until you have 88 sts.
Row 50: K3 * K2tog K7 K2tog K1 * Repeat form * to * 6 more times. K1 (74 sts)
Row 51: P across
Row 52: K3 * K2tog K5 K2tog K1 * Repeat form * to * 6 more times. K1 (60 sts)
Row 53: P across
Row 54: K3 * K2tog K3 K2tog K1 * Repeat form * to * 6 more times. K1 (46 sts)
Row 55: P across
Row 56: K3 * K2tog K1 K2tog K1 * Repeat form * to * 6 more times. K1 (32 sts)
Row 58: P across
Row 59: K2tog across (16 sts)
Row 60: P across
Row 61: K2tog across. Break yarn. Draw through. Sew the seam up to the point formed by Row 22 before you move on to the finishing edge.

Sew this seam along the back of the hat..

up to this point.

Now that the seam is sewn, pick up sts along the back of the hat.
Finishing Edge
With the RIGHT side facing you and starting at the cast off edge of the front band, pick up 3 sts in the C4F cable, 1 st in the purl space, 7 sts in the 9 st cable, 1 st in the purl space, and 3 sts in the C4B cable, in every second row along the back and 3 sts in the C4B cable, 1 st in the purl space, 7 sts in the 9 st cable, 1 st in the purl space, and 3 sts in the C4F cable.
Row 1: K across
Row 2: K2 Cast off 1 st. K to the last 3 sts. Cast off 1 st. K1
Row 3: K2 Cast on 1. K to the cast off st. Cast on 1. K2
Row 4: K across
Cast off with the WRONG side facing you. Break yarn.
Hints and Tips
If you want a more slouchy hat, when you’re done row 25, work more knit and purl rows to make the 88 st section longer.
You can easily make this hat in 2 colours if you like. Because the band is made separately, you could make it and the pom pom complimentary colours.
To pick up sts evenly along the purl row, divide the length in half. You now need to pick up 30 sts evenly. Still too hard to space them out? Divide the half into a quarter. You now need to space 15 sts evenly in the 1/4 section. You can use spare pieces of yarn or st markers to divide the sections smaller and smaller for even spacing.
If you’re off by a st or 2 when picking up sts along the band, it won’t make a huge difference. Your st counts later will be off, but that’s no a big deal either.
Make the ties from long strands of yarn pulled through the hole. You’ll now have 2 strands. Feed as many strands as you like through the holes but make sure that the number of total strands is divisible by 3 if you’re braiding it. For the beige hat, I used 6 long strands giving me 12 strands total. Each of the 3 sections of the braid was made of 4 strands of yarn.
I also did a 5 strand braid on the grey hat (makes it flatter and wider). I used 5 long strands to give me 10 strands total. Each of the 5 sections of the braid was made of 2 strands of yarn.

One strand pulled through the hole
You can either make a pom pom for your hat or purchase pom poms from all sorts of retailers. I got my faux fur pom poms online.
If you would like to make a smaller hat for kids, use a thinner yarn and smaller needles. How the sizing turns out, I can’t say. A tighter gauge will keep the proportions of the hat and scale it down in size.
There are a number of ends to work in when you’re done. One thing you can do is work them in as you knit. Watch the video blow to learn how. This also a handy skill to have when knitting just about anything, tbh.
Abbreviations
k – knit
p – purl
st – stitch
sts – stitches
k2tog – knit 2 sts together.
Side note: I use both versions of the terminology when it comes to cable stitches. I’ve been corrected that I’m using the wrong one for both occasions so it’s a no win for me. What I mean is that C4F is the same technique as C2F. Just like how C2B is the same as C4B. Do you think of it as the just the stitches you’re pulling or the number of stitches you’re using in total when you do it? It’s a personal choice, I guess.
C4F – Pick up the next 2 stitches with your cable needle. Pull the stitches to the FRONT of your work. Knit the next 2 stitches on your non-working needle. Knit the 2 stitches from the cable needle.
C4B – Pick up the next 2 stitches with your cable needle. Pull the stitches to the BACK of your work. Knit the next 2 stitches on your non-working needle. Knit the 2 stitches from the cable needle.
C6F – This is made the same way as a C4B but is made over 6 sts. Pick up the next 3 stitches with your cable needle. Pull the stitches to the FRONT of your work. Knit the next 3 stitches on your non-working needle. Knit the 3 stitches from the cable needle.
C6B – This is made the same way as a C4B but is made over 6 sts. Pick up the next 3 stitches with your cable needle. Pull the stitches to the BACK of your work. Knit the next 3 stitches on your non-working needle. Knit the 3 stitches from the cable needle.
M1 – Make one (knit wise). Increase one stitch between the stitches. Pick up the yarn between the stitches. Twist slightly. Place it on your non-working needle. Knit the stitch.
PM1 – Make one (purl wise). Increase one stitch between the stitches. Pick up the yarn between the stitches. Twist it slightly and place it on your non-working needle. Purl the stitch.
Like all of my patterns you have my permission to sell and/or give away the physical items that you make using this pattern. You are NOT permitted to reprint this pattern in any form unless you have obtained my written permission to do so.
If you have any questions, please feel free to leave a comment or send me your questions at kweenbee_crafts@hotmail.ca.


I love your patterns and thank you for letting your patrons access to the pattern for free in your read only format and allowing for the purchase of your creations. Please continue to share your creativity with us.
No worries about that! Even though a few complain, the majority are gracious and pleased with this format. If people feel the need to complain, no one is making them stay.
I might have loved this pattern if I could only just get the pattern without all the ads. It’s just too confusing to copy and paste the pattern into a word processing app and I surely wouldn’t try to print from this page. I really wish you would put a print pattern feature. I understand you’re needing the ads to help pay you for your page here – but you should be thinking of your patrons too.
Copy and pasting my patterns is stealing my work. It’s a violation of my copyright and disrespects the hard work I put in to designing and sharing my patterns.
This is how I earn my living. If you want to print the pattern, support my work! You can pay the small fee (less than the cost of the yarn it will take for you to make this). You can also become a member for $4 a month and get access to nearly 70 patterns. To say i should “think of my patrons” is insulting when I already give access to my work for free yet less than $4 out of pocket for the individual pattern is too much for you. What a shameful comment to make. I suggest you go elsewhere for your lack of gratitude and entitlement.