Gussy it up or wear it plain, this crocheted hat pattern is extremely versatile and makes hats for nearly anyone. Anyone but my 14 year old son apparently, who said, with his usual unenthusiastic honesty, “I don’t like it but it fits OK”. How do I know this? I needed to borrow his head to see how the smaller size fit and felt when wearing, so I guess it’s at least fit approved ¯\_(‘~’)_/¯


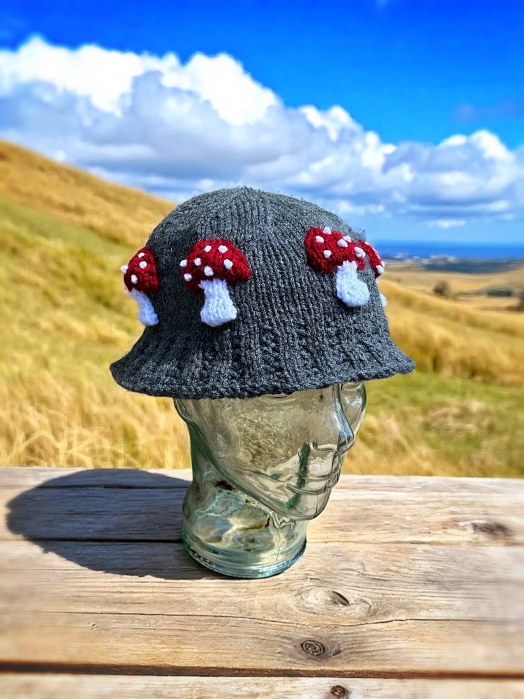
If you would prefer to have a KNITTED version of the bucket hat, I have that too! Click this link – Knit Bucket Hat for Children and Adults – FREE Pattern to start making hats for the entire family, kids included! I recently added mushrooms to the bucket hat! You can read that pattern here – Knit Flat Mushroom Bucket Hat for Adults.
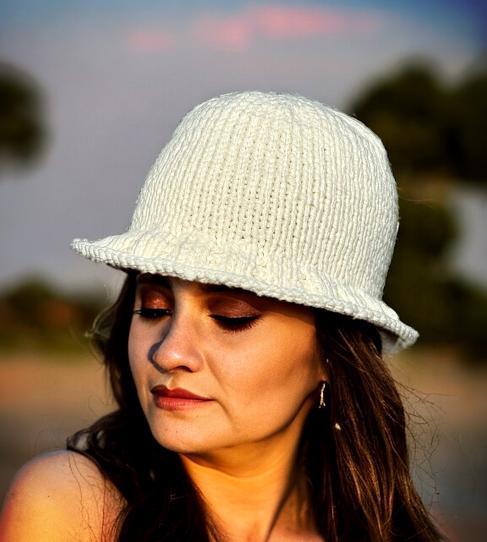
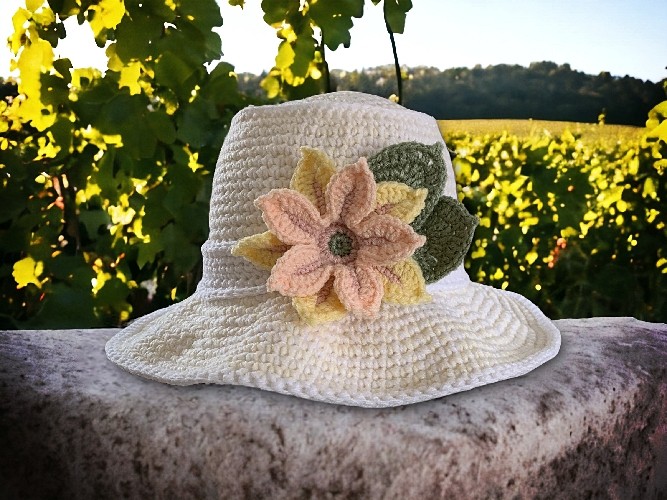
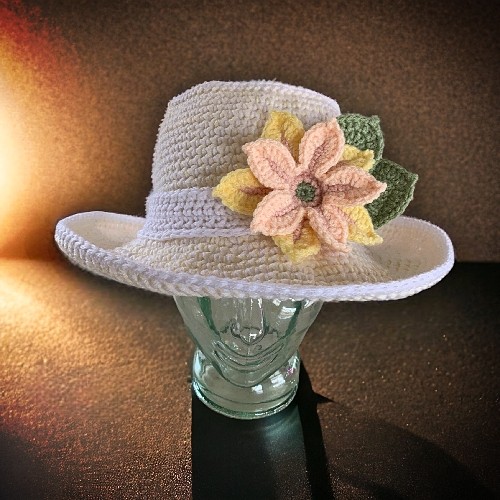
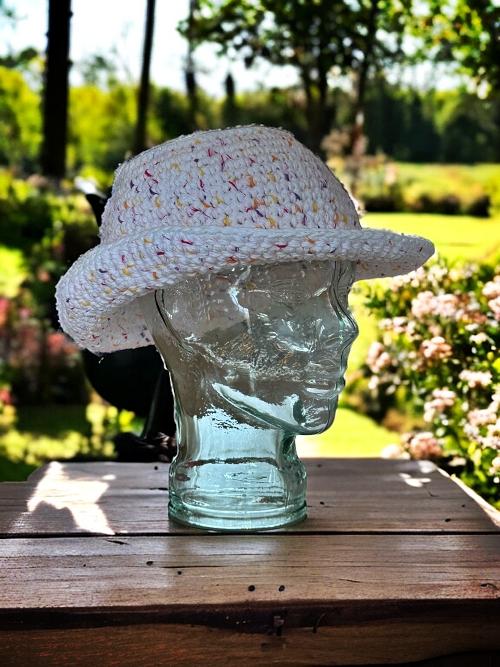
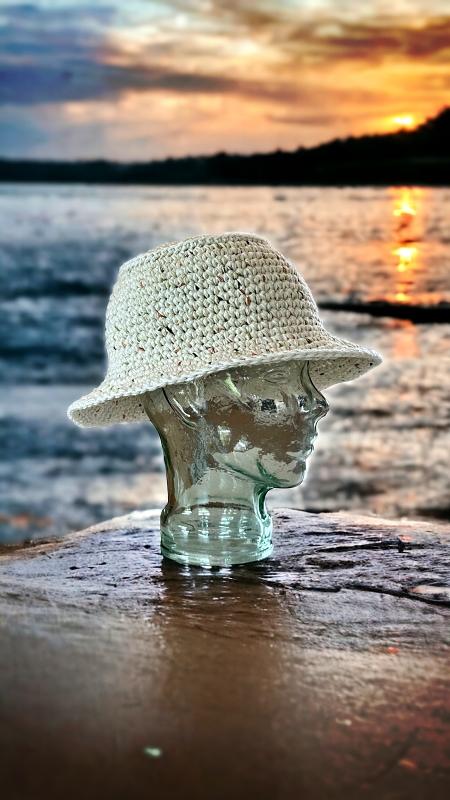
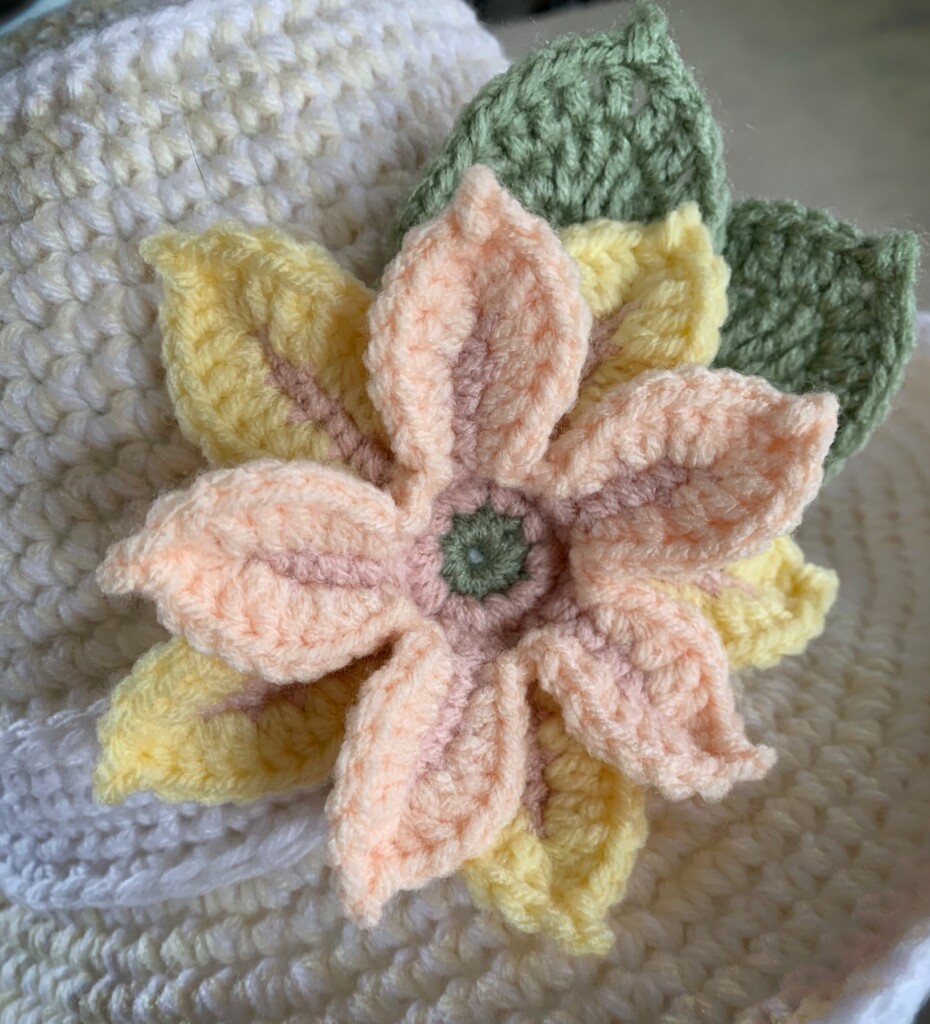
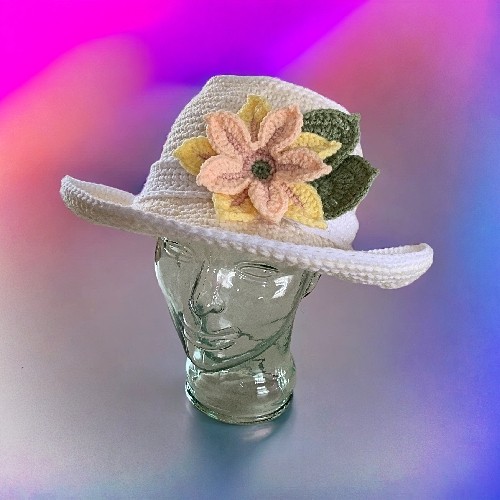
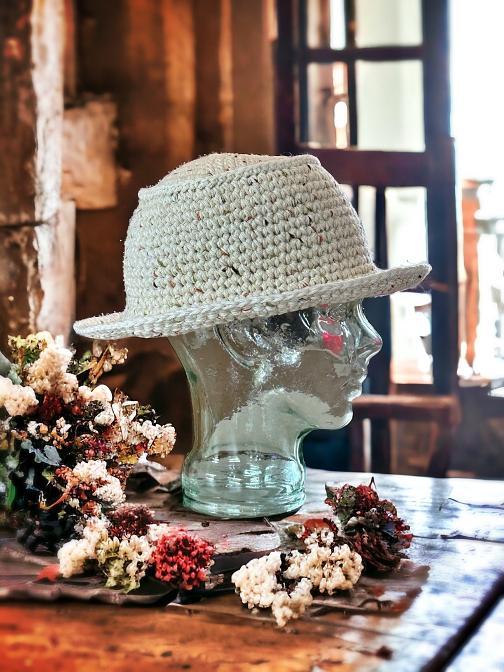
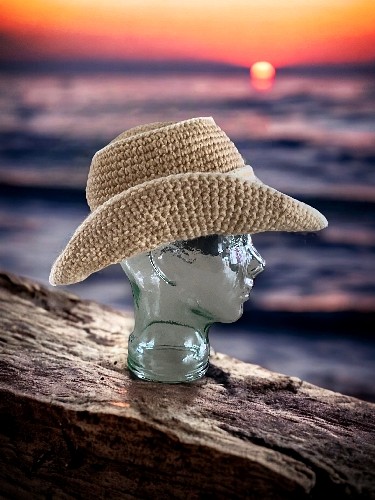
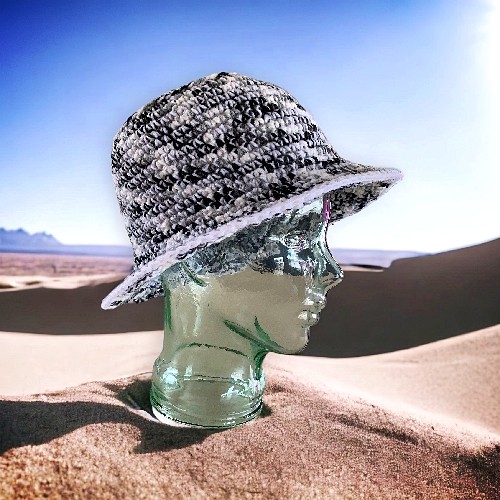
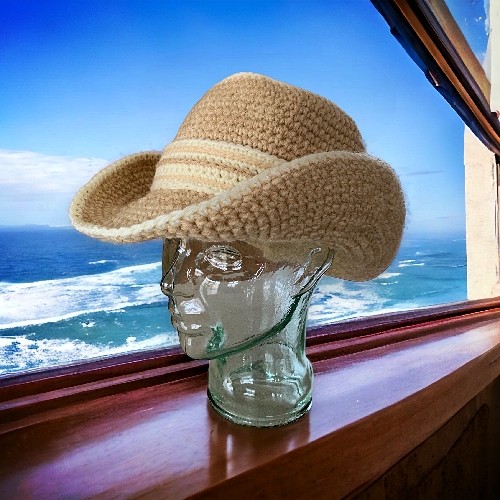
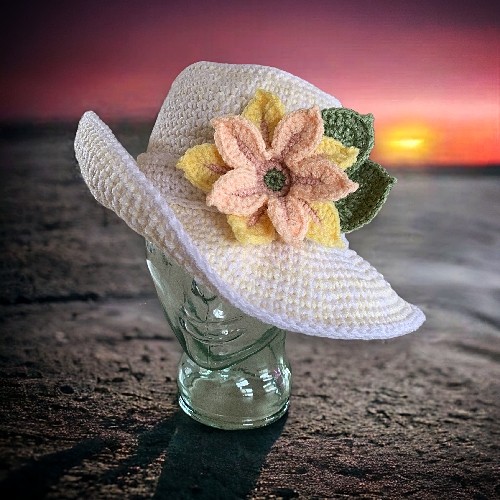
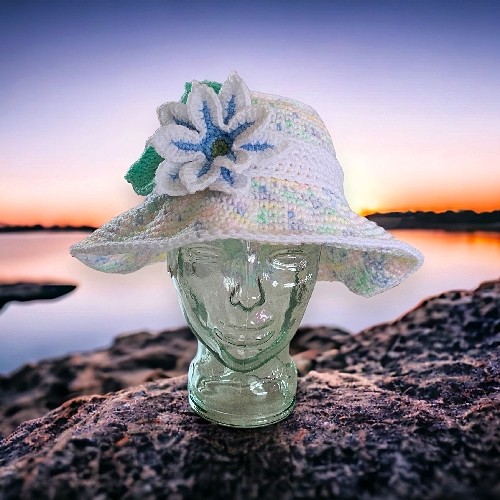
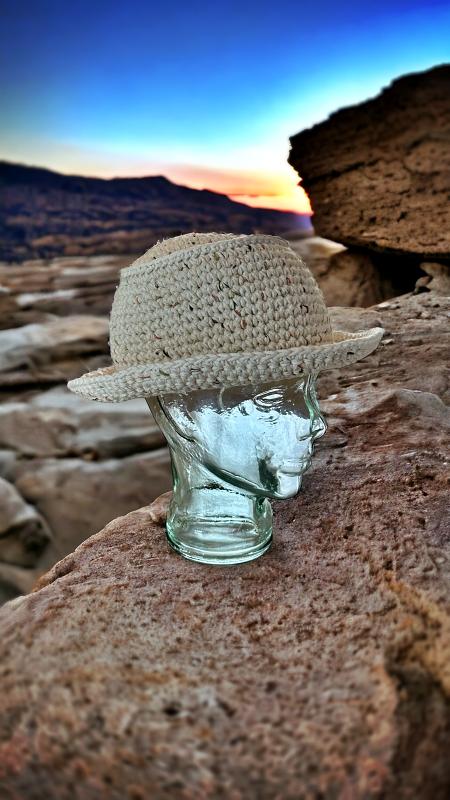
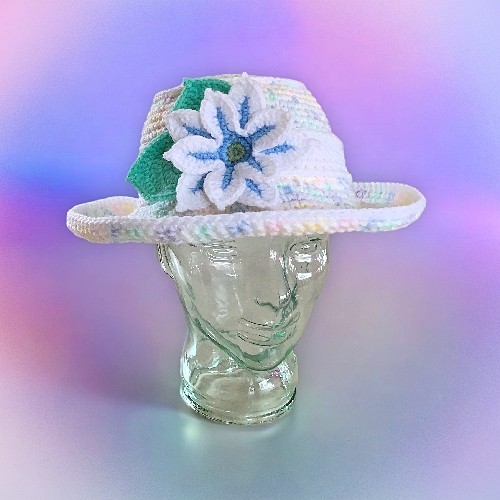
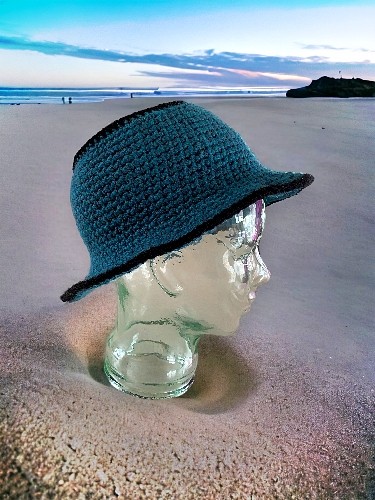
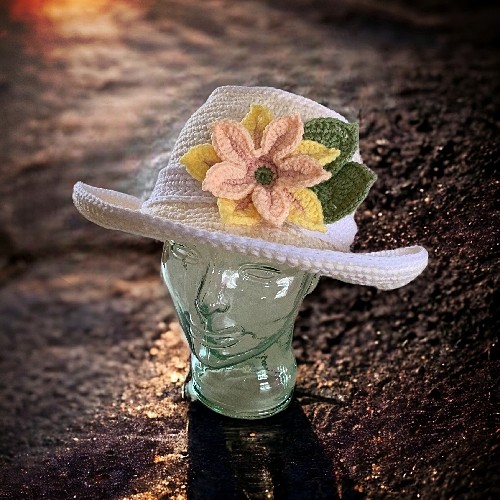
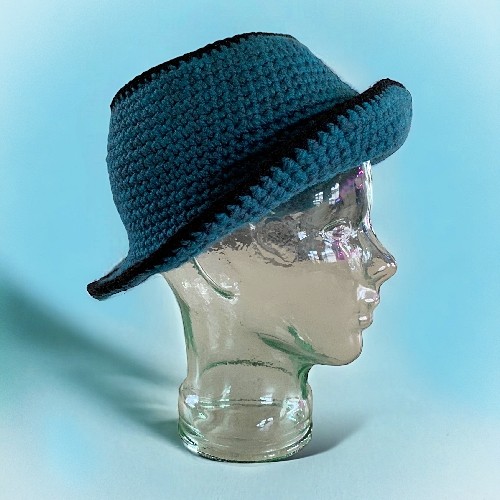
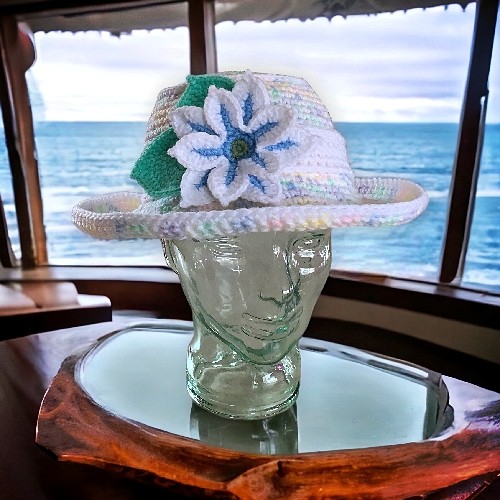
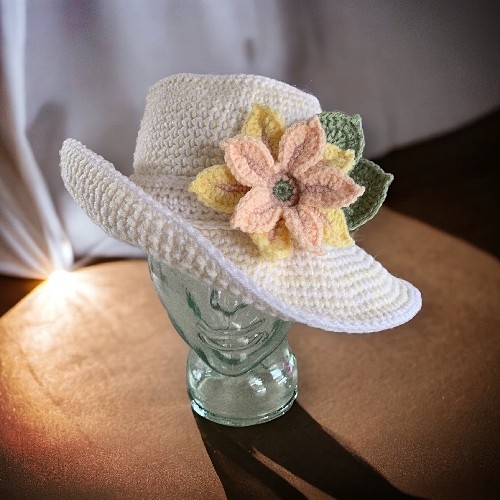
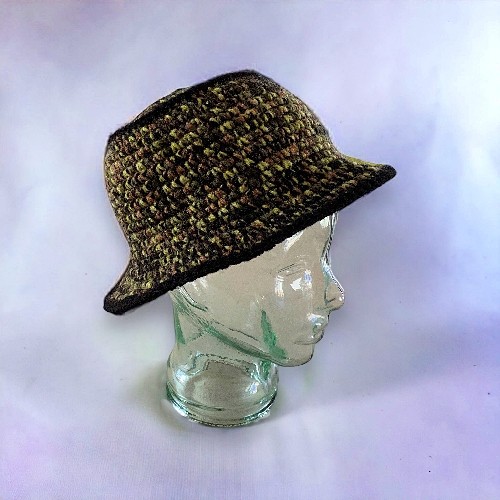
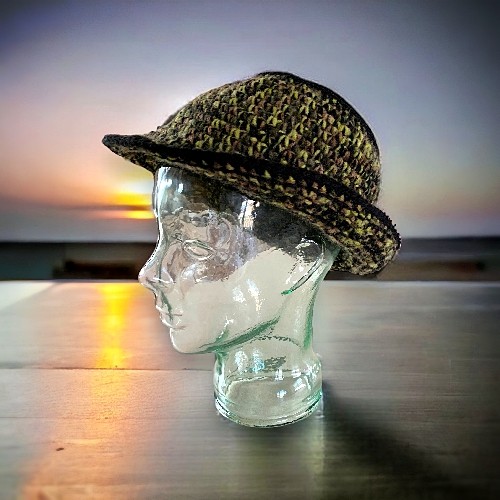
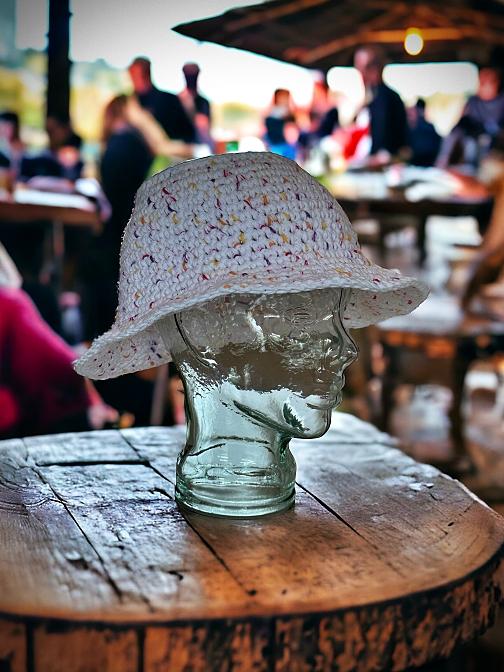
This hat can be made a number of ways, either as a wider brimmed sun hat with a flower, plain with the brim shaped similar to a cowboy/cowgirl hat, or with a narrower brim to be a bucket hat. Any way you choose is going to be a success! It’s easy to make, and as long as you know the basics of crochet. Literally if you know how to chain, single crochet (sc) and do a slip stitch (sl st), you’ll be able to make the hat. The flower can be a bit more tricky but I’ve included many photos and detailed descriptions to help you along.
The hat is made with 2 strands worsted weight yarn (or one strand of super bulky yarn) and a larger crochet hook. The stitches need to be fairly tight so the hat will hold it’s shape. Anything larger than the gauge given will make it floppy and the sizing may not work out as written. But, like all my patterns, play with it! If you want a floppy hat, no one said you can’t.
There aren’t any specific measurements for the hat sizing. It’s all very general as there is some stretch to the hat when finished and will form to fit the head it’s covering. If you want your hat to fit a little looser, go for the bigger size.
The way I thought of it when I was designing this hat, if it fit the glass head, it’s a small/medium size. In other words, a regular sized head. If it fits me and looks a little too big on the glass head, it’s a large/extra large. Let me put it this way. I know I have a big head. If you have ever thought you too might have a big head because hats don’t always fit you, hello fellow large head! If this statement makes no sense to you, go for the small/medium.
If you are looking to make the flower and the leaves, they each have their own page on the website. This pattern turned into a bit of a beast as it is. Both patterns are included with the printable PDF version of the sun and bucket hat.
If you don’t want to or are unable to make a financial donation, sharing this pattern through social media is a great way to help out too! The links below are a super easy way for you to do so.
If you would like to avoid the ads on this page or would like to print the pattern, you can purchase the PDF for a small fee from this website at Sun Hat with Gorgeous Flower or Simple Bucket Hat – Printable Crochet Pattern, through my Etsy shop, LoveCrafts or on Ravelry.
Another way to avoid ads and pop-ups, get instant, PRINTABLE downloads of this pattern and others, is by becoming a Member. When you become a Website Supporter at $4/month, you’ll gain access to exclusive member only posts on Buy Me A Coffee. You can download as many patterns as you like for the same $4 each month. You can go to this page to learn more, become a member and support my work… Exclusive Member Area
Like all of my patterns you have my permission to sell and/or give away the physical items that you make using this pattern. You are NOT permitted to reprint this pattern in any form unless you have obtained my written permission to do so.
Abbreviations
Ch – chain
sc – single crochet
sl st – slip stitch
hdc – half double crochet
dc – double crochet
trc – treble crochet
st – stitch
sts – stitches
Things You Need:
6 mm (US 10 or J) crochet hook (or what ever size hook you need to get the correct gauge)
3.5 mm (US 4 or E) crochet hook for top edging, flowers and leaves (all optional)
2 balls Worsted Weight yarn or 1 ball Super Bulky yarn (for the hat itself)
For the sun hat you’l need:
106 gr or 3.7 oz each of the worsted weight colours (216 m or 237 yards)
or
173 gr or 6 oz Super Bulky yarn (170 m or 185 yards) of course it’s less yarn for the bucket hat.
Worsted weight yarn (for band, flowers, leaves and edging)
Stitch markers (at least 8 but it never hurts to have more. See Hints and Tips section)
Tapestry needle (to sew band and flowers, work in the ends)
Gauge
With 2 strands of worsted weight yarn or 1 strand of super bulky yarn
13 sts = 4”
14 rows = 4”
Check your gauge to obtain correct sizing and density of the final fabric created. The stitching needs to be tight to hold the hat shape.
Small/Medium
With 2 strands of worsted weight yarn or 1 strand of super bulky yarn and your 6 mm (US 10 or J) crochet hook…
Please share this page!
More FREE patterns
Click the pic to read online!!


FREE Knitting Graph Paper for Colorwork Knitting


![]()
![]()


Ch 2 (make the first chain large enough to fit in all the stitches for Round 1)
Round 1: 12sc around. Do NOT join. The following rounds are worked without joining.
Round 2: Sc in first sc of previous round. 2sc in the next stitch. *Sc in next stitch. 2sc in the next stitch.* Repeat from * to * around. Place stitch marker. (18 sts)
Round 3: *2sc. 2sc in the next stitch.* Repeat from * to * around to stitch marker.
Round 4: *3sc. 2sc in the next stitch.* Repeat from * to * around to stitch marker.
Round 5: *4sc. 2sc in the next stitch.* Repeat from * to * around to stitch marker.
Round 6: *5sc. 2sc in the next stitch.* Repeat from * to * around to stitch marker.
Round 7: *3sc. 2sc in the next stitch. 2sc. 2sc in the next stitch.* Repeat from * to * around to stitch marker. (54 sts)
Round 8: *4sc. 2sc in the next stitch. 3sc. 2sc in the next stitch.* Repeat from * to * around to stitch marker. (66 sts)
Round 9: Sc around in the back loop.
Round 10-20: Sc around.
Round 21: *5sc. 2sc in the next stitch.* Repeat from * to * around to stitch marker. (77 sts)
***Please note – If you are making the BUCKET HAT, crochet these stitches as you normally would (through both loops of the stitch).
- If you are making the SUN HAT, crochet these stitches through the front loop ONLY!
Round 22: *8sc. 2sc in the next stitch. 9sc. 2sc in the next stitch.* Repeat from * to * around. Sc in the last st. (or crochet as many stitches as you have at the end of the round). (Mark each increase with a stitch marker as you go for a total of 8 markers. You will use these later on. I’m no longer giving final stitch counts. See the Hints and Tips section for clarification if needed).
Round 23: 4sc. 2sc in the next stitch. *9sc. 2sc in the next stitch.* Repeat from * to * around (Crochet as many stitches as you have to the end of the round but there should be 0).
Round 24: *10sc. 2sc in the next stitch. 11sc. 2sc in the next stitch.* Repeat from * to * around. 2sc (or crochet as many stitches as you have to the end of the round).
***Please note – If you are making the BUCKET HAT sc around and continue on the Round 31.
Round 25: 5sc. 2sc in the next stitch. *11sc. 2sc in the next stitch. 12sc. 2sc in the next stitch.* Repeat from * to * around 2 more times. 11sc. 2sc in the next stitch. 8sc. (or crochet as many stitches as you have to the end of the round).
Round 26: Sc around.
Round 27: *Sc to the next stitch marker. Sc as you normally would. Sc to the next stitch marker. 2sc in this stitch.* Repeat from * to * around.
Other ways to state this round…Increase 4 times evenly around. Or…Increase every other stitch marker.
Round 28: Sc around.
Round 29: *Sc to the next stitch marker. 2sc in this stitch. Sc to the next stitch marker. Sc as you normally would.* Repeat from * to * around.
Round 30: Sc around and join with a slip stitch. Tie off and break yarn.
Round 31: With the inside of the hat facing you and with one strand of worsted weight yarn and the same hook you made the hat with, sc around. Join with a slip st. Tie off and break yarn.
Top or Crown Edging (Optional)
With 3.5 mm (US 4 or E) crochet hook and a single strand of worsted weight yarn…
In the loops left from Round 9, sc in each stitch around. Join with a slip st. Tie off and break yarn.
Work in all ends.
Large/Extra Large
With 2 strands of worsted weight yarn or 1 strand of super bulky yarn and your 6 mm (US 10 or J) crochet hook…
Ch 2 (make the first chain large enough to fit in all the stitches for Round 1)
Round 1: 12sc around. Do NOT join. The following rounds are worked without joining.
Round 2: Sc in first sc of previous round. 2sc in the next stitch. *Sc in next stitch. 2sc in the next stitch.* Repeat from * to * around. Place stitch marker. (18 sts)
Round 3: *2sc. 2sc in the next stitch.* Repeat from * to * around to stitch marker.
Round 4: *3sc. 2sc in the next stitch.* Repeat from * to * around to stitch marker.
Round 5: *4sc. 2sc in the next stitch.* Repeat from * to * around to stitch marker.
Round 6: *5sc. 2sc in the next stitch.* Repeat from * to * around to stitch marker.
Round 7: *3sc. 2sc in the next stitch. 2sc. 2sc in the next stitch.* Repeat from * to * around to stitch marker. (54 sts)
Round 8: *5sc. 2sc in the next stitch.* Repeat from * to * around to stitch marker. (63 sts)
Round 9: *8sc. 2sc in the next stitch.* Repeat from * to * around to stitch marker. (70 sts)
Round 10: Sc around in the back loop.
Round 11-23: Sc around.
Round 24: *4sc. 2sc in the next stitch.* Repeat from * to * around to stitch marker. (84 sts)
***Please note – If you are making the BUCKET HAT, crochet these stitches as you normally would (through both loops of the stitch).
- If you are making the SUN HAT, crochet these stitches through the front loop ONLY!
Round 25: *9sc. 2sc in the next stitch. 10sc. 2sc in the next stitch.* Repeat from * to * around to the beginning of the row. (Mark each increase with a stitch marker as you go for a total of 8 markers. You will use these later on. I’m no longer giving final stitch counts. See the Hints and Tips section for clarification if needed).
Round 26: 6sc. 2sc in the next stitch. *11sc. 2sc in the next stitch. 10sc. 2sc in the next stitch.* Repeat from * to * around 2 more times. 10sc. 2sc in the next stitch. 5sc. (or crochet as many stitches as you have to the end of the round).
Round 27: *11sc. 2sc in the next stitch. 12sc. 2sc in the next stitch.* Repeat from * to * around 3 more times.
***Please note – If you are making the BUCKET HAT sc around and continue on the Round 34.
Round 28: 6sc. 2sc in the next stitch. *12sc. 2sc in the next stitch. 13sc. 2sc in the next stitch.* Repeat from * to * around 2 more times. 12sc. 2sc in the next stitch. 7sc. (or crochet as many stitches as you have to the end of the round).
Round 29: Sc around.
Round 30: *Sc to the next stitch marker. Sc as you normally would. Sc to the next stitch marker. 2sc in this stitch.* Repeat from * to * around.
Other ways to state this round…Increase 4 times evenly around. Or…Increase every other stitch marker.
Round 31: Sc around.
Round 32: *Sc to the next stitch marker. 2sc in this stitch. *Sc to the next stitch marker. Sc as you normally would.* Repeat from * to * around.
Round 33: Sc around and join with a slip stitch. Tie off and break yarn.
Round 34: With the inside of the hat facing you and with one strand of worsted weight yarn and the same hook you made the hat with, sc around. Join with a sl st. Tie off and break yarn.
Top or Crown Edging (Optional)
With 3.5 mm (US 4 or E) crochet hook and a single strand of worsted weight yarn…
In the loops left from Round 10, sc in each stitch around. Join with a slip st. Tie off and break yarn.
Work in all ends.
Band (Optional)
With a single strand of worsted weight yarn and your large 6mm (US 10 or J) crochet hook:
Small/Medium – Chain 74
Large/Extra Large – Chain 79
In second chain from hook, sc in each chain. Bring the ends of the band together and sc in the first sc of previous row. Be sure not to twist. We are now working in rounds.
Round 2-3: Sc around. Join with a slip st. Tie off and break yarn.
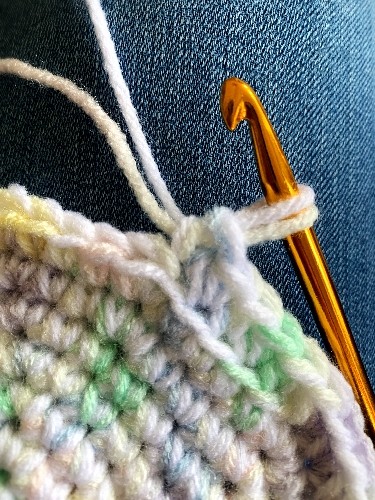
Working in the bottom loop of the original chains…
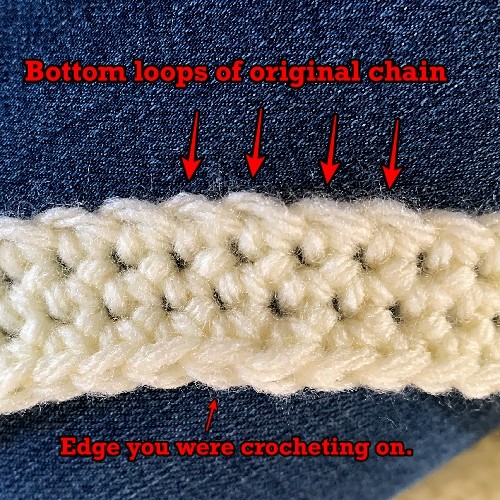
Work 3 rounds of sc evenly. Join with a slip st. Tie off and break yarn. Work in ends. Attach to the hat sewing the bottom edge of the band to where the brim joins the hat.
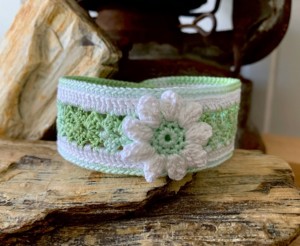
Add flowers or other embellishments of your choice.
Click a button to go to the flowers and leaf patterns
Hints and Tips
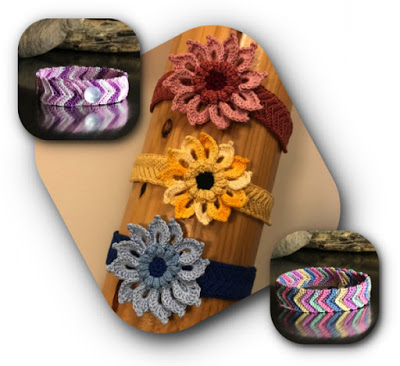
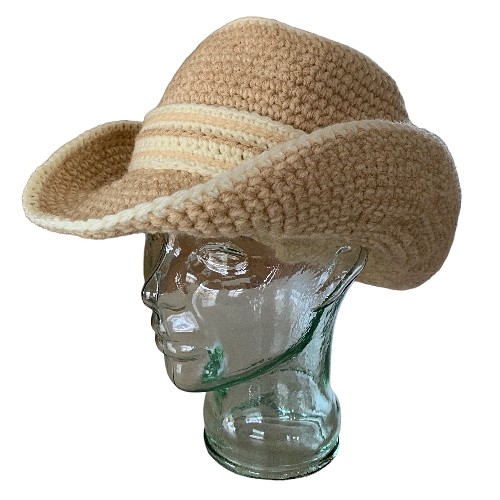
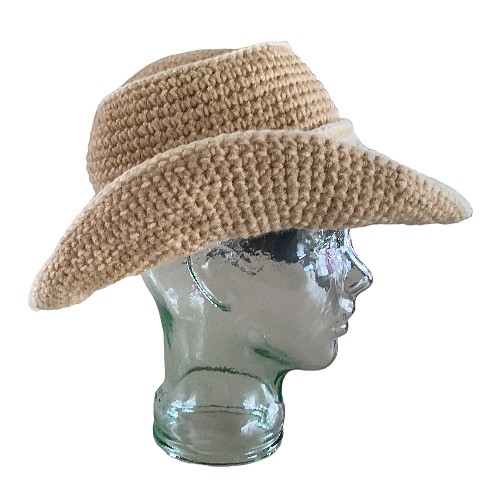
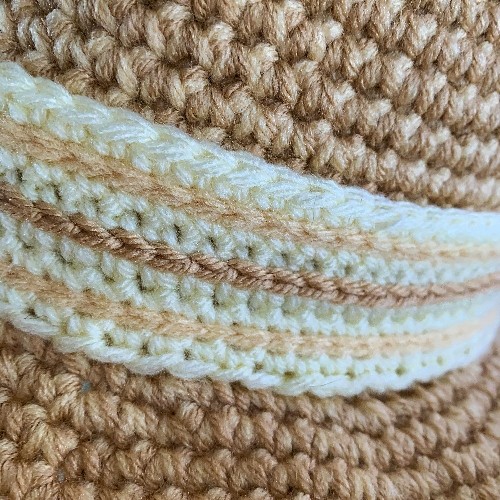
Colour choice of the 2 different worsted weight yarns can make a huge difference to your final hat. I mixed 2 tones of one colour for the cowboy/cowgirl hat, white and beige for the yellow flower hat, camo and black for the camo bucket hat. Variegated yarns should be used with a solid colour of yarn for the best effect.
Stitch markers make this so much easier. Pieces of yarn also work. I like to use a single bobby pin to note where the round starts and use regular stitch markers for where I’m making the increases.
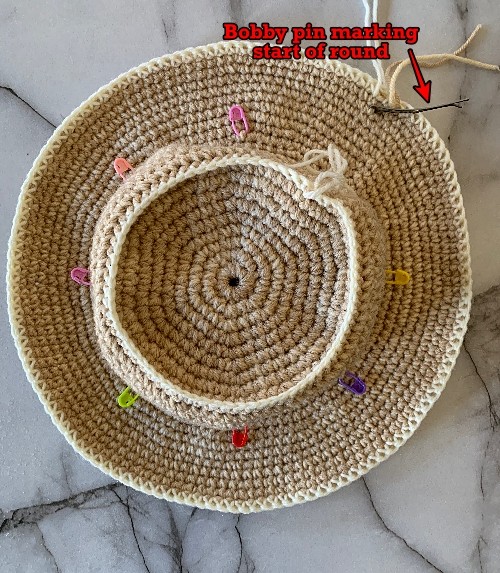
In regards to the stitch markers, if you don’t want to use the stitch counts given for the rows, you can use the stitch markers instead. Think of it as increase 8 times evenly around. I did the math to figure out what was even spacing and to stagger the increases between the rows around the brim for the crochet purists.
I like to move my start of the round stitch marker as I make each row (the bobby pin in the photos). I leave the increases for the brim where they are. It makes things go a little quicker and avoids keeping track of stitch counts.
Speaking of stitch counts. This is crocheted in the round, meaning if your stitch counts become a little off, too many or not enough between the increases, it will still work out in the long run. I gave the number of stitches between the increases mainly to avoid repeating increases along the brim. It looked very noticeable and unsightly to me when the increases in increases lined up, but I’m a bit of a stickler for things like that. If you could care less how it look, have at it!
Edging is done with worsted weight yarn! If you are using a double strand of worsted weight yarn, select one of the colours and go with that. If you are using Super Bulky yarn, you’ll need to use any complimentary colour of worsted weight yarn you like. You don’t need very much.
Why I made the band the way I did. It’s very easy to twist the band if you join the chain right away. It’s considerably easier to avoid this if you sc in each chain first then bring the ends together.
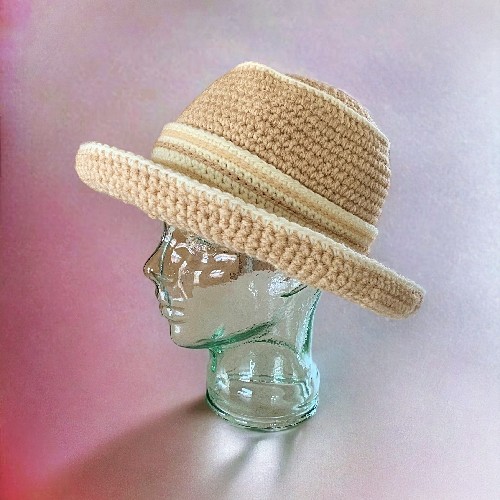
The cowboy/cowgirl hat is the sun hat but with the brim formed into a more familiar cowboy hat style.
The band on the cowboy/cowgirl hat has daisy chain embellishments. You can either embroider them on or use your crochet hook. Place your yarn at the back of the band and pull up a loop to the front. Push your hook through the next hole and pull up a loop. Keep going down the length of the band.
Like all of my patterns you have my permission to sell and/or give away the physical items that you make using this pattern. You are NOT permitted to reprint this pattern in any form unless you have obtained my written permission to do so.