
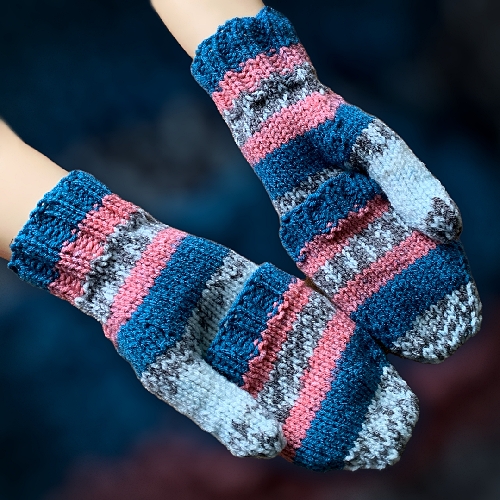
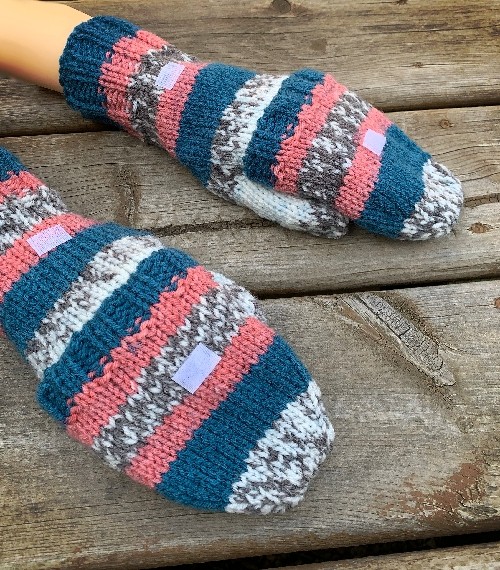
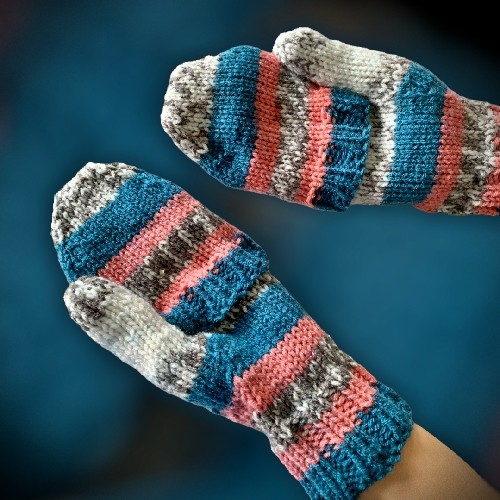
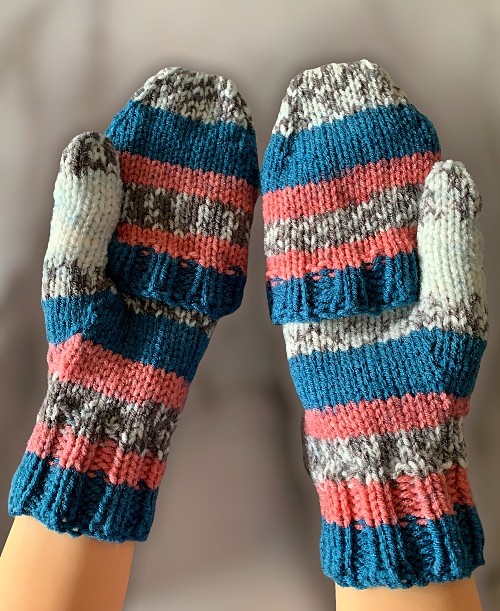
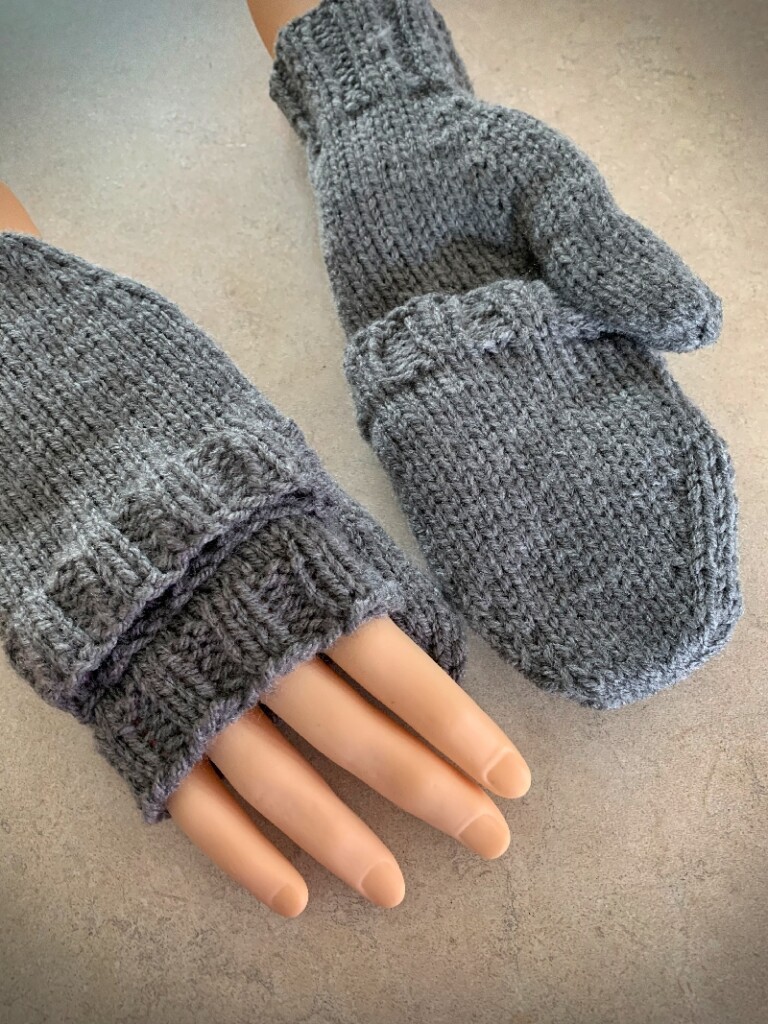
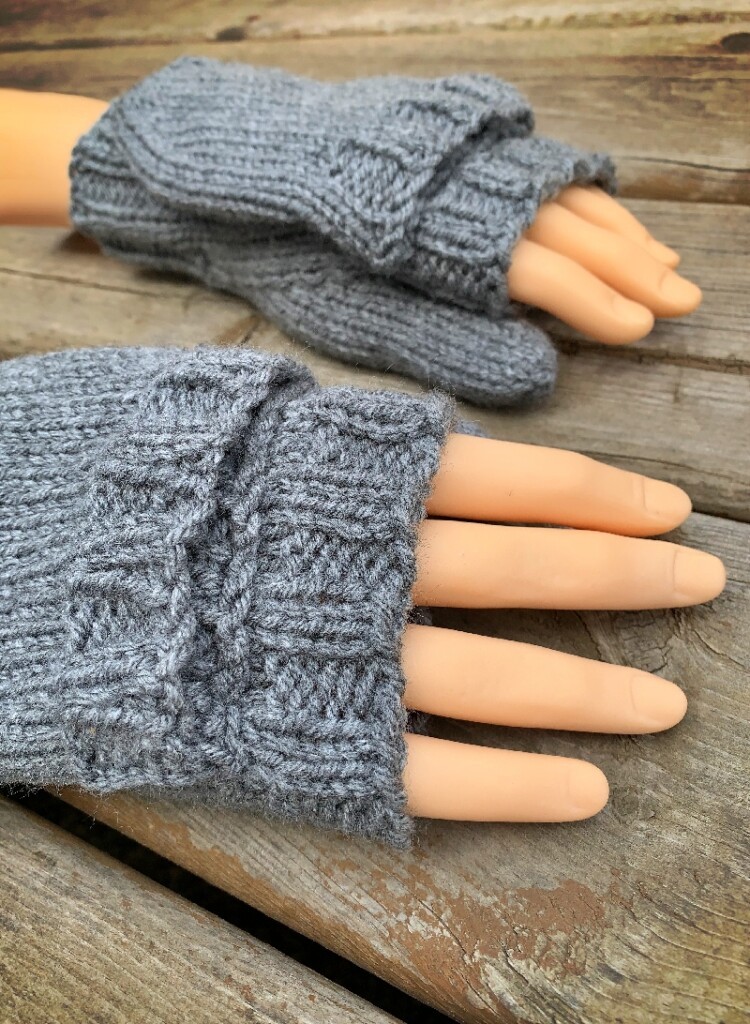
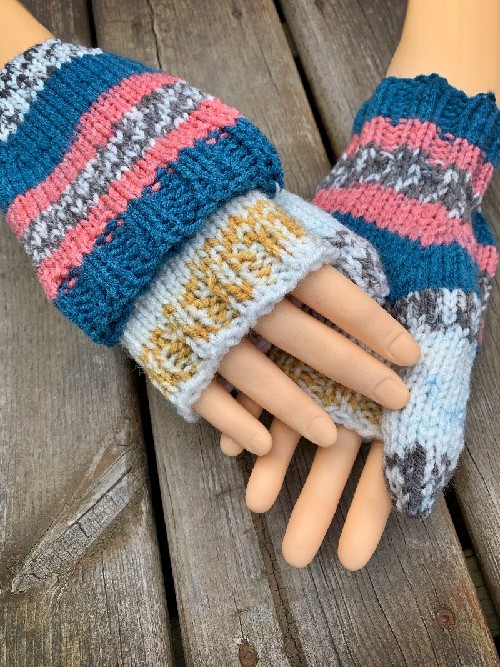
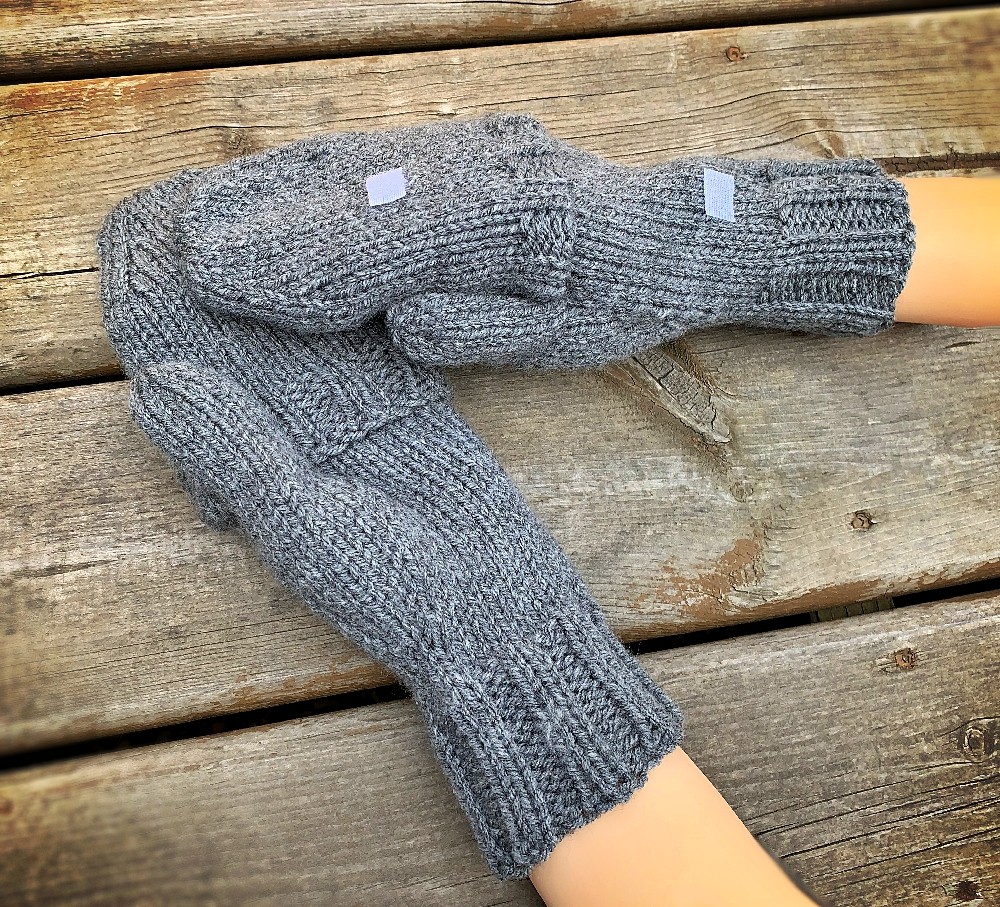
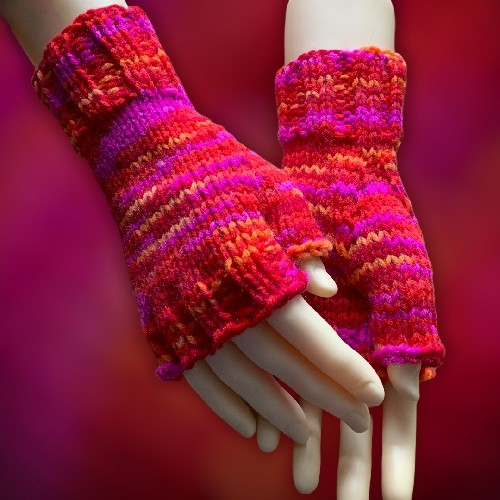
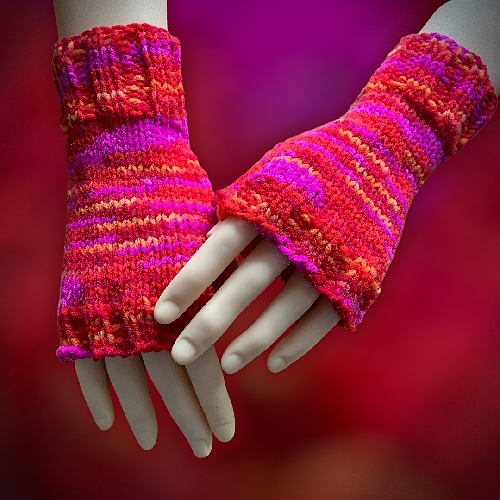
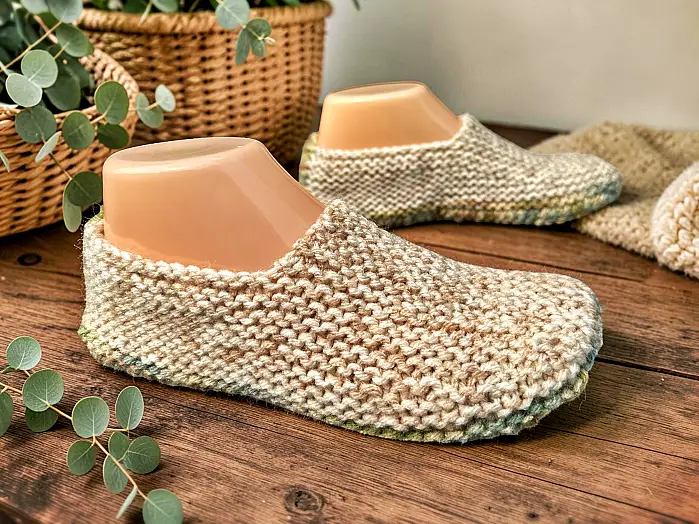
Make yourself a nifty pair of flip mitts. They’re hip, trendy and handier than a pocket on a shirt! Not only can you make these super awesome mitts for just about anyone from teen to adult, but you can forgo the finger portion and make some cool fingerless gloves. Technically, they’re fingerless mittens but that just sounds weird.

They’re knitted on double point needles, also known as DPN. Though this sounds intimidating, it really is very simple. You’ll need to know how to knit to make this project, but knitting in the round is the same as knitting flat. Only difference is you don’t flip your work back in forth; it’s done a continuous circle.
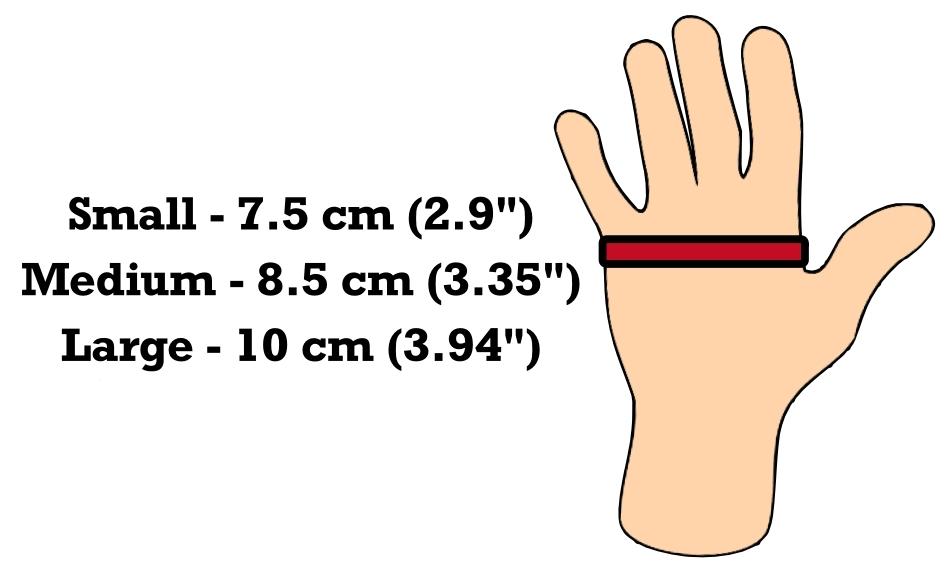
The sizing for mittens, like socks or slippers, is somewhat general. The small size will fit someone with a smaller hand, medium is an average lady’s hand, large is for an average man’s hand, and extra large will fit a very large man’s hand. Each size is written out in full as the row and stitch counts differ for each.
Keep scrolling to read how to make the finger flap. Sorry, this pattern is a bit of a mammoth
If you would prefer, you can also download this pattern to any device such as a smartphone, computer or tablet. The PDF of this pattern is available in my Shopify shop here: Knitted Flip Mitts and Fingerless Gloves. It will be available in all my retailers such as Buy Me A Coffee, Etsy and Lovecrafts. I’m also working on a compilation of all my glove and mitten patterns that will be a book on Amazon.
Another way to avoid ads and pop-ups, get instant, PRINTABLE downloads of this pattern and others, is by becoming a Member. When you become a Website Supporter at $4/month, you’ll gain access to exclusive member only posts on Buy Me A Coffee. You can download as many patterns as you like for the same $4 each month. You can go to this page to learn more, become a member and support my work… Exclusive Member Area
If you love this pattern and think you know someone who would like it, feel free to share it! Use any of the icon below to share it on your social media like Facebook (Meta), Pinterest, Threads, etc.
Things you need
Yarn (a standard ball of worsted weight yarn will be more than enough)
Size 5 mm (US size 8) double pointed needles (or whatever size needles you need to get the correct gauge).
Hook and loop fastener (AKA – Velcro*)
Permanent glue
Gauge
18 stitches = 4 inches
24 rows = 4 inches
Pick Up A Stitch
This was one of the first patterns I wrote 10 years ago. I use the term “pick up a stitch” which technically is correct. Now, I refer to it as M1 or make one. Regardless of how you refer to it, It’s an increase between stitches. There are photos at the end of the pattern showing you how to do it, but since I wrote this, I’ve made a video showing how. I’ve included it here.
Small
The Mitt
Cast on 28 sts (loosely). Divide these evenly as possible on three of the double pointed needles.
Round 1 – 12: K2, P2 (Creates knit 2 purl 2 ribbing).
Round 13 – 17: Knit
Round 18: K1, pick up a st, k1, pick up a stitch. K26.
Round 19 – 20: Knit
Round 21: K1, pick up a st, k3, pick up a stitch. K26.
Round 22 – 23: Knit
Round 24: K1, pick up a st, k5, pick up a stitch. K26.
Round 25 – 26: Knit
Round 27: K1, pick up a st, k7, pick up a stitch. K26.
Round 28 – 29: Knit
Round 30: K1, pick up a st, k9, pick up a stitch. K26.
Round 31 – 32: Knit
Round 33: K1, place next 11 sts onto the stitch holder. K26.
Round 34: K1, pick up a st, K26.
Round 35 – 37: Knit
Round 38 – 42: K2, P2
Bind off loosely.
The Thumb
Worked over the 11 sts on the stitch holder.
Please share this page!
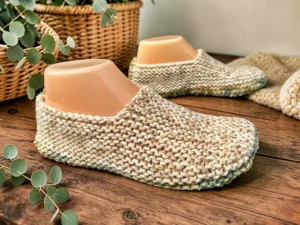
More FREE patterns
Click the pic to read online!!


![]()
![]()


FREE Knitting Graph Paper for Colorwork Knitting


Pick up and divided the 11 sts on the stitch holder between the 3 double pointed needles. One of the needles will have more sts than the others.
Round 1 – 12: Knit
Round 13: K2tog around. (You may have to pass the last stitch from one dpn the next dpn to do this).
Round 14: Knit
Pull yarn through.
More of my stuff on Etsy:
You can make a widget like this for your blog or website, too.
Instructions are on my website here: How to Display Etsy Items on Your Website
Medium
The Mitt
Cast on 32 sts (loosely). Divide these evenly as possible on three of the double pointed needles.
Round 1 – 12: K2, P2 (Creates knit 2 purl 2 ribbing).
Round 13 – 17: Knit
Round 18: K1, pick up a st, k1, pick up a stitch. K30.
Round 19 – 20: Knit
Round 21: K1, pick up a st, k3, pick up a stitch. K30.
Round 22 – 23: Knit
Round 24: K1, pick up a st, k5, pick up a stitch. K30.
Round 25 – 26: Knit
Round 27: K1, pick up a st, k7, pick up a stitch. K30.
Round 28 – 29: Knit
Round 30: K1, pick up a st, k9, pick up a stitch. K30.
Round 31 – 32: Knit
Round 33: K1, pick up a st, k11, pick up a stitch. K30.
Round 34 – 35: Knit
Round 36: K1, place next 13 sts onto the stitch holder. K30.
Round 37: K1, pick up a st, K30.
Round 38 – 40: Knit
Round 41 – 45: K2, P2
Bind off loosely.
The Thumb
Worked over the 13 sts on the stitch holder.
Pick up and divided the 13 sts on the stitch holder between the 3 double pointed needles. One of the needles will have more sts than the others.
Round 1 – 13: Knit
Round 14: K2tog around. (You may have to pass the last stitch from one dpn the next dpn to do this).
Round 15: Knit
Pull yarn through.
Large
The Mitt
Cast on 36 sts (loosely). Divide these evenly as possible on three of the double pointed needles.
Round 1 – 12: K2, P2 (Creates knit 2 purl 2 ribbing).
Round 13 – 17: Knit
Round 18: K1, pick up a st, k1, pick up a stitch. K34.
Round 19 – 20: Knit
Round 21: K1, pick up a st, k3, pick up a stitch. K34.
Round 22 – 23: Knit
Round 24: K1, pick up a st, k5, pick up a stitch. K34.
Round 25 – 26: Knit
Round 27: K1, pick up a st, k7, pick up a stitch. K34.
Round 28 – 29: Knit
Round 30: K1, pick up a st, k9, pick up a stitch. K34.
Round 31 – 32: Knit
Round 33: K1, pick up a st, k11, pick up a stitch. K34.
Round 34 – 35: Knit
Round 36: K1, pick up a st, k13, pick up a stitch. K34.
Round 37 – 38: Knit
Round 39: K1, place next 15 sts onto the stitch holder. K34.
Round 40: K1, pick up a st, K34.
Round 41 – 43: Knit
Round 44 – 49: K2, P2
Bind off loosely.
The Thumb
Worked over the 15 sts on the stitch holder.
Pick up and divided the 15 sts on the stitch holder between the 3 double pointed needles. One of the needles will have more sts than the others.
Round 1 – 18: Knit
Round 19: K2tog around. (You may have to pass the last stitch from one dpn the next dpn to do this).
Round 20: Knit
Pull yarn through.
Extra Large
The Mitt
Cast on 40 sts (loosely). Divide these evenly as possible on three of the double pointed needles.
Round 1 – 12: K2, P2 (Creates knit 2 purl 2 ribbing).
Round 13 – 17: Knit
Round 18: K1, pick up a st, k1, pick up a stitch. K38.
Round 19 – 20: Knit
Round 21: K1, pick up a st, k3, pick up a stitch. K38.
Round 22 – 23: Knit
Round 24: K1, pick up a st, k5, pick up a stitch. K38.
Round 25 – 26: Knit
Round 27: K1, pick up a st, k7, pick up a stitch. K38.
Round 28 – 29: Knit
Round 30: K1, pick up a st, k9, pick up a stitch. K38.
Round 31 – 32: Knit
Round 33: K1, pick up a st, k11, pick up a stitch. K38.
Round 34 – 35: Knit
Round 36: K1, pick up a st, k13, pick up a stitch. K38.
Round 37-38: Knit
Round 39: K1, pick up a st, k15, pick up a stitch. K38.
Round 40 – 41: Knit
Round 42: K1, place next 17 sts onto the stitch holder. K38.
Round 43: K1, pick up a st, K38.
Round 44 – 46: Knit
Round 47 – 52: K2, P2
Bind off loosely.
The Thumb
Worked over the 17 sts on the stitch holder.
Pick up and divided the 17 sts on the stitch holder between the 3 double pointed needles. One of the needles will have more sts than the others.
Round 1 – 20: Knit
Round 21: K2tog around. (You may have to pass the last stitch from one dpn the next dpn to do this).
Round 22: Knit
Pull yarn through.
More of my stuff on Etsy
You can make a widget like this for your blog or website, too.
Instructions are on my website here: How to Display Etsy Items on Your Website
Finger Flap
Instructions are written for small (medium, large, extra large)
Cast on 32 (36, 40, 44) loosely.
Round 1 – 6: K2 P2
Round 7 and on: Knit around until work measures 3 (3.5, 4, 4.5) inches from the cast on edge.
Next round: K1 K2tog K10 (12, 14, 16) K2 tog K2 K2tog K10 (12, 14, 16) K2tog K1.
Next 2 rounds: Knit
Next round: K1 K2tog K8 (10, 12, 14) K2 tog K2 K2tog K8 (10, 12, 14) K2tog K1.
Next 2 rounds: Knit
Next round: K1 K2tog K6 (8, 10, 12) K2 tog K2 K2tog K6 (8, 10, 12) K2tog K1.
Next 2 rounds: Knit
Next round: K1 K2tog K4 (6, 8, 10) K2 tog K2 K2tog K4 (6, 8, 10) K2tog K1.
Next 2 rounds: Knit
Transfer the stitches onto two needles being sure that the thumb is along the edge of fold.
Break yarn leaving enough to graft the fingertips and sew in ends. 12 inches is plenty.
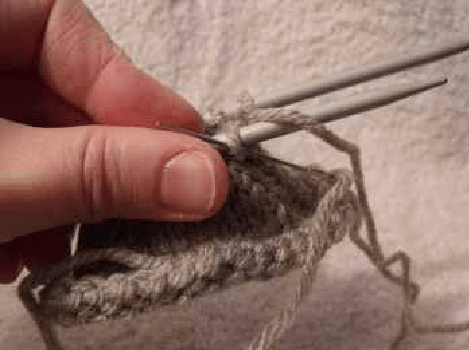
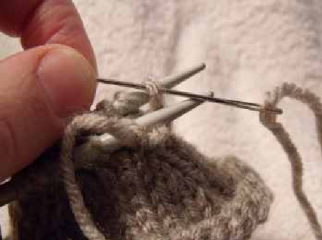
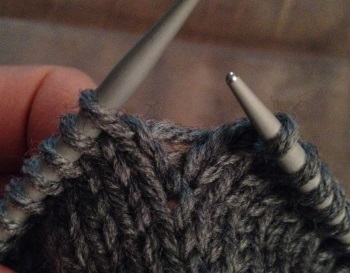
Graft Fingertips
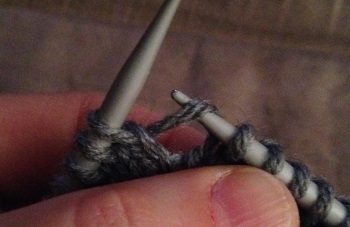
The divided stitches will look something like this:

With a darning needle, insert the needle through the front loop of the first needle as if to PURL.
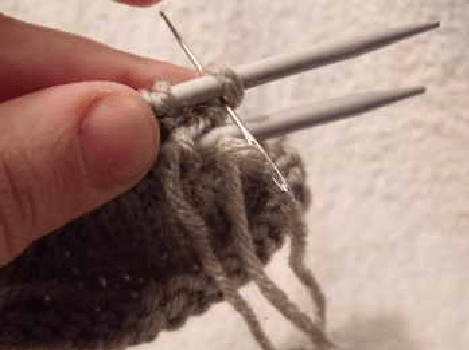
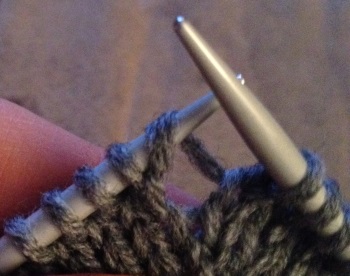
Insert needle through the stitch on the back needle as shown.
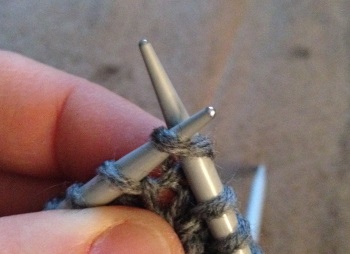
Insert the needle through the back loop of the first stitch AND through the stitch of the next stitch as if to PURL. Drop the first stitch.
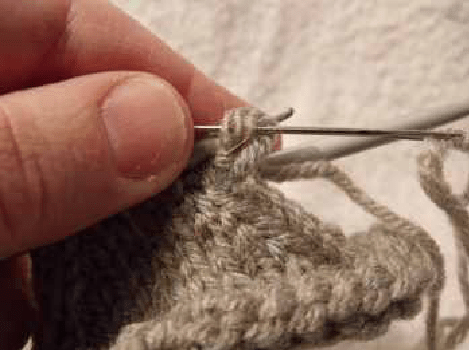
Insert the needle through the stitch on the back needle as if to PURL. Drop this stitch.
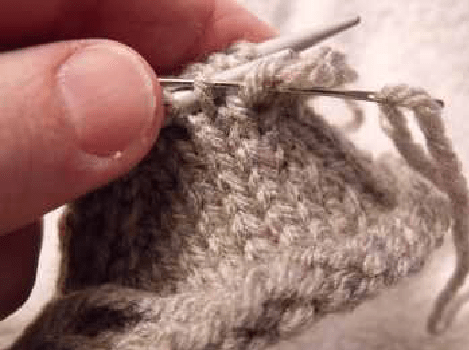
* Insert the needle through the back loop of the next stitch on the front needle and the front loop of the next stitch as if to PURL. Drop the first stitch.
Insert the needle through the stitch on the back needle as if to PURL. Drop this stitch. *

Repeat from * to * until there are no stitches left on either needle.
Pull the yarn tight.
Make another mitten to match.
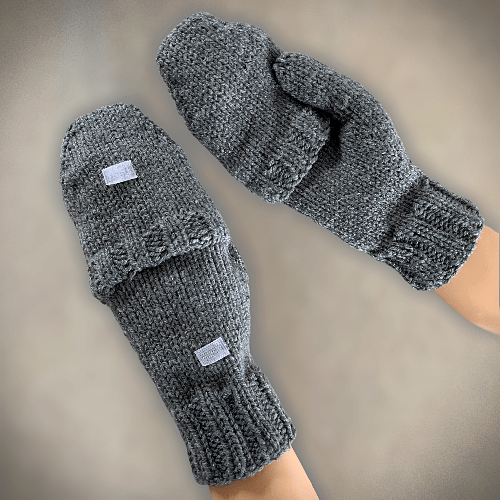
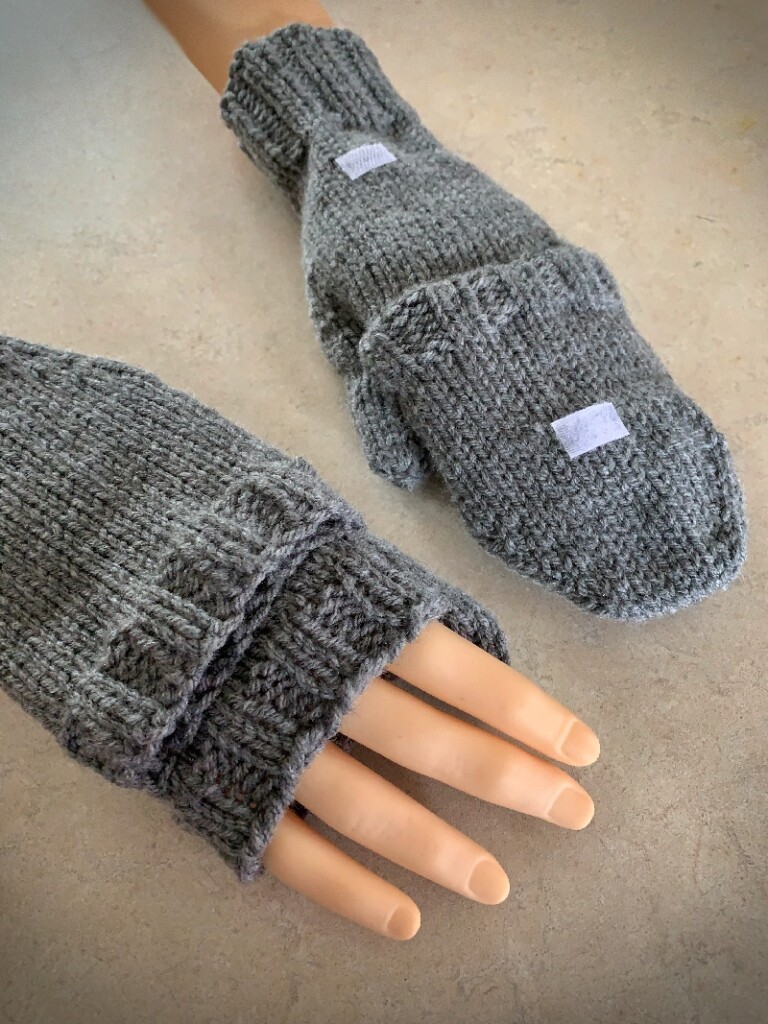
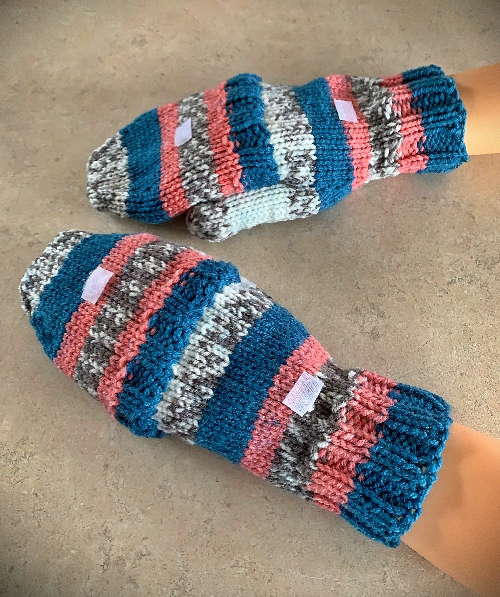
Attaching the Velcro
Cut a small piece of Velcro. Keeping both halves of the Velcro together, attach it to the back of the mitten first. Glue it in place.
Keeping the Velcro pieces together, place some glue on the other half of the Velcro. Pull the finger flap back (off the fingers). Press firmly. DO NOT pull the Velcro apart until ALL the glue has dried completely.
How to Pick Up a Stitch
I use this method to increase a stitch or pick up a stitch because it doesn’t leave a hole in your work. It takes a little longer to do but worth the effort in the final piece.
Make the stitch in the yarn stretched between two stitches.
Pick the yarn up with the needle.
Transfer the stitch onto the opposite needle.
Knit this newly formed stitch. You may have to pull the yarn forward a bit to get your needle beneath the yarn.
It automatically twists the stitch eliminating the hole.
Abbreviations
K – Knit
P – Purl
K2tog – knit 2 together
sts – stitches
st – stitch
Helpful Hints
You don’t need a stitch holder. Even a piece of yarn will work.
Instead of glue, you can also sew the Velcro on. I find glue is simpler and quicker.
Customise this pattern as you see fit. If you want the cuff longer, do so. If you need a longer thumb or finger flap, add more rows. As long as your stitch counts stay the same, it should work out fine.
Some folks like to felt their mittens as it can help stop the wind from blowing through the stitches. Be careful though because felting shrinks your work! It’s hard to guess how much shrinkage will happen as there are so many variables involved, from temperature of the water to how much agitation occurs during the felting process. You can give it a try but make sure you use PURE wool! Anything that is a blend won’t felt properly. My last attempt at felting a pair of mittens for myself resulted in my young son getting a new pair of mitts. At least they didn’t go to waste :-/
If you have any questions or comments you can reach me here.
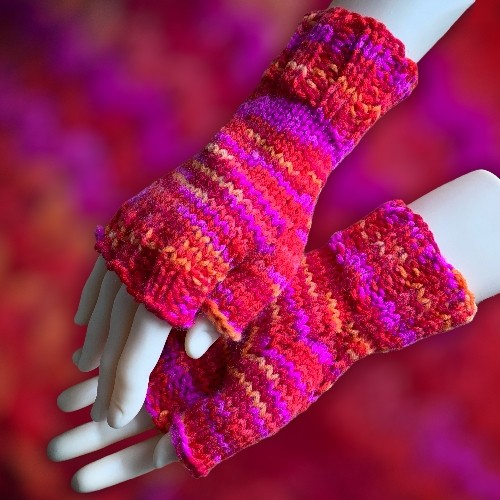
Like always, you can sell or give away whatever you make from my patterns. Don’t be a douche and try to pass this pattern off as your own in any way or form (physical or digital). See how handy fingerless gloves can be ?


Your patterns are so well written – and detailed – Thanks.
Donna King
Just found your site ! Love the pattern for fingerless mitts. My Grandson wants some so will try this pattern for him . Hopefully might be able to post you a picture of the finished articles .
Like!! Really appreciate you sharing this blog post.Really thank you! Keep writing.
It was helpful. Keep on posting!
Wow, incredible blog layout! How long have you been blogging for? you make blogging look easy. The overall look of your site is wonderful, as well as the content!
Thank you for your kind words!
This is a reboot of past efforts, but I’ve been online for over a decade.