
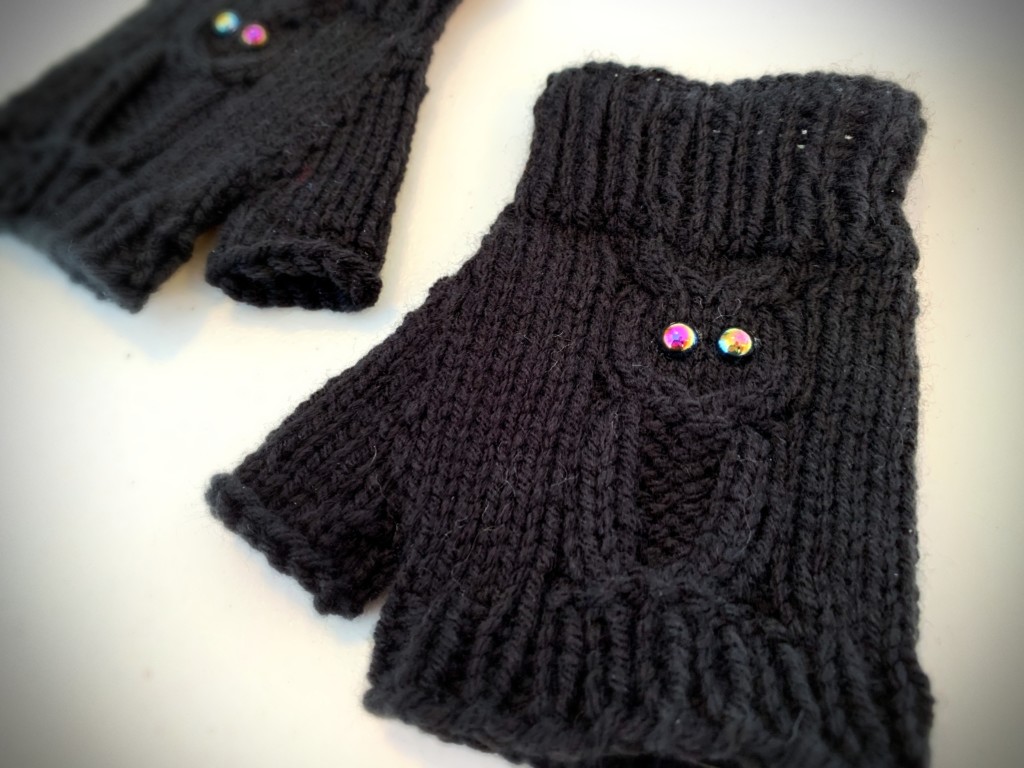
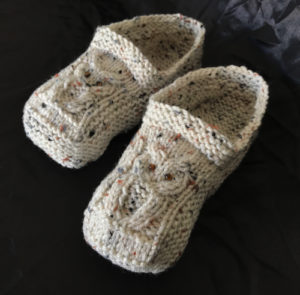
Also known as fingerless mittens, I seem to have a thing going on for this awesome owl motif. If you haven’t seen them already, I also have a Knitted Owl Slipper pattern that you may like. But more about these awesome fingerless gloves… They are fairly quick to make if you’re somewhat of an experienced knitter.
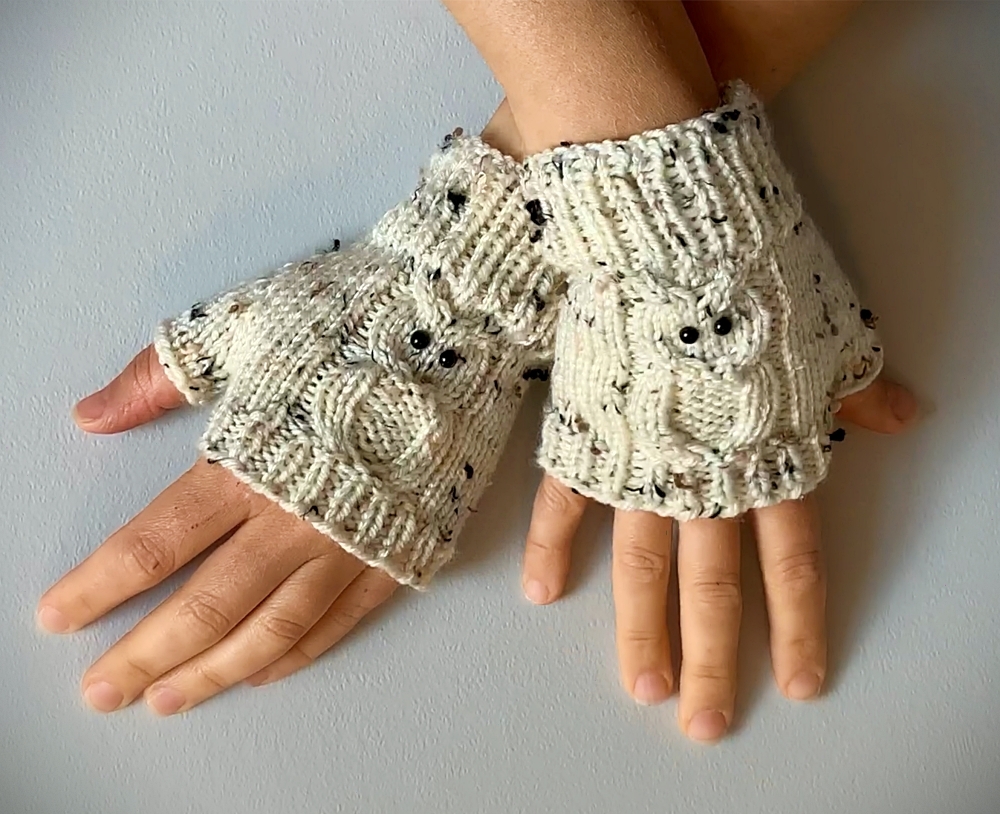

If you don’t know how to knit in the round on double pointed needles (dpn), you’re in luck! I rewrote the pattern so anyone who loves the knitted owl motif, but not comfortable knitting in the round can still make an awesome pair of owl fingerless gloves. I have 2 knit flat owl fingerless gloves now. Both are a bit different from the other. Both patterns are free to read online, too! Click on other photo below to read the pattern.
If you’re willing to learn how to knit on 4 needles, I’ve made a step-by-step video showing you every single round. You can watch it here if you need any help along the way – How to Knit Fingerless Gloves – with Owls! If you scroll furhterdown the page, I’ve also embedded the video so you won’t have to leave this page.
Regardless if knitted flat or in the round, this is also a great pattern if you have a bit of left over yarn from other knitting projects. Like enough to knit one slipper, but you’re not sure if you’ll have enough to finish the whole pair. I know. We’ve all been there.
Due to the number of folks contacting me via email and through the comments below, I am now offering a download of this pattern! You can download it directly from this site here – Owl Fingerless Gloves, or at other ebook retailers such as Ravelry, Etsy, and LoveCrafts. If you support me as a member on Buy Me A Coffee, you can download and print the pattern for free here – Seamless Owl Fingerless Gloves – Knit On DPN’s. What is this Buy Me A Coffee thing?
Another way to avoid ads and pop-ups, get instant, PRINTABLE downloads of this pattern and others, is by becoming a Member. When you become a Website Supporter at $4/month, you’ll gain access to exclusive member only posts on Buy Me A Coffee. You can download as many patterns as you like for the same $4 each month. You can go to this page to learn more, become a member and support my work… Exclusive Member Area
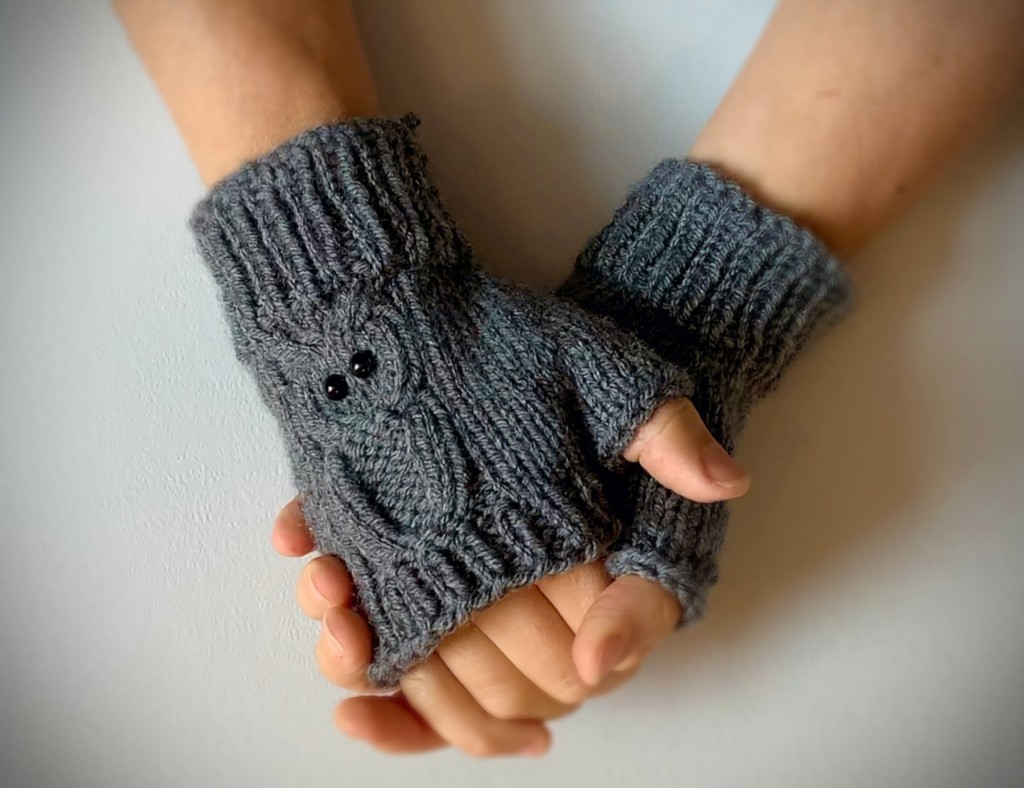
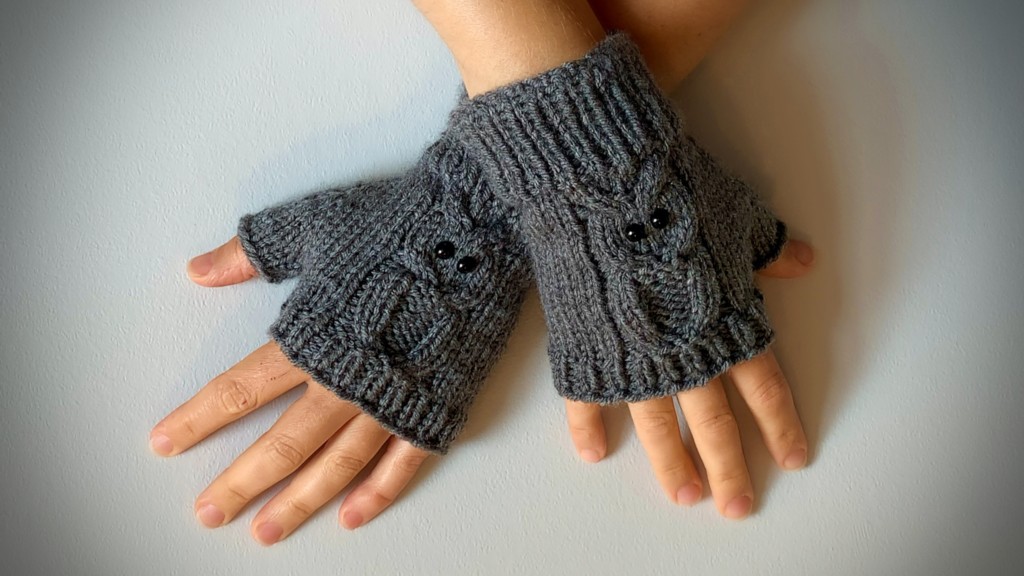
A few quick words on sizing. Instead of going through all the effort to remake the pattern for different sizes, and to keep the proportion of the knitted owls the same, I’ve gone about adjusting the sizing by changing the size of your knitting needles. These are knitted in the round making them seamless with no scratchy seams to worry about. Because of being knitted in the round, the thumbs have to be on different sides so they fit correctly. You’ll have to make one for the left hand and the right hand. Instructions are given separately for both. You can click the links or scroll down the page.
Loving the free knitting patterns? Then please help support this site. You can use these links below and share this and my other patterns through your social media. More eyeballs on my work helps a bunch.
Want other knitted mitten patterns that are for texting or are more plain Jane and can cover the ends of your fingers? I have those too. You can check out my How to Knit Texting Mittens and How to Knit Flip Mitts. I forgot I even had those… huh! And for those who actually take the time to read these long-winded intro’s, I just finished another fingerless mitten pattern. It’s cleverly titled – How to Knit Fingerless Gloves. It uses finer yarn, smaller needles and is sized with different stitch and row counts. It also is very plain Jane and is owl free!
Things you will need:
worsted weight yarn (less than 50 grams was more than enough to make a pair of large knitted gloves. I know because I weighed them). I used Red Heart worsted weight yarn when designing the pattern but any kind will do.
Set of 4 double pointed needles (see note on sizing)
Stitch holder
Tapestry needle to sew the hole by the thumb and work in ends
Cable needle
4 – 4 mm half beads (aka flat back beads) for eyes. You can use larger ones or very small buttons, too. I’m using some jewels I found and gluing them on.
More of my stuff on Etsy:
You can make a widget like this for your blog or website, too.
Instructions are on my website here: How to Display Etsy Items on Your Website
A Note on Sizing:
As I mentioned previously, the sizing for this pattern is done a little differently. Instead of different stitch counts which I normally do, I’m changing the size of the needles. Chances are good that if you know how to knit in the round, you already have these size needles anyways. If not, it’s a good excuse to go to your favourite yarn store to pick up the needles you’ll need. And since you’re there, check out the yarn sales. You’d be foolish not to.
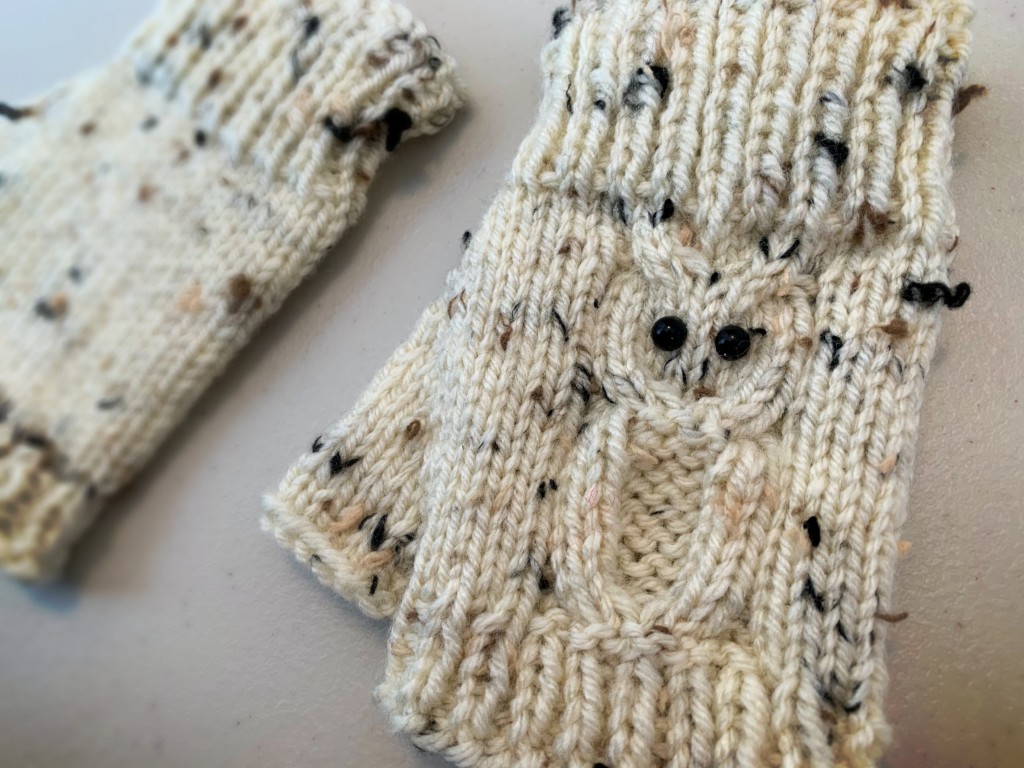
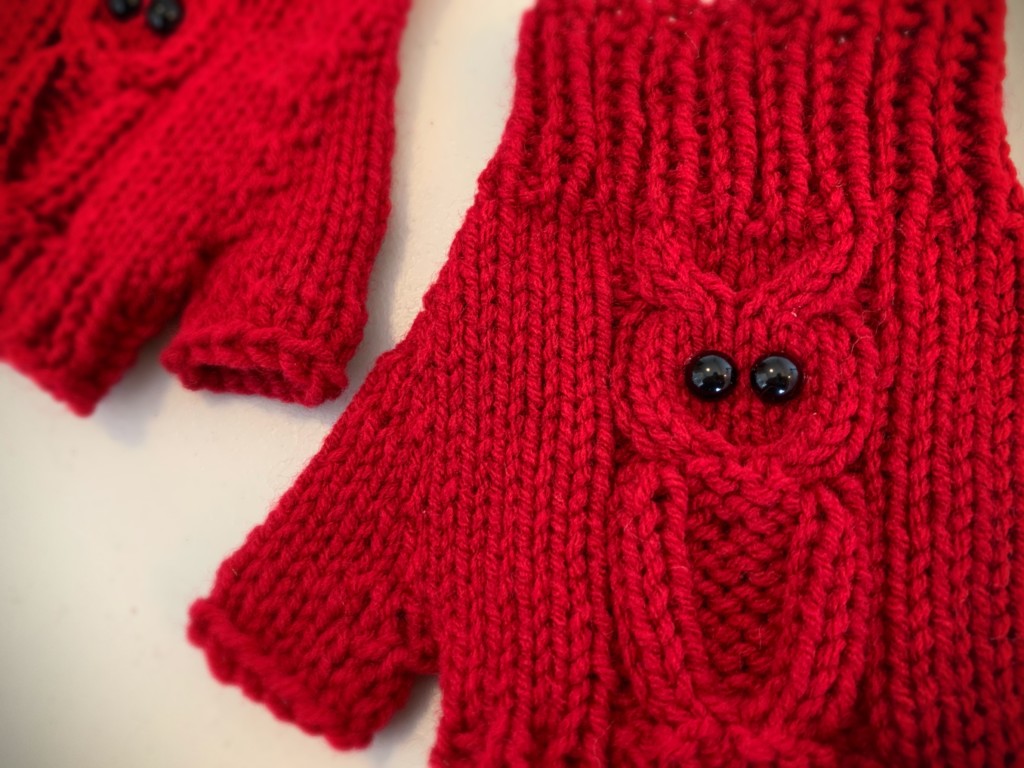
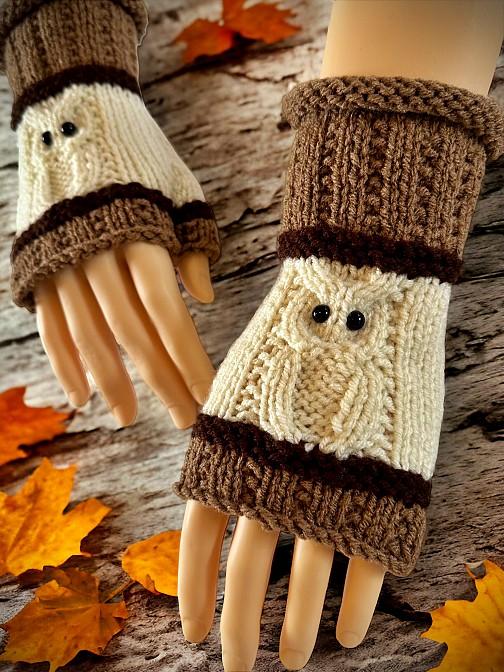
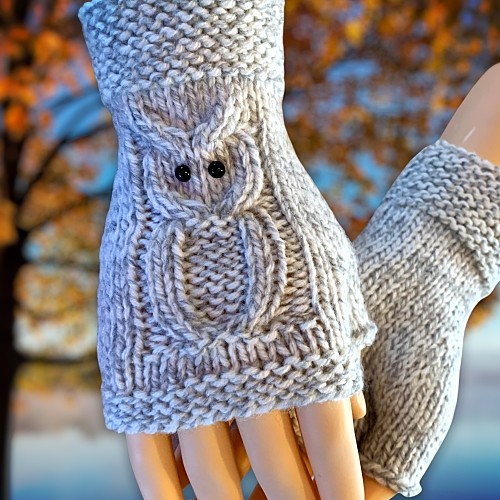
My standard for sizing was my hand and designed the knitting pattern according to what kind of rubber gloves fit me comfortably. I wear a medium sized rubber glove and the medium sized glove fits perfectly. the Grey mittens are a medium. The beige is a small if you like your gloves a bit on the snug side. I didn’t even bother trying to model the red. They were too big. You may need to use different sized needles to get the correct gauge, but this pattern is very forgiving if you’re a bit off.
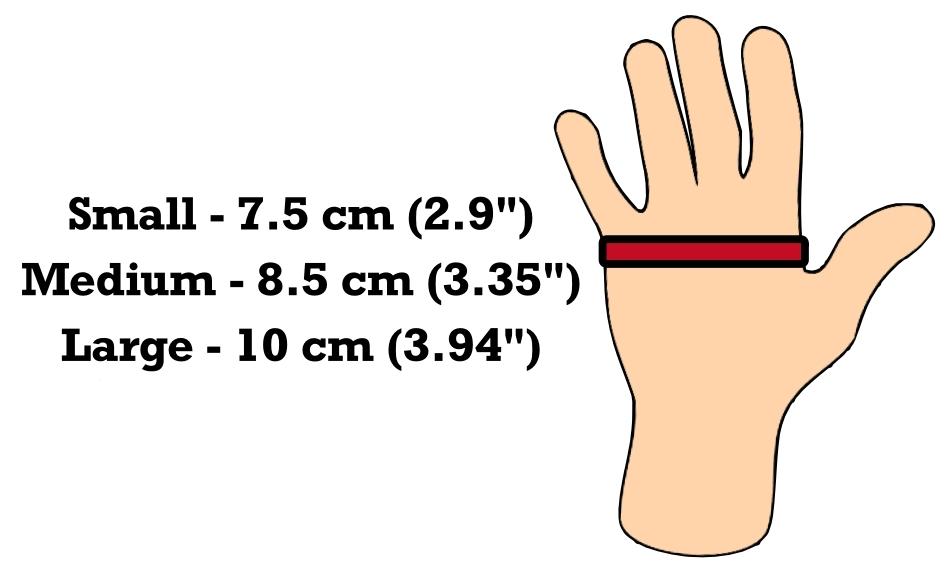
Small
- size 3.5 mm (US size 4) dpn
- 11 stitches every 2 inches (5 cm)
- 16 rows every 2 inches (5 cm)
Medium
- size 4 mm (US size 6) dpn
- 10 stitches every 2 inches (5 cm)
- 14 rows every 2 inches (5 cm)
Large
- size 5 mm (US size 8) dpn
- 9 stitches every 2 inches (5 cm)
- 12 rows every 2 inches (5 cm)
Watch the Video!
If you are having problems with a particular row, once you push play, you can scroll through the video to find the card with the row number written on it. If you watch the video on YouTube here – How to Knit Fingerless Owls Gloves or Mitts, there are time stamps for each row in the description.
Left Hand
Cast on 36 sts loosely (you need to allow the ribbing to stretch)
Round 1 – 10: K1 P1
Round 11 – 13: K around
Round 14: K1 M1 K1 M1 K6 P1 K8 P1 K18 (knitted stitches between the M1’s are the thumb increase)
Round 15: K around to the P. P1 C4F C4B P1 K18
Round 16: K around to the P. P1 K8 P1 K18
Round 17: K1 M1 K3 M1 K6 P1 K8 P1 K18
Round 18: Repeat round 16
Round 19: Repeat round 16
Round 20: K1 M1 K5 M1 K6 P1 K8 P1 K18
Round 21: Repeat round 16
Round 22: Repeat round 16
Round 23: K1 M1 K7 M1 K6 P1 C4F C4B P1 K18
Round 24: K around to the P. P1 K2 P4 K2 P1 K18
Please share this page!
More FREE patterns
Click the pic to read online!!


![]()
![]()


FREE Knitting Graph Paper for Colorwork Knitting


Round 25: Repeat round 24
Round 26: K1 M1 K9 M1 K6 P1 K2 P4 K2 P1 K18
Round 27: Repeat round 24
Round 28: Repeat round 24
Round 29: K1 M1 K11 M1 K6 P1 K2 P4 K2 P1 K18
Round 30: Repeat round 24
Round 31: Repeat round 24
Round 32: K1 Pass the 13 stitches to the stitch holder (the thumb stitches). K to the P. P1 K2 P4 K2 P1 K18
Round 33: K to the P. P1 C4F C4B P1 K18
Round 34: K to the P. P10 K 18
Round 35: K1 P1 around. P last 2 stitches together to maintain pattern.
Round 36 – 39: K1 P1 around.
Cast off loosely. It needs to stretch.
Make Thumb
Pick up the 13 stitches from the stitch holder. Work 3 rounds even. Cast off loosely.
Right Hand
Cast on 36 sts loosely (you need to allow the ribbing to stretch)
Round 1 – 10: K1 P1
Round 11 – 13: K around
Round 14: K1 M1 K1 M1. K19. P1 K8 P1 K5 (knitted stitches between the M1’s are the thumb increase)
Round 15: K around to the P. P1 C4F C4B P1 K5
Round 16: K around to the P. P1 K8 P1 K5
Round 17: K1 M1 K3 M1 K19 P1 K8 P1 K5
Round 18: Repeat round 16
Round 19: Repeat round 16
Round 20: K1 M1 K5 M1 K19 P1 K8 P1 K5
Round 21: Repeat round 16
Round 22: Repeat round 16
Round 23: K1 M1 K7 M1 K19 P1 C4F C4B P1 K5
Round 24: K around to the P. P1 K2 P4 K2 P1 K5
Round 25: Repeat round 24
Round 26: K1 M1 K9 M1 K19 P1 K2 P4 K2 P1 K5
Round 27: Repeat round 24
Round 28: Repeat round 24
Round 29: K1 M1 K11 M1 K19 P1 K2 P4 K2 P1 K5
Round 30: Repeat round 24
Round 31: Repeat round 24
Round 32: K1 Pass the 13 stitches to the stitch holder (the thumb stitches). K19. P1 K2 P4 K2 P1 K5
Round 33: K to the P. P1 C4F C4B P1 K5
Round 34: K to the P. P10 K5
Round 35: K2tog. *P1 K1* Repeat from * to * around ending with P1.
Round 36 – 39: K1 P1 around.
Cast off loosely. It needs to stretch.
Make Thumb
Pick up the 13 stitches from the stitch holder. Work 3 rounds even. Cast off loosely.
Hints and Tips
I cast all the stitches on one needle when I start. Then I divide them up between the 3 needles. This helps to avoid the twisting you can sometimes get when casting on to each needle.
Your gauge isn’t overly important but best if it’s at least close. Because the knitted mittens are are fingerless, they are very forgiving if they’re a little small or large.
I prefer to use bamboo dpn. I find that it helps to prevent that line you get between needles when knitting in the round.
You will probably need to adjust the number of stitches you have on each needle. I usually make one split between the purl and the start of the owl motif. It gives more than 12 on one needle and less than 12 on the other, but it makes it easier to knit the owl.
I haven’t tried this, but changing to even smaller needles and thinner yarn can make even smaller child sizes. Let me know if you try this and what gauge and needles give the right sizes. You can leave your findings in the comment section.
Abbreviations:
C4F – Cable 4 forward. With your cable needle, slip 2 stitches off the needle and pull the stitches towards the front of your work. Knit the next 2 stitches. Knit the 2 stitches from the cable needle.
C4B – Cable 4 backward. With your cable needle, slip 2 stitches off the needle and pull the stitches towards the back of your work. Knit the next 2 stitches. Knit the 2 stitches from the cable needle.
M1 – Make 1 stitch. Pull up a loop between the stitches and knit.
K – Knit
P – Purl
Sts – stitches
K2tog – Knit 2 together


I’d love to try your owl series (gloves, hat and scarf)!! They look so adorable. I’m not a super advanced knitter. Wondering, which of these would be easier and quicker to knit – the gloves, scarf, or hat? Ideally I’d like to make all 3, but gotta start somewhere 🙂 thank you!
I would recommend the gloves as they are a smaller project. But not this pattern. This one is knitted on 4 double pointed needles in the round. There are 2 flat versions also in the website. A search of the term “owl” will bring them up.
Thank you! Also, what colors are best to help show the owl on the gloves? Maybe lighter colors? I started with a navy blue with some light blue shades, but as I’m knitting, the dark shade seems to make it hard to see the owl pattern.
What do you mean by’knit to the P’? I have made these in the flat but want to try in the round.
Knit to the purl on the previous round. You always purl in the purl sts. The number of sts changes depending which row you’re on because of the sts added for the thumb.
It’s very easy to see where the purl sts are on either side of the owl.
I’m doing the knitted owl pattern that gives directions for starting at the feet of owl. Row 13 says k14 cast on 13 stitches k6 cab caf k6. I don’t know how to cast in the 13 stitches for the thumb.
The pattern, both the print version and the one on this website (this isn’t the pattern you’re talking about) both have links to a video showing how to make the thumb.
I am allergic to DP needles :). I hope you will reconsider making pattern for straight needles. Or, is it possible to use two circular needles? Thanks!
There is a pattern that’s knit flat for the gloves on straight needles. I give the link to the pattern in the first paragraph of this one. If you missed it (I skim past the blib blab too) here’s the link – Easy to Knit Owl Fingerless Gloves
These are adorable – thank you for sharing! 🙂
Great pattern! Thank you.
I’m making a pair for a 10 year old child with 3 x 3.25mm addiCraSyTrio needles and red dk Stylecraft yarn. They came out at 6.5cm measured flat across the palm from where the thumb joins the palm. Mine with 4mm needles are 8cm across, so the smaller ones will fit ok.
How do you sew on the eyes?
However it works best for you. If you’re unsure how to sew on a button, I’m certain you can google how. Or you can find a very strong glue and glue them on.
Love the look!
I must say, too, that I would have to buy dpns. I have lots of circulars, however.
Your pattern will be put into my SOS – until I get the blanket done that my friend wants. The yarn is Caron Simply Soft and I wonder if your mitts/gloves would work with that yarn.
At my age, my SOS is getting larger while my UFOs and WIPs and Wannabees is getting not done. LOL
You’re a gem. Thank you!!
This pattern is AMAZING. well written, easy to understand, and the owl mits are gorgeous! Thank you! <3
I started the ribbing pattern with the “magic loop” which is using two needles on a long circular needle. After a few rounds I switched to DPNs. I use this method every time when a pattern states to knit in the round because there is less chance for twisting. Hope this helps!
these mitts are super cute and easy to make ?! I just finished my second pair 1st pair on (2) 16″ circular’s it kinda took more time than wanted. I just used 1 16″ circular (magic loop) for the 2nd pair, it was a bit tight but well worth it. Many thanks for the great pattern, it was spelled out perfectly.
As with dpns, I also haven’t done anything with the magic loop.
It took me 40 years to attempt entrelac – and when I did it via YouTube tutorial, found out how truly easy entrelac is to do!
I love these owl mitts, for sure.
Hi, I purchased a twist red 30 inch cable to do owl fingerless mitts with magic loop. I am amazed at the easiness of it. Really need to invest in good cable. It doesn’t twist
I made one using this pattern and it turned out lovely! But sadly, too small- and I don’t have other needles available… I used 3,5mm and I’d love to try making medium size instead- how could I adjust the pattern for that? I imagine I’d start with more stitches (40 instead of 36? 42, 44?) and centering the owl pattern but I’m having trouble seeing how that would work…
That’s why I used needle sizes instead of rewriting the pattern. I’m not sure what the math would be to center the owl. It really is trial and error and I don’t have the desire to re-knit the pattern a bunch of times to see how many stitches need to be knit to make that happen.
this pattern keeps saying knit 18 at the end and there is no way . I come up with sixteen after making two increases.
I’m not sure why you’re getting that count. Anyone else having troubles? This is the first I’ve been told there may be trouble with my stitch count.
Yes, I also get 16 in the end.
What exactly does “knit to p” mean. That’s where I got lost, and I had to take the whole thing apart?
P = purl. Knit to the purl stitch. The number of knit stitches changes as you add stitches for the thumb.
Hi,
Thank you so much for the wonderful pattern, my daughter fell in love with it and wants me to knit one for her. But I have never knitted with dpn and not done the cable stitch yet, can you please do a video tutorial? It would be of great help.
Thank you again from Muscat, Sultanate of Oman
Padma, cables are simply knitting out of order. Those are easy – it’s the dpns in the round that stop me cold.
There are lots of YouTube videos on how to do cables.
Have fun!
from southern California … at our rainy season. Good thing the drops are not snow.
Wish this site would allow one to print out the pattern
I love the owl mittens but would it be possible to receive the pattern knitted on two needles. I’m afraid my knitting skills only cope with two needles!!
Thank you.
Sue.
I would have to rewrite the entire pattern. Every 2nd row would be different than how it’s currently written; to account for back and forth vs round and round. It would be a ton of work. But….
Is there an interest in this? If enough people want it, I can do it. It’ll take awhile for it to be done though. Would it be better to have the seam on the thumb side of the hand or the pinky finger side? I’ve never made flat mittens before.
Let me know in the comments if you would like a flat version. If the demand is there, it’ll be worth my time and effort.
I would think having the seam on the pinky side would be less intrusive when wearing them and doing things. Very cute pattern by the way. I will be trying it with double points, but would also like to try making them as a flat piece and seamed.
I would definatly like a pattern for two needles, and would be happy to pay again for it. please keep me posted if you do thank you elaine
Very cute indeed ?
I would order a pair, but I live way in Wisconsin and It sure the shipping would take forever. I so much love those speckled gloves. I think it shows the Owl off very nicely.
Not as long as you would think. I’m slow right now and could whip up a pair in a day or two. Shipping to the USA is between 5-10 days. It may be a bit longer because of the virus thing but I haven’t heard anyone complain who’s placed orders.
Do circular needles work on this pattern? Also, you mention picking up stitches from the stitch holder, but I don’t see where it says to place any stitches on a holder?
Round 32: K1 Pass the 13 stitches to the stitch holder (the thumb stitches). K to the P. P1 K2 P4 K2 P1 K18 It’s the same row whether making the right or left hand.
And of course circular needles will work, though they will be too long for the number of stitches that make up the diameter of the glove. You’ll have to periodically pull the plastic cord through the worked stitches to continue working the stitches. I find it annoying to do that and easier to have the splits occur at regular intervals when knitting, but to each their own.
Hi there
Thank you so much for this brilliant pattern and also for the way you have worded everything. It’s as if you are actually here and I am talking to you! I love all your little comments, they made me laugh. I haven’t actually knitted a whole pattern with 4dpns and I usually use a circular needle so this will be good experience for me.
Thanks again, love from Australia. Sue
You’re welcome from Canada!?? I’m glad you’re enjoying the pattern ?
On round 15 should there be a p 1 after C4F and C4B? I come up with 19 st after the cables instead of 18..
Yes there should be! Just a simple typo. Ugh! I fixed it in the pattern. Thanks for letting me know ?
There should also be a P1 after the C4B in line 23. Just finished the left hand mitt and it turned out great! Thanks so much for sharing your pattern, I think I’ll be making several pair.
Ugh. ?. Changed. Damn copy and paste. Only as accurate as what you copy I guess.
Trying first mitt, terribly excited. I subscribed but don’t know where to download this pattern.
Love this pattern – on my list of projects to do! I will probably use circular needles, do not like the double pointed ones if I can avoid it! Keep up the great work!
I really don’t like double pointed needles and I don’t like a thumb with a fingerless mitt pattern. I think it would look better as a rectangle just folded over with out the thumb done on straight needles.
Good idea! And a lot simpler to make too. I’d love to see the final product when you make it. I’ve never seen mittens made this way before.
Hi thanks for the pattern, looks like some practice on dpns! I do prefer thumbs … personal preference, and one’s whole hand feels warmer 🙂 There are quite a few patterns on the net, as suggested by Cindy above.
oh my gosh, thank you so much for sharing. I have a friend who loves owls. They were the theme for her wedding. She is going to love these gloves. I can’t wait to get started knitting
Love this, thank you!
Thank you so much for your kind words. I’m glad you like it. ?