
Made with large needles, these fingerless gloves are super fast to make if you know how to knit in the round. And really, knitting in the round isn’t difficult. But damn, it does look impressive when you’re knitting something using four needles. Not gonna lie. But with saying that, if you would prefer to knit this pattern flat on two needles like my Super Simple Fingerless Gloves or my Easy to Knit Owl Fingerless Gloves, please leave a comment at the end of this pattern.
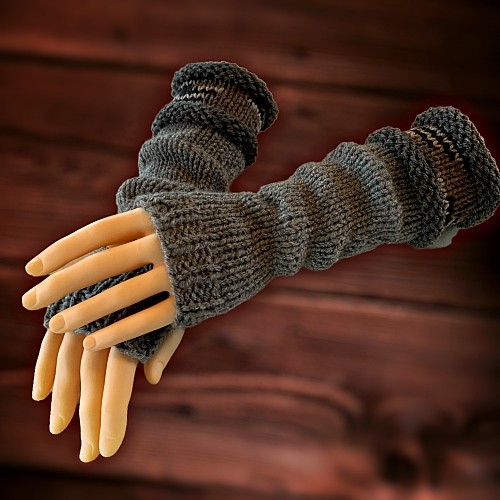
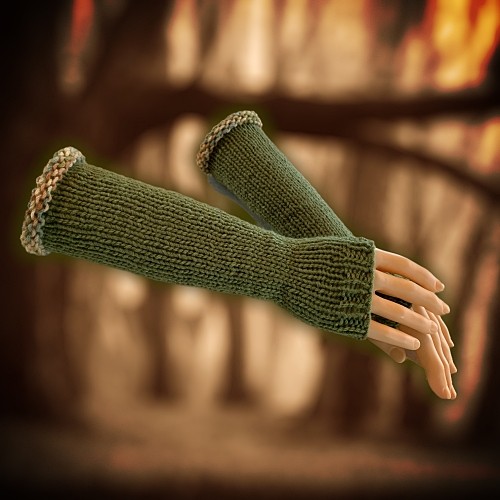
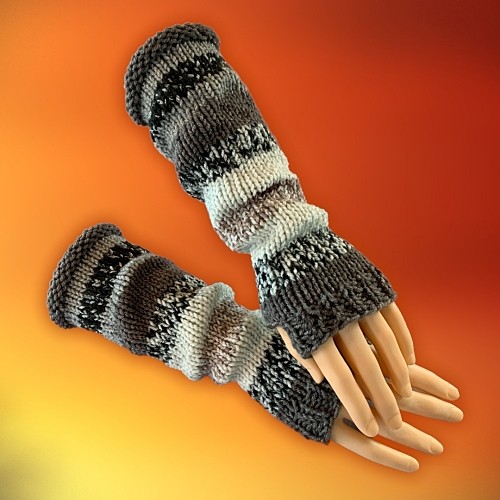
But I digress. There are two styles you can make with this pattern. One has a plain cuff. The other has a double cuff. Both allow for your creativity to shine with yarn choice.
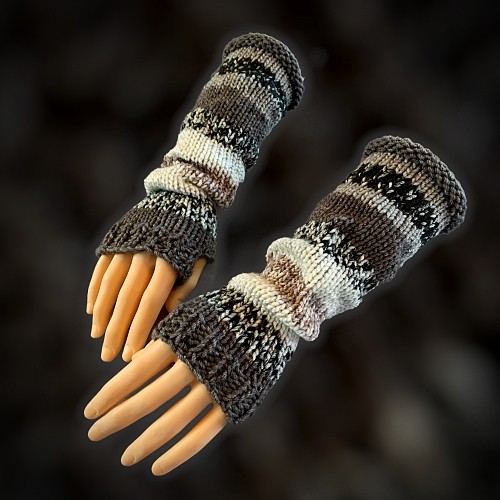
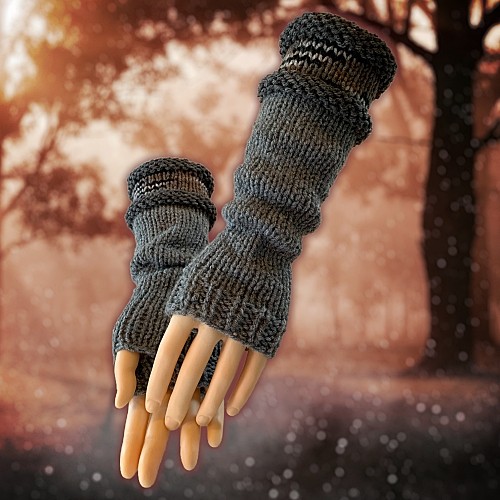
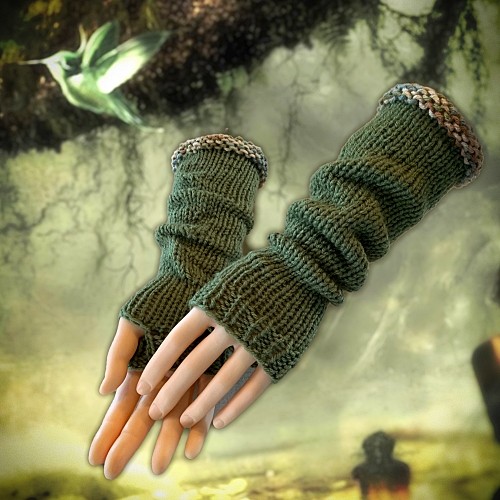
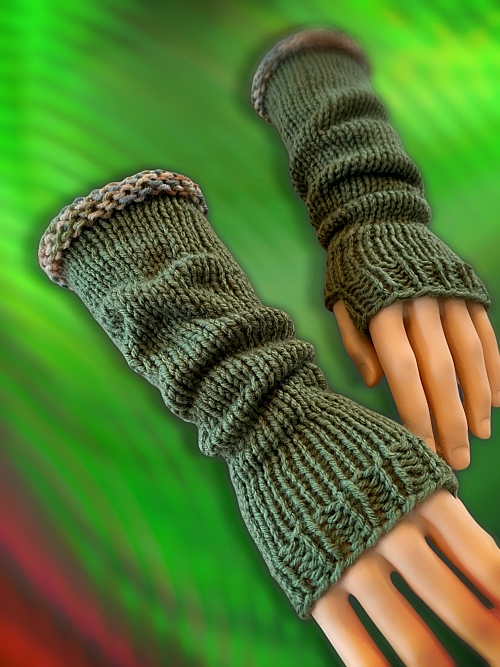
Because they are such a plain design, you can use any variety of colours to make these look awesome. Dare I say my favourite – variegated yarn – did wonders here… I really like how the splotching effect worked for the double cuff and how random the colours appeared when making the plain purl cuff with the beginning purl round.
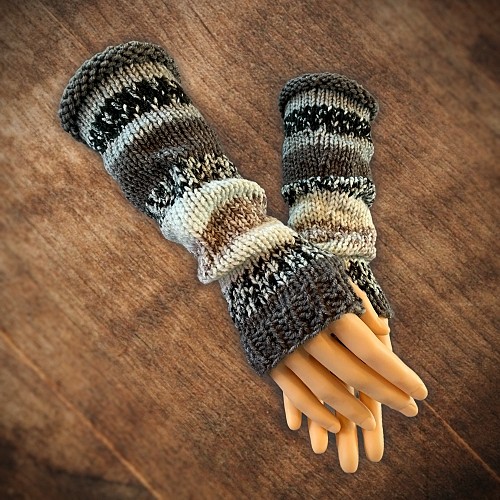
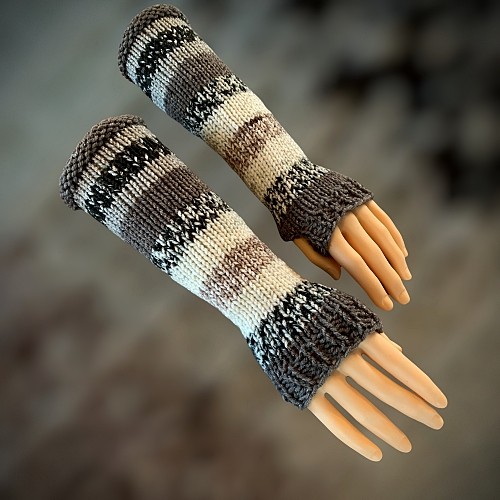

These also are a great stash buster. You can use up the smaller quantities of yarn from other projects to make stripes. I used the self-striping yarn available at one of the big box craft stores to make my striped version. Be warned though. Not all self-striping yarn will work for this. It needs to be smaller sections of striping than most of the self striping yarn out there. If it makes for a great ombre shall or blanket, the striping is too wide.
As always, if you would prefer a printable paper version of this pattern, you can purchase and download the PDF from all of my usual sites. You can make a purchase from this website here – How to Knit Basic Long Fingerless Gloves. You can also purchase a download from my other online retailers which are LoveCrafts, Etsy and Ravelry. Depending on how long ago I published this, the printable pattern may appear below.
Another way to avoid ads and pop-ups, get instant, PRINTABLE downloads of this pattern and others, is by becoming a Member on this website. When you become a Website Supporter for $3/month, you’ll gain access to exclusive member only posts. These posts contain one click downloads of the patterns. Simply click the Download & Print button. The PDF will automatically download to your computer or smart device. You can then read it on your device or print it at your leisure. You can download as many patterns as you like for the same $3 each month. You can go to this page to learn more, become a member and support my work… Exclusive Member Area
If you want them longer, you can add more rows between the decrease rows. So instead of 6 rows, you could do 8 or more. If you want them to go further up the arm, cast on more when starting. Multiples of four stitches seem to work out quite nicely and let you maintain the ribbing at the fingers. I do recommend that you decrease stitches down to what’s written for the various sizes. It keeps it from getting sloppy, and dare I say annoying, when they don’t fit properly at the hand.
Knitting 2 together, or the decreases, do form a bit of a seam. To keep this out of view and make it run less noticeably down the inside of the arm, the pattern is designed so the thumb hole is on either side of this seam for the left and right hand.
What style would you like to make?
Gauge
This is important to follow for correct sizing.
2″ (5 cm) – 8 sts
2″ (5 cm) – 11 rows
in stockinette
Please share this page!
More FREE patterns
Click the pic to read online!!


FREE Knitting Graph Paper for Colorwork Knitting


![]()
![]()


Things You Need
You can click any link below to see what you need.
Set of 4 size 9 US (5.5 mm) double pointed knitting needles (DPN)
Left Hand (Plain Cuff)
Cast on 28 (32, 36)
Round 1 – 6: Purl around
Round 7 – 19: Knit around
Round 20: K2tog. Knit to the end of the round. You now have 27 (31, 35) sts.
Round 21 – 26: Knit around
Round 27: K2tog. Knit to the end of the round. You now have 26 (30, 34) sts.
Round 28 – 33: Knit around
Round 34: K2tog. Knit to the end of the round. You now have 25 (29, 33) sts.
Round 35 – 40: Knit around
Round 41: K2tog. Knit to the end of the round. You now have 24 (28, 32) sts.
Round 42 – 47: Knit around
Round 48: K2tog. Knit to the end of the round. You now have 23 (27, 31) sts.
Round 49 – 54: Knit around
Round 55: K2tog. Knit to the end of the round. You now have 22 (26, 30) sts.
Round 56 – 67: Knit around
Round 68: Knit 2 (4,6). Cast off 3 sts. Knit to the end of the round
Round 69: Knit 2 (4, 6). Cast on 3 sts. Knit to the end of the round. (Thumb hole made).
Round 70 – 74: P1 K1 around.
Cast off.
Right Hand (Plain Cuff)
Cast on 28 (32, 36)
Round 1 – 6: Purl around
Round 7 – 19: Knit around
Round 20: K2tog. Knit to the end of the round. You now have 27 (31, 35) sts.
Round 21 – 26: Knit around
Round 27: K2tog. Knit to the end of the round. You now have 26 (30, 34) sts.
Round 28 – 33: Knit around
Round 34: K2tog. Knit to the end of the round. You now have 25 (29, 33) sts.
Round 35 – 40: Knit around
Round 41: K2tog. Knit to the end of the round. You now have 24 (28, 32) sts.
Round 42 – 47: Knit around
Round 48: K2tog. Knit to the end of the round. You now have 23 (27, 31) sts.
Round 49 – 54: Knit around
Round 55: K2tog. Knit to the end of the round. You now have 22 (26, 30) sts.
Round 56 – 67: Knit around
Round 68: Knit 17 (19, 21). Cast off 3 sts. Knit to the end of the round
Round 69: Knit 17 (19, 21). Cast on 3 sts. Knit to the end of the round. (Thumb hole made).
Round 70 – 74: K1 P1 around.
Cast off.
Left Hand (Double Cuff)
Cast on 28 (32, 36)
Round 1 – 6: Purl around
Round 7 – 15: Knit around (If you are going to change the colour of the yarn for the purl rows, knit round 15 with the new colour).
Round 16 – 19: Purl around
Round 20: K2tog. Knit to the end of the round. You now have 27 (31, 35) sts.
Round 21 – 26: Knit around
Round 27: K2tog. Knit to the end of the round. You now have 26 (30, 34) sts.
Round 28 – 33: Knit around
Round 34: K2tog. Knit to the end of the round. You now have 25 (29, 33) sts.
Round 35 – 40: Knit around
Round 41: K2tog. Knit to the end of the round. You now have 24 (28, 32) sts.
Round 42 – 47: Knit around
Round 48: K2tog. Knit to the end of the round. You now have 23 (27, 31) sts.
Round 49 – 54: Knit around
Round 55: K2tog. Knit to the end of the round. You now have 22 (26, 30) sts.
Round 56 – 67: Knit around
Round 68: Knit 2 (4,6). Cast off 3 sts. Knit to the end of the round
Round 69: Knit 2 (4, 6). Cast on 3 sts. Knit to the end of the round. (Thumb hole made).
Round 70 – 74: P1 K1 around.
Cast off.
Right Hand (Double Cuff)
Cast on 28 (32, 36)
Round 1 – 6: Purl around
Round 7 – 15: Knit around (If you are going to change the colour of the yarn for the purl rows, knit round 15 with the new colour).
Round 16 – 19: Purl around
Round 20: K2tog. Knit to the end of the round. You now have 27 (31, 35) sts.
Round 21 – 26: Knit around
Round 27: K2tog. Knit to the end of the round. You now have 26 (30, 34) sts.
Round 28 – 33: Knit around
Round 34: K2tog. Knit to the end of the round. You now have 25 (29, 33) sts.
Round 35 – 40: Knit around
Round 41: K2tog. Knit to the end of the round. You now have 24 (28, 32) sts.
Round 42 – 47: Knit around
Round 48: K2tog. Knit to the end of the round. You now have 23 (27, 31) sts.
Round 49 – 54: Knit around
Round 55: K2tog. Knit to the end of the round. You now have 22 (26, 30) sts.
Round 56 – 67: Knit around
Round 68: Knit 17 (19, 21). Cast off 3 sts. Knit to the end of the round
Round 69: Knit 17 (19, 21). Cast on 3 sts. Knit to the end of the round. (Thumb hole made).
Round 70 – 74: K1 P1 around.
Cast off.
Love the free patterns? You can say thanks in a couple of ways. You can read more about how you can Support My Work by clicking that link or make a small donation and Buy Me a Coffee. ?? That is a website where you can make a one time donation as a thanks. If you don’t want to or are unable to make a financial donation, sharing this pattern through social media is a great way to help out too! The links below are a super easy way for you to do so.
Abbreviations
K – knit
P – purl
K2tog – Knit 2 together
Like all of my patterns you have my permission to sell and/or give away anything that you make using this pattern. You are NOT permitted to reprint this pattern in any form unless you have obtained my written permission to do so.
If you have any questions, please feel free to leave a comment or send me your questions at kweenbee_crafts@hotmail.ca.


Thank you, I’ve been looking for a plain pattern for fingerless gloves. Enjoy your weekend.
Thank you.