I do loves me a good crocheted bracelet. Don’t ask me why…

This is a fairly simple bracelet to make and doesn’t involve any complicated or unusual stitches. If you have successfully completed other crocheted projects, this should be easy for you to make.
If you are looking to make some extra cash and sell these, which I’m always cool with btw, the cost to make these is next to nothing. You can purchase crochet cotton thread for very reasonable costs, and reuse buttons you’ve collected, found at second hand stores, or even for cheap at many big box stores.
If you’d prefer to download an ad free version of this pattern instead of reading it online, you can get it in my Shopify shop, Etsy Shop and Buy Me A Coffee Shop.
Another way to avoid ads and pop-ups, get instant, PRINTABLE downloads of this pattern and others, is by becoming a Member. When you become a Website Supporter at $4/month, you’ll gain access to exclusive member only posts on Buy Me A Coffee. You can download as many patterns as you like for the same $4 each month. You can go to this page to learn more, become a member and support my work… Exclusive Member Area
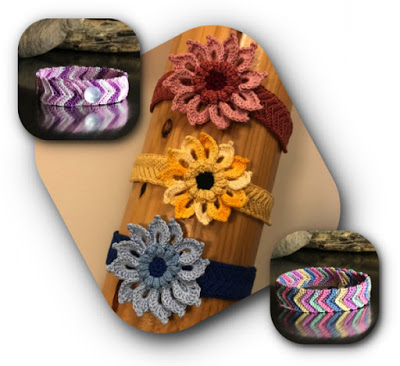
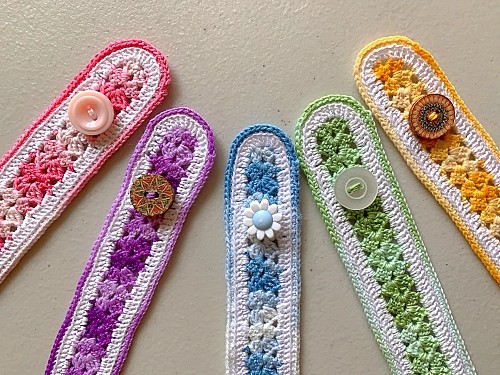
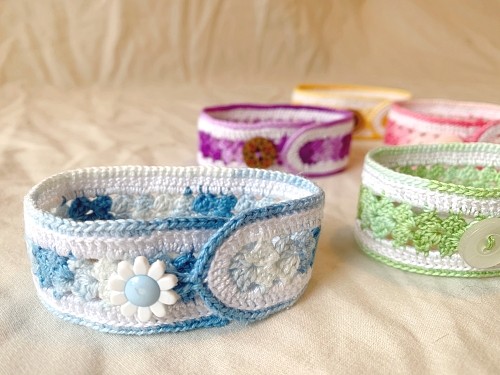
If you like crocheted jewelry as much as I do, I have a number of other jewelry patterns you may be interested in. Tap nay photo to see those patterns too.

If you are enjoying the free patterns and would like to see more, then please share my work social media! Use those handy little icons down there👇🏼 A couple clicks from you are easy and it helps me so much 😊.
Things you need:
Gauge:
It’s not really important for this project as there isn’t a specific size needed. This pattern can be made as long as you like and you can easily adjust the length to what you want when you’re making it. Each fan adds approximately 3/16″ or 0.5 cm. Generally speaking, I make my bracelets approximately 7 inches (17.5 cm) in length making 27 fans total
The 2 additional rounds added make it about 1/2 inch longer, so if you need a specific length keep that in mind. Another point to remember, is it will stretch a bit longer as the stitches relax over time or if you press it with an iron.
The Pattern:
Chain 4.
Row 1: With main colour of thread, 2dc in 1st ch. Ch2, 3dc in 1st ch of original ch 4 again. Ch3. Turn.
Row 2: 3dc in ch2 space of previous row. Ch2. 3Dc in ch2 space. Tc in the top of the ch3 of previous round. Ch3. Turn.
Repeat row 2 until work measures the desired length. Break thread.
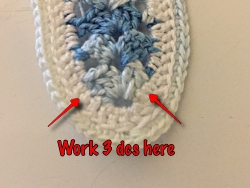
Round 1: You’ll now be working in rounds going around the bracelet. With the start of the bracelet on your right and the last fan you made on your left and with the complimentary colour of thread, join with a sl st in any ch3 or tc space (counts as a dc). Ch2, dc in same space. *Dc in the top of the ch3 or tr of the fan (see photo A). 2 dc in next ch3 or tc space.* Repeat from * to * down the length of the bracelet ending with the 2 dc in the space ch3 or tc space. Dc in the top of each dc of fan. 5dc in the ch2 space of fan. Dc in the top of each dc. Repeat from * to * down the length of the bracelet. Make 3 dc along the length of the dc or ch3 of the original fan (see photo B). 5Dc in the ch1 in the base of the original fan. Make 3 dc along the length of the dc or ch3 of the original fan. Repeat from * to * until at the beginning ch2 of this round. Join with sl st to the top of the 2nd chain. Break thread.
Photo A:
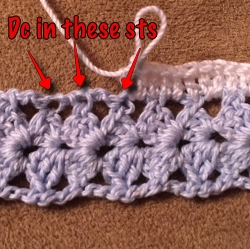
Photo B:
Round 2: Start with the first fan on your right and the last fan you made on your left. With the main colour of thread, and working in the back loop of each dc, join thread in back loop of any dc of previous round along the length. Ch1, sc in same st as join. Sc in each dc down the length to the 1st dc of the 5dc of the previous round. 2sc in the first dc of the 5 dc, sc in the next dc. Sc in the 3rd dc, ch10 (or how many you need to go around your button), sl st in the sc you just made. Sc in the 3rd dc again. Sc in the next dc. 2sc in the next dc. Sc in each dc down the length of the bracelet to the 1st dc of the 5dc of the previous round. 2sc in the 1st dc of the 5dc, sc in the next st. 3sc in the middle dc of the 5dc. Sc in the next st. 2sc in the next st. Sc in each dc until reaching the 1st sc of round. Join with sl st to first sc. Break thread.
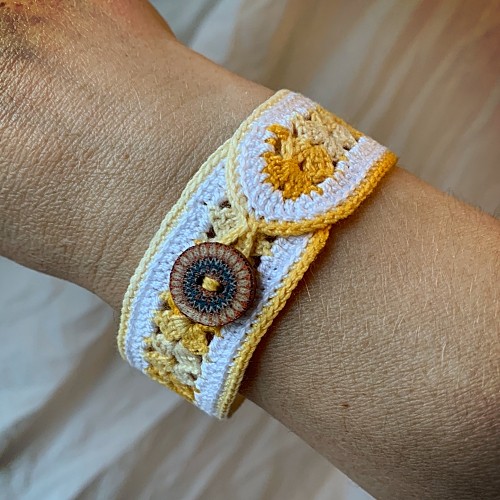
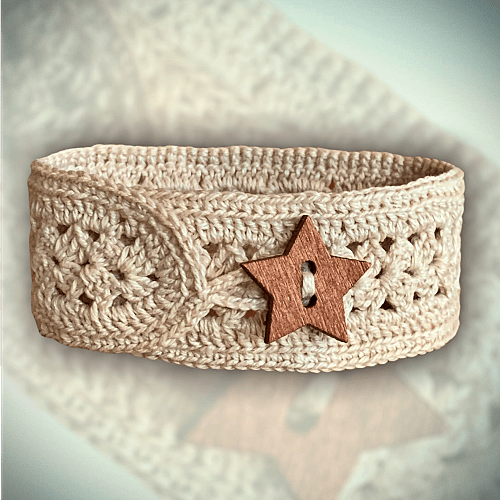
Sew button to the end opposite the loop.
Work in thread ends.
Wear, give away or sell with pride!
More of My Stuff on Etsy
You can make a widget like this for your blog or website, too.
Instructions are on my website here: How to Display Etsy Items on Your Website
Hints and Tips:
No matter what, don’t stretch out the fan portion before you are finished crocheting the entire piece! If you do, it won’t lay flat when you are done.
To save work of sewing in ends, work in the ends of the threads as you are making the bracelet. Hold the thread behind your work and catch it as you make the next 4-5 stitches. Position the joins so there aren’t too many ends in one area.
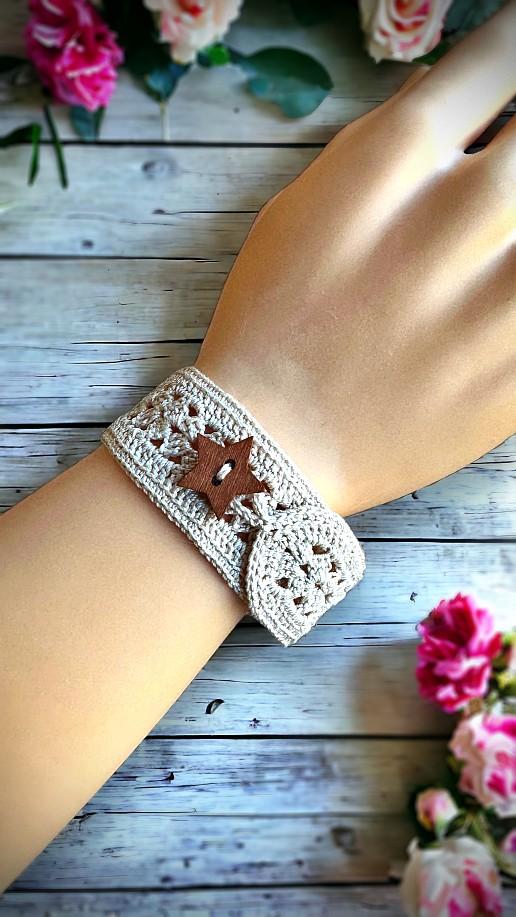
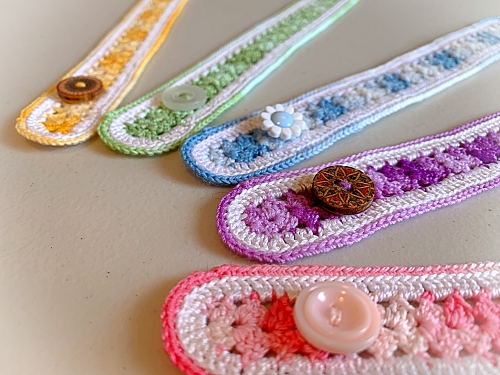
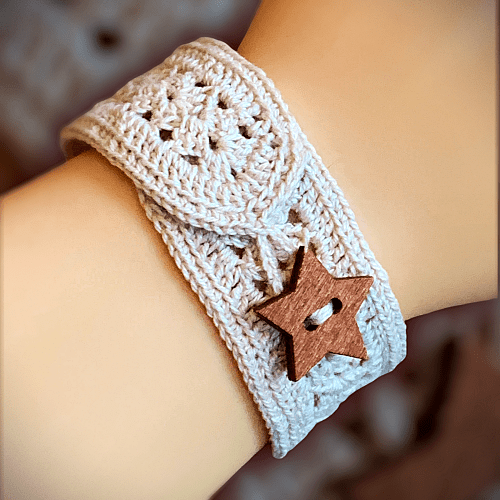
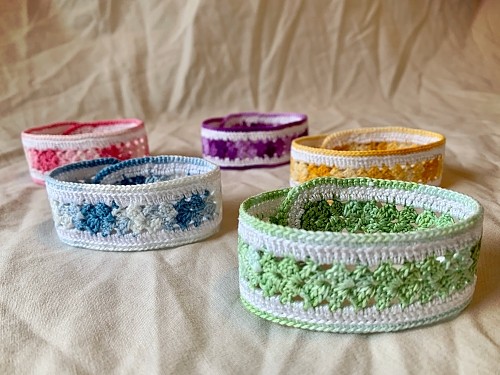
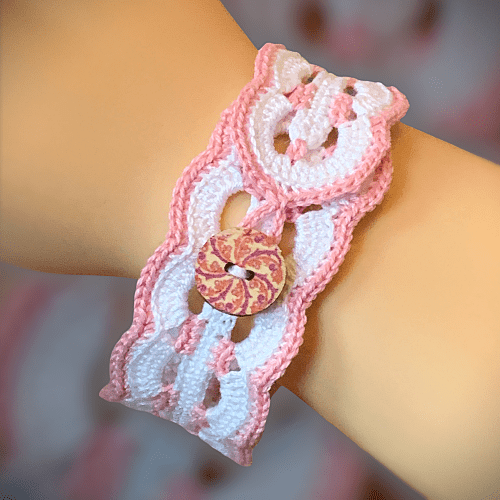
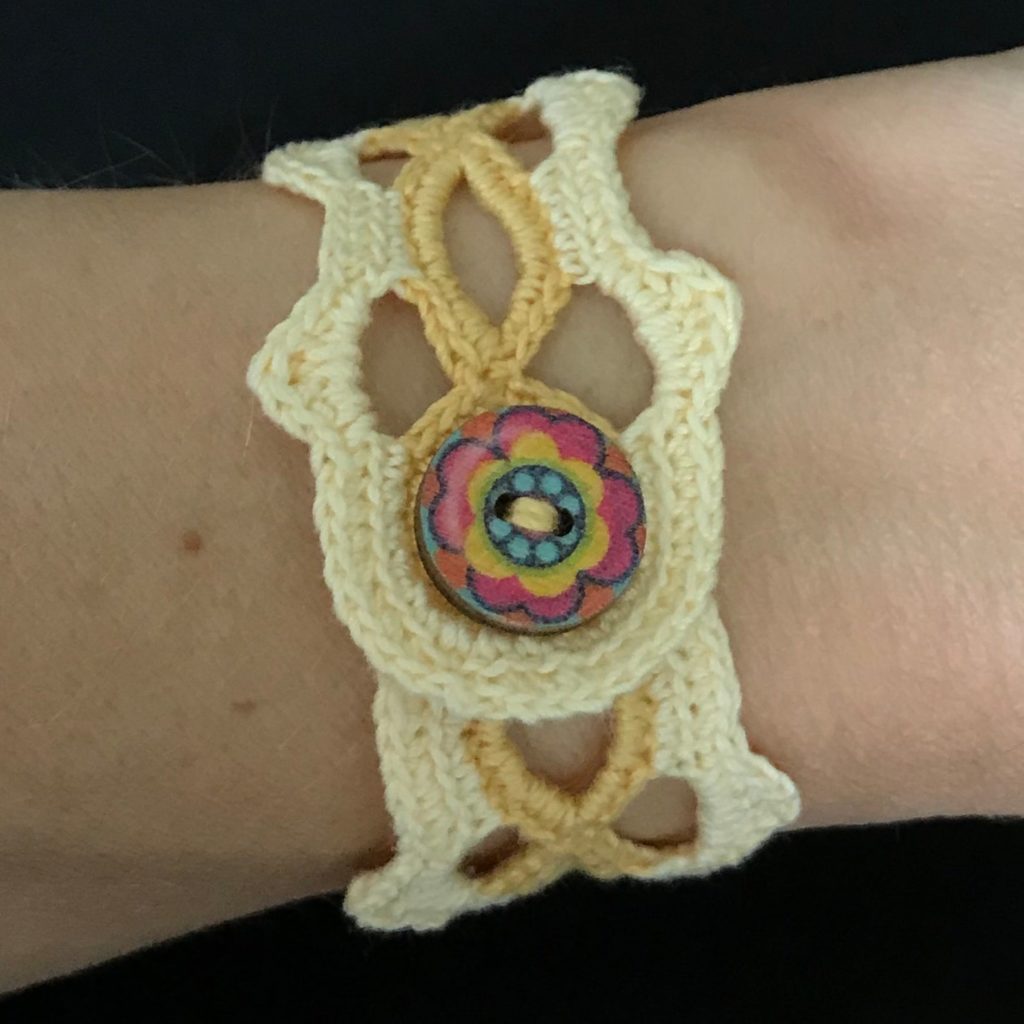
You can use 1 to 3 colours to make this bracelet. I’ve included an example above with 3 colours. One colour works particularly well to highlight a button.
When making the loop to secure the bracelet, chain as many stitches as you think you may need. Sl st to the sc and pass the button through the loop. If it is too small, undo the sl st and add more chains. If too long, undo the sl st and take some stitches out. It’s easier to check now than later.
Abbreviations:
sc – single crochet
dc – double crochet
tc – treble (or triple) crochet
ch – chain
sl st – slip stitch
Please share this page!
More FREE patterns
Click the pic to read online!!


FREE Knitting Graph Paper for Colorwork Knitting


![]()
![]()


st – stitch
sts – stitches
If you have any questions, please feel free to leave a comment or send me your questions here.
If you love this pattern, be sure to check out my other bracelet patterns: Crocheted Waves Bracelet.
Like all my patterns, you are allowed to sell or give away any of the bracelets that you make, but you are not permitted to redistribute this pattern in any way.