

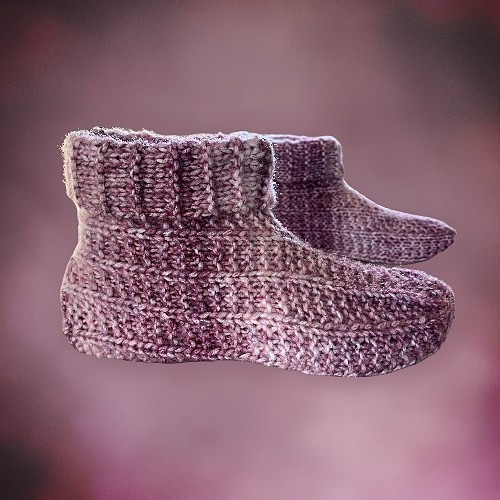
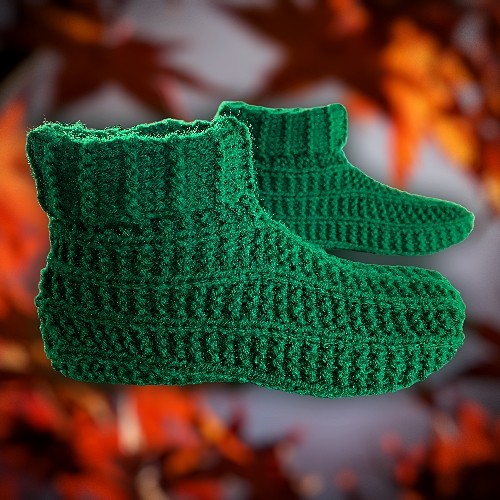
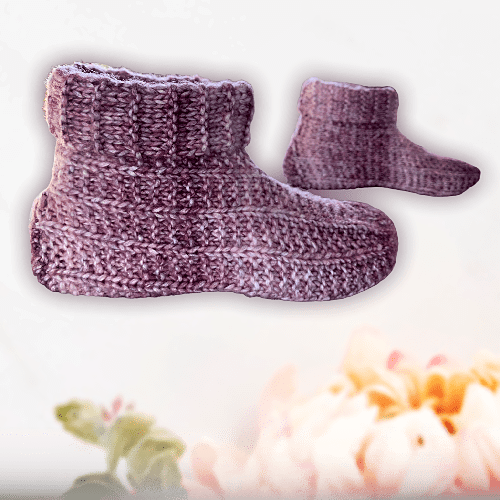
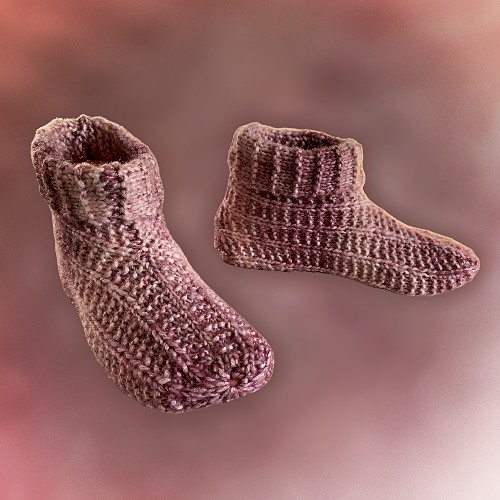
This easy to knit slipper pattern is a variation of my Rolled Cuff Slipper pattern. This pattern has the same foot design, but I know that some people prefer a longer cuff to help keep their ankles warm.
Like my previous slipper pattern, this was written to avoid any difficult techniques, specifically, picking up stitches. That is why this pattern is done in one piece; starting at the heel flap and working towards the toe.
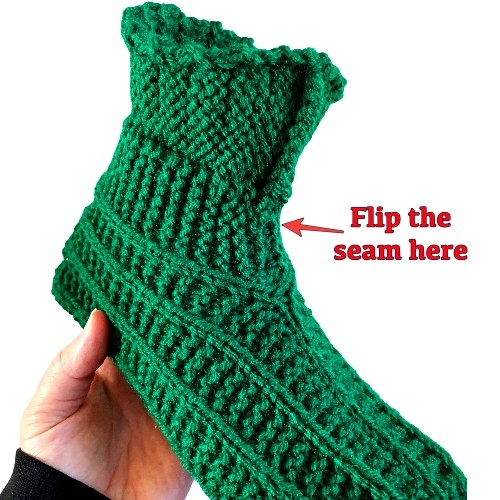
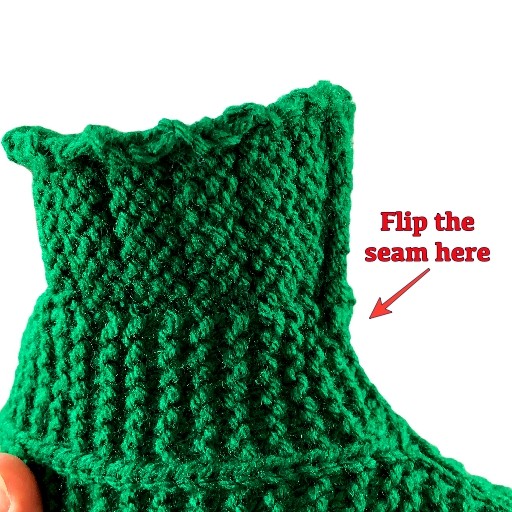
Also, the extended cuff is worked in one piece as you knit the slipper. I’ve given instructions and included photos to show how you’ll need to flip the slipper so the seam for the folded down section is on the right side. When folded, the seam disappears. You can read more about that when you go to the Hints and Tips section at the end of this post.

If you don’t want to or are unable to make a financial donation, sharing this pattern through social media is a great way to help out too! The links below are a super easy way for you to do so.
If you would like to avoid the ads on this page or would like to print the pattern, you can purchase the PDF through my Etsy shop or on Ravelry. You can also get the PDF for FREE if you are a member on Buy Me A Coffee.
Another way to avoid ads and pop-ups, get instant, PRINTABLE downloads of this pattern and others, is by becoming a Member. When you become a Website Supporter at $4/month, you’ll gain access to exclusive member only posts on Buy Me A Coffee. You can download as many patterns as you like for the same $4 each month. You can go to this page to learn more, become a member and support my work… Exclusive Member Area
Things You Need
Yarn (a standard ball of worsted weight yarn such as this will be more than enough)
Size 5 mm (US 8 ) single pointed needles
Tapestry needle to sew seams and work in ends
Gauge
18 stitches = 4 inches
24 rows = 4 inches
in stockinette
Sizes are written as such:
Women’s 6-7 (8-9, 10-11, 12)
Men’s 6 (7-8, 9-10, 11-12, 13)
Heel Flap
Cast on 2
Row 1: Knit across.
Row 2: Increase in each stitch. (4 sts)
Row 3 – 4 : Knit across.
Row 5: Increase in the first stitch. K until one stitch remains. Increase in this stitch. (6 sts)
Row 6 – 7: Knit across.
Row 8: Increase in the first stitch. K until one stitch remains. Increase in this stitch. (8 sts)
Row 9 – 10: Knit across.
Row 11: Increase in the first stitch. K until one stitch remains. Increase in this stitch. (10 sts)
Row 12 – 13: Knit across.
Row 14: Increase in the first stitch. K until one stitch remains. Increase in this stitch. (12 sts)
Row 15 – 16: Knit across.
PLEASE NOTE:
The following rows are for sizes Women’s size 12 and Men’s sizes 11, 12 and 13 ONLY:
Next row: Increase in the first stitch. K until one stitch remains. Increase in this stitch (14 sts)
Next 2 rows: Knit across.
Continue the pattern for all sizes.
Next row: Cast on 29 stitches. (Yes, you already have 12 (12, 12, 14, 14) stitches on your needle. After casting on, you’ll have 41 (41, 41, 43, 43) sts on your needle). The following is worked over the stitches you just cast on and the stitches from the heel. K8 P1 Knit to the end of the row. As you worked those stitches, your work was transferred onto the other needle. Cast on another 29 sts onto this needle. (You now have 70 (70, 70, 72, 72 sts) on your needle)
Next row: K16 P1 *K3 P1* Repeat from * to * 2 more times. K12 (K12, K12, K14, K14) *P1 K3* Repeat from * to * 2 more times. P1 K16.
Please share this page!
More FREE patterns
Click the pic to read online!!


![]()
![]()


FREE Knitting Graph Paper for Colorwork Knitting


♥ ☺ Next row: P9 K52 (K52, K52, K54, K54) P9
Next row: K16 P1 *K3 P1* Repeat from * to * 2 more times. K12 (K12, K12, K14, K14) *P1 K3* Repeat from * to * 2 more times. P1 K16.
Next row: K8 P1 K52 (K52, K52, K54, K54) P1 K8.
Next row: K16 P1 *K3 P1* Repeat from * to * 2 more times. K12 (K12, K12, K14, K14) *P1 K3* Repeat from * to * 2 more times. P1 K16. ♥ Repeat from ♥ to ♥ 6 (6, 7, 7, 8) times more for 30, (30, 34, 34, 38) rows total.
Please note – Repeat the row marked with ☺ once to maintain the pattern.
Shaping Toe
Next row: Cast off 15 sts. P1 *K3 P1* Repeat from * to * 2 more times. K12 (K12, K12, K14, K14) *P1 K3* Repeat from * to * 2 more times. P1 K16.
Next row: Cast of 15 sts. Knit across.
◊ ♫ Next row: P2 *K3 P1* Repeat from * to * 2 times more. K12 (12, 12, 14, 14). ◘ P1 K3 ◘ Repeat from ◘ to ◘ 2 times more. P2.
Next row: Knit across. ◊ Repeat from ◊ to ◊ 9 (10, 10, 11, 11) times more for 22 (24, 24, 26, 26) rows total.
Please note – Repeat the row marked with ♫ once to maintain the pattern.
End Toe
Next row: K2tog 10 (10, 10, 11, 11) times. K1 K2tog to last 3 sts. K1 K2tog.
Next row: P1 K2 *P1 K1* Repeat from * to * once P1 K6 (6, 6, 7, 7) *P1 K1* Repeat from * to * 2 time more. P1.
Next row: K1 K2tog 4 (4, 4, 5, 5) times. K1 (1, 1, 0, 0). K2tog until last st. K1
Next row: P1 K1 P3 K3 P4.
Break yarn and pull through. Pull tight to draw loops together.
Hints and Tips
Leave a longer length of yarn when you first start the slipper. You can use this piece to sew one of the seams along the heel flap. When you end the slipper, leave that yarn length longer too. You can use the length to sew the toe seam.
When sewing the seams to form the cuff, when you get to the part that folds over, be sure to turn the slipper inside out so the seam is on the RIGHT side.
The sizing of these slippers is very forgiving. The garter stitch used throughout helps the slipper to stretch both width and length wise. If your gauge is off by a row or a stitch, you should be able to get the size of slipper you want.
Abbreviations
K – Knit
P – Purl
K2tog – knit 2 together
sts – stitches
st – stitch
The use of this pattern allows you to make and sell the slippers you make, but you may not redistribute or resell this pattern.


Thank you for getting back to me. I’ll try what you said and I’ll let you know either way about how the slipper turned out. Thank you for your help, I appreciate it very much. Have a great evening.
I have a question. The first decrease row for the toe isn’t adding up. I k2tog 11 times but the rest of the stitches are an even amount and to k1, k2tog is an odd amount and the stitches are not adding up. Can you please help me? My email is lmcfunyarn21@outlook.com. please get back to me I would really appreciate it. Thanks
Did you miss the extra k1 after the first 11 decreases? You didn’t mention it in your question.
The stitch counts are given to maintain the pattern of the slipper. As long as you are k2tog in the single stitch solid line and maintaining it with a P on the opposite side, it really doesn’t matter how many stitches there are. It’s all drawn together at the end and is hardly noticeable if you make a mistake.