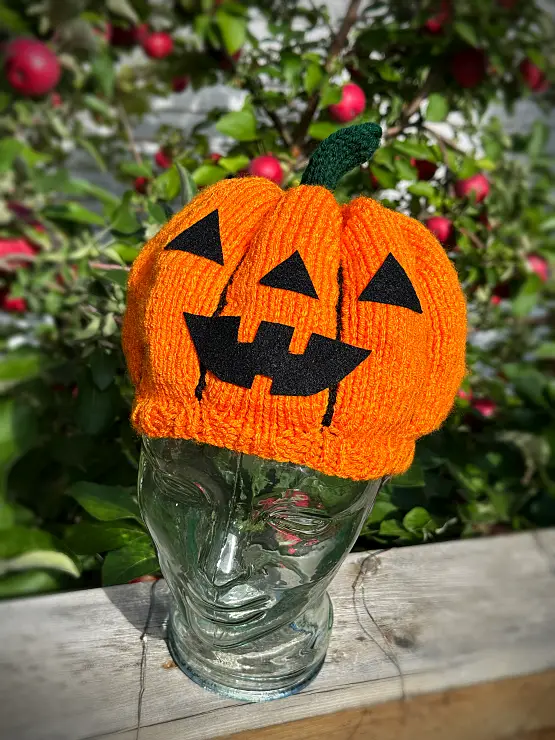
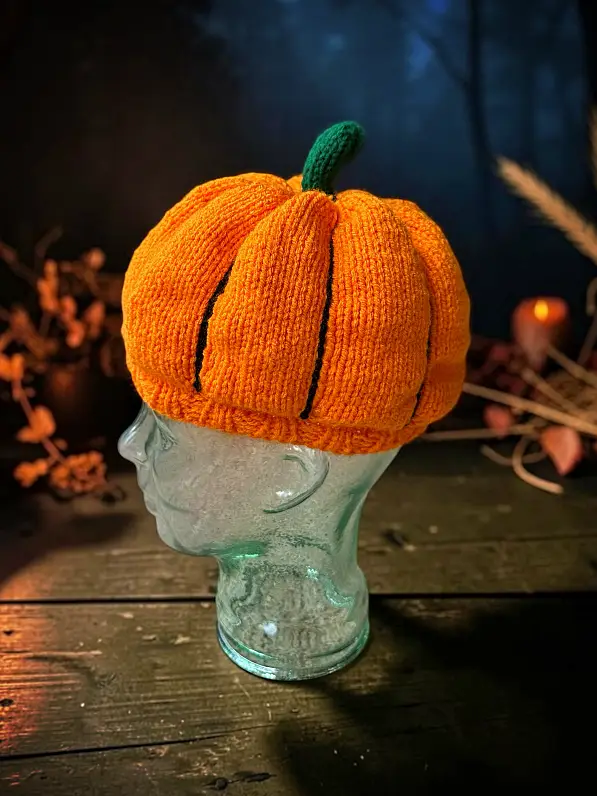
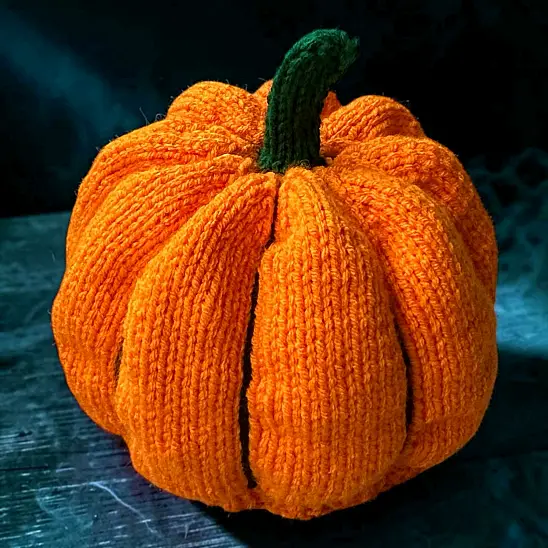
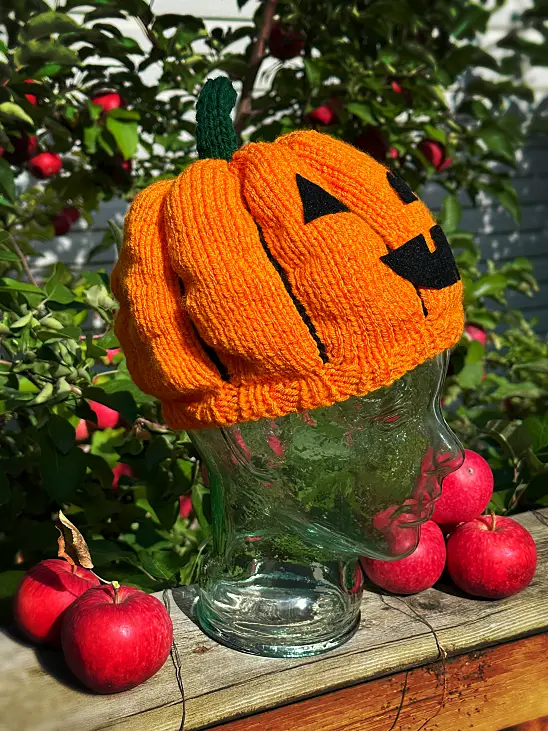
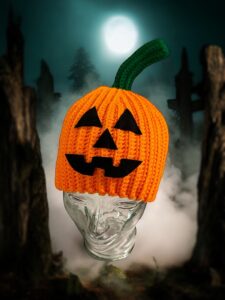
Halloween is the perfect excuse to knit something a little silly, and this pumpkin hat is definitely ready for the occasion! It’s a fun and fairly easy knitting project that comes in both kids’ and adult sizes, making it a great choice for anyone who wants to add a handmade touch to their Halloween costume or outfit.

The hat is knitted flat on straight needles with simple shaping to create the round pumpkin shape. A knitted stem finishes off the top, and chain stitches are added to separate the sections and give the pumpkin that fun, cartoon-like look.
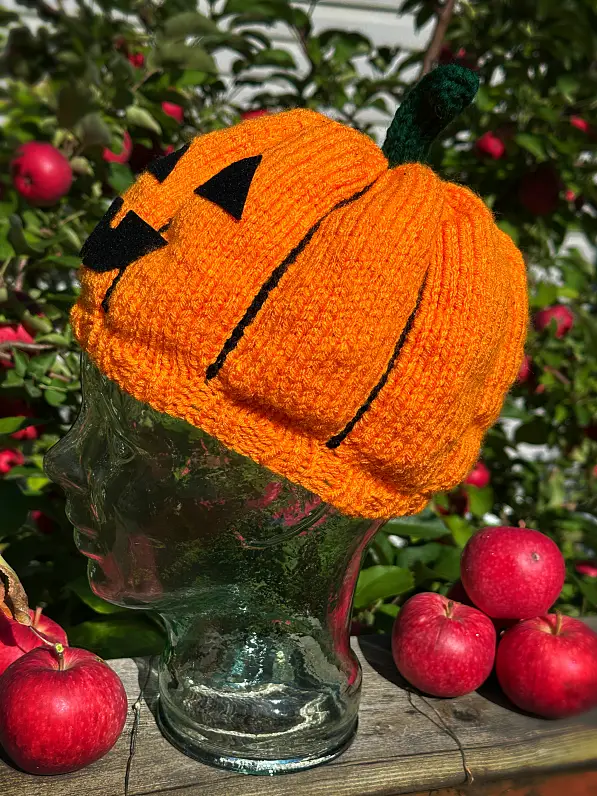
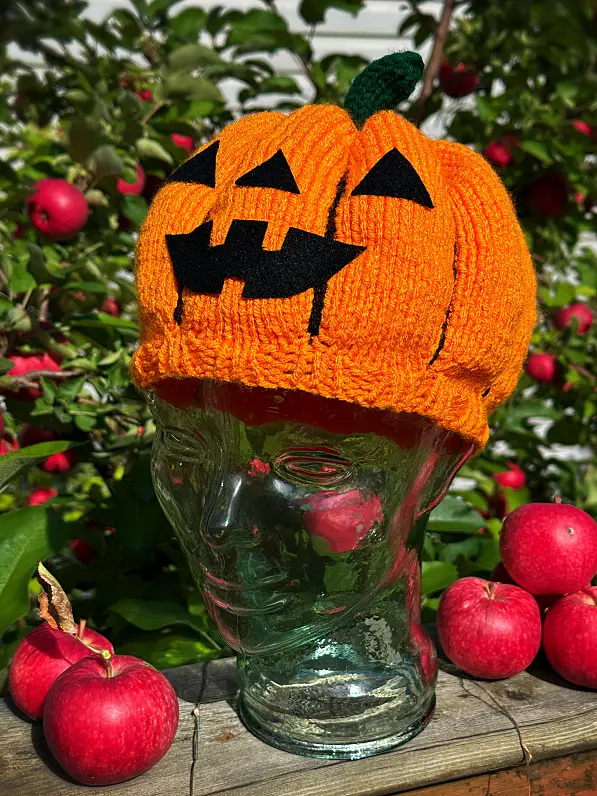
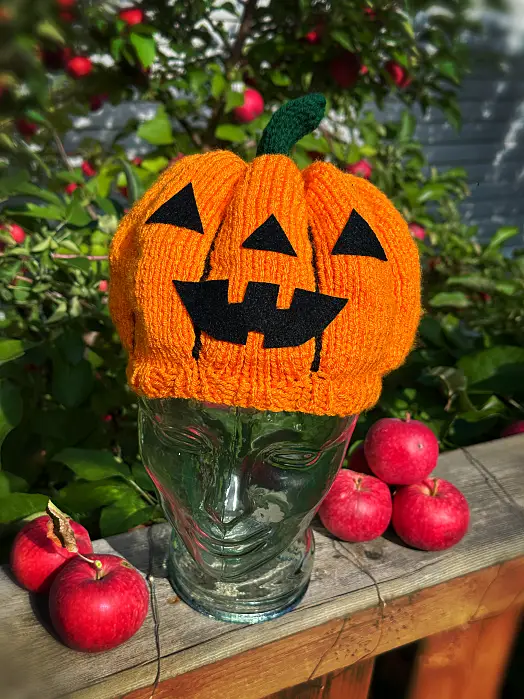
If you’re looking for an easy Halloween hat to knit, this one is a quick and enjoyable project. I’ve also included step-by-step photos showing how to add the chain stitches, so you can easily get the finished look. Grab your orange yarn and let’s knit a pumpkin!
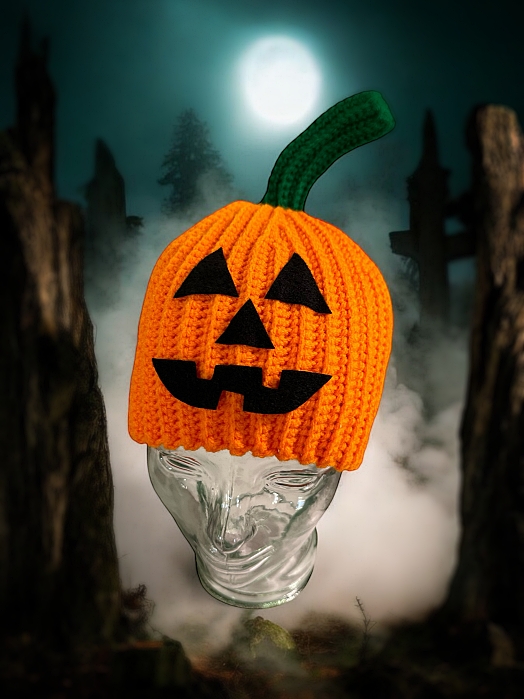
Not a knitter but know how to crochet? I wrote that pattern out years ago. You can see that one here: Crocheted Pumpkin Beanie Hat – FREE Jack o’ Lantern Crochet Pattern or you can tap the photo
If you would prefer the printable version of the pattern, I have a number of online retailers you can buy it from including online at KweenBee on Shopify, Etsy, Ravelry and Buy Me A Coffee (👈🏼 If you are a member you can print this for free with your monthly fee 😉) I also have the paperback booklet and Kindle versions available on Amazon. You can find it here – United States, Canada, United Kingdom, and Australia.
Another way to avoid ads and pop-ups, get instant, PRINTABLE downloads of this pattern and others, is by becoming a Member. When you become a Website Supporter at $4/month, you’ll gain access to exclusive member only posts on Buy Me A Coffee. You can download as many patterns as you like for the same $4 each month. You can go to this page to learn more, become a member and support my work… Exclusive Member Area
Don’t forget to share this pattern with anyone you think may like it on your social media accounts. It’s free for everyone to use and it’s a great way to support my work without paying a single cent. I even included the handy share button right here 👇🏼
Things You Need
Orange Worsted weight yarn. I used Loops and Threads because I liked this shade of orange, but any orange colour will do.
Green Worsted weight yarn. A small amount
Black worsted weight yarn (optional) – to highlight the sections and give a more cartoon-like feel.
5 mm (US size 8) knitting needles
Tapestry needle – to sew seams and line between sections.
Gauge
In stockinette
18 sts = 4 inches or 10 cm
23 rows = 4 inches or 10 cm
The pattern is written for sizes as such child (sm/med, lg/ xlg)
Child size ~ 18 inches around
Small/Medium ~ 21 inches around
Large/X-large ~ 24 inches around
The ribbing at the brim helps the hat stretch and contract to fit.
The Pumpkin
Cast on 56 (66, 74) sts
♥ Row 1: *K2 P2* Repeat from * to * to the last 2 sts. K2. The child size (smallest size with 56 sts), won’t have 2 sts.
Row 2: P0 (2, 2) *K2 P2* Repeat from * to * to the last 2 sts. P2 for the child size (smallest size with 56 sts). ♥ Repeat from ♥ to ♥ one more time for a total of 4 rows.
Row 5: P1 ♦ P1 K5 (6, 7) ♦ Repeat from ♦ to ♦ until 1 (2, 1) st remains. P1 (2, 1).
Row 6: K1 (2, 1) ♣ P5 (6, 7) K1 ♣ Repeat from ♣ to ♣ to the last st. K1
Row 7: P1 ♪ P1 M1 K5 (6, 7) M1 ♪ Repeat from ♪ to ♪ until 1 (2, 1) st remains. P1 (2, 1).
Row 8: K1 (2, 1) ● P7 (8, 9) K1 ● Repeat from ● to ● to the last st. K1
Row 9: P1 ◘ P1 M1 K7 (8, 9) M1 ◘ Repeat from ◘ to ◘ until 1 (2, 1) st remains. P1 (2, 1).
Row 10: K1 (2, 1) ▲ P9 (10, 11) K1 ▲ Repeat from ▲ to ▲ to the last st. K1.
☺ Row 11: P1 ◊ P1 K9 (10, 11) ◊ Repeat from ◊ to ◊ until 1 (2, 1) st remains. P1 (2, 1).
Row 12: K1 (2, 1) ▲ P9 (10, 11) K1 ▲ Repeat from ▲ to ▲ to the last st. K1. ☺ Repeat from ☺ to ☺ until your work measures 6 (7, 8) inches or 5 (18, 20) cm from the cast on edge.
Next row: P1 □ P1 TWK2tog K5 (6, 7) K2tog □ Repeat from □ to □ until 1 (2, 1) st remains. P1 (2, 1).
Next row: K1 (2, 1) ● P7 (8, 9) K1 ● Repeat from ● to ● to the last st. K1
Next row: P1 ☼ P1 TWK2tog K3 (4, 5) K2tog ☼ Repeat from ☼ to ☼ until 1 (2, 1) st remains. P1 (2, 1).
Please share this page!
More FREE patterns
Click the pic to read online!!

FREE Knitting Graph Paper for Colorwork Knitting






















Next row: K1 (2, 1) ♣ P5 (6, 7) K1 ♣ Repeat from ♣ to ♣ to the last st. K1
Next row: P1 ♫ P1 TWK2tog K1 (2, 3) K2tog ♫ Repeat from ♫ to ♫ until 1 (2, 1) st remains. P1 (2, 1).
Next row: K1 (2, 1) ◄ P3 (4, 5) K1 ◄ Repeat from ◄ to ◄ to the last st. K1.
If making the child size, skip to the row marked with 🎃
**For Sm/Med and Lg/Xlg ONLY!**
Next row : P1 ♫ P1 TWK2tog K0 (0, 1) K2tog ♫ Repeat from ♫ to ♫ until 1 (2, 1) st remains. P1 (2, 1).
Next row: K0 (2, 1) ⌂ P0 (2, 3) K1 ⌂ Repeat from ⌂ to ⌂ to the last st. K1.
If making the Lg/Xlg sizes, skip to the row marked with 🎃
**For Sm/Med ONLY!**
Next row: P1 ∆ P1 TWK2tog ∆ Repeat from ∆ to ∆ until 2 sts remains. P2
Next row: K1 ⌂ K1 P1 ⌂ Repeat from ⌂ to ⌂ to the last 2 sts. K2. Break orange yarn. Go to the Stem.
**For Child and Lg/Xlg ONLY!**
🎃 Next row: P1. * P1. Insert your needles as if to knit. Pass onto your working needle. K2tog. Pass the st you passed over, over the the K2tog you just made. * Repeat from * to * until 1 (0, 1) st remains. P1 (0, 1).
Next row: K1 ▼ P1 K1 ▼ Repeat from ▼ to ▼to the last st. K1. Break orange yarn. Go to the Stem.
More of My Stuff On Etsy
Stem
Next row: With GREEN, K2tog across. Knit any remaining st.
Next row: Purl across
♠ Next row: Knit across.
Next row: Purl across. Repeat from ♠ to ♠ 6 more times for a total of 16 rows. This can be longer or shorter. It’s up to you.
Next row: K2tog across. K any remaining sts.
Next row: P across
Next row: K2tog across. K any remaining sts. Break yarn. Draw through.
Chain Stitches Between Sections
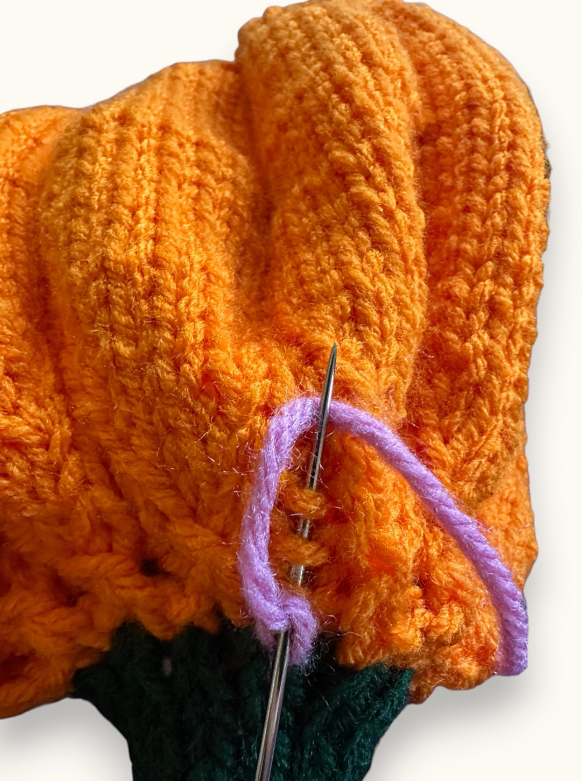
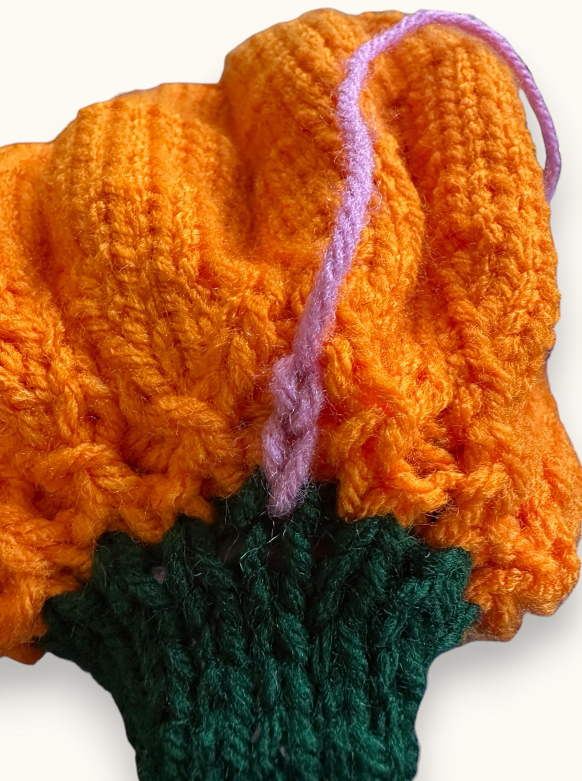
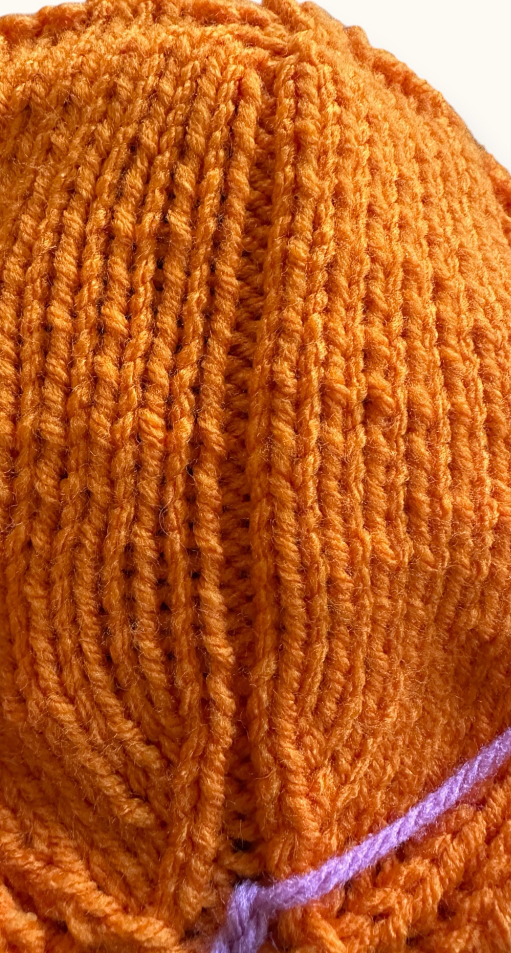
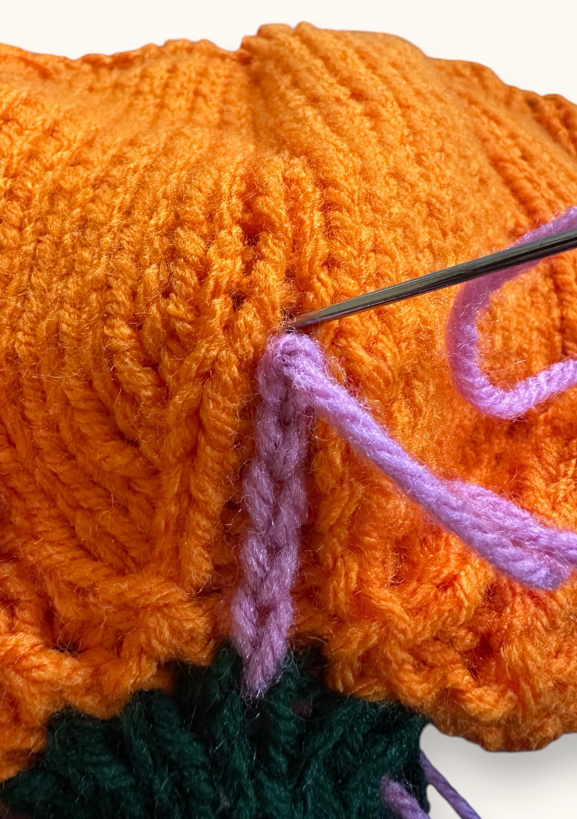
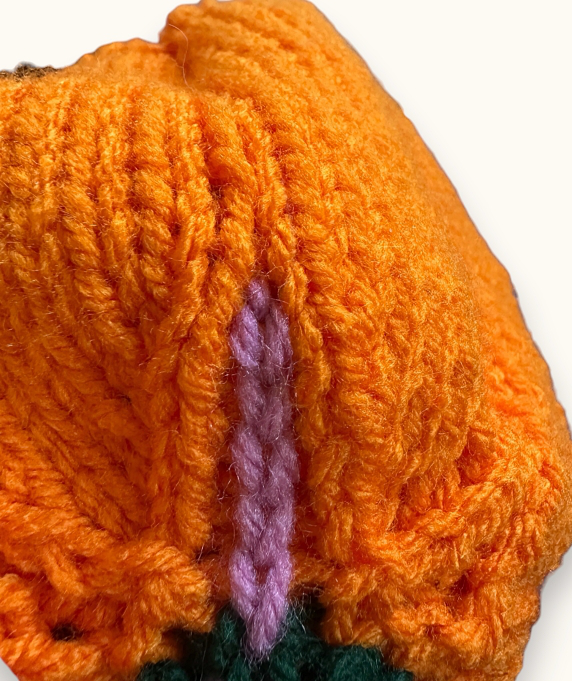
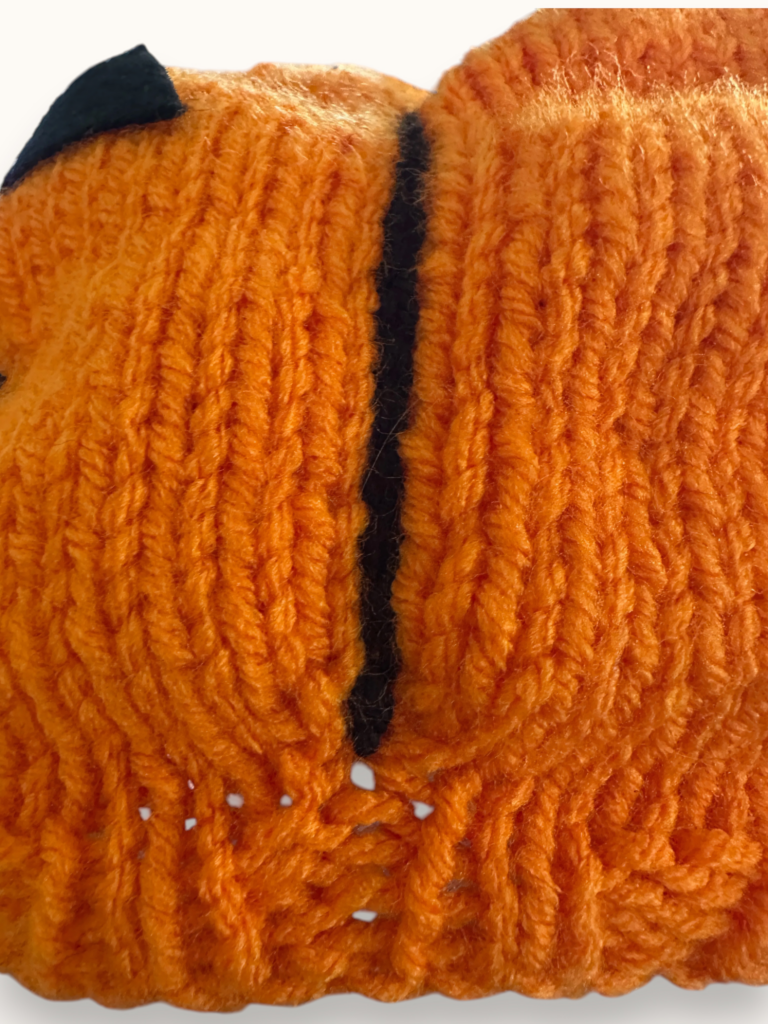
I used pink yarn in the photos because black is exceptionally hard to photograph. You don’t need to use black yarn but I strongly recommend it.
I’ve includes how-to photos, but if you want to watch a video instead, there are many embroidery videos on YouTube that can show you how.
Make the lines of chains sts BEFORE you sew the final seam. It’s easier to do when it’s flat. Make a line of chain sts over the seam.
When done, put your hands inside the hat a fluff out the sections.The knitting is tight enough that the sections will hold their shape.
When chaining the sts between the pumpkin sections, give a quick measure so they are all roughly the same length. Make each chain as close to the same size as possible. You want it to pull tight and bunch up a bit.
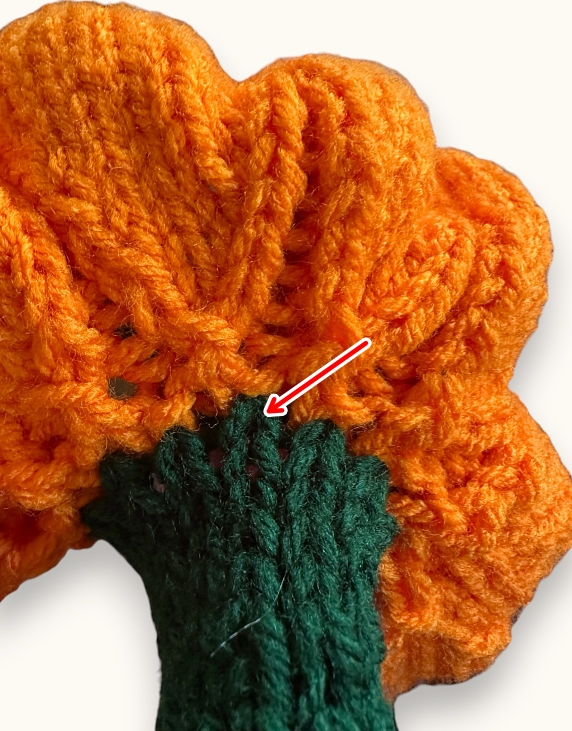
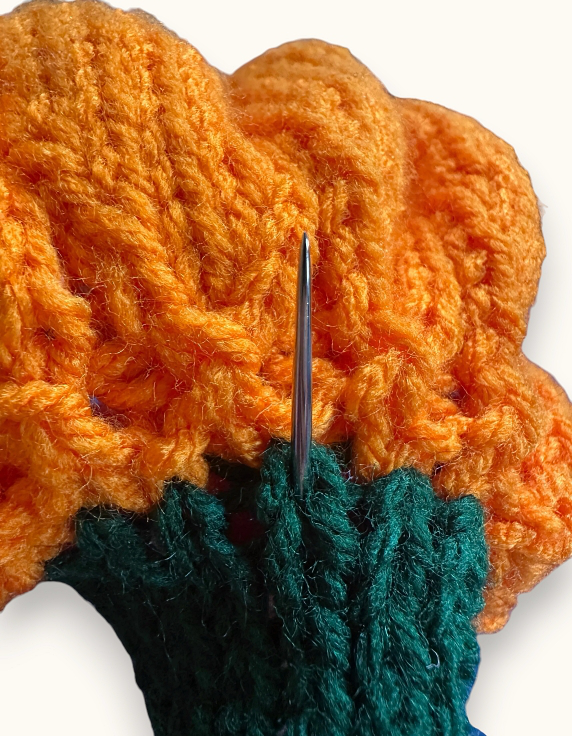
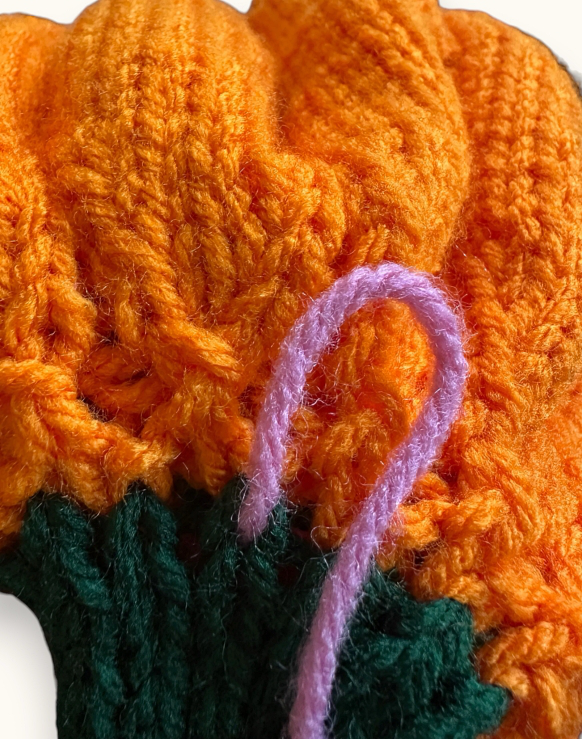
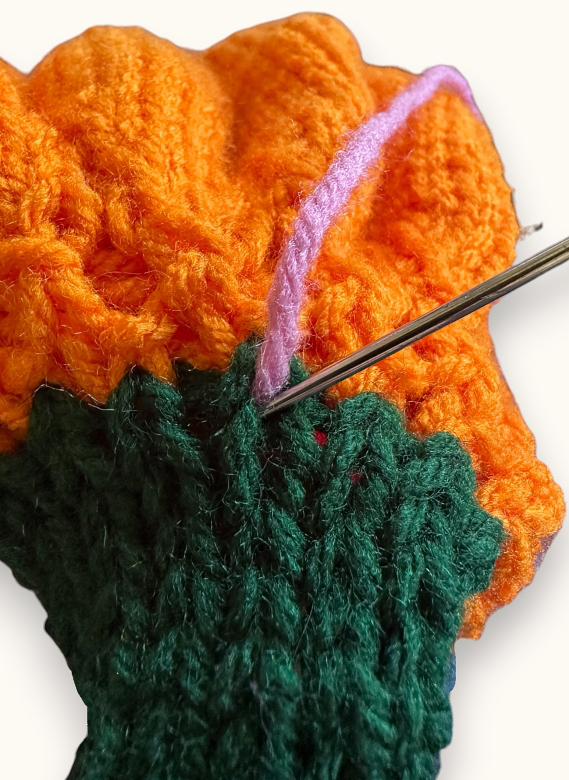
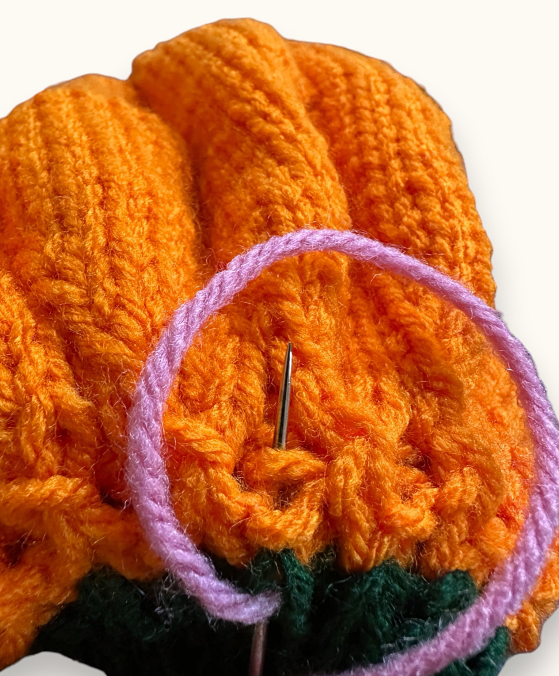
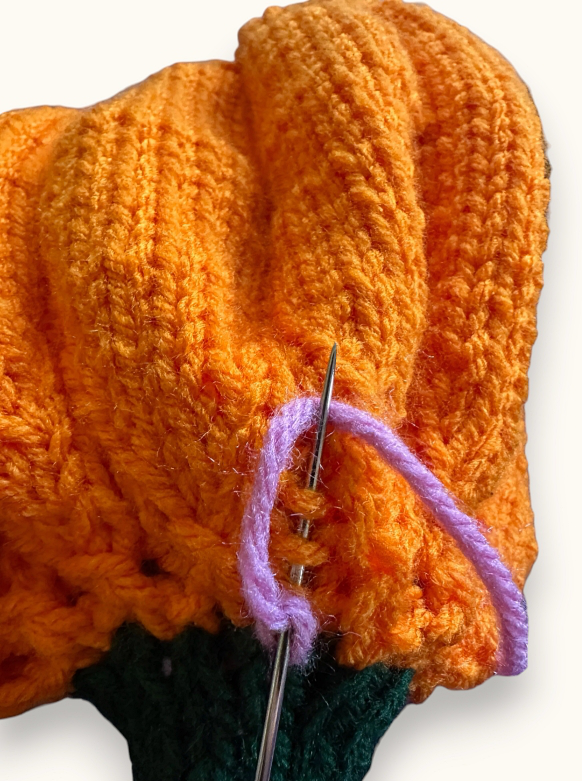
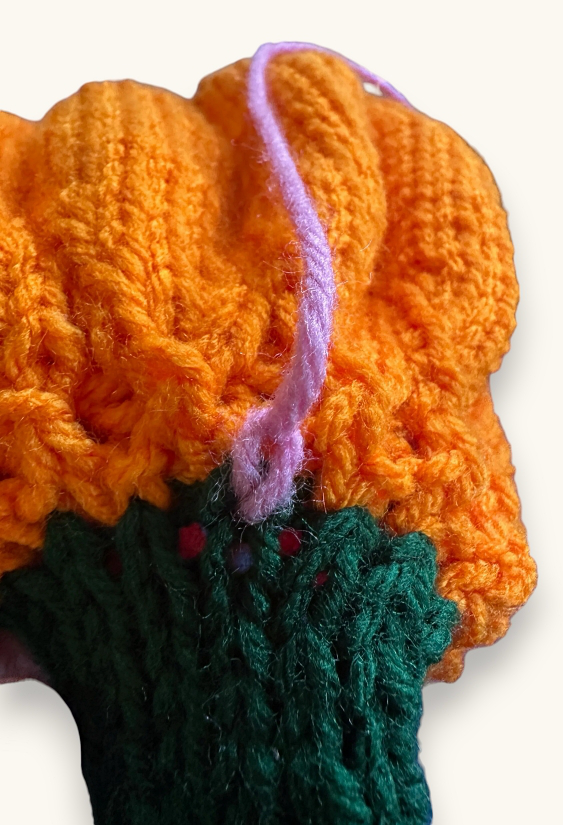
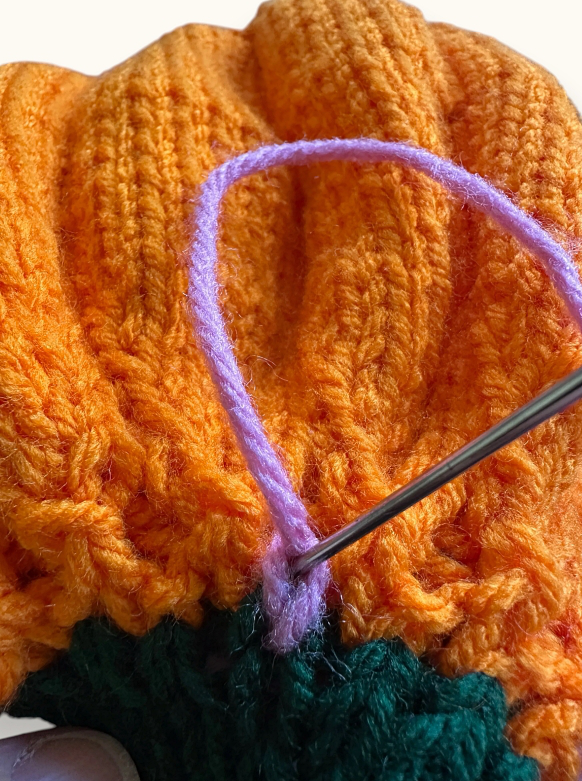
Making the Face
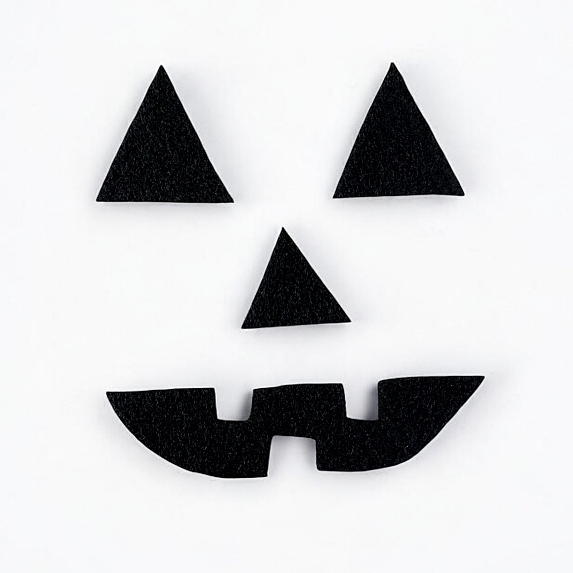
Make any type of facial features you like, or not face at all! It’s really up to you. I added the photo for the facial features I had for the crochet version of this hat. It’s a sample only. Maybe you want googly eyes. Maybe you want pointy teeth. No choice is wrong!
I used felt that was sticky on the back to make my face cut outs.
Hints and Tips
If you haven’t seen notation such as P0 (2, 2) before, the 0 simply means you skip that instruction for your size. You do not knit the stitch, work the K, or complete whatever instruction is listed because it doesn’t apply to your size.
Row st counts aren’t super important for this pattern. The line between the sections is. It needs to be straight. Make sure you PURL on the RIGHT side and KNIT on the WRONG side.
Cut out the face shapes from paper to get the sizing and proportions correct before cutting them out from the felt. Use some tape to adjust the placement and size, then use the paper cut outs as a template for the felt.
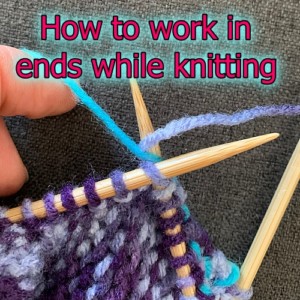
There will be a few ends to work in but not if you work them in as you go. I have a video that shows you how to do it when making knit stitches. That video is below.
Abbreviations
st – stitch
sts – stitches
K – knit
P – purl
K2tog – Knit 2 sts together.
TWK2tog – (Twist and Knit 2 sts together) – Pick up a stitch as if to knit. Twist the stitch and place it back on your non-working needle. Knit the 2 stitches together from right to left. The video is for a different pattern but is done the exact same way.