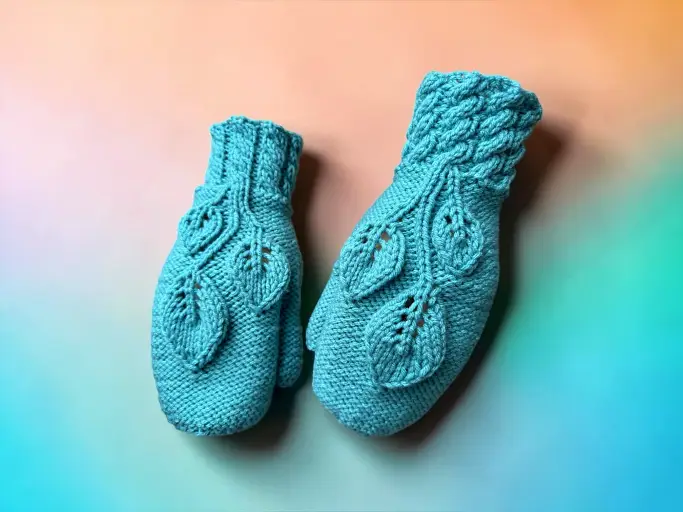
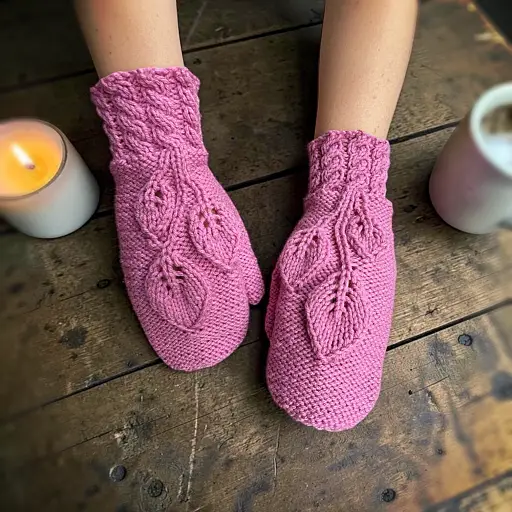
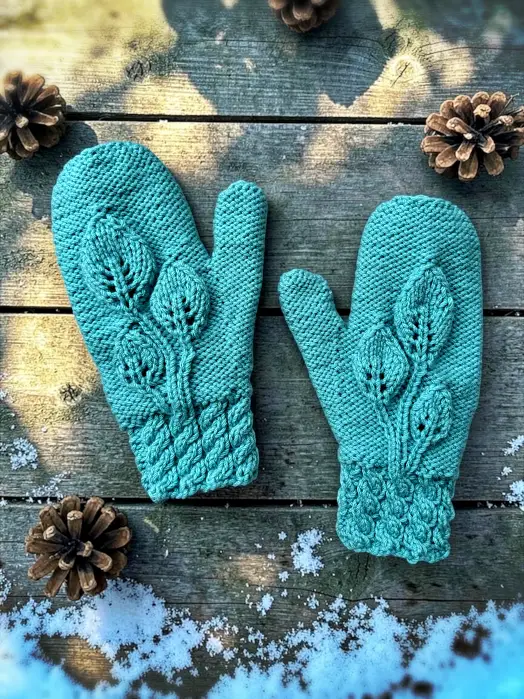
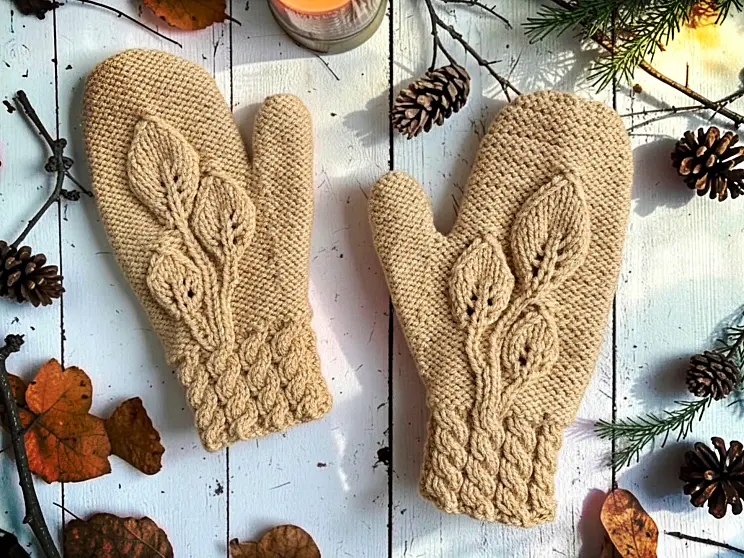
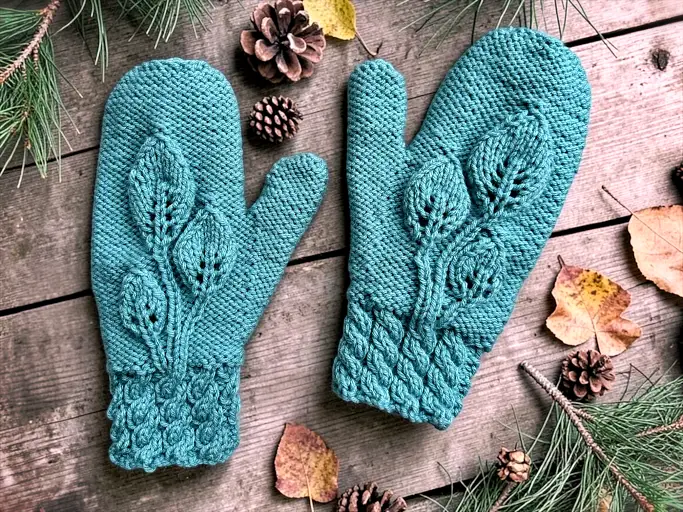
If you’re looking for a free knitting pattern for leaf mittens knit flat on straight needles, these Autumn Leaves Mittens are a cozy and elegant choice for fall and winter. Designed with three textured leaf motifs across the back of the hand, this pattern brings a beautiful nature-inspired detail to classic knit mittens. The leaves are worked in different sizes to fit naturally across the hand, creating a balanced and eye-catching design. Best of all, these mittens are knit flat and seamed, making them perfect for knitters who prefer working with straight needles instead of double pointed needles.

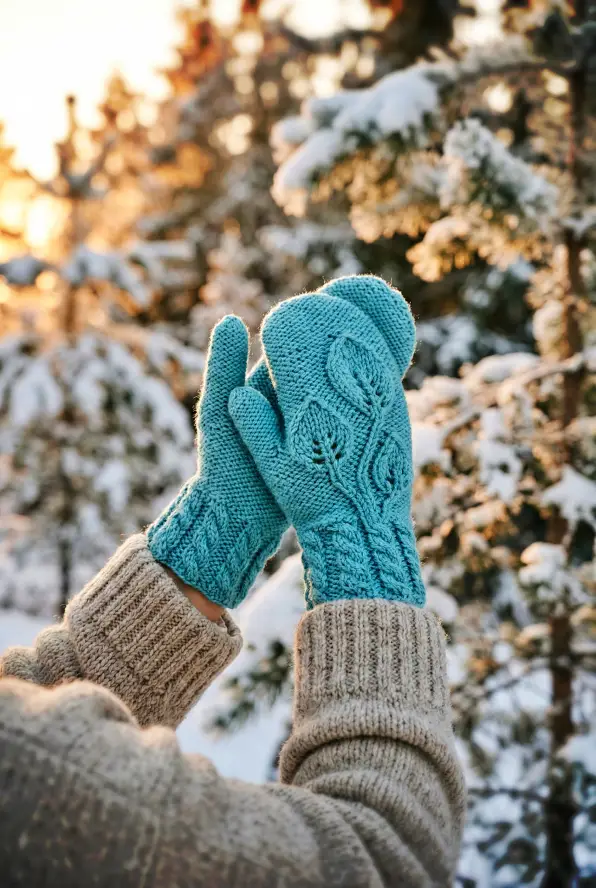


This intermediate mitten knitting pattern is ideal for knitters who are comfortable with basic stitches and ready to try textured knitting techniques. The leaf motif uses simple shaping to create depth and dimension, and video tutorials are included to help guide you through the more detailed steps. If you’ve been searching for a free knit mitten pattern on straight needles, a flat knit mitten pattern with a leaf design, or cozy handmade mittens for women, this pattern is a rewarding project that results in warm, stylish mittens.
If you need help with sts, check the Abbreviations section. I’ve included descriptions of how to make them and embedded videos where I could. Scroll down the page or use the Table of Contents.
If you would prefer the printable version of the pattern, I have a number of online retailers you can buy it from including my online KweenBee on Shopify, Etsy, and Buy Me A Coffee. I also have the paperback booklet and Kindle versions available on Amazon. Links coming soon!
Another way to avoid ads and pop-ups, get instant, PRINTABLE downloads of this pattern and others, is by becoming a Member. When you become a Website Supporter at $4/month, you’ll gain access to exclusive member only posts on Buy Me A Coffee. You can download as many patterns as you like for the same $4 each month. You can go to this page to learn more, become a member and support my work… Exclusive Member Area
Don’t forget to share this pattern with anyone you think may like it on your social media accounts. It’s free for everyone to use and it’s a great way to support my work without paying a single cent. I even included the handy share button right here 👇🏼
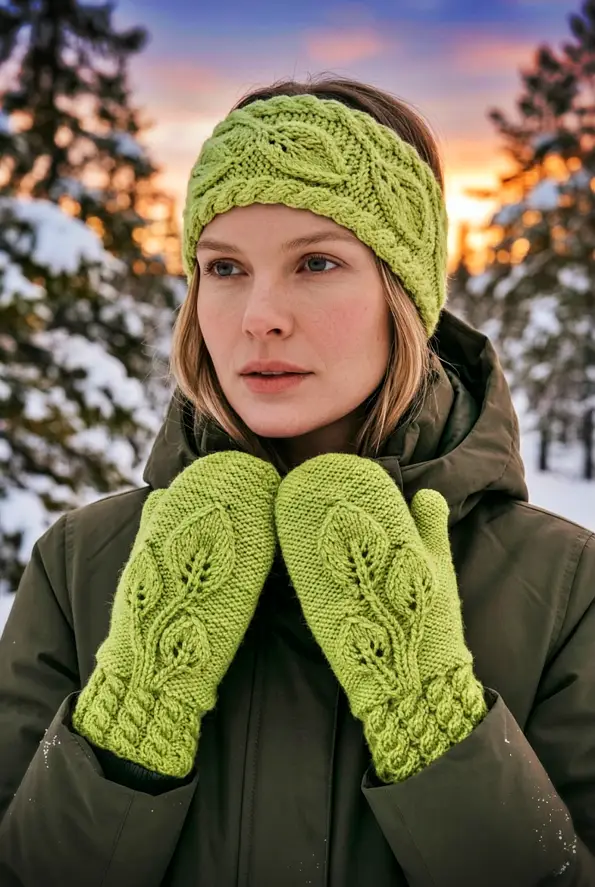
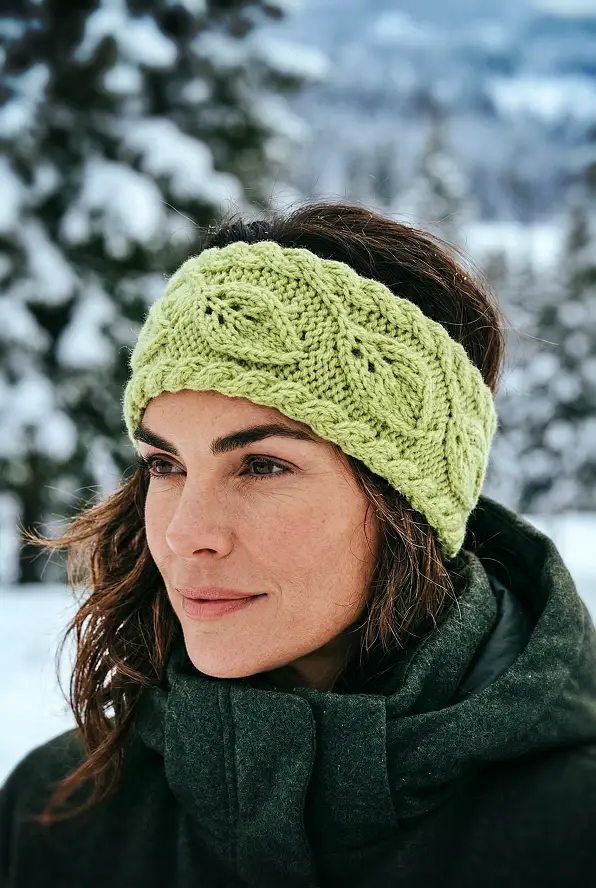
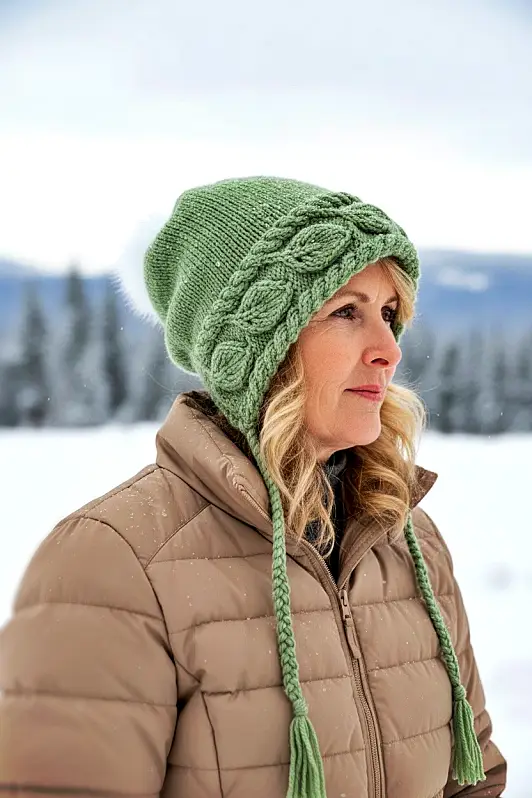
If you would like to make a matching winter set, you can! Right now I have the matching headband/ ear warmer, a bobble beanie and slouchy hat. I’m planning n making a matching scarf too. I’m not sure when I’ll get to it. I’ve got a lot going on right now 😊 You can tap or click on either pic below if you would like to read the FREE patterns on this website.

Things You Will Need
Worsted weight yarn (less than a standard ball will be more than enough). I used Red Heart worsted weight yarn when designing the pattern but any kind will do.
Set of single pointed needles (see note on sizing)
Stitch holder
Tapestry needle to sew the seams and work in ends
Cable needle
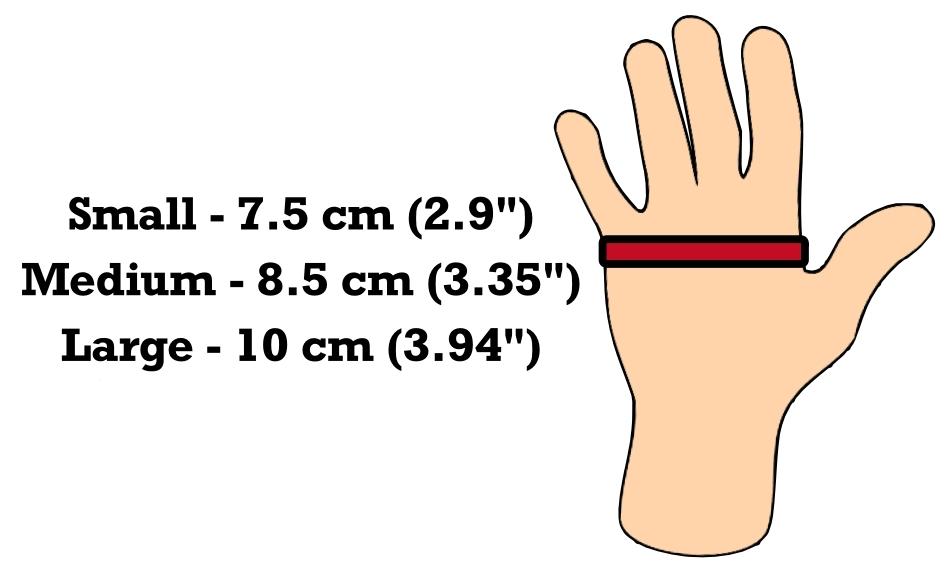
Sizing
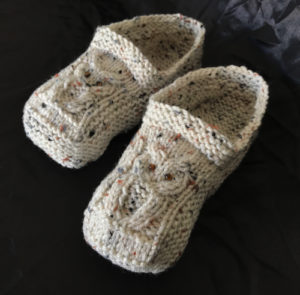
Like my other fingerless gloves I’ve designed such as my owl fingerless gloves, I use the size of the needles to change the size of the mitt. This keeps the proportion of the design consistent to the size of the mitten.
My standard for sizing was my hand and designed the knitting pattern according to what kind of rubber gloves fit me comfortably. I wear a medium sized rubber glove and the medium sized glove fits perfectly. You may need to use different sized needles to get the correct gauge.
Gauge
In stockinette stitch
Small
size 3.5 mm (US size 4) single pointed needles
11 stitches every 2 inches (5 cm)
16 rows every 2 inches (5 cm)
Medium
size 4 mm (US size 6) single pointed needles
10 stitches every 2 inches (5 cm)
14 rows every 2 inches (5 cm)
Large
size 5 mm (US size 8) single pointed needles
9 stitches every 2 inches (5 cm)
12 rows every 2 inches (5 cm)
Right Hand
Cast on 41
Row 1: * P1 K4 * Repeat from * to * to the last st. P1
Row 2: ◊ K1 P4 ◊ Repeat from ◊ to ◊ to the last st. K1
♥ Row 3: * P1 C4f * Repeat from * to * to the last st. P1
Row 4: as row 2
Row 5: as row 1
Row 6: as row 2 ♥ Repeat from ♥ to ♥ two more times.
Row 15: As row 3
Row 16: As row 2
Row 17: P5 P2tog P3 P2tog K1 PM1 K2 P5 * P2tog P3 * Repeat from * to * 3 more times. P4. (36 sts)
Please share this page!
More FREE patterns
Click the pic to read online!!


FREE Knitting Graph Paper for Colorwork Knitting


![]()
![]()


Row 18: K22 P2 K1 P1 K10
Row 19: P10 K1 P1 K2 P22
Row 20: K22 P2 K1 P1 K10
Row 21: P9 C1B P1 K2 P22
Row 22: K13 INC K1 INC K6 P2 K2 P1 K9 (38 sts)
Row 23: P9 M1 K1 M1 P2 K1 C1F P23 (40 sts)
Row 24: K23 P1 K1 P1 K2 P3 K9
Row 25: P9 K1 YO K1 YO K1 P2 K1 P1 C1F P22 (42 sts)
Row 26: K13 INC K3 INC K4 P1 K2 P1 K2 P5 K9 (44 sts)
Row 27: P9 K2 YO K1 YO K2 P2 K1 P2 K1 P24 (46 sts)
Row 28: K24 P1 M1 K2 P1 K2 P7 K9 (47 sts)
Row 29: P9 TWK2tog K3 K2tog P2 K1 P3 M1 K1 M1 P24 (47 sts)
Row 30: K13 INC K5 INC K4 P3 K3 P1 K2 P5 K9 (49 sts)
Row 31: P9 TWK2tog K1 K2tog P2 K1 P3 K1 YO K1 YO K1 P26 (49 sts)
Row 32: K26 P5 K3 P1 K2 P3 K9
Row 33: P9 Sl as if to knit K2tog PSSO P2 K1 P3 K2 YO K1 YO K2 P26 (49 sts)
Row 34: K13 INC K7 INC K4 P7 K3 P1 K12 (51 sts)
Row 35: P11 C1B P3 K3 YO K1 YO K3 P28 (53 sts)
Row 36: K28 P9 K4 P1 K11
Row 37: P11 M1 K1 M1 P4 TWK2tog K5 K2tog P28 (53 sts)
Row 38: K13 INC K9 INC K4 P7 K4 P3 K11 (55 sts)
Row 39: P11 K1 YO K1 YO K1 P4 TWK2tog K3 K2tog P30 (55 sts)
Row 40: K30 P5 K4 P5 K11
Row 41: P11 K2 YO K1 YO K2 P4 TWK2tog K1 K2tog P30 (55 sts)
Row 42: K13 INC K11 INC K4 P3 K4 P7 K11 (57 sts)
Row 43: P11 K3 YO K1 YO K3 P4 Sl as if to knit K2tog. PSSO. P4. Pass the next 15 sts onto a st holder. P13 (42 sts)
Row 44: K22 P9 K11
Row 45: P11 K4 YO K1 YO K4 P22 (44 sts)
Row 46: K22 P11 K11
Row 47: P11 TWK2tog K7 K2tog P22 (42 sts)
Row 48: K22 P9 K11
Row 49: P11 TWK2tog K5 K2tog P22 (40 sts)
Row 50: K22 P7 K11
Row 51: P11 TWK2tog K3 K2tog P22 (38 sts)
Row 52: K22 P5 K11
Row 53: P11 TWK2tog K1 K2tog P22 (36 sts)
Row 54: K22 P3 K11
Row 55: P11 Sl as if to knit K2tog PSSO P22 (34 sts)
♣ Row 56: Knit across
Row 57: Purl across ♣ Repeat from ♣ to ♣ 4 more times
Row 66: Knit across
Row 67: P2tog across
Row 68: Knit across
Row 69: P2tog across. P the last st.
Break the yarn leaving a long enough length to sew the side seam.
Thumb
Pass the 15 sts from the st holder back on to one of your knitting needles.
♫ Row 1: Purl across
Row 2: Knit across ♫ Repeat from ♫ to ♫ 5 more times.
Row 13: P2tog across. Purl the last st.
Break the yarn leaving a long enough length to sew the thumb seam.
More of My Stuff On Etsy
You can make a widget like this for your blog or website, too.
Instructions are on my website here: How to Display Etsy Items on Your Website
Left Hand
Cast on 41
Row 1: * P1 K4 * Repeat from * to * to the last st. P1
Row 2: ◊ K1 P4 ◊ Repeat from ◊ to ◊ to the last st. K1
♥ Row 3: * P1 CB4 * Repeat from * to * to the last st. P1
Row 4: as row 2
Row 5: as row 1
Row 6: as row 2 ♥ Repeat from ♥ to ♥ two more times.
Row 15: As row 3
Row 16: As row 2
Row 17: P5 P2tog * P3 P2tog * Repeat from * to * 2 more times. P4 K2 PM1 K1 P1 P2tog P3 P2tog P4 (36 sts)
Row 18: K10 P1 K1 P2 K22
Row 19: P22 K2 P1 K1 P10
Row 20: K10 P1 K1 P2 K22
Row 21: P22 K2 P1 C1F P9
Row 22: K9 P1 K2 P2 K6 INC K1 INC K13 (38 sts)
Row 23: P23 C1B K1 P2 M1 K1 M1 P9 (40 sts)
Row 24: K9 P3 K2 P1 K1 P1 K23
Row 25: P22 C1B P1 K1 P2 K1 YO K1 YO K1 P9 (42 sts)
Row 26: K9 P5 K2 P1 K2 P1 K4 INC K3 INC K13 (44 sts)
Row 27: P24 K1 P2 K1 P2 K2 YO K1 YO K2 P9 (46 sts)
Row 28: K9 P7 K2 P1 K2 M1 P1 K24 (47 sts)
Row 29: P24 M1 K1 M1 P3 K1 P2 TWK2tog K3 K2tog P9 (47 sts)
Row 30: K9 P5 K2 P1 K3 P3 K4 INC K5 INC K13 (49 sts)
Row 31: P26 K1 YO K1 YO K1 P3 K1 P2 TWK2tog K1 K2tog P9 (49 sts)
Row 32: K9 P3 K2 P1 K3 P5 K26
Row 33: P26 K2 YO K1 YO K2 P3 K1 P2 Sl as if to knit K2tog PSSO P9 (49 sts)
Row 34: K12 P1 K3 P7 K4 INC K7 INC K13 (51 sts)
Row 35: P28 K3 YO K1 YO K3 P3 C1F P11 (53 sts)
Row 36: K11 P1 K4 P9 K28
Row 37: P28 TWK2tog K5 K2tog P4 M1 K1 M1 P11 (53 sts)
Row 38: K11 P3 K4 P7 K4 INC K9 INC K13 (55 sts)
Row 39: P30 TWK2tog K3 K2tog P4 K1 YO K1 YO K1 P11 (55 sts)
Row 40: K11 P5 K4 P5 K30
Row 41: P30 TWK2tog K1 K2tog P4 K2 YO K1 YO K2 P11 (55 sts)
Row 42: K11 P7 K4 P3 K4 INC K11 INC K13 (57 sts)
Row 43: P13 Pass the next 15 sts onto a st holder. P4 Sl as if to knit K2tog. PSSO. P4 K3 YO K1 YO K3 P11 (42 sts)
Row 44: K11 P9 K22
Row 45: P22 K4 YO K1 YO K4 P11 (44 sts)
Row 46: K11 P11 K22
Row 47: P22 TWK2tog K7 K2tog P11 (42 sts)
Row 48: K11 P9 K22
Row 49: P22 TWK2tog K5 K2tog P11 (40 sts)
Row 50: K11 P7 K22
Row 51: P22 TWK2tog K3 K2tog P11 (38 sts)
Row 52: K11 P5 K22
Row 53: P22 TWK2tog K1 K2tog P11 (36 sts)
Row 54: K11 P3 K22
Row 55: P22 Sl as if to knit K2tog PSSO P11 (34 sts)
♣ Row 56: Knit across
Row 57: Purl across ♣ Repeat from ♣ to ♣ 4 more times
Row 66: Knit across
Row 67: P2tog across
Row 68: Knit across
Row 69: P2tog across. P the last st.
Break the yarn leaving a long enough length to sew the side seam.
Thumb
Pass the 15 sts from the st holder back on to one of your knitting needles.
♫ Row 1: Purl across
Row 2: Knit across ♫ Repeat from ♫ to ♫ 5 more times.
Row 13: P2tog across. Purl the last st.
Break the yarn leaving a long enough length to sew the thumb seam.
Hints and Tips
If you have too many sts at the end, more than 34, it’s not a big deal. P2tog if you can. P any remaining sts.
Make the seam as narrow as you can when sewing it along the side. Less seam means less irritation. Make sure that it still looks good. If you don’t know how, there are a number of videos online that will show you how to do a blanket stitch.
Abbreviations
K – Knit
P – Purl
P2tog – Purl 2 stitches together
K2tog – Knit 2 sts together.
sts – stitches
st – stitch
PSSO – Pass slipped stitch over
YO – Yarn over
INC – Increase one stitch. Knit in the the front and back of the st.
C1B – Cable 1 back. Pick up next stitch on a cable needle. Pull this stitch to the BACK of your work. Knit the next stitch. Purl the stitch on the cable needle. Watch the video to learn how. It’s for a different pattern I wrote but the technique is exactly the same.
C1F – Cable 1 forward. Pick up next stitch on a cable needle. Pull this stitch to the FRONT of your work. Purl the next stitch. Knit the stitch on the cable needle. Watch the video to learn how. It’s how to make the leg for a spider, but done exactly the same way.
M1 – Make one (knit wise). Increase one stitch between the stitches. Pick up the yarn between the stitches. Twist it slightly and place it on your non-working needle. Knit the stitch.
PM1 – Make one (purl wise). Increase one stitch between the stitches. Pick up the yarn between the stitches. Twist it slightly and place it on your non-working needle. Purl the stitch.
TWK2tog – (Twist and Knit 2 sts together) – Pick up a stitch as if to knit. Twist the stitch and place it back on your non-working needle. Knit the 2 stitches together from right to left.
Side note: I use both versions of the terminology when it comes to cable stitches. I’ve been corrected that I’m using the wrong one for both occasions so it’s a no win for me. What I mean is that C4F is the same technique as C2F. Just like how C2B is the same as C4B. Do you think of it as the just the stitches you’re pulling or the number of stitches you’re using in total when you do it? It’s a personal choice, I guess.
C4F – Pick up the next 2 stitches with your cable needle. Pull the stitches to the FRONT of your work. Knit the next 2 stitches on your non-working needle. Knit the 2 stitches from the cable needle. Watch this video to see how.
C4B – Pick up the next 2 stitches with your cable needle. Pull the stitches to the BACK of your work. Knit the next 2 stitches on your non-working needle. Knit the 2 stitches from the cable needle. Watch this video to see how.
Like all of my patterns you have my permission to sell and/or give away the physical items that you make using this pattern. You are NOT permitted to reprint this pattern in any form unless you have obtained my written permission to do so.


you have CF4 in the wrist and I cannot find the term in the explanation of terms. I am not clear on what it means. There is a term defined that is C4F. Is it the same thing?
wow! You really got around with this typo! Anyways, the problem has been addressed and fixed.