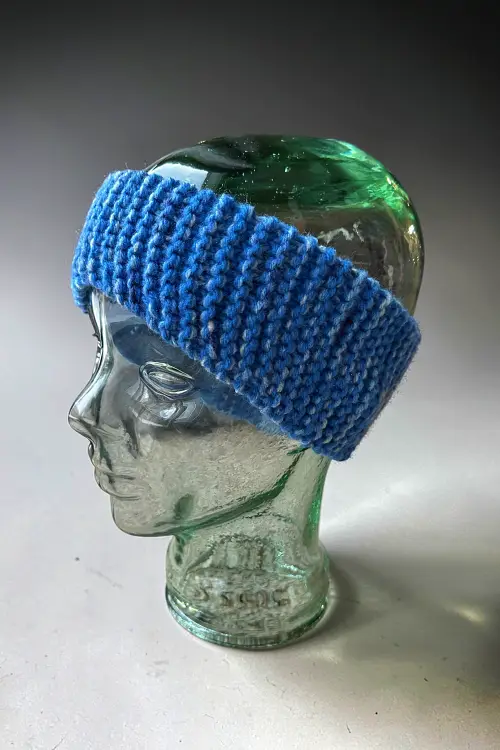
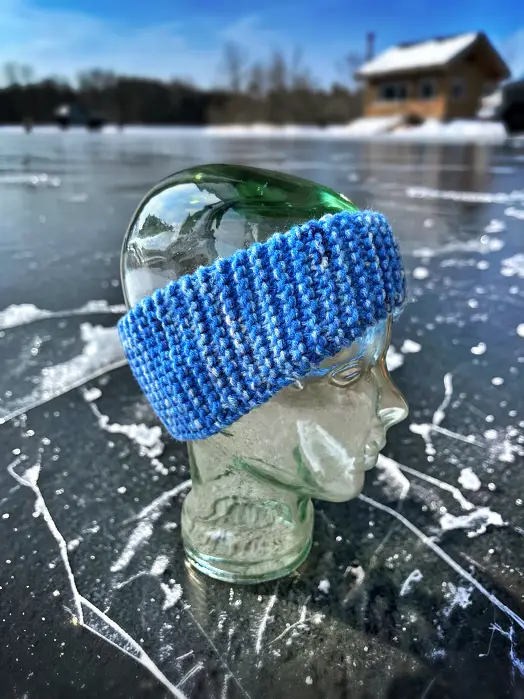
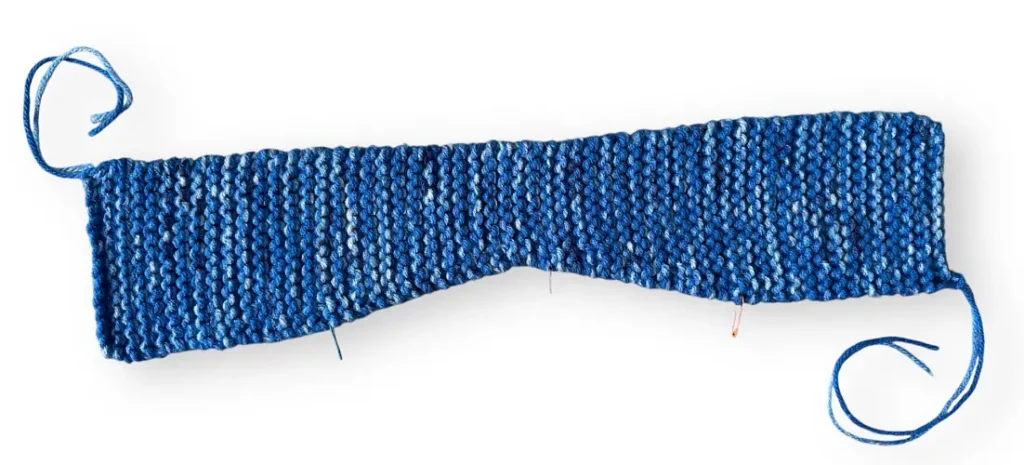
Knit a simple headband or ear warmer. Perfect for new knitters, the simple version uses very basic stitches and include how-to videos to show you how to knit 2 stitches together and make one (make an increase). It’s very plain and great for those who want a practical and thinner ear warmer to wear under something like a hoodie or a hard hat. I’m looking at you patch and construction workers 😉
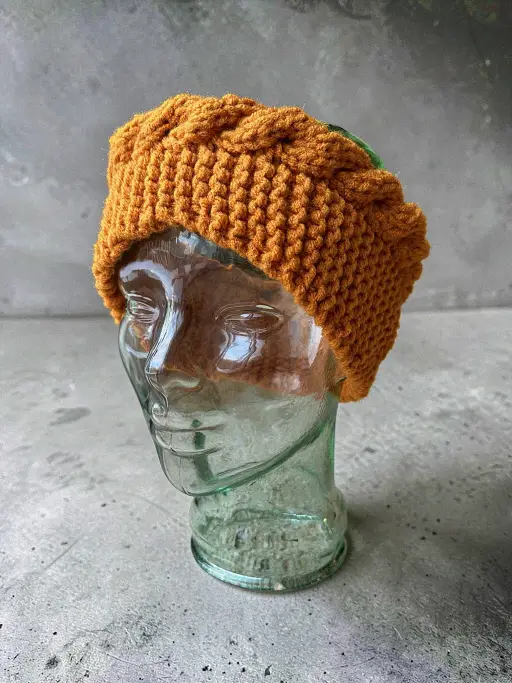
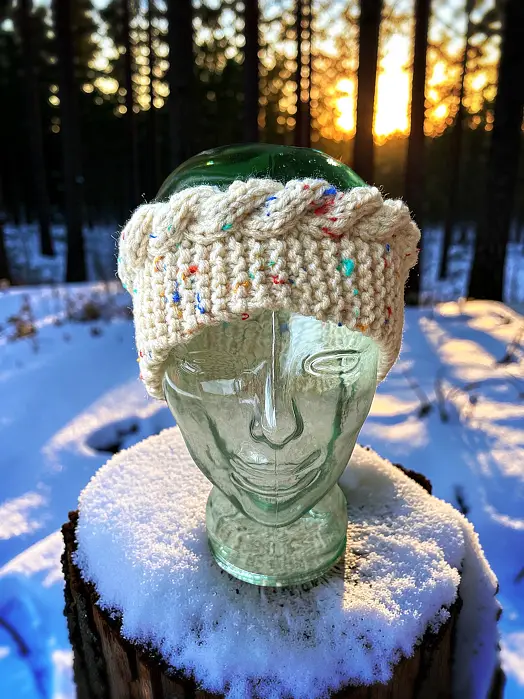


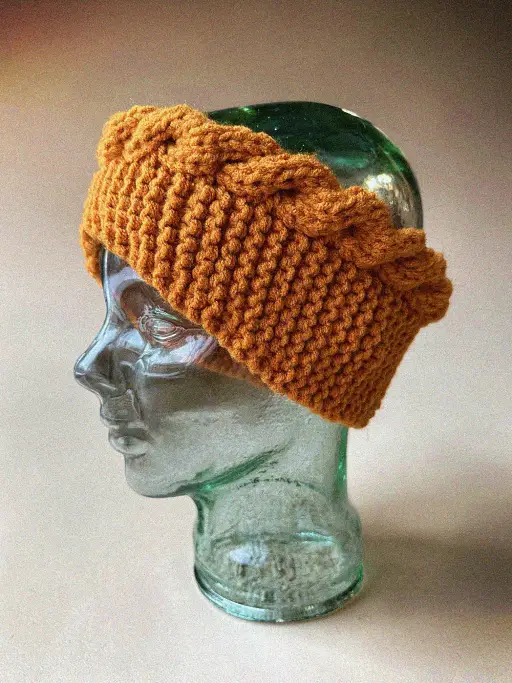
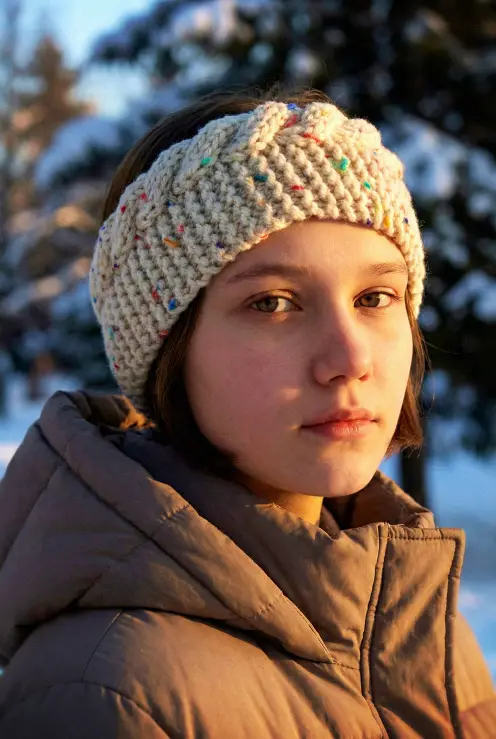
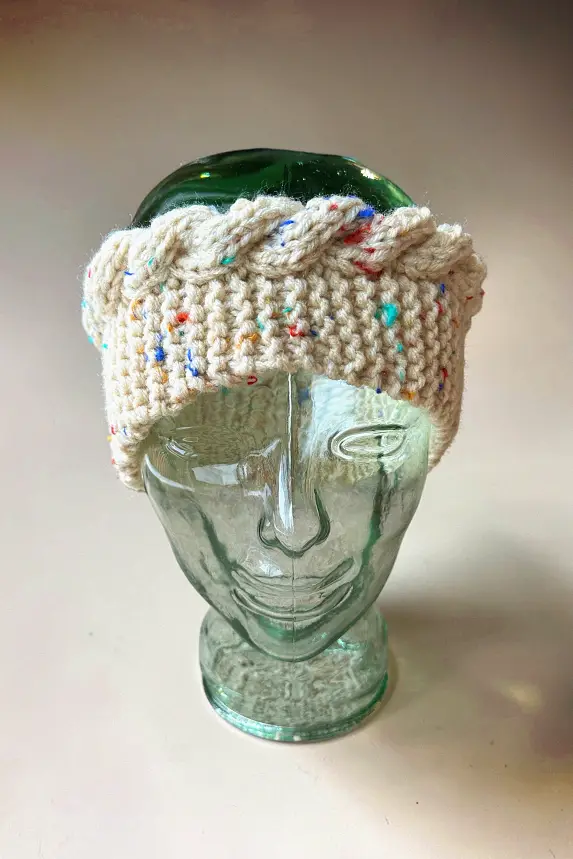
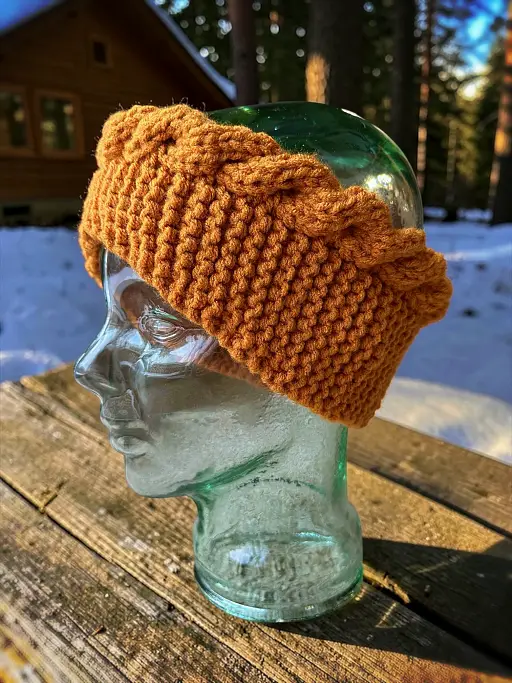
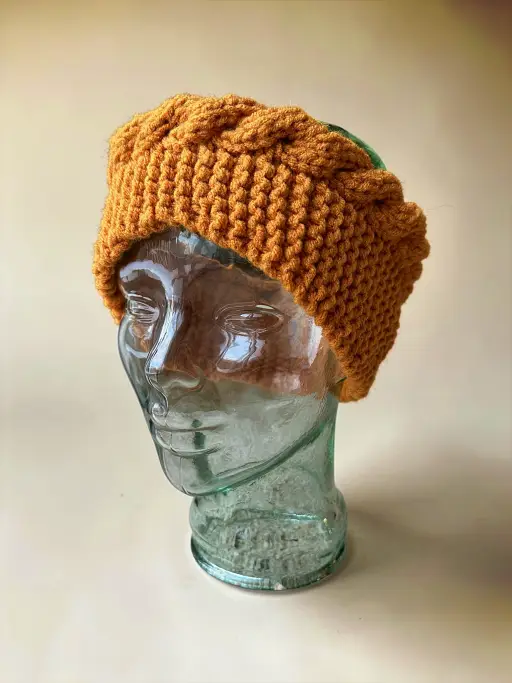
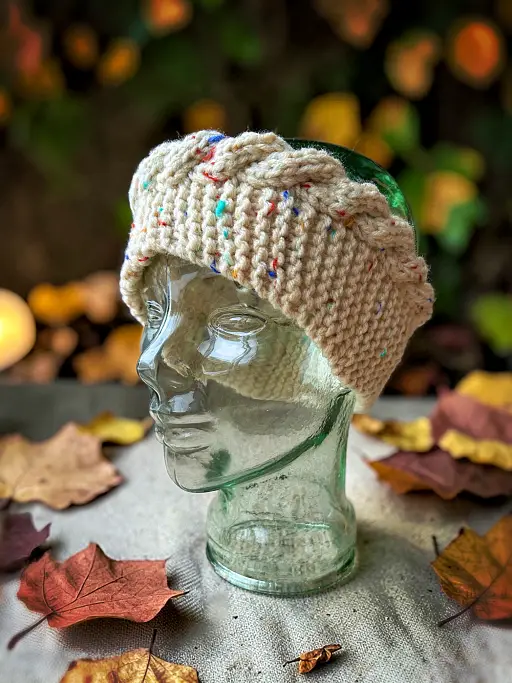
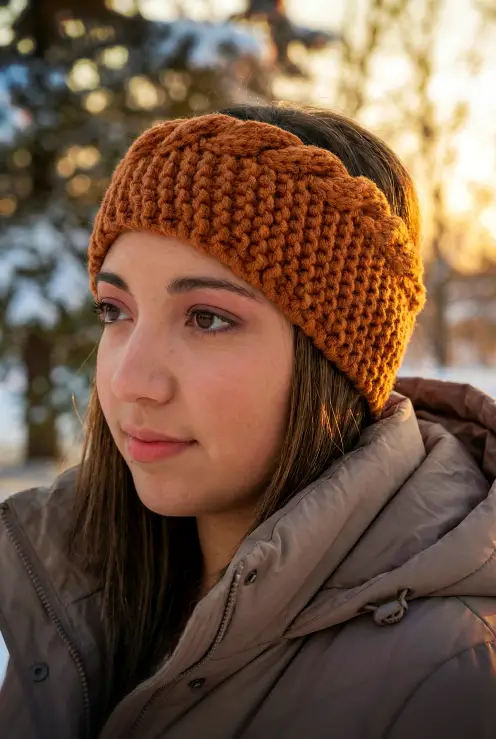

If you want something a little fancier, I have the same basic headband but with a cable top edging. It can add a bit of a crown-like feature if you are anything but basic. It still has a fairly flat profile so can be worn under other hoods if necessary.
Regardless of which style you choose to make, they are both very quick projects. Made with 2 strands of worsted weight yarn, they work up fast. Great for a last minute gift and perfect to sell at craft fairs and online and IRL markets.
The pattern is very repetitive and I’ve written out the rows as necessary. You can place stitch markers, like the ones shown in the plain headband demo photo, to help keep track of rows and the increase and decrease sections. They’re helpful, but not required.
Not a fan of reading things online or would like to print this pattern? You can download the ad free PDF version of this pattern from my Shopify shop, from Buy Me A Coffee or from my Etsy Shop. If you shop on Amazon I also have the Kindle and paperback versions.
Another way to avoid ads and pop-ups, get instant, PRINTABLE downloads of this pattern and others, is by becoming a Member. When you become a Website Supporter at $4/month, you’ll gain access to exclusive member only posts on Buy Me A Coffee. You can download as many patterns as you like for the same $4 each month. You can go to this page to learn more, become a member and support my work… Exclusive Member Area
Love the pattern and want to let other people know about it? I’ve added these super easy share buttons. Simply tap and share anywhere you are on social media.
Things You Need
You can make the mittens with either 2 strands of worsted weight yarn, or one strand of super bulky yarn. Take your pick. But please note, you don’t need both. Choose one or the other.
Worsted weight yarn – 2 (two) balls of yarn (215 yards/197 m). You’ll have leftover yarn.
or
Super Bulky yarn – (186 yards/170 m) like Bernat or Lion brand. Not all super bulky yarn is as thick as others. A Bulkyyarn may also work if it’s on the thicker side. As long as your gauge is the same your sizing will be accurate.
5 mm (8 US) knitting needles
Cable needle
Tapestry needle – to sew seams and work in ends
Stitch markers – optional
Gauge
In garter stitch
16 stitches every 4 inches (10 cm)
26 rows every 4 inches (10 cm)
Sizes are written as such:
sm/m (lg/xlg)
20 – 21 inches (22-24 inches)
Simple Style Headband
If you need help with K2tog or M1, there are videos in the Abbreviations section to show you how.
Cast on 14 sts
K across for 28 (34) rows
Next row: K1 K2tog K11
Next 5 rows: Knit across
Next row: K1 K2tog K10
Next 5 rows: Knit across
Next row: K1 K2tog K9
Next 5 rows: Knit across
Next row: K1 K2tog K8
Next 5 rows: Knit across
Next row: K1 K2tog K7
Next 5 rows: Knit across
Please share this page!
More FREE patterns
Click the pic to read online!!


![]()
![]()


FREE Knitting Graph Paper for Colorwork Knitting


Next row: K1 M1 K8
Next 5 rows: Knit across
Next row: K1 M1 K9
Next 5 rows: Knit across
Next row: K1 M1 K10
Next 5 rows: Knit across
Next row: K1 M1 K11
Next 5 rows: Knit across
Next row: K1 M1 K12
K across for 28 (34) rows
Cast off on the WRONG side. Break yarn and sew seam.
More of My Stuff On Etsy
You can make a widget like this for your blog or website, too.
Instructions are on my website here: How to Display Etsy Items on Your Website
Cable Top Headband
If you need help with any sts like the C6F, there is a video showing you how in the Abbreviations section.
Cast on 17 sts
♠ Row 1: K10 P1 K6
Row 2: P6 K11 (and all even rows)
Row 3: K10 P1 K6
Row 5: K10 P1 C6F
Row 6: P6 K11 ♠ Repeat from ♠ to ♠ 3 (4) times more.
Next row: K10 P1 K6
♦ Next row: P6 K to the end of the row.
Next row: K10 P1 K6
Next row: As row marked with ♦
Next row: K1 K2tog K7 P1 C6F
Next row: As row marked with ♦
Next row: K9 P1 K6
Next row: As row marked with ♦
Next row: K9 P1 K6
Next row: As row marked with ♦
Next row: K1 K2tog K6 P1 C6F
Next row: As row marked with ♦
Next row: K8 P1 K6
Next row: As row marked with ♦
Next row: K8 P1 K6
Next row: As row marked with ♦
Next row: K1 K2tog K5 P1 C6F
Next row: As row marked with ♦
Next row: K7 P1 K6
Next row: As row marked with ♦
Next row: K7 P1 K6
Next row: As row marked with ♦
Next row: K1 K2tog K4 P1 C6F
Next row: As row marked with ♦
Next row: K6 P1 K6
Next row: As row marked with ♦
Next row: K6 P1 K6
Next row: As row marked with ♦
Next row: K1 K2tog K3 P1 C6F
Next row: As row marked with ♦
Next row: K5 P1 K6
Next row: As row marked with ♦
Next row: K5 P1 K6
Next row: As row marked with ♦
Next row: K1 M1 K4 P1 C6F
Next row: As row marked with ♦
Next row: K6 P1 K6
Next row: As row marked with ♦
Next row: K6 P1 K6
Next row: As row marked with ♦
Next row: K1 M1 K5 P1 C6F
Next row: As row marked with ♦
Next row: K7 P1 K6
Next row: As row marked with ♦
Next row: K7 P1 K6
Next row: As row marked with ♦
Next row: K1 M1 K6 P1 C6F
Next row: As row marked with ♦
Next row: K8 P1 K6
Next row: As row marked with ♦
Next row: K8 P1 K6
Next row: As row marked with ♦
Next row: K1 M1 K7 P1 C6F
Next row: As row marked with ♦
Next row: K9 P1 K6
Next row: As row marked with ♦
Next row: K9 P1 K6
Next row: As row marked with ♦
Next row: K1 M1 K8 P1 C6F
Next row: As row marked with ♦
♪ Next row: K10 P1 K6
Next row: As row marked with ♦
Next row: K10 P1 K6
Next row: As row marked with ♦
Next row: K10 P1 C6F
Next row: As row marked with ♦ ♪ Repeat from ♪ to ♪ 3 (4) times more.
Next row: K10 P1 K6
Next row: As row marked with ♦
Next row: K10 P1 K6
Cast off on the WRONG side. Break yarn and sew seam.
Hints and Tips
Make the seam as narrow as you can when sewing it in the back. Less seam means less irritation. Make sure that it still looks good. If you don’t know how, there are a number of videos online that will show you how to do a blanket stitch.
If you want to make smaller sizes to fit children, make less rows at the start and the end. Instead of 28 for the small size, knit 20 rows, or whatever you think will work. At length a couple inches smaller than the head allows the headband to be tight enough to fit snuggly but not too tight. Make sure to knit the same number of rows so the seam is in the back.
Abbreviations
k – knit
p – purl
st – stitch
sts – stitches
k2tog – knit 2 sts together.
C6F – This is made over 6 sts. Pick up the next 3 stitches with your cable needle. Pull the stitches to the FRONT of your work. Knit the next 3 stitches on your non-working needle. Knit the 3 stitches from the cable needle.
M1 – Make one (knit wise). Increase one stitch between the stitches. Pick up the yarn between the stitches. Twist slightly. Place it on your non-working needle. Knit the stitch.