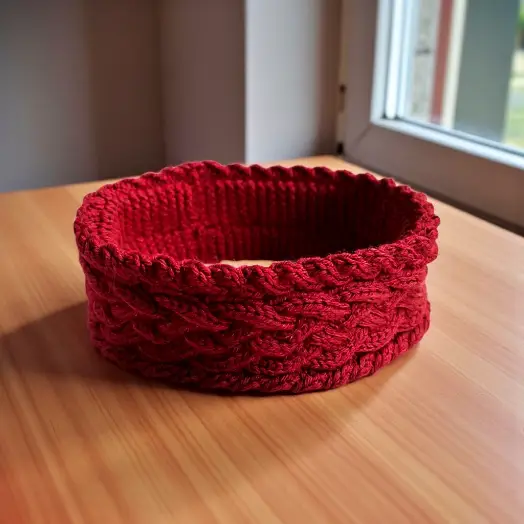
This double thick cable knit headband pattern is designed for cold weather warmth, comfort, and durability. Featuring a bold five strand cable knit running up the center, this cozy knitted ear warmer is thick enough to keep ears and forehead warm in winter while staying sturdy for everyday wear. The sizing is flexible and works well for kids ages 5 and up through adults, making it a practical and versatile knitting pattern for children and adults alike.

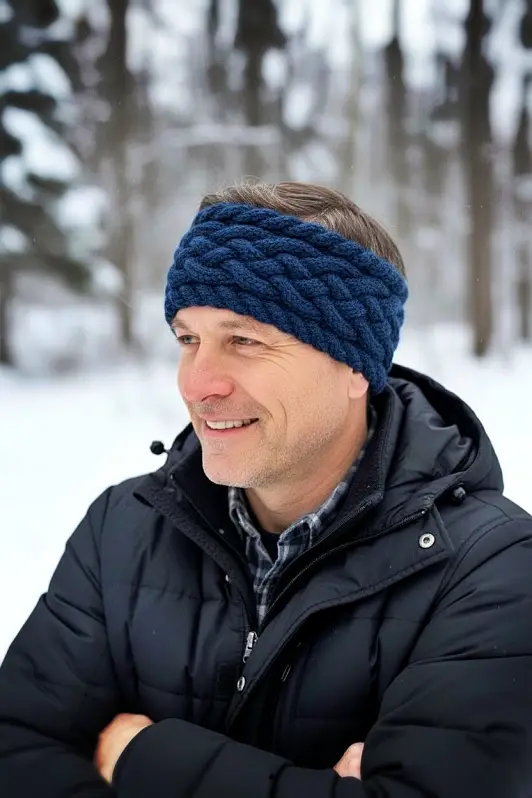


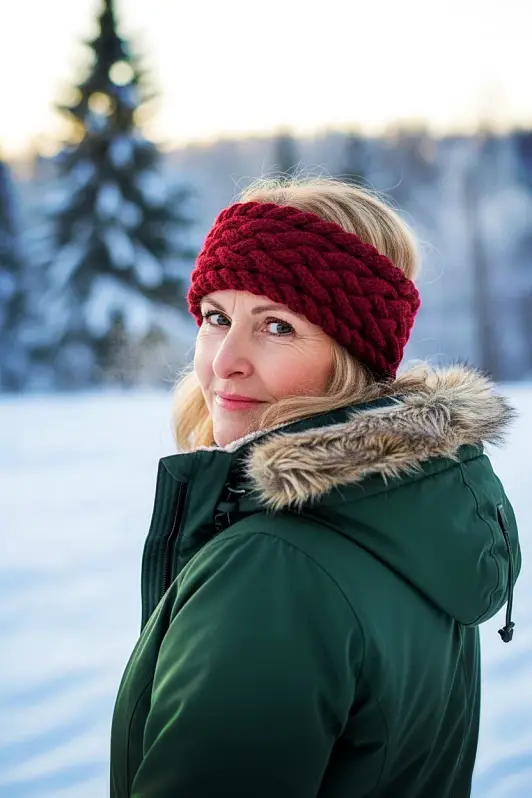

This free cable knit headband pattern includes everything you need to knit the project from start to finish, with clear written instructions, sizing guidance, and step by step video tutorials for the cable technique. It’s an ideal project for knitters looking for an easy cable knitting pattern, a warm winter accessory, or a handmade gift. Whether you call it a knit headband or ear warmer, this pattern creates a cozy, wearable piece you’ll reach for again and again.
Due to the demand for the printable version of this pattern, I’m now offering the printable PDF in all my usual places. You can buy it in my Etsy shop, my online shop, Creative Fabrica, Ravelry, and on Buy Me a Coffee. The PDF includes links to the full how-to video and the specific sections showing how to do the cables.
Another way to avoid ads and pop-ups, get instant, PRINTABLE downloads of this pattern and others, is by becoming a Member. When you become a Website Supporter at $4/month, you’ll gain access to exclusive member only posts on Buy Me A Coffee. You can download as many patterns as you like for the same $4 each month. You can go to this page to learn more, become a member and support my work… Exclusive Member Area
If you enjoy the free patterns, please help me out by sharing this pattern with anyone you think may enjoy it. I’ve include these handy buttons to make it super easy. All you have to do is click!
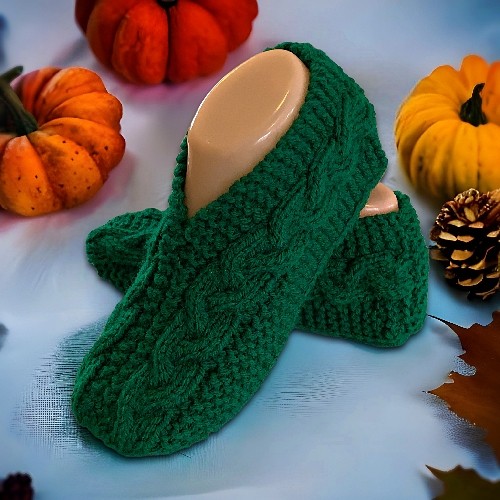
Now that you know how easy it is to make cables, you may want to check out some of my other cable knit projects like the Woodland Wanderer Hat, Cable Slippers, Cable Fingerless Gloves, or Cable Scarf. Click any of the photos to read the patterns for free on this website.


Things you need
Worsted weight yarn – one standard ball (515 yards / 471 m) will be more than enough.
1 set of size 4 mm (US size 6) single pointed needles
Cable needle
Tapestry needle (to work in ends)
Gauge
With size 4 mm (US size 6) needles or whatever size you need to obtain the correct number of stitches and rows. Be sure to check your gauge. It doesn’t need to be exact but the closer the better.
In garter st
17 sts = 4 inches or 10 cm
34 rows = 4 inches or 10 cm
The Complete How-to Video
The video below includes the full pattern worked row by row. It is a complete tutorial, and the video on its own is enough to make the project from start to finish.
Child Sizing
Data is based on World Health Organization and pediatric growth standards. You can also do an online search for sizing if you believe it to be inaccurate. Other organizations located in the USA, UK, etc give sizes as being slightly larger. A gentle reminder that this is knitting and it does stretch to accommodate close measurements. Close IS usually good enough in this case.
This design is for children (5 ish) and older. The headband is quite thick and a heads any smaller than 20 inches (51 cm) will be too wide to fit comfortably on the forehead.

Adult Sizing
Small/Medium – 21 to 22 inches (53.5 – 56 cm)
Large/Extra Large – 23 to 24 inches (57 – 61 cm)
The Pattern
If you need help in making the cables, i’ve included how-to videos in the Abbreviations section at the end of this page.
Cast on 45
Row 1: K7 P2 K4 P2 K15 P2 K4 P2 K7
Row 2 (and ALL even rows): K9 P4 K2 P15 K2 P4 K9
♥ Row 3: K7 P2 C4F P2 C6F twice K3 P2 C4B P2 K7
Row 5: as row 1
Row 7: K7 P2 C4F P2 K3 C6B twice P2 C4B P2 K7
Row 9: as row 1
Row 10: as Row 2 ♥ Repeat from ♥ to ♥ until the headband measures 2 to 2 ½ inches less than the head measurement. So if the head measurement is 24 inches, make it 22 – 21 ½ inches long. Measure the length of the MIDDLE 5-strand cable.
End on any EVEN row (wrong side).
Cast off on the RIGHT side.
Sew seam on back side of the headband and around the edges to join.
More of My Stuff On Etsy
You can make a widget like this for your blog or website, too.
Instructions are on my website here: How to Display Etsy Items on Your Website
Hints and Tips
When sewing the long seam to make this into a tube, make sure you stretch the yarn out from end to end. If the seam is pulled tight, all the stretch from the garter stitch won’t work. Stretch it out as you sew.
Please share this page!
More FREE patterns
Click the pic to read online!!


FREE Knitting Graph Paper for Colorwork Knitting


![]()
![]()


Watch the video below to learn how to sew the seam. It automatically starts at casting off and continues on to sewing the seams.
Abbreviations
Keep scrolling down the page for helpful how-to videos that show how to make the cables.
k – knit
p – purl
st – stitch
sts – stitches
Side note: I use both versions of the terminology when it comes to cable stitches. I’ve been corrected that I’m using the wrong one for both occasions so it’s a no win for me. What I mean is that C4F is the same technique as C2F. Just like how C2B is the same as C4B. Do you think of it as the just the stitches you’re pulling or the number of stitches you’re using in total when you do it? It’s a personal choice, I guess.
C4F – Pick up the next 2 stitches with your cable needle. Pull the stitches to the FRONT of your work. Knit the next 2 stitches on your non-working needle. Knit the 2 stitches from the cable needle. Watch this video to see how.
C4B – Pick up the next 2 stitches with your cable needle. Pull the stitches to the BACK of your work. Knit the next 2 stitches on your non-working needle. Knit the 2 stitches from the cable needle. Watch this video to see how.
C6F – This is made the same way as a C4B but is made over 6 sts. Pick up the next 3
stitches with your cable needle. Pull the stitches to the FRONT of your work. Knit the next 3 stitches on your non-working needle. Knit the 3 stitches from the cable needle.
C6B – This is made the same way as a C4B but is made over 6 sts. Pick up the next 3 stitches with your cable needle. Pull the stitches to the BACK of your work. Knit the next 3 stitches on your non-working needle. Knit the 3 stitches from the cable needle.


Hello – 2 things regarding this pattern (which I am looking forward to getting on my needles.
1) A standard skein of worsted wt yarn is usually about 200-250 yards. Does this project really take over 500 yards?
2) Clarification – this looks like a 10 row repeat. The heart for the close of the repeat is after Row 10 (knit as per Row 2) – correct?
In your notes on supplies, you list both straight (single pointed needles) and cable needles. I think you mean that the knitter can use either straight or cable needles of the correct size to achieve gauge. Am I reading you correctly?
Thanks so much –
You are wrong on everything you wrote (even your number of points).
1) Yes. One standard ball of worsted weight yarn. You will have more than enough to finish and lots leftover. By “standard ball” I mean what’s easy to find in big box stores, so yarn like Red Heart, Lion Brand or Bernat. This pattern is directed towards newer knitters and what someone new to knitting can easily find and use. That’s why I don’t use the term skein in any of my patterns. I’m keeping my work as accessible as possible.
2) No, it is an 8 row repeat. On the right side you alternate between cable rows and straight k and p stitch rows. All even rows are the same. This equals 8.
3) Cable needles are used to hold and pull stitches forward or back. You don’t knit any stitches with them when making cables. You only knit the stitches with straight needles. By default you wouldn’t use the single cable needle required to make the gauge swatch. You only need one for this pattern. Also, all cable needles have a bend to them. How and why would you want to use a cable needle to measure the gauge??? It wouldn’t lay flat…
TBH I get comments like these on occasion; a couple times a year. Usually they’re private and messaged right to me so this comment was unique in that regard. Always happy to correct any misinterpretations regarding my patterns 😊
Carolyn – I think when you read cable needle you are thinking circular needle. The headband is knit flat and seamed, so it can be knit on straight needles. Or it can be knit on circular needles if you prefer. Some knitters use circulars for all their knitting even when they’re not knitting in the round.