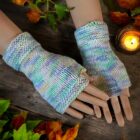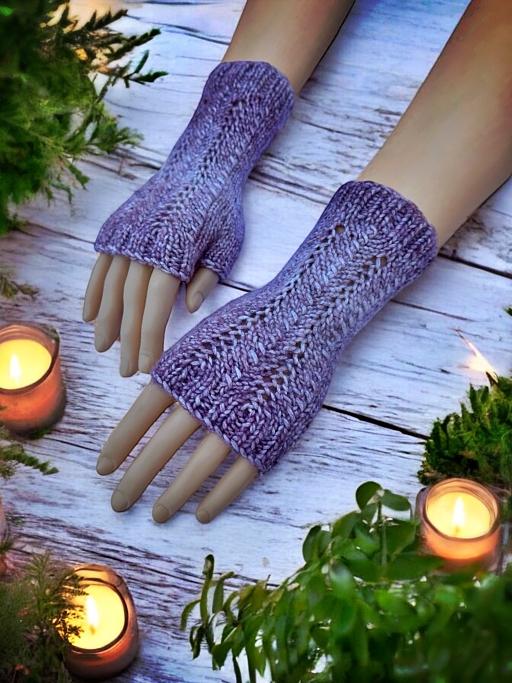

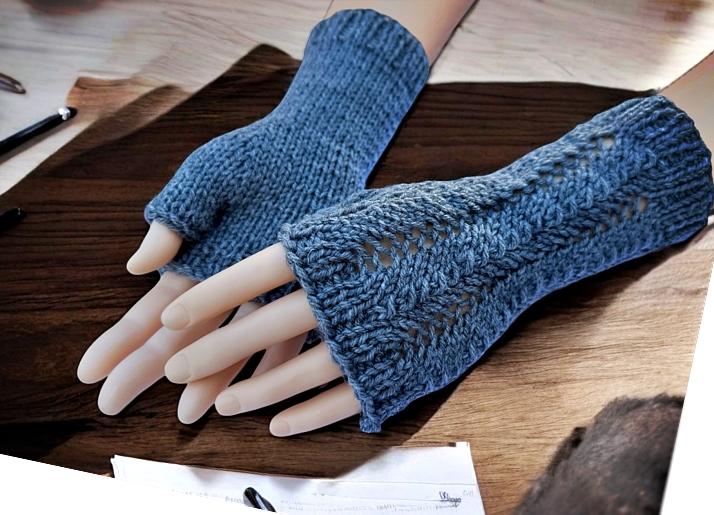
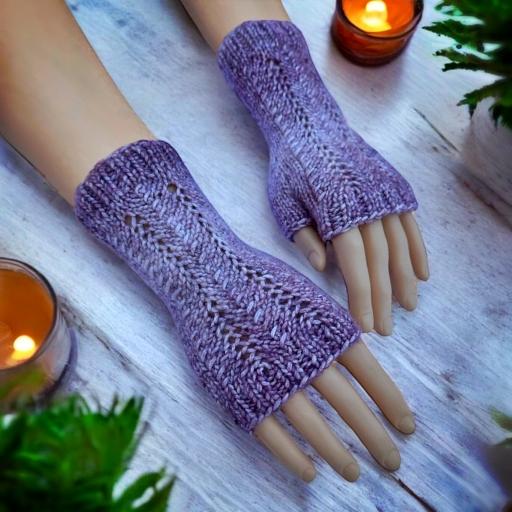
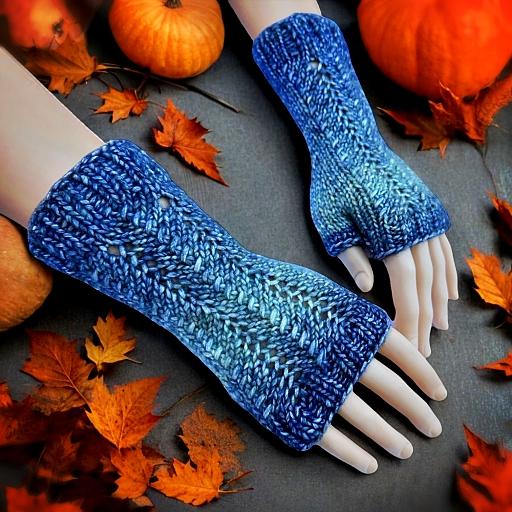
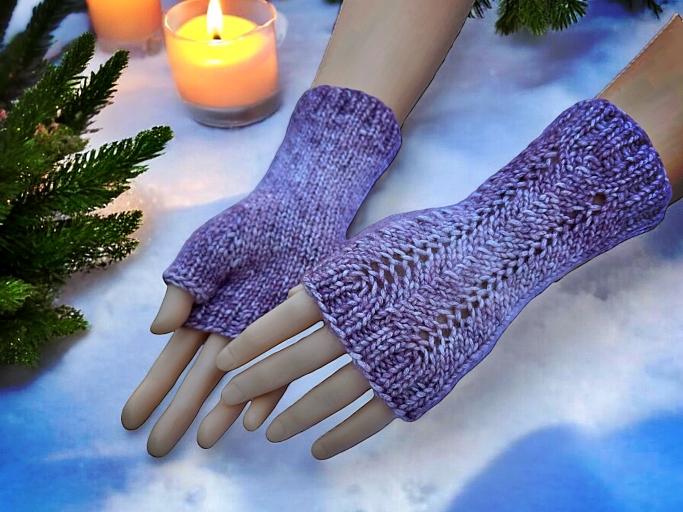
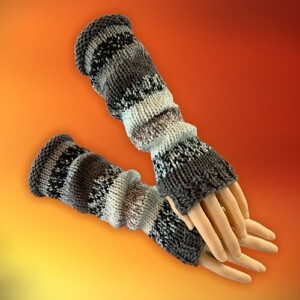
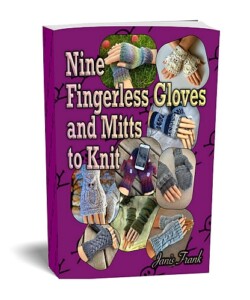
Once again, I’m back to one of my favourite, smaller projects to knit: fingerless gloves! I’ve designed a number of different ones over the years with some of my most popular being the Owl Gloves, Spider Fingerless Gloves, Hippo Gloves and the Autumn Leaves Fingerless Gloves, to name a few. Like this pattern, they too are knit flat on straight needles. Over the years I’ve found that most people prefer this to those knit in the round, though I do have those too ☺
Like the other patterns, and to keep the design on the back of the hand centered, I change the size of the needles to make them larger or smaller. There’s more about that in the Gauge section with a quick reference info graphic to help you with the sizing. These are designed for adult hands,but if you would like them even smaller for children, I recommend using thinner yarn and needles. I can’t help with what the final sizing would be unfortunately. It’ll be a guess on your part unless you know how to do the math.
If you need help with any of the techniques used in the pattern, there are links and playable videos in the Abbreviations section after the pattern. All the videos that will show you exactly how to do it.

If you enjoy this pattern and my other free online knitting patterns, please consider making a small donation or helping me out by visiting my Help Support My Work page. If that’s not possible, that’s totally fine too! Even sharing this page on your social media helps me out immensely. You can use those buttons below to do so easily.
Things You Need
Worsted weight yarn – a standard ball of yarn (215 yards/197 m)
Knitting needles – described below in sizing and gauge
Stitch Holder
Tapestry needle to sew the seam and work in the ends
Sizing and Gauge
Like my other fingerless gloves I’ve designed such as my owl fingerless gloves, I use the size of the needles to change the size of the mitt. This keeps the proportion of the spider consistent to the size of the glove.
My standard for sizing was my hand and designed the knitting pattern according to what kind of rubber gloves fit me comfortably. I wear a medium sized rubber glove and the medium sized glove fits perfectly. You may need to use different sized needles to get the correct gauge, but this pattern is very forgiving if you’re a bit off. Most knitting is tbh.
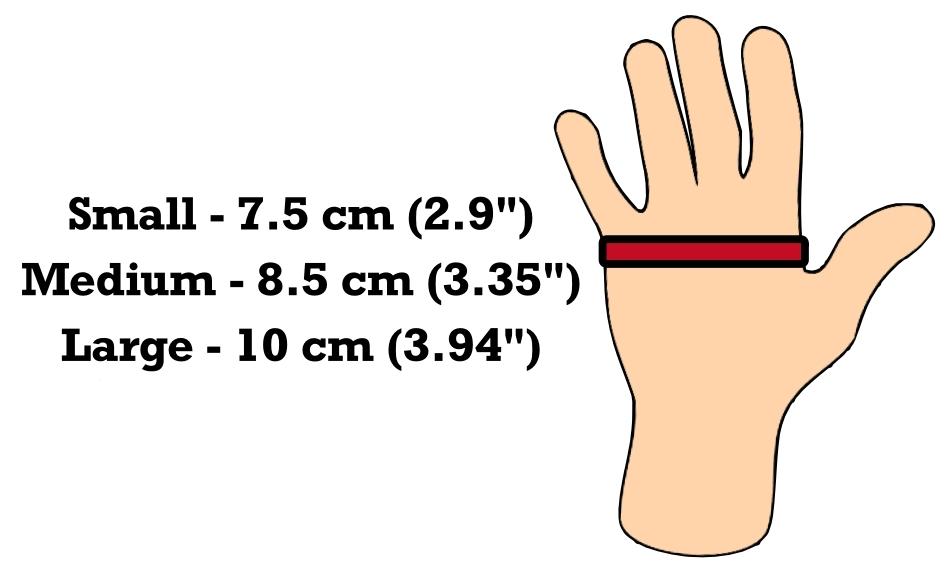
Small
size 3.5 mm (US size 4)
11 stitches every 2 inches (5 cm)
16 rows every 2 inches (5 cm)
Medium
size 4 mm (US size 6)
10 stitches every 2 inches (5 cm)
14 rows every 2 inches (5 cm)
Large
size 5 mm (US size 8)
9 stitches every 2 inches (5 cm)
12 rows every 2 inches (5 cm)
All use stockinette for gauge.
Right Hand
Cast on 35
♠ Row 1: * K2 P1 * repeat from * to * to the last 2 sts. K2
Row 2: * P2 K1 * repeat from * to * to the last 2 sts. P2 ♠ Repeat from ♠ to ♠ for a total of 8 rows.
Row 9: K across
Row 10: P across
♦Row 11: K2 [K2tog K2 YO K2 Sl st knit-wise K2tog PSSO K2 YO K2 Sl st knit-wise. K1 PSSO] K18 (33 sts) The pattern between the [ and ] make up the pattern up the back of the hand on the RIGHT side.
Row 12: P22 YO P6 YO P5 ♦ (35 sts) Repeat from ♦ to ♦ 7 more times (You can repeat these 2 rows as more than 7 times if you want longer gloves.)
Row 27: K2 K2tog K2 YO K2 Sl st knit-wise K2tog PSSO K2 YO K2 Sl st knit-wise. K1 PSSO K3 M1 K1 M1 K14 (35 sts)
Row 28: P24 YO P6 YO P5 (37 sts)
Row 29: K2 K2tog K2 YO K2 Sl st knit-wise K2tog PSSO K2 YO K2 Sl st knit-wise. K1 PSSO K20 (35 sts)
Row 30: P14 PM1 P3 PM1 P7 YO P6 YO P5 (39 sts)
Row 31: K2 K2tog K2 YO K2 Sl st knit-wise K2tog PSSO K2 YO K2 Sl st knit-wise K1 PSSO K22 (37 sts)
Please share this page!
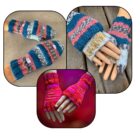
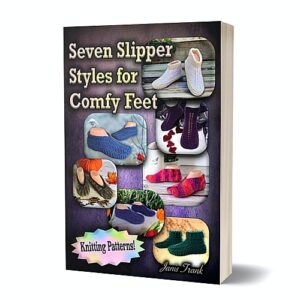
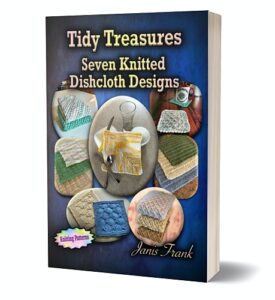
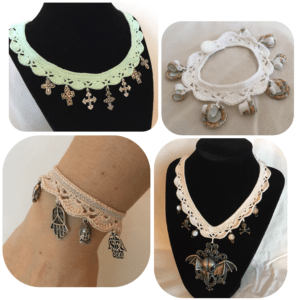
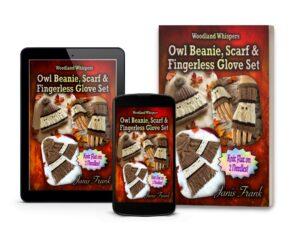
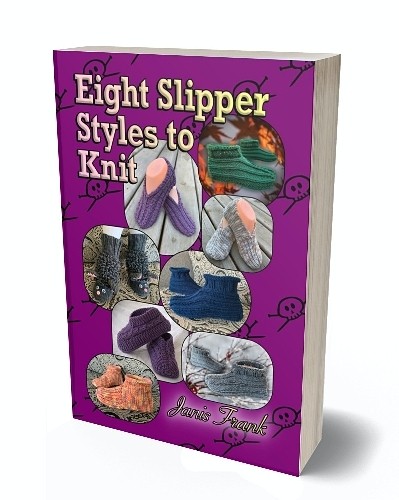
More FREE patterns
Click the pic to read online!!


![]()
![]()


FREE Knitting Graph Paper for Colorwork Knitting


Row 32: P26 YO P6 YO P5 (39 sts)
Row 33: K2 K2tog K2 YO K2 Sl st knit-wise K2tog PSSO K2 YO K2 Sl st knit-wise K1 PSSO K3 M1 K5 M1 K14 (39 sts)
Row 34: P28 YO P6 YO P5 (41 sts)
Row 35: K2 K2tog K2 YO K2 Sl st knit-wise K2tog PSSO K2 YO K2 Sl st knit-wise K1 PSSO K24 (39 sts)
Row 36: P14 PM1 P7 PM1 P7 YO P6 YO P5 (43 sts)
Row 37: K2 K2tog K2 YO K2 Sl st knit-wise K2tog PSSO K2 YO K2 Sl st knit-wise K1 PSSO K26 (41 sts)
Row 38: P30 YO P6 YO P5 (43 sts)
Row 39: K2 K2tog K2 YO K2 Sl st knit-wise K2tog PSSO K2 YO K2 Sl st knit-wise K1 PSSO K3 M1 K9 M1 K14 (43 sts)
Row 40: P32 YO P6 YO P5 (45 sts)
Row 41: K2 K2tog K2 YO K2 Sl st knit-wise K2tog PSSO K2 YO K2 Sl st knit-wise K1 PSSO K28 (43 sts)
Row 42: P14 PM1 P11 PM1 P7 YO P6 YO P5 (47 sts)
Row 43: K2 K2tog K2 YO K2 Sl st knit-wise K2tog PSSO K2 YO K2 Sl st knit-wise K1 PSSO K30 (45 sts)
Row 44: P34 YO P6 YO P5 (47 sts)
Row 45: K2 K2tog K2 YO K2 Sl st knit-wise K2tog PSSO K2 YO K2 Sl st knit-wise K1 PSSO K3. Transfer the next 13 sts onto a stitch holder. K14 (32 sts)
Row 46: P21 YO P6 YO P5 (34 sts)
Row 47: K2 K2tog K2 YO K2 Sl st knit-wise K2tog PSSO K2 YO K2 Sl st knit-wise K1 PSSO K17 (32 sts)
Row 48: P21 YO P6 YO P5 (34 sts)
Row 49: K across
Row 50: * K1 P2 * Repeat from * to * to the last st. K1
Row 51: P1 * K2 P1 * Repeat from * to * to the end of the row.
Row 52: as row 50
Row 53: as row 51
Cast off
Making the Thumb
Transfer the the sts on the st holder back to the knitting needle. With the RIGHT side facing:
Row 1: K across
Row 2: Purl across
Row 3: K across
Cast off
More of My Stuff On Etsy
You can make a widget like this for your blog or website, too.
Instructions are on my website here: How to Display Etsy Items on Your Website
Left Hand
Cast on 35
♠ Row 1: * K2 P1 * repeat from * to * to the last 2 sts. K2
Row 2: * P2 K1 * repeat from * to * to the last 2 sts. P2 ♠ Repeat from ♠ to ♠ for a total of 8 rows.
Row 9: K across
Row 10: P across
♦Row 11: K18 [K2tog K2 YO K2 Sl st knit-wise K2tog PSSO K2 YO K2 Sl st knit-wise K1 PSSO] K2 (33 sts) The pattern between the [ and ] make up the pattern up the back of the hand on the RIGHT side.
Row 12: P6YO P6 YO P21 ♦ (35 sts) Repeat from ♦ to ♦ 7 more times (You can repeat these 2 rows as more than 7 times if you want longer gloves.)
Row 27: K14 M1 K1 M1 K3 K2tog K2 YO K2 Sl st knit-wise K2tog PSSO K2 YO K2 Sl st knit-wise K1 PSSO K2 (35 sts)
Row 28: P6 YO P6 YO P23 (37 sts)
Row 29: K20 K2tog K2 YO K2 Sl st knit-wise K2tog PSSO K2 YO K2 Sl st knit-wise K1 PSSO K2 (35 sts)
Row 30: P6 YO P6 YO P6 PM1 P3 PM1 P14 (39 sts)
Row 31: K22 K2tog K2 YO K2 Sl st knit-wise K2tog PSSO K2 YO K2 Sl st knit-wise K1 PSSO K2 (37 sts)
Row 32: P6 YO P6 YO P25 (39 sts)
Row 33: K14 M1 K5 M1 K3 K2tog K2 YO K2 Sl st knit-wise K2tog PSSO K2 YO K2 Sl st knit-wise K1 PSSO] K2 (39 sts)
Row 34: P6 YO P6 YO P27 (41 sts)
Row 35: K24 K2tog K2 YO K2 Sl st knit-wise K2tog PSSO K2 YO K2 Sl st knit-wise K1 PSSO K2 (39 sts)
Row 36: P6 YO P6 YO P6 PM1 P7 PM1 P14 (43 sts)
Row 37: K26 K2tog K2 YO K2 Sl st knit-wise K2tog PSSO K2 YO K2 Sl st knit-wise K1 PSSO K2 (41 sts)
Row 38: P6 YO P6 YO P29 (43 sts)
Row 39: K14 M1 K9 M1 K3 K2tog K2 YO K2 Sl st knit-wise K2tog PSSO K2 YO K2 Sl st knit-wise K1 PSSO K2 (43 sts)
Row 40: P6 YO P6 YO P31 (45 sts)
Row 41: K28 K2tog K2 YO K2 Sl st knit-wise K2tog PSSO K2 YO K2 Sl st knit-wise K1 PSSO K2 (43 sts)
Row 42: P6 YO P6 YO P6 PM1 P11 PM1 P14 (47 sts)
Row 43: K30 K2tog K2 YO K2 Sl st knit-wise K2tog PSSO K2 YO K2 Sl st knit-wise K1 PSSO K2 (45 sts)
Row 44: P6 YO P6 YO P33 (47 sts)
Row 45: K14 Transfer the next 13 sts onto a stitch holder. K3 K2tog K2 YO K2 Sl st knit-wise K2tog PSSO K2 YO K2 Sl st knit-wise K1 PSSO K2 (32 sts)
Row 46: P6 YO P6 YO P20 (34 sts)
Row 47: K17 K2tog K2 YO K2 Sl st knit-wise K2tog PSSO K2 YO K2 Sl st knit-wise K1 PSSO K2 (32 sts)
Row 48: P6 YO P6 YO P20 (34 sts)
Row 49: K across
Row 50: * K1 P2 * Repeat from * to * to the last st. K1
Row 51: P1 * K2 P1 * Repeat from * to * to the end of the row.
Row 52: as row 50
Row 53: as row 51
Cast off
Making the Thumb
Transfer the the sts on the st holder back to the knitting needle. With the RIGHT side facing:
Row 1: K across
Row 2: Purl across
Row 3: K across
Cast off
Abbreviations
K – Knit
P – Purl
st – stitch
sts – stitches
YO – Yarn over. Pull the yarn FORWARD under your working needle when knitting and knit the next stitch OR pull the yarn BACK under your working needle for a purl and purl the next stitch. Increases one stitch in your work and makes a hole.
How to YO the KNITTING
How to YO when PURLING
K2tog – Knit 2 stitches together
Sl st – slip the stitch onto your working needle. Do NOT knit the stitch.
PSSO – on your working needle, pass the slipped stitch over the stitch just worked. It may be a knit or a K2tog. This and Sl st are a combo that are often done together.
M1 – Make one (knit wise). Increase one stitch between the stitches. Pick up the yarn between the stitches. Twist it slightly and place it on your non-working needle. Knit the stitch. Watch this video on How to M1 or Make 1 to see how.
PM1 – Make one (purl wise). Increase one stitch between the stitches. Pick up the yarn between the stitches. Twist it slightly and place it on your non-working needle. Purl the stitch. Watch this video on How to PM1 or Purl Make 1 to see how.
Hints and Tips
If you prefer to knit the last two stitches together on the left side of the design instead of Sl st and PSSO, make sure that you twist the stitch and put it back on your non-working needle. I did this for the autumn leaf gloves I mentioned earlier. You can watch how I do it here – Motif Edges – Autumn Leaf Half Gloves
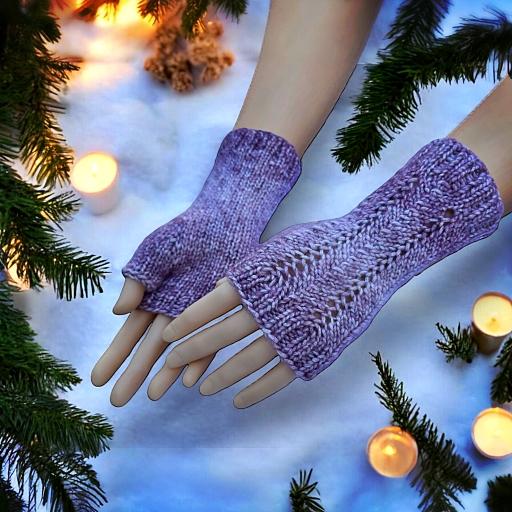
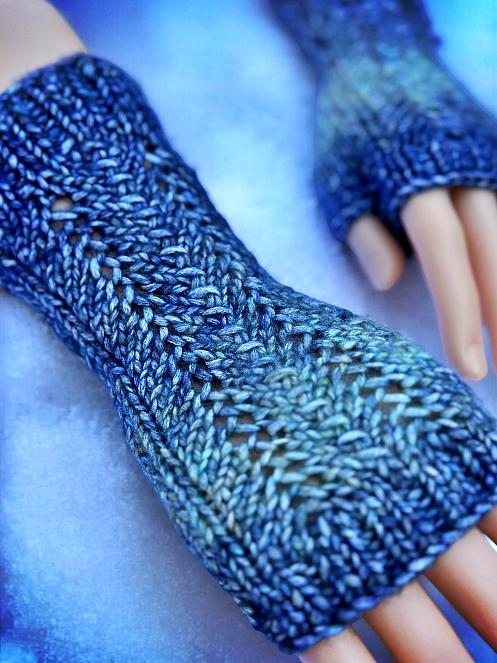
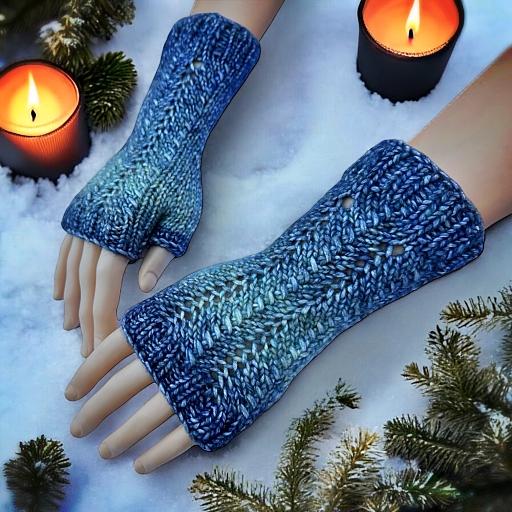
I like using ombre or colour transitioning yarns for these. Solid colours also work well. Lighter colours tend to be better as it can be hard to discern the pattern with dark colours like black, brown, purple and such. Variegated colours would probably make the pattern indistinguishable.
You can make the cuff at the fingers and wrist different colours for a little extra flair.
Make the fingerless mittens as long as you like. I made an additional 7 repeats of the design, but you could do more or less. If you do more you should probably cast on more stitches as the arm get thicker towards the elbow, then decrease down to the number of stitches as written in the instructions.
Like all of my patterns you have my permission to sell and/or give away the physical items that you make using this pattern. You are NOT permitted to reprint this pattern in any form unless you have obtained my written permission to do so.
If you have any questions, please feel free to leave a comment or send me your questions at [email protected].