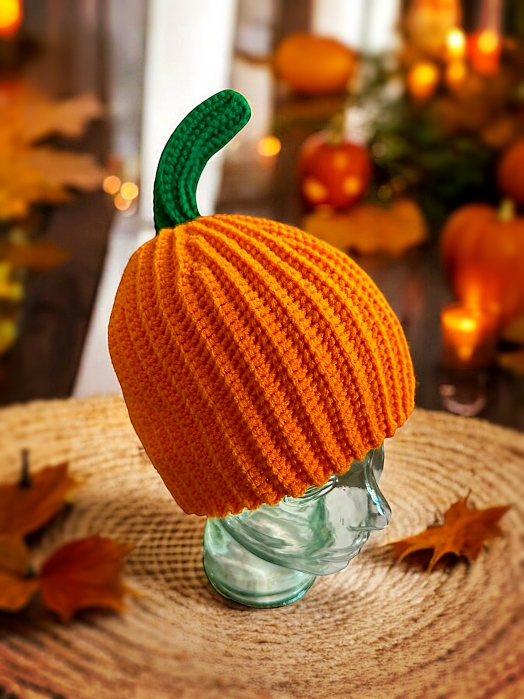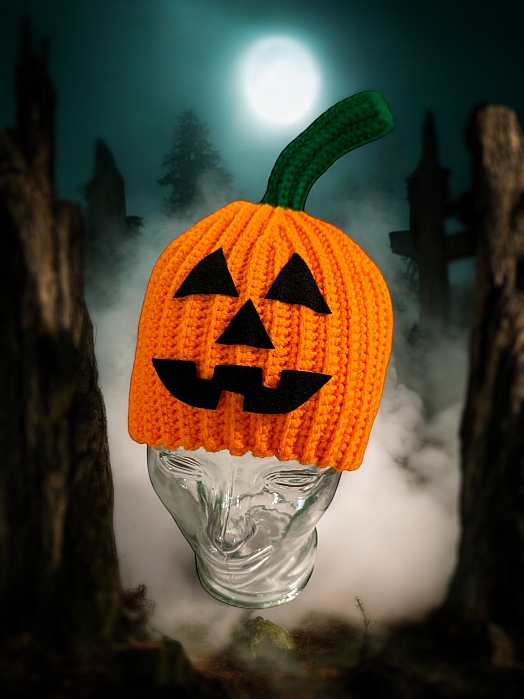
As the crisp autumn air rolls in and the scent of pumpkin spice fills the air, there’s no better time to crochet a fun and festive beanie to keep you warm. This pumpkin beanie (or toque) is the perfect project to get into the fall spirit. Whether you’re heading out for a pumpkin patch adventure or just cozying up with your favourite latte, this hat is sure to become your go-to accessory for chilly weather.
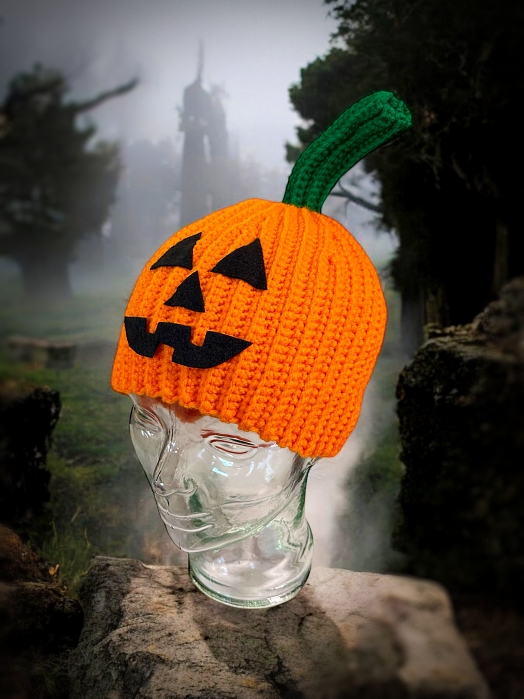
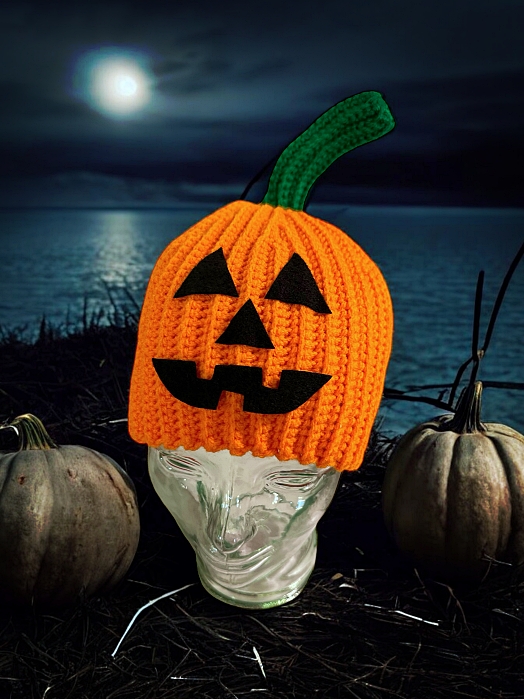
The design features a whimsical green stem at the top, capturing the playful essence of the season. You can also take it a step further by adding optional felt embellishments like a cute nose, eyes, and mouth to give your beanie a jack-o’-lantern twist. With the freedom to personalize it, you can wear a pumpkin on your head that matches your style and personality!
Don’t worry if you’re newer to the art of crochet—this pattern is easy to follow and comes with plenty of helpful photos along the way. Whether you’re making it for yourself, a friend, or as a gift for a pumpkin-loving family member, this project is as enjoyable to make as it is to wear. Grab your hook, settle in with a cozy blanket, and let’s make something magical for the autumn season!
Another way to avoid ads and pop-ups, get instant, PRINTABLE downloads of this pattern and others, is by becoming a Member on this website. When you become a Website Supporter for $3/month, you’ll gain access to exclusive member only posts. These posts contain one click downloads of the patterns. Simply click the Download & Print button. The PDF will automatically download to your computer or smart device. You can then read it on your device or print it at your leisure. You can download as many patterns as you like for the same $3 each month. You can go to this page to learn more, become a member and support my work… Exclusive Member Area
If you enjoy this pattern and my other free online knitting patterns, please consider making a small donation or helping me out by visiting my Help Support My Work page. If that’s not possible, that’s totally fine too! Even sharing this page on your social media helps me out immensely. You can use those buttons below to do so easily.
Happy Knitting!
Things You Need
Worsted weight yarn. Green for the stem and orange for the pumpkin. An equivalent amount of the 2 colours to one standard ball (278 yards or 255 m) will do
Size 5 mm (H or size 8) crochet hook
Tapestry needle so work in ends
Black felt for face (optional)
Gauge
In single crochet
17 sts = 4 inches or 10 cm
16 rows = 4 inches or 10 cm
The Pattern
To achieve the ribbing effect, all stitches are made in the BACK loop only!
With GREEN Ch 20. Switch to ORANGE and Ch 36. (56 ch total). Turn. In second ch from hook, start row 1:
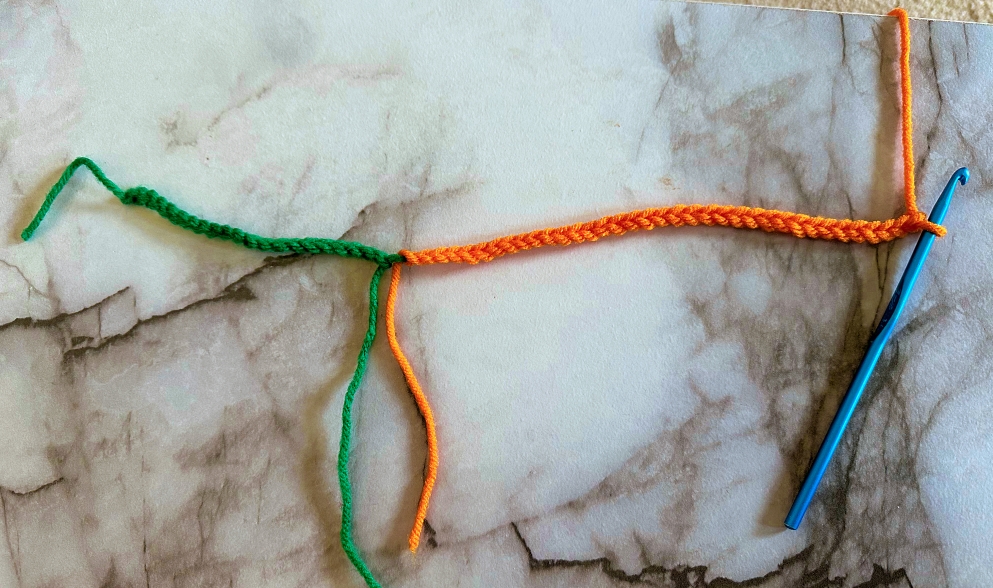
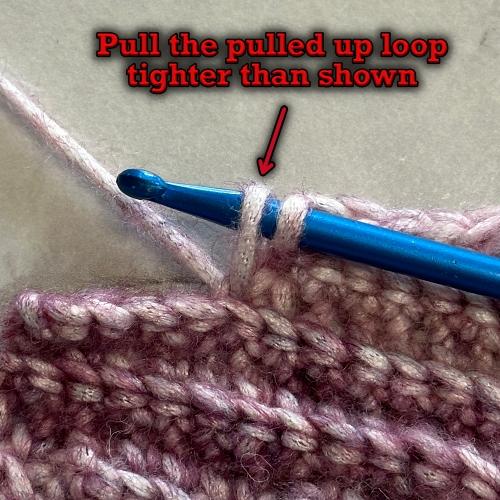
Row 1: With ORANGE 35 SC. In the 35th st pull up a loop as you regularly would. Pull the ORANGE yarn forward and switch to GREEN. Complete the SC as normal. 20 SC in remaining chains. Ch 1. Turn.
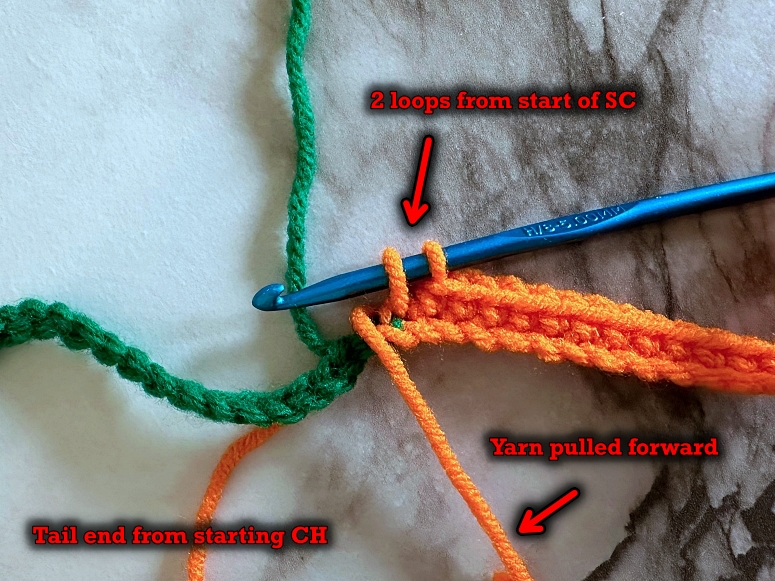
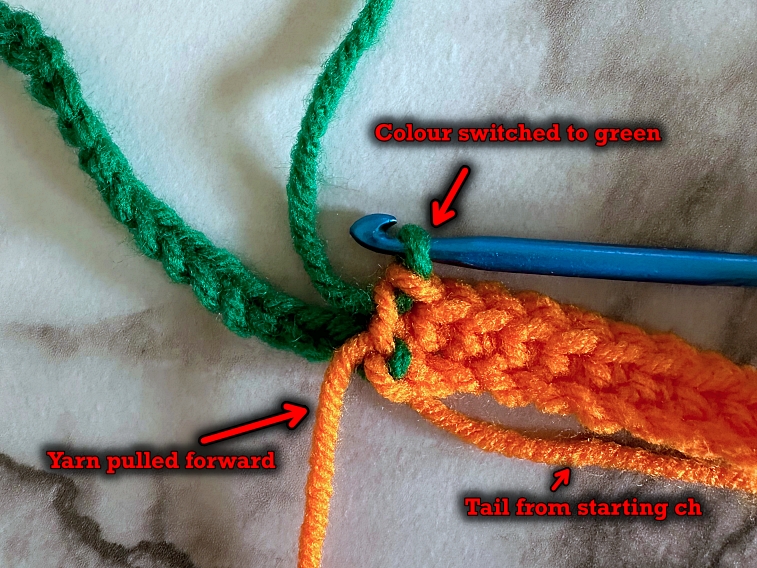
Row 2: With GREEN 20 SC. In the 20th st pull up a loop as you regularly would. Pull the GREEN yarn forward and switch to ORANGE. Complete the SC as normal. 35 SC in remaining sts. Ch 1. Turn.
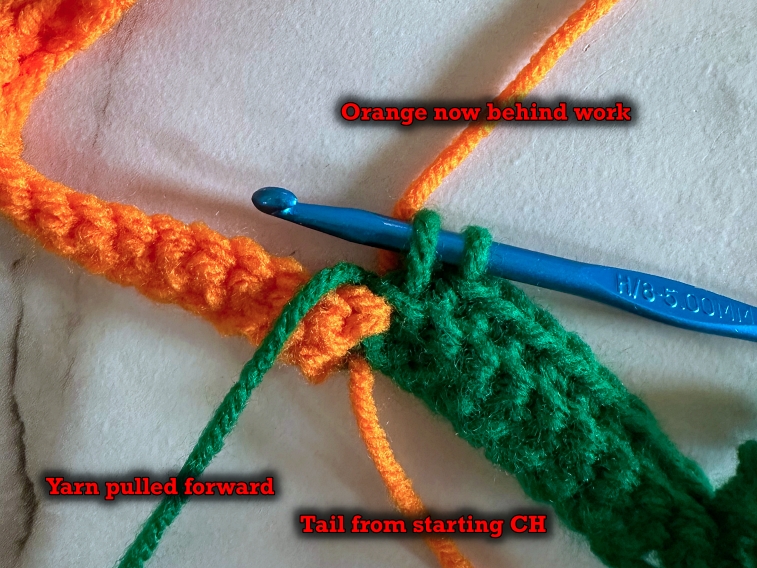
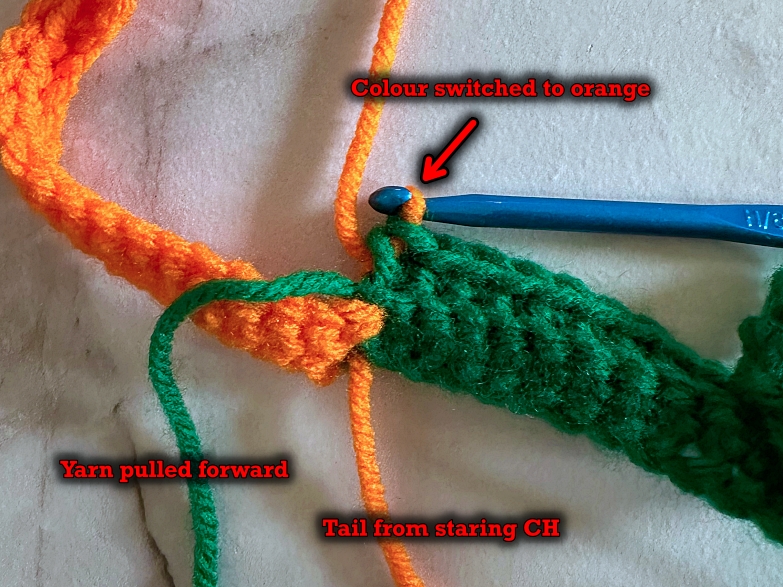
* Row 3: With ORANGE 32 SC, HDC over the next 2 sts. Ch 1, Turn (leave remaining sts unworked).
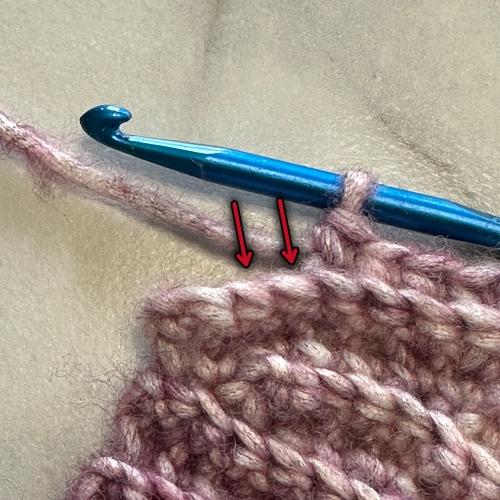
(Ignore the green sts. We don’t work them now.)
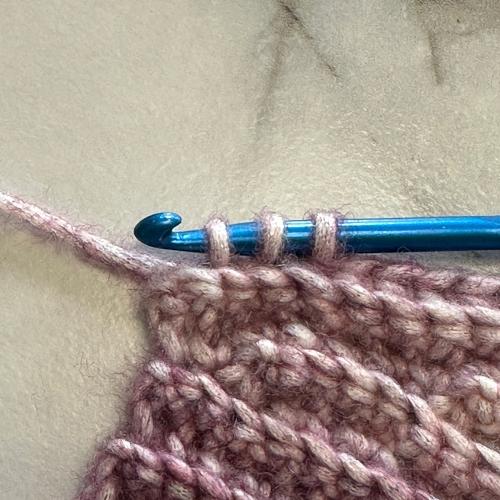
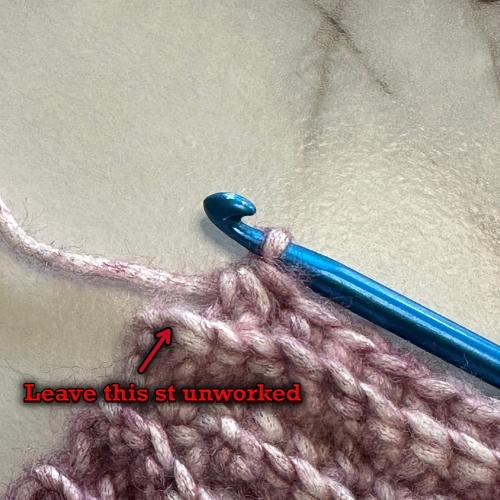
Row 4: 33 SC, Ch 1. Turn.
Row 5: 27 SC, HDC over the next 2 sts. Ch 1, Turn (leave remaining sts unworked).
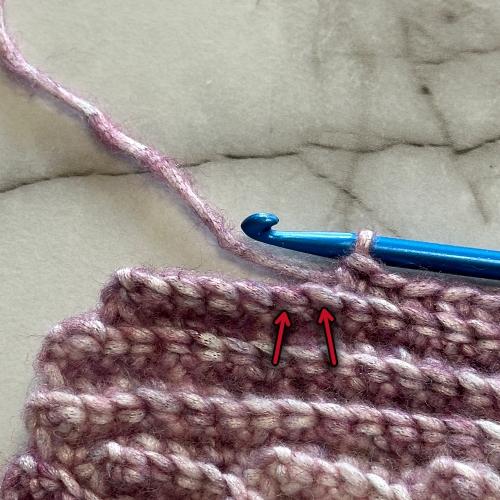
YO and draw through all 3 loops.
Leave remaining 4 sts unworked.
Row 6: 28 SC, Ch 1. Turn.
Row 7: 22 SC, HDC over the next 2 sts. Ch 1, Turn (leave remaining sts unworked).
Row 8: 23 SC, Ch 1.Turn.
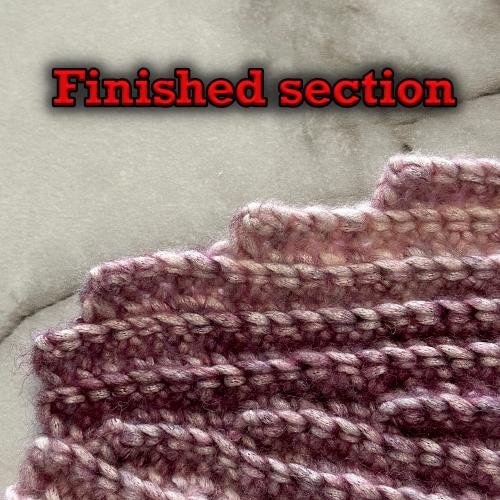
Row 9: With ORANGE 35 SC (see photos below for extra help where to crochet the sts). In the 35th st pull up a loop as you regularly would. Pull the ORANGE yarn forward and switch to GREEN. Complete the SC as normal. 20 SC in remaining chains. Ch 1. Turn.
The followiong is extra help with this row:
To complete this row, you need to pick up the stitches that were decreased. Yours will be ORANGE.
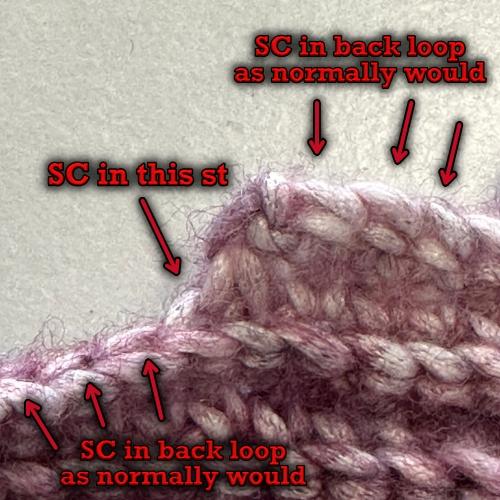
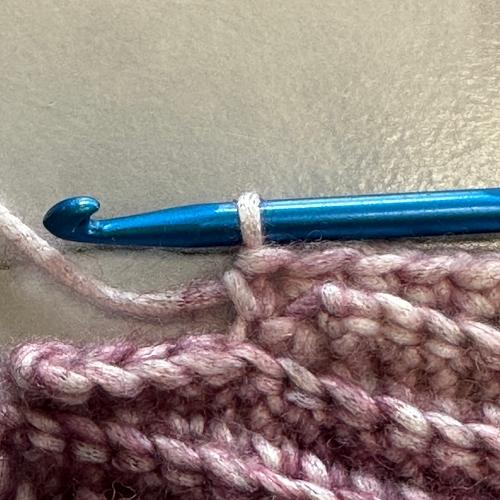
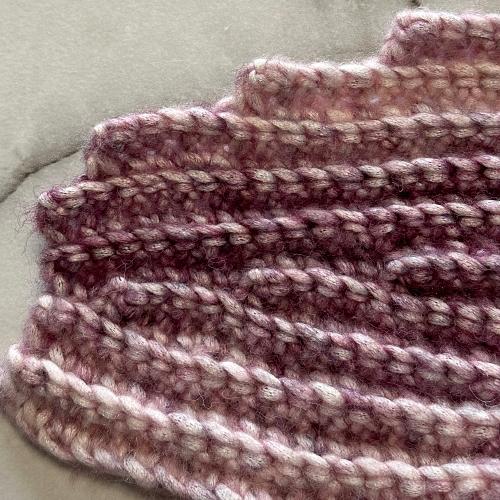
Row 10: With GREEN 20 SC. In the 20th st pull up a loop as you regularly would. Pull the GREEN yarn forward and switch to ORANGE. Complete the SC as normal. 35 SC in remaining sts. Ch 1. Turn.
Row 11: As row 9
Row 12: As row 10 *
Repeat from * to * 7 more times (for a total of 8 sections). End with Row 9 (including the CH 1 and turn) when done the 8th section.
Please share this page!
More Crochet Patterns you May Like
Finishing
Bring up the starting edge towards you. The edge you just made is behind the starting edge.
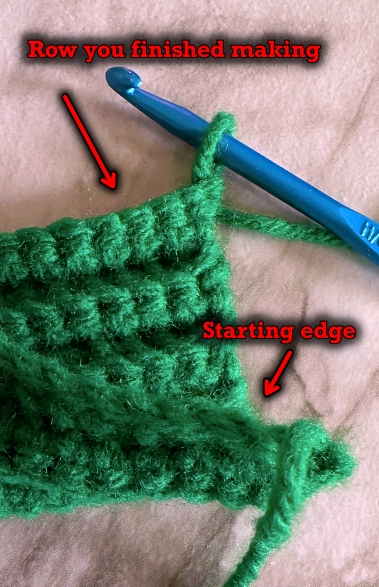
Push your hook between the spaces of the sts on the starting edge AND through the back loop of the row you just finished. Sl st down the length of the beanie, switching from GREEN to ORANGE where the transition occurs.
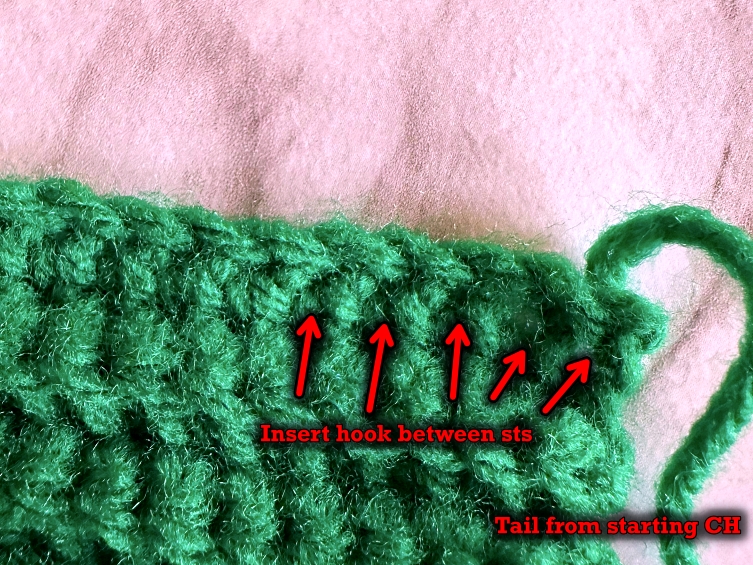
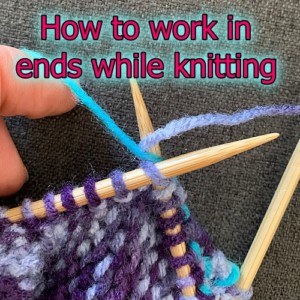
Break yarn when done. Work in the ends. Turn the hat inside out when done the seam.
Abbreviations
SC – single crochet
HDC – half double crochet
sl st – slip stitch
st – stitch
sts – stitches
Hints and Tips
The hat is designed to fit adults with the ribbing allowing to fit from small to large. If you have someone with a very large head, I woulduse a larger size hook than what is written.
Form the green stem into a curve. The stitches are dense enough that you can reposition it any way you like.
If you’d like it to be for children, Make less ORANGE sts. The ORANGE chain sts are from the forehead to the crown, so if you know how long this measurement is, you should be able to make it work.
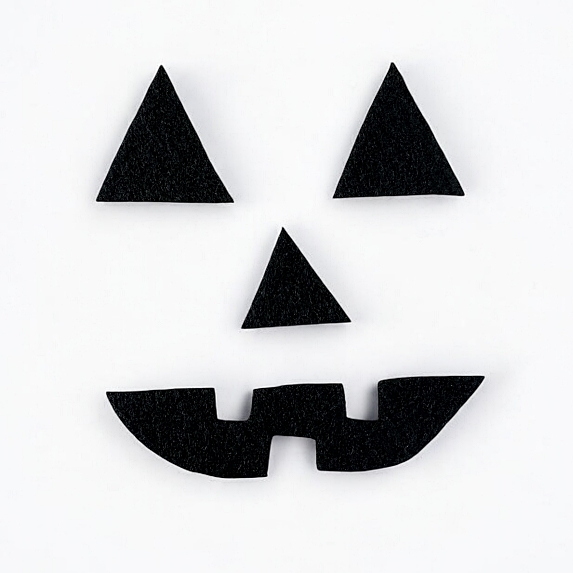
If you feel that the pumpkin needs a little more, you can always add felt cut outs for eyes, nose and a mouth. Cut out the shapes you like with paper first to get the right size and shape you want. Then transfer it onto the felt. If you can find self sticking felt, it’s even easier! And you can take them off and change it out from year to year.
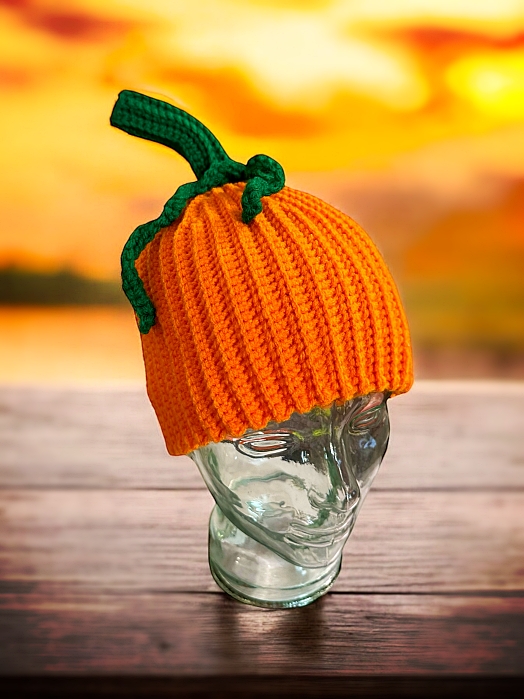
You can also add curly tendrils. Actual pumpkins don’t have this but it may look nice regardless. To do so, CH as many as you like and SC in each CH. It will automatically curl.
You can also add leaves. I do have a leaf pattern on my website. It’s not a pumpkin leaf, but could work. Here’s the link How to Crochet Leaves
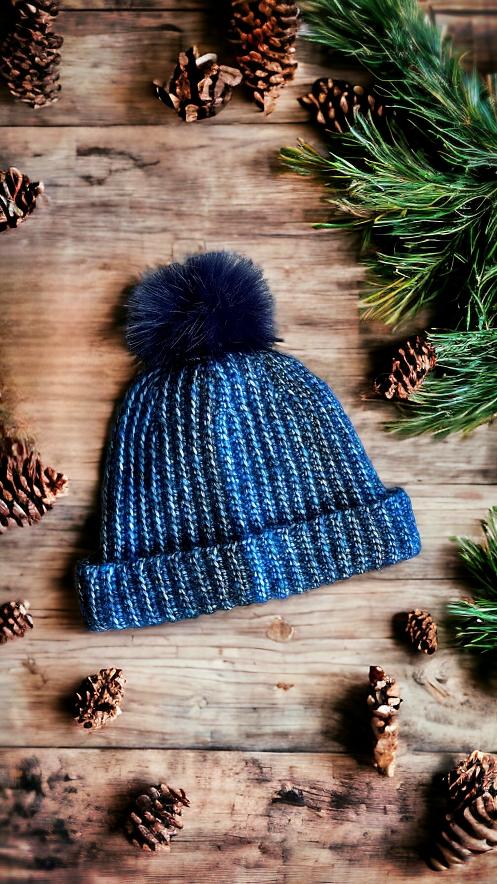
The photos aren’t all from the pumpkin hat, there is a regular ribbed beanie/hat/toque pattern I did before this. The hat pattern is free on my website.
Like all of my patterns you have my permission to sell and/or give away the physical items that you make using this pattern. You are NOT permitted to reprint this pattern in any form unless you have obtained my written permission to do so.


