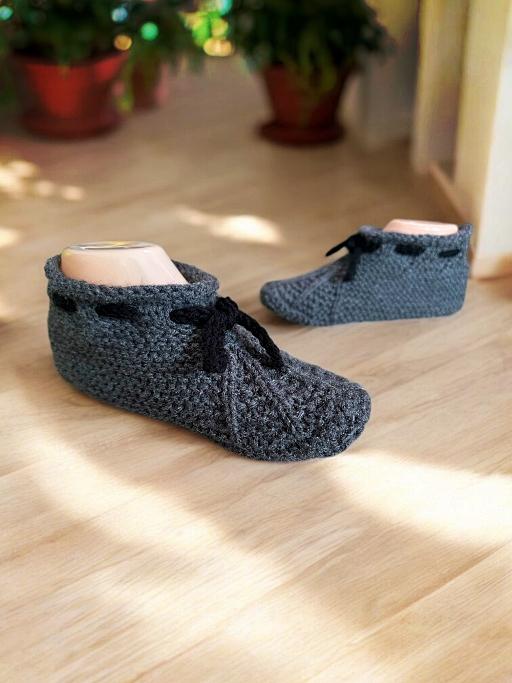
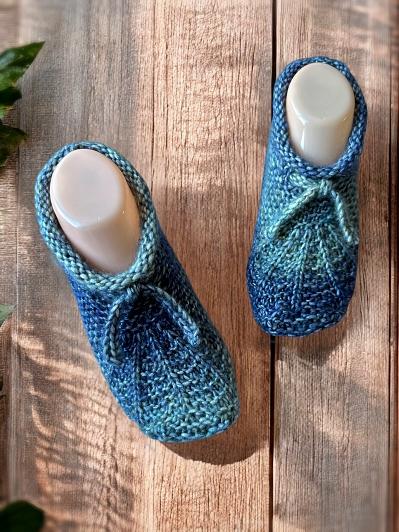
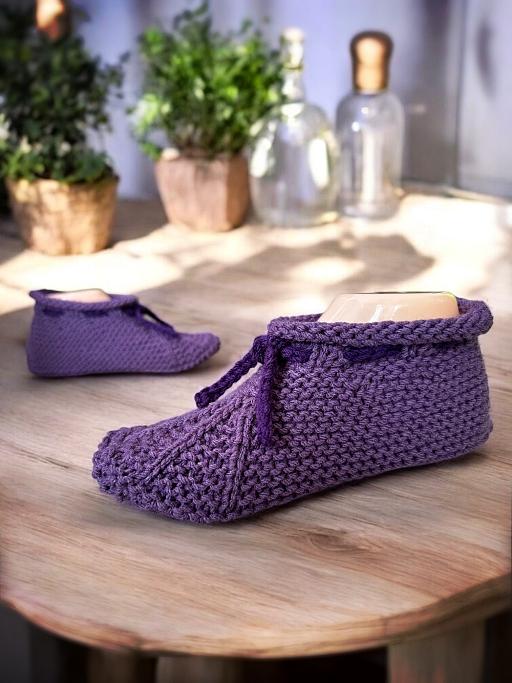
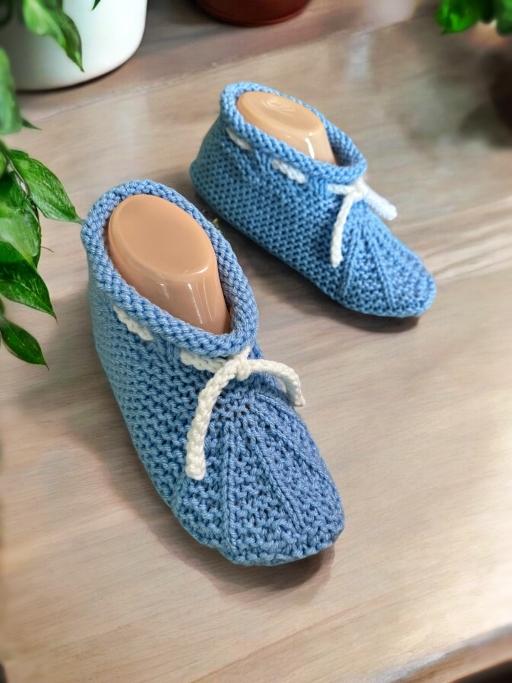
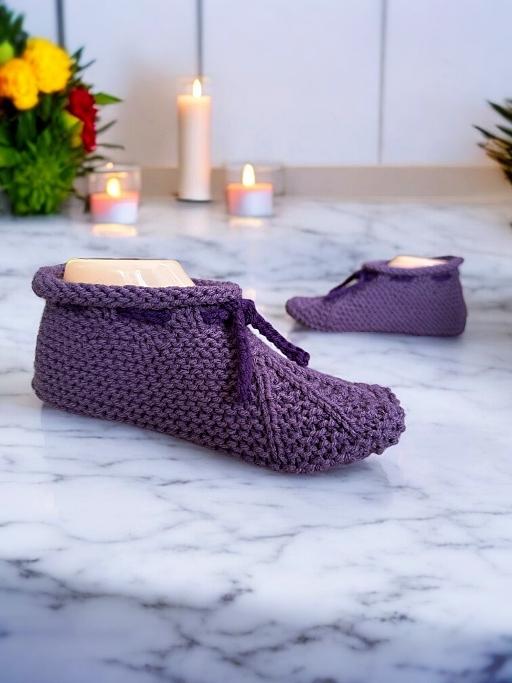
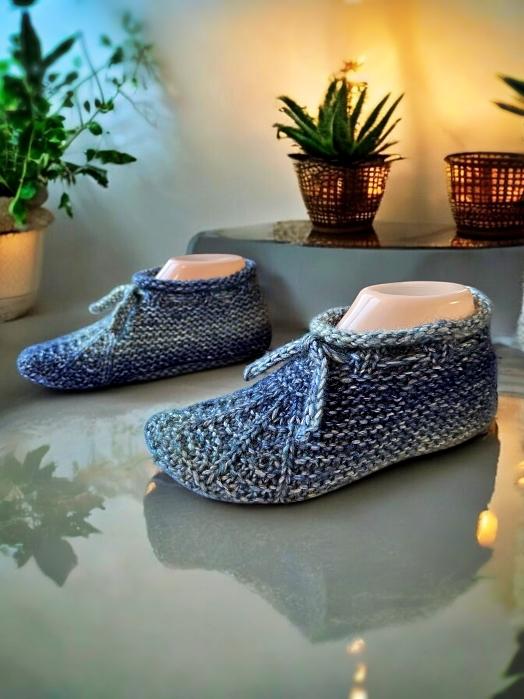
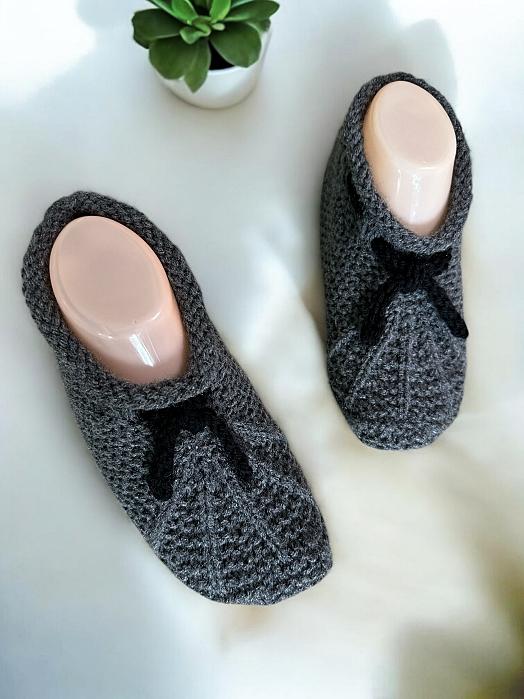
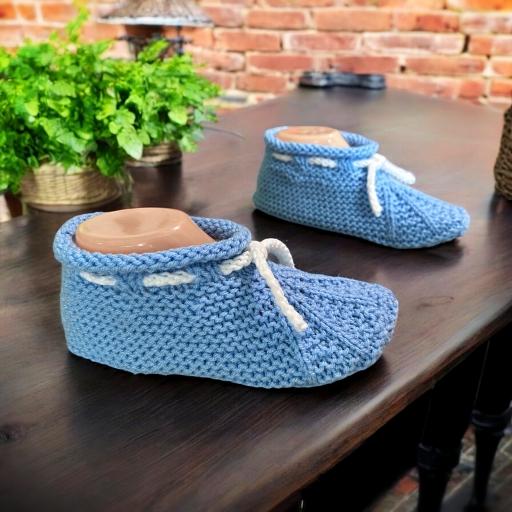
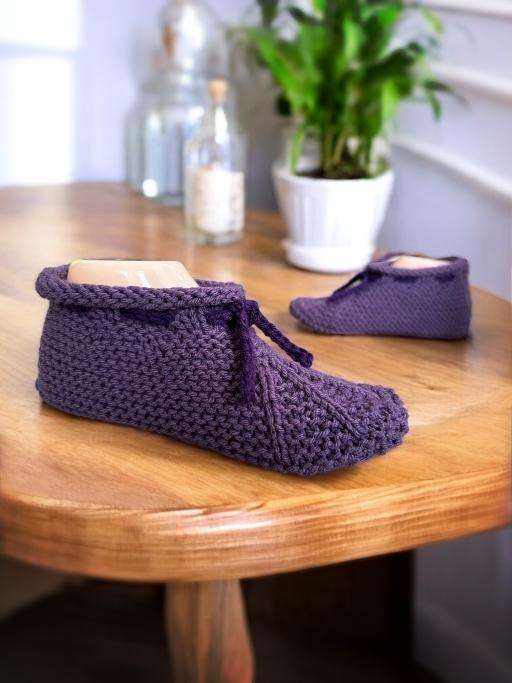
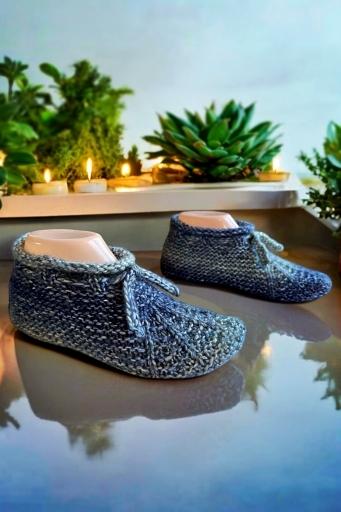
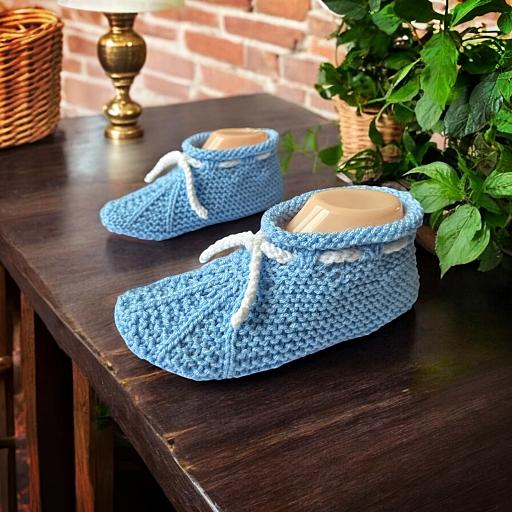
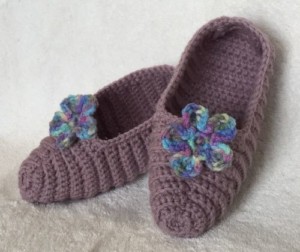
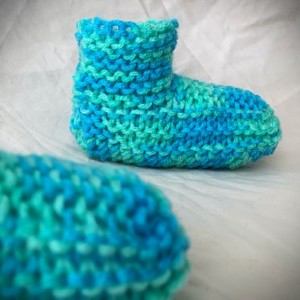
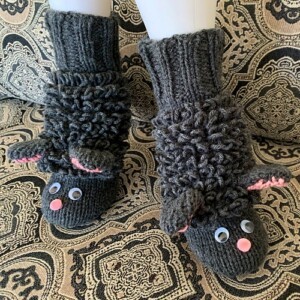
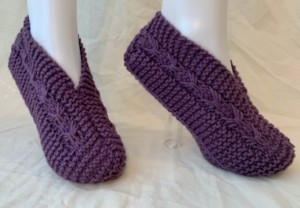
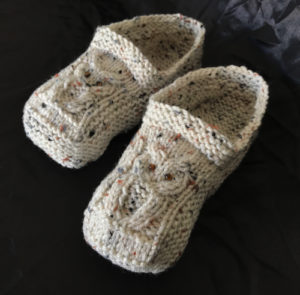
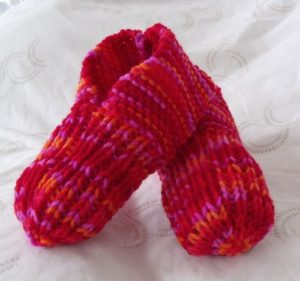
Looking for a knitting pattern to make cozy hand-knit house slippers that actually stay on your feet? These handmade slippers are easy and quick to make, perfect for beginners who want a simple hand-knitting project with great results. Designed with a unique tie-up feature, they hug your feet for a snug, secure fit—no more slipping off while you walk! Whether you’re knitting for yourself or making a thoughtful gift, this pattern works up fast and can be customized with your favorite colors. Grab your needles and let’s get started!
You can download it from a number of places. In particular, my site here – Stay-Put Tie-Up Knitted Slippers for Men and Women. You can also get it at a number of other online book retailers such as Buy Me A Coffee, Ravelry, and Etsy. It is also available as paperback and as a Kindle book on Amazon.
Another way to avoid ads and pop-ups, get instant, PRINTABLE downloads of this pattern and others, is by becoming a Member. When you become a Website Supporter at $4/month, you’ll gain access to exclusive member only posts on Buy Me A Coffee. You can download as many patterns as you like for the same $4 each month. You can go to this page to learn more, become a member and support my work… Exclusive Member Area
If you enjoy this pattern and my other free online knitting patterns, please consider making a small donation or helping me out by visiting my Help Support My Work page. If that’s not possible, that’s totally fine too! Even sharing this page on your social media helps me out immensely. You can use the buttons below to do so easily.
Things You Need
1 MAIN colour of worsted weight yarn (average 260 yard, 5 oz or 141 gram ball will be more than enough). I used Red Heart worsted weight yarn when designing the pattern but any worsted weight yarn will suffice.
1 COMPLIMENTARY colours of worsted weight yarn for the tie (optional).
1 set of size 4 mm (US size 6) single point knitting needles.
Stitch holder
Tapestry needle to sew in ends. You can also use this handy tutorial to show you how to work in the ends while knitting these slippers. A new page will open so you won’t lose this one.
Gauge
With size 4 mm (US size 6) needles or whatever size you need to obtain the correct number of stitches and rows. Be sure to check your gauge otherwise the sizing won’t be correct.
In garter stitch
4” = 18 sts
4” = 36 rows
Sizes (are written as such)
Women’s 6-7 (8-9, 10-11, 12-13)
Men’s 5-6 (7-8, 9-10, 11-12)
The Pattern
Cast on 41(43, 47, 49)
Ϫ Row 1: Knit across
Row 2: Purl across
Repeat form Ϫ to Ϫ for a total of 6 rows.
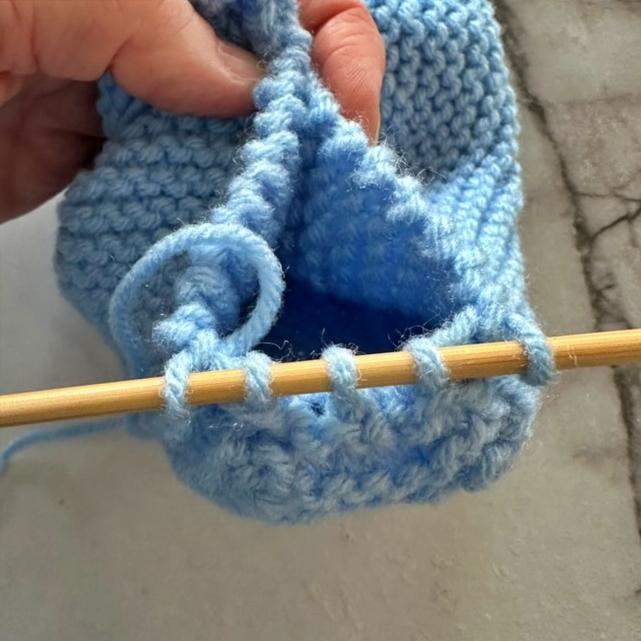
Row 7: K2 (3, 5, 5). ▲Cast off one stitch, K1▲ Repeat from ▲ to ▲ 4 times more. Cast off one stitch, K4 (4, 4, 6) ▲Cast off one stitch, K1▲ Repeat from ▲ to ▲ 4 times more. Cast off one stitch. K1 (2, 4, 4). (29, 31, 35, 37 sts. Problem with the st count? Go to Hints and Tips section for details.)

Row 8: P2 (3, 5, 5). ◊ Cast on one stitch, P2 ◊ Repeat from ◊ to ◊ 4 times more. Cast on one stitch,
P5 (5, 5, 7). ◊ Cast on one stitch, P2 ◊ Repeat from ◊ to ◊ 4 times more. Cast on one stitch. P2 (3, 5, 5). (41, 43, 47, 49 sts)

Row 9-10: K across.
Row 11: K3 (4, 6, 6) *INC, K4 (4, 4, 3)* Repeat from * to * 6 (6, 6, 8) more times. INC, K2 (3, 5, 6). (49, 51, 55, 59 sts)
Row 12: K across
Row 13: K3 (4, 6, 7) *INC, K5 (5, 5, 4)* Repeat from * to * 6 (6, 6, 8) more times. INC, K3 (4, 6, 6). (57, 59, 63, 69 sts)
Row 14-15: K across
Row 16: K26 (27, 29, 32) ♫ P1 M1 ♫ Repeat from ♫ to ♫ 3 more times P1 K26 (27, 29, 32). (61, 63, 67, 73 sts)
Row 17: K across
Row 18: K26 (27, 29, 32) ◘ P1 INC ◘ Repeat from ◘ to ◘ 3 more times P1 K26 (27, 29, 32). (65, 67, 71, 77 sts)
Row 19: K across
Row 20: K26 (27, 29, 32) ☼ P1 K2 ☼ Repeat from ☼ to ☼ 3 times more P1 K26 (27, 29, 32).
Row 21: K27 (28, 30, 33) ♠ INC, K2♠ Repeat from ♠ to ♠ 3 more times. K26 (27, 29, 32). (69, 71, 75, 81 sts)
Row 22: K26 (27, 29, 32) □ P1 K3 □ Repeat from □ to □ 3 times more P1 K26 (27, 29, 32).
Please share this page!
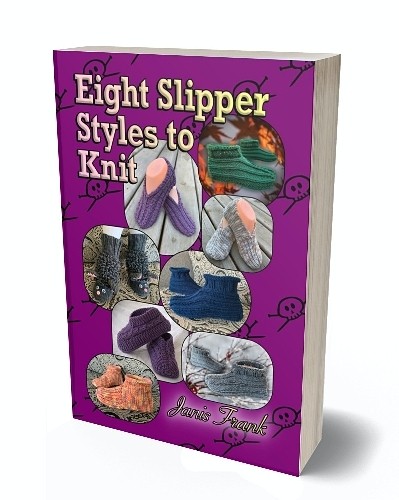
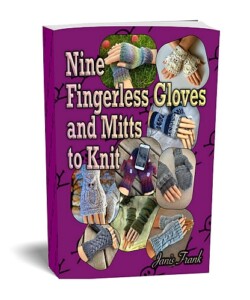
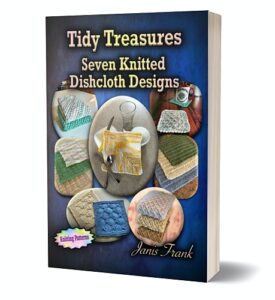
More FREE patterns
Click the pic to read online!!


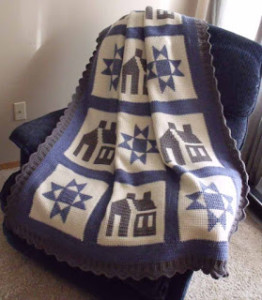
FREE Knitting Graph Paper for Colorwork Knitting


![]()
![]()


Row 23: K across
Row 24: As row 22.
Row 25: K27 (28, 30, 33) ☺ K, INC, K2☺ Repeat from ☺ to ☺ 3 more times. K26 (27, 29, 32). (73, 75, 79, 85 sts)
Row 26: K26 (27, 29, 32) ♣ P1 K4 ♣ Repeat from ♣ to ♣ 3 times more P1 K26 (27, 29, 32).
Row 27: K across.
Row 28: As row 26
Row 29: K27 (28, 30, 33) ♪ K, INC, K3 ♪ Repeat from ♪ to ♪ 3 more times. K26 (27, 29, 32) . (77, 79, 83, 89 sts)
Row 30: K26 (27, 29, 32) ♯ P1 K5 ♯ Repeat from ♯ to ♯ 3 times more P1 K26 (27, 29, 32) .
For Women’s sizes 6-7 and men’s 6
Row 31: Knit across
Row 32: Cast off 36 sts. K4. Cast off 36 sts.
There are 5 sts remaining on your needle.
Continue on to knit the Sole
For Women’s sizes 8-9 and Men’s size 7-8
Row 31: K28, ♪ K2, INC, K3 ♪ Repeat from ♪ to ♪ 3 more times. K27. (83 sts)
Row 32: K27 # P1 K6 # Repeat from ♯ to ♯ 3 times more P1 K27.
Row 33: K across
Row 34: Cast off 39 sts. K4. Cast off 39 sts.
There are 5 sts remaining on your needle.
Continue on to knit the Sole
For Women’s size (10-11, 12) and men’s sizes (9-10, 11-12)
Row 31: K across
Row 32: As row 30.
Row 33: K (30, 33) ♪ K2, INC, K3 ♪ Repeat from ♪ to ♪ 3 more times. K (30, 32). (87, 93 sts).
Row 34: K (30, 32) ♯ P1 K6 ♯ Repeat from ♯ to ♯ 3 times more. P1 K (30, 32).
Row 35: K across
Row 36: Cast off (41, 44) sts. K4. Cast off (41, 44) sts.
There are 5 sts remaining on your needle.
Continue on to knit the Sole
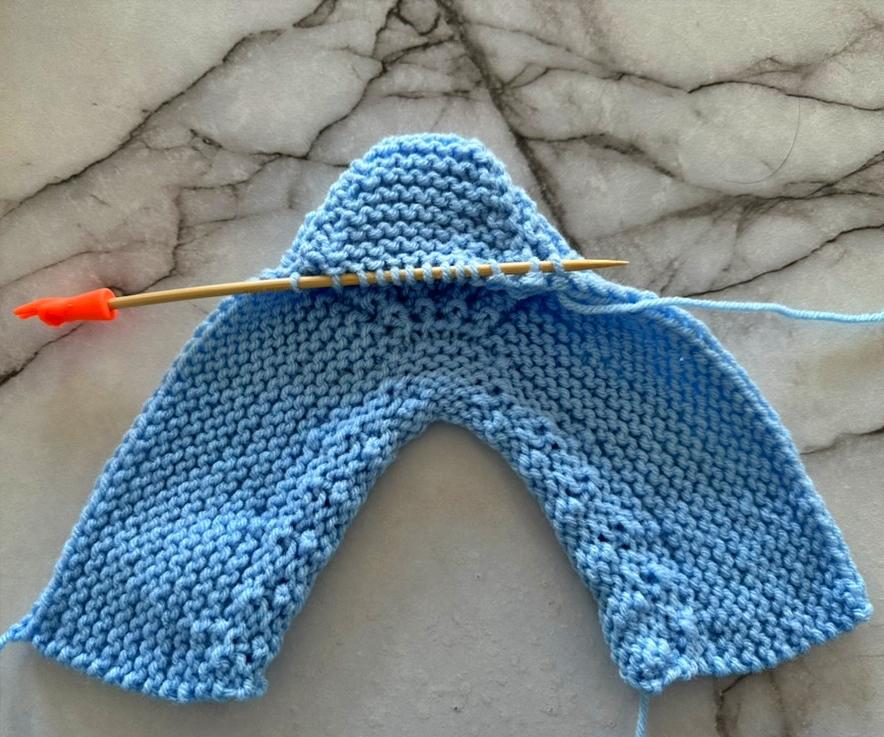
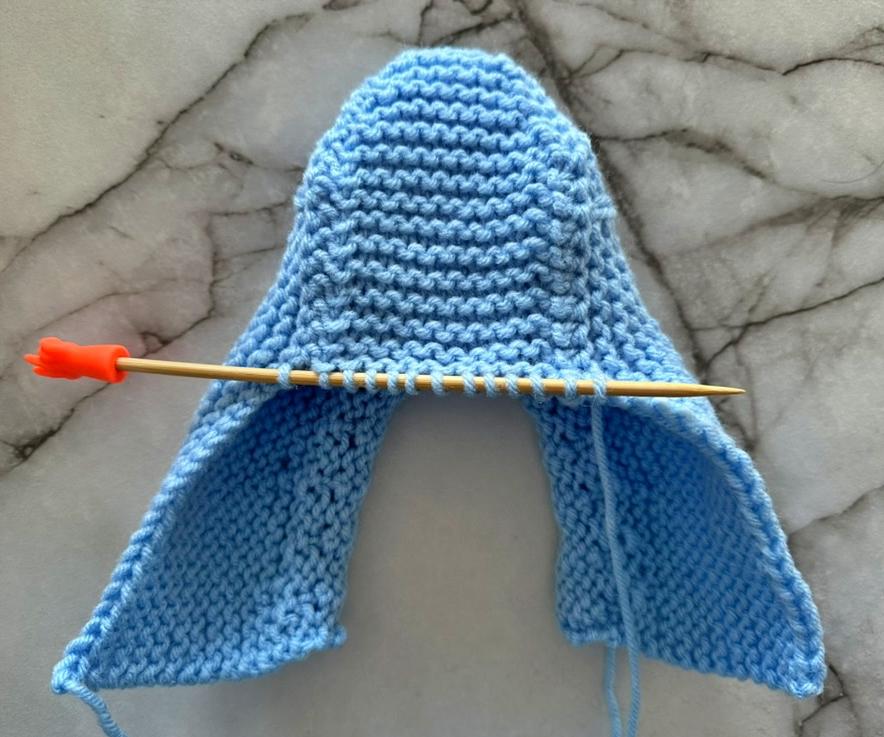
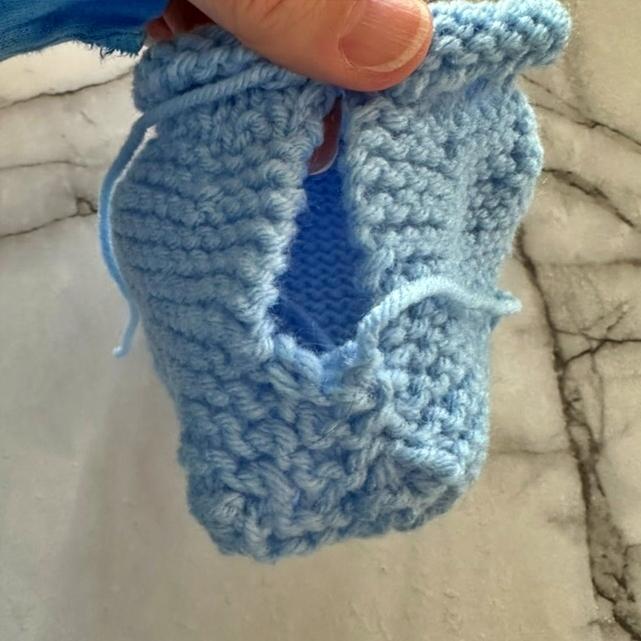
Making the Sole
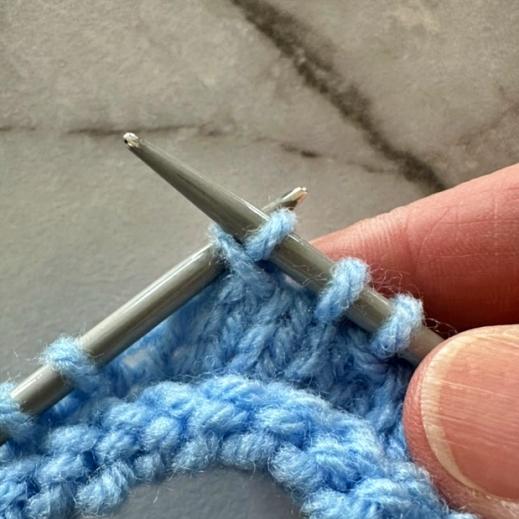
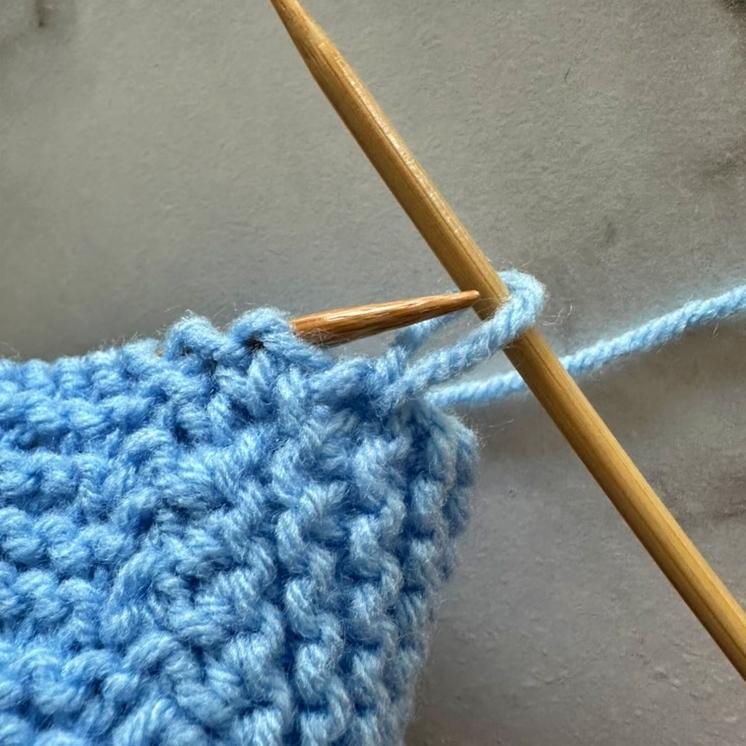
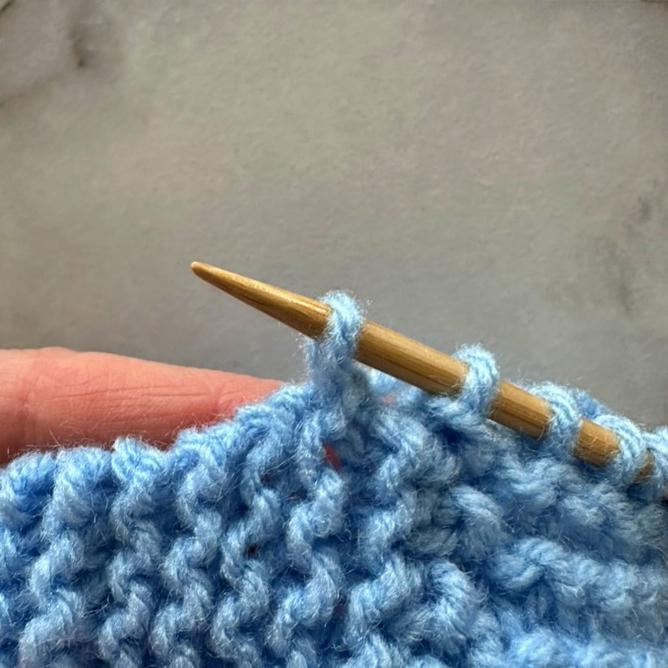
Next row: With the RIGHT side facing, attach yarn and knit the first cast off stitch by the 5 sts remaining of the last row (cast off stitch on the right by the point of the needle).
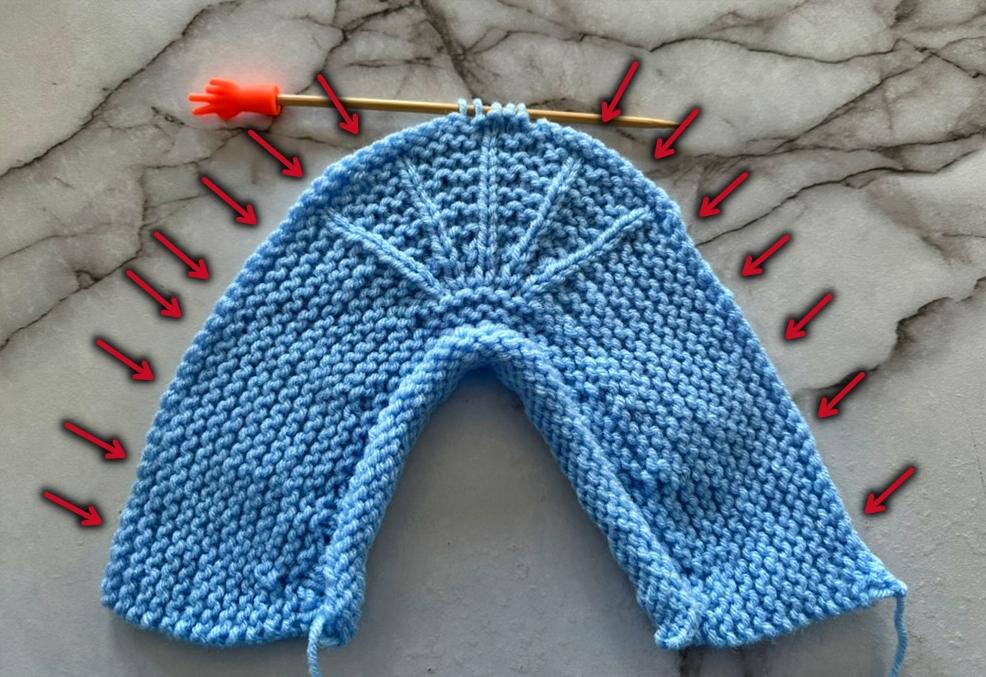

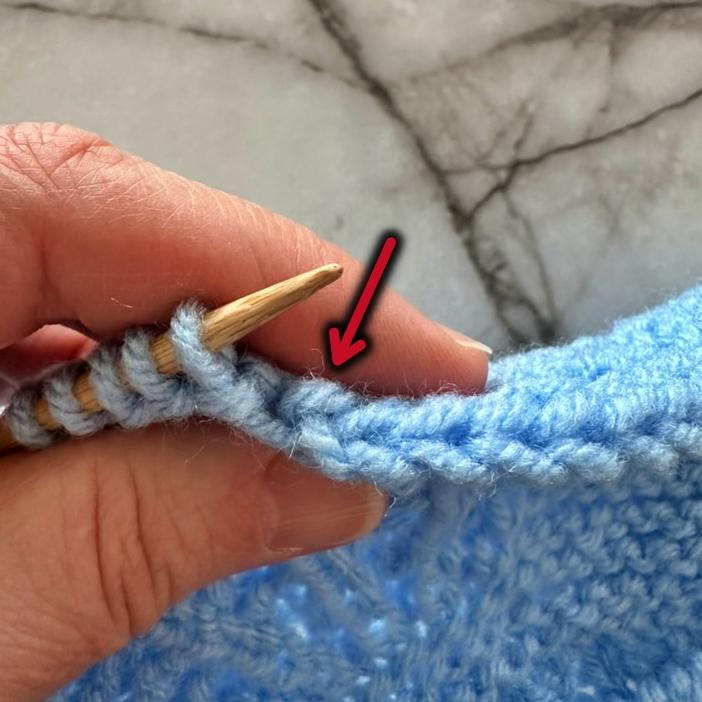

K2tog K1 K2tog. Pick up the cast off stitch by the point of your needle. (5 stitches).
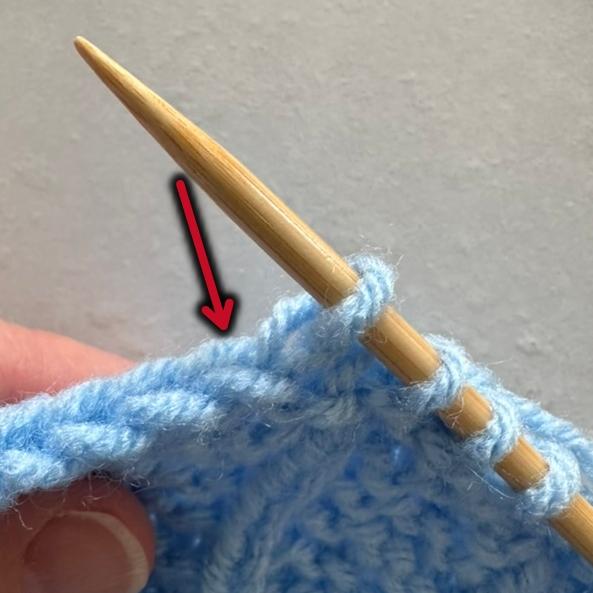
Quick tip – wrap the yarn counterclockwise around your needle and turn it down to pull the yarn through the cast off stitch on the right. If you have a hard time doing this, you can also use a crochet hook to pull the loop through and place that loop on your working needle.
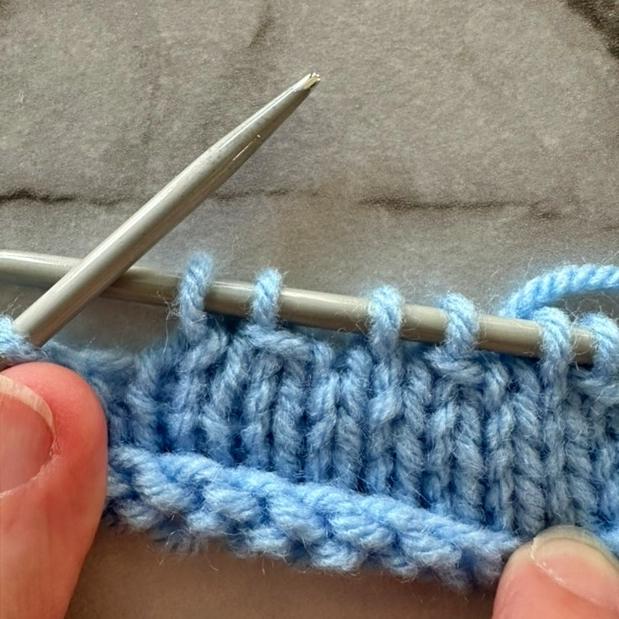
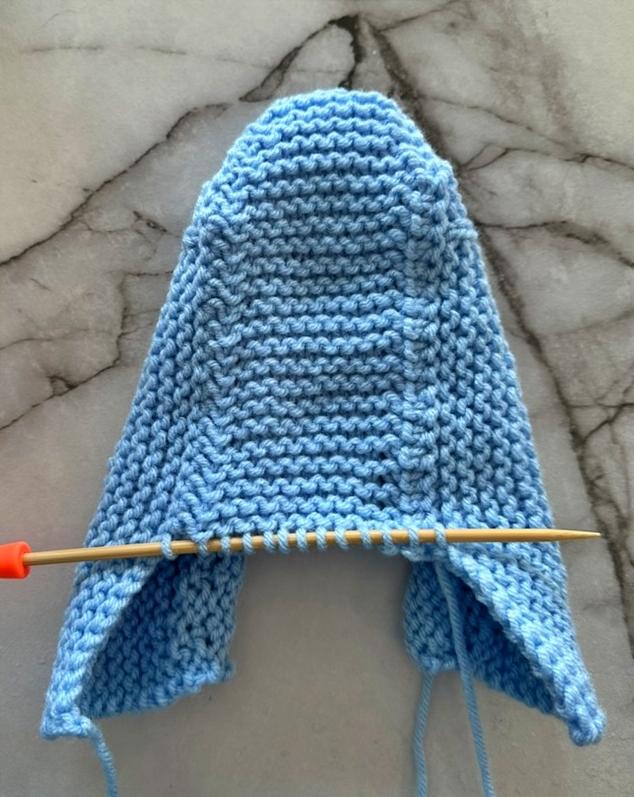
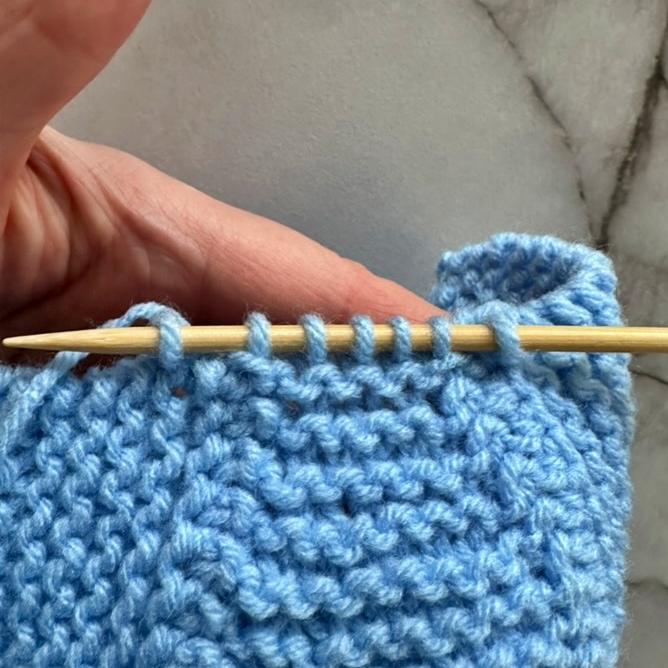
You now are working back and forth along the bottom of the foot picking up one cast off stitch on each side as you go.
Next row: Knit across.
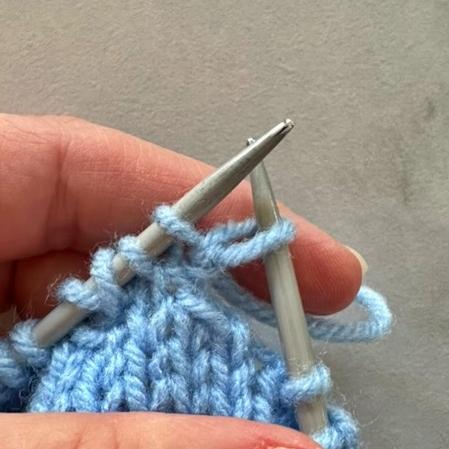
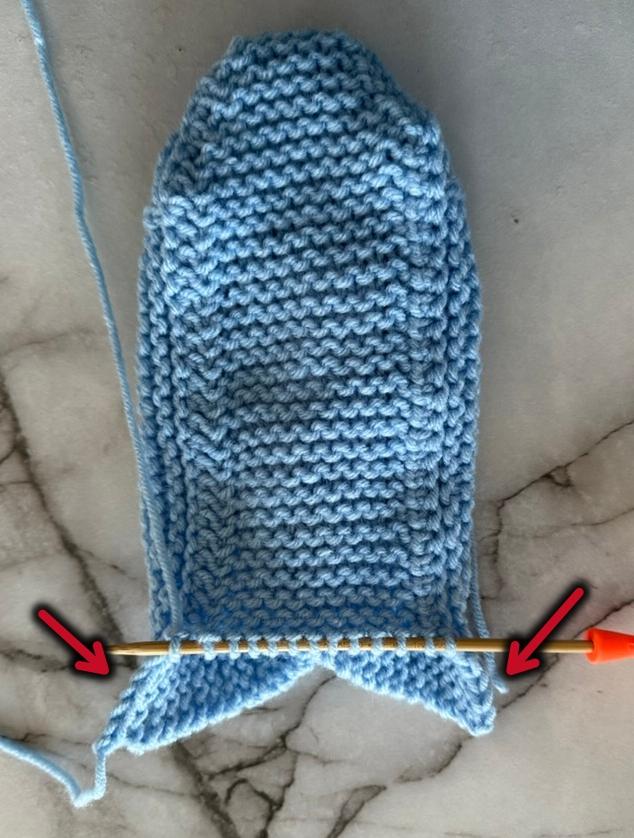
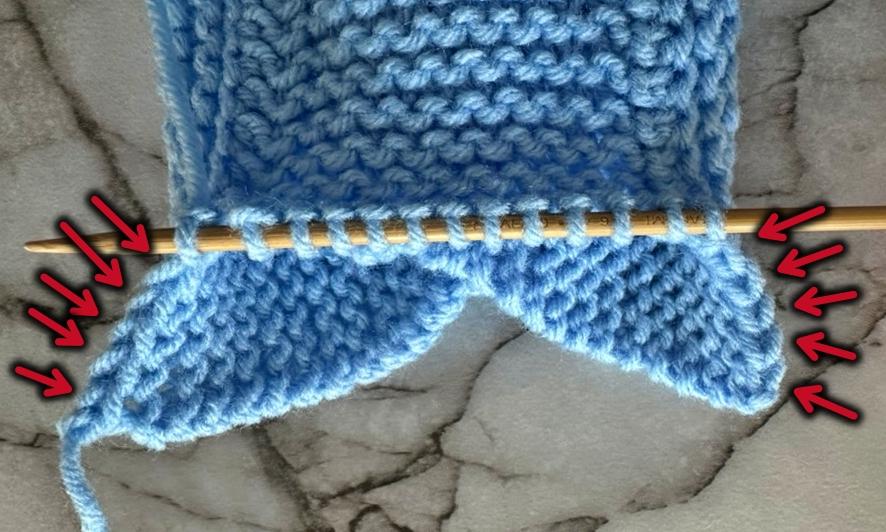
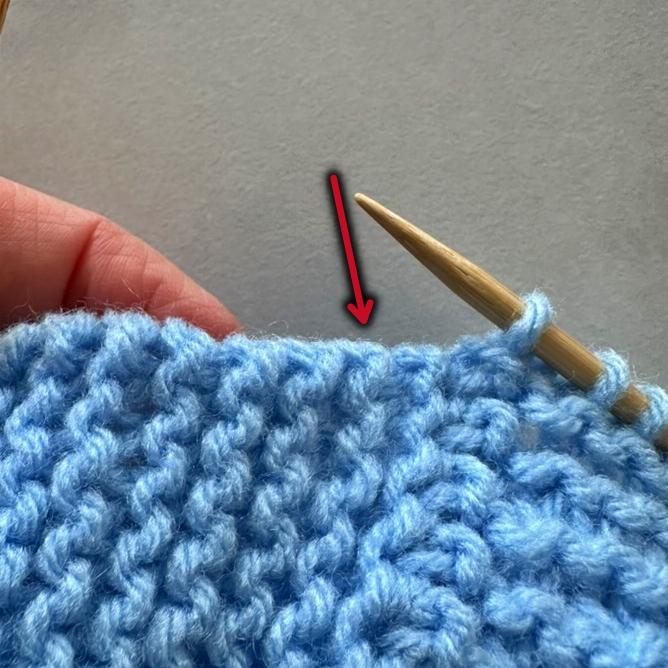
⌖ Next row: Pick up the next stitch of the cast off stitches. K across. Pick up the cast off stitch on the other side of the slipper by the point of your needle. (7 stitches).
Next row: Knit across.
Next row: Pick up the next stitch of the cast off stitches. K2tog. Knit to the last 2 stitches K2tog. Pick up the cast off stitch on the other side of the slipper by the point of your needle. (7 stitches).
Next row: Knit across.
Next row: Repeat row with ⌖ (9 sts)
Next row: Knit across.
Next row: Repeat row with (9 sts)
Next row: Knit across.
Next row: Repeat row with⌖ (11 sts)
Next row: Knit across.
Next row: Repeat row with (11 sts)
Next row: Knit across.
Next row: Repeat row with ⌖ (13 sts)
Next row: Knit across.
♥ Next row: Repeat row with (13 sts)
Next row: Knit across. ♥ Repeat from ♥ to ♥ until there are 5 cast off stitches to pick up.
✿ Next row: Pick up the cast off stitch by the point of your needle. K2tog twice Knit to the last 4 stitches. K2tog twice. Pick up the cast off stitch by the point of your needle. (11 stitches).
Next row: Knit across.
⌘ Next row: Pick up the next stitch of the cast off stitches. K2tog. Knit to the last 2 stitches K2tog. Pick up the cast off stitch on the other side of the slipper by the point of your needle. (11 stitches).
Next row: Knit across.
Next row: Repeat row with ✿ (9 sts)
Next row: Knit across.
Next row: Repeat row with ⌘ (9 sts)
Next row: Knit across.
Next row: Repeat row with ✿ (7 sts)
Next row: Knit across.
More of My Stuff on Etsy:
You can make a widget like this for your blog or website, too.
Instructions are on my website here: How to Display Etsy Items on Your Website
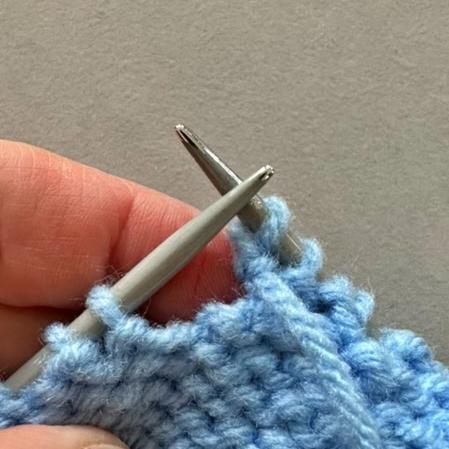
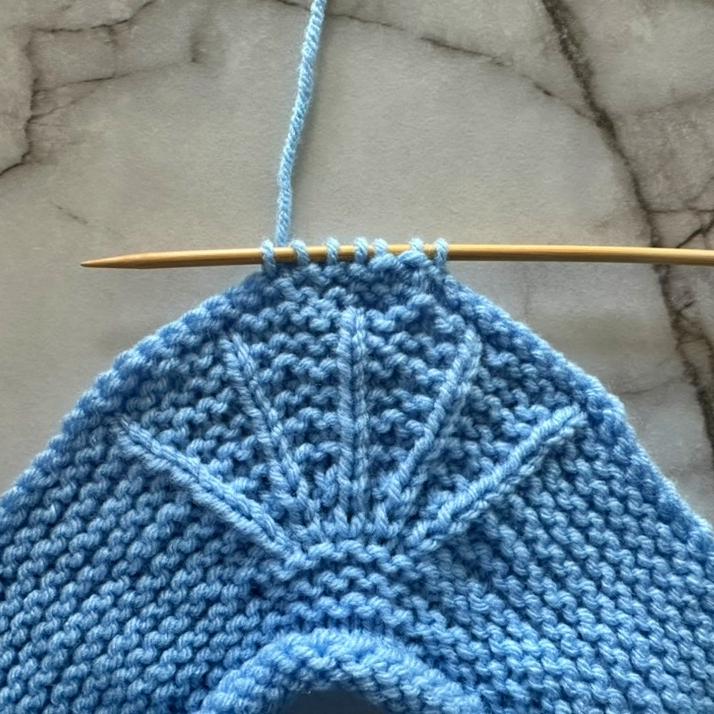
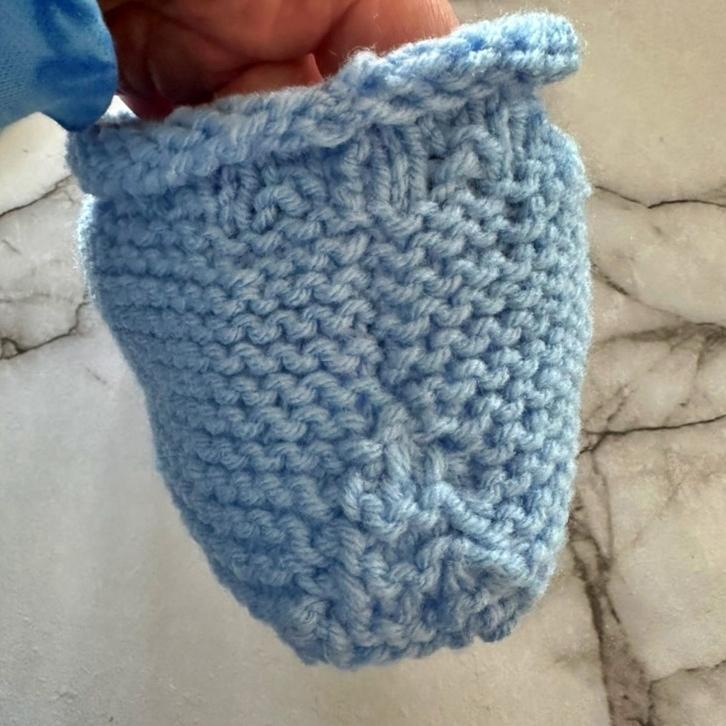
Making the Heel
You’re now going to make a small triangle to fit in the back of the heel. You’re going to fill this space in the slipper.
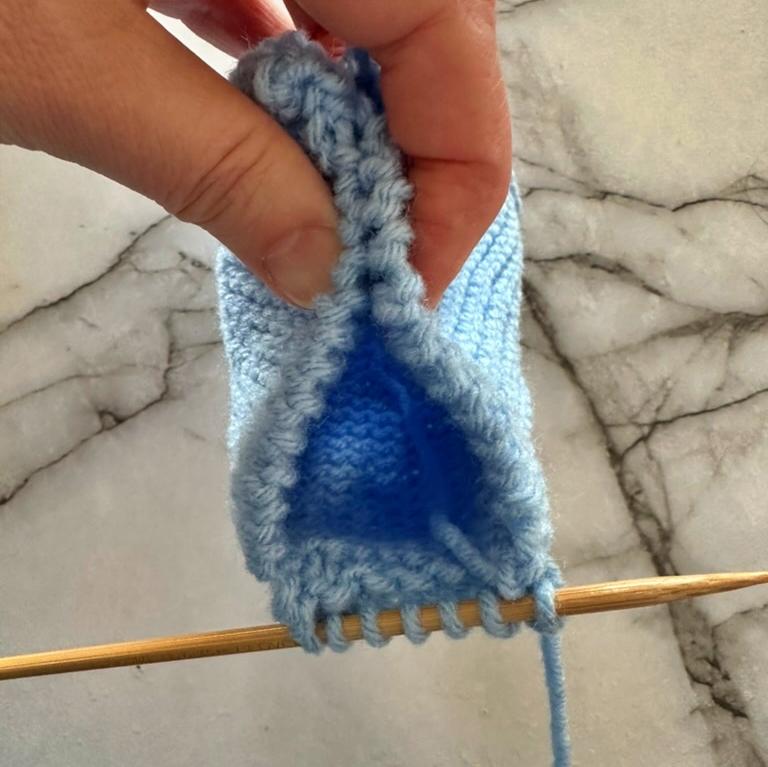
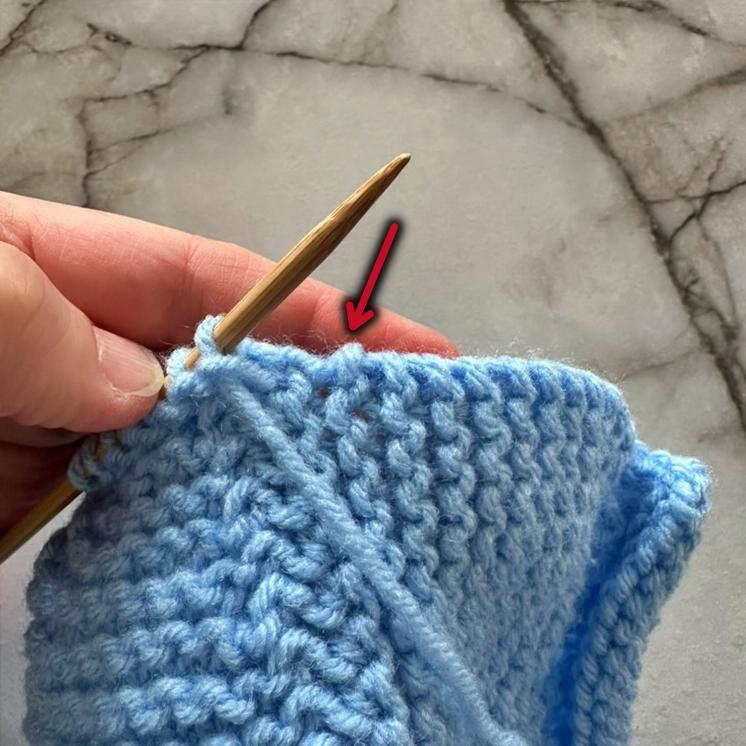
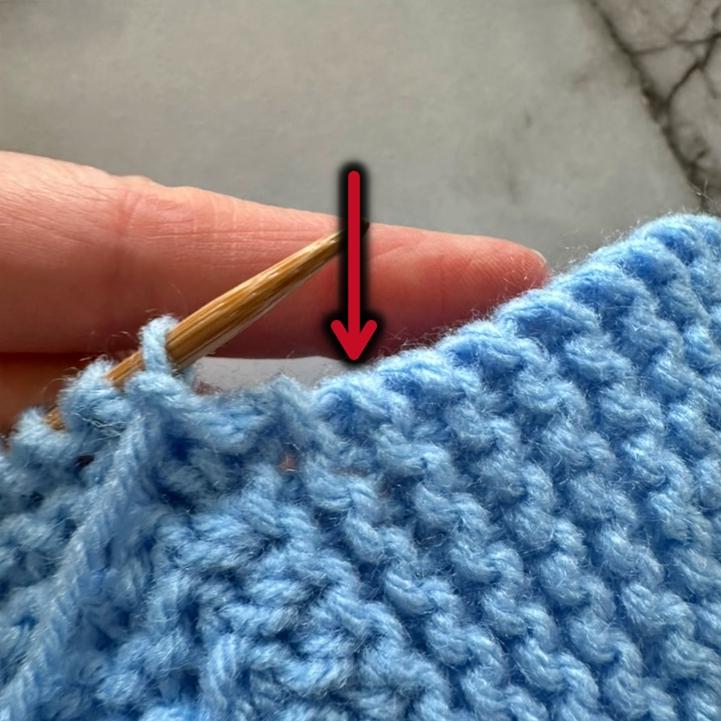
Next row: With the RIGHT side facing, pick up a stitch in the ridge closest to the sole of the slipper. Count how many ridges it is for the size you are making. K2tog once. Knit to the last 2 stitches. K2tog once. Count down the same number of ridges on the other side and pick up a stitch in the space beneath it. (7 stitches).
Next row: K across
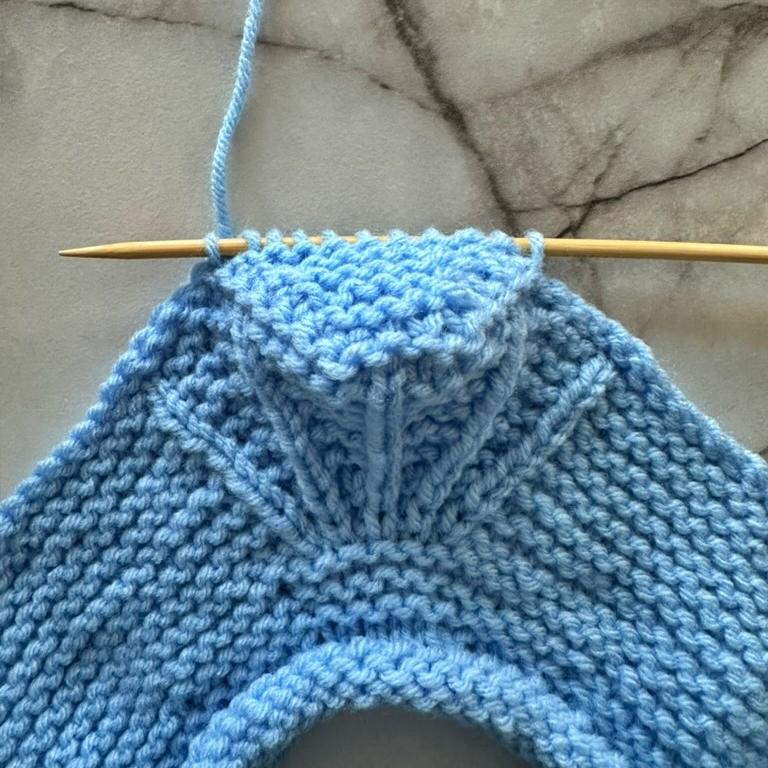
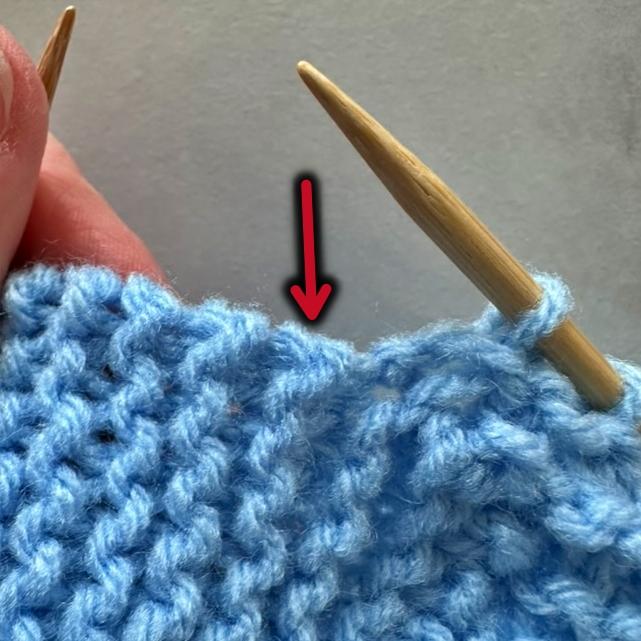
Next row: Pick up a stitch beneath the next ridge. K2tog K3tog K2tog. Pick up a stitch in the space beneath the next ridge on the other side. (5 sts)
Next row: K across
Next row: Pick up a stitch beneath the next ridge. K2tog K1 K2tog. Pick up a stitch in the space beneath the next ridge on the other side. (5 sts)
Next row: K across
Next row: Pick up a stitch beneath the next ridge. K2tog K1 K2tog. Pick up a stitch in the space beneath the next ridge on the other side. (5 sts)
Next row: K2tog K1 K2tog. (3 sts)
Next row: K3tog. Break yarn and fasten off. Sew the remaining seam up the back of the heel.
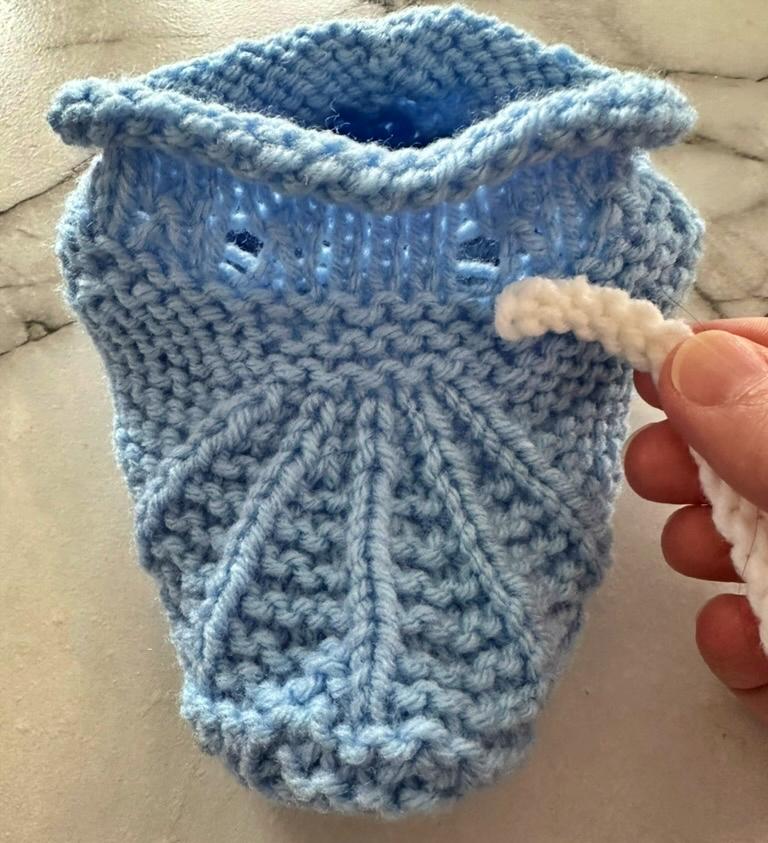
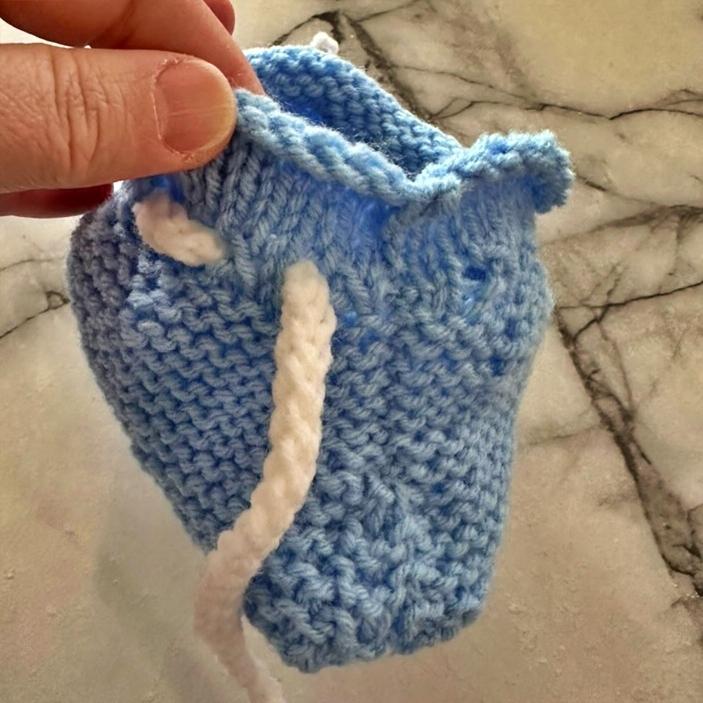
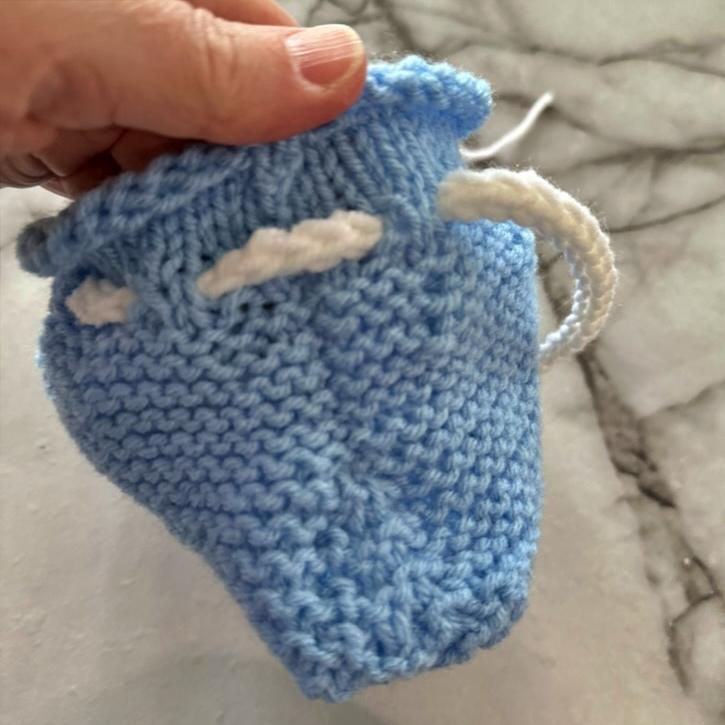
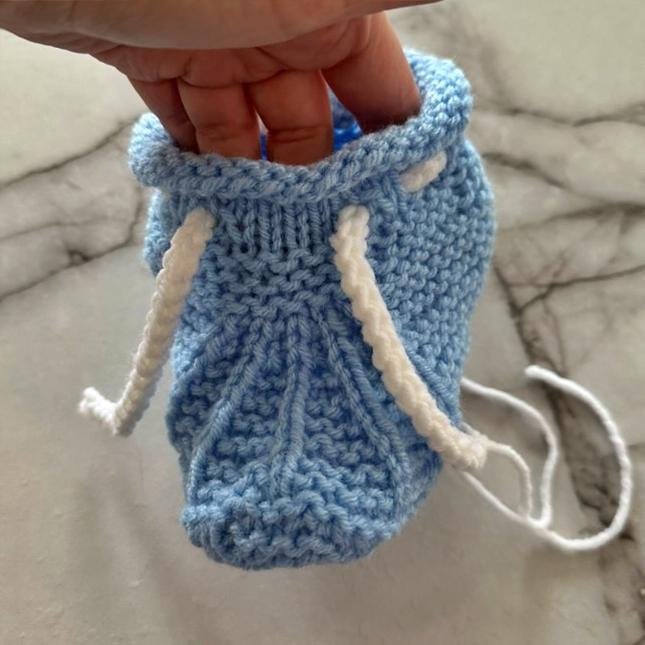
Making the Tie and Lacing
Holes for the tie are made with the cast off and cast on sts in rows 7 and 8. There are 6 holes on each side.
Use what you like to make the tie. You can use a crochet hook and make a simple chain, use a shoe lace, a piece of ribbon, or cast on about 62 (65, 71, 74) sts and immediately cast off the next row if you want a plain knot to tie the slippers. Cast on and cast off about 82 (86, 94, 98) sts if you would prefer a bow. Make a braid of 6 or 9 strands. There are many options.
Hints and Tips
If you’re having trouble with Row 7, make sure to knit the cast off stitches (marked in italics) after the repeated cast off stitches. If you skip this step, you’ll end up with too many stitches at the end.
Casting off leaves one stitch on the needle. With K4 there are 5 sts for the start of the sole.
Cast on loosely in Row 8 to create a more noticeable hole. You can also use stitch markers to make them easier to find.
Abbreviations
K – knit
P – purl
K2tog – knit 2 together
K3tog – knit 3 together
M1 – Make one (knit wise). Increase one stitch between the stitches. Pick up the yarn between the stitches. Twist slightly. Place it on your non-working needle. Knit the stitch. Watch this video to see how.
INC – Make 2 sts in one st. Knit in the front of the stitch and the back of the stitch Click this link to watch this video to see how. How to INC When Knitting – Increase one stitch
Like all of my patterns you have my permission to sell and/or give away the slippers that you make using this pattern. You are NOT permitted to reprint or redistribute this pattern in any form unless you have obtained my written permission to do so.