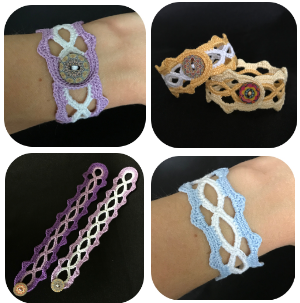
If you’ve crocheted before and are familiar with most of the stitches, this will be a snap for you to make. If you’re new, it may push you a bit, but is still totally doable. It’s extremely repetitive and once you catch on, the repeated sections will be second nature to you.
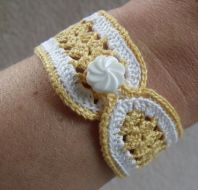
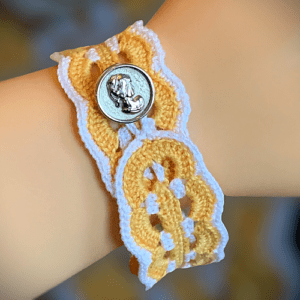
I’ve written instructions to make the bracelet in one colour (easiest if you’re new to crocheting) and separate instructions for the two-tone version. Only Round 2 is a bit different, but I figured it would be easier to have it written out in full for both versions instead of having to scroll back to look. Keep scrolling down the page to read the two-tone instructions.
If you’re making the single colour bracelet, selecting a variegated thread could add some interesting variations to the look of the bracelet. Sorry I never made a one colour one though. I’m rather fond of two colour…
Please Share this Pattern with Others
Not a fan of reading online? You can always download the pattern fro a small fee from my website – Quick and Easy Crochet Bracelet or my Etsy shop. Some things never change ?
Another way to avoid ads and pop-ups, get instant, PRINTABLE downloads of this pattern and others, is by becoming a Member on this website. When you become a Website Supporter for $3/month, you’ll gain access to exclusive member only posts. These posts contain one click downloads of the patterns. Simply click the Download & Print button. The PDF will automatically download to your computer or smart device. You can then read it on your device or print it at your leisure. You can download as many patterns as you like for the same $3 each month. You can go to this page to learn more, become a member and support my work… Exclusive Member Area
But let’s get to the pattern.
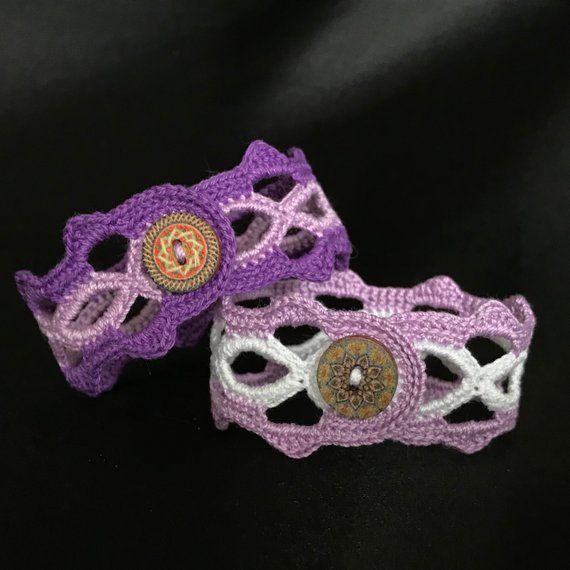
Things you need:
1 or 2 balls of crochet cotton thread
A pretty button ( approximately 1/2” or 1.5 cm diameter)
Gauge:
It’s not really important for this project as there isn’t a specific size needed. This pattern can be made as long as you like and you can easily adjust the length to what you want when you’re making it. Each loop adds approximately 25/32″ or 2 cm. It depends how tightly you crochet. Generally speaking, I make my bracelets approximately 7 inches (17.5 cm) in length. I make 10 loops total for this pattern but you can add or make less as you see fit.
Another point to remember, your final product will stretch a bit longer as the stitches relax over time or if you press it with an iron.
Abbreviations:
sc – single crochet
dc – double crochet
hdc – half double crochet
trc – treble (or triple) crochet
tr-trc – triple treble crochet (wrap the thread around the hook 6 times)
ch – chain
sl st – slip stitch
st – stitch
sts – stitches
More of my stuff for sale on Etsy
You can make a widget like this for your blog or website, too.
Instructions are on my website here: How to Display Etsy Items on Your Website
Single Colour Bracelet
(keep scrolling if you want the 2 colour version)
Starting loop:
Chain 7. Tr-trc (triple treble crochet – wrap the thread 6 time around the hook) in 7th chain from hook.
Additional loops:
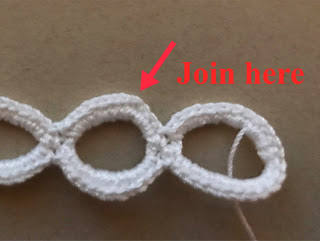
Chain 8. Tr-trc in 7th chain from hook. Repeat 8 more times for 10 loops total. You can add more or make less loops depending on the length you want.
Round 1: Ch1. *12 sc in loop just formed. Sl st in ch between loops.* Repeat from * to * down the length of the bracelet. Work 24 sc in last loop. Repeat from * to * down the length of the bracelet. 12 sc in last loop. Join with sl st to first sc.
Round 2: *2 sc. Work 2 sc in next st.* Repeat from * to * 2 more times. Ch 6. In the next loop after sl st in space between loops, skip next 3 sts and starting in the 4th st, ? 5 sc, ch 6. ?ᅠRepeat from ?ᅠto ?ᅠdown the length of the bracelet. In last loop starting after the sl st between loops, skip first 3 sts and starting in the 4th st ⛄ 2 sc. Work 2 sc in next st.⛄ Repeat from ⛄ to ⛄ 5 more times. Ch 6. Repeat from ?ᅠto ?ᅠdown the length of the bracelet. In last loop after the sl st between loops and starting in the 4th st, repeat from * to * 3 times total. Join with sl st in the back loop of the first sc of the round.
Round 3: Sc in the back loop of every sc of previous round. (Sc, hd, dc, trc, dc, hdc, sc) in every ch 6 space. Join with sl st to first sc of the round.
Please share this page!
More FREE patterns
Click the pic to read online!!





FREE Knitting Graph Paper for Colorwork Knitting























Break thread.
Sew button to the end opposite of either loop.
Work in thread ends.
Wear, give away or sell with pride!
Two-Tone Bracelet
Starting loop:
Chain 7. Tr-trc (triple treble crochet – wrap the thread 6 time around the hook) in 7th chain from hook.
Additional loops:
Chain 8. Tr-trc in 7thchain from hook. Repeat 8 more times for 10 loops total. You can add more or make less loops depending on the length you want.
Round 1: Ch1. *12 sc in loop just formed. Sl st in ch between loops.* Repeat from * to * down the length of the bracelet. Work 24 sc in last loop. Repeat from * to * down the length of the bracelet. 12 sc in last loop. Join with sl st to first sc. Break thread.
Round 2:In any loop other than a loop on the end, and starting after the sl st between loops, skip the first 3 sts join the thread in the 4th st, ch 1 (counts as first sc), 4 sc, ch 6. ?ᅠ5 sc, ch 6.?ᅠRepeat from ?ᅠto ? down the length of the bracelet. In last loop after the sl st between loops, skip first 3 sts and starting in the 4th st ?ᅠ2 sc. Work 2 sc in next st. ?ᅠRepeat from ?ᅠto ?ᅠ5 more times. Ch 6. Repeat from ?ᅠto ?ᅠdown the length of the bracelet. In last loop after the sl st between loops, and starting in the 4th st, repeat from ?ᅠto ?ᅠ6 times total. Ch 6. Join with sl st in the back loop of the first sc of the round.
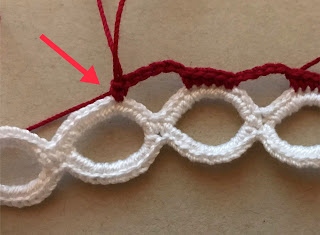
Round 3: Sc in the back loop of every sc of previous round. (Sc, hdc, dc, trc, dc, hdc, sc) in every ch 6 space. Join with sl st to first sc of the round.
Break thread.
Sew button to the end opposite of either loop.
Work in thread ends.
Wear, give away or sell with pride!
Hints and Tips:
It is very easy to either miss a chain, chain the wrong number, or sc the wrong number by accident in Round 1. This will throw off the counts for Round 2 and you may end up with too many or not enough sc. Don’t panic! Round 3 is very forgiving and will hide all. As long as your skipped stitches on either side of the 5 sc clusters are the same, you won’t really be able to tell; even if you only make 4 stitches or make it 6 sc. Make it work with what you have. Another fix, you can either sc stitches together if too many or sc 2 stitches in one stitch if you don’t have enough. FYI making things work like this, works great for all projects. Many times it can be hidden in a seam or the back of the work 😉
No matter what, don’t stretch out the necklace or bracelet before you are completely finished crocheting the entire piece! If you do, it won’t lay flat when you are done.
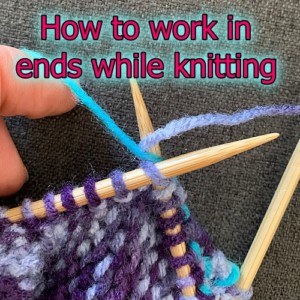
To save work of sewing in ends, work in the ends of the threads as you are making your project. Hold the thread behind your work and catch it as you make the next 4-5 stitches.
Be sure you don’t twist your loops when adding the sc’s in Round 1. The chains should be on the BOTTOM of the loop and the tr-trc on the TOP.
A simple rule to follow for this very repetitive pattern, after the 5 sc clusters and the large numbers of sc’s made on the end loops, always remember to ch 6. Simply put, every time you run across the sl st between the loops, ch 6.
And the best tip of all, if you like this pattern and would like to see more in the future, Help Support My Work!
Like all of my patterns you have my permission to sell and/or give away the bracelets that you make using this pattern. You are NOT permitted to reprint this pattern in any form unless you have obtained my written permission from me to do so.







Thanks for finally writing about >How to Crochet Jewelry – Quick Crochet Bracelet | KweenBee.com Loved it!
I really wanted to make this bracelet but i cannot figure out the instructions. Am i to start with the “starting loop” or “round 1”? if round 1 i can’t make 1 sc’s never mind 12 sc’s in the loop just made as it won’t hold a sc. Wish you had pics to show or a demo video.
You start with the starting loops. Make as many as you like depending on the length of the bracelet you want. They are the base on which you’ll do all the other stitches.