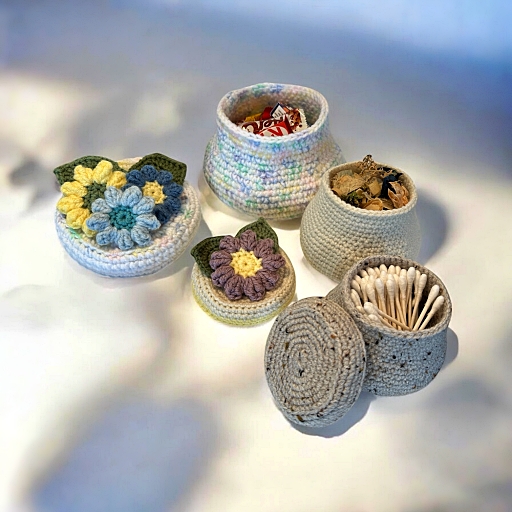
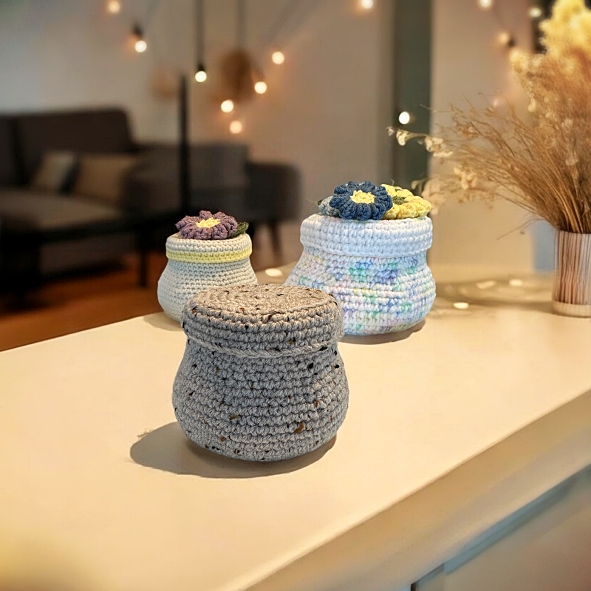
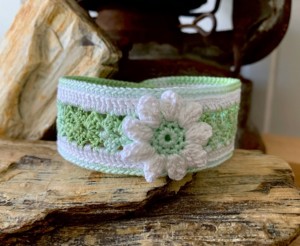
This crocheted jar or pot with a lid is a fantastic way to use up those extra bits of yarn from other projects. It’s a unique and versatile item that’s perfect for selling at craft fairs or gifting to friends and family. The finished jar can hold small trinkets, potpourri, loose change, cotton balls, or even hide your stash of secret snacks! The crocheted jars add a touch of handmade charm to any space. With endless possibilities for color combinations and personalization, you can easily tailor each jar to suit different styles and occasions.
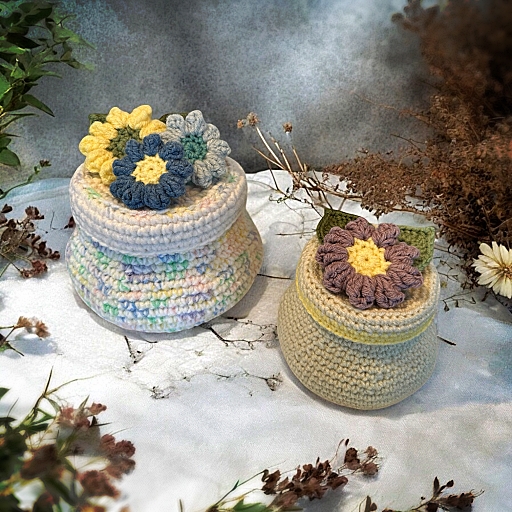
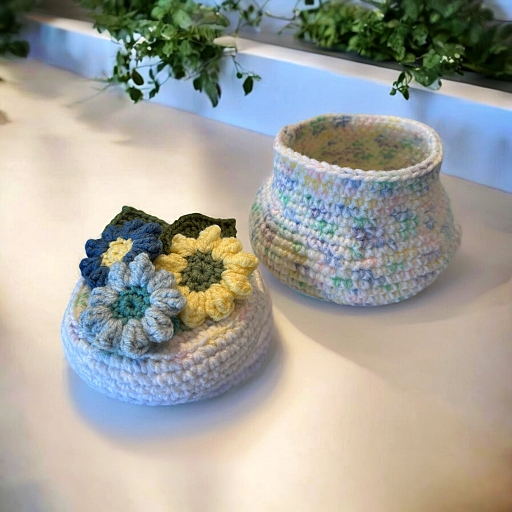
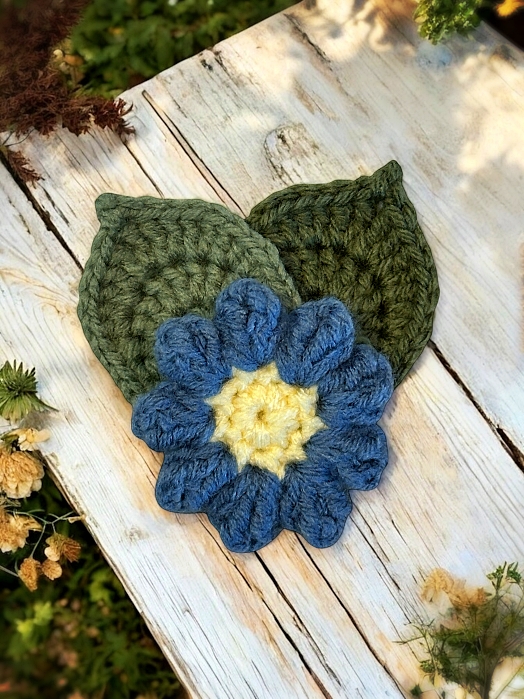
The pattern includes detailed instructions for making the jar, lid, and the decorative flower and leaf elements. You can mix and match colors or experiment with different yarn textures to create one-of-a-kind designs. Add a pop of color with bright flowers or keep it subtle with neutral tones—either way, the result is a beautiful, functional piece that showcases your crochet skills. Whether you’re looking for a quick, creative project or something special to add to your craft table, this pattern is a must-try!
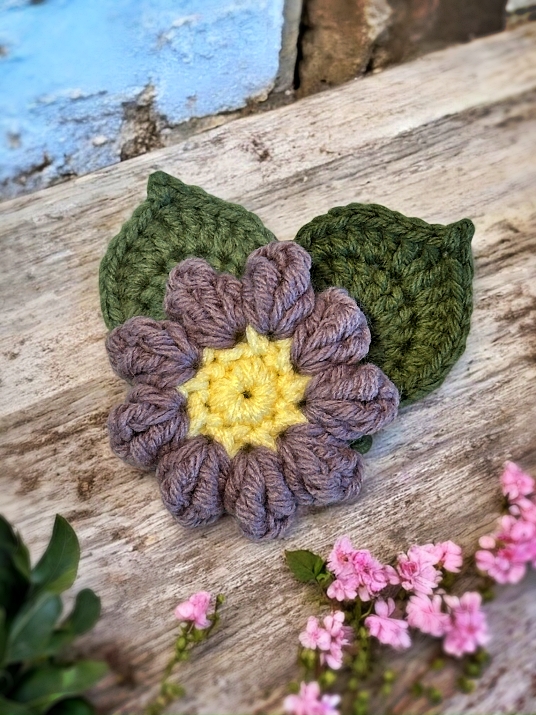
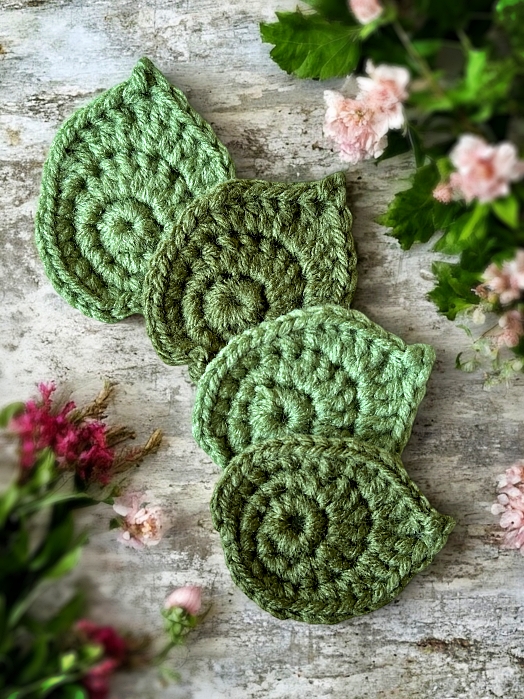
I am not including the patterns for the leaf or the flower on this page as it’s already very long. You can use either of the buttons below to read those patterns. Clicking either button opens a new page. You won’t lose this one.
The printable version of this pattern is a member exclusive ONLY! It is only available to download and print if you are a member on Buy Me a Coffee or you are subscriber on my Facebook page. The entire pattern for the jar, lid, leaves and flower are all free to read on this website and are ad-supported. You can see the pattern in my Buy Me A Coffee shop here: Stash-Busting Crochet Jar and Lid with Flowers and Leaves – Member Pattern It’s set at a ridiculous price but free for all monthly of yearly members.
Another way to avoid ads and pop-ups, get instant, PRINTABLE downloads of this pattern and others, is by becoming a Member. When you become a Website Supporter at $4/month, you’ll gain access to exclusive member only posts on Buy Me A Coffee. You can download as many patterns as you like for the same $4 each month. You can go to this page to learn more, become a member and support my work… Exclusive Member Area
Love the free patterns? You can say thanks in a couple of ways. You can read more about how you can Support My Work by clicking that link or make a small donation and Buy Me a Coffee. 👈🏼 That is a website where you can make a one time donation as a thanks. If you don’t want or are unable to make a financial donation, sharing this pattern through social media is a great way to help out too! The links below are a super easy way for you to do so.
Things You Need
Worsted weight yarn (less than a standard ball)
Size E/ 4 (3.5 mm) to size C/2 (2.5 mm) crochet hook (for 1 stand of yarn)
Size G/6 (4.25 mm) or smaller crochet hook (for 2 stands of yarn). If you can’t find a 4.25 mm hook and 4.5 will do. It’s not that much bigger.
Tapestry needle
Stitch marker (optional)
Gauge
It isn’t really important with this project. Make sure to maintain tension throughout the project so the lid fits correctly. See the Hints and Tips section for more information on hook size.
The Pot or Jar
Ch 2 (make the first chain large enough to fit in all the stitches for Round 1)
Round 1: 12sc around. Do NOT join. The following rounds are worked without joining.
Round 2: Sc in first sc of previous round. 2sc in the next stitch. *Sc in next stitch. 2sc in the next stitch.* Repeat from * to * around. Place stitch marker. (18 sts)
Round 3: *2sc. 2sc in the next stitch.* Repeat from * to * around to stitch marker. (24 sts)
Round 4: *3sc. 2sc in the next stitch.* Repeat from * to * around to stitch marker. (30 sts)
Round 5: *4sc. 2sc in the next stitch.* Repeat from * to * around to stitch marker. (36 sts)
Round 6: *5sc. 2sc in the next stitch.* Repeat from * to * around to stitch marker. (42 sts)
Round 7: *3sc. 2sc in the next stitch. 2sc. 2sc in the next stitch.* Repeat from * to * around to stitch marker. (54 sts)
Round 8: *5sc. 2sc in the next stitch.* Repeat from * to * around to stitch marker. (63 sts)
Round 9: Sc around in the back loop.
Round 10: Sc around.
Round 11: *8sc. 2sc in the next stitch.* Repeat from * to * around to stitch marker. (70 sts)
Round 12-15: Sc around.
Round 16: *8sc. Sc2tog over the next 2 stitches.* Repeat from * to * around to stitch marker. (63 sts)
Round 17: Sc around.
Round 18: *7sc. Sc2tog over the next 2 stitches.* Repeat from * to * around to stitch marker. (56 sts)
Round 19: Sc around.
Round 20: *6sc. Sc2tog over the next 2 stitches.* Repeat from * to * around to stitch marker. (49 sts)
Round 21-25: Sc around. Sl st in next st. Break yarn. Work in ends.
The Lid
Ch 2 (make the first chain large enough to fit in all the stitches for Round 1)
Round 1: 12sc around. Do NOT join. The following rounds are worked without joining.
Round 2: Sc in first sc of previous round. 2sc in the next stitch. *Sc in next stitch. 2sc in the next stitch.* Repeat from * to * around. Place stitch marker. (18 sts)
Please share this page!
More FREE patterns
Click the pic to read online!!


FREE Knitting Graph Paper for Colorwork Knitting


![]()
![]()


Round 3: *2sc. 2sc in the next stitch.* Repeat from * to * around to stitch marker. (24 sts)
Round 4: *3sc. 2sc in the next stitch.* Repeat from * to * around to stitch marker. (30 sts)
Round 5: *4sc. 2sc in the next stitch.* Repeat from * to * around to stitch marker. (36 sts)
Round 6: *5sc. 2sc in the next stitch.* Repeat from * to * around to stitch marker. (42 sts)
Round 7: *3sc. 2sc in the next stitch. 2sc. 2sc in the next stitch.* Repeat from * to * around to stitch marker. (54 sts)
Round 8: Sc around in the back loop.
Round 9: *16sc. Sc2tog * Repeat from* to * 2 times more. (51 sts)
Round 10-11: Sc around. Sl st in next st. Break yarn. Work in ends.
Hints and Tips
The tighter your stitches the more solid and stiffer the fabric you create. I suggest that you use the smallest hook you can use comfortably to make the pot and lid. I used as small as a 2.5 mm hook but it was TIGHT. I don’t think I’d go any smaller than this for a single strand of worsted weight yarn. 4.25 was a great size for the larger, double strand pot.
Maintaining tension is very important for this project! The lid is designed to be only slightly larger than the top of the pot. If your tension suddenly are tighter or more loose when making the lid, it won’t fit.
Make sure the lid and pot are made with the same size hook and thickness of yarn. The lid won’t fit otherwise. It’s made to be snug and if your yarn is thinner or your tension os off, it won’t fit correctly.
If you want larger and smaller flowers and leaves, use different sized hooks. Large hook equals a larger flower and leaf. The same holds true for the pot and lid. I wouldn’t go larger than a 3.5 mm hook. The stitches need to be tight enough to hold their shape.
You can personalize the pot and lid anyway you like. Embroider a pattern on it, a name, maybe flowers. There are many ideas and options that you can do to personalize your piece. It’s really up to you and your creativity.
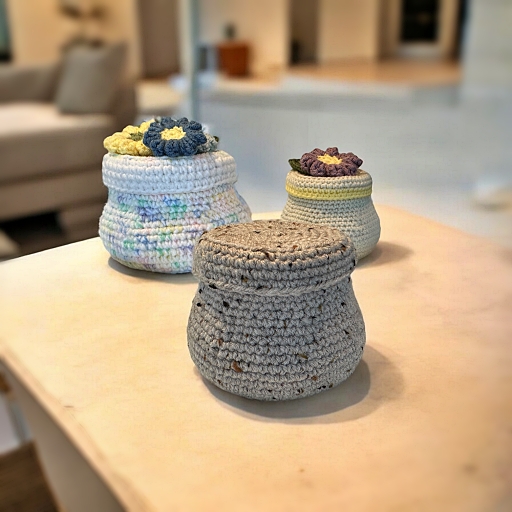
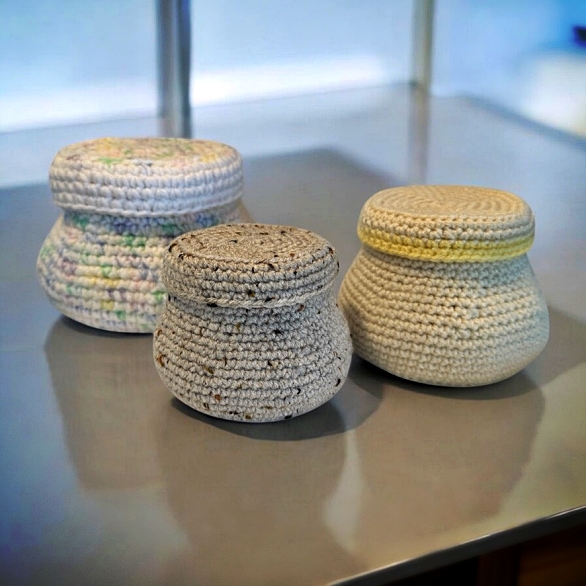
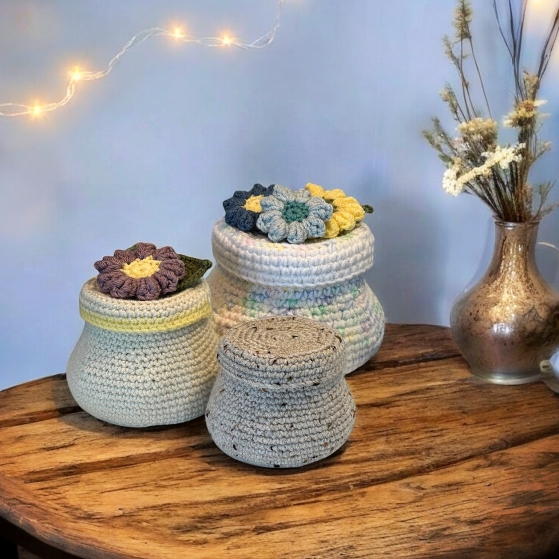
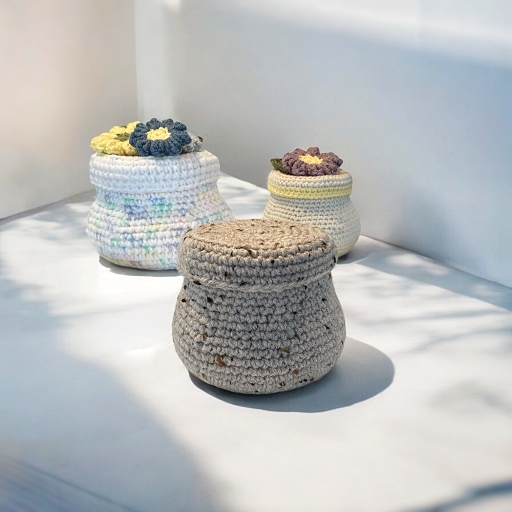
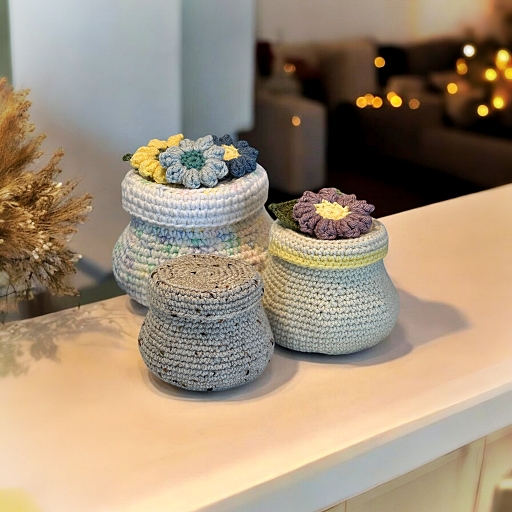
You can make stripes by changing colours of yarn you use. This would be a great way to use up the little leftover bits of yarn. Make sure the thicknesses are yarn are the same. Not all brands are as thick as others. I changed to yellow for rounds 10-11 for the lid on the mid-sized pot. I changed to white from rounds 8-11 for the largest pot.
The size of your pot is determined by the size and thickness of your yarn. All the pots and lids are made with the same pattern. All that I changed for the largest pot, was 2 strands of yarn and a size 4.25 mm hook. The mid-size version (light beige with yellow on the rim) was done with a 3.5 mm hook, the smallest (ecru with flecks) with a 2.5 mm hook. Both were done with one strand of yarn.
Shape the final jar with your hand and fingers. It will hold its shape as you press and stretch it in the round shape you want. It acts sort of like clay to a certain extent.
If your lid is too small you can stretch and form it a bit with your hands. Grab the edges of the either side of the lid with your fingers and pull apart. Turn it a 1/8th of a turn and pull it apart again. Keep moving around like this until it’s big enough to fit the top of the pot.
To make the jar sit flat and the top level, place it on top of a table and press down a bit.
If you want a tiny pot, you could use crochet cotton thread instead of yarn. You could also use thinner yarn for smaller pots. I haven’t done this, but you’ll need to play around with hook size to get a tight gauge.