Posted on Leave a comment

Super Simple Fingerless Gloves – FREE Knitting Pattern

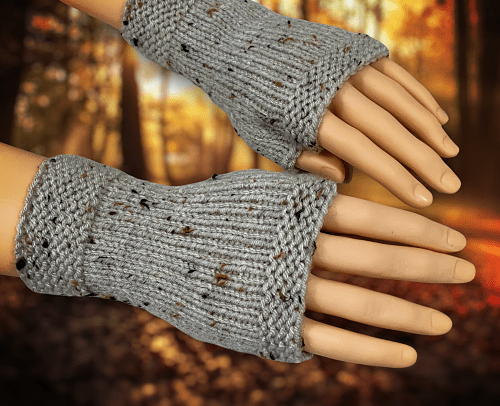
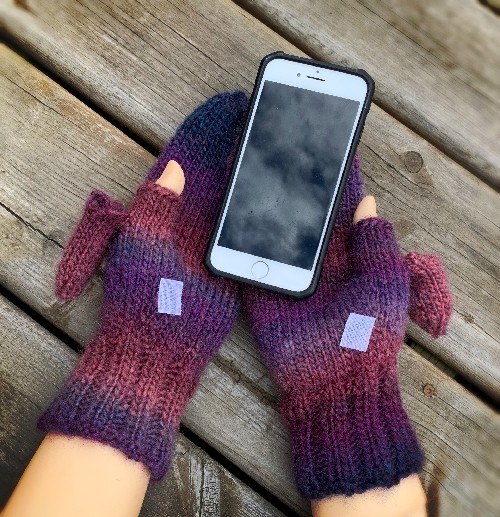
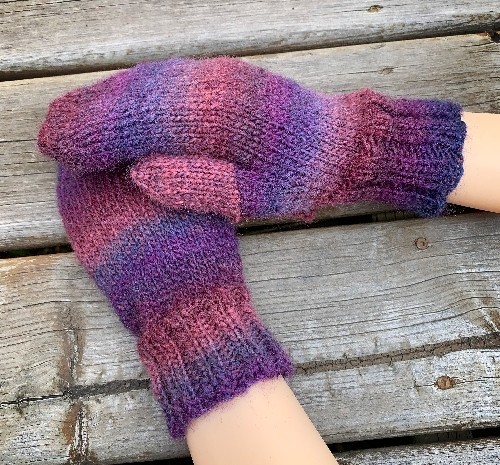
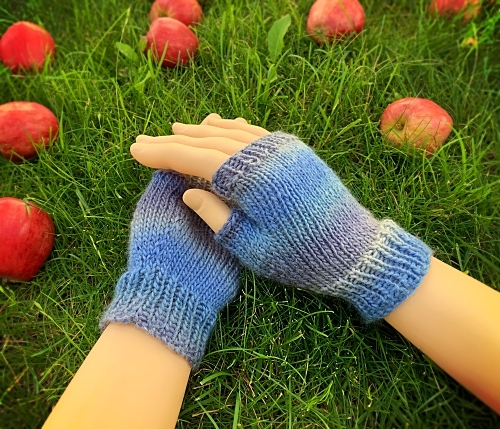
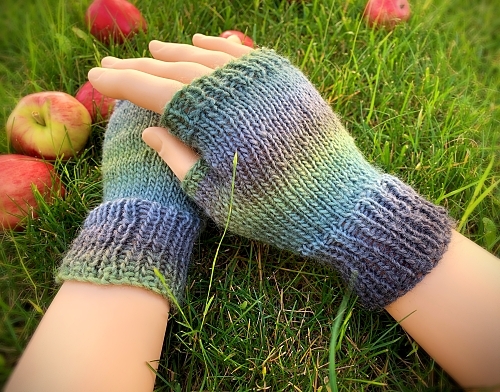
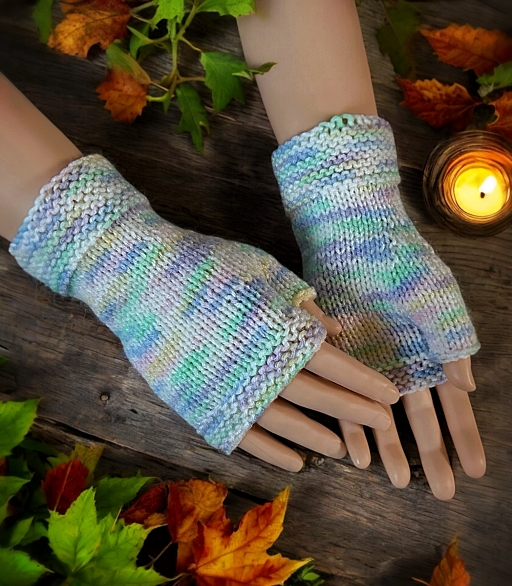
Simple Knit Fingerless Gloves

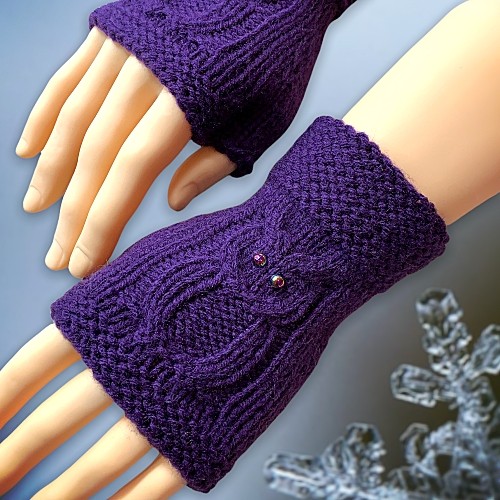
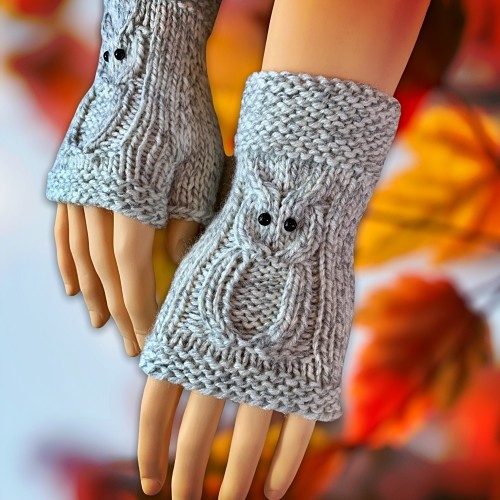
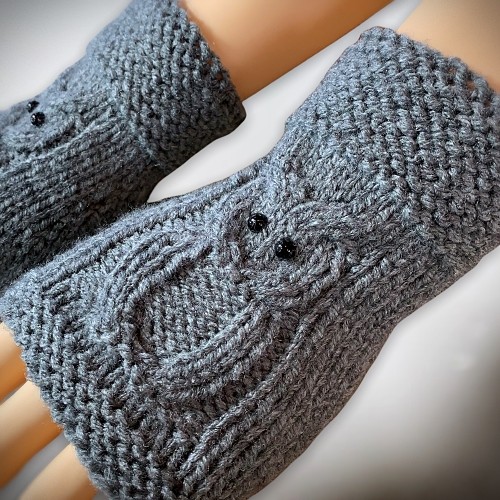
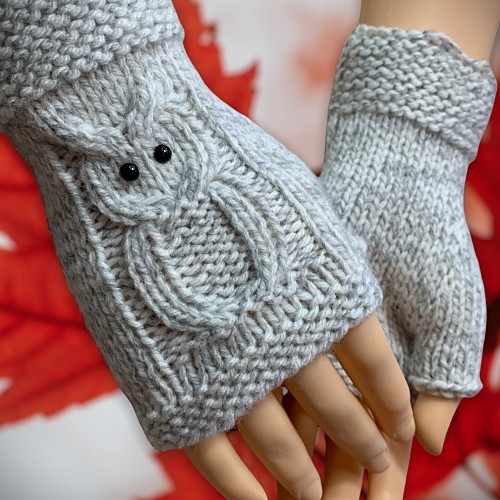
Are you just learning to knit? Tired of making dishcloths and scarves and want to make something awesome? Here is something that will make you look like a pro when it comes to knitting. A total brag-worthy design that any knitting newbie can make.

I’ve written a bunch of beginner patterns for slippers, but never for fingerless gloves. It was a common request, but for some reason, I never felt compelled to do so. After a bit of false starts and redesigns, I’ve finally come up with a fingerless glove pattern that I am happy with. I’ve kept the seams to a minimum and placed the seam along the outside of the hand and inside of the thumb. If you’re not a fan of seams my other fingerless gloves and mitts knitted on dpn can be found here – Fingerless Gloves – with OWLS, How to Knit Texting Mittens, How to Knit Fingerless Gloves and How to Knit Flip Mitts.

These mitts are knitted completely flat, on 2 needles and are perfect for the beginner. There is use of a stitch holder and picking up those stitches to complete the thumb, but it isn’t difficult. Slide them on to the holder, slide them back on the needle when instructed and knit them like any other set of stitches. If you need help with increasing stitches, there is a video showing how to increase when making the P1 and the M1.I also just made a video showing How to Use a Stitch Holder. You can click those links to watch the how-to videos. They are also embedded at the end of this page. Scroll to the bottom to watch.

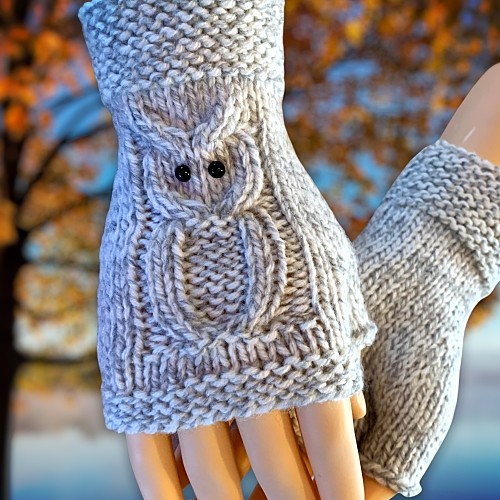
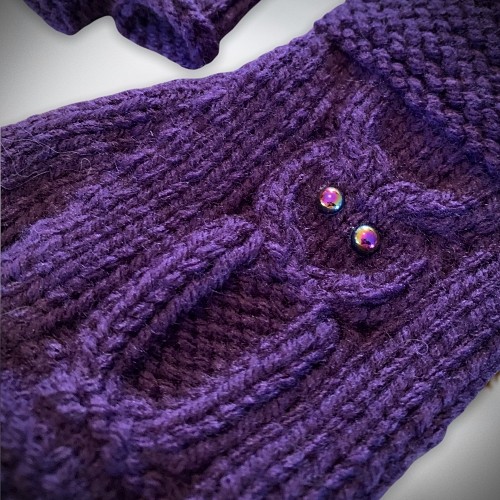
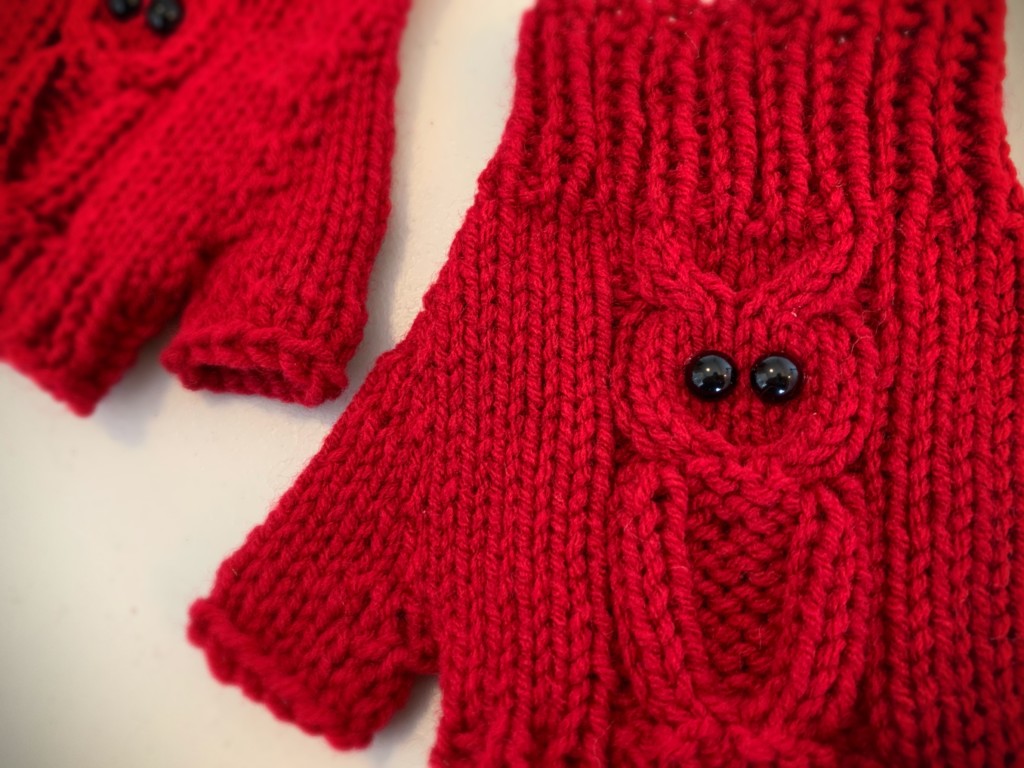
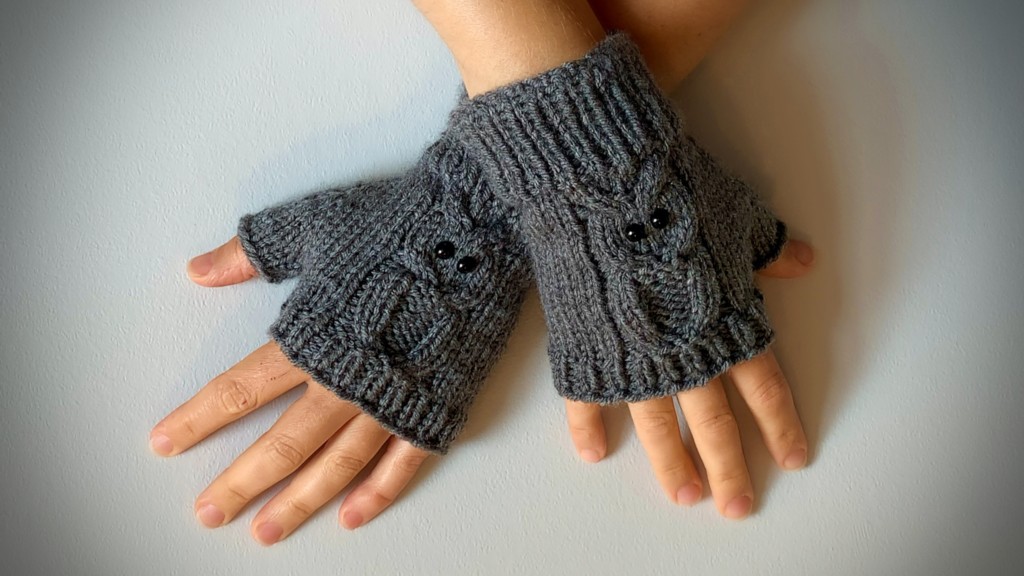
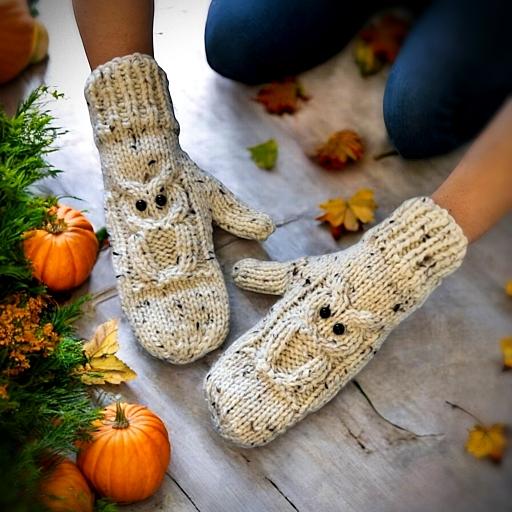
I’ve also jazzed up this basic design a bit. If you want to knit owl gloves flat on 2 needles just like this pattern is, You can use this link – Easy to Knit Owl Fingerless Gloves to read the free knitting pattern online.

I’ve also written the pattern to fit different sizes – small, medium and large. Once again I’ll use the analogy of what fits my hand. I wear a medium rubber glove and the medium size fits my hand perfectly. I wash dishes and scrub my toilets. I wear gloves when I do. If you never wear rubber or latex gloves, this won’t make any sense to you, I guess. I’m only saying this because I have had complaints about my sizing references. I don’t live in a gloveless kind of world but I’m glad some people do. It always amazes me what some “Karens” feel the need to bitch about ? If you want to go to a specific size you can try these links. If I’ve done my code correctly, it should take you to the right point on the webpage:

Small

Medium

Large

I’ve made a PDF download for this pattern. I didn’t think it was going to be this long until I wrote it out. I made the decision to write each size and hand out separately to make it even easier for the new knitters out there who want to give this pattern a go. And btw, you can totally do it! To get the downloadable pattern for a small fee you can get it in my Etsy Shop, Ravelry, LoveCrafts and from this website – KweenBee.com.

If you would prefer to order a printed paperback version from Amazon, you can now do so! Shipping is free if you are an Amazon Prime member. Make sure you select the country you are in to take advantage of the free shipping. Click the following link for your country – United States, United Kingdom, Canada, and Australia. Available in English only.

Another way to avoid ads and pop-ups, get instant, PRINTABLE downloads of this pattern and others, is by becoming a Member on this website. When you become a Website Supporter for $3/month, you’ll gain access to exclusive member only posts. These posts contain one click downloads of the patterns. Simply click the Download & Print button. The PDF will automatically download to your computer or smart device. You can then read it on your device or print it at your leisure. You can download as many patterns as you like for the same $3 each month. You can go to this page to learn more, become a member and support my work… Exclusive Member Area

I also plan on making a how-to video for this. It will cover the medium size as that’s what most people order when I sell online. I always am hopeful I’ll get the videos done in a timely manner, but they’re always more work than I think they’re going to be. You can check out my other videos in the meantime with this handy link – KweenBee on YouTube – Janis Frank

Love the free patterns? You can say thanks in a couple of ways. You can read more about how you can Support My Work by clocking that link or make a small donation and Buy Me a Coffee. 👈🏼 That is a website where you can make a one time donation as a thanks. If you don’t want or are unable to make a financial donation, sharing this pattern through social media is a great way to help out too! The links below are a super easy way for you to do so.


Gauge

This is important to follow for correct sizing.

2″ (5 cm) = 10 sts

2″ (5 cm) – 16 rows

If You Need Help with the M1 or P1

Scroll down to the end of the page to watch quick how-to videos showing how to do these simple stitches. There’s a video showing how to use a stitch holder too!

Things You Need:

You can click any link below to see what you need.

Worsted weight yarn

Size 6 US (4 mm) knitting needles

Stitch holder – It looks like a big safety pin

Tapestry needle


Small

Right Hand

Cast on 31

Rows 1-14: Knit across

Row 15: Knit across

Row 16: Purl across

Row 17: Knit across

Row 18: Purl across

Row 19: Knit across

Row 20: Purl across

Row 21: Knit across

Row 22: Purl across

Row 23: K18 M1 K1 M1 K12

Row 24: Purl across

Row 25: Knit across

Row 26: P12 PM1 P3 PM1 P18

Row 27: Knit across

Row 28: Purl across

Row 29: K18 M1 K5 M1 K12

Row 30: Purl across

Row 31: Knit across

Row 32: P12 PM1 P7 PM1 P18

Row 33: Knit across

Row 34: Purl across

Row 35: K18 M1 K9 M1 K12

Row 36: Purl across

Row 37: K18. Slip the next 11 stitches onto a stitch holder. K12.

Row 38: Purl across

Row 39: Knit across

Row 40: Purl across

Row 41-48: Knit across

Cast off.

Making the Thumb

Pick up the 11 stitches on the stitch holder

Row 1: Knit across

Row 2: Purl across

Row 3: Knit across

Row 4: Purl across

Cast off.

Sew seam along the side of the glove and the inside of the thumb. Work in ends.

Left Hand

Cast on 31

Rows 1-14: Knit across

Row 15: Knit across

Row 16: Purl across

Row 17: Knit across

Row 18: Purl across

Row 19: Knit across

Row 20: Purl across

Row 21: Knit across

Row 22: Purl across

Row 23: K12 M1 K1 M1 K18

Row 24: Purl across

Row 25: Knit across

Row 26: P18 PM1 P3 PM1 P12

Row 27: Knit across

Row 28: Purl across

Row 29: K12 M1 K5 M1 K18

Row 30: Purl across

Row 31: Knit across

Row 32: P18 PM1 P7 PM1 P12

Row 33: Knit across

Row 34: Purl across

Row 35: K12 M1 K9 M1 K18

Row 36: Purl across

Row 37: K12. Slip the next 11 stitches onto a stitch holder. K18.

Row 38: Purl across

Row 39: Knit across

Row 40: Purl across

Row 41-48: Knit across

Cast off.

Making the Thumb

Pick up the 11 stitches on the stitch holder

Row 1: Knit across

Row 2: Purl across

Row 3: Knit across

Row 4: Purl across

Cast off.

Sew seam along the side of the glove and the inside of the thumb. Work in ends.

Medium

Right Hand

Cast on 33

Rows 1-14: Knit across

Row 15: Knit across

Row 16: Purl across

Row 17: Knit across

Row 18: Purl across

Row 19: Knit across

Row 20: Purl across

Row 21: Knit across

Row 22: Purl across

Row 23: K19 M1 K1 M1 K13

Row 24: Purl across

Row 25: Knit across

Row 26: P13 PM1 P3 PM1 P19

Row 27: Knit across

Row 28: Purl across

Row 29: K19 M1 K5 M1 K13

Row 30: Purl across

Row 31: Knit across

Row 32: P13 PM1 P7 PM1 P19

Row 33: Knit across

Row 34: Purl across

Row 35: K19 M1 K9 M1 K13

Row 36: Purl across

Row 37: Knit across

Row 38: P13 PM1 P11 PM1 P19

Row 39: Knit across

Row 40: Purl across

Row 41: K19. Slip the next 13 stitches onto a stitch holder. K13.

Row 42: Purl across

Row 43: Knit across

Row 44: Purl across

Row 45-52: Knit across

Cast off.

Making the Thumb

Pick up the 13 stitches on the stitch holder

Row 1: Knit across

Row 2: Purl across

Row 3: Knit across

Row 4: Purl across

Cast off.

Sew seam along the side of the glove and the inside of the thumb. Work in ends.

Left Hand

Cast on 33

Rows 1-14: Knit across

Row 15: Knit across

Row 16: Purl across

Row 17: Knit across

Row 18: Purl across

Row 19: Knit across

Row 20: Purl across

Row 21: Knit across

Row 22: Purl across

Row 23: K13 M1 K1 M1 K19

Row 24: Purl across

Row 25: Knit across

Row 26: P19 PM1 P3 PM1 P13

Row 27: Knit across

Row 28: Purl across

Row 29: K13 M1 K5 M1 K19

Row 30: Purl across

Row 31: Knit across

Row 32: P19 PM1 P7 PM1 P13

Row 33: Knit across

Row 34: Purl across

Row 35: K13 M1 K9 M1 K19

Row 36: Purl across

Row 37: Knit across

Row 38: P19 PM1 P11 PM1 P13

Row 39: Knit across

Row 40: Purl across

Row 41: K13. Slip the next 13 stitches onto a stitch holder. K19.

Row 42: Purl across

Row 43: Knit across

Row 44: Purl across

Row 45-52: Knit across

Cast off.

Making the Thumb

Pick up the 13 stitches on the stitch holder

Row 1: Knit across

Row 2: Purl across

Row 3: Knit across

Row 4: Purl across

Cast off.

Sew seam along the side of the glove and the inside of the thumb. Work in ends.

Large

Right Hand

Cast on 35

Rows 1-14: Knit across

Row 15: Knit across

Row 16: Purl across

Row 17: Knit across

Row 18: Purl across

Row 19: Knit across

Row 20: Purl across

Row 21: Knit across

Row 22: Purl across

Row 23: K20 M1 K1 M1 K14

Row 24: Purl across

Row 25: Knit across

Row 26: P14 PM1 P3 PM1 P20

Row 27: Knit across

Row 28: Purl across

Row 29: K20 M1 K5 M1 K14

Row 30: Purl across

Row 31: Knit across

Row 32: P14 PM1 P7 PM1 P20

Row 33: Knit across

Row 34: Purl across

Row 35: K20 M1 K9 M1 K14

Row 36: Purl across

Row 37: Knit across

Row 38: P14 PM1 P11 PM1 P20

Row 39: Knit across

Row 40: Purl across

Row 41: K20 M1 13 M1 K14

Row 42: Purl across

Row 43: K20. Slip the next 15 stitches onto a stitch holder. K14.

Row 44: Purl across

Row 45: Knit across

Row 46: Purl across

Row 47-54: Knit across

Cast off.

Making the Thumb

Pick up the 15 stitches on the stitch holder

Row 1: Knit across

Row 2: Purl across

Row 3: Knit across

Row 4: Purl across

Cast off.

Sew seam along the side of the glove and the inside of the thumb. Work in ends.

Left Hand

Cast on 35

Rows 1-14: Knit across

Row 15: Knit across

Row 16: Purl across

Row 17: Knit across

Row 18: Purl across

Row 19: Knit across

Row 20: Purl across

Row 21: Knit across

Row 22: Purl across

Row 23: K14 M1 K1 M1 K20

Row 24: Purl across

Row 25: Knit across

Row 26: P20 PM1 P3 PM1 P14

Row 27: Knit across

Row 28: Purl across

Row 29: K14 M1 K5 M1 K20

Row 30: Purl across

Row 31: Knit across

Row 32: P20 PM1 P7 PM1 P14

Row 33: Knit across

Row 34: Purl across

Row 35: K14 M1 K9 M1 K20

Row 36: Purl across

Row 37: Knit across

Row 38: P20 PM1 P11 PM1 P14

Row 39: Knit across

Row 40: Purl across

Row 41: K14 M1 13 M1 K20

Row 42: Purl across

Row 43: K14. Slip the next 15 stitches onto a stitch holder. K20.

Row 44: Purl across

Row 45: Knit across

Row 46: Purl across

Row 47-54: Knit across

Cast off.

Making the Thumb

Pick up the 15 stitches on the stitch holder

Row 1: Knit across

Row 2: Purl across

Row 3: Knit across

Row 4: Purl across

Cast off.

Sew seam along the side of the glove and the inside of the thumb. Work in ends.

Hints and Tips

Make your seams as narrow as possible when sewing them. The bulkier the seam the more noticeable and possibly uncomfortable for the wearer.

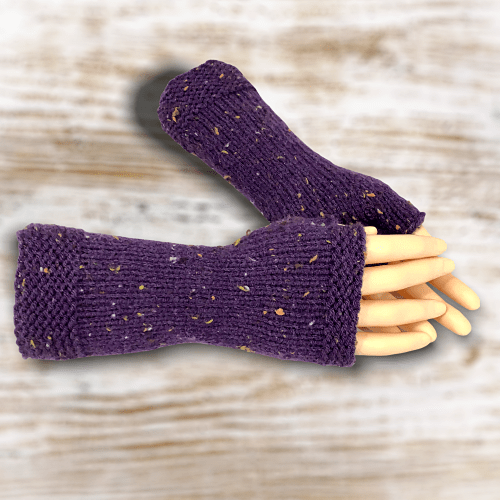
The purple fingerless mitts have 60 rows total between the garter stitch cuff and the start of the thumb gusset (Row 15 – 22). I don’t think I would increase much further than that. The glove itself isn’t very stretchy and won’t fit further up the forearm. Too much bunching may also make the glove push its way further down and off the fingers.

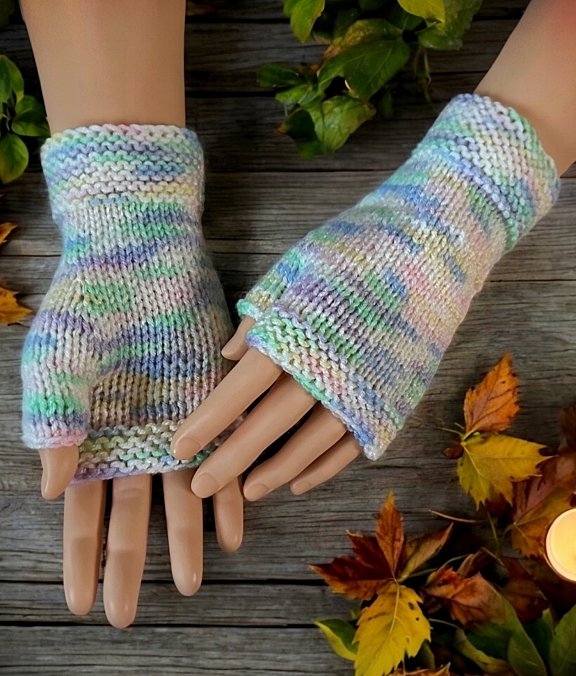
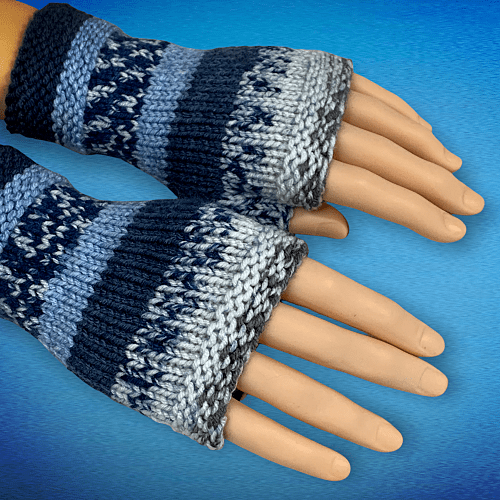
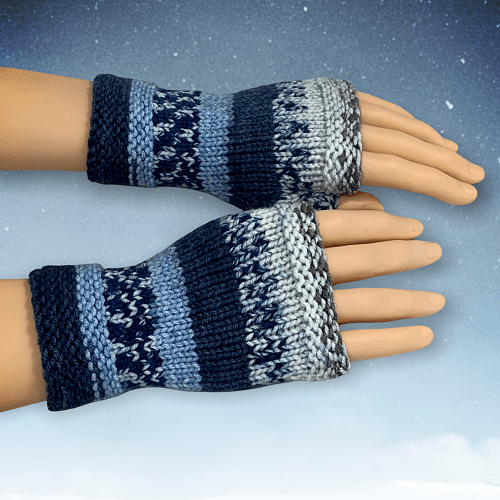
I used some self-striping yarn to make these. Not all striping yarn is created equal. Some of them are designed to stripe for larger projects and don’t really work for smaller projects like this. Though with saying that, you could always cut the yarn and start a new colour where you choose. You will have more ends to deal with, but I have a post that shows you How to Work in the Ends While Knitting. ?? This link will take you right there.

Abbreviations

K – knit

P – purl

M1 – Make one (knit wise). Increase one stitch between the stitches. Pick up the yarn between the stitches. Twist slightly. Place it on your non-working needle. Knit the stitch. Watch this video below to see how.

How to make one or M1 – Increase between stitches.

PM1- Make one (purl wise). Pick up the stitch as you did for M1, but purl the stitch as you regularly would. You can watch the video below.

And for those of you who are unsure of how to use a stitch holder, I made a quick little video that shows you how to do it without cutting the yarn. It’s a time saver for sure. No one likes working in ends if they can avoid it.

Posted on Leave a comment

Knitting Calculator – Decrease Stitches Evenly Across the Row

Knitter struggling with how to decrease stitches

The term, “decrease evenly across ? number of stitches” in any pattern can be an unpleasant sight to any knitter (me included). Whereas I try to do this calculation in the patterns I write, some don’t. Regardless, the stitch calculator below will help!

Using this calculator will give you evenly spaced decreases over the length of your work. All you need to enter is the number of stitches you have on your needle and the number of stitches you need to decrease. Everything is calculated for you.


Please note: If you have more or less stitches at the end of your work, go ahead and knit them. The number of decreases across the stitches is correct.

I want to be completely transparent in where this increase and decrease knitting calculators originated. I did not write the code myself. After much tweaking of this query to ChatGPT, I’ve developed a stitch calculator to determine how to decrease evenly across your work. I knew what I wanted, I just didn’t know how to write the code to make it happen. AI is useful after all!

Posted on 8 Comments

Super Simple Easy to Knit Slippers – Free Knitting Pattern – Now with a Complete How-to Video!

easy to knit slipper pattern

These slippers are perfect for a beginner! If you know how to cast on, knit, purl, K2tog, M1, and draw through (or gather) stitches you will be able to make these slippers. Don’t know how? I have a full online video tutorial to show you how to do it!.

If you’re looking for the pattern, keep scrolling down the page. It’s written out in full below.

Happy days! Because I was asked by a number of people to make a printable version this pattern, I made up the PDF! You can get it in all my usual places. The first is right from this site. Click this link to download and print this pattern – Super Simple Easy to Knit Slippers – Great Knitting Pattern for Beginners. You can also find it in my Etsy shop, Love Crafts and on Ravelry. If you like Amazon, you can also get the Kindle version there.

Loving the free patterns on this site? You can always help me out by sharing this with people you think may like it. A share on social media is always appreciated. You can use the links below??????. Financial donations are always welcome, too! I recently started a profile on Buy Me a Coffee. It’s a one time donation that is a simple thanks for all the hard work I put into my patterns and this website.

Another way to avoid ads and pop-ups, get instant, PRINTABLE downloads of this pattern and others, is by becoming a Member on this website. When you become a Website Supporter for $3/month, you’ll gain access to exclusive member only posts. These posts contain one click downloads of the patterns. Simply click the Download & Print button. The PDF will automatically download to your computer or smart device. You can then read it on your device or print it at your leisure. You can download as many patterns as you like for the same $3 each month. You can go to this page to learn more, become a member and support my work… Exclusive Member Area


Things You Will Need:

Worsted weight yarn (aka 4 or Aran weight or 10 ply) I like acrylic. It washes and wears well. It’s also easy to find and rather inexpensive.

Size 4 mm (US size 6) knitting needles

Tapestry needle (to sew seams and work in the ends)

Knitted socks can be slippery on wood floors but I find that this can help:


Abbreviations

If you’re unsure how to do any of the following, click the link to watch the video demo.

Cast on – cast on

K – knit

P – purl

K2tog – knit 2 stitches together

M1 – Make one (Makes one stitch increase)

draw through (or gather) stitches

Gauge

With size 4 mm (US size 6) needles or whatever size needles you need to create the number of stitches and rows. Be sure to check your gauge or the sizing could be off. But even in saying that, this is a very forgiving pattern. If you’re off a bit, it’ll be okay.

4″ = 16 stitches

4″ = 40 rows

Sizes are written as follows:

Women 6-7 (8-9, 10-11,12-13)

Men’s 5-6 (7-8, 9-10, 11-12)

It’s only the numbers of rows that are going to change with the sizing.

To Begin – Making the Heel Flap

Cast on 3 stitches

(I’m counting this as row 1 only because I mis-numbered the rows when I originally posted this knitting pattern. It was easier to change it at the beginning than renumbering the entire pattern.)

Rows 2 – 3: Knit across

Row 4: K1 M1 K2. (4 sts)

Rows 5 – 6: Knit across

Row 7: K1 M1 K2 M1 K1 (6 sts)

Rows 8 – 9: Knit across

Row 10: K1 M1 K4 M1 K1 (8 sts)

Rows 11 – 12: Knit across

Row 13: K1 M1 K6 M1 K1 (10 sts)

Rows 14 – 15: Knit across

Row 16: K1 M1 K8 M1 K1 (12 sts)

Rows 17 – 18: Knit across

Row 19: K1 M1 K10 M1 K1 (14 sts)

Rows 20 – 21: Knit across

Row 22: K1 M1 K12 M1 K1 (16 sts)

Row 23 – 24: Knit across

If you are having difficulties with casting on the stitches, the video above ???? starts exactly at that spot. If you know how to do that, keep on going with the pattern.

Row 25: Cast on 14 sts. (Yes, you already have 16 stitches on your needle. Don’t break your yarn. Simply cast on. The next stitches are knit into the stitches you cast on and the original 16 that were there). * P1 K1 * Repeat from * to * 6 more times. P1 K14 P1. (30 sts)

Row 26: Cast on 14 sts. (Yes again.) ⟡ K1 P1 ⟡ Repeat from ⟡ to ⟡ 6 more times. K16 ⦷ P1 K1 ⦷ Repeat for ⦷ to ⦷ 6 more times. (44 sts)

Row 27: ⧱ P1 K1 ⧱ Repeat from ⧱ to ⧱ 6 more times. P1 K14 P1. ⨳ K1 P1 ⨳ Repeat from ⨳ to ⨳ 6 more times (44 sts)

Row 28: ⋚ K1 P1 ⋚ Repeat from ⋚ to ⋚ 6 more times. K16 ⨈ P1 K1 ⨈ Repeat from ⨈ to ⨈ 6 more times.⧭

Repeat ⧭ to ⧭ 28 (31, 34, 37) times.

Another way to think of it, you will have knit 56 (62, 68, 74) rows TOTAL.

***END WITH ROW 27***. This maintains the pattern.

More of my stuff on Etsy:


You can make a widget like this for your blog or website, too.
Instructions are on my website here: How to Display Etsy Items on Your Website

Ending the Toe

Like with the casting on, some people have difficulties with forming the toe. The video below starts exactly at that point.

Next row: K1 K2tog 12 times. K1 K2tog to the end of the row.

Next row: P8 K7 P8

Next row: K2tog across. Knit the last stitch.

Next row: P5 K3 P4.

Pull the yarn through or draw stitches together. Cut the yarn leaving 12″ or so.

Finishing

Sew up the seam from where you gathered the toe stitches to roughly 2/3 up the foot.

Flip up the heel flap and sew up the seams on the back of the heel.

Work in your ends.

Hints and Tips

It’s important to sew the toe seam close to 2/3 of the way from the toe to the ankle. Any less and it will feel a bit sloppy on the wearer’s foot. Any further and it will be too tight for the wearer to get over their heel. You can lay it out and measure it or simply eyeball it. It’s not rocket science.
If you want to pick up stitches to add the heel flap after instead of how I did it in one piece, cast on 44 sts to start and then start at row 27.

This is a good pattern to use variegated yarn. The pattern is very simple so the yarn texture and print can really show off. You can use the self striping yarn, but getting the stripes to match will be difficult.
Like all my patterns, you can sell whatever slippers you make with this pattern. You are NOT permitted to print or copy this pattern in any way. You are not permitted to copy or redistribute this pattern in any form including, but not limited to, any physical or digital versions. To do so will violated copyright law. And give you bad karma.
Posted on 3 Comments

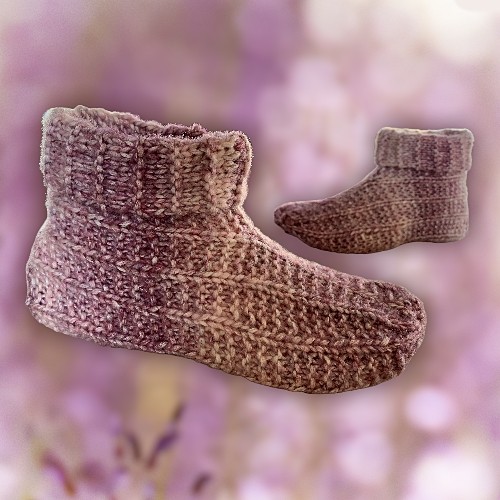
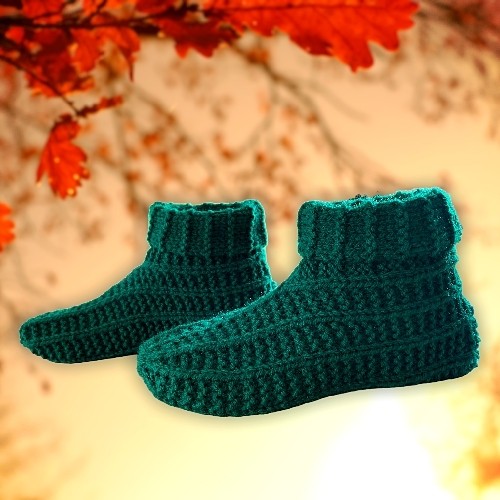
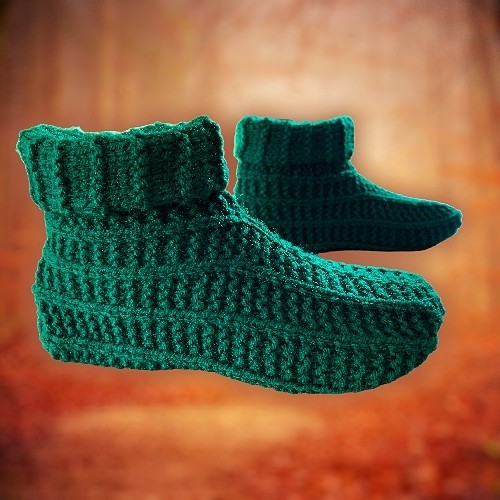
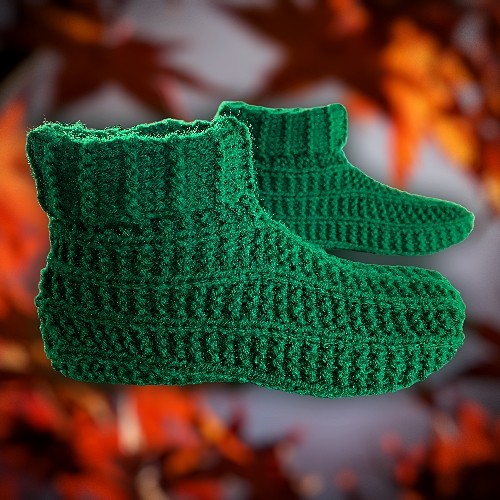
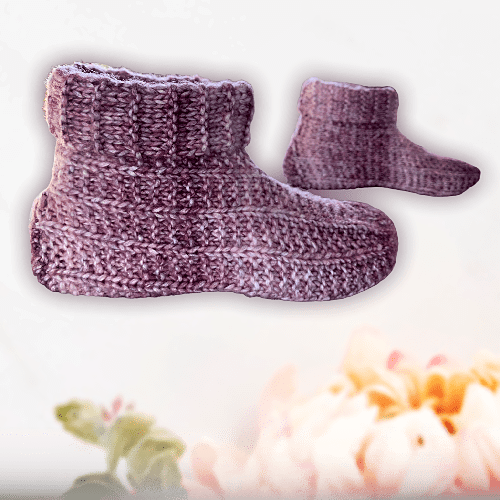
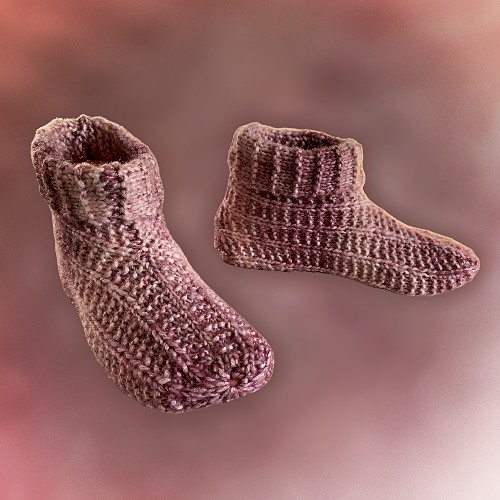
Easy to Knit Long Cuffed Slippers – FREE Knitting Pattern

FREE Knitting Pattern -Long Cuffed slippers - Green

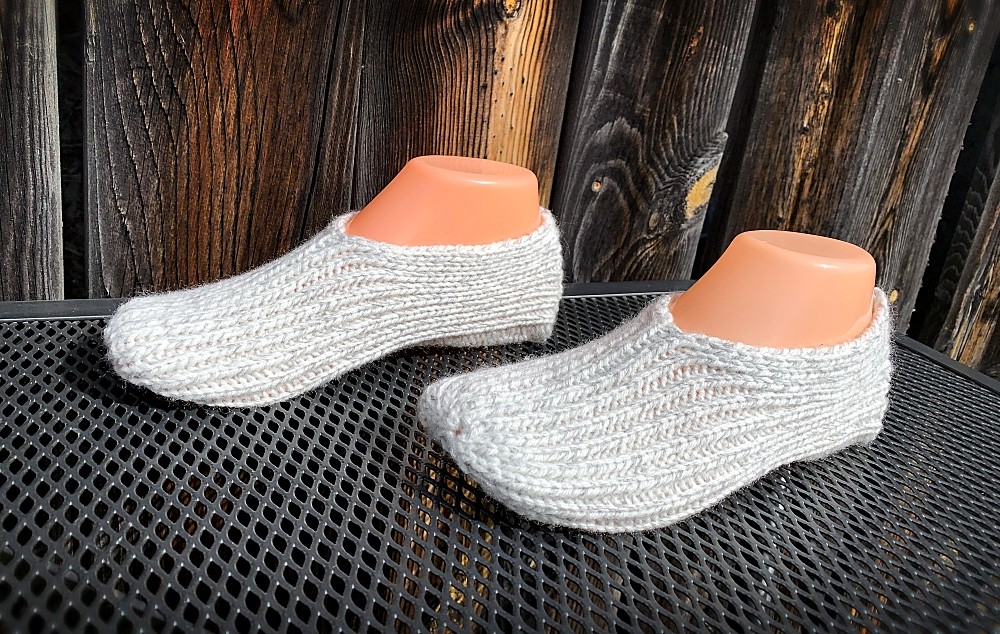
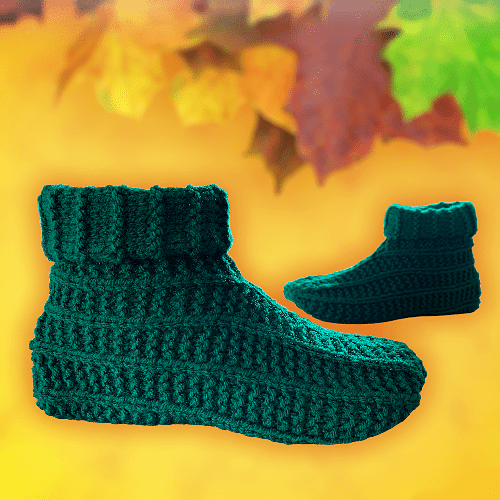
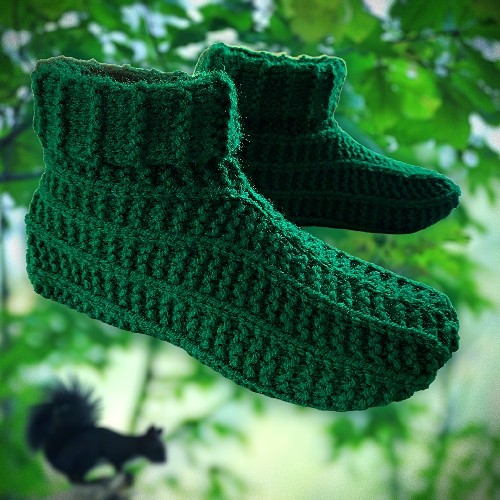
This easy to knit slipper pattern is a variation of my Rolled Cuff Slipper pattern. This pattern has the same foot design, but I know that some people prefer a longer cuff to help keep their ankles warm.

Like my previous slipper pattern, this was written to avoid any difficult techniques, specifically, picking up stitches. That is why this pattern is done in one piece; starting at the heel flap and working towards the toe. 

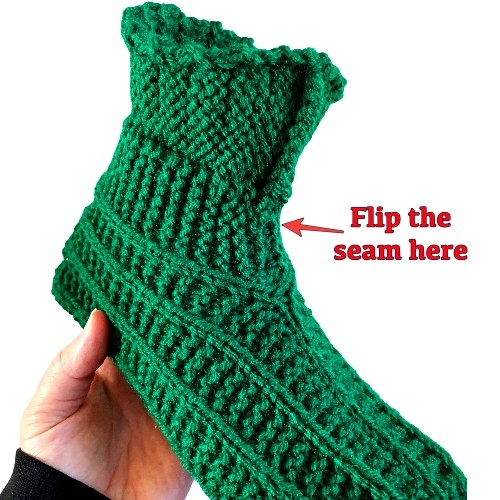
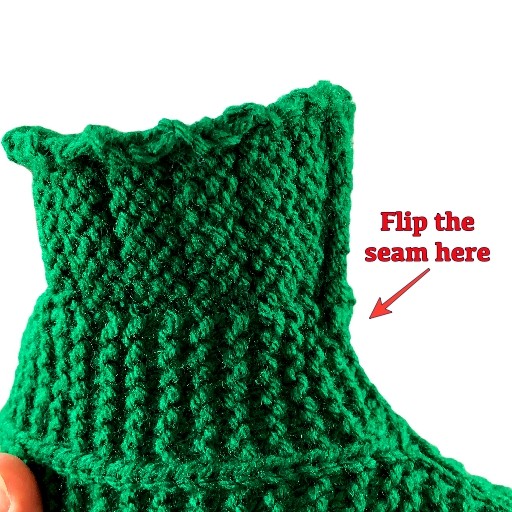
Also, the extended cuff is worked in one piece as you knit the slipper. I’ve given instructions and included photos to show how you’ll need to flip the slipper so the seam for the folded down section is on the right side. When folded, the seam disappears. You can read more about that when you go to the Hints and Tips section at the end of this post.

Love the free patterns? You can say thanks in a couple of ways. You can read more about how you can Support My Work by clicking that link or make a small donation and Buy Me a Coffee. ?? That is a website where you can make a one time donation as a thanks. (FYI I have some great offers if you would like to buy me multiple coffees. You can see those by clicking on the Extras tab or you can click this link Janis Frank Extras).

If you don’t want to or are unable to make a financial donation, sharing this pattern through social media is a great way to help out too! The links below are a super easy way for you to do so.

If you would like to avoid the ads on this page or would like to print the pattern, you can purchase the PDF for a small fee from this website at Easy to Knit Long Cuffed Slippers , through my Etsy shop or on Ravelry.

Another way to avoid ads and pop-ups, get instant, PRINTABLE downloads of this pattern and others, is by becoming a Member on this website. When you become a Website Supporter for $3/month, you’ll gain access to exclusive member only posts. These posts contain one click downloads of the patterns. Simply click the Download & Print button. The PDF will automatically download to your computer or smart device. You can then read it on your device or print it at your leisure. You can download as many patterns as you like for the same $3 each month. You can go to this page to learn more, become a member and support my work… Exclusive Member Area

Things You Need

Yarn (a standard ball of worsted weight yarn such as this will be more than enough)

Size 5 mm (US 8 ) single pointed needles

Tapestry needle to sew seams and work in ends

Gauge

18 stitches = 4 inches 

24 rows = 4 inches 

in stockinette

Sizes are written as such:

Women’s 6-7 (8-9, 10-11, 12)

Men’s 6 (7-8, 9-10, 11-12, 13)

Heel Flap

Cast on 2

Row 1: Knit across.

Row 2: Increase in each stitch. (4 sts)

Row 3 – 4 : Knit across.

Row 5: Increase in the first stitch. K until one stitch remains. Increase in this stitch. (6 sts)

Row 6 – 7: Knit across.

Row 8: Increase in the first stitch. K until one stitch remains. Increase in this stitch. (8 sts)

Row 9 – 10: Knit across.

Row 11: Increase in the first stitch. K until one stitch remains. Increase in this stitch. (10 sts)

Row 12 – 13: Knit across.

Row 14: Increase in the first stitch. K until one stitch remains. Increase in this stitch. (12 sts)

Row 15 – 16: Knit across.

PLEASE NOTE:

The following rows are for sizes Women’s size 12 and Men’s sizes 11, 12 and 13 ONLY:

Next row: Increase in the first stitch. K until one stitch remains. Increase in this stitch (14 sts)

Next 2 rows: Knit across.

Continue the pattern for all sizes.

Next row: Cast on 29 stitches. (Yes, you already have 12 (12, 12, 14, 14) stitches on your needle. After casting on, you’ll have 41 (41, 41, 43, 43) sts on your needle). The following is worked over the stitches you just cast on and the stitches from the heel. K8 P1 Knit to the end of the row.  As you worked those stitches, your work was transferred onto the other needle. Cast on another 29 sts onto this needle. (You now have 70 (70, 70, 72, 72 sts) on your needle)

Next row: K16 P1 *K3 P1* Repeat from * to * 2 more times. K12 (K12, K12, K14, K14) *P1 K3* Repeat from * to * 2 more times. P1 K16.

♥ ☺ Next row: P9 K52 (K52, K52, K54, K54) P9

Next row: K16 P1 *K3 P1* Repeat from * to * 2 more times. K12 (K12, K12, K14, K14) *P1 K3* Repeat from * to * 2 more times. P1 K16.

Next row: K8 P1 K52 (K52, K52, K54, K54) P1 K8.

Next row: K16 P1 *K3 P1* Repeat from * to * 2 more times. K12 (K12, K12, K14, K14) *P1 K3* Repeat from * to * 2 more times. P1 K16. ♥ Repeat from ♥ to ♥ 6 (6, 7, 7, 8) times more for 30, (30, 34, 34, 38) rows total.

Please note – Repeat the row marked with ☺ once to maintain the pattern.

Shaping Toe

Next row: Cast off 15 sts. P1 *K3 P1* Repeat from * to * 2 more times. K12 (K12, K12, K14, K14) *P1 K3* Repeat from * to * 2 more times. P1 K16.

Next row: Cast of 15 sts. Knit across.

◊ ♫ Next row: P2 *K3 P1* Repeat from * to * 2 times more. K12 (12, 12, 14, 14). ◘ P1 K3 ◘ Repeat from ◘ to ◘ 2 times more. P2.

Next row: Knit across. ◊ Repeat from ◊ to ◊ 9 (10, 10, 11, 11) times more for 22 (24, 24, 26, 26) rows total.

Please note – Repeat the row marked with  once to maintain the pattern.

End Toe

Next row: K2tog 10 (10, 10, 11, 11) times. K1 K2tog to last 3 sts. K1 K2tog. 

Next row: P1 K2 *P1 K1* Repeat from * to * once P1 K6 (6, 6, 7, 7) *P1 K1* Repeat from * to * 2 time more. P1.

Next row: K1 K2tog 4 (4, 4, 5, 5) times. K1 (1, 1, 0, 0). K2tog until last st. K1

Next row: P1 K1 P3 K3 P4.

Break yarn and pull through. Pull tight to draw loops together.

Hints and Tips

Leave a longer length of yarn when you first start the slipper. You can use this piece to sew one of the seams along the heel flap. When you end the slipper, leave that yarn length longer too. You can use the length to sew the toe seam.

When sewing the seams to form the cuff, when you get to the part that folds over, be sure to turn the slipper inside out so the seam is on the RIGHT side.

The sizing of these slippers is very forgiving. The garter stitch used throughout helps the slipper to stretch both width and length wise. If your gauge is off by a row or a stitch, you should be able to get the size of slipper you want.

Abbreviations

K – Knit

P – Purl

K2tog – knit 2 together

sts – stitches

st – stitch

The use of this pattern allows you to make and sell the slippers you make, but you may not redistribute or resell this pattern.

Posted on Leave a comment

Eight Slipper Styles to Knit

Eight Slipper Styles to Knit - Knitting Pattern Book

Well, I’m back at it again. Updating my old patterns with new photos and the occasional typo fix. I’m also very pleased to say that I have had enough of rehashing the old and am nearly done. Just a couple more to go.

So like always I’ve made this compilation of my original slipper patterns available as a PDF, Kindle and physical book. The book is available only through Amazon at this point. Like my other compilations, please pick the country you’re from so if you are an Amazon Prime member, you’ll get the shipping for free.

United States

United Kingdom

Canada

Australia

The patterns themselves are still all free to read on the website (the links are listed further down this post). You won’t be able to print them from the site. I lose ad revenue if you do… Betchya didn’t even think of that before ?. I’ve kept the cost for a printable PDF very low so it’s definitely within everyone’s budget. It’s less than a ball of yarn! You can purchase the PDF through this website here – Eight Slipper Styles to Knit or you can get it through my Etsy shop here – Eight Slipper Styles to Knit – Updated and Revised.

For those comfortable with reading patterns online, clicking any of the links below will take you right to it.
Easy to Knit Bow Slippers

Easy to Knit Slippers

Two Slippers with One Pattern

How to Knit Children’s Slippers

How to Knit Adult Slippers

How to Knit Slippers Just Like Granny Made

Adult Booties

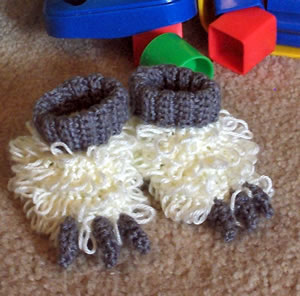
How to Knit Sheep Slippers

And to beat any Karen’s to the punch…if you’re scrolling past everything here to leave a nasty comment that I’m lying about free patterns. Or maybe you feel you need some passive/aggressive, poor you bullish!t that it’s too hard to close an ad to follow a link, please move on and don’t use my patterns. I don’t want my good in the world tarnished by someone as entitled as yourself. And also, learn how to use the internet before you start your self absorbed, unfounded complaints.

Posted on 2 Comments

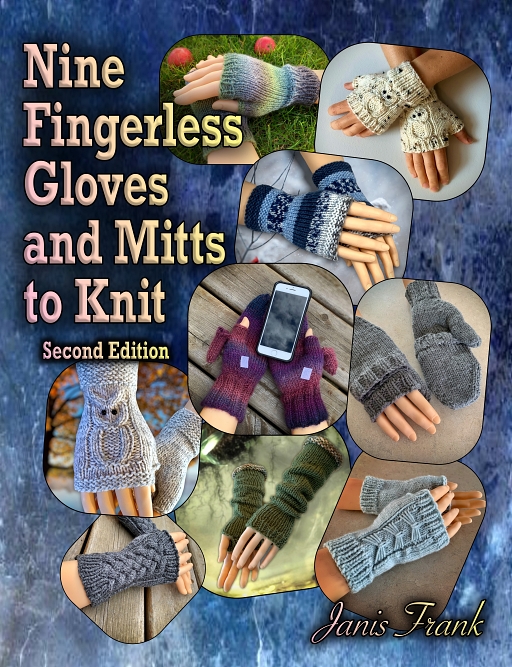
Nine Fingerless Gloves and Mitten Patterns to Knit

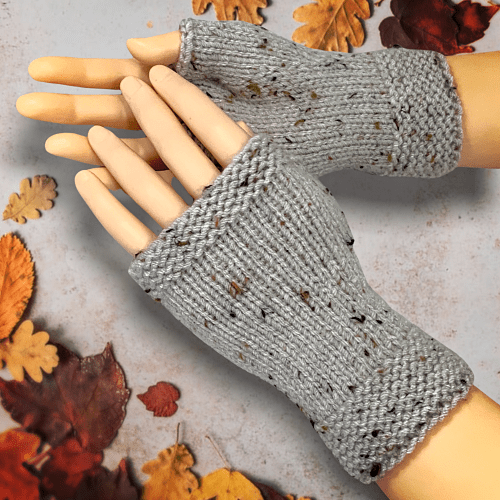
Nine fingerless gloves and mitts to knit

I’ve been busy as of late! I’ve updated photos and rewritten a few of my fingerless glove and mitt patterns over the last few weeks to bring you yet another compilation of my mitt and glove patterns! In this edition, there are a total of 9 patterns with all the classic favourites, plus a couple that were so old you may not have even known they existed!

If you don’t want to purchase the collection, that’s cool too! 😁 I have 2 options for you.

  1. Scroll down the page to the links to the free-to-read online versions further down the page.
  2. Leave a comment below for a chance to win a FREE printable copy! Scroll to the bottom👇🏼 of the page to learn more.

If you would like to purchase a copy, you can purchase and print the PDF yourself . It is cheaper that way, of course. You can purchase it from my website here – Nine Fingerless Gloves and Mitten Patterns to Knit or from my Etsy shop here – Nine Knitting Patterns! – Fingerless Gloves and Mitten Collection. Either way I would like you to know it’s 93 pages. It’s a lot to print, but if you are comfortable reading PDF’s on your tablet or phone, this a very economical option.

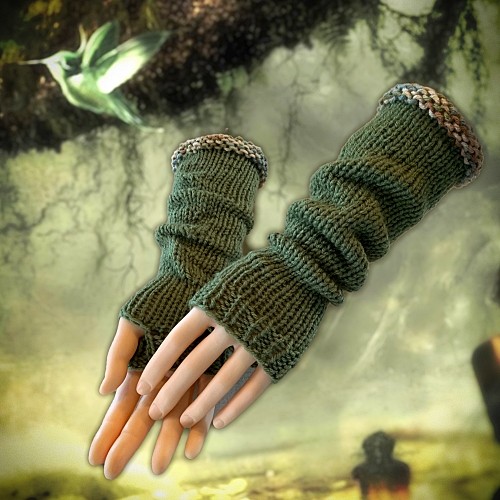
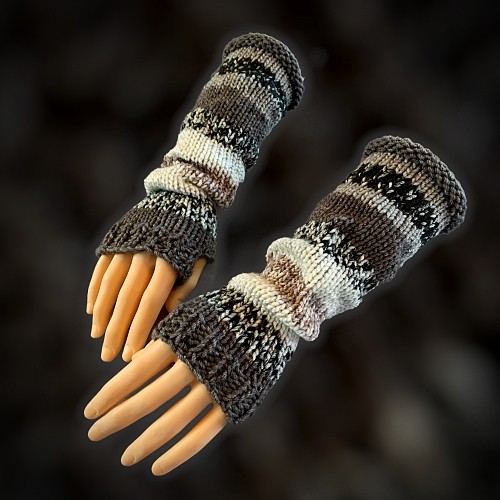
All of the mitts and gloves shown in the photos below are included in this pattern collection.

This collection contains patterns for fingerless gloves knit flat on 2 needles and seamless gloves and mittens knit in the round on double pointed needles (DPN). This compilation also includes mitts that are specifically designed for texting. And lastly, another design to free your fingers when you need them but cover your fingers when required. In short, this collection meets all your fashion and functionality requirements.

If you want to purchase the printed, paperback book, delivered to your door, you can buy it from Amazon. If you’re an Amazon Prime member, shipping is FREE. To make sure you’re getting the best deal for where you live, please click the country you are in or closest to:

United States

United Kingdom

Canada

Australia

This publication is available in English only.

Like always, all of the patterns are free to read on this website. They are ad supported and unprintable. Sorry, but too many people were just printing the pages leaving me with nothing but a bill for web hosting costs. You may not realize this, but with each illegal print, you cost me advertising revenue. I am writing patterns to help support me and my family. I’m not a charity. I can only give so much folks!

The list of the patterns in this collection include the following (all titles are clickable links to the read online pattern btw):

Super Simple Fingerless Gloves

Easy to Knit Owl Fingerless Gloves

How to Knit Fingerless Gloves

How to Knit Fingerless Gloves – with OWLS!

Basic Long Fingerless Gloves

Cable Fingerless Gloves or Mitts

Knit a Pair of Flip Mittens or Fingerless Gloves

Knit a Pair of Texting Mitts

Arm Warmers or Gloves – with BOWS!

I’ve also organized it so there is a specific page with all of the glove and mitten patterns in one place. You can see that here: Fingerless Gloves and Flip Mitts – FREE Knitting Patterns

Happy knitting everyone!!!

Win a free digital copy of this pattern collection by leaving a comment on this post! To increase your karma points, share this page (and my other patterns) on your social media platforms, like Facebook and Pinterest with the floating buttons along the right side of every page or with the buttons below 👇🏼 These handy share buttons are on all my other patterns, too!

Your email address is required but will remain private and won’t be visible to the public. I won’t send you any emails unless you sign up to my email list specifically. You can read my Privacy Policy for more information. Contest closes October 20, 2024.

Posted on 9 Comments

Easy to Knit Owl Fingerless Gloves – FREE Knitting Pattern

2 needle owl gloves

Well, since the how-to video showing how to knit these gloves in the round went over like a lead balloon, I’ve put in the effort and redesigned the gloves so they can be knit flat on 2 needles. Perfect for a newbie knitter wanting to learn new techniques! In case you still want to learn how to knit in the round or want the seamless version, you can read the pattern here – How to Knit Owl Fingerless Gloves. The video is embedded on that page too, if you want to watch it.
If you are looking to knit a pair of plain gloves without the owls, the original version this pattern is available here – Super Simple Fingerless Gloves. It’s also knitted flat on 2 needles with a seam on the outside of the hand and inside of the thumb.

If you are so inclined and like to have matching sets of things, I have completed the matching hat or beanie! You could also call it a toque. Whatever floats your boat. It’s free to read on this website too. If you’d like to, click this link – How To Knit A Beanie Hat – With OWLS! – FREE Knitting Pattern

Once again, I’ve made the gloves as one pattern and adjusted the needle size to change the sizes. This makes it a heck of a lot easier to design and keeps the proportion of the owl the same on all sizes. Frankly, the overall look is better.

I am finished creating the downloadable pdf for this pattern and it’s available in all my usual online selling venues including Ravelry, Etsy, and this website – Super Easy to Knit Fingerless Gloves – with OWLS! Click any of those links to avoid the ads and purchase it for a nominal fee.

Another way to get instant, PRINTABLE downloads of this pattern and more, is by becoming a Member on this website. When you become a Website Supporter for $3/month, you’ll gain access to exclusive member only posts. These posts contain one click downloads of the patterns. Simply click the Download & Print button. The PDF will automatically download to your computer or smart device. You can then read it on your device or print it at your leisure. You can download as many patterns as you like for the same $3 each month. You can go to this page to learn more, become a member and support my work… Exclusive Member Area

I’ve also created videos for you to see how the stitches are done, if any of them are giving you problems. I do have all the basic stitch videos here – Learn Basic Knitting Stitches, but links to the slightly more advanced stitches that show you how to M1, PM1, C4F and C4B are provided on this page. Clicking the links will take you to the video, but will leave this page window open in your browser. You can also scroll down to the bottom of the page to see the stitch abbreviations that also contain the embedded video you can watch right from this page.

Love the free patterns? You can say thanks in a couple of ways. You can read more about how you can Support My Work by clicking that link or make a small donation and Buy Me a Coffee. ?? That is a website where you can make a one time donation as a thanks. If you don’t want to or are unable to make a financial donation, sharing this pattern through social media is a great way to help out too! The links below are a super easy way for you to do so.


Gauge

This is important to follow for correct sizing. This is when using the US size 6 (4 mm) knitting needles.

2″ (5 cm) = 10 sts

2″ (5 cm) – 16 rows

in stockinette

Things You Need:

You can click any link below to see what you need.

Knitting needles:

Small – Size 3 US (3.25 mm) knitting needles

Medium – Size 6 US (4 mm) knitting needles

Large – Size 8 US (5mm) knitting needles

Worsted weight yarn

Cable Needle – There are a number a styles but I prefer the hook version

Stitch holder – It looks like a big safety pin

Tapestry needle

Left Hand

Cast on 33

Rows 1-14: Knit across

Row 15: Knit across

Row 16: Purl across

Row 17: Knit across

Row 18: Purl across

Row 19: Knit across

Row 20: P5 K1 P8 K1 P to the end of the row

Row 21: K13 M1 K1 M1 K4 P1 C4F C4B P1 K to the end of the row

Row 22: P5 K1 P8 K1 P to the end of the row

Row 23: K20 P1 K8 P1 K to the end of the row

Row 24: P5 K1 P8 K1 P4 PM1 P3 PM1 P to the end of the row

Row 25: K22 P1 K8 P1 K to the end of the row

Row 26: P5 K1 P8 K1 P to the end of the row

Row 27: K13 M1 K5 M1 K4 P1 K8 P1 K to the end of the row

Row 28: P5 K1 P8 K1 P to the end of the row

Row 29: K24 P1 C4F C4B P1 K to the end of the row

Row 30: P5 K1 P2 K4 P2 K1 P4 PM1 P7 PM1 P to the end of the row

Row 31: K26 P1 K2 P4 K2 P1 K to the end of the row

Row 32: P5 K1 P2 K4 P2 K1 P to the end of the row

Row 33: K13 M1 K9 M1 K4 P1 K2 P4 K2 P1 K to the end of the row

Row 34: P5 K1 P2 K4 P2 K1 P to the end of the row

Row 35: K28 P1 K2 P4 K2 P1 K to the end of the row

Row 36: P5 K1 P2 K4 P2 K1 P4 PM1 P11 PM1 P to the end of the row

Row 37: K30 P1 K2 P4 K2 P1 K to the end of the row

Row 38: P5 K1 P2 K4 P2 K1 P to the end of the row

Row 39: K13 Pass the next 13 sts onto a stitch holder. K4 P1 K2 P4 K2 P1 K to the end of the row

Row 40: P5 K1 P2 K4 P2 K1 P to the end of the row

Row 41: K17 P1 C4F C4B P1 K to the end of the row

Row 42: P5 K10 P to the end of the row

Row 43: Knit across

Row 44: Purl across

Row 45-50: Knit across

Cast off.

Making the Thumb

Pick up the 13 stitches on the stitch holder

Row 1: Knit across

Row 2: Purl across

Row 3: Knit across

Row 4: Purl across

Cast off.

Sew seam along the side of the glove and the inside of the thumb. Work in ends.

More of my stuff on Etsy:


You can make a widget like this for your blog or website, too.
Instructions are on my website here: How to Display Etsy Items on Your Website

Right Hand

Cast on 33

Rows 1-14: Knit across

Row 15: Knit across

Row 16: Purl across

Row 17: Knit across

Row 18: Purl across

Row 19: Knit across

Row 20: P18 K1 P8 K1 P to the end of the row

Row 21: K5 P1 C4F C4B P1 K4 M1 K1 M1 K to the end of the row

Row 22: P20 K1 P8 K1 P to the end of the row

Row 23: K5 P1 K8 P1 K to the end of the row

Row 24: P13 PM1 P3 PM1 P4 K1 P8 K1 P to the end of the row

Row 25: K5 P1 K8 P1 K to the end of the row

Row 26: P22 K1 P8 K1 P to the end of the row

Row 27: K5 P1 K8 P1 K4 M1 K5 M1 K to the end of the row

Row 28: P24 K1 P8 K1 P to the end of the row

Row 29: K5 P1 C4F C4B P1 K to the end of the row

Row 30: P13 PM1 P7 PM1 P4 K1 P2 K4 P2 K1 P to the end of the row

Row 31: K5 P1 K2 P4 K2 P1 K to the end of the row

Row 32: P26 K1 P2 K4 P2 K1 P to the end of the row

Row 33: K5 P1 K2 P4 K2 P1 K4 M1 K9 M1 K to the end of the row

Row 34: P28 K1 P2 K4 P2 K1 P to the end of the row

Row 35: K5 P1 K2 P4 K2 P1 K to the end of the row

Row 36: P13 PM1 P11 PM1 P4 K1 P2 K4 P2 K1 P to the end of the row

Row 37: K5 P1 K2 P4 K2 P1 K to the end of the row

Row 38: P30 K1 P2 K4 P2 K1 P to the end of the row

Row 39: K5 P1 K2 P4 K2 P1 K4 Pass the next 13 sts onto a stitch holder. K to the end of the row

Row 40: P17 K1 P2 K4 P2 K1 P to the end of the row

Row 41: K5 P1 C4F C4B P1 K to the end of the row

Row 42: P17 K10 P to the end of the row

Row 43: Knit across

Row 44: Purl across

Row 45-50: Knit across

Cast off.

Making the Thumb

Pick up the 13 stitches on the stitch holder

Row 1: Knit across

Row 2: Purl across

Row 3: Knit across

Row 4: Purl across

Cast off.

Sew seam along the side of the glove and the inside of the thumb. Work in ends.

Hints and Tips

Make your seams as narrow as possible when sewing them. The bulkier the seam the more noticeable and possibly uncomfortable for the wearer.

You can make these gloves with a ribbed cuff and around the fingers like the original Owl Fingerless Gloves. You can easily do a K1 P1 ribbing to make that happen.

Abbreviation

K – knit

P – purl

M1 – Make one (knit wise). Increase one stitch between the stitches. Pick up the yarn between the stitches. Twist slightly. Place it on your non-working needle. Knit the stitch. Watch this video below to see how.

M1 or Make 1 – Increase between stitches when knitting.

PM1 – Make one (purl wise). Increase one stitch between the purl stitches. Pick up the yarn between the stitches. Place it on your non-working needle. Purl the stitch as you regularly would.

PM1 or Purl Make 1 – Increase between stitches when purling.

C4F – Pick up the next 2 stitches with your cable needle. Pull the stitches to the FRONT of your work. Knit the next 2 stitches on your non-working needle. Knit the 2 stitches from the cable needle.

C4F or Cable 4 Forward

C4B – Pick up the next 2 stitches with your cable needle. Pull the stitches to the BACK of your work. Knit the next 2 stitches on your non-working needle. Knit the 2 stitches from the cable needle.

C4B or Cable 4 Back
Posted on Leave a comment

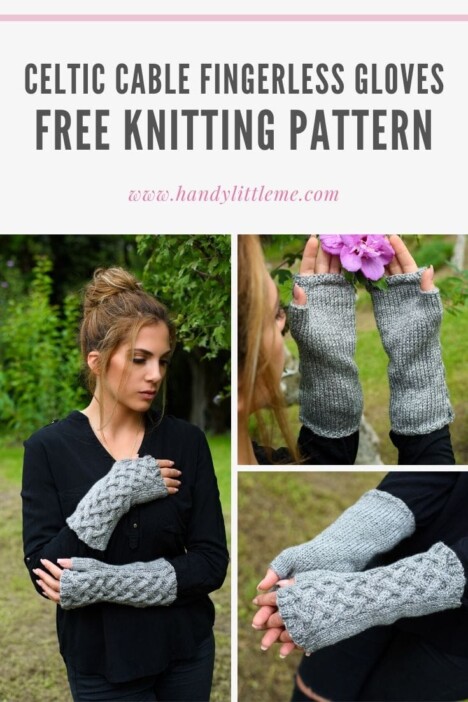
Celtic Cable Fingerless Gloves Pattern

Knitted Fingerless gloves

Inspired by the series Outlander, these gorgeous fingerless gloves are absolutely lovely! Like the designer Louise Bollanos, I too enjoy of the show and have noticed the great hand knit items that Claire wears throughout the series. The Hobbit was also pretty awesome and had knitters right onset knitting stuff. For real. It was in the extended version behind the scenes if you’d like to see for yourself. But I digress…

These fingerless gloves are knit in the round on double point needles (dpn) and the use of a cable needle. If you are comfortable with both techniques, then this pattern should be no problem for you to make.

You’ll need to scroll quite a ways down the page ?? Celtic Cable Fingerless Gloves Pattern ?? to get to the pattern, but it’s there. If you would prefer an ad free version, you can purchase, download and print the knitting pattern from her online shop here – Celtic Cable Fingerless Gloves Knitting Pattern PDF

Posted on Leave a comment

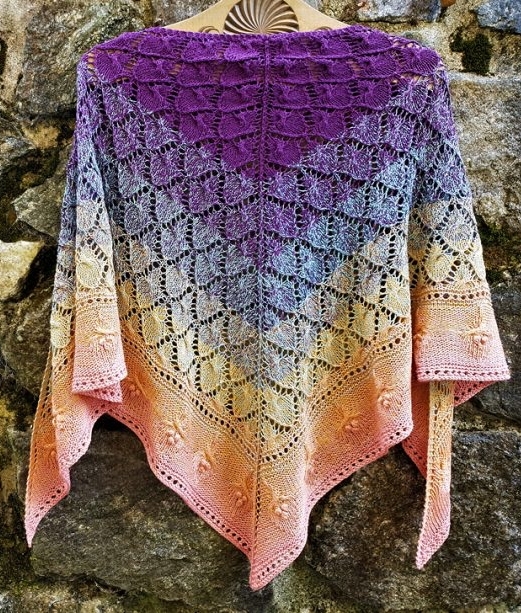
Lace Knit shawl by Valentinasknits

Valentina shares step by step instructions for knitting this beautiful lace knit shawl. It would look gorgeous made with all of the self-striping yarns that are out there. The triangular shawl shape, with a diamond repeat pattern features a border edge with a series of romantic floral bouquet motifs.

Read the pattern online here: Lace Knit shawl by Valentinasknits


Posted on Leave a comment

FREE Knitted Jewelry Patterns

If you’re looking to knit something different than a pair of slippers, sweaters, socks or mittens, look no further (and I bet you didn’t even know that knitted jewelry was “a thing” ?). Well folks, it certainly is and here are a few of my favourite designs that I found online to share with you.


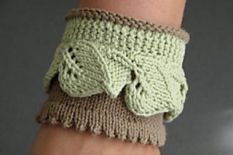
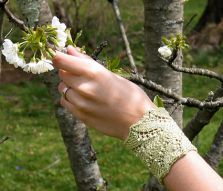
Leaf Lace Cotton Cuff 

OMG the is so pretty!!! The free PDF is available as a download through Ravelry. Includes both written and chart instructions and is written in English and Dutch.

Download it here – Leaf Lace Cotton Cuff


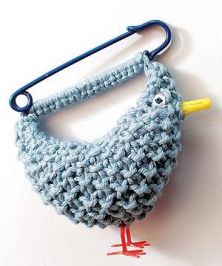
Knitted Bluebird Brooch 

I really like the look of this one. Simple and cute! Be warned. I’m not sure how long/if the link will continue to work. This was apparently uploaded to the internet a while ago and is actually in an archive section. It may take a while to load the page.

Hope this works, but here’s the link – Knitted Bluebird Brooch


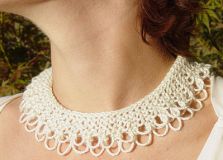
Knecklace

Love the title for this one ?. This is another one of those knitting patterns that really can be made to suit the wearer with something as simple as choosing a variegated yarn. Regardless, this lacy necklace would make a great gift, even or yourself ?

Read it here – Knecklace


Perdita – A Pretty Knitted Bracelet

I absolutely love this and is what inspired this list, if I can be honest. The pattern is written out in full as a chart AND as the written pattern. I love the final look of this knitted bracelet.

You can read it here – Perdita


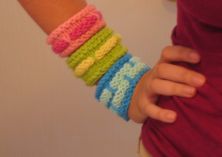
Band Cuffs

These would look great alone or stacked together as shown. And what a great way to use up the left over stash! (We all have those tiny balls that we hoard for projects just like these. Admit it.) 

Read it online or get the PDF here – Band Cuffs


The Nameless Choker

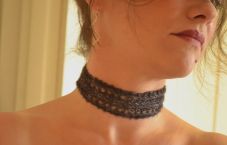
If you’re into lace knitting, this may be right up your alley. Made with a small quantity of sock yarn, you could get a bunch of different effects if using a variegated yarn. 

You can read the pattern in full online here – The Nameless Choker

Posted on Leave a comment

Excellent Blogs You Should Read

knitting pattern watermelon slippers

As a blogger and pattern creator myself, I always have a soft spot for my fellow online posters of great patterns. I think there is something to be said for folks that go out of their way to design a pattern, a ton of work btw, and then give it away for free! So here is my latest shoutout to those I’ve found on the “intertubes” that deserve a a few extra page visits, views, likes and shares thrown their way.


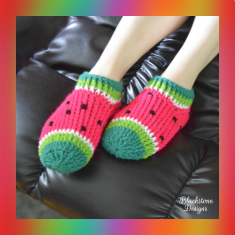
Watermelon Chunky Slippers

These are some super cute slippers! Designed to fit both adults and children, you can read this pattern in full on the blog here. And did I mention, it’s free ?

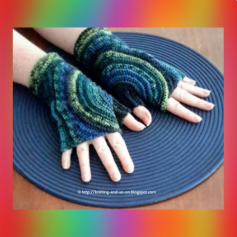
Kreisel Fingerless Gloves

I’ve always been a fan of crocheted mittens of any style, but I REALLY like the looks of these. I’m a fan of both the design and the colour. Bit of a sucker for the cooler shades… You can read the pattern on the blog here.

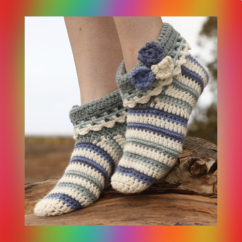
Annabelle by DROPS Design

I’m always so impressed by the number of patterns available at this site and love these crocheted slippers! You can read the pattern for this lovely design here.

Ombre Basket Pattern

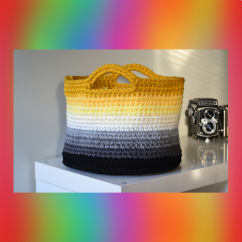
I actually like this purse/basket so much that I’m going to share this one again. I did once with another website I was running, but that’s a story for another day. The basket is going to turn out based entirely on the yarn colour selections. I know that the yarn cakes are really popular right now but the colour changes may not be short enough to get this fabulous colour transition. But enough on my views, get to making this now! Read the pattern here.

This is a great project for anyone! If you’re learning how to crochet or even if you’re an experienced crocheter (is that even a word) you’ll find the final product super useful. I have one sitting by my kitchen sink right now. And it was from a fellow crocheter (still not sure if that’s a word ?). I’m including the how to video and the link where you can read the pattern online – The Best Kitchen Scrubbie
Posted on Leave a comment

Stuff for Kids – FREE Knitting Patterns

Dishcloth

Sometimes it’s nice to have smaller projects that use up our stash ends. Sometimes we want to give something to that favourite child in our lives. Maybe we are sill looking for an excuse to make something a little more on the fun and whimsical side. Whatever the reason, knitting patterns designed for children seem to involve all those factors. Here’s a quick sampling of the few things I’ve found lurking about on the web.


Almost Lost Washcloth

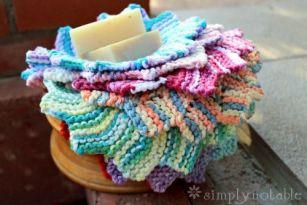
So not necessarily a kid thing, it’s a bit more on the whimsical side by not being your basic square washcloth. It looks like tit’s knitted in the round but in reality, it’s knitted flat on 2 needles. The swooping effect is created by leaving a few stitches on the needle. Very ingenious. Click here to read the pattern online.

Stacking Stars

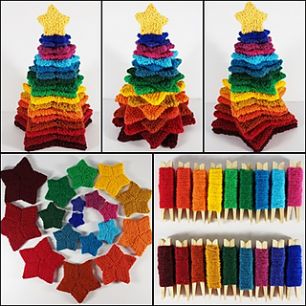
Remember the stacking rings that children played with years ago? MThat was the first thing I thought of when I saw this. The star motif for the pattern is the same regardless of the size. What creates the difference in the sizes of the star is how many repeats you do. Available as a download only, You can get the pattern through Ravelry here – Stacking Stars

Snowman Hat Knitting Pattern

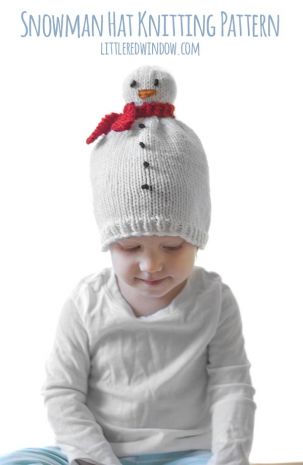
Awesomely super cute! Knit up this toque (I’m Canadian, that’s what we call these here ?) that’s sure to make all the preschoolers a little envious. You can read the pattern in full online here. There is also a PDF download but there is a fee required for that. The links to the downloads are on the website.

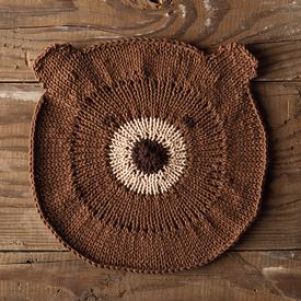
Bear With Me Dishcloth

Available as a PDF download from KnitPicks, (tons of patterns there btw), I added this primarily because of the awwwwwww factor. You can get the pattern here – Bear Washcloth

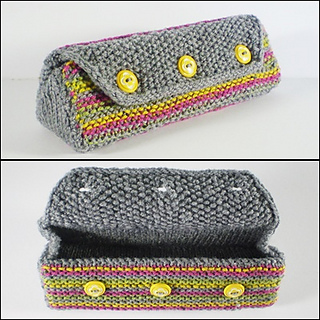
Knitted Pencil Case

I didn’t know that a knitted pencil case was a thing until I found this. I have to admit, I like it. Available as a download only, you can find it on Ravelry here – The Toby Case
Posted on Leave a comment

Free Knitting Patterns that Can Make a Difference – Knitting for Charity

knitting pattern for a tote bag

Knitting patterns that either help raise awareness for a cause or charity or are to give to someone comfort in their time of need. If you can’t directly help the organization that provides the pattern, maybe you can start a similar group to help those that live in your community. Let this page be an inspiration to you.


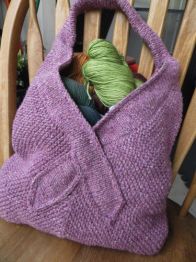
Tote for a Cause

Knit up this tote bag to help raise cancer awareness. This would make a great gift for someone as a show of support. Get the pattern here – Tote for a Cause 

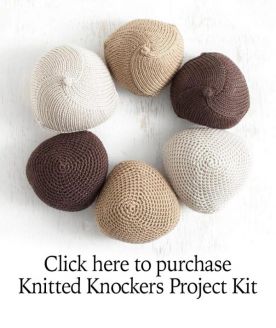
Knitted Knockers

These “knockers” are useful for ladies as a prosthetic after a mastectomy. These are especially useful if the surgery is recent and the patient is tender. Just about every country out there has a chapter of this group. A little research will certainly turn up something near you. The link provided here offers complete step-by-step videos and has both crocheted and knitted versions of the patterns to download for free. Download the pattern – Knitted Knockers

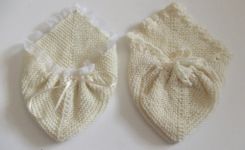
Baby Angel Pocket or Blanket

These are for babies that have been lost due to miscarriage, stillbirth and other complications. There is both a crocheted and knitted version of this pattern. Click here to get the pattern – Baby Angel Pocket or Blanket Why you may want to make these for your local hospital (as taken from the page linked to this entry) :
  • The babies are treated with dignity and respect just as a live baby would be wrapped up when it is born.
  • The blankets and angel pockets help hospital staff present babies to their family in a respectful way.
  • The angel pockets allow parents to ‘hold’ their baby without touching their skin, which is very fragile and deteriorates quite quickly.
  • A dead baby’s body starts to seep fluids shortly after death and the blankets help to ‘soak up’ some of that fluid.
  • Some parents want to keep the blankets they have bought for their baby so choose to bury or cremate them in the donated blanket.
  • The blankets may be kept as a keepsake. When there is very little to show for a baby, a pretty angel pocket or blanket will often be treasured forever.

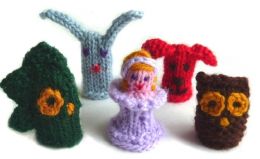
Knitting Pattern: Five Finger Puppets

It can get pretty dull for anyone who’s stuck in a hospital for any length of time. It’s even harder if you’re a young child. Why not whip up these cute inner puppets. You probably have enough leftovers in your stash to make them right now (I know I do). Read the pattern in full here – Five Finger Puppets 

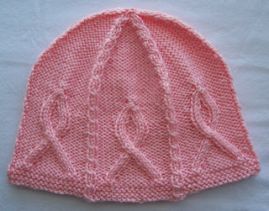
Pink Ribbon Hat

Another knitting pattern to help raise awareness of breast cancer and show your support for those who’s lives it touches. Read the pattern online here – Pink Ribbon Hat

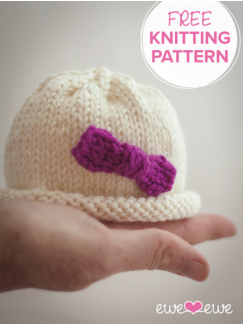
Hello Preemie Free Baby Hat Knitting Pattern 

These are perfect for the tiny little newborns in the hospital. They look super cute and help keep these new additions warm. Just about every hospital with babies can use these. Get the pattern here – Hello Preemie Free Baby Hat
Posted on Leave a comment

Socks, Slippers and More!!

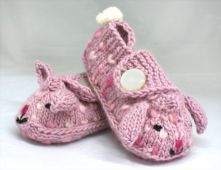
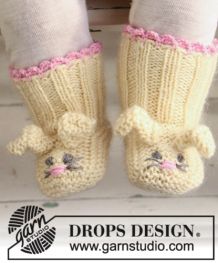
knitted bunny slippers

I do like a nice pair of slippers; I certainly do design a lot. But for some reason, maybe because all my spawn are older, I don’t get around to making children’s sizes very often. I actually don’t get around to designing much of anything for kids. Maybe I should… or better yet, I’ll let all the other good people out there design for kids and I’ll share their patterns on my website!

So with that, here is this week’s instalment of some fun, cute and quick to make knitting patterns for children I thought may tickle your fancy. And because I didn’t want anyone to feel left out, there is a treat for you adults in here too. Who doesn’t love Bunny Slippers ??


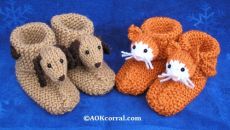
Knit Animal Slippers for Children

This is a basic knitted slipper pattern for kids with instructions on how to make cat and the dog head as shown. There are other head patterns that you can buy. Read the pattern here – Animal Slippers

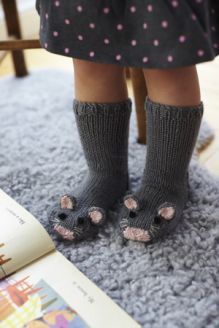
Knit Mice Socks for Kids

OMG! How cute are these!! A basic sock design with a few extra embellishments at the end to create some genuine mouse-y goodness. Now I don’t want to toot my own horn too much, but if you want to make something similar for an adult, I have a knitted sock pattern for adults all ready to go on here. Just sayin’ is all… You can read the pattern for these super cuties here – Knit Mice Socks

Das Monster – Knitted Toddler Pants

Possibly the most fantastic knitted toddler pants to ever be created. And though the original pattern was more like the purple and green ones with the teeth, with a bit of tweaking, you could personalize these to be like the Elmo ones. But of course that would be Elmo inspired or a tribute to Elmo. Not the actual Elmo himself because that would be copyright infringement and we don’t want none of that sorta stuff ’round here. Read the pattern here – Das Monster

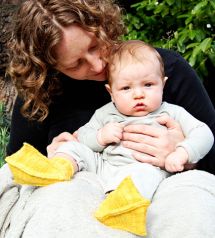
Duck Feet – Knitted Slippers/Socks

I’ve shared these awesome slippers or socks before because I love them so much! This version is written for toddlers, but you can make them for adults too! Go to Ravelry and you can download the PDF from the same designer. The pattern is written in full here – Knitted Duck Feet for toddlers and here – Duck Feet for Adults.

Bunny Toes – Knitted Baby Booties

Yet another super cute pair of what really are tiny socks with ears and a bit of extra embroidery. But gosh, darn it! Look at what you get! The pattern ranges from 1 month to 4 years. I haven’t tried this pattern yet, but it’s done with very fine yarn and small DPN. If you used a larger gauge of needle and some thicker yarn, it may magically transform into adult sized socks. The number of cast on stitches is the same as my socks, so technically, it should work… let me know if you try. Read the pattern here – Bunny Toes – Knitted Baby Booties

Bunny Hop – Thrummed Bunny Slippers

I’ll be honest, I had no idea what “thrummed” or “thrumming” was (or that it was even a word) until I found this pattern. Thankfully, this pattern not only explains it, but shows you how to do it. In this instance, it makes a cushier, thicker sole. I may need to keep this in mind for future designs… The pattern is in adult sizes only and can be sans bunny parts to make a more sophisticated slipper for those with discerning tastes. Read the pattern here – Bunny Hop Thrummed Bunny Slippers
Posted on Leave a comment

More Free Patterns for Cute Things

It’s been a while since I did a little research and found some great patterns that are available to read online or to download. As always, this short list is curated and all of the knitting and crochet patterns linked to are free. If you find that a link isn’t working, or the pattern is no longer free, please leave a comment below.


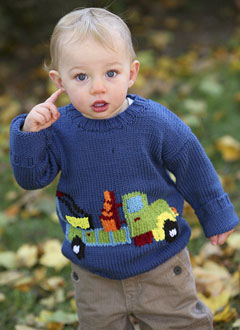
Child Sweater Knitting Pattern

OMG! Soooooo cute! I absolutely love this knitted sweater. Gives the full instructions to make it in 4 different sizes. For sure one will be the right size for the little one you have in mind.

You can read the pattern in full here – Knitted Truck Sweater.


Crocheted Soccasins

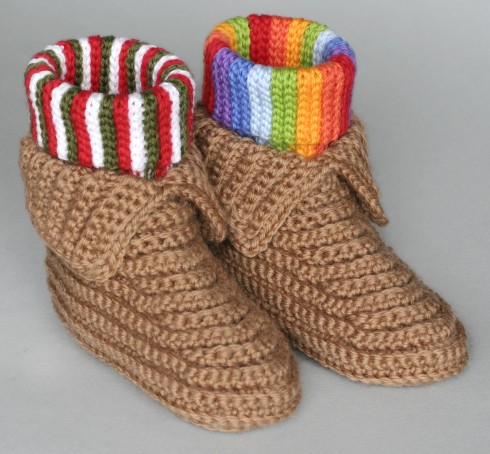
“What is a Soccasin? It is a unisex moccasin-style slipper with a built-in sock leg to keep little feet very toasty and warm.” You can also switch up the pattern to make a ballet slipper or Mary Jane’s. I’ve given the link to the main page. The link to the pattern is here.

Read the pattern online –  Crocheted Soccasins


FREE Knitting Stitches

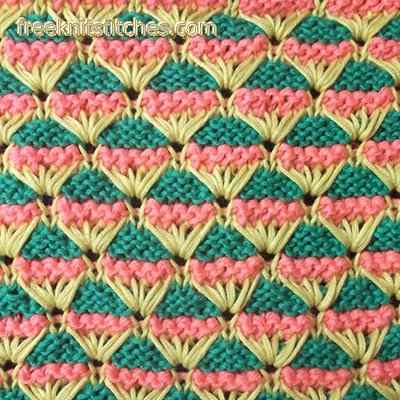
Not necessarily falling under the “cute” title, I think many of you will find this incredibly useful. This is a great collection of various knitting stitches to use in upcoming projects. Some are for texture, some use colour, but the collection of various stitches a guaranteed to impress.

Look at the collection of them here – Free Knit Stitches


Abominable Baby Slippers

Another of those very old patterns that’s been archived, but you can still read online. You can use this crochet pattern to make slippers that are for a new born up to 2 years old.

Read it in full online here – Abominable Baby Slippers


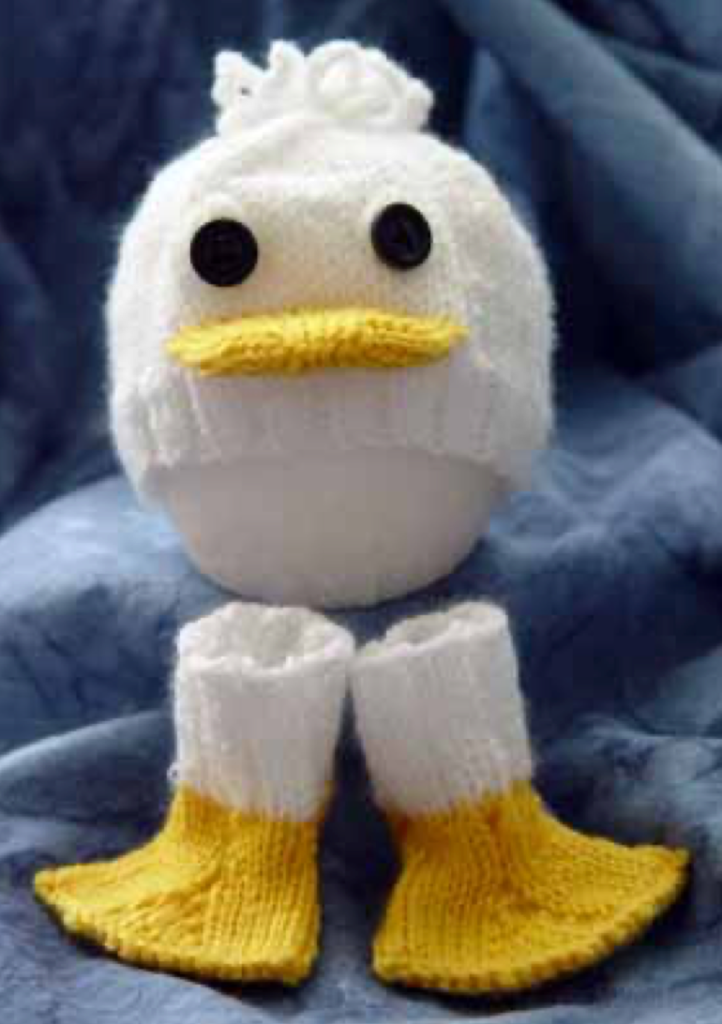
Just Ducky – Hat & Slipper Socks

These links are a bit more complicated and the ducky hat and the ducky slipper socks are on two separate webpages. Put them together and you get this awesome knitted combo!

Be aware that the author of this pattern doesn’t want you to sell anything you make from the patterns. It’s for personal use only.

Get the patterns here – Just Ducky Hat and Just Ducky Slipper Socks


Posted on Leave a comment

Knitted Scarf & Cowl – FREE Knitting Patterns

When the wind starts to blow and temperatures get cold, it’s time to bundle up and keep warm with these knitted scarf and cowl patterns. All are free and available as either a download or to read online.

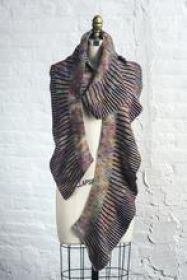
Pleated Scarf Pattern

 
Make a lovely scarf with this pattern. The pattern itself forms the pleats with no folding or ironing involved. If I don’t have to iron to make it look like this, I’m sold! Get the download on Ravelry here – Arisaid Pleated Scarf


Twined Flowers

A bit of a different design that makes for a lovely, drape-y kind of feel. The pattern is online and can also be downloaded. The link to see it says download, but it will open up in your browser window. Read it here – Twin Flowers Scarf Pattern


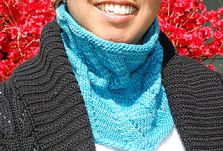
Knitted Cowl Pattern

A simple and repetitive pattern and great for the beginner knitter. You can read the pattern in full online here – Birthday Cowl.


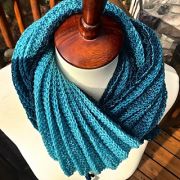
Textured Knit Purl Cowl 

This cowl made with a soft wool would feel absolutely amazing! The pattern is written out in full on the website. And it’s so easy, it’s literally 2 rows repeated over and over. Read the pattern here – Textured Knit Purl Cowl


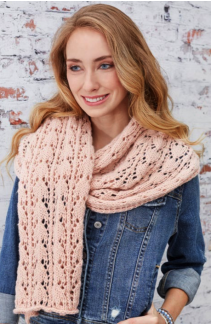
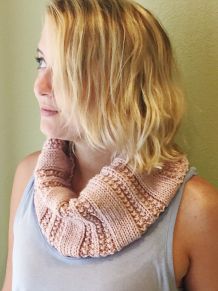
First-Timer Knit Lace Scarf

Another pattern that’s great for a beginning knitter. As long as you know how to Yarn Over and have your basic stitches down, you’ll do great at this! Read the pattern in full online here – First-Timer Knit Lace Scarf