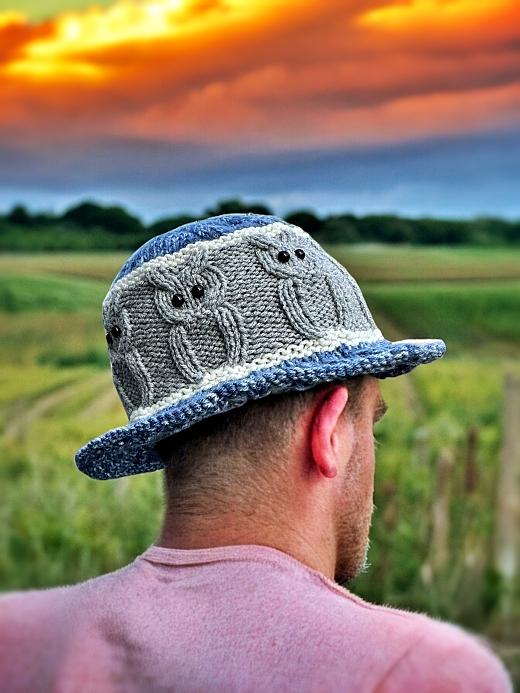
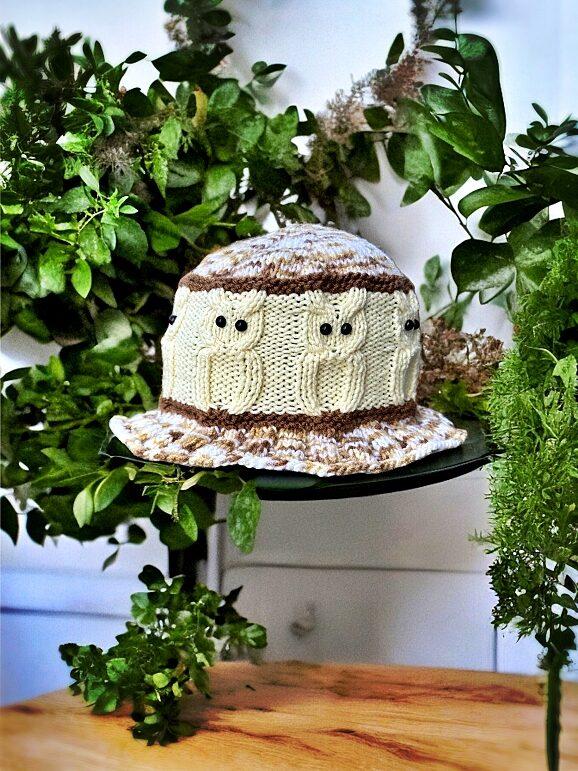
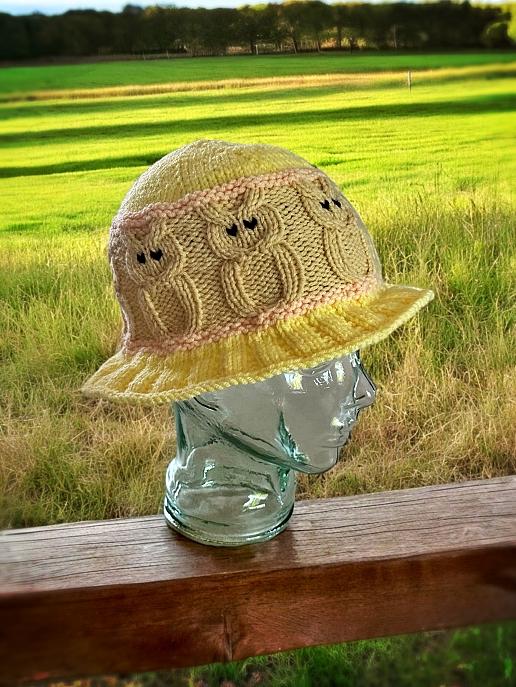
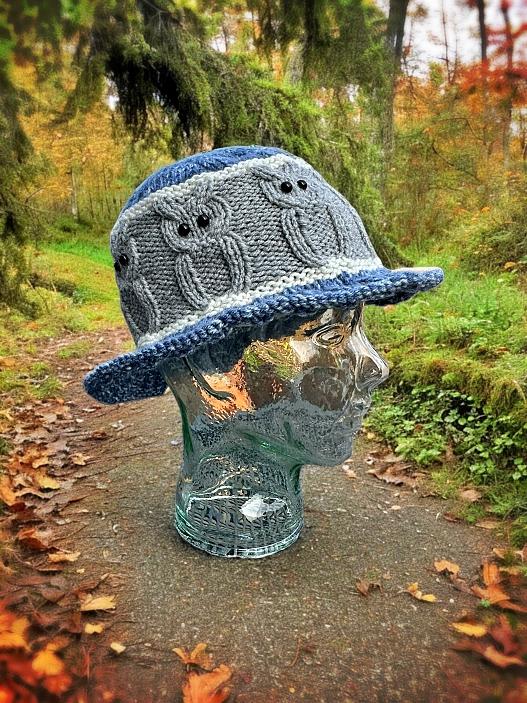
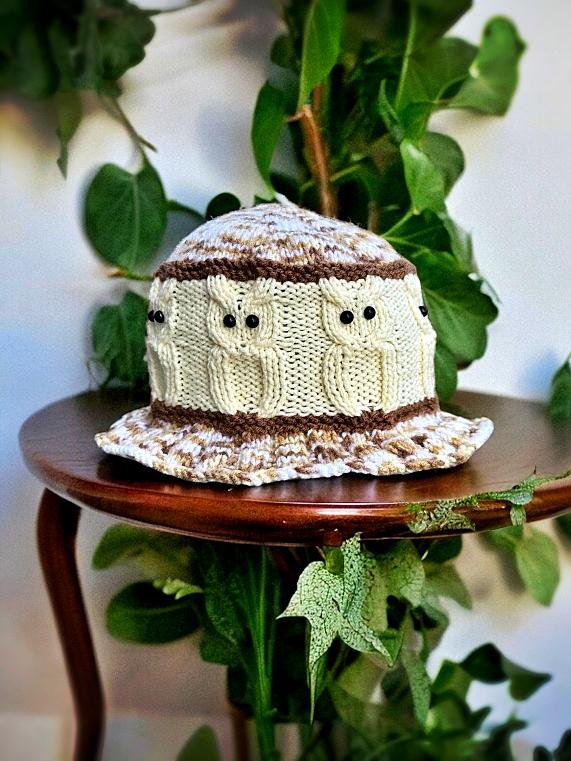
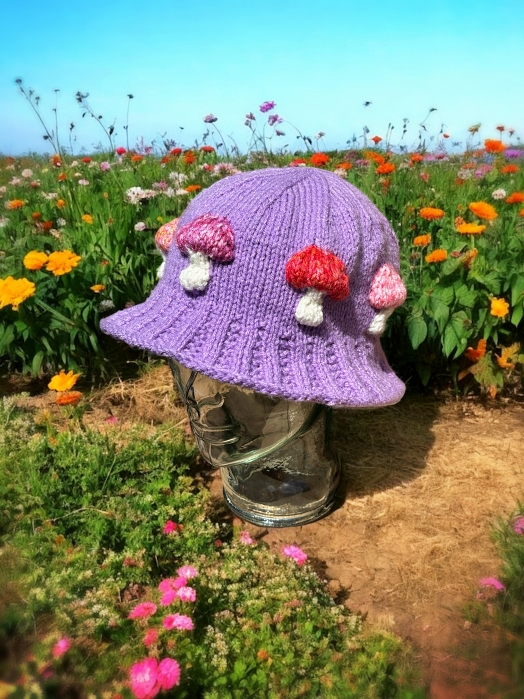
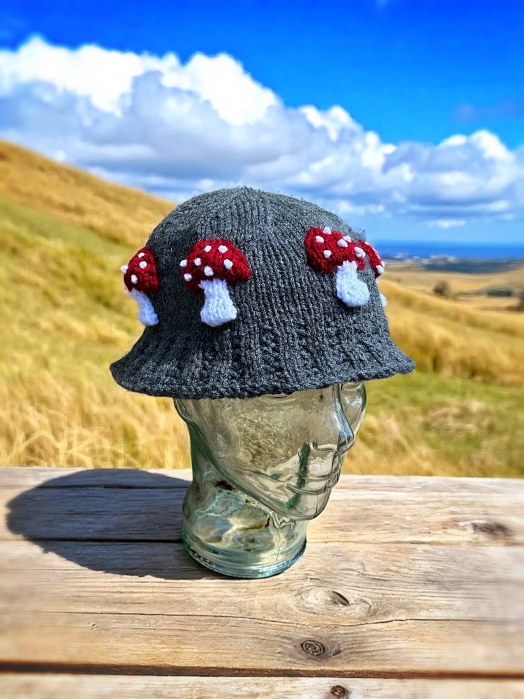
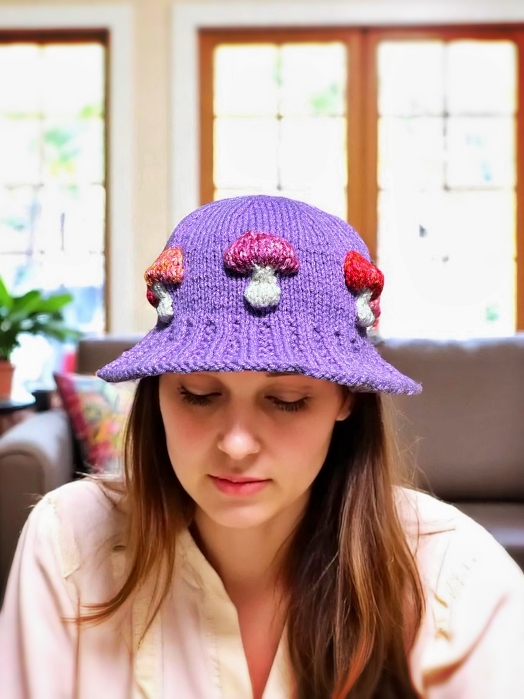
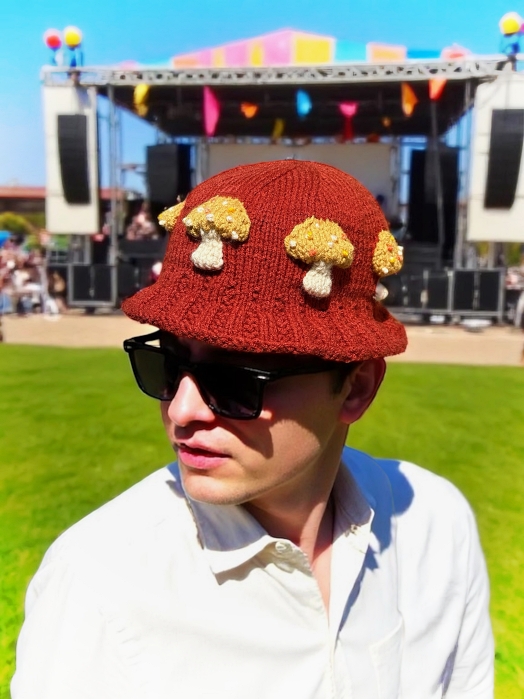
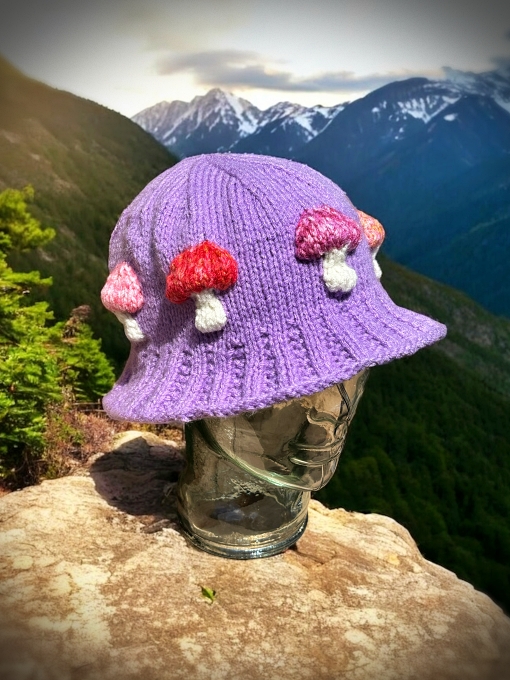
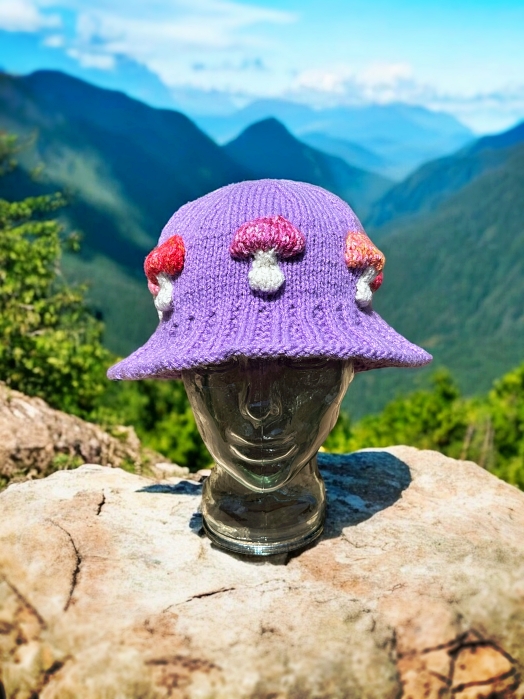
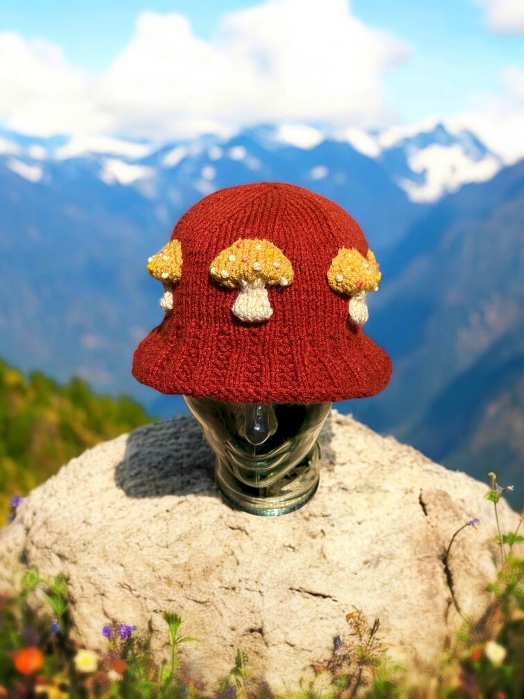
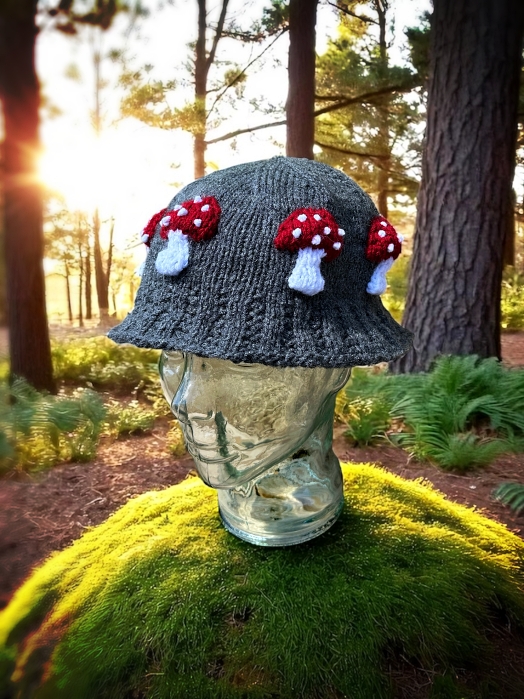
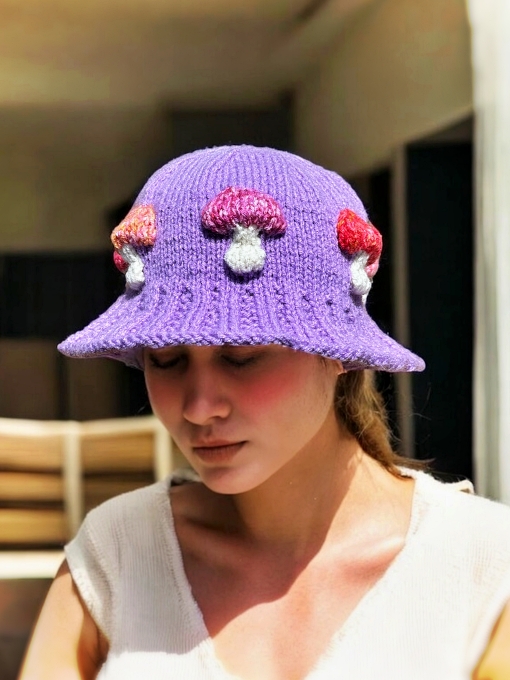
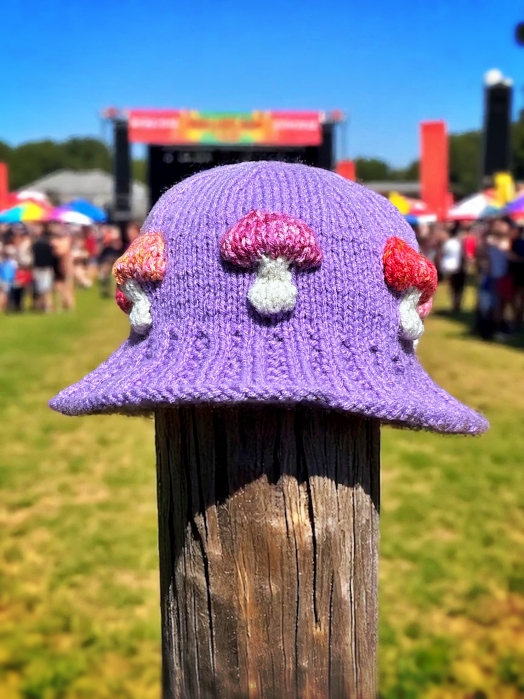
I do like fungi and I do like hats. So what better than to combine the 2 and make a hat with mushrooms! Is it to everyone’s taste? Heck, no. And I knew that when I designed it. And boy was it a challenge. It took me 9 complete hats to get the design to work and sit on the head right. It started as a single mushroom, smack dab in the front, but it just didn’t work no matter what I did. Now there are 7 toadstools all around the hat.

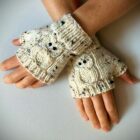
For this pattern, you’ll need to pull the stitches together so the mushroom stands out from the background. To do this, pass the yarn behind your work and catch it when knitting on the right side. It’s done the same way you do any colour work when knitting. The video has you pull it tighter for the gloves, but for the hat, how you normally do it will work.
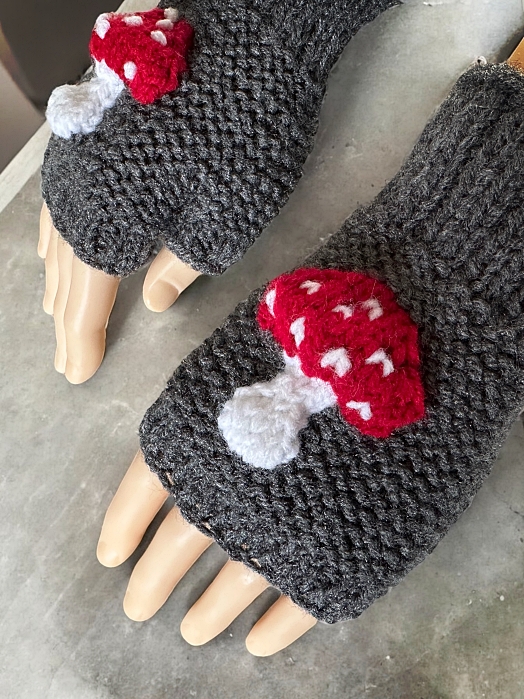
The video is queued to the right spot for each row as you knit the mushrooms. I originally showed how to make the toadstools on gloves but kept the video general enough to apply to anything. You can watch the video by clicking the video below. It will automatically play from the start for the gloves with the intro.
I’ve made this hat to only fit adults as I got tired of making hats. I ran out of patience and desire to do the math and make the samples of smaller hats. If you want me to work up child sized versions, let me know. You can leave me a comment below.
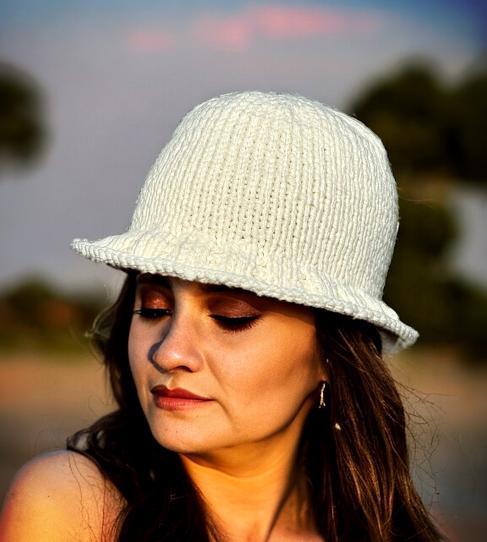
If you would like to make a plain bucket hat that is designed to fit the whole family, be sure to check out this one. Knit flat with straight needles and 2 strands of worsted weight yarn, it works up super fast! Here’s the link to read that pattern – Knitted Bucket Hat for Children and Adults
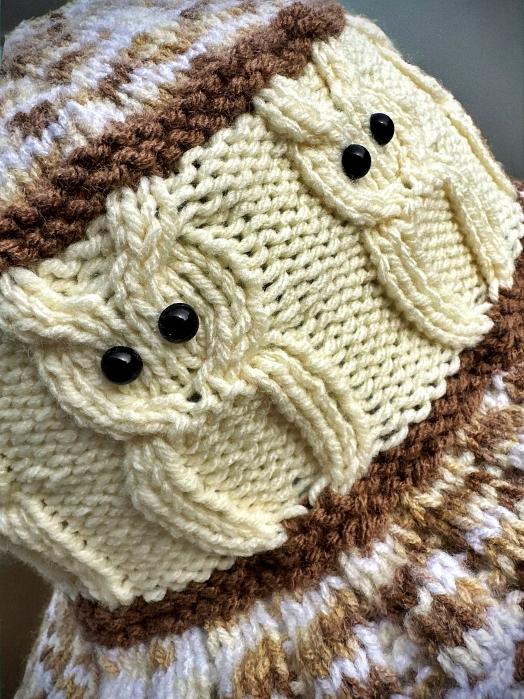
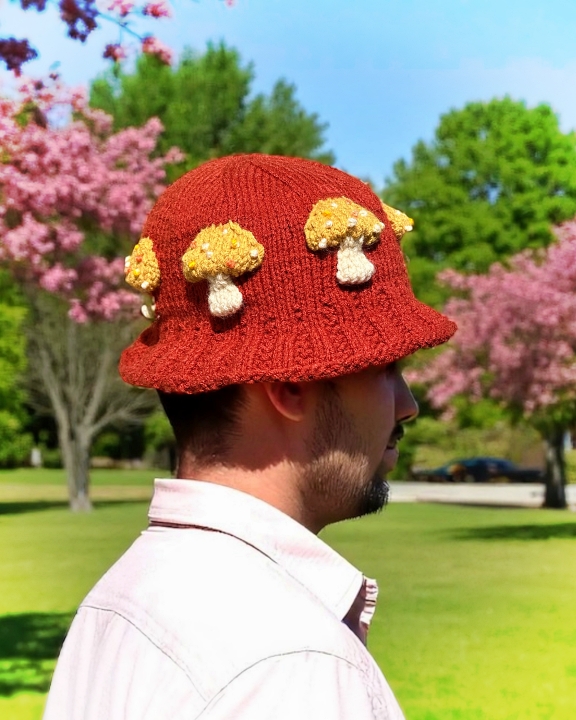
For ease of knitting this hat, I generally used one colour for the mushrooms on my sample hat. There is nothing stopping you from making each mushroom unique with its individual coloured stem and cap. It would be a great way to use up some of those small leftovers of yarn that really aren’t good for much more than a single stripe on a scarf.
If you would to prefer to support my work and have access to a printable, ad-free version of this pattern, I offer that too. To get the downloadable pattern for a small fee you can get it in my Etsy Shop, Ravelry, LoveCrafts, Buy Me A Coffee and from the shop section on this website – KweenBee.com.
If you would prefer to order a Kindle or printed paperback version from Amazon, you can now do so! Shipping is free if you are an Amazon Prime member. Make sure you select the country you are in to take advantage of the free shipping. Click the following link for your country – United States, United Kingdom, Canada, and Australia. The Kindle download and paperback versions are available in English only. Links for this coming soon!
Another way to avoid ads and pop-ups, get instant, PRINTABLE downloads of this pattern and others, is by becoming a Member. When you become a Website Supporter at $4/month, you’ll gain access to exclusive member only posts on Buy Me A Coffee. You can download as many patterns as you like for the same $4 each month. You can go to this page to learn more, become a member and support my work… Exclusive Member Area
Things You Need
Worsted weight yarn in 3 colours:
Main Colour (MC): approx. 100 g (3.5 oz)
Stem Colour (SC): small amount. Each stem uses about 120 cm (47 inches)
Cap Colour (CC): approx. 30 g Each cap uses about 275 cm (108 inches)
1 set of 4 mm (US 6) single pointed knitting needles
1 set of 3.25 or 3.5 mm (US 3 or 4) single pointed knitting needles (optional)
Tapestry needle – to sew the seam and work in the ends.
Gauge
In stockinette
9 sts = 2 inches (5 cm)
12 rows = 2 inches (5 cm)
Sizes are written as such:
S-M (L-XL)
21-22 inches (23-24 inches)
53.5 – 56 cm (57 – 61 cm)
Brim
With MC cast on 122 (130) sts with the 3.25 or 3.5 mm knitting needles. You can use the 4 mm needles but smaller needles will make a tighter brim edge.
Switch to the 4 mm (US 6) for the remainder of the pattern.
♥ Row 1: K across
Row 2: *K2 P2* Repeat from * to * until the last 2 sts. K2 ♥ Repeat from ♥ to ♥ for a total of 8 rows
Row 9: K4 🍄 K2tog K6 Repeat from 🍄 to 🍄 to the last 6 sts. K2tog K4 (107, 114 sts)
Row 10: K2 P2 🐿️ K1 P2 K2 P2 🐿️ Repeat from 🐿️ to 🐿️ to the last 5 sts. K1 P2 K2
Row 11: K across
Row 12: As row
Row 13: ♦ K2tog K5 ♦ Repeat to the last 2 sts. K2tog. (91, 97 sts)
Row 14: ♪ K1 P2 ♪ Repeat to the last st. K1
Mushroom Band or Crown
☼ Row 15: K across
Row 16: P across ☼ Repeat from ☼ to ☼ one more time.
Row19: K5. With SC K1 M1 K1 M1 K1, Turn. Leave remaining sts unworked. P5. Turn. K5. Turn. P5. Turn. K5. ♠ With MC K10 (11). With SC K1 M1 K1 M1 K1, Turn. Leave remaining sts unworked. P5. Turn. K5. Turn. P5. Turn. K5. ♠ Repeat from ♠ to ♠ 5 times more. With MC K5. (105, 111 sts)
Row 20: P5. With SC P5. ◊ With MC K10 (11). With SC P5.◊ Repeat from ◊ to ◊ 5 times more. With MC P5.
Row 21: K5. With SC TWK2tog. K1. K2tog. ◘ With MC K10 (11). With SC TWK2tog. K1. K2tog. ◘ Repeat from ◘ to ◘ 5 times more. With MC K5.(91, 97 sts)
Row 22: P5. With SC P3. ☺ With MC P10 (11). With SC P3. ☺ Repeat from ☺ to ☺ 5 times more. With MC P5.
Row 23: K5. With SC K3. ◘ With MC K10 (11). With SC K3. ◘ Repeat from ◘ to ◘ 5 times more. With MC K5.
Row 24: As row 22
Row 25: K3. With CC K1 M1 K1 M1 K1 M1 K1 M1 K1 M1 K1 M1 K1. Turn. Leave remaining sts unworked. P13. Turn. K13. Turn. P13. Turn K13. ₪ With MC K6 (7). With CC K1 M1 K1 M1 K1 M1 K1 M1 K1 M1 K1 M1 K1. Turn. Leave remaining sts unworked. P13. Turn. K13. Turn. P13. Turn K13. ₪ Repeat from ₪ to ₪ 5 times more. With MC K3. ( 133, 139 sts)
Row 26: P3. With CC P2tog P9 TBLP2tog. † With MC P6 (7). With CC P2tog P9 TBLP2tog. † Repeat from † to † 5 times more. With MC P3. (119, 125 sts)
Row 27: K3. M1. ♫ With CC TWK2tog K7 K2tog. With MC M1. K6 (7). M1. With CC TWK2tog K7 K2tog. With MC M1. ♫ Repeat from ♫ to ♫ 5 times more. With MC K3. (119, 125 sts)
Row 28: P4. With CC P2tog P5 TBLP2tog. ☻ With MC P8 (9). With CC P2tog P5 TBLP2tog. ☻ Repeat from ☻ to ☻ 5 times more. With MC P4. (105, 111 sts)
Row 29: K4. M1. ♣ With CC TWK2tog K3 K2tog. With MC M1 K8 (9) M1. With CC TWK2tog With MC M1. ♣ Repeat from ♣ to ♣ 5 times more. With MC K4. (105, 111 sts)
Row 30: With MC P across
✾ Row 31: K across
Row 32: P across ✾ Repeat from ✾ to ✾ 1 (2) times more.
More of My Stuff On Etsy
You can make a widget like this for your blog or website, too.
Instructions are on my website here: How to Display Etsy Items on Your Website
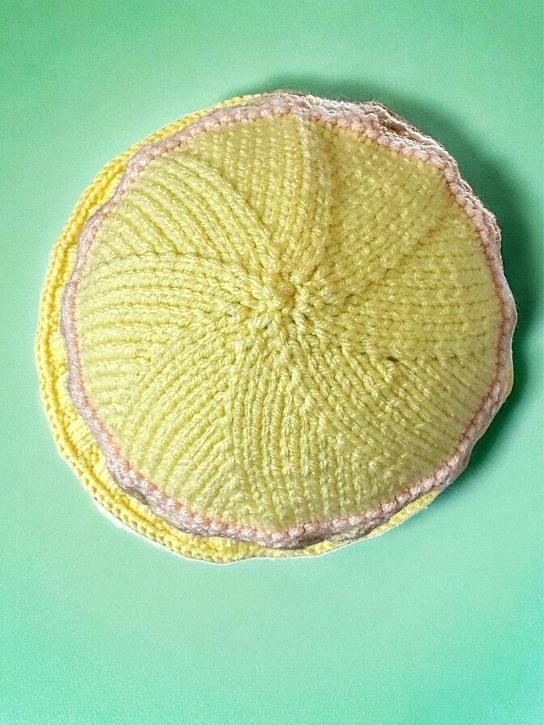
Top
Next row: K8 K2tog Repeat from to to the last 5 (1) st. K5 (1). (95, 100 sts)
Next row: P across
Next row: K7 K2tog Repeat from to to the last 5 (1) st. K5 (1). (85, 89 sts)
Next row: P across
Next row: K6 K2tog Repeat from to to the last 5 (1) st. K5 (1). (75, 78 sts)
Next row: P across
Next row: K5 K2tog Repeat from to to the last 5 (1) st. K5 (1). (65, 67 sts)
Next row: P across
Next row: K4 K2tog Repeat from to to the last 5 (1) st. K5 (1). (55, 56 sts)
Next row: P across
Next row: K3 K2tog Repeat from to to the last st. K5 (1). (45, 45 sts)
Next row: P across
Next row: K2 K2tog Repeat from to to the last st. K1. (34, 34 sts)
Next row: P across
Next row: K1 K2tog Repeat from to to the last st. K1. (23, 23 sts)
Next row: P across
Next row: K2tog across. K the last st. (12, 12 sts)
Break yarn and draw through. Sew the seam and add embellishments to the mushrooms if desired. Work in all ends.Watch the video for help on finishing and catching any loose stitches. You can use this link – Finishing
How to Make the Dots (French Knots)
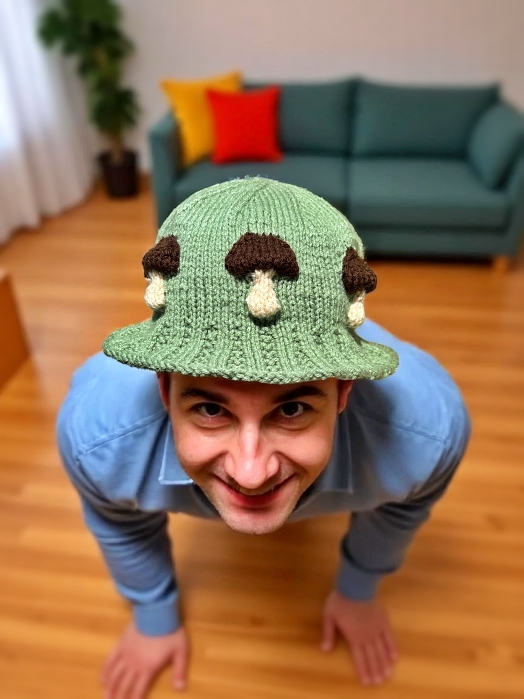
You can make the dots or you can do flecks on your mushroom caps. You can even leave the cap plain if you like. It’s up to you. To make the flecks, just go over a few stitches with a complimentary colour of yarn.
If you want to make the dots, they’re French knots, you can watch the video below.
Hints and Tips
This hat needs to be blocked, so to speak. To get the correct sizing at the end, it’s best to get the stitches to relax. You can do this by steaming the piece and gently stretching it over a bowl, mannequin head or even a Styrofoam ball. If you are able to, using the head of the intended wearer can also work.
The video showing how the knit the mushroom is very similar but not exactly the same. The stem is shorter than in the original mushroom in the video. It fits the hat better when done like this. Also, the mushroom cap is one row shorter. Because the stitches are stockinette on the right side, purling across on the wrong side with the main colour looks ok on the right side.
I suggest not keeping the lengths of the stem colour long like I did for the mushroom in the video (I also don’t include the french knots in the length required for the stems) There are 7 ends to contend with and can be a bit cumbersome to manage when trying to knit. It’s better to use a shorter length to knit the stem and come back with another, separate length of yarn to make the embellishments like the french knots or the flecks.
The lengths of yarn given for the stem and mushroom are approximate only. You may need more or less depending how much you need to wrap around your fingers for even tension.
Abbreviations
st – stitch
sts – stitches
sl – slip the stitch
K – knit
P – purl
K2tog – knit 2 stitches together
M1 – Make one (knit wise). Increase one stitch between the stitches. Pick up the yarn between the stitches. Twist it slightly and place it on your non-working needle. Knit the stitch. Watch this video on How to M1 or Make 1 to see how.
TWK2tog – (Twist and Knit 2 sts together) – Pick up a stitch as if to knit. Twist the stitch and place it back on your non-working needle. Knit the 2 stitches together from right to left.
TBLP2tog – (Through the Back Loop, Purl 2 sts together) – Purl 2 together through the back loop from left to right.
Like all of my patterns you have my permission to sell and/or give away the physical items that you make using this pattern. You are NOT permitted to reprint this pattern in any form unless you have obtained my written permission to do so.