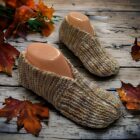
Posted on 1 Comment

Free Pattern: Knitted Owl Slippers with Cozy Cuff for Adults

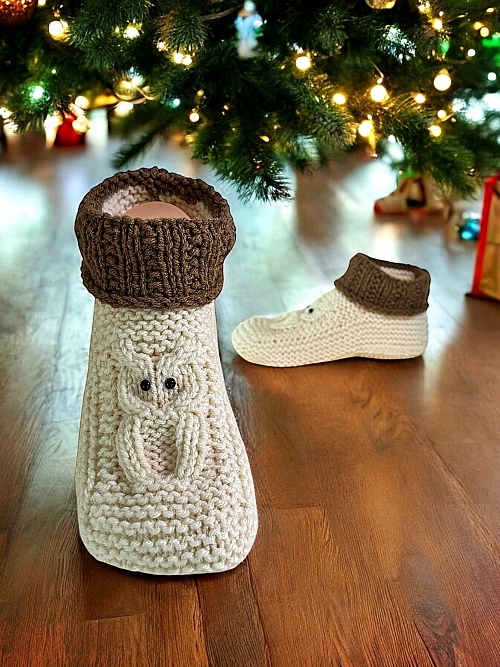
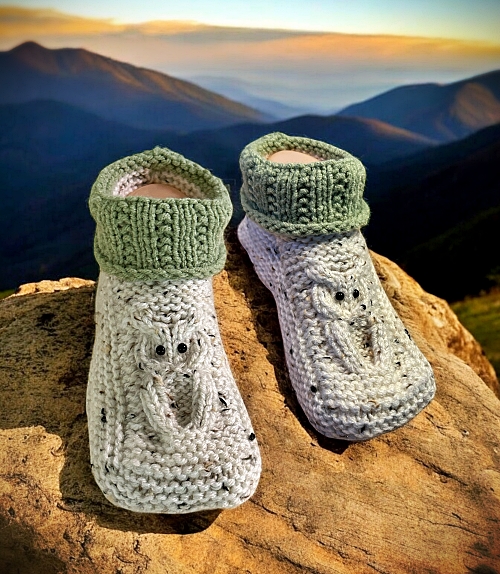
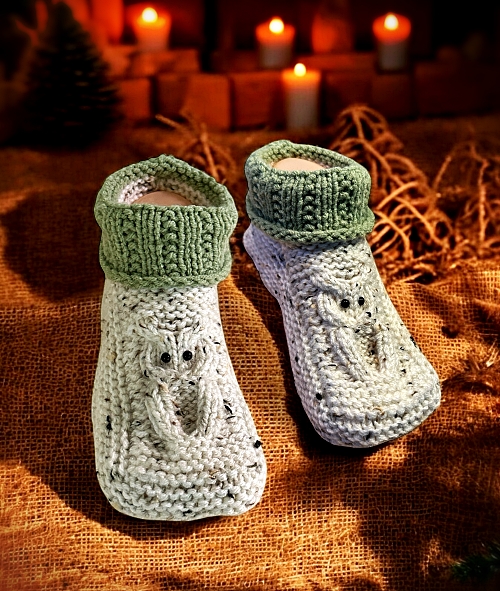
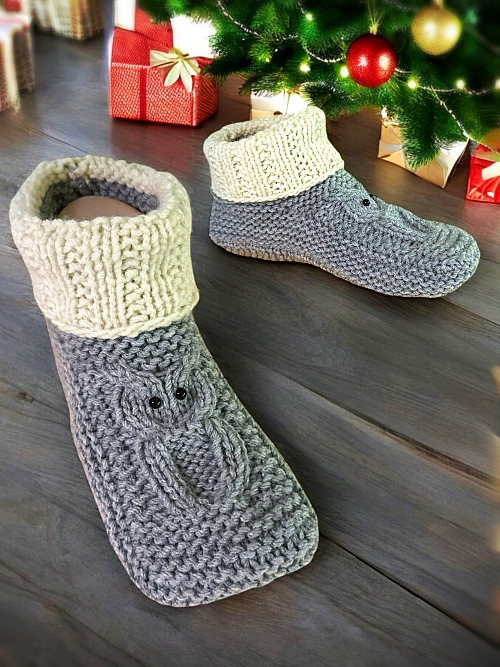
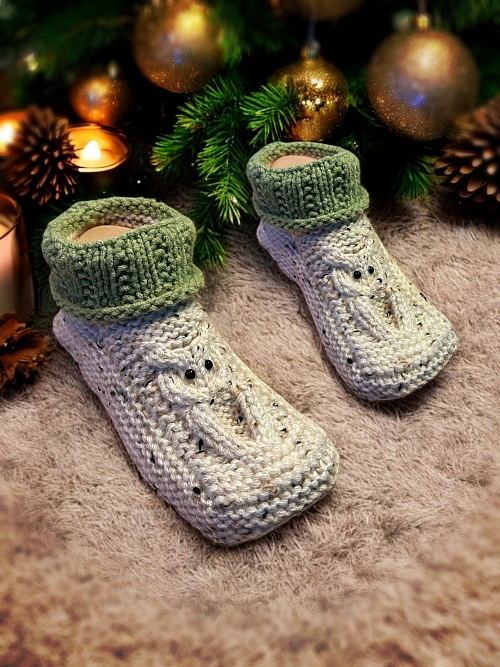
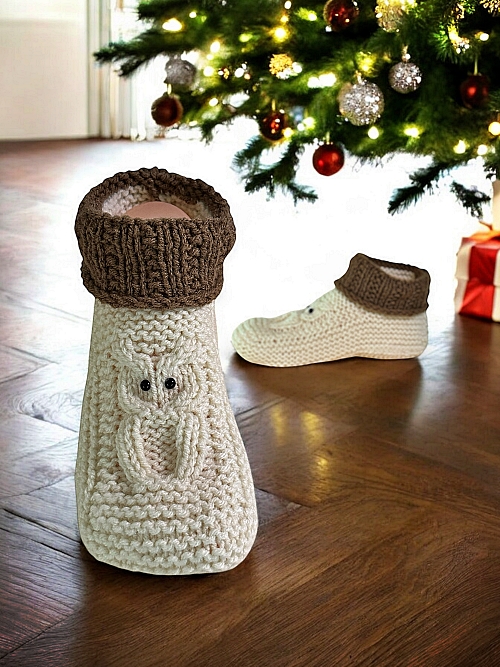
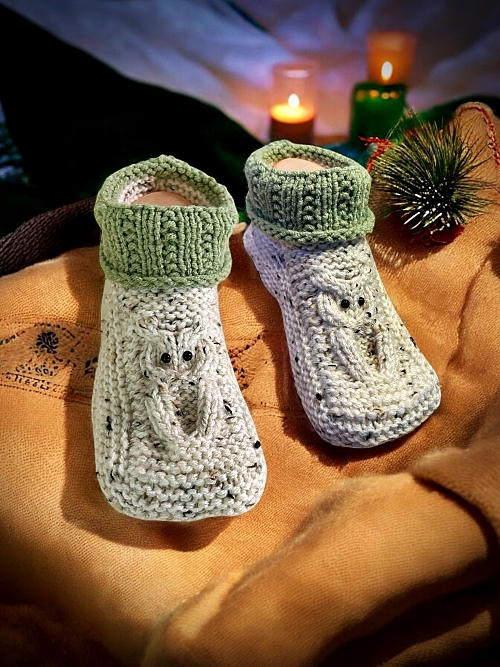
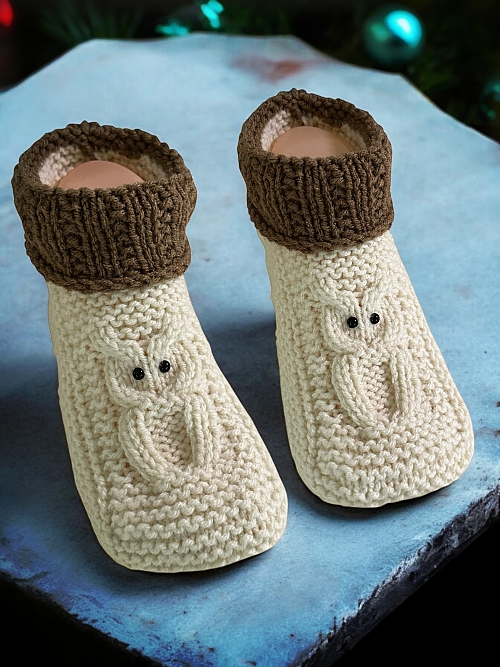
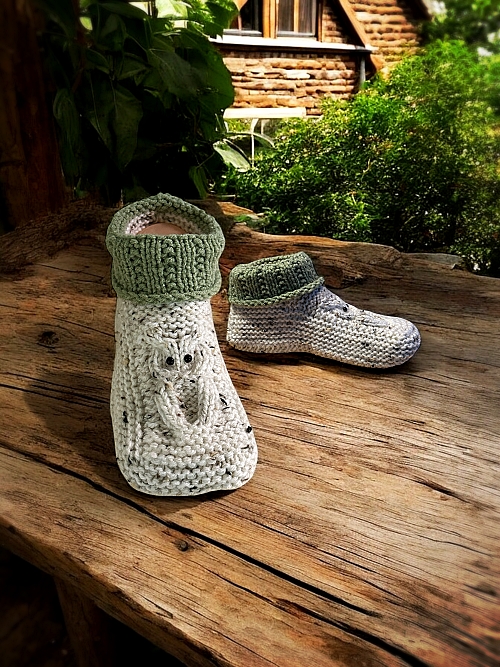
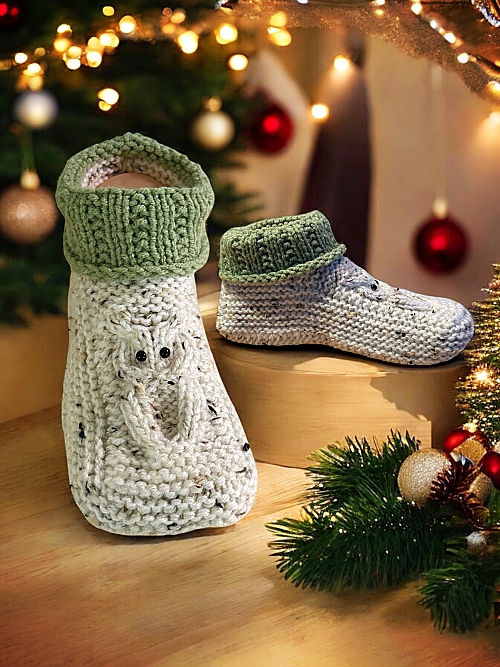
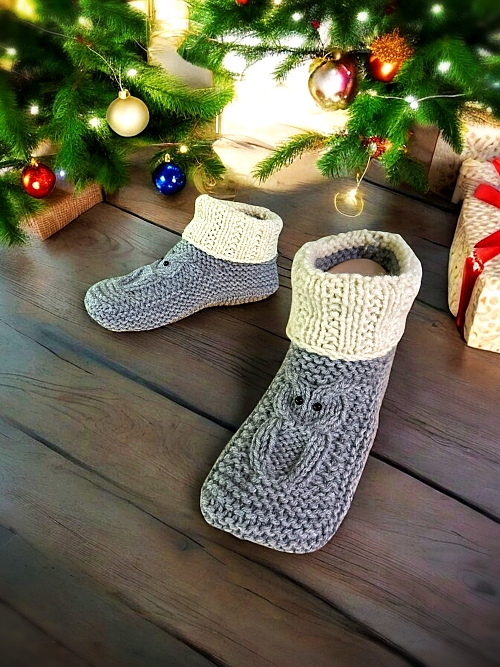
free knitting pattern - owl slippers with a cuff

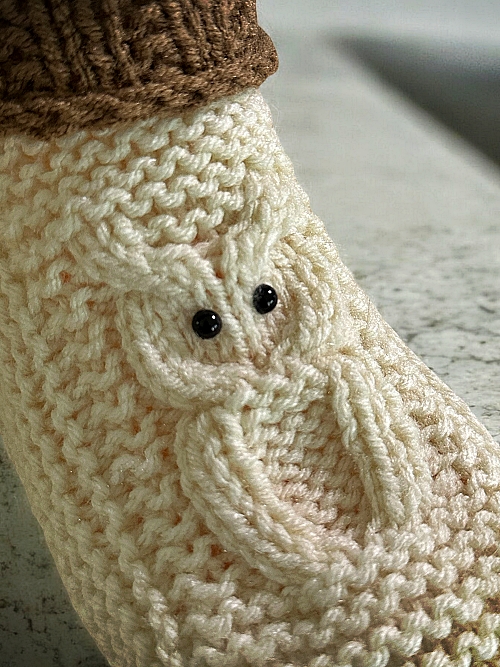
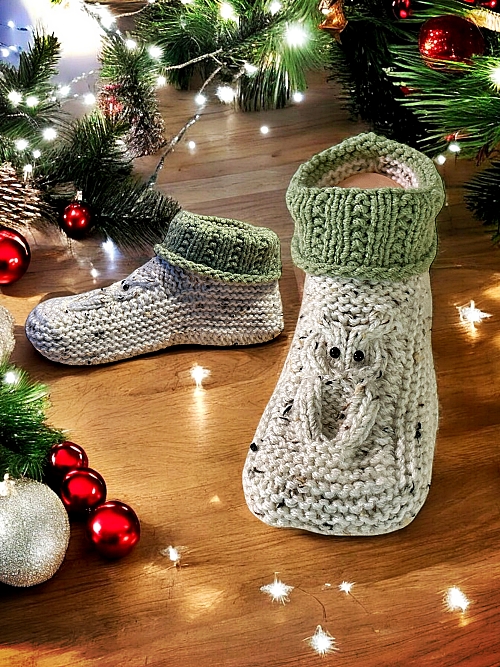
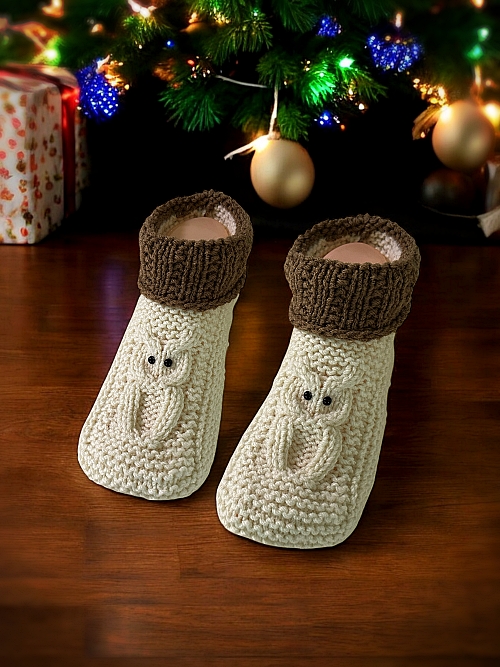
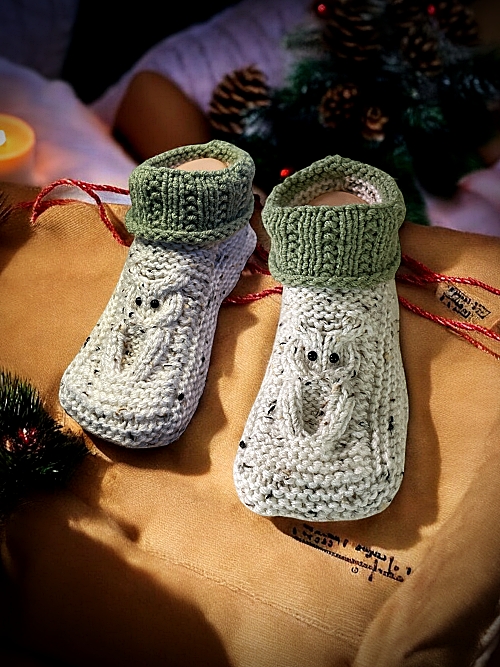
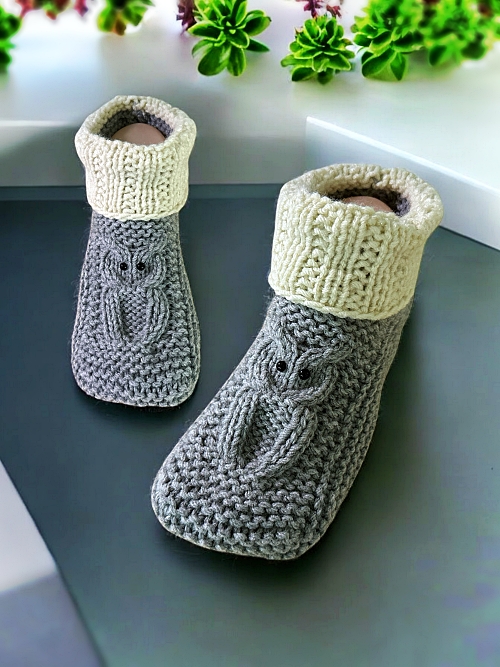
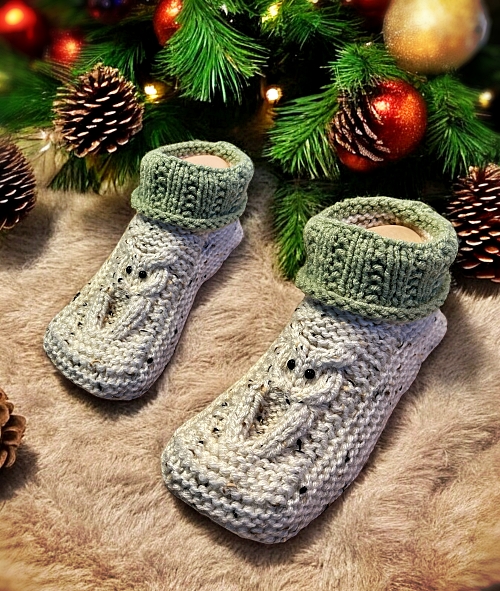
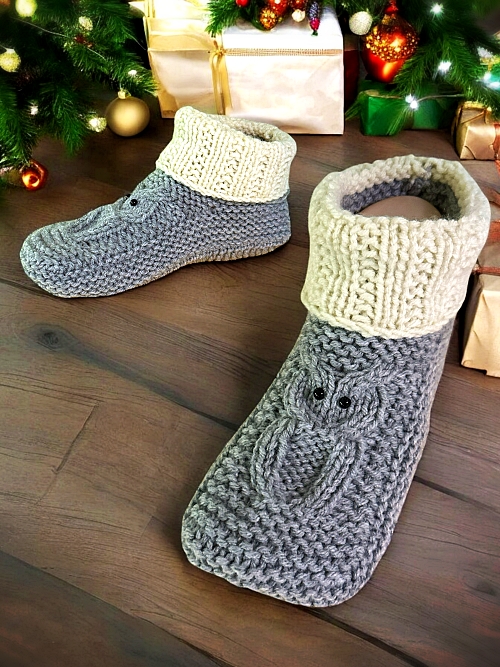
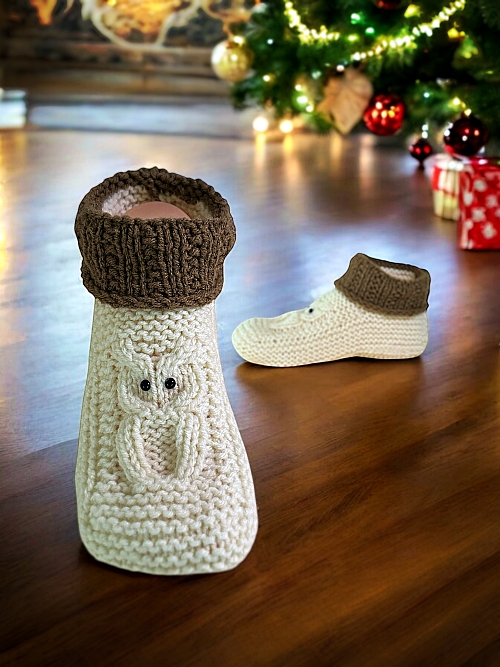
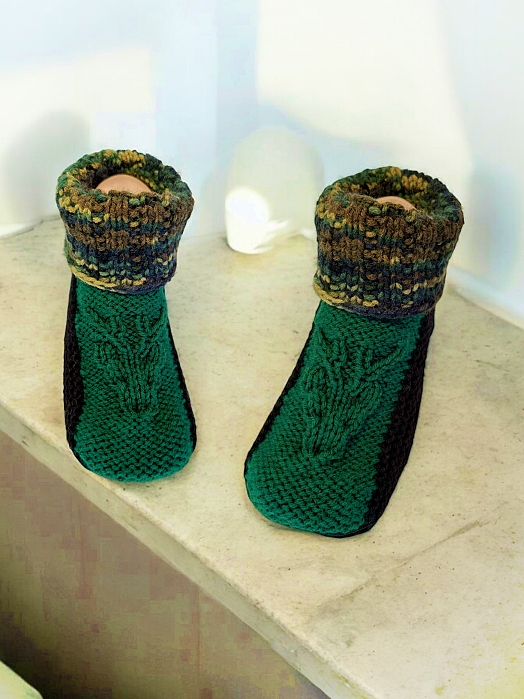
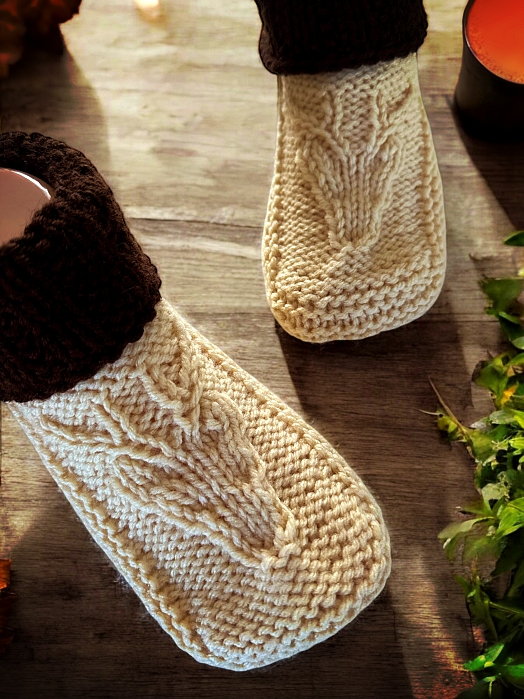
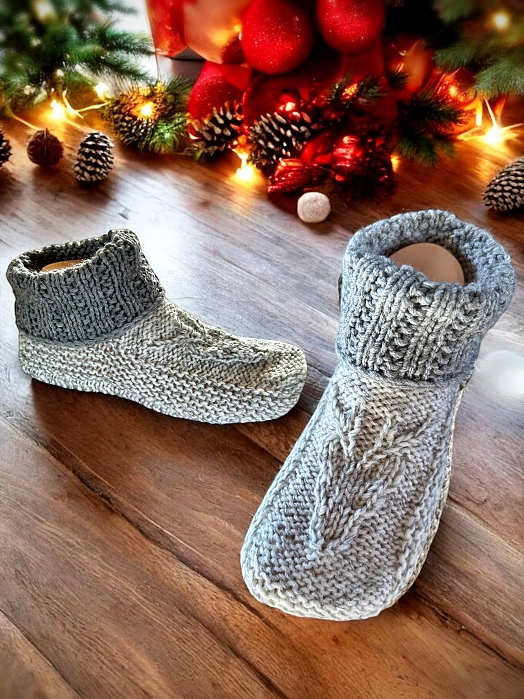
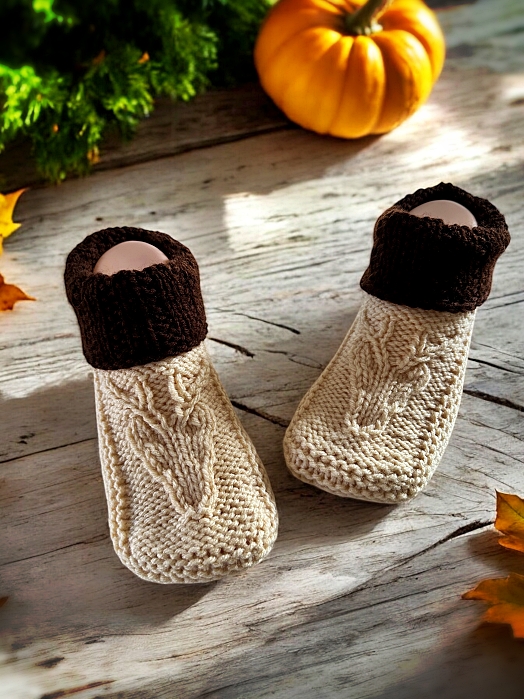
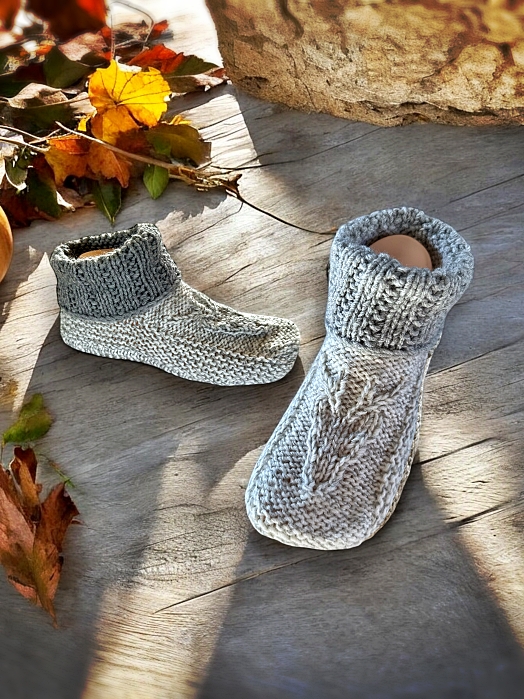
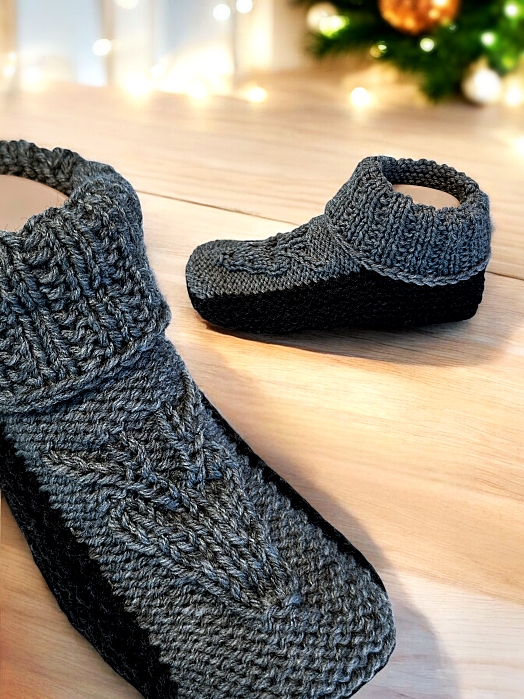
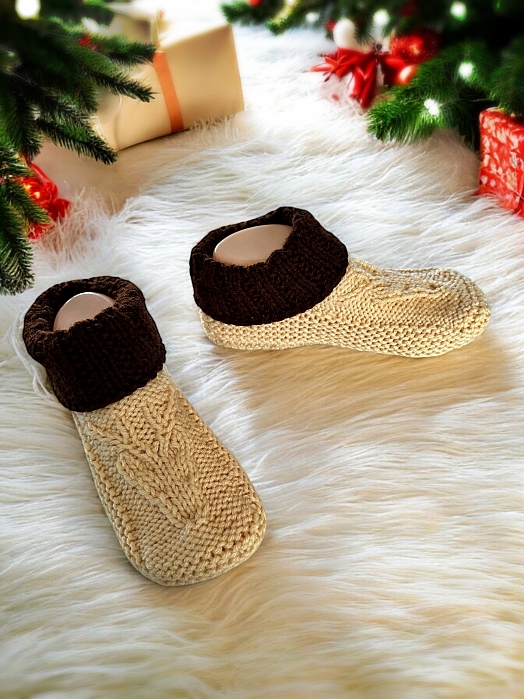
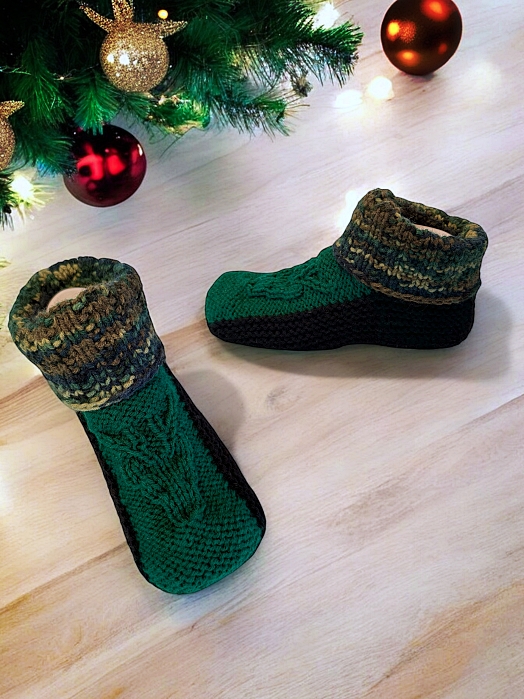
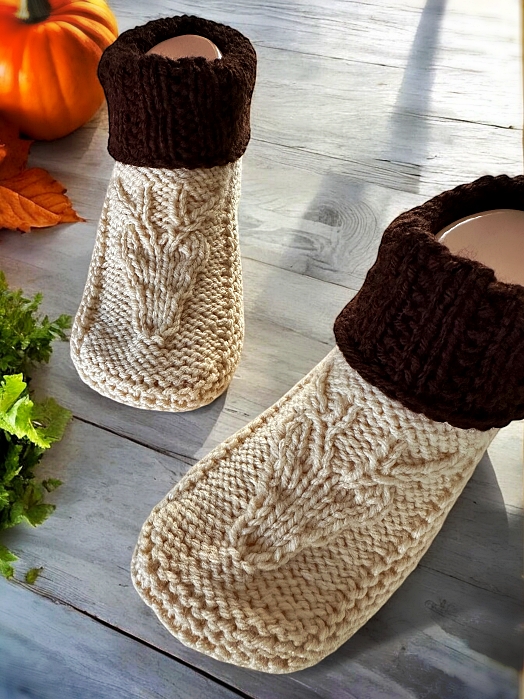
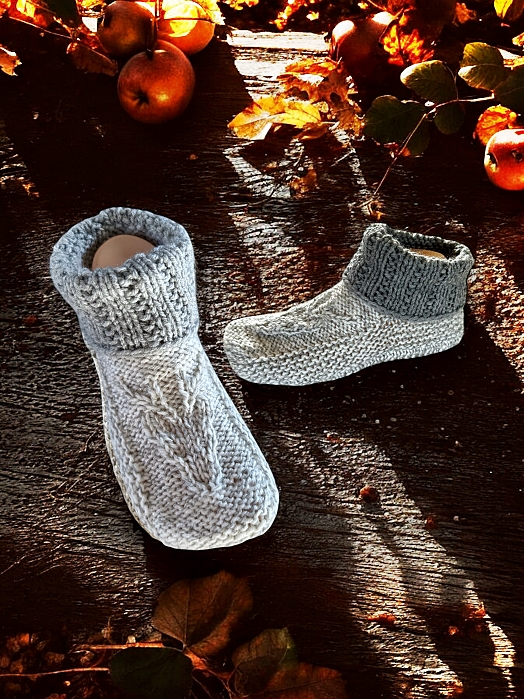
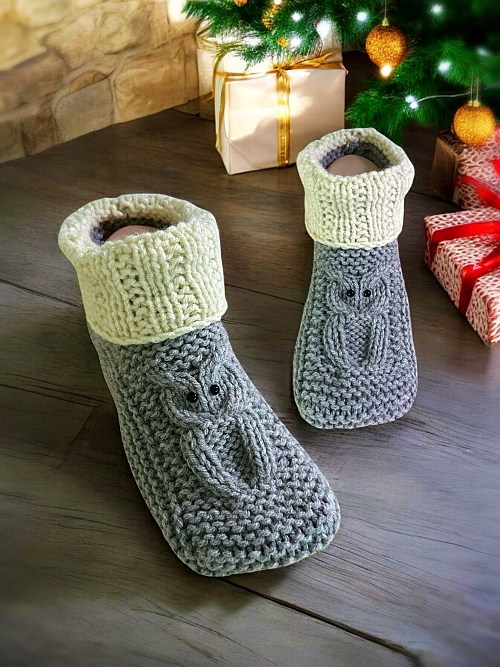
Get ready to knit a pair of slippers that are as cozy as they are charming! This knitting pattern brings together the best of warmth and whimsy, featuring a delightful owl motif perched right on top of the foot. These adult-sized slippers have been crafted with both style and function in mind, thanks to a fitted cuff that hugs your ankle for extra warmth and coziness. Perfect for chilly mornings or relaxed evenings, these slippers will be a go-to pair for any owl lover.

This pattern is designed for knitters with a bit of experience—if you’re comfortable with basic stitches, you’ll be able to follow along with ease. And don’t worry, you won’t be left to navigate the trickier parts alone! I’ve included detailed, how-to videos to help guide you through each step, ensuring that even challenging sections feel doable. Before you know it, you’ll have a cozy, owl-adorned pair of slippers that are sure to turn heads and keep feet warm.

if you are a lover of owls, then you are in LUCK! I have a number of patterns with owls including fingerless gloves, owl beanie, owl bucket hat, and an owl scarf. All are knit flat on 2 needles and are FREE to read on this website. Click any of the links and a new window will open a new page with the entire pattern there for you to enjoy.

You can download it from a number of places. In particular, my site here – Owl Slippers with a Cuff – Knitting Pattern. You can also get it at a number of other online book retailers such as Ravelry, LoveCrafts, CreativeFabrica and Etsy. It is also available as paperback and as a Kindle book on Amazon. I think that’s enough options to make nearly everyone happy 🥰.

Another way to avoid ads and pop-ups, get instant, PRINTABLE downloads of this pattern and others, is by becoming a Member. When you become a Website Supporter at $4/month, you’ll gain access to exclusive member only posts on Buy Me A Coffee. You can download as many patterns as you like for the same $4 each month. You can go to this page to learn more, become a member and support my work… Exclusive Member Area

If you enjoy this pattern and my other free online knitting patterns, please consider making a small donation or helping me out by visiting my Help Support My Work page. If that’s not possible, that’s totally fine too! Even sharing this page on your social media helps me out immensely. You can use the buttons below to do so easily.

Happy Knitting!

Things You Need

1 ball of worsted weight yarn (average 260 yard, 5 oz or 141 gram ball will be more than enough). 
You can use a second colour for the cuff.

2 sets of size 4 mm (US size 6) single point knitting needles.

Stitch holder

Cable Needle

Tapestry needle to sew in ends. You can also use this handy video tutorial to show you how to work in the ends while knitting these slippers. The embedded video is in the Abbreviations section

Gauge

With size 4 mm (US size 6) needles or whatever size you need to obtain the correct number of stitches and rows. Be sure to check your gauge otherwise the sizing won’t be correct.

In garter stitch

2” = 9 sts

2” = 18 rows

Sizes (are written as such)

Women’s 6-7 (8-9, 10-11, 12-13)

Men’s 5-6 (7-8, 9-10, 11-12)

Cuff

With CUFF colour

Cast on 36 (38, 40, 42) loosely

Row 1: K across

Row 2: With the RIGHT side facing you, (K1 P2) across. Maintain this pattern with any remaining sts at the end of the row. 

Repeat from  to  10 (12, 14, 16) times more for a total of 12 (14, 16, 18) rows

Next Row: With the RIGHT side facing, P across.

Next Row: K across. If cuff colour differs from the MAIN colour, break yarn now. Start the new colour when done knitting this row. 

Next Row: K across for 13 (15, 17, 19) rows. Break yarn.

Toe Flap

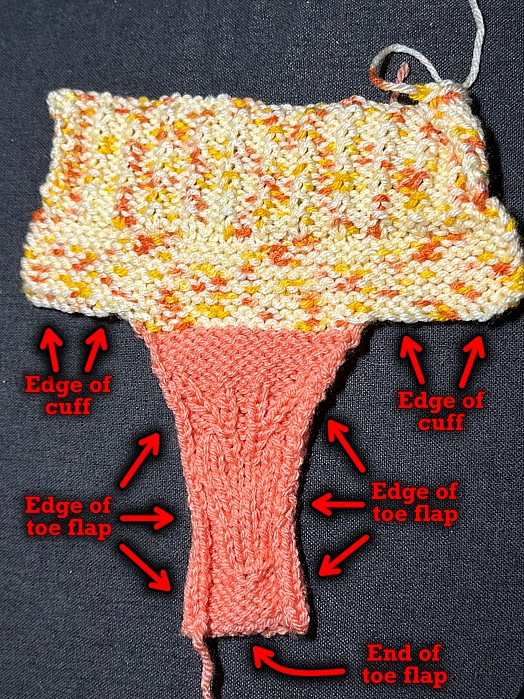
Next Row: With the MAIN colour and the WRONG side of the ribbing facing you, transfer the first 11 (12, 13, 14) stitches to a stitch holder. Reattach the yarn and knit the next 14 stitches (the start of the toe flap with the owl motif). Leave the remaining 11 (12, 13, 14) stitches on the needle unworked.

The following rows are worked back and forth on the 14 toe flap stitches only!

Knit across for 7 (9, 911) rows.

Next Row (with the RIGHT side of the ribbing facing you): K3 P2 K4 P2 K3

Next Row (with the WRONG side of the ribbing facing you): K2 P1 K8 P1 K2

Next Row: K3 P8 K3

♦ Next Row: K2 P1 C4F C4B P1 K2

Next Row: K3 P8 K3

♥ Next Row: K2 P1 K8 P1 K2 

Next Row: K3 P8 K3  Repeat from  to  2 more times

Next Row: Repeat row marked with 

Next Row: K3 P2 K4 P2 K3

♪ Next Row: K2 P1 K2 P4 K2 P1 K2

Next Row: K3 P2 K4 P2 K3 ♪ Repeat from ♪ to ♪ 3 more times

Next Row: Repeat row marked with 

Next Row: K across for 5 (7, 79) rows.

More of My Stuff on Etsy


You can make a widget like this for your blog or website, too.
Instructions are on my website here: How to Display Etsy Items on Your Website

Sides of Foot

This is where you’re going to need the extra set of knitting needles. You’ll be knitting back and forth in rows but the turn around the toe is too tight to use circular needles. For this, you’ll put the 14 toe flap stitches on one of your extra needles. It’s a little unconventional, but it works.

Next Row: With the RIGHT side facing, transfer the 11 (12, 13, 14) stitches from the stitch holder onto one of your needles. Attach your yarn and knit the 11 (12, 13, 14) stitches. Pick up 21 (22, 23, 24) stitches evenly along the edge of the toe flap. (All of these stitches are on  ONE needle. (32, 34, 36, 38) stitches on this needle)

With another needle, knit the 14 stitches of the toe flap. (14 stitches on this needle)

With another needle, pick up 21 (22, 23, 24) stitches evenly along the side of the toe flap. Knit the remaining 11 (12, 13,14) stitches on the next needle. (32, 34, 36, 38) stitches on this needle)

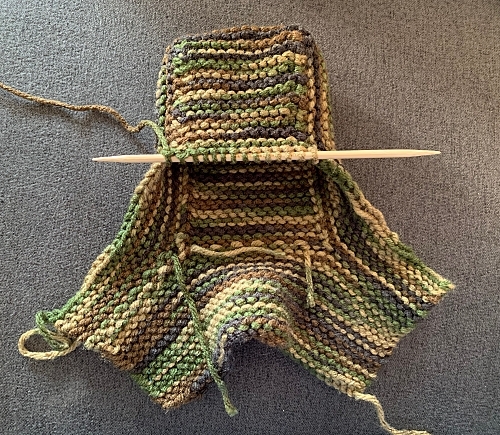
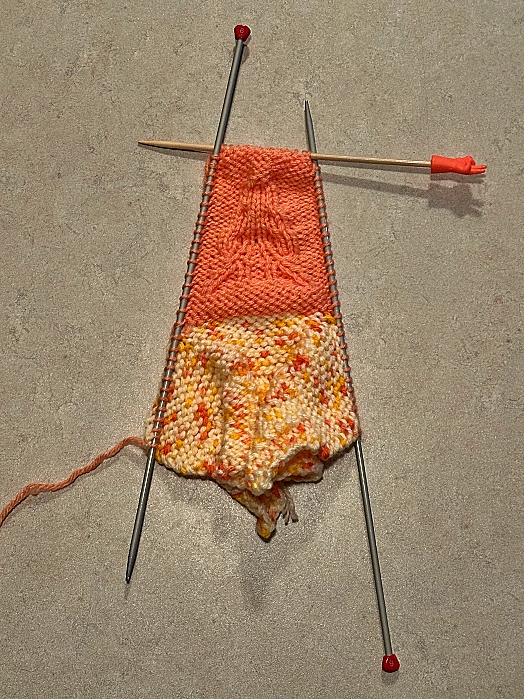
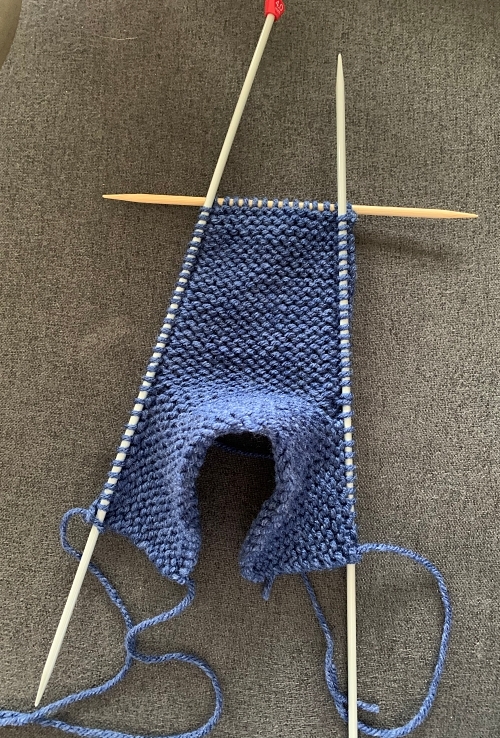
You should now have 3 needles holding stitches with all the points pointing as shown below when laid flat. You also have one spare needle to knit with. You are now going to knit in rows, back and forth with these three needles. Once you finish knitting all the stitches on one needle, move on to the next needle (the point of the needle is right there) until you complete the row.
How to knit slippers
I used a double pointed needle to work my 14 stitches
for the toe only because it was handy. A regular needle works!

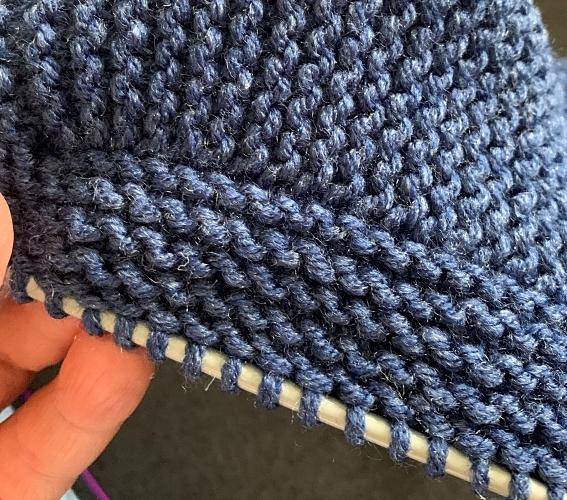
Knit the next 8 (10, 12, 14) rows

There are 4 (5, 6, 7) ridges on the tip of the toe.

The following photo shows the 5 ridges for the women’s size 8-9 or the men’s 7-8.
How to knit slippers
These are the ridges picked up along the side.

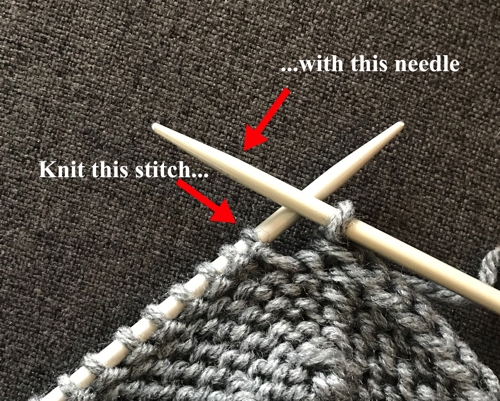
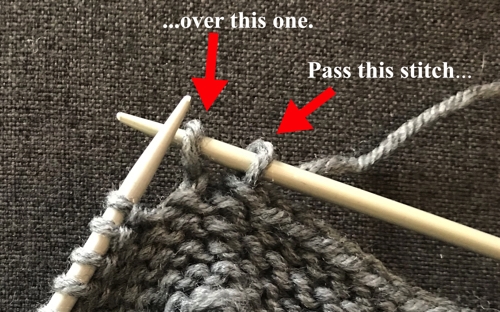
Next Row: With WRONG side facing. Cast off all the stitches from the first needle loosely. You’ll need to pass the last stitch from the first needle over the first stitch of the toe flap stitches (second needle).
Knitted Owl Slippers - Making the Sole

Using the same needle that now has one stitch, knit the remaining 12 stitches of the toe flap. Cast off all the stitches from the third needle loosely. Break yarn.

Making the Sole

If you need more help than the photos provide, you can watch the how-to video. The link starts the video in the correct section. No need to find the spot. I already have it cued up for you.

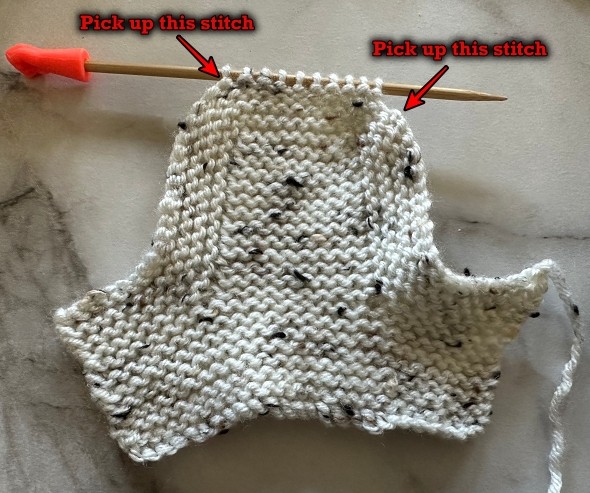
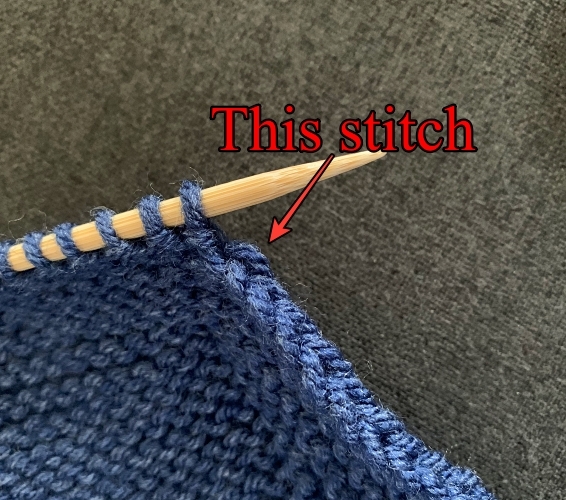
Next Row: With the RIGHT side facing, attach yarn and knit the first stitch of the cast off stitches by the toe flap (cast off stitch on the right by the point of the needle).
Knitted Moccasin Bootie Slippers for Children - picking up stitches
How to knit slippers
Pick up this stitch at the start of the row.

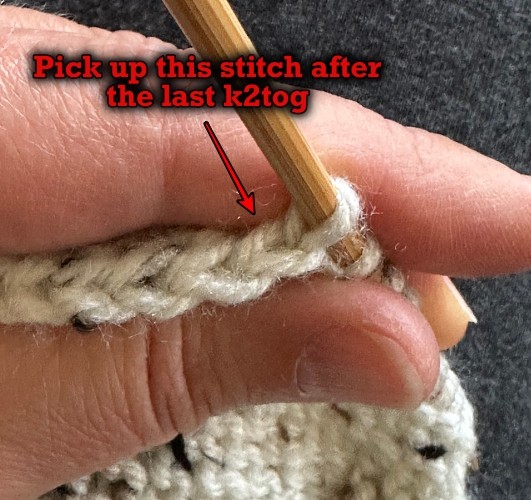
K2tog. Knit to the last 2 stitches K2tog. Pick up the cast off stitch by the point of your needle. (14 stitches).
Knitted Moccasin Bootie Slippers for Children - Picking up stitches
Pick up this stitch at the end of the row.

Quick tip – wrap the yarn counterclockwise around your needle and turn it down to pull the yarn through the cast off stitch on the right. If you have a hard time doing this, you can also use a crochet hook to pull the loop through and place that loop on your working needle.

You now are working back and forth along the bottom of the foot picking up one cast off stitch on each side as you go.

Next Row: Knit across.

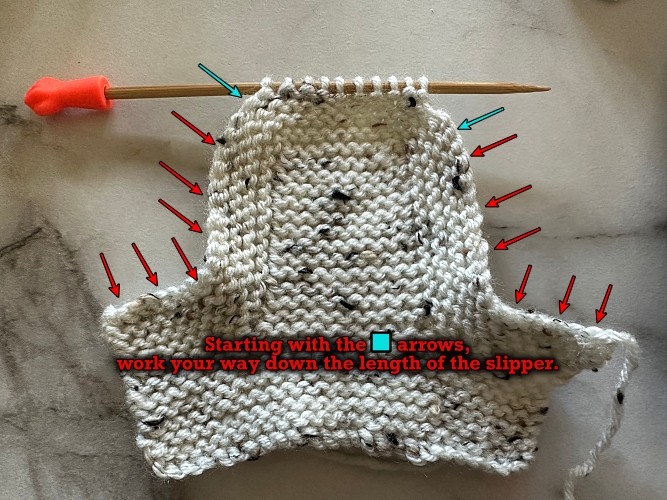
ʤ Next Row: Pick up the next stitch of the cast off stitches. K2tog. Knit to the last 2 stitches K2tog. Pick up the cast off stitch on the other side of the slipper by the point of your needle. (13 stitches).
Working your way down the sides
Keep working your way down the slipper to make the sole.

Next Row: Knit across ʤ

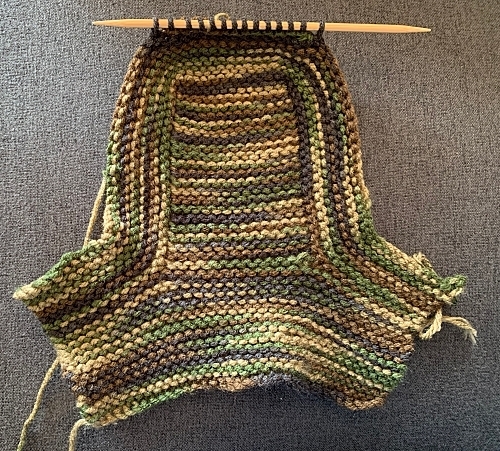
Repeat from ʤ to ʤ down the entire length of the foot. There are equal number of cast off stitches along each side. How many rows varies depending on the size of slipper you’re making. Be sure to end with a completed knit across row.
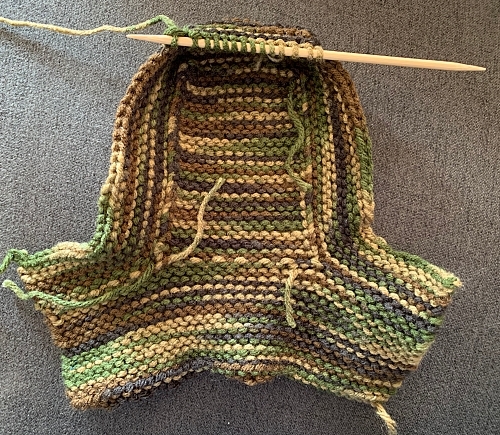
Adult Moccasin Slippers - Making the Sole
Starting the sole. Right side.
Adult Moccasin Slippers - Making the Sole
Working your way down while making the sole. Wrong side.
Adult Moccasin Slippers - Making the Sole
Continuing to work down the length of the sole.
Adult Moccasin Slippers - Making the Sole
Still further down the sole. Note how the cast off edges are being picked up as you go. Keep working your way down the length of the sole until you’ve picked up all the cast off stitches.

Making the Heel

If you need more help than the photos provide, you can watch the how-to video. The video starts in the correct section. No need to find the spot. I already have it cued up for you.

You’re now going to make a small triangle to fit in the back of the heel. You’re going to fill this space in the slipper.

Child moccasin slippers - Picking up stitches to make the heel.

Ҩ Next Row: With the RIGHT side facing, pick up a stitch in the row closest to the sole of the slipper. Count how many ridges it is for the size you are making. K2tog twice. Knit to the last 4 stitches. K2tog twice. Count down the same number of ridges on the other side and pick up a stitch in the space beneath it. (12 stitches).

Owl Slippers knitting pattern
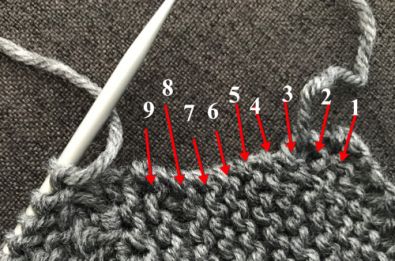
The photo above shows 9 rows of ridges. These are rows you knit to form the edges of the slipper. 
Owl Slippers - Free Knitting Pattern
Stitch picked up on the right edge in the 9th row shown above
Owl Slippers - Free Knitting Pattern
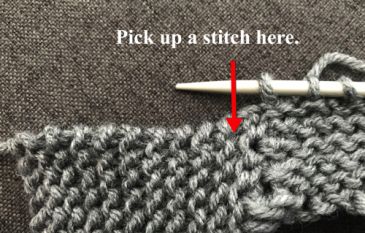
After you K2tog at the end of the row, you’ll pick up a stitch here.
Owl Slippers - Free Knitting Pattern
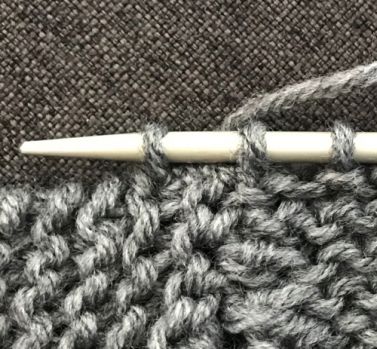
Stitch picked up.

Next Row: Knit across.

Next Row: Count down one ridge less than the previous row and pick up a stitch in the space beneath it. K2tog. Knit until the last 2 stitches. K2tog. Count down the same number of ridges and pick up a stitch in the space beneath it on the other side.

Next Row: Knit across. Ҩ Repeat from Ҩ to Ҩ until 6 stitches remain.

Next Row: Pick up a stitch beneath the next ridge. K2tog 3 times. Pick up a stitch in the space beneath the next ridge on the other side.

Next Row: Knit across.

Next Row: K2tog, K1, K2tog. Pass the middle stitch on your working needle over the stitch on the left. Pass the stitch on the right over the stitch on the left. (Or you can turn your work and K3tog).

Break yarn leaving a length of yarn long enough (8ish inches) to sew up the remaining seam.

Make another slipper.

Yes, they do look a little boxy when they’re done and not on a foot. The stretch of the garter stitch allows these slippers to stretch around the contours of any foot easily.

Hints and Tips

If you want a longer cuff at the top, work more rows than stated at the beginning when you cast on. Make sure to increase the same amount of garter stitch rows and ribbed rows equally. If increasing 10 rows, do so on both.

When picking up stitches from the cast off row, be sure you’re really moving on to the next cast off stitch! It’s an easy mistake to pick up a stitch in a stitch you already picked up. If in doubt, give the needle holding the stitches a bit of a tug. You’ll see the yarn move slightly at the very back, closest to the needle. Pick up a stitch at the NEXT cast off stitch.

If you don’t have the same number of stitches on both sides when you are forming the sole, you may have picked up a stitch twice in one stitch or missed one. Don’t worry! This is fixable. You can skip one cast off stitch if you need to make it even, or pick up a cast off stitch twice on the other side. There’s enough stretch in the slipper that any puckering this causes won’t be overly visible if you’re off by a stitch or two.

To speed up finishing the slippers and not have so many ends to sew in, hold the yarn ends to the back of your work as you knit. You can watch the how to video here – how to work in the ends while knitting these slippers.

Abbreviations

K – knit

P – purl

K2tog – knit 2 together

K3tog – knit 3 together

st – stitch

sts – stitches

Side note: I use both versions of the terminology when it comes to cable stitches. I’ve been corrected that I’m using the wrong one for both occasions so it’s a no win for me. What I mean is that C4F is the same technique as C2F. Just like how C2B is the same as C4B. Do you think of it as the just the stitches you’re pulling or the number of stitches you’re using in total when you do it? It’s a personal choice, I guess.

C4F – Pick up the next 2 stitches with your cable needle. Pull the stitches to the FRONT of your work. Knit the next 2 stitches on your non-working needle. Knit the 2 stitches from the cable needle. Watch this video to see how. How to C4F or Cable 4 Forward

C4B – Pick up the next 2 stitches with your cable needle. Pull the stitches to the BACK of your work. Knit the next 2 stitches on your non-working needle. Knit the 2 stitches from the cable needle. Watch this video to see how. How to C4B or Cable 4 Back

Like all of my patterns you have my permission to sell and/or give away the slippers that you make using this pattern. You are NOT permitted to reprint this pattern in any form unless you have obtained my written permission to do so. 

If you have any questions, please feel free to leave a comment or send me your questions at [email protected].

Posted on 1 Comment

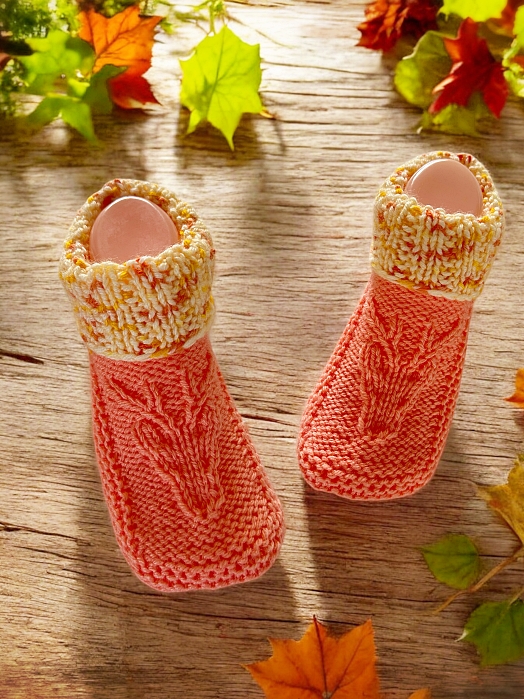
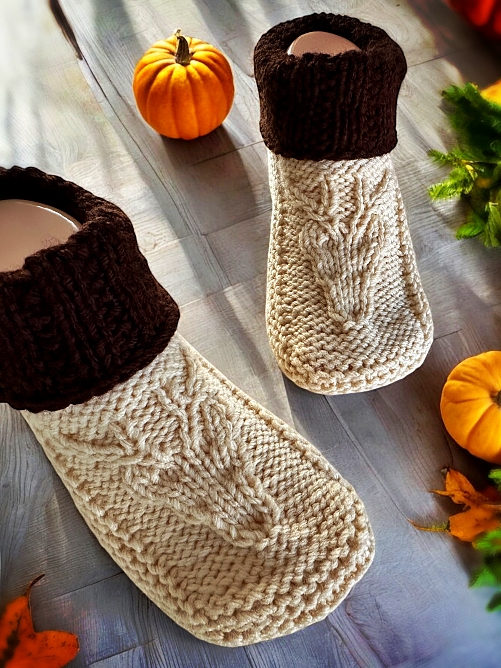
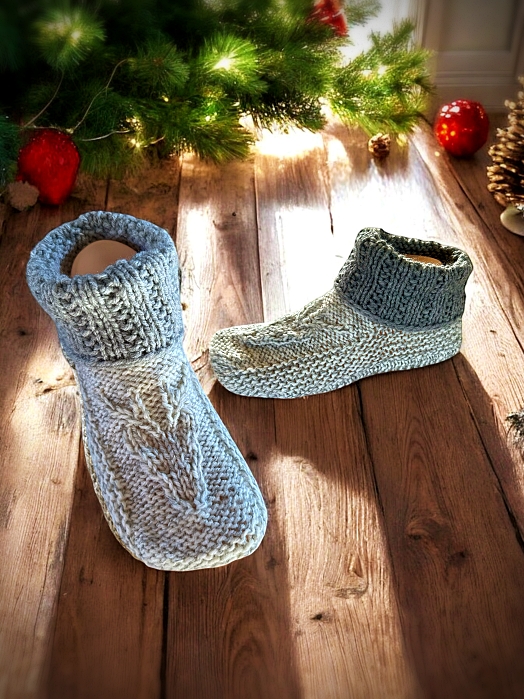
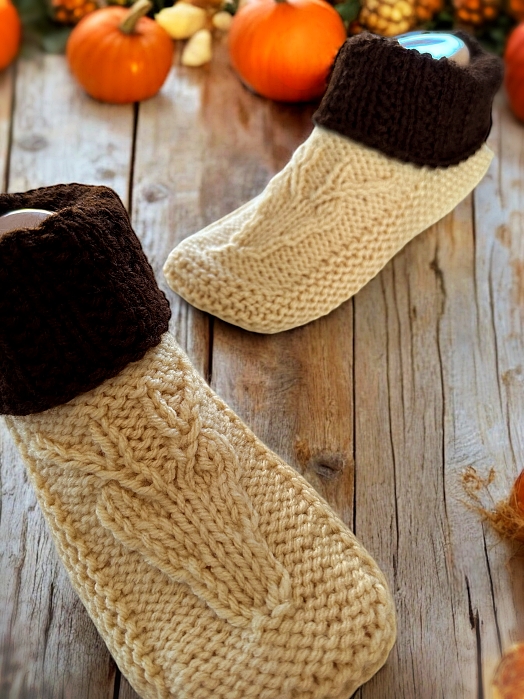
Knitted Deer Slippers with a Cuff – FREE Knitting Pattern

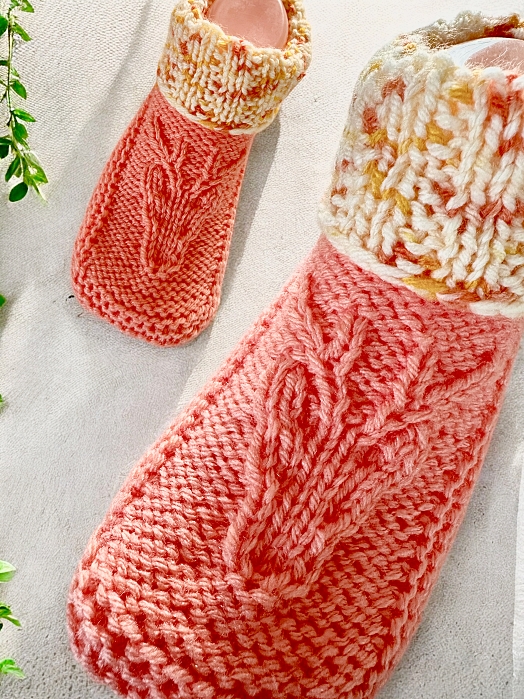
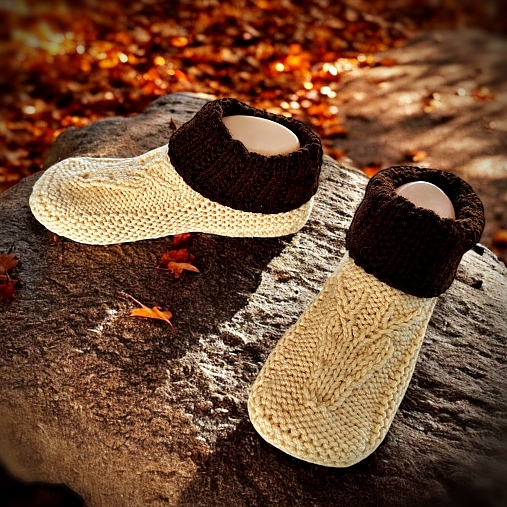
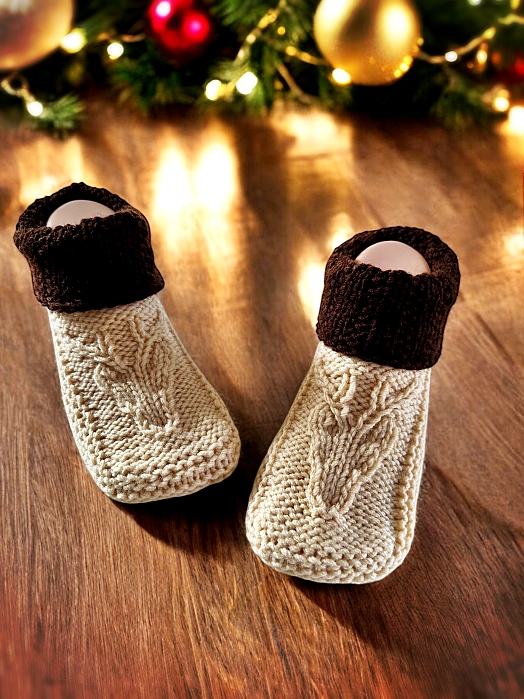
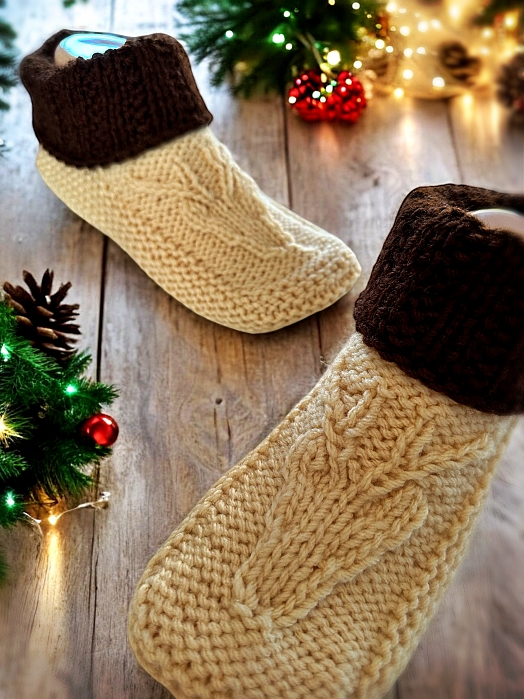
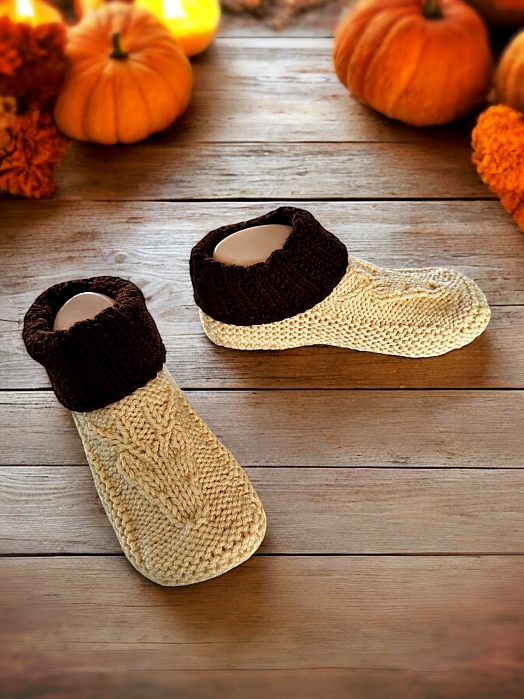
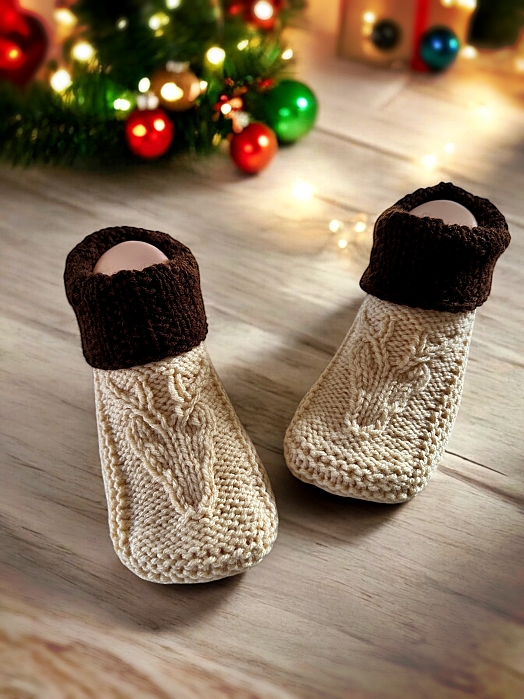
I’ve always wanted to design a pair of slippers that had a bit more character and substance—something that not only looks good but fits snugly and keeps you cozy. The deer motif on top of the foot gives these slippers a rustic charm, while the substantial cuff provides extra warmth and a secure fit. These slippers are great for knitters who are comfortable with basic stitches and ready to dive into something a bit more intricate.

This pattern is packed with various cable stitches, so you’ll get plenty of practice with your cable needle. The cables vary—sometimes you’ll be knitting the stitches on the cable needle, sometimes purling, and the number of stitches will also change. To keep things simple, I explain how to work each cable stitch as you go along, so you won’t need to constantly check the Abbreviations section. 

This isn’t a beginner pattern, but if you’re familiar with the basics of knitting and feel comfortable using a cable needle, you’ll be able to handle this. I’ve included lots of helpful photos to guide you through the deer motif, so you’ll have plenty of visual aids as you knit.

You can download it from a number of places. In particular, my site here – Knitted Deer Moccasin Slippers with a Cuff. You can also get it at a number of other online book retailers such as Ravelry, LoveCrafts, CreativeFabrica and Etsy. It is also available as paperback and as a Kindle book on Amazon. I think that’s enough options to make nearly everyone happy 🥰. If a link isn’t working, I either haven’t formatted it for the distributor or I’m waiting for approval.

Another way to avoid ads and pop-ups, get instant, PRINTABLE downloads of this pattern and others, is by becoming a Member on this website. When you become a Website Supporter for $3/month, you’ll gain access to exclusive member only posts. These posts contain one click downloads of the patterns. Simply click the Download & Print button. The PDF will automatically download to your computer or smart device. You can then read it on your device or print it at your leisure. You can download as many patterns as you like for the same $3 each month. You can go to this page to learn more, become a member and support my work… Exclusive Member Area

If you enjoy this pattern and my other free online knitting patterns, please consider making a small donation or helping me out by visiting my Help Support My Work page. If that’s not possible, that’s totally fine too! Even sharing this page on your social media helps me out immensely. You can use the buttons below to do so easily.

Happy Knitting!

Things You Need

1 ball of worsted weight yarn (average 260 yard, 5 oz or 141 gram ball will be more than enough) 

2 sets of size 4 mm (US size 6) single point knitting needles.

Stitch holder

Cable Needle

Tapestry needle to sew in ends. You can also use this handy video tutorial to show you how to work in the ends while knitting these slippers. The embedded video is in the Abbreviations section

Gauge

With size 4 mm (US size 6) needles or whatever size you need to obtain the correct number of stitches and rows. Be sure to check your gauge otherwise the sizing won’t be correct.

In garter stitch

2” = 9 sts

2” = 18 rows

Sizes (are written as such)

Women’s 6-7 (8-9, 10-11, 12-13)

Men’s 5-6 (7-8, 9-10, 11-12)

Toe Flap

Cast on 14 sts

🦌 Row 1: P across

Row 2: K across 🦌

Repeat from 🦌 to 🦌 2 (3, 4, 5) times more for a total of 6 (8, 10, 12) rows

Next Row: P6 K2 P6

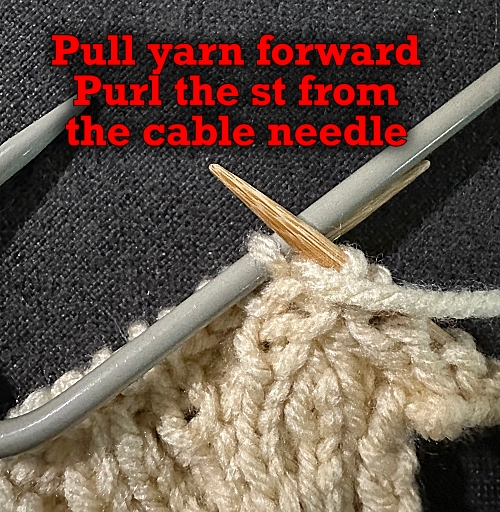
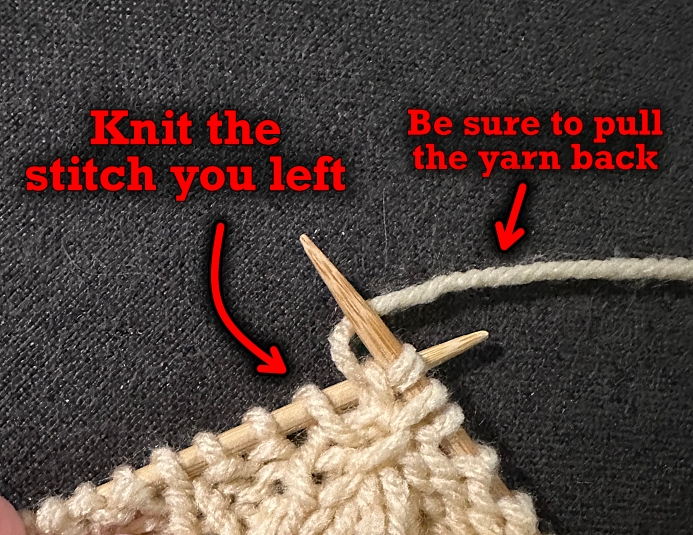
Next Row: K5 Pick up the next st with the cable needle. Pull the st FORWARD, P the next st. P the st on the cable needle. Pick up the next st with the cable needle. Pull the st BACK, P the next st. P the st on the cable needle. K5

🌼 Next Row: P5 K4 P5

Next Row: K5 P4 K5 🌼  Repeat from 🌼  to 🌼  one more time

Next Row: P4 Pick up the next st with the cable needle. Pull the st BACK, K the next st. K the st on the cable needle. K2 Pick up the next st with the cable needle. Pull the st FORWARD, K the next st. K the st on the cable needle. P4

Next Row: K4 P6 K4

Next Row: P4 K6 P4

Next Row: K4 P6 K4

Next Row: P3 Pick up the next st with the cable needle. Pull the st BACK, K the next 2 sts. K the st on the cable needle. K2 Pick up the next 2 sts with the cable needle. Pull the st FORWARD, K the next st. K the 2 sts on the cable needle. P3

Next Row: K3 P8 K3

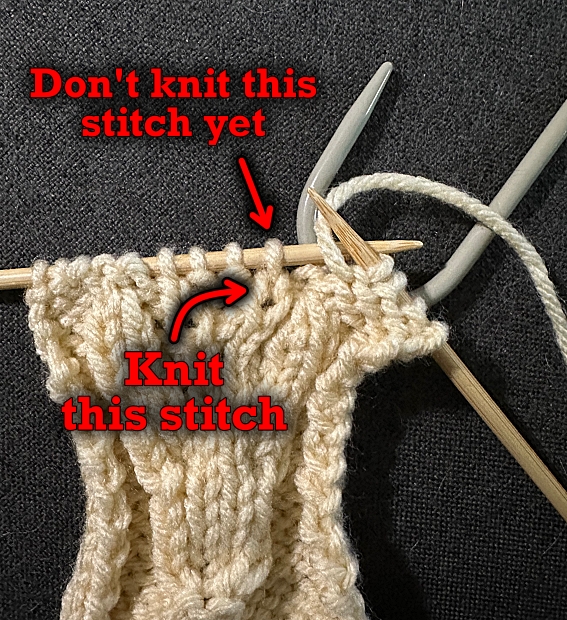
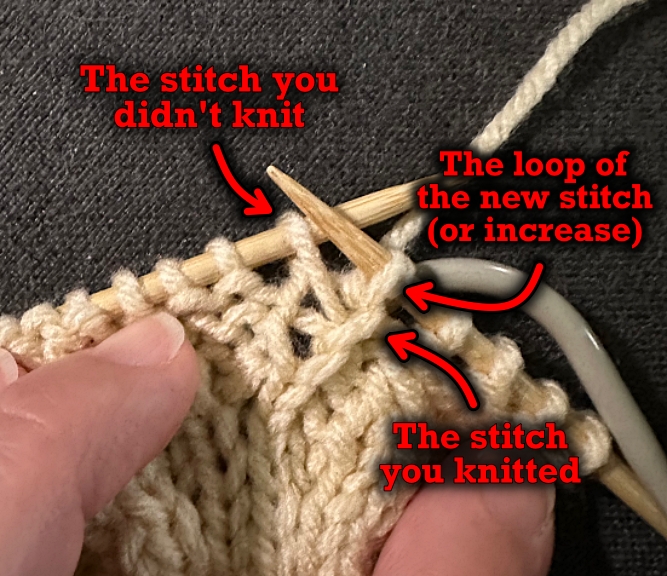
Next Row: P3 K2 P1 K1 PM1 K1 P1 K2 P3 (15 sts)

Next Row: K3 P2 K1 P1 K1 M1 P1 K1 P2 K3 (16 sts)

Next Row: P3 K2tog (When making this stitch, pick up a stitch as if to knit. Twist the stitch and place it back on your non-working needle. Knit the 2 stitches together from right to left.) P1 K1 P2 K1 P1 K2tog (as you normally would left to right) P3 (14 sts) This video shows how to knit the first K2tog. It’s for the leaf but it’s done the same way.

Next Row: K5 P1 K2 P1 K5

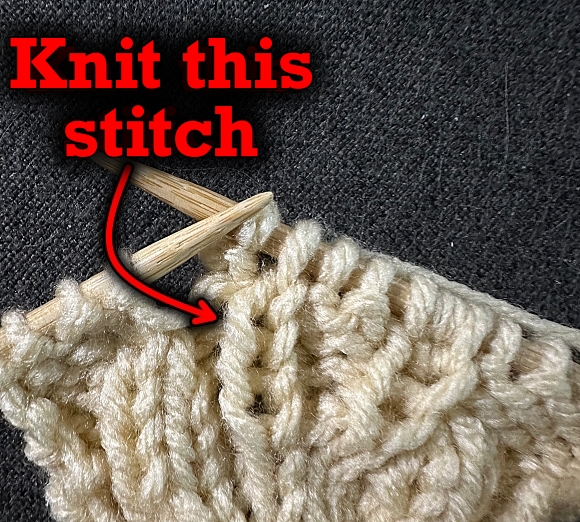
Next Row: P4 Pick up the next st with the cable needle. Pull the st BACK, K1 in the st BELOW (see photos). P1 the st on the cable needle. K1 P2 K1 P1 K1 in the 2nd st BELOW (knit this st in the knit st you made before the P1 as shown in the photos). P4 (16 sts)

How to knit deer antlers
Knit in the stitch below
How to knit deer antlers
Pull up a loop knit-wise like this.
How to knit deer antlers
After purling the st from the cable needle,
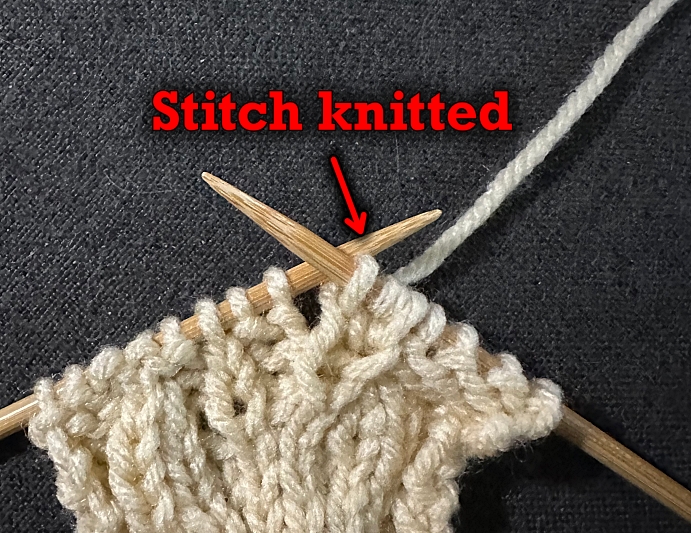
knit the next st on your non-working needle
How to knit deer antlers
The other antler.
You already knitted the st so it needs to be
2 sts down as shown. This is the st that is
bold and italicized in the pattern.
How to knit deer antlers
Pick up this st with the non-working needle.
How to knit deer antlers
Branch of second antler complete.

Next Row: K4 P1 K1 P1 K2 P1 K1 P1 K4

Next Row: P3 Pick up the next st with the cable needle. Pull the st BACK, K the next st. P the st on the cable needle. P1 K1 P2 K1 P1 Pick up the next st with the cable needle. Pull the st FORWARD, P the next st. K the st on the cable needle. P3

Next Row: K3 P1 K2 P1 K2 P1 K2 P1 K3

Next Row: P2 Pick up the next st with the cable needle. Pull the st BACK, K the next st. P the st on the cable needle. P8 Pick up the next st with the cable needle. Pull the st FORWARD, P the next st. K the st on the cable needle. P2

Next Row: K2 P1 K10 P1 K2 

🍄 Next Row: P across

Next Row: K16 🍄 Repeat from 🍄 to 🍄 1 (2, 3, 4) times more. If you want a different colour for the cuff, break yarn when the last row is completed.

Making the Cuff

Next Row:(with the optional cuff colour) K16. Cast on an additional 11 (12, 13, 14). You now have 27 (28, 29, 30) sts on your needle.

Next Row: K27 (28, 29, 30). Cast on an additional 11 (12, 13, 14). You now have 38 (40, 42, 44) sts on your needle.

Next Rows: K across for a total of 13 (15, 17, 19) rows.

Next Row: With the WRONG side facing you, P across. 

🌸  🐿️  Next Row: With the RIGHT side facing you, (K1 P2) across. Maintain this pattern with any remaining sts at the end of the row.

Next Row: K across. 🌸 Repeat from 🌸 to 🌸 6 (7, 8, 9) times more. For a total of 14 (16, 18, 20) rows.

Repeat the row marked with 🐿️ one more time.

Cast off loosely with the WRONG side facing you.

If you would like to change the colour around the toe and foot, change colour now.

More of My Stuff on Etsy


You can make a widget like this for your blog or website, too.
Instructions are on my website here: How to Display Etsy Items on Your Website

Sides of Foot

This is where you’re going to need the extra set of knitting needles. You’ll be knitting back and forth in rows but the turn around the toe is too tight to use circular needles. For this, you’ll put the 13 toe flap stitches on one of your extra needles. It’s a little unconventional, but it works.

he sections of the slipper.

Next Row: With the RIGHT side facing, pick up 11 (12, 13, 14) stitches evenly along the edge of the cuff and place onto one of your needles. Pick up 18 (20, 22, 24) stitches evenly along the edge of the toe flap. (All of these stitches are on ONE needle. (29, 32, 35, 38) stitches on this needle)

With another needle, pick up 13 stitches evenly along the end of the toe flap.

With another needle, pick up 18 (20, 22, 24) stitches evenly along the side of the toe flap. Pick up 11 (12, 13, 14) stitches evenly along the edge of the cuff and place onto the next needle. (29, 32, 35, 38) stitches on this needle)

You should now have 3 needles holding stitches with all the points pointing as shown below when laid flat. You also have one spare needle to knit with. You are now going to knit in rows, back and forth with these three needles. Once you finish knitting all the stitches on one needle, move on to the next needle (the point of the needle is right there) until you complete the row.

I used a capped double pointed needle to work my 13 stitches
for the end of the toe. A regular needle also works.

Knit the next 8 (10, 10, 12) rows

There are 4 (5, 5, 6) ridges on the tip of the toe.

The photo below shows the 5 ridges for the women’s size 8-9 or the men’s 7-8.

How to knit slippers
These are the ridges picked up along the side.

Next Row: With WRONG side facing. Cast off all the stitches from the first needle loosely. You’ll need to pass the last stitch from the first needle over the first stitch of the toe flap stitches (second needle).

Knitted Owl Slippers - Making the Sole

Using the same needle that now has one stitch, knit the remaining 12 stitches of the toe flap. Cast off all the stitches from the third needle loosely. Break yarn.

Making the Sole

If you need more help than the photos provide, you can watch the how-to video. The link starts the video in the correct section. No need to find the spot. I already have it cued up for you.

Next Row: With the RIGHT side facing, attach yarn and knit the first stitch of the cast off stitches by the toe flap (cast off stitch on the right by the point of the needle).

Knitted Moccasin Bootie Slippers for Children - picking up stitches
How to knit slippers
Pick up this stitch at the start of the row.

K2tog. Knit to the last 2 stitches K2tog. Pick up the cast off stitch by the point of your needle. (13 stitches).

Knitted Moccasin Bootie Slippers for Children - Picking up stitches
Pick up this stitch at the end of the row.

Quick tip – wrap the yarn counterclockwise around your needle and turn it down to pull the yarn through the cast off stitch on the right. If you have a hard time doing this, you can also use a crochet hook to pull the loop through and place that loop on your working needle.

You now are working back and forth along the bottom of the foot picking up one cast off stitch on each side as you go.

Next Row: Knit across.

ʤ Next Row: Pick up the next stitch of the cast off stitches. K2tog. Knit to the last 2 stitches K2tog. Pick up the cast off stitch on the other side of the slipper by the point of your needle. (13 stitches).

Working your way down the sides
Keep working your way down the slipper to make the sole.

Next Row: Knit across ʤ

Repeat from ʤ to ʤ down the entire length of the foot. There are equal number of cast off stitches along each side. How many rows varies depending on the size of slipper you’re making. Be sure to end with a completed knit across row.
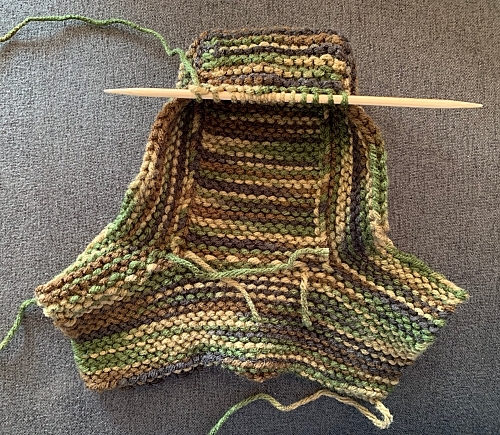
Adult Moccasin Slippers - Making the Sole
Starting the sole. Right side.
Adult Moccasin Slippers - Making the Sole
Working your way down while making the sole. Wrong side.
Adult Moccasin Slippers - Making the Sole
Continuing to work down the length of the sole.
Adult Moccasin Slippers - Making the Sole
Still further down the sole. Note how the cast off edges are being picked up as you go. Keep working your way down the length of the sole until you’ve picked up all the cast off stitches.

Making the Heel

If you need more help than the photos provide, you can watch the how-to video. The video starts in the correct section. No need to find the spot. I already have it cued up for you.

You’re now going to make a small triangle to fit in the back of the heel. You’re going to fill this space in the slipper.
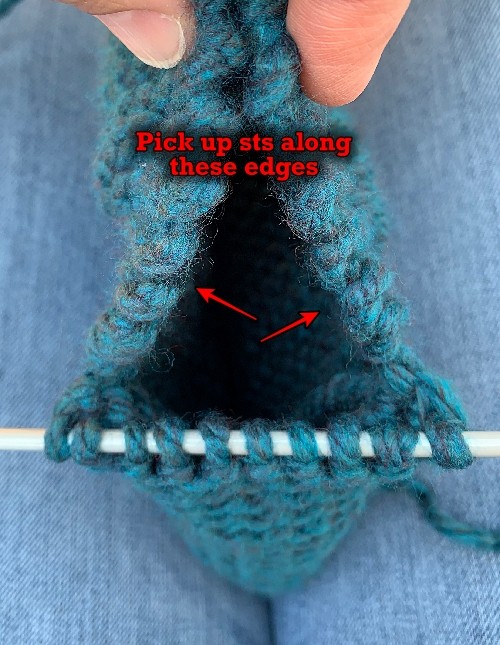
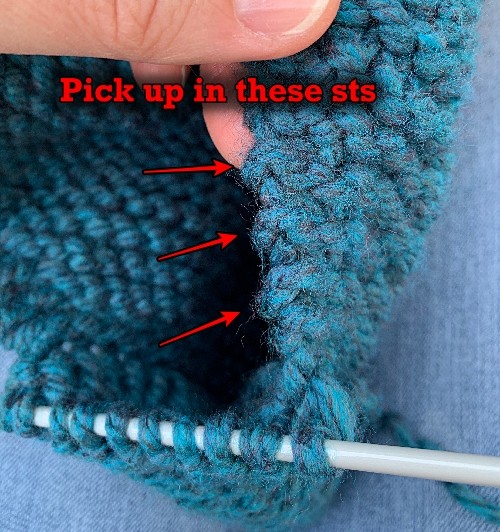
Child moccasin slippers - Picking up stitches to make the heel.

Ҩ Next Row: With the RIGHT side facing, pick up a stitch in the row closest to the sole of the slipper. Count how many ridges it is for the size you are making. K2tog twice. Knit to the last 4 stitches. K2tog twice. Count down the same number of ridges on the other side and pick up a stitch in the space beneath it. (11 stitches).

Owl Slippers knitting pattern
The photo above shows 9 rows of ridges. These are rows you knit to form the edges of the slipper. 
Owl Slippers - Free Knitting Pattern
Stitch picked up on the right edge in the 9th row shown above
Owl Slippers - Free Knitting Pattern
After you K2tog at the end of the row, you’ll pick up a stitch here.
Owl Slippers - Free Knitting Pattern
Stitch picked up.

Next Row: Knit across.

Next Row: Count down one ridge less than the previous row and pick up a stitch in the space beneath it. K2tog. Knit until the last 2 stitches. K2tog. Count down the same number of ridges and pick up a stitch in the space beneath it on the other side.

Next Row: Knit across. Ҩ Repeat from Ҩ to Ҩ until 7 stitches remain. End with the K across row.

Next Row: Count down one ridge less than the previous row and pick up a stitch in the space beneath it. K2tog. K3tog. K2tog. Count down the same number of ridges and pick up a stitch in the space beneath it on the other side.

Next Row: Knit across.

Next Row: K2tog, K1, K2tog. 

Next Row: Knit the 3 sts together.

Break yarn leaving a length of yarn long enough (8ish inches). to sew up the remaining seam. Fold the cuff over when done sewing.

Make another slipper.

Yes, they do look a little boxy when they’re done and not on a foot. The stretch of the garter stitch allows these slippers to stretch around the contours of any foot easily.

Hints and Tips

Picking up the stitch to make the second branch of the antler is sort of up to you. If you pick up the stitch right below where you just knitted, it won’t be a disaster. Most deer antlers aren’t perfectly symmetrical in real life anyways. In fact, the more off they are, the more desirable; especially if it has a drop tine.

If you want a longer cuff at the top, work more rows than stated at the beginning when you cast on. Make sure to increase the same amount of garter stitch rows and ribbed rows.

When picking up stitches from the cast off row, be sure you’re really moving on to the next cast off stitch! It’s an easy mistake to pick up a stitch in a stitch you already picked up. If in doubt, give the needle holding the stitches a bit of a tug. You’ll see the yarn move slightly at the very back, closest to the needle. Pick up a stitch at the NEXT cast off stitch.

If you don’t have the same number of stitches on both sides when you are forming the sole, you may have picked up a stitch twice in one stitch or missed one. Don’t worry! This is fixable. You can skip one cast off stitch if you need to make it even, or pick up a cast off stitch twice on the other side. There’s enough stretch in the slipper that any puckering this causes won’t be overly visible if you’re off by a stitch or two.

Picking up the stitches evenly along the toe flap is about 1 stitch every ridge.

To speed up finishing the slippers and not have so many ends to sew in, hold the yarn ends to the back of your work as you knit. You can watch the how to video here – how to work in the ends while knitting these slippers.

Abbreviations

K – knit

P – purl

K2tog – knit 2 together

K3tog – knit 3 together

M1 – Make one (knit wise). Increase one stitch between the stitches. Pick up the yarn between the stitches. Twist slightly. Place it on your non-working needle. Knit the stitch. Watch this video to see how. 

PM1 – Make one (purl wise). Increase one stitch between the purl stitches. Pick up the yarn between the stitches. Place it on your non-working needle. Purl the stitch as you regularly would. Watch this video to see how. 

st – stitch

sts – stitches

Like all of my patterns you have my permission to sell and/or give away the slippers that you make using this pattern. You are NOT permitted to reprint this pattern in any form unless you have obtained my written permission to do so. 

If you have any questions, please feel free to leave a comment or send me your questions at [email protected].