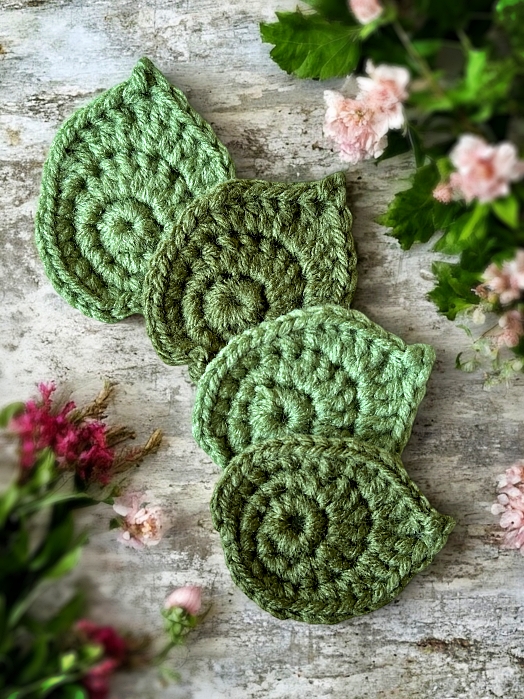

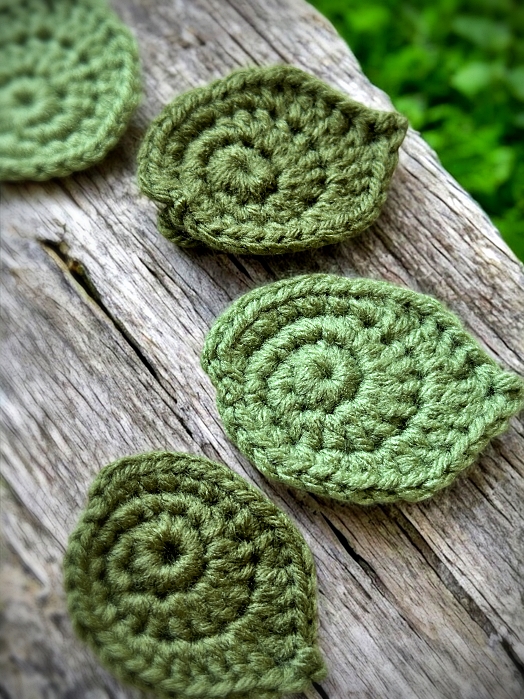
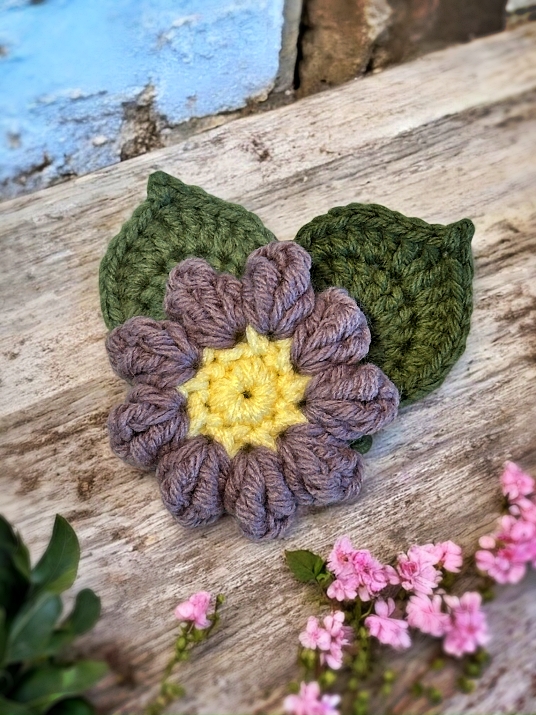
This crochet leaf pattern was created as an accent to complement the flowers in my Crochet Jar with Lid Pattern. On their own, the leaves aren’t meant to stand out—I designed them to serve as subtle fillers that enhance the flowers and draw attention to the main design.
These leaves are a smaller adaptation of the original pattern I designed for my Sun Hat. Since both the original leaf and flower were too large for the jar lid, I did a simple redesign and came up with this perfectly sized version.
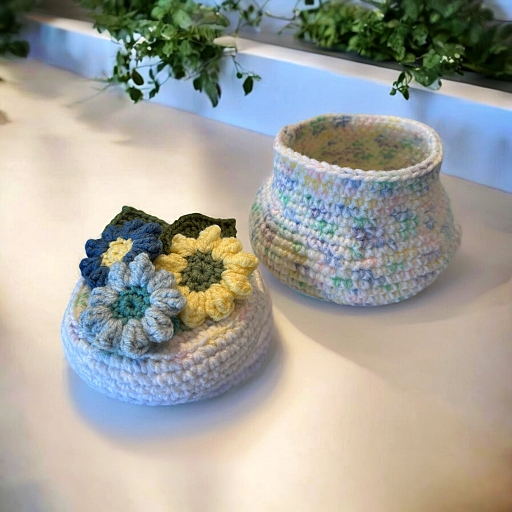
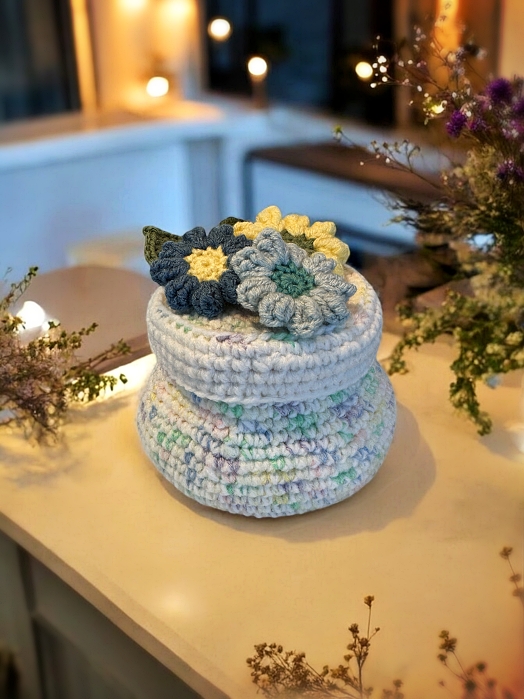
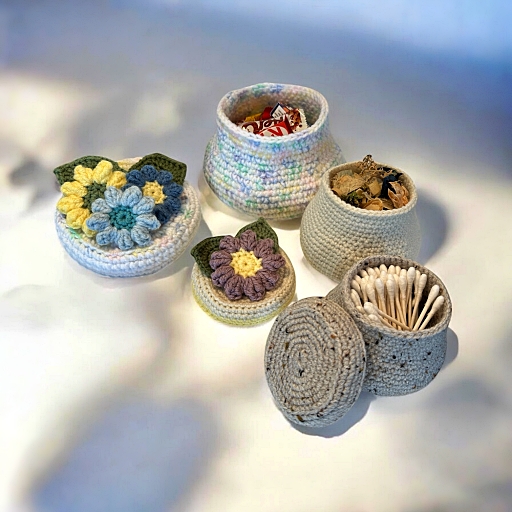
This pattern isn’t available alone as a downloadable and printable PDF. It will be included with the Crochet Jar with Lid Pattern along with the flower. It was easier to divide the jar, flower and leaf into separate pages on the website.
If you know someone you think would like this post, by all means, share it! The more eyeballs on my work the better. If you are enjoying the free patterns, this is a great way to support my work. You can also Buy Me A Coffee or check out the other options when you check out the Help Support My Work page. If you’re looking for something new to share with your friends on your website or on social media, these links will help you do it.
Things You Need
Worsted weight yarn (less than a standard ball)
Size E/ 4 (3.5 mm) to size C/2 (2.5 mm) crochet hook
Tapestry needle
Gauge
It isn’t really important with this project. Make sure to maintain tension throughout the project so the lid fits correctly. See the Hints and Tips section for more information on hook size.
I also made a how-to video showing all the steps and stitches needed to make the leaf. If you are having trouble with any part, it’s all here 😊
Leaf
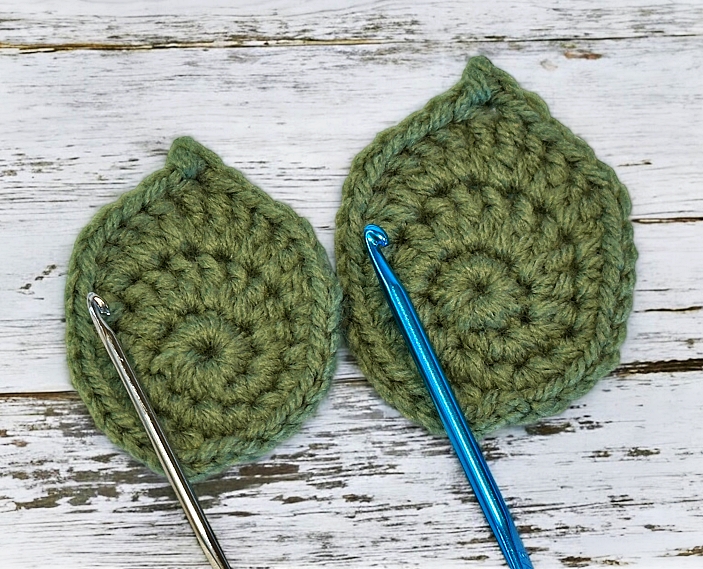
Please note: The rounds end in various places on the bottom of the leaf. Regardless, the stitch counts work.
With ONE strand of worsted weight yarn and hook size of your choice.
Ch 2 (make the first chain large enough to fit in all the stitches for Round 1)
Round 1: 11sc in 2nd chain from hook. Do NOT join. Begin to work in the round.
Round 2: In the 1st sc from the last round, sc. 2sc in the next st. In the next st, sc, hdc. In the next st, hdc, dc. 2dc in the next 2 sts. In the next st, dc, hdc. In the next st, hdc, sc. 2sc in the next st. Sc.
Round 3: *2sc in the next st, sc* Repeat from * to * 2 more times. In the next st, sc, hdc. In the next st, hdc, dc. 2dc in the next st. In the next st, dc, trc. Ch 2, sl st in the 2nd chain from hook (picot made). In the next st, trc, dc. 2dc in the next st. In the next st, dc, hdc. In the next st, hdc, sc. *Sc, 2sc in the next st* Repeat from * to * 2 more times. Sl st in next st. Break yarn. Work in the ends and sew into place.
More of My Stuff on Etsy!
You can make a widget like this for your blog or website, too.
Instructions are on my website here: How to Display Etsy Items on Your Website
Hints for the Leaf
Add extra embroidered details to the leaves as you see fit. Maybe some extra veining lines or stitches around the edge in a slightly darker shade? It really is up to you.
I prefer to make at least 2 leaves to fill in behind the flowers. It makes a group of 3 which always balances out itself. Five is also a good number to aim for btw. If you want to make a bit more pizzaz to the combo, use differnt shades of green. To make them different sizes, use a larger hook for one and smaller hook for the other.
As much as I wanted to avoid pressing anything, the leaves also may need to be pressed to have them lie flat. Be sure to do a test swatch BEFORE you press anything. Acrylic is notorious for melting and losing all constructive properties when pressed. It melts to give a flat, melted look. Press with your iron at the lowest setting possible. Press with a damp cloth between the iron and the leaf. Iron the leaves from the BACK only!
Abbreviations
Sl st – slip stitch
Ch – chain
sc – single crochet
hdc – half double crochet.
dc – double crochet.
tr – treble crochet. Wrap the thread 2 times around the hook.
st – stitch
sts – stitches