Posted on 10 Comments

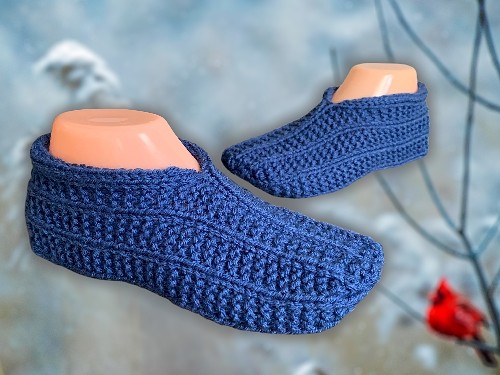
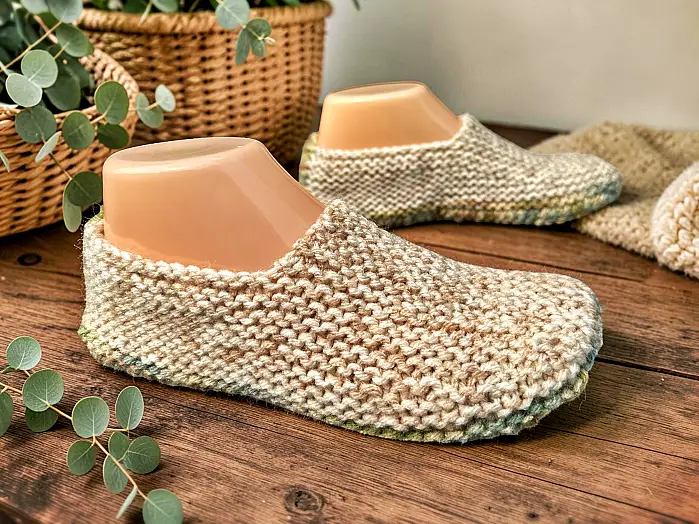
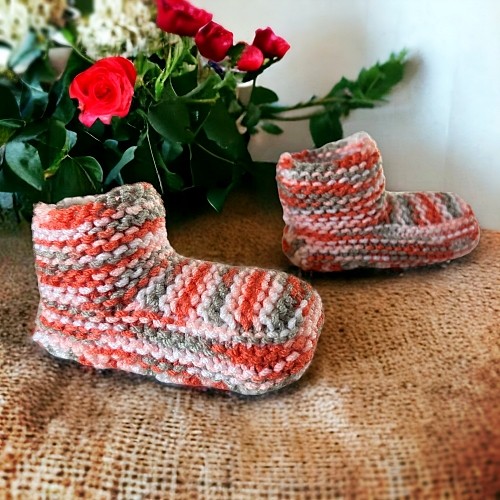
Knitted Moccasin Bootie Slippers for Children – FREE Knitting Pattern and How-to Video!

Knitted Moccasin Bootie Slippers for Children - Knit on Straight Needles

After a bit of math and a little tweaking of the results, the child sizes of the FREE Knitted Slipper Pattern is finally available! (You can click that link if you need the adult sizes). Because these are made for little feet, they often don’t need much yarn. This makes them a great way to use up the smaller leftover bits from larger projects. Not to mention, these tend to sell like hotcakes at local farmers’ markets, craft fairs and consignment shops. The smaller pairs are “so cute” making for an easy sale and the return on the investment of your time is great! They’re quick to make and since the yarn has already been bought for a larger project, anything made from the leftovers, like these child shippers, is gravy, baby!

If you stumbled upon this post looking for a finished pair of slippers, I have them for sale in my Etsy shop. Prices vary depending on size. You can use this link – CUSTOM MADE Hand Knit Camo House Slippers – Slippers for Children – Kids Moccasin Booties – Slippers with a Cuff – Handcrafted House Shoes

If you enjoy this pattern and my other free online knitting patterns, please consider making a small donation or helping me out by visiting my Help Support My Work page. If you can’t help financially, I totally get it. Sharing on your social media is the next best thing.

And yes, you have my permission to sell or give away anything you make from my patterns. You’re just not allow to redistribute any of the patterns themselves in any form. Linking to and sharing is always welcome though! You can use those buttons ?? to do so easily.


Please note, this isn’t a pattern for beginners, but if you know how to knit a stitch, pick up stitches and knit two stitches together, you should be okay. I used a very different technique involving multiple sets of needles, but no worries! I included photos and now a how-to video demonstrating how I’m using the extra set and it totally works! Trust me.

And if you are concerned with the number of ends you’ll need to weave in when done, I’ve also created a tutorial to help you with that too! It’s so much easier to work the ends in as you go, though there will be a few you’ll have to do (i.e. when you sew up the seam for the heel), but if you are interested in easing your work load, here’s the link showing you How to Weave in the Ends While Knitting. A new window will open so you won’t lose this page ?. There’s also a clickable card in the scrolling free pattern pics running across the top of this website if you need to find the page again.

If you don’t want to read it online and want to print it, this knitting pattern is available in all the usual places including this website – Knitted Moccasin Bootie Slippers for Children, Ravelry, in my Etsy shop, LoveCrafts, a paperback on Amazon, and as an ePub that you can download on your Kindle. I’ll link to all of them as I get them completed and uploaded to the retailers. If a link isn’t working, it’s on its way. I need to reformat everything to get things on Amazon…

FYI I’m working at uploading my work to a distributor that also works with libraries. I’m publishing paperbacks of the patterns that you’ll be able to borrow! Some are available right now like the slipper and fingerless glove compilations I have. The single pattern paperbacks should be available as I get them uploaded and the distributor gets them out to the libraries. If they aren’t there now, you can always ask them to get it for you ?

The printable version of this pattern will also be in the member section and at Patreon also. Here are the links where you can get it.

Abbreviations

k – knit

k2tog – knit 2 together

st – stitch

sts – stitches

Things You Need

If you are uncertain or having trouble finding what you need to make these slippers, clicking any of the links below will show you exactly what you need. And if you decide to order through Amazon, it will be delivered right to your door and help support the hosting costs of the website (I do get a small commission from sales through Amazon).

And because this pattern is so basic with no pattern of any sort, it’s a great knitting pattern to highlight the colour of your yarn. I have a weakness for variegated/shaded yarns. I really enjoying watching how the colours pool on the finished project. Little weird, I know… And In case you were thinking of trying self-striping yarn. Don’t. It looks terrible.

1 ball of worsted weight yarn (average 260 yard, 5 oz or 141 gram ball will be more than enough). I used Red Heart and Bernat worsted weight yarn when designing the pattern but any worsted weight yarn will suffice.

2 sets of size 4 mm (US size 6) single point knitting needles.

Stitch holder

Cable needle

Tapestry needle to sew in ends. You can also use this handy tutorial to show you how to work in the ends while knitting these slippers.

Use this product to help prevent slippers from sliding on slick floors

Gauge

With size 4 mm (US size 6) needles or whatever size you need to obtain the correct number of stitches and rows. Be sure to check your gauge otherwise the sizing won’t be correct.

In garter stitch

4” = 16 sts

4” = 40 rows


Sizes (are written as such)

Child’s 1-2 (3-4, 5-6, 7-8, 9-10, 11-12, 13-1, 2-3, 4-5)

I’m using a colour code to denote the number of stitches for the various sizes. I hope this helps when making the sizes of slippers.

SizeLength
1-24 inches10 cm
3-44.5 inches11.4 cm
5-65 inches12.5 cm
7-85 3/4 inches14.5 cm
9-106 inches15 cm
11-126 3/4 inches17 cm
13-17 1/4 inches18.5 cm
2-38 1/4 inches21 cm
4-58 3/4 inches22 cm
All measurements are approximate. Knitted slippers are very forgiving for size and foot shape.

To Begin

Cast on 18 (20, 22, 24, 26, 28, 30, 32, 34)

Knit across for 10 (12, 12, 14, 14, 16, 18, 20, 20) rows. Break yarn when completed last row.

Toe Flap

Next Row: With RIGHT side facing, transfer the first 6 (7, 7, 8, 8, 9, 10, 10, 11) stitches to a stitch holder. Reattach the yarn and knit the next 6 (6, 8, 8, 10, 10, 10, 12, 12) to create the toe flap. Leave the remaining 6 (7, 7, 8, 8, 9, 10, 10, 11) stitches on the needle unworked.

The following rows are worked back and forth on the 6 (6, 8, 8,10, 10, 10, 12, 12) toe flap stitches only!

Knit across for 18 (20, 22, 24, 26, 30, 32, 36, 40) rows.

Break yarn. You’ll have the 6 (6, 8, 8, 10, 10, 10, 12, 12) stitches of the toe flap on your needle and the 6 (7, 7, 8, 8, 9, 10, 10, 11) stitches you left on the needle when you started making the toe flap.

Making the Sides of the Slipper

This is where you’re going to need the extra set of knitting needles. You’ll be knitting back and forth in rows but the turn around the toe is too tight to use circular needles. For this, you’ll put the toe flap stitches on one of your extra needles. It’s a little unconventional, but it works.

Next Row: With the RIGHT side facing, transfer the 6 (7, 7, 8, 8, 9, 10, 10, 11) stitches from the stitch holder onto one of your needles. Attach your yarn and knit these stitches. Pick up 9 (10, 11, 12, 13, 15, 16, 18, 20) stitches evenly along the edge of the toe flap. (All of these stitches are now on ONE needle – 15 (17, 18, 20, 21, 24, 26, 28, 31) stitches

With another needle, knit the 6 (6, 8, 8, 10, 10, 10, 12, 12) stitches of the toe flap. Leave the remaining 6 (7, 7, 8, 8, 9, 10, 10, 11) stitches on the other needle unworked for now.

With another needle, pick up 9 (10, 11, 12, 13, 15, 16, 18, 20) stitches evenly along the side of the toe flap. Knit the remaining 6 (7, 7, 8, 8, 9, 10, 10, 11) stitches on the next needle. There are now 15 (17, 18, 20, 21, 24, 26, 28, 31) stitches on this needle.

You should now have 3 needles holding stitches with all the points pointing as shown below when laid flat. You also have one spare needle to knit with. You are now going to knit in rows, back and forth with these three needles. Once you finish knitting all the stitches on one needle, move on to the next needle (the point of the needle is right there) until you complete the row.

Knitting on 4 Needles
I used double pointed needles because they were handy and I don’t like the longer needles flopping and waggling about while I knit. Regular knitting needles work perfectly fine, too!

Another way to say it for the following rows, knit all the stitches forming the side of the slipper, knit the stitches holding the toe flap stitches, then knit the other side of the slipper (counts as one row). Turn. Repeat.

Knit the next 4 (4, 6, 6, 8, 8, 8, 10, 10) rows.

There are 2 (2, 3, 3, 4, 4, 4, 5, 5) ridges on the tip of the toe.

The photo below shows the 5 ridges for the sizes 2-3 and 4-5.

How to knit slippers
These are the ridges picked up along the toe flap
Ridges for child slippers
The 2 ridges for small size 1-2 and 3-4.

Next Row: With WRONG side facing. Cast off all the stitches from the first needle loosely. You’ll need to pass the last stitch from the first needle over the first stitch of the toe flap stitches (second needle).

Knitted Owl Slippers - Making the Sole

Using the same needle that now has one stitch, knit the remaining 5 (5, 7, 7, 9, 9, 9, 11, 11) stitches of the toe flap.

Cast off all the stitches from the third needle loosely. Break yarn.

Making the Sole

If you need help with making the sole, picking up stitches along the side etc, you can watch this video. It starts exactly where you need it to.

Next Row: With the RIGHT side facing, attach yarn and knit the first stitch of the cast off stitches by the toe flap (cast off stitch on the right by the point of the needle).

Knitted Moccasin Bootie Slippers for Children - picking up stitches
How to knit slippers
Pick up this stitch at the start of the row.

K2tog. Knit to the last 2 stitches K2tog. Pick up the cast off stitch by the point of your needle. – 6 (6, 8, 8, 10, 10, 10, 12, 12) stitches

Knitted Moccasin Bootie Slippers for Children - Picking up stitches
Pick up this stitch at the end of the row.

Quick tip – wrap the yarn counterclockwise around your needle and turn it down to pull the yarn through the cast off stitch on the right. If you have a hard time doing this, you can also use a crochet hook to pull the loop through and place that loop on your working needle.

You now are working back and forth along the bottom of the foot picking up one cast off stitch on each side as you go.

Next Row: Knit across.

? Next Row: Pick up the next stitch of the cast off stitches. K2tog. Knit to the last 2 stitches K2tog. Pick up the cast off stitch on the other side of the slipper by the point of your needle. – 6 (6, 8, 8, 10, 10, 10, 12, 12) stitches 

Working your way down the sides
Keep working your way down the slipper to make the sole.

Next Row: Knit across ?

Repeat from ? to ? in every stitch down the entire length of the foot. There are equal number of cast off stitches along each side. How many rows varies depending on the size of slipper you’re making. Be sure to end with a completed knit across row.

Adult Moccasin Slippers - Making the Sole
Starting the sole. Right side. This is shows the adult size but will have less stitches for child sizes.
Adult Moccasin Slippers - Making the Sole
Working your way down while making the sole. Wrong side.
Adult Moccasin Slippers - Making the Sole
Continuing to work down the length of the sole.
Adult Moccasin Slippers - Making the Sole
Still further down the sole. Note how the cast off edges are being picked up as you go. Keep working your way down the length of the sole until you’ve picked up all the cast off stitches.

More of my stuff on Etsy


You can make a widget like this for your blog or website, too.
Instructions are on my website here: How to Display Etsy Items on Your Website

Making the Heel

If you need help with making the heel, you can watch the video. It starts where you need it to. As mentioned in the video, you’ll need to follow how to decrease with the pattern as written below.

If You Have 6 Stitches

Next Row: With the RIGHT side facing, pick up a stitch in the row closest to the sole of the slipper. Count how many ridges it is for the size you are making. K2tog 3 times. Count down the same number of ridges and pick up a stitch in the space beneath it on the other side.

Child moccasin slippers - Picking up stitches to make the heel.
Owl Slippers knitting pattern
The photo above shows 9 rows of ridges. These are rows you knit to form the edges of the slipper. 
Owl Slippers - Free Knitting Pattern
Stitch picked up on the right edge in the 9th row shown above
Owl Slippers - Free Knitting Pattern
After you K2tog at the end of the row, you’ll pick up a stitch here.
Owl Slippers - Free Knitting Pattern
Stitch picked up on the left or end of the row.

Next Row: Knit across.

Next Row: K2tog, K1, K2tog. Pass the middle stitch on your working needle over the stitch on the left. Pass the stitch on the right over the stitch on the left. (Or you can turn your work and knit the 3 sts together).

Break yarn leaving a length of yarn long enough (8ish inches) to sew up the remaining seam.

Make another slipper.

If You Have 8 Stitches

Next Row: With the RIGHT side facing, pick up a stitch in the row closest to the sole of the slipper. Count how many ridges it is for the size you are making. K2tog 4 times. Count down the same number of ridges and pick up a stitch in the space beneath it on the other side. (Scroll up to the “If you have 6 stitches” section to see the photos if you need help).

Next Row: Knit across.

Next Row: Pick up a stitch beneath the next ridge. K2tog 3 times. Pick up a stitch in the space beneath the next ridge on the other side.

Next Row: Knit across.

Next Row: K2tog, K1, K2tog. Pass the middle stitch on your working needle over the stitch on the left. Pass the stitch on the right over the stitch on the left. (Or you can turn your work and knit the 3 sts together).

Break yarn leaving a length of yarn long enough (8ish inches) to sew up the remaining seam.

Make another slipper.

If you have 10 or More Stitches

♀️ Next Row: With the RIGHT side facing, pick up a stitch in the row closest to the sole of the slipper. Count how many ridges it is for the size you are making. K2tog twice. Knit to the last 4 stitches. K2tog twice. Count down the same number of ridges on the other side and pick up a stitch in the space beneath it. (Scroll up to the “If you have 6 stitches” section to see the photos if you need help).

Next Row: Knit across.

Next Row: Count down one ridge less than the previous row and pick up a stitch in the space beneath it. K2tog. Knit until the last 2 stitches. K2tog. Count down the same number of ridges and pick up a stitch in the space beneath it on the other side.

Next Row: Knit across. ♀️ Repeat from ♀️ to ♀️ until 6 stitches remain.

Next Row: Pick up a stitch beneath the next ridge. K2tog 3 times. Pick up a stitch in the space beneath the next ridge on the other side.

Next Row: Knit across.

Next Row: K2tog, K1, K2tog. Pass the middle stitch on your working needle over the stitch on the left. Pass the stitch on the right over the stitch on the left. (Or you can turn your work and knit the 3 sts together).

Break yarn leaving a length of yarn long enough (8ish inches) to sew up the remaining seam.

Make another slipper.

Yes, they do look a little boxy when they’re done and not on a foot. The stretch of the garter stitch allows these slippers to stretch around the contours of any foot easily.

Hints and Tips

If you want a longer cuff at the top, work more rows than stated at the beginning when you cast on. Because smaller kid-lettes tend to have chunkier legs (aka – cankles ?), which is so gosh-darn cute btw, don’t go too crazy with the length.

When picking up stitches from the cast off row, be sure you’re really moving on to the next cast off stitch! It’s an easy mistake to pick up a stitch in a stitch you already picked up. If in doubt, give the needle holding the stitches a bit of a tug. You’ll see the yarn move slightly at the very back, closest to the needle. Pick up a stitch at the NEXT cast off stitch.

If you don’t have the same number of stitches on both sides when you are forming the sole, you may have picked up a stitch twice in one stitch or missed one. Don’t worry! This is fixable. You can skip one cast off stitch if you need to make it even, or pick up a cast off stitch twice on the other side. There’s enough stretch in the slipper that any puckering this causes won’t be overly visible if you’re off by a stitch or two.

Picking up the stitches evenly along the toe flap is roughly 1 stitch every ridge.

To speed up finishing the slippers and not have so many ends to sew in, hold the yarn ends to the back of your work as you knit. And yes, this is the third time I’m sharing it, but I made a photo tutorial showing how to do this. You can see it here – How to Work in the Ends as You Knit.

If you have any questions, please feel free to leave a comment below or send me your questions here. If there is a typo or stitch count that’s off, let me know in the comments! I type these out from notes I make when designing the slippers. It’s easy, and embarrassingly common for me to miss something. Especially on the smaller slippers that involve so many different stitch counts for the numerous sizes.

To see how you can keep the free patterns coming, visiting this page – Help Support My Work!  A financial donation is always appreciated but a share, like and follow on social media also helps me immensely ?


Posted on 10 Comments

Easy to Knit Rolled Cuff Slippers – FREE Knitting Pattern

Easy to Knit One Piece Rolled Cuff Slippers - free knitting pattern

I’ve written a number of slipper patterns over the years with a couple of goals in mind, two goals to be specific. The first is to never have any seams to sew. This pattern didn’t meet this requirement. I offer a heartfelt apology for this. 

The other goal is to make them as easy as possible so new knitters or those with not as much experience, can knit something that gives a great final product. This pattern was written specifically to avoid any difficult techniques, specifically, picking up stitches. That is why this pattern is done in one piece; starting at the heel and working towards the toe. 

The cuff is made as you knit the piece. Because of the stitches used, it automatically rolls back up on itself giving a nice finished edge without adding any additional stitches or work.

I also made a longer cuffed version of this pattern. It fits more like a bootie. You can use this link to check out that slipper design – Easy to Knit – Long Cuffed Slippers. There is also a thicker version of this slipper using 2 strands of yarn. It’s quicker to make and extra thick – Easy to Knit Beginner Slipper Pattern – Knit Flat with Bulky Yarn on Straight Needles – FREE Knitting Pattern

Love the free patterns? You can say thanks in a couple of ways. You can read more about how you can Support My Work by clicking that link or make a small donation and Buy Me a Coffee. ?? That is a website where you can make a one time donation as a thanks. (FYI I have some great offers if you would like to buy me multiple coffees. You can see those by clicking on the Extras tab or you can click this link Janis Frank Extras).

If you don’t want to or are unable to make a financial donation, sharing this pattern through social media is a great way to help out too! The links below are a super easy way for you to do so.

If you would like to avoid the ads on this page or would like to print the pattern, you can purchase the PDF for a small fee from this website at Easy to Knit Rolled Cuff Slippers , through my Etsy shop or on Ravelry.

Another way to avoid ads and pop-ups, get instant, PRINTABLE downloads of this pattern and others, is by becoming a Member on this website. When you become a Website Supporter for $3/month, you’ll gain access to exclusive member only posts. These posts contain one click downloads of the patterns. Simply click the Download & Print button. The PDF will automatically download to your computer or smart device. You can then read it on your device or print it at your leisure. You can download as many patterns as you like for the same $3 each month. You can go to this page to learn more, become a member and support my work… Exclusive Member Area

Things You Need

Yarn (a standard ball of worsted weight yarn will be more than enough)

Size 5 mm (US 8 ) single pointed needles

Tapestry needle to sew seams and work in ends

Gauge(in stockinette)

18 stitches = 4 inches 

24 rows = 4 inches 

Sizes are written as such:

  • Women’s 6-7 (8-9, 10-11, 12)
  • Men’s 6 (7-8, 9-10, 11-12, 13)

Heel Flap

Cast on 2

Row 1: Knit across.

Row 2: Increase in each stitch. (4 sts)

Row 3 – 4 : Knit across.

Row 5: Increase in the first stitch. K until one stitch remains. Increase in this stitch. (6 sts)

Row 6 – 7: Knit across.

Row 8: Increase in the first stitch. K until one stitch remains. Increase in this stitch. (8 sts)

Row 9 – 10: Knit across.

Row 11: Increase in the first stitch. K until one stitch remains. Increase in this stitch. (10 sts)

Row 12 – 13: Knit across.

Row 14: Increase in the first stitch. K until one stitch remains. Increase in this stitch. (12 sts)

Row 15 – 16: Knit across.

PLEASE NOTE:

The following rows are for sizes Women’s 10, 11 and 12 and Men’s sizes 9, 10, 11, 12 and 13 ONLY:

Next row: Increase in the first stitch. K until one stitch remains. Increase in this stitch (14 sts)

Next 2 rows: Knit across.

Continue the pattern for all sizes.

Next row: Cast on 16 stitches. (Yes, you already have 12 (12, 14, 14, 14) stitches on your needle. After casting on, you’ll have 28 (28, 30, 30, 30) sts on your needle). The following is worked over the stitches you just cast on and the stitches from the heel. P4 *K3 P1* Repeat from * to * 2 times more. K12 (12, 14, 14, 14). As you worked those stitches, your work was transferred onto the other needle. Cast on another 16 sts onto this needle. (You now have 44 (44, 46, 46, 46 sts) on your needle)

♥ Next row: Knit across.

Next row: P4 *K3 P1* Repeat from * to * 2 times more. K12 (12, 14, 14, 14). ◘ P1 K3 ◘ Repeat from ◘ to ◘ 2 times more. P4. ♥ Repeat from ♥ to ♥ 11 (12, 13, 14, 15) times more for 24, (26, 28, 30, 32) rows total.

Shaping Toe

Next row: K2tog K to the last 2 sts K2tog. (42 (42, 44, 44, 44) sts)

Next row: P3 *K3 P1* Repeat from * to * 2 times more. K12 (12, 14, 14, 14). ◘ P1 K3 ◘ Repeat from ◘ to ◘ 2 timesmore. P3.

Next row: K2tog K to the last 2 sts K2tog. (40 (40, 42, 42, 42) sts)

Next row: P2 *K3 P1* Repeat from * to * 2 times more. K12 (12, 14, 14, 14). ◘ P1 K3 ◘ Repeat from ◘ to ◘ 2 timesmore. P2.

Next row: Knit across.

Next row: P2 *K3 P1* Repeat from * to * 2 times more. K12 (12, 14, 14, 14). ◘ P1 K3 ◘ Repeat from ◘ to ◘ 2 timesmore. P2. ☺ Repeat from ☺ to ☺ 12 (13, 14, 15, 16) times more for 26 (28, 30, 32, 34) rows total.

End Toe

Next row: K2tog 10 (10, 11, 11, 11) times. K1 K2tog to last 3 sts. K1 K2tog. 

Next row: P1 K2 *P1 K1* Repeat from * to * once P1 K6 (6, 7, 7, 7) *P1 K1* Repeat from * to * 2 time more. P1.

Next row: K1 K2tog 4 (4, 5, 5, 5) times. K1 (1, 0, 0, 0) times. K2tog until last st. K1

Next row: P1 K1 P3 K3 P4.

Break yarn and pull through. Pull tight to draw loops together.

Sew seam on top of toe and the heel flap to the sides of the slipper (the 16 stitches you cast on earlier) and join the edges of the cuff together in the back above the flap.

Hints and Tips

Sew the seam on the top of the toe up to where you K2tog when shaping the toe. If you don’t like what the join looks like, you can always make a pom pom to cover it.

Leave a longer length of yarn when you first start the slipper. You can use this piece to sew one of the seams along the heel flap. When you end the slipper, leave that yarn length longer too. You can use the length to sew the toe seam.

The sizing of these slippers is very forgiving. The garter stitch used throughout helps the slipper to stretch both width and length wise. If your gauge is off by a row or a stitch, you should be able to get the size of slipper you want.

Abbreviations

K – Knit

P – Purl

K2tog – knit 2 together

sts – stitches

st – stitch

The pattern allows you to make, sell or give away any of the slippers that you make. You are NOT permitted to redistribute this pattern in any way. The purchase the PDF is for your PERSONAL USE ONLY! Sharing copies of my patterns robs me of what I financially gain from my hard work and creativity that goes into designing my patterns. Please respect my copyright.