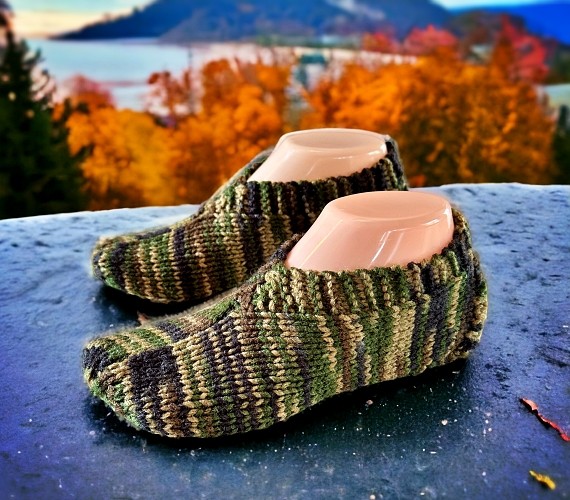
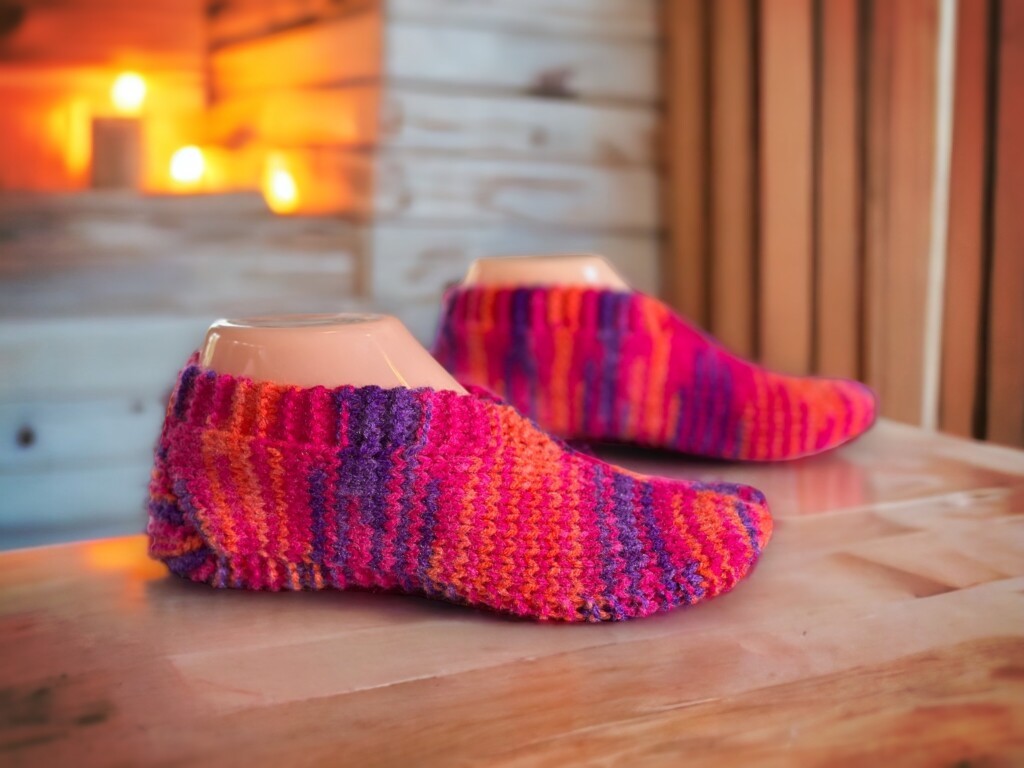
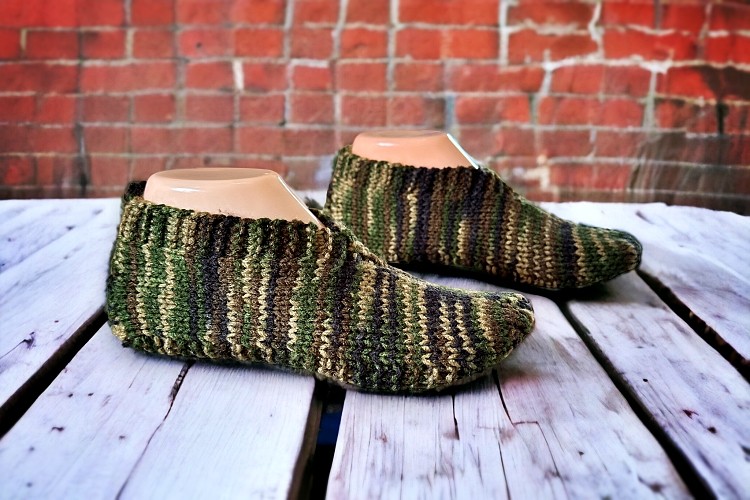
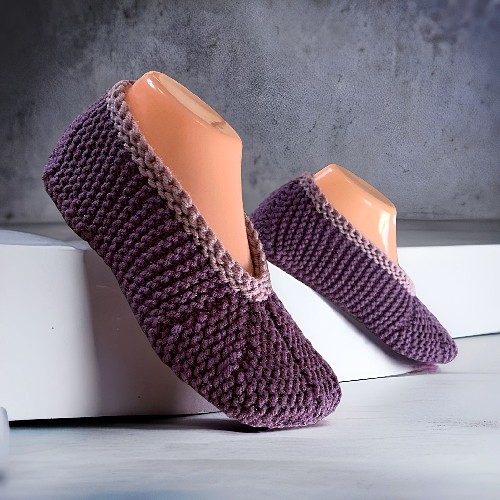
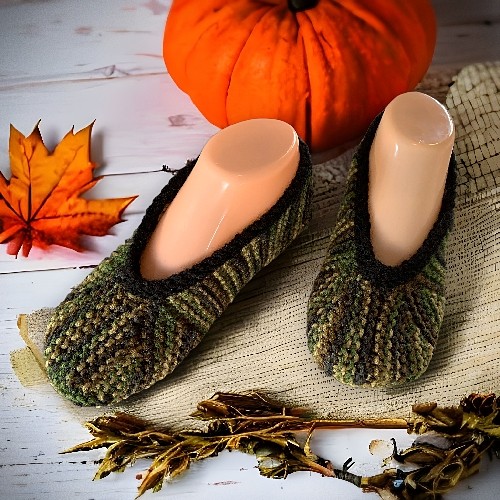
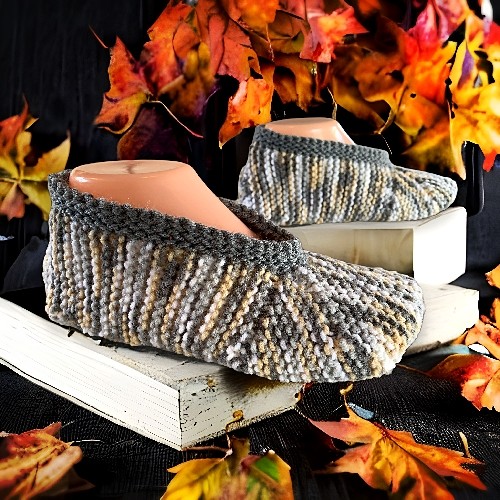
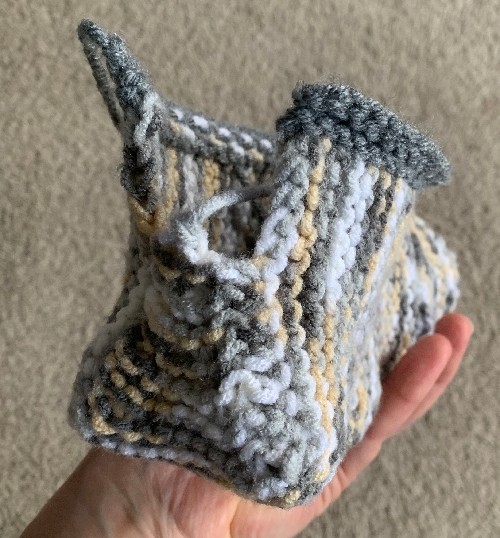
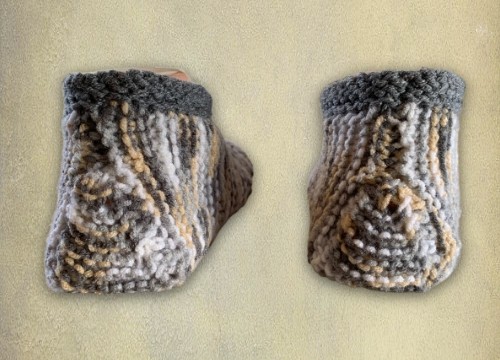
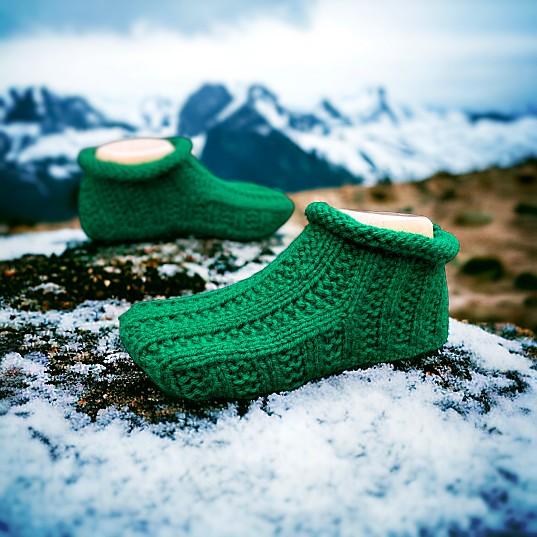
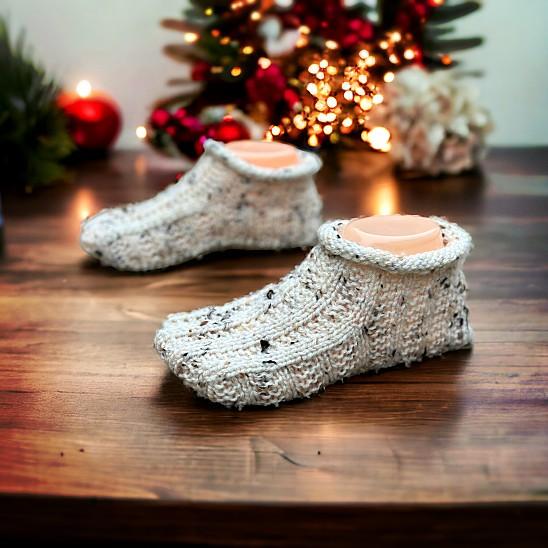
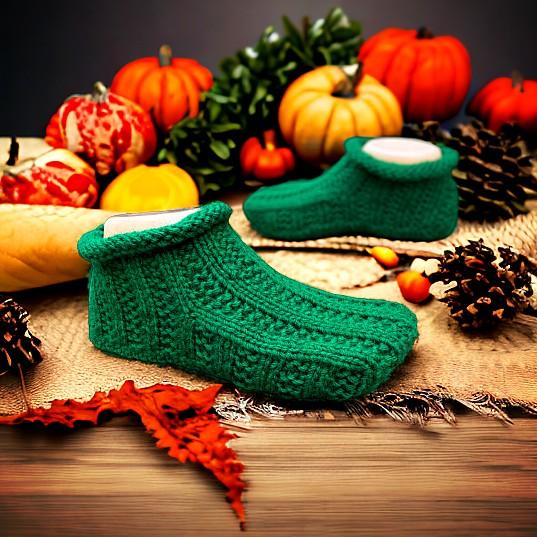
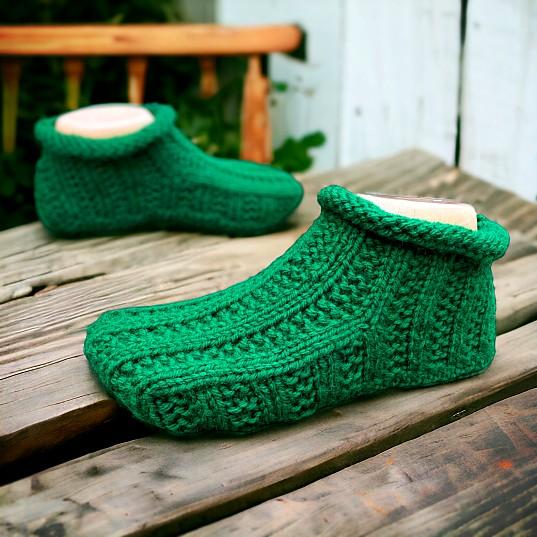
Shocker. Another slipper design 😂 I really do like this style of slipper but after designing the basic moccasin slipper, I was thinking of ways that I can gussy it up a bit if you will. I liked the idea of doing ribbing around it, simply for the additional visual appeal. When I started I didn’t realize how complicated it would be to make the ribbing line up regardless of the sizing. But I gave it some thought, did the math and tahdah! The ribbed moccasins slippers have arrived.
Like the original design, this style of slipper is knit flat on straight needles. The only catch is that it use 2 sets of needles. Don’t worry though. I’ve added a number of photos to help you along. There’s even a few videos for specific stitches and techniques on YouTube if you need extra help.


If you would prefer a printable, ad-avoiding version, you can download the PDF version of this pattern for a small fee/donation. You can download it from a number of places. In particular, my site here – Ribbed Moccasin Bootie Slippers for Adults. You can also get it at a number of other online retailers such as Ravelry, CreativeFabrica, DeviantArt and Etsy. There is also the Kindle and Paperback versions available on Amazon.
Another way to avoid ads and pop-ups, get instant, PRINTABLE downloads of this pattern and others, is by becoming a Member on this website. When you become a Website Supporter for $3/month, you’ll gain access to exclusive member only posts. These posts contain one click downloads of the patterns. Simply click the Download & Print button. The PDF will automatically download to your computer or smart device. You can then read it on your device or print it at your leisure. You can download as many patterns as you like for the same $3 each month. You can go to this page to learn more, become a member and support my work… Exclusive Member Area
If you enjoy this pattern and my other free online knitting patterns, please consider making a small donation or helping me out by visiting my Help Support My Work page. If that’s not possible, that’s totally fine too! Even sharing this page on your social media helps me out immensely. You can use the buttons below to do so easily.
Things You Need
1 ball of worsted weight yarn (average 260 yard, 5 oz or 141 gram ball will be more than enough).
2 sets of size 4 mm (US size 6) single point knitting needles.
Stitch holder
Tapestry needle to sew in ends. You can also use this handy tutorial to show you how to work in the ends while knitting these slippers. (You can watch the embedded video in the Hints and Tips section too).
Gauge
With size 4 mm (US size 6) needles or whatever size you need to obtain the correct number of stitches and rows. Be sure to check your gauge otherwise the sizing won’t be correct.
In garter stitch
4” = 16 sts
4” = 40 rows
Sizes (are written as such)
Women’s 6-7 (8-9, 10-11, 12-13)
Men’s 5-6 (7-8, 9-10, 11-12)
The Pattern
Cast on 42 (46, 46, 50)
♠ Row 1: P across
Row 2: K across ♠ Repeat from ♠ to ♠ for a total of 8 rows
♫ Row 9: K2 (0, 0, 2) ♦ P2, K2 ♦ Repeat from ♦ to ♦ 9 (10, 10, 11) times more. P0 (2, 2, 0).
Row 10: K across ♫ Repeat from ♫ to ♫ for a total of 10 (10, 12, 12) rows.
Next Row: Repeat row 9.
Toe Flap
Next Row: Pass the next 14 (16, 16, 18) sts on to a stitch holder. K1 M1 K12 M1 K1. Leave the remaining sts unworked on your non-working needle. Turn
♣ ☺ Next Row: P3 ◘ K2 P2 ◘ Repeat from ◘ to ◘ two times more. P1
Next Row: K across. ♣ Repeat from ♣ to ♣ 12 (12, 14, 14) times more.
Repeat the row marked with ☺. 28 (28, 36, 36) rows for the toe flap.
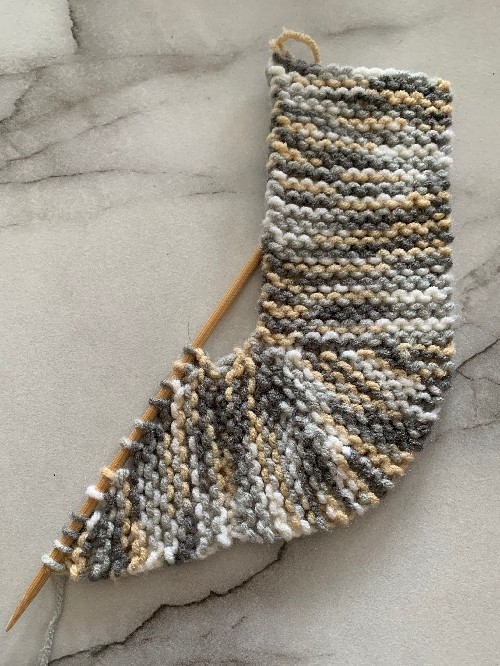
Making the Sides
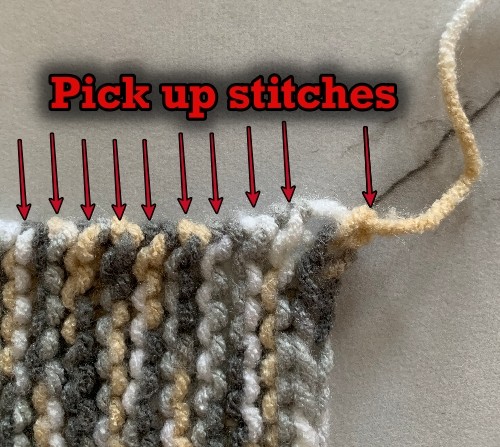
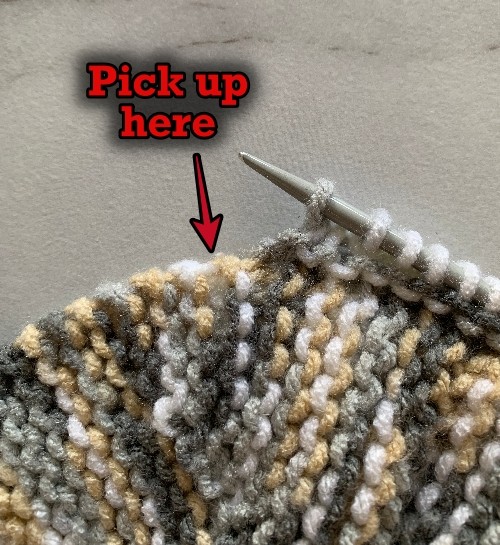
Next Row: Put the sts on the stitch holder back on a knitting needle. With the RIGHT side facing and with your first needle, K14 (16, 16, 18). Pick up 16 (16, 20, 20) sts evenly along the toe flap. Be sure to pick up a st in the first st of the stockinette stripe and in the M1.
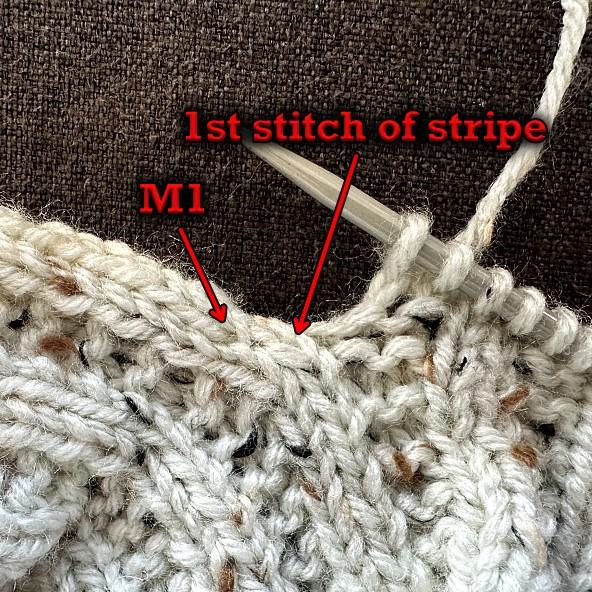
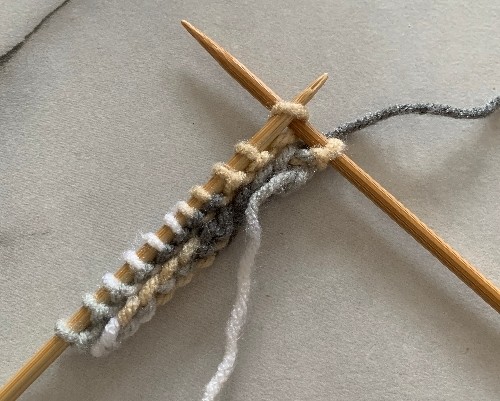
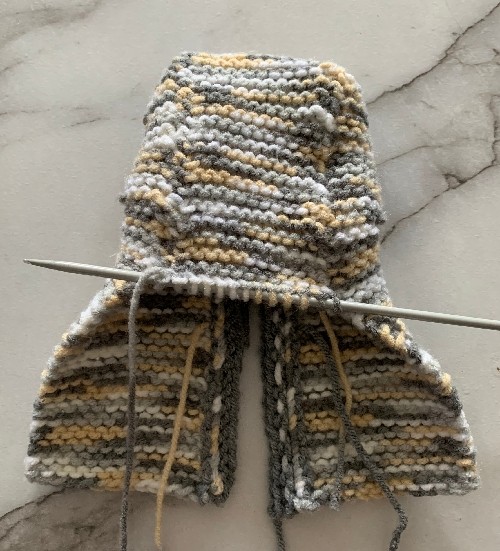
Right side of slipper
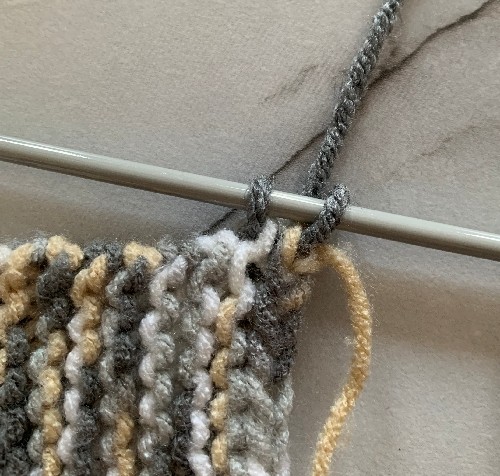
With your second needle along the sts of the toe flap, K2tog (To make it blend more into the slipper, pick up the first st as if to knit, twist this st and place it back on your non-working needle. Knit this and the next st together going from RIGHT to LEFT. You can also knit the 2 sts together as you normally would if you want.) K12 K2tog (as you normally would).
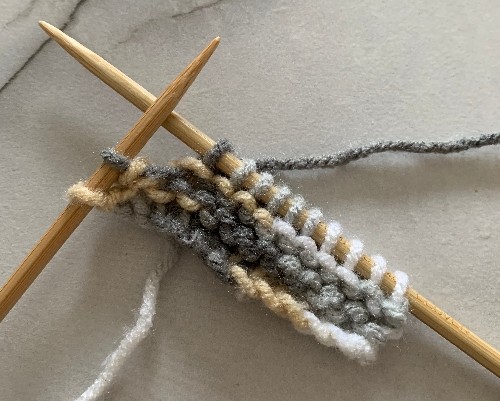
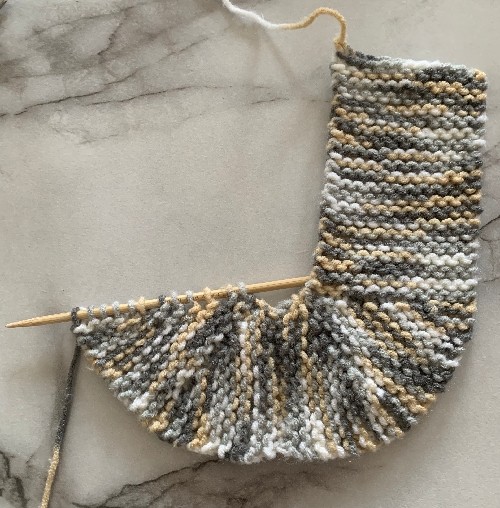
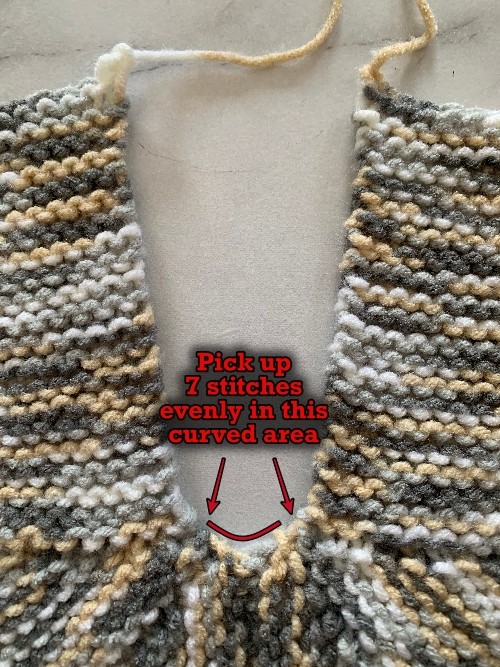
With your third needle, pick up 16 (16, 20, 20) sts evenly along the toe flap. Be sure to pick up a st in the M1 and the first st of the stockinette stripe. K14 (16, 16, 20).
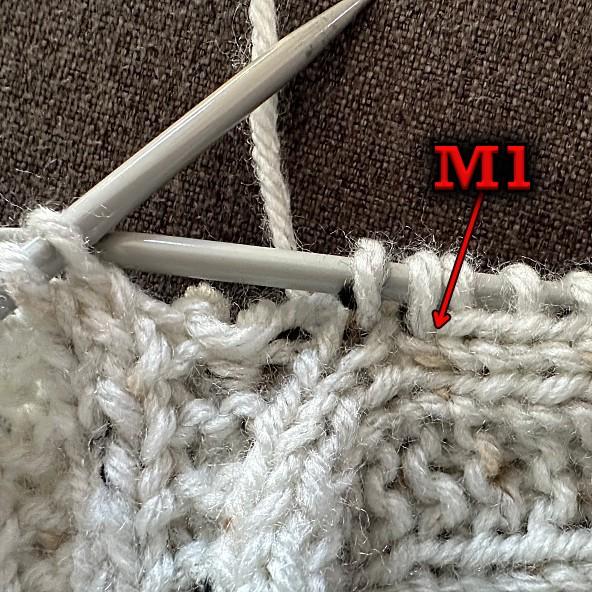
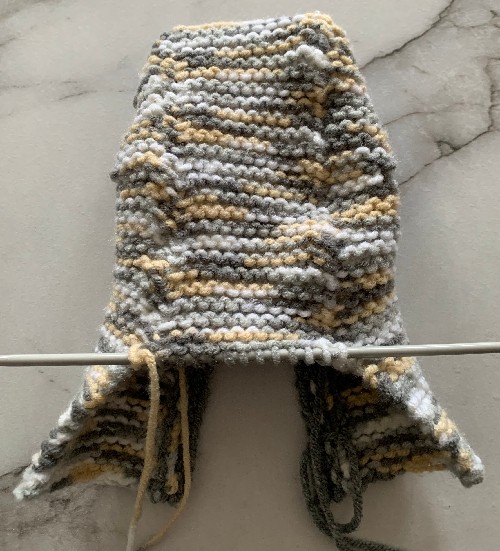
Left side of the slipper. (I accidentally dropped the next 2 sts when taking the photo)
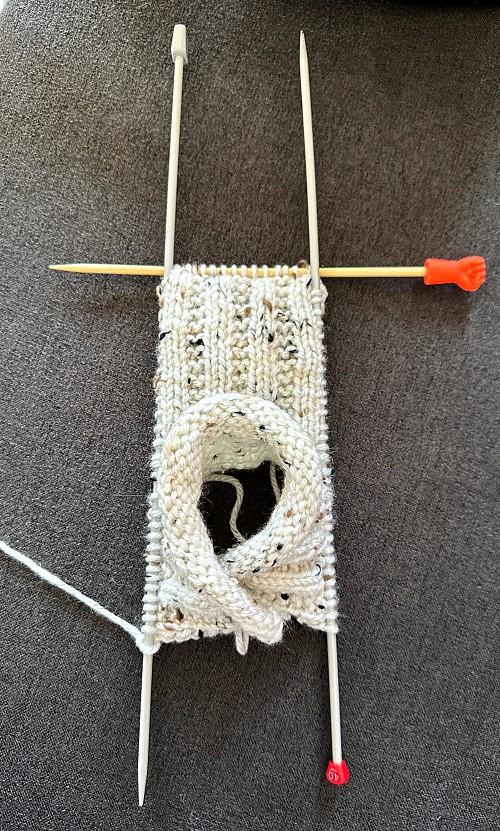
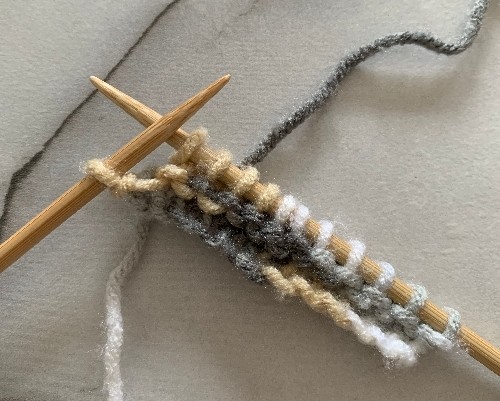
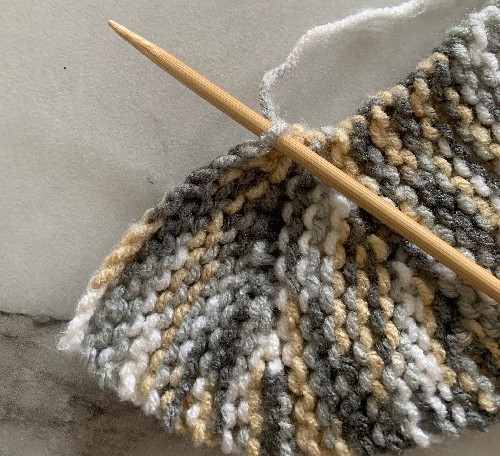
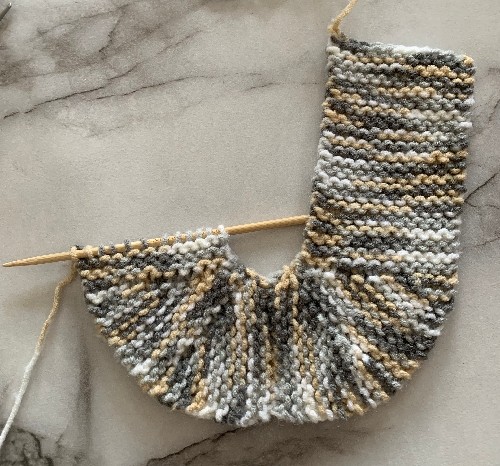
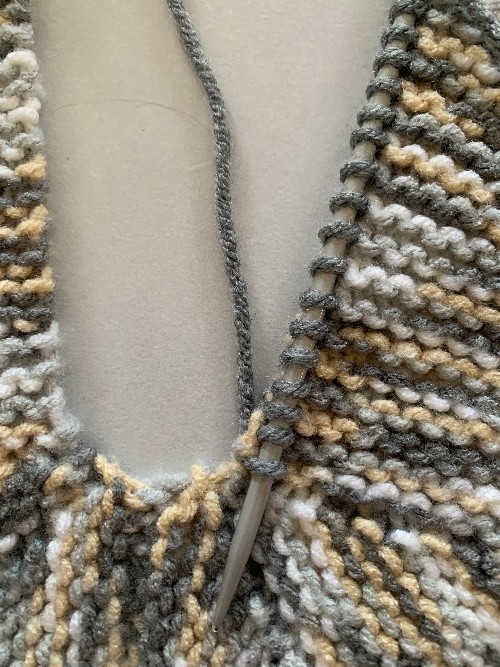
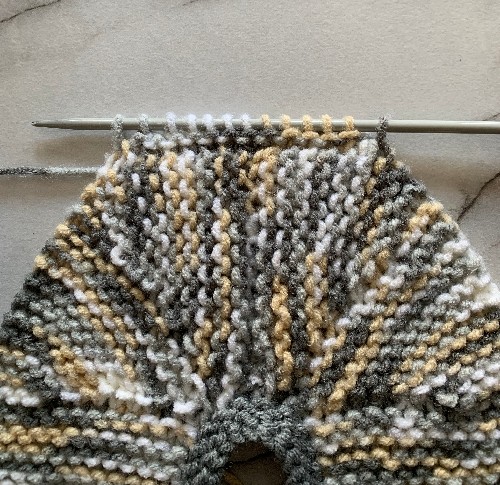
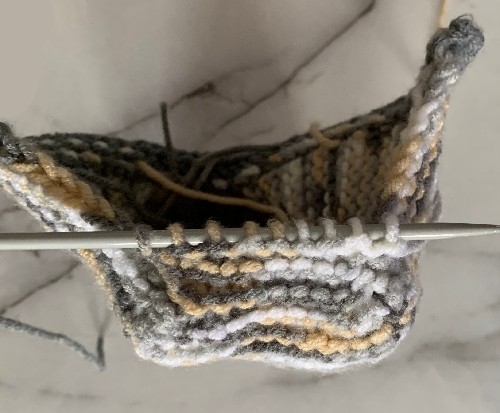
Your 3 needles will look like this
♥ Next Row: K2 (0, 0, 2) ♦ P2, K2 ♦ Repeat from ♦ to ♦ 17 (18, 20, 21) times more. P0 (2, 2, 0).
Next Row: K across ♥ Repeat from ♥ to ♥ 2 (3, 4, 5).
With the WRONG side facing you, cast off 30 (32, 36, 38) sts. (Maintain the P2 K2 pattern while casting off) P1 ◘ K2 P2 ◘ Repeat from ◘ to ◘ two times more. Cast off the remaining sts maintaining the P2 K2 pattern. Bind off
More of My Stuff on Etsy
You can make a widget like this for your blog or website, too.
Instructions are on my website here: How to Display Etsy Items on Your Website
Making the Sole
If you need more help than the photos provide below, you can watch the how-to video embedded here. The video starts in the correct section. No need to find the spot. I already have it cued up for you. The video is for a different style of slipper, but it is made EXACTLY the same way.
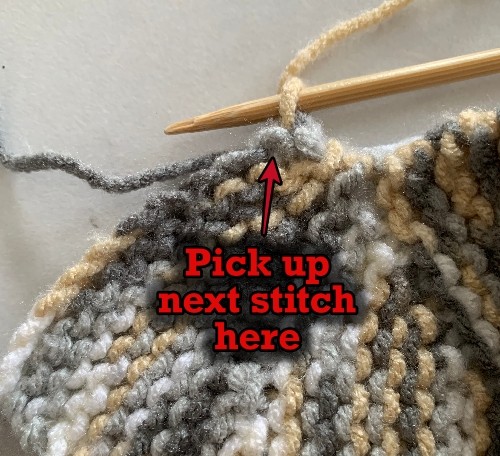
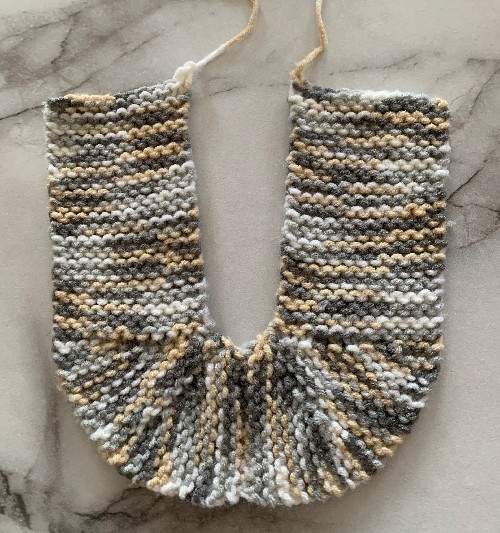
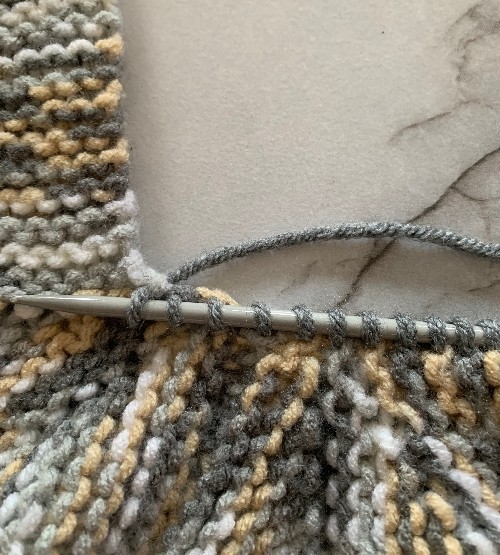
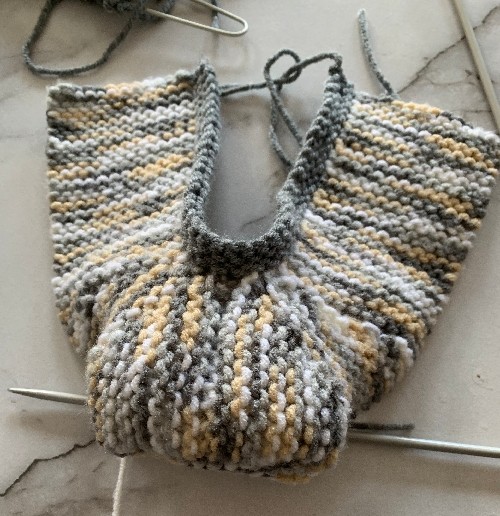
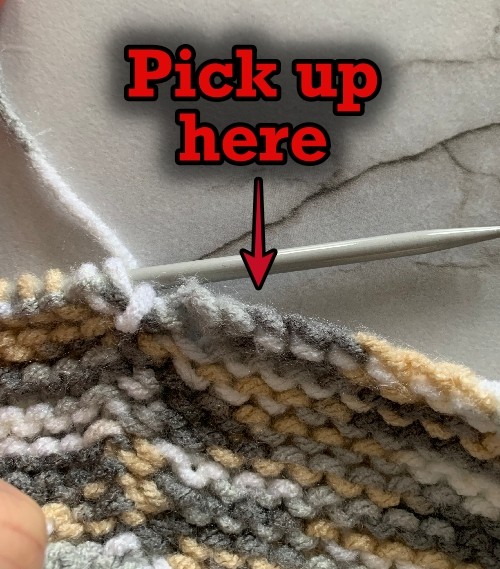
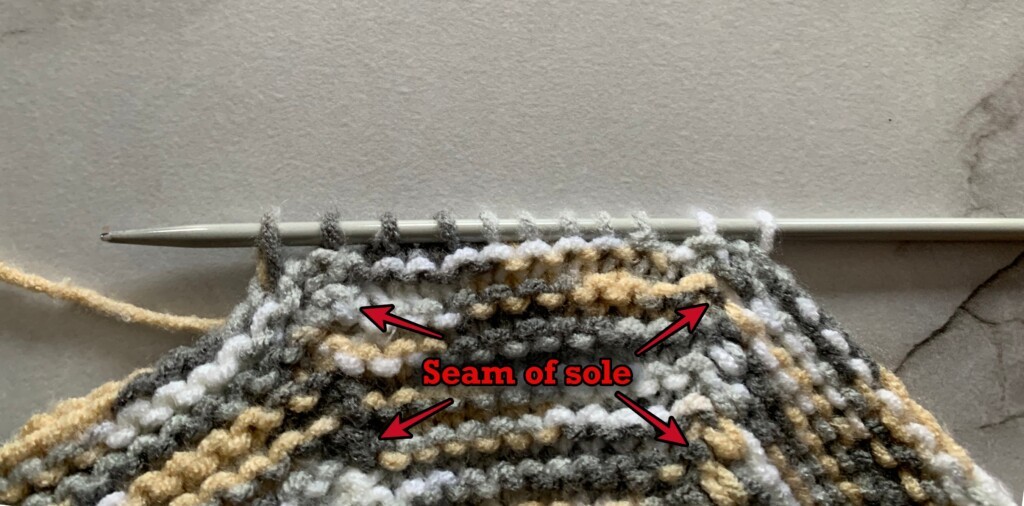
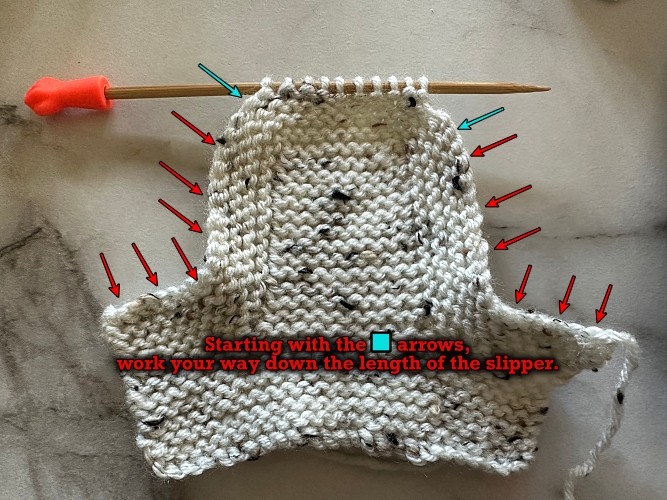
Next Row: With the RIGHT side facing, attach yarn and knit the first stitch of the cast off stitches by the toe flap (cast off stitch on the right by the point of the needle).
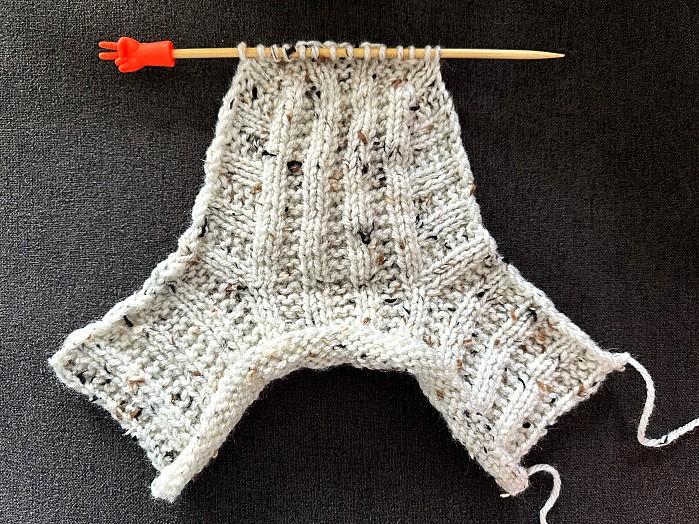
Your slipper will look like the slipper above. (I’m using a similar design to more clearly show the cast off stitches.)
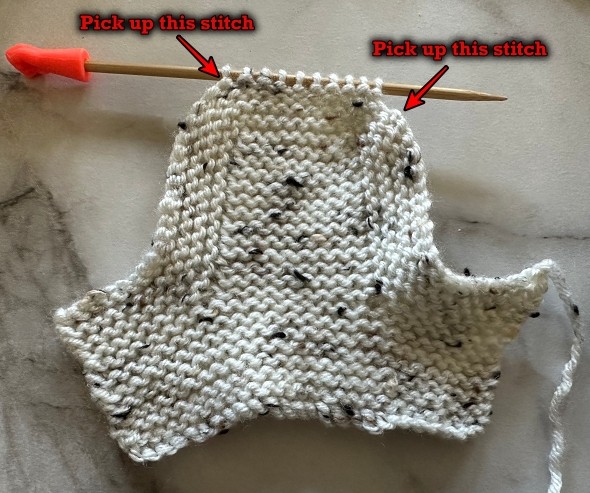
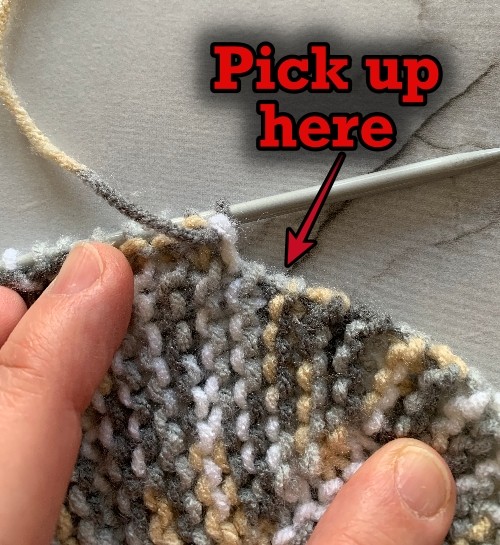
Pick up this stitch at the start of the row.
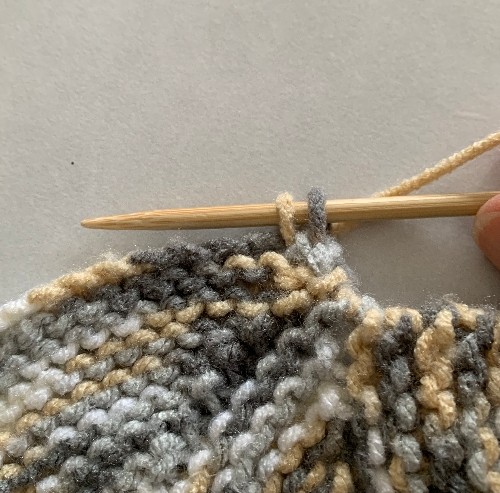
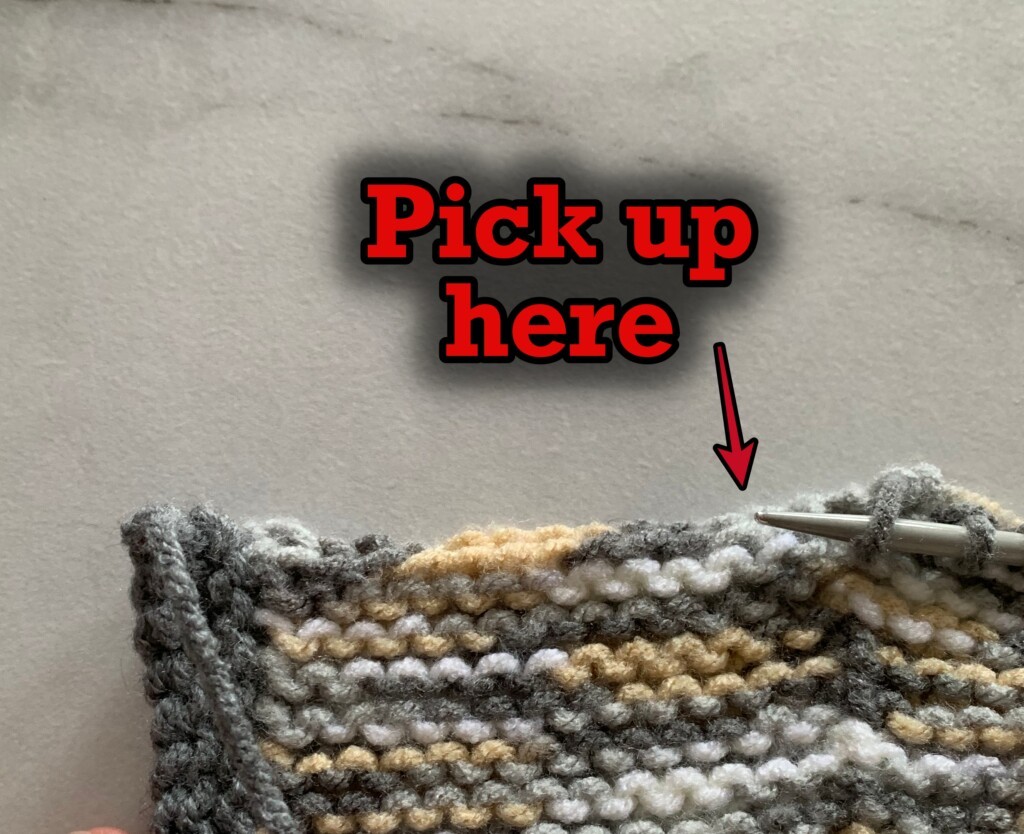
K2tog. Knit to the last 2 stitches K2tog. Pick up the cast off stitch by the point of your needle. (14 stitches).
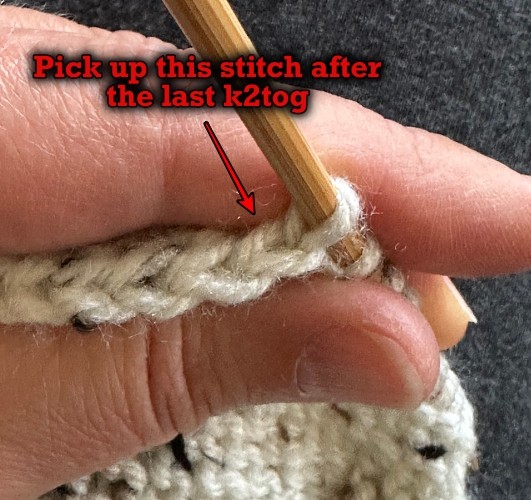
Pick up this stitch at the end of the row.
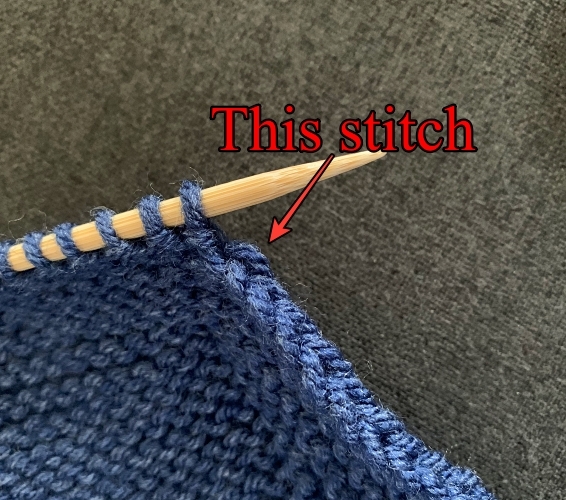
Quick tip – wrap the yarn counterclockwise around your needle and turn it down to pull the yarn through the cast off stitch on the right. If you have a hard time doing this, you can also use a crochet hook to pull the loop through and place that loop on your working needle.
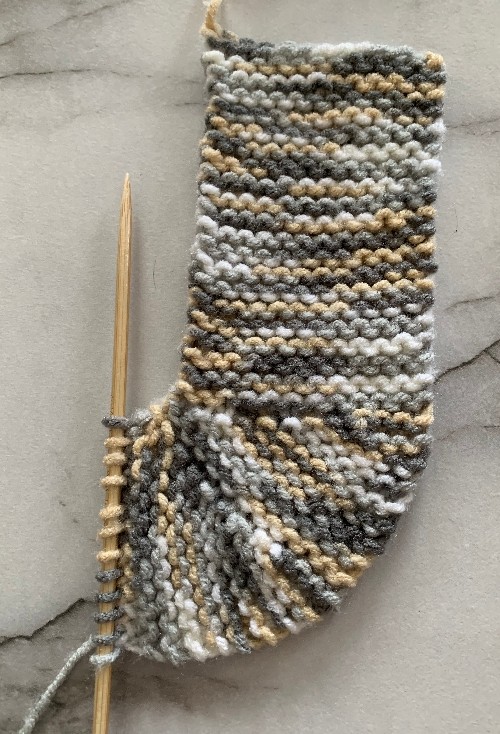
You now are working back and forth along the bottom of the foot picking up one cast off stitch on each side as you go.
Next Row: Knit across.
ʤ Next Row: Pick up the next stitch of the cast off stitches. K2tog. Knit to the last 2 stitches K2tog. Pick up the cast off stitch on the other side of the slipper by the point of your needle. (14 stitches).
Next Row: Knit across ʤ
Repeat from ʤ to ʤ down the entire length of the foot. There are equal number of cast off stitches along each side. How many rows varies depending on the size of slipper you’re making. Be sure to end with a completed knit across row.
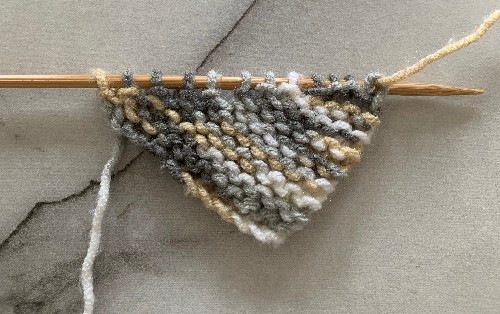
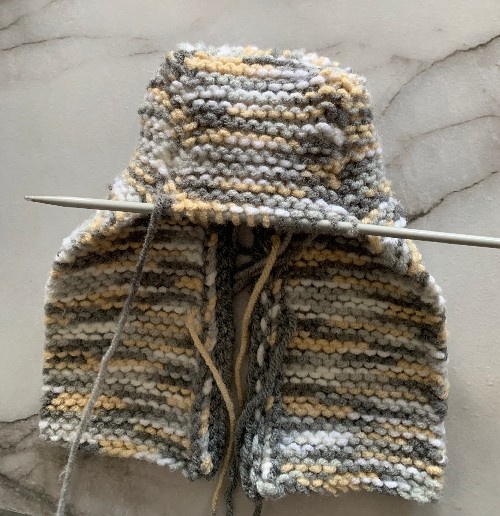
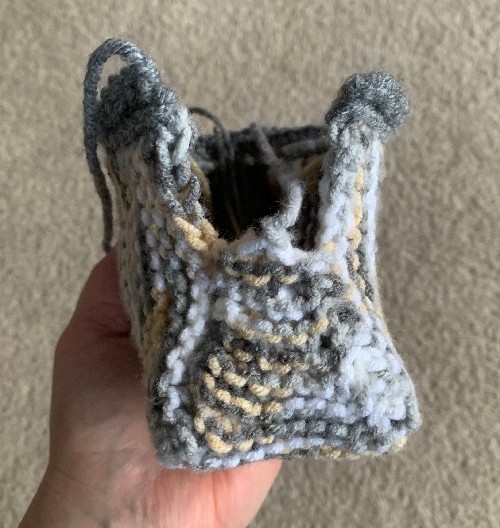
Making the Heel
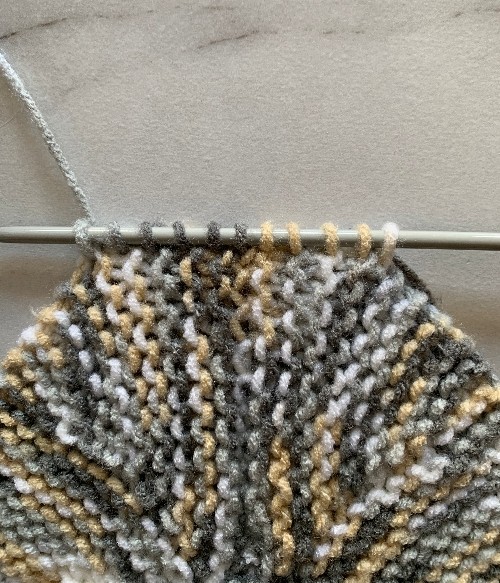
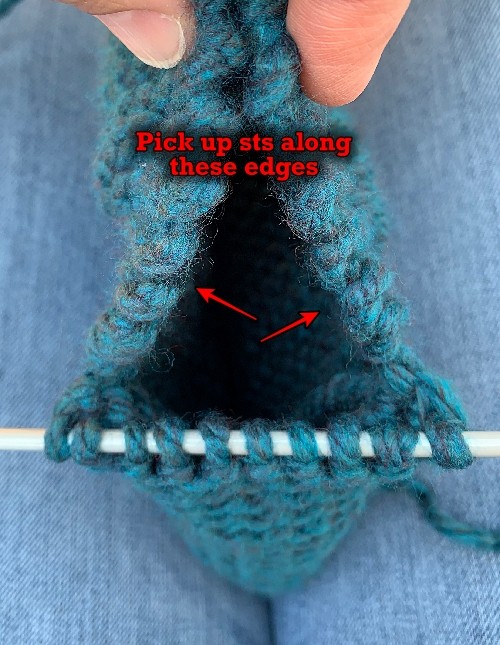
You’re now going to make a small triangle to fit in the back of the heel. You’re going to fill this space in the slipper by working on the 14 sole sts already on your needle, and picking up a st on each side of the needle.
I’ve made a specific video showing how to make the heel. It’s for a number of different styles, but it works the same for all.
Please note: the video decreases every other row. This pattern calls for decreasing EVERY row after the first one or two rows (depending on size). I’ve included photos but if you are still confused, please watch the video embedded below.
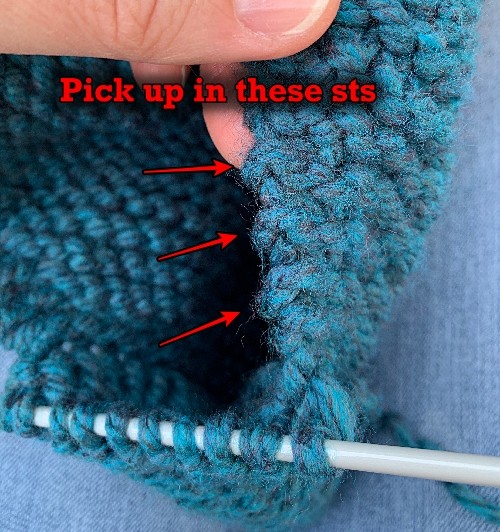
♠ Next Row: With the RIGHT side facing, pick up a stitch along the side closest to the sole of the slipper. K2tog. Knit to the last 2 stitches. K2tog. Pick up a stitch on the other side.
Next Row: Knit across. ♠ Repeat from ♠ to ♠ 0 (0, 1, 1) time.
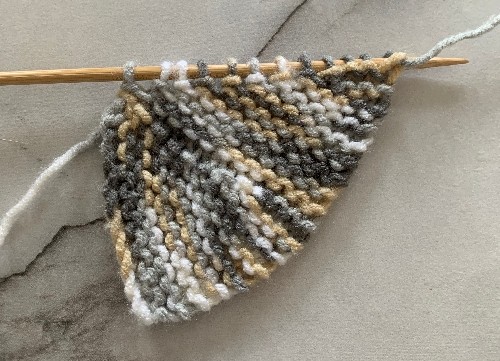
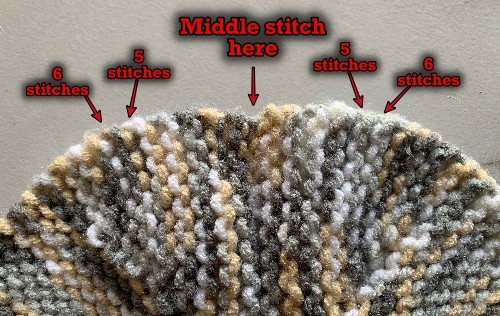
◘ Next row: With the RIGHT side facing, pick up a stitch along the side closest to the sole of the slipper. K2tog twice. Knit to the last 4 stitches. K2tog twice. Pick up a stitch on the other side.
Next row: Knit across. ◘ Repeat from ◘ to ◘ until 6 stitches remain.
Next Row: Pick up a stitch along the side. K2tog 3 times. Pick up a stitch on the other side.
Next Row: Knit across.
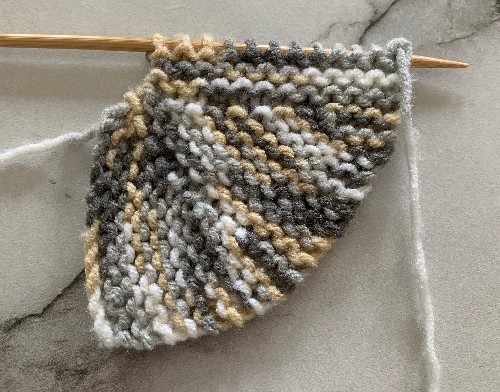
Next Row: K2tog, K1, K2tog. Pass the middle stitch on your working needle over the stitch on the left. Pass the stitch on the right over the stitch on the left. (Or you can turn your work and knit the 3 sts together).
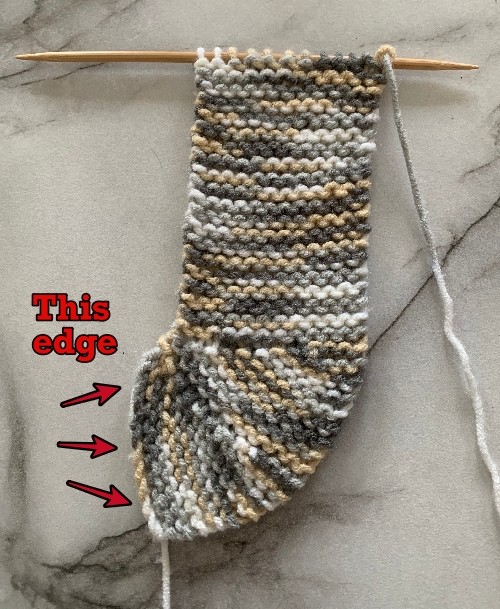
Break yarn leaving a length of yarn long enough (8ish inches) to sew up the remaining seam.
Make another slipper.
Hints and Tips
I make my K2tog a little differently at the top of the toe only because how the t looks when you knit the two together can look off. I’m very picky though. It doesn’t really matter.
When picking up the first 2 and last 2 sts along the toe, you don’t have to go through the M1. Once again, I’m just overly particular about what it looks like. What works for you will be fine.
There is a lot of breaking and rejoining of yarn with this pattern. I have made a complete tutorial showing How to Work in the Ends While Knitting. You can watch the video right here.
Abbreviations
k – knit
p – purl
k2tog – knit 2 sts together
st – stitch
sts – stitches
M1 – Make one (knit wise). Increase one stitch between the stitches. Pick up the yarn between the stitches. Twist slightly. Place it on your non-working needle. Knit the stitch. Watch this video to see how.
Like all of my patterns, you have my permission to sell and/or give away the physical items that you make using this pattern. You are NOT permitted to reprint this pattern in any form unless you have obtained my written permission to do so.
If you have any questions, please feel free to leave a comment or send me your questions at [email protected].