Posted on Leave a comment

Crocheted Sun Hat and Bucket Hat – FREE Crochet Pattern

Crochet hat pattern - sun hat bucket hat cowboy hat

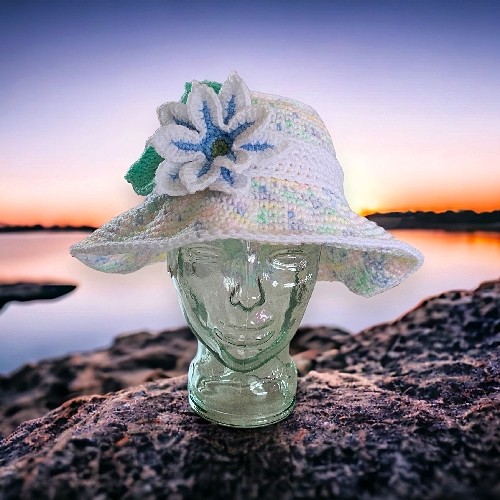
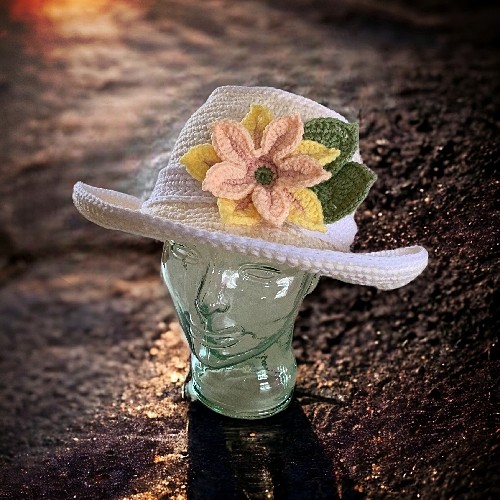
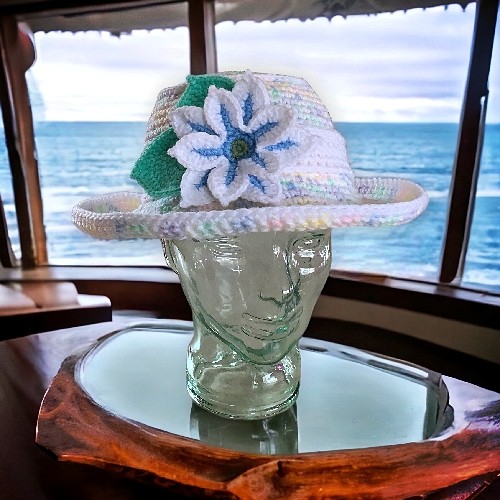
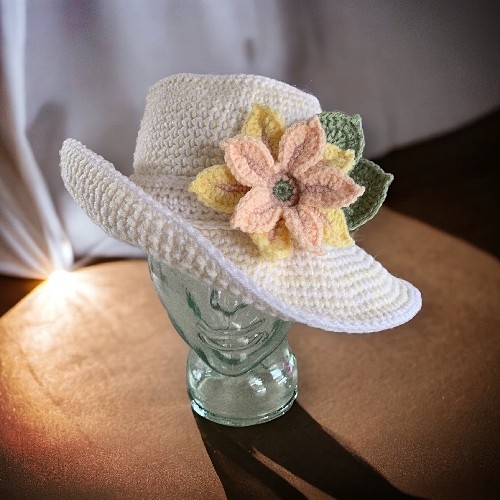
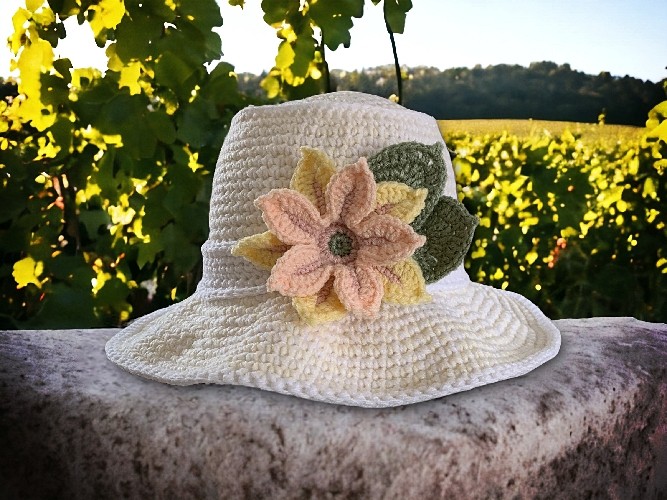
Gussy it up or wear it plain, this crocheted hat pattern is extremely versatile and makes hats for nearly anyone. Anyone but my 14 year old son apparently, who said, with his usual unenthusiastic honesty, “I don’t like it but it fits OK”. How do I know this? I needed to borrow his head to see how the smaller size fit and felt when wearing, so I guess it’s at least fit approved ¯\_(‘~’)_/¯

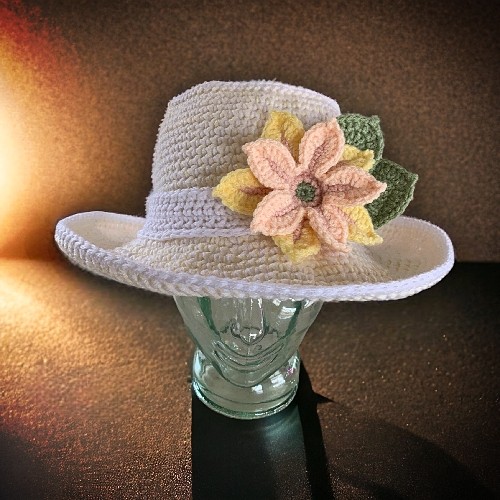
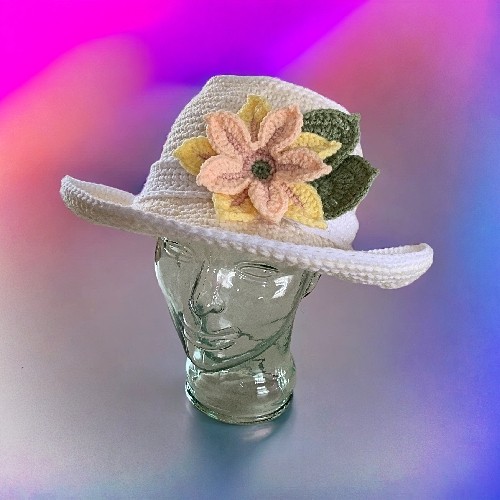
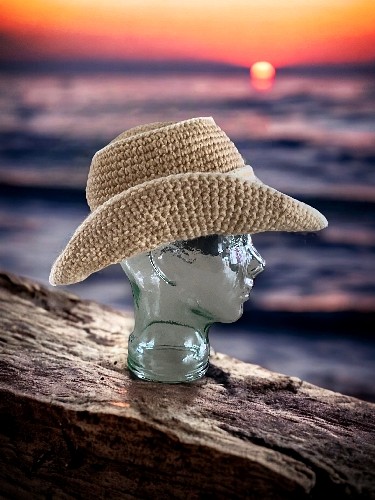
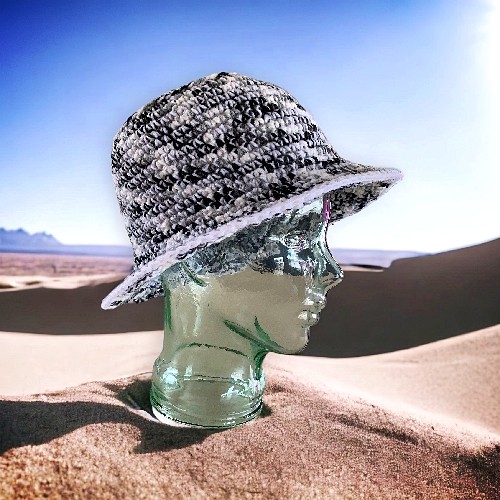
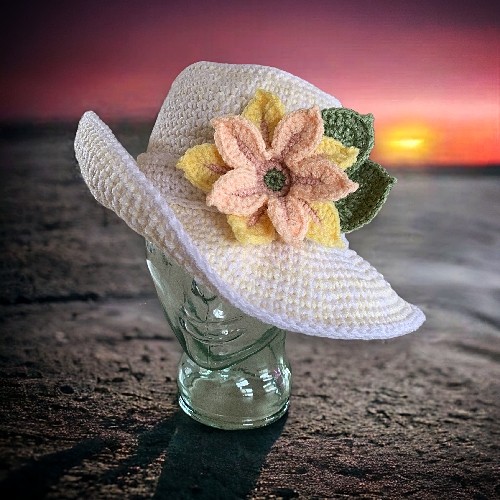
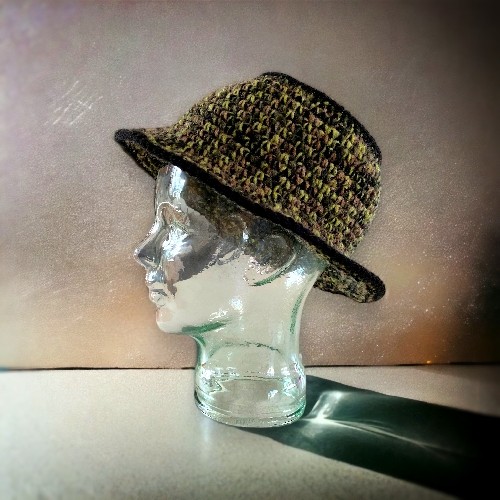
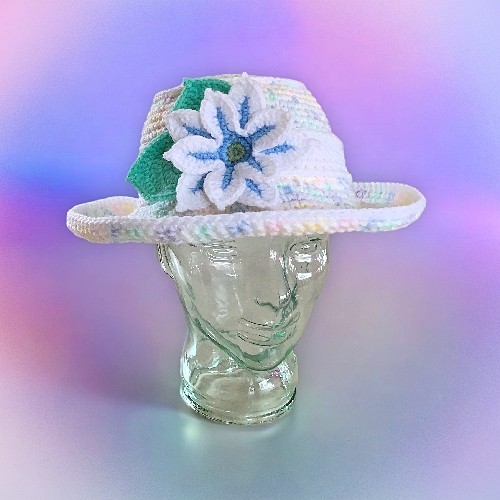
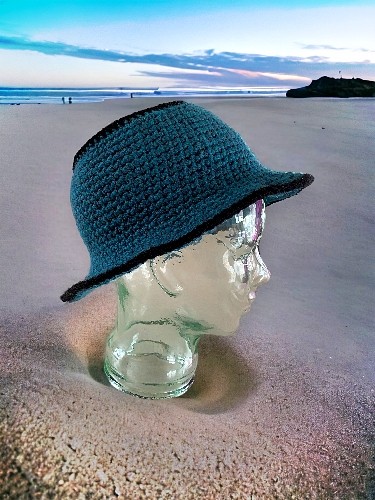
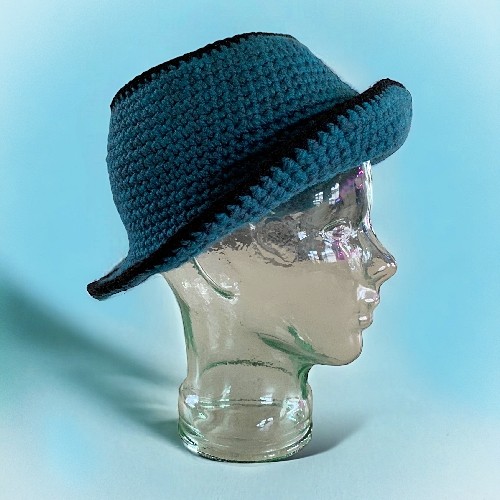
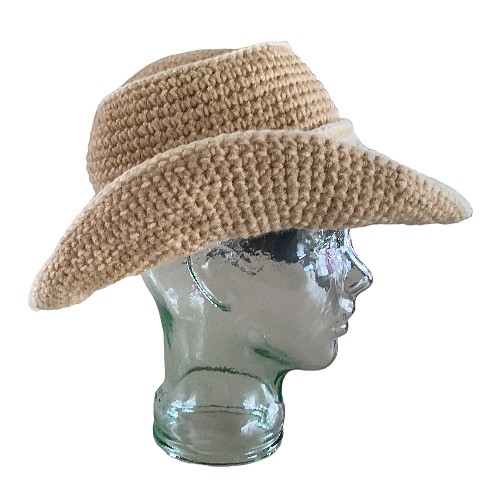
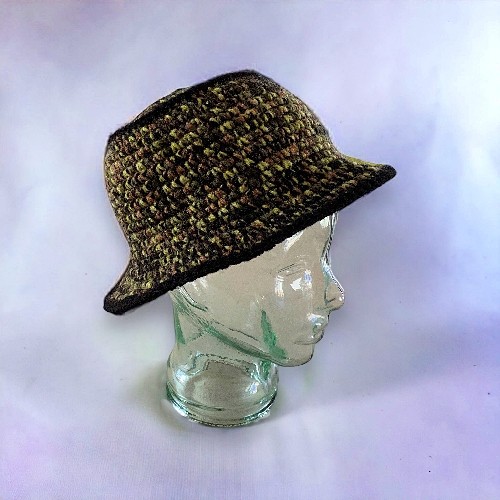
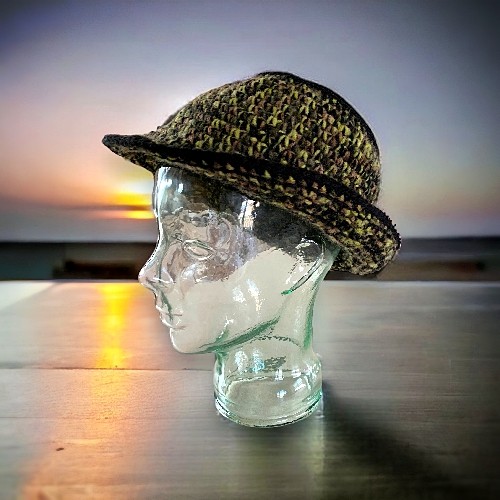
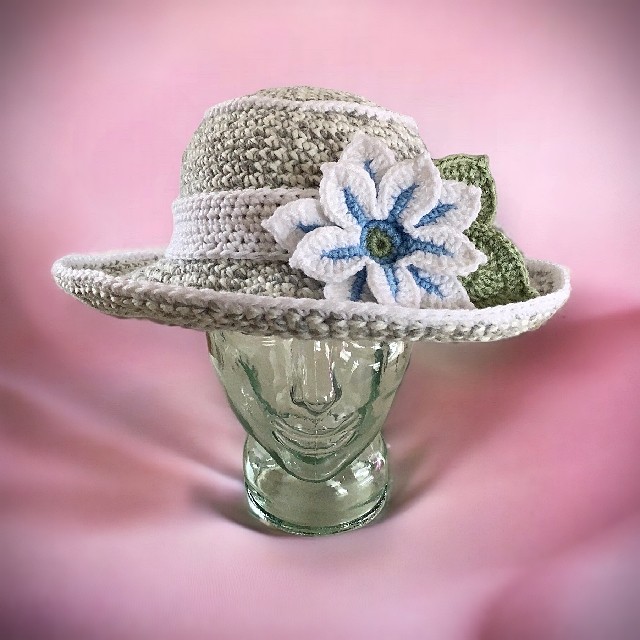
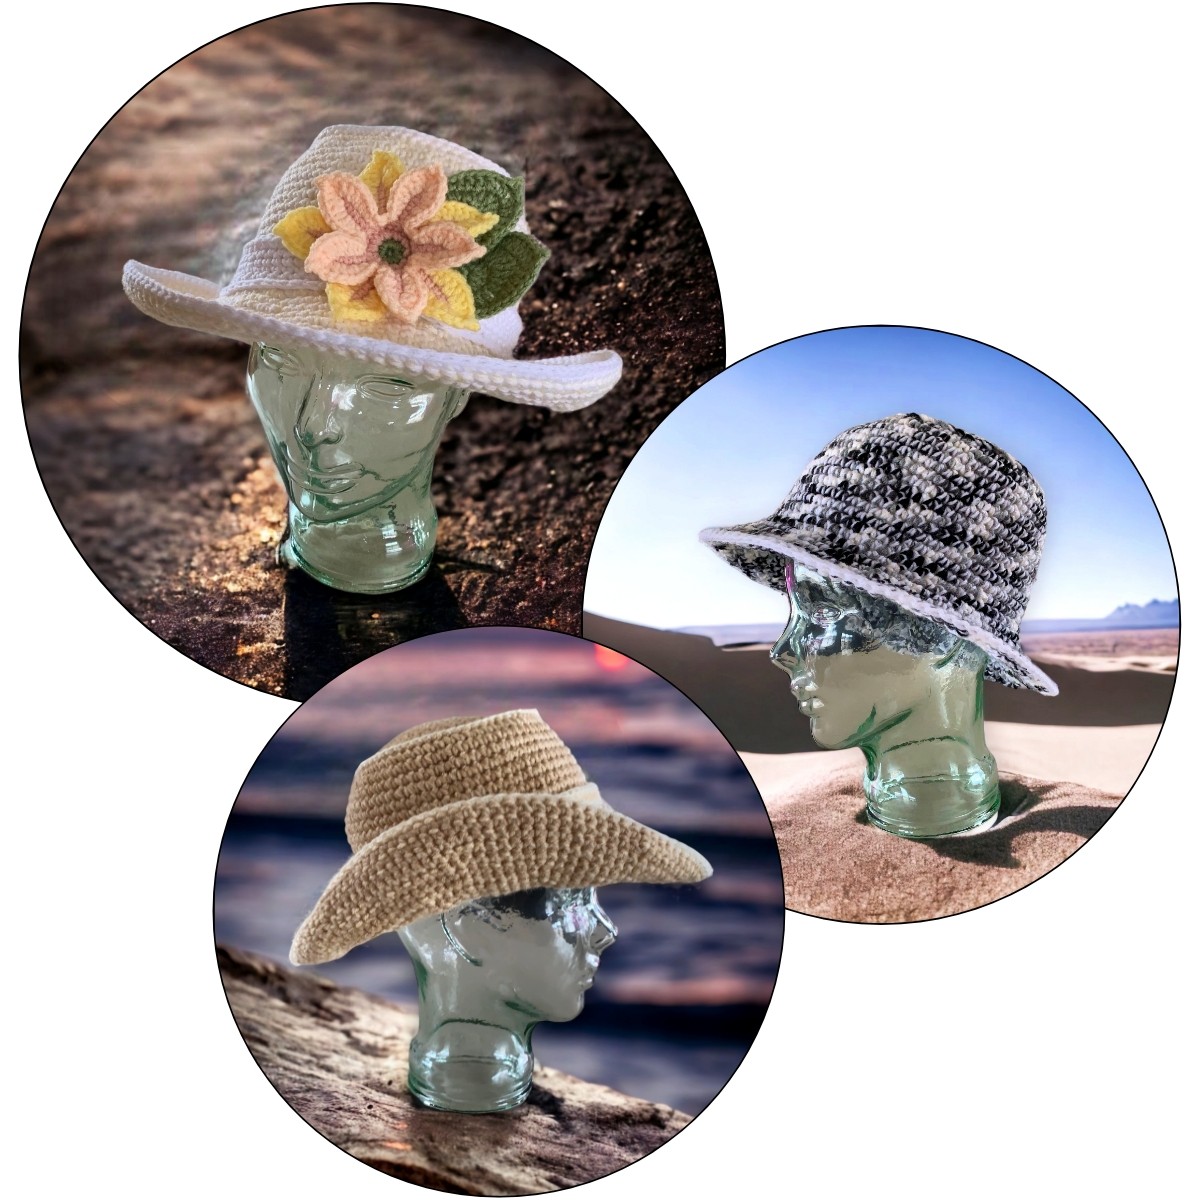
This hat can be made a number of ways, either as a wider brimmed sun hat with a flower, plain with the brim shaped similar to a cowboy/cowgirl hat, or with a narrower brim to be a bucket hat. Any way you choose is going to be a success! It’s easy to make, and as long as you know the basics of crochet. Literally if you know how to chain, single crochet (sc) and do a slip stitch (sl st), you’ll be able to make the hat. The flower can be a bit more tricky but I’ve included many photos and detailed descriptions to help you along.

The hat is made with 2 strands worsted weight yarn (or one strand of super bulky yarn) and a larger crochet hook. The stitches need to be fairly tight so the hat will hold it’s shape. Anything larger than the gauge given will make it floppy and the sizing may not work out as written. But, like all my patterns, play with it! If you want a floppy hat, no one said you can’t.

There aren’t any specific measurements for the hat sizing. It’s all very general as there is some stretch to the hat when finished and will form to fit the head it’s covering. If you want your hat to fit a little looser, go for the bigger size. 

The way I thought of it when I was designing this hat, if it fit the glass head, it’s a small/medium size. In other words, a regular sized head. If it fits me and looks a little too big on the glass head, it’s a large/extra large. Let me put it this way. I know I have a big head. If you have ever thought you too might have a big head because hats don’t always fit you, hello fellow large head! If this statement makes no sense to you, go for the small/medium.

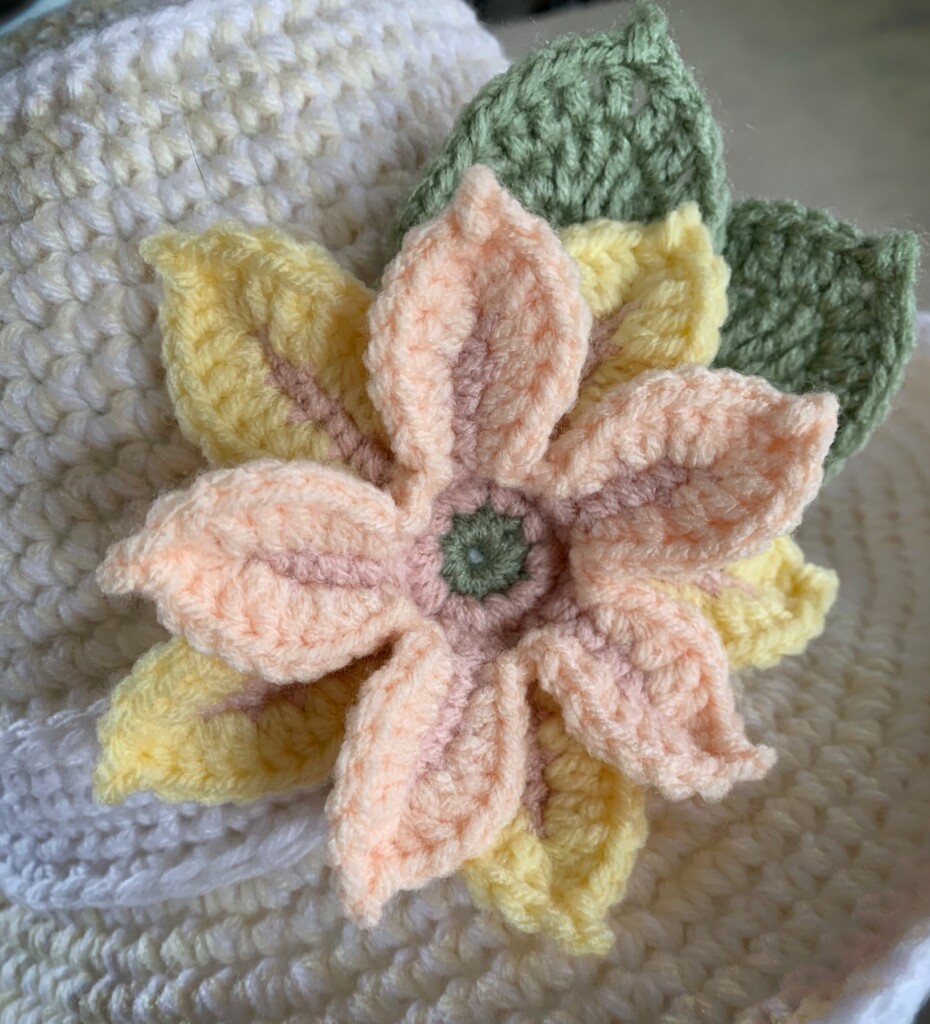
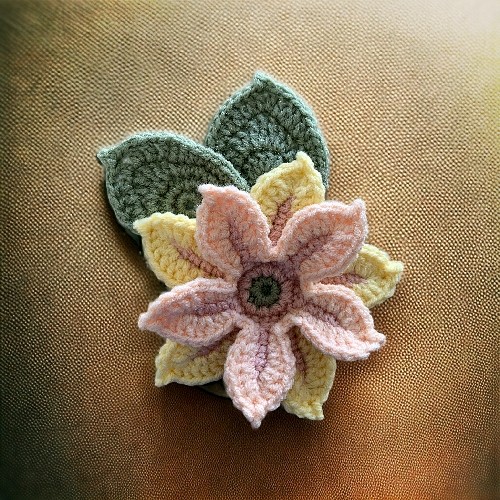
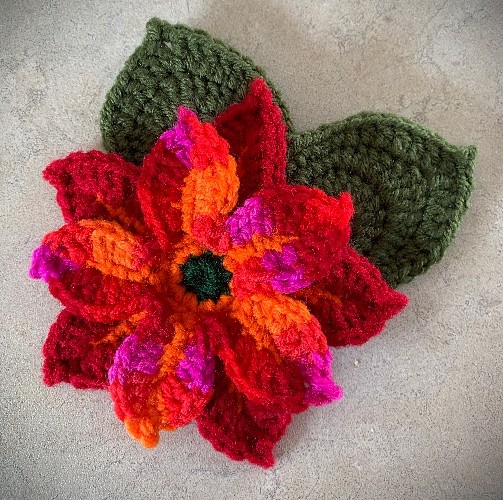
If you are looking to make the flower and the leaves, they each have their own page on the website. This pattern turned into a bit of a beast as it is. Both patterns are included with the printable PDF version of the sun and bucket hat.

Love the free patterns? You can say thanks in a couple of ways. You can read more about how you can Support My Work by clicking that link or make a small donation and Buy Me a Coffee. ?? That is a website where you can make a one time donation as a thanks. (FYI I have some great offers if you would like to buy me multiple coffees. You can see those by clicking on the Extras tab or you can click this link Janis Frank Extras).

If you don’t want to or are unable to make a financial donation, sharing this pattern through social media is a great way to help out too! The links below are a super easy way for you to do so.

If you would like to avoid the ads on this page or would like to print the pattern, you can purchase the PDF for a small fee from this website at Sun Hat with Gorgeous Flower or Simple Bucket Hat – Printable Crochet Pattern, through my Etsy shop, LoveCrafts or on Ravelry.

Another way to avoid ads and pop-ups, get instant, PRINTABLE downloads of this pattern and others, is by becoming a Member on this website. When you become a Website Supporter for $3/month, you’ll gain access to exclusive member only posts. These posts contain one click downloads of the patterns. Simply click the Download & Print button. The PDF will automatically download to your computer or smart device. You can then read it on your device or print it at your leisure. You can download as many patterns as you like for the same $3 each month. You can go to this page to learn more, become a member and support my work… Exclusive Member Area

Like all of my patterns you have my permission to sell and/or give away the physical items that you make using this pattern. You are NOT permitted to reprint this pattern in any form unless you have obtained my written permission to do so. 

Abbreviations

Ch – chain

sc – single crochet

sl st – slip stitch

hdc – half double crochet

dc – double crochet

trc – treble crochet

st – stitch

sts – stitches

Things You Need:

6 mm (US 10 or J) crochet hook (or what ever size hook you need to get the correct gauge)

3.5 mm (US 4 or E) crochet hook for top edging, flowers and leaves (all optional)

2 balls Worsted Weight yarn or 1 ball Super Bulky yarn (for the hat itself)

For the sun hat you’l need:

106 gr or 3.7 oz each of the worsted weight colours (216 m or 237 yards)

or

173 gr or 6 oz Super Bulky yarn (170 m or 185 yards) of course it’s less yarn for the bucket hat.

Worsted weight yarn (for band, flowers, leaves and edging)

Stitch markers (at least 8 but it never hurts to have more. See Hints and Tips section)

Tapestry needle (to sew band and flowers, work in the ends)

Gauge

With 2 strands of worsted weight yarn or 1 strand of super bulky yarn

13 sts = 4”

14 rows = 4”

Check your gauge to obtain correct sizing and density of the final fabric created. The stitching needs to be tight to hold the hat shape.

Small/Medium

With 2 strands of worsted weight yarn or 1 strand of super bulky yarn and your 6 mm (US 10 or J) crochet hook…

Ch 2 (make the first chain large enough to fit in all the stitches for Round 1)

Round 1: 12sc around. Do NOT join. The following rounds are worked without joining.

Round 2: Sc in first sc of previous round. 2sc in the next stitch. *Sc in next stitch. 2sc in the next stitch.* Repeat from * to * around. Place stitch marker. (18 sts)

Round 3: *2sc. 2sc in the next stitch.* Repeat from * to * around to stitch marker.

Round 4: *3sc. 2sc in the next stitch.* Repeat from * to * around to stitch marker. 

Round 5: *4sc. 2sc in the next stitch.* Repeat from * to * around to stitch marker.

Round 6: *5sc. 2sc in the next stitch.* Repeat from * to * around to stitch marker.

Round 7: *3sc. 2sc in the next stitch. 2sc. 2sc in the next stitch.* Repeat from * to * around to stitch marker. (54 sts)

Round 8: *4sc. 2sc in the next stitch. 3sc. 2sc in the next stitch.* Repeat from * to * around to stitch marker. (66 sts)

Round 9: Sc around in the back loop.
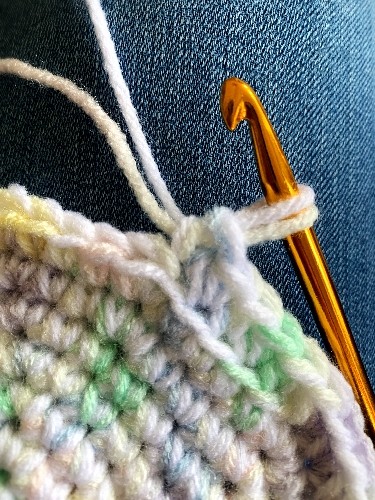
Crochet in back of loop

Round 10-20: Sc around.

Round 21: *5sc. 2sc in the next stitch.* Repeat from * to * around to stitch marker. (77 sts)

***Please note – If you are making the BUCKET HAT, crochet these stitches as you normally would (through both loops of the stitch). 

  • If you are making the SUN HAT, crochet these stitches through the front loop ONLY!

Round 22: *8sc. 2sc in the next stitch. 9sc. 2sc in the next stitch.* Repeat from * to * around. Sc in the last st. (or crochet as many stitches as you have at the end of the round). (Mark each increase with a stitch marker as you go for a total of 8 markers. You will use these later on. I’m no longer giving final stitch counts. See the Hints and Tips section for clarification if needed).

Round 23: 4sc. 2sc in the next stitch. *9sc. 2sc in the next stitch.* Repeat from * to * around (Crochet as many stitches as you have to the end of the round but there should be 0).

Round 24: *10sc. 2sc in the next stitch. 11sc. 2sc in the next stitch.* Repeat from * to * around. 2sc (or crochet as many stitches as you have to the end of the round). 

***Please note – If you are making the BUCKET HAT sc around and continue on the Round 31.

Round 25: 5sc. 2sc in the next stitch. *11sc. 2sc in the next stitch. 12sc. 2sc in the next stitch.* Repeat from * to * around 2 more times. 11sc. 2sc in the next stitch. 8sc. (or crochet as many stitches as you have to the end of the round).

Round 26: Sc around.

Round 27: *Sc to the next stitch marker. Sc as you normally would. Sc to the next stitch marker. 2sc in this stitch.* Repeat from * to * around.

Other ways to state this round…Increase 4 times evenly around. Or…Increase every other stitch marker.

Round 28: Sc around.

Round 29: *Sc to the next stitch marker. 2sc in this stitch. Sc to the next stitch marker. Sc as you normally would.* Repeat from * to * around. 

Round 30: Sc around and join with a slip stitch. Tie off and break yarn.

Round 31: With the inside of the hat facing you and with one strand of worsted weight yarn and the same hook you made the hat with, sc around. Join with a slip st. Tie off and break yarn.

Top or Crown Edging (Optional)

With 3.5 mm (US 4 or E) crochet hook and a single strand of worsted weight yarn

In the loops left from Round 9, sc in each stitch around. Join with a slip st. Tie off and break yarn.

Work in all ends.

Large/Extra Large 

With 2 strands of worsted weight yarn or 1 strand of super bulky yarn and your 6 mm (US 10 or J) crochet hook…

Ch 2 (make the first chain large enough to fit in all the stitches for Round 1)

Round 1: 12sc around. Do NOT join. The following rounds are worked without joining.

Round 2: Sc in first sc of previous round. 2sc in the next stitch. *Sc in next stitch. 2sc in the next stitch.* Repeat from * to * around. Place stitch marker. (18 sts)

Round 3: *2sc. 2sc in the next stitch.* Repeat from * to * around to stitch marker.

Round 4: *3sc. 2sc in the next stitch.* Repeat from * to * around to stitch marker. 

Round 5: *4sc. 2sc in the next stitch.* Repeat from * to * around to stitch marker.

Round 6: *5sc. 2sc in the next stitch.* Repeat from * to * around to stitch marker.

Round 7: *3sc. 2sc in the next stitch. 2sc. 2sc in the next stitch.* Repeat from * to * around to stitch marker. (54 sts)

Round 8: *5sc. 2sc in the next stitch.* Repeat from * to * around to stitch marker. (63 sts)

Round 9: *8sc. 2sc in the next stitch.* Repeat from * to * around to stitch marker. (70 sts)

Round 10: Sc around in the back loop. 

Crochet in back of loop
Crochet in back loop

Round 11-23: Sc around.

Round 24: *4sc. 2sc in the next stitch.* Repeat from * to * around to stitch marker. (84 sts)

***Please note – If you are making the BUCKET HAT, crochet these stitches as you normally would (through both loops of the stitch). 

  • If you are making the SUN HAT, crochet these stitches through the front loop ONLY!

Round 25: *9sc. 2sc in the next stitch. 10sc. 2sc in the next stitch.* Repeat from * to * around to the beginning of the row. (Mark each increase with a stitch marker as you go for a total of 8 markers. You will use these later on. I’m no longer giving final stitch counts. See the Hints and Tips section for clarification if needed).

Round 26: 6sc. 2sc in the next stitch. *11sc. 2sc in the next stitch. 10sc. 2sc in the next stitch.* Repeat from * to * around 2 more times. 10sc. 2sc in the next stitch. 5sc. (or crochet as many stitches as you have to the end of the round).

Round 27: *11sc. 2sc in the next stitch. 12sc. 2sc in the next stitch.* Repeat from * to * around 3 more times. 

***Please note – If you are making the BUCKET HAT sc around and continue on the Round 34.

Round 28: 6sc. 2sc in the next stitch. *12sc. 2sc in the next stitch. 13sc. 2sc in the next stitch.* Repeat from * to * around 2 more times. 12sc. 2sc in the next stitch. 7sc. (or crochet as many stitches as you have to the end of the round).

Round 29: Sc around.

Round 30: *Sc to the next stitch marker. Sc as you normally would. Sc to the next stitch marker. 2sc in this stitch.* Repeat from * to * around.

Other ways to state this round…Increase 4 times evenly around. Or…Increase every other stitch marker.

Round 31: Sc around.

Round 32: *Sc to the next stitch marker. 2sc in this stitch. *Sc to the next stitch marker. Sc as you normally would.* Repeat from * to * around. 

Round 33: Sc around and join with a slip stitch. Tie off and break yarn.

Round 34: With the inside of the hat facing you and with one strand of worsted weight yarn and the same hook you made the hat with, sc around. Join with a sl st. Tie off and break yarn.

Top or Crown Edging (Optional)

With 3.5 mm (US 4 or E) crochet hook and a single strand of worsted weight yarn

In the loops left from Round 10, sc in each stitch around. Join with a slip st. Tie off and break yarn.

Work in all ends.

Band (Optional)

With a single strand of worsted weight yarn and your large 6mm (US 10 or J) crochet hook: 

Small/Medium – Chain 74 

Large/Extra Large – Chain 79

In second chain from hook, sc in each chain. Bring the ends of the band together and sc in the first sc of previous row. Be sure not to twist. We are now working in rounds. 

Round 2-3: Sc around. Join with a slip st. Tie off and break yarn.

Working in the bottom loop of the original chains…
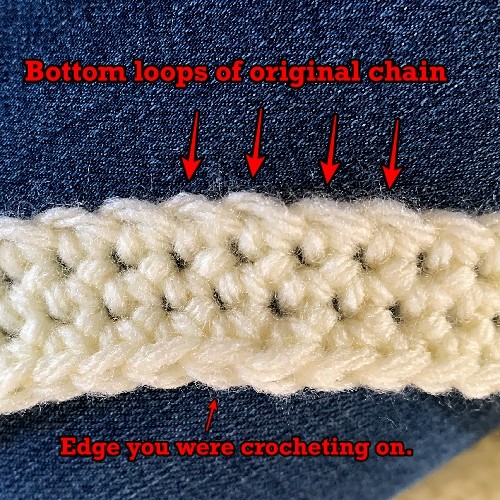
Work 3 rounds of sc evenly. Join with a slip st. Tie off and break yarn. Work in ends. Attach to the hat sewing the bottom edge of the band to where the brim joins the hat.

Add flowers or other embellishments of your choice.

Click a button to go to the flowers and leaf patterns

Hints and Tips

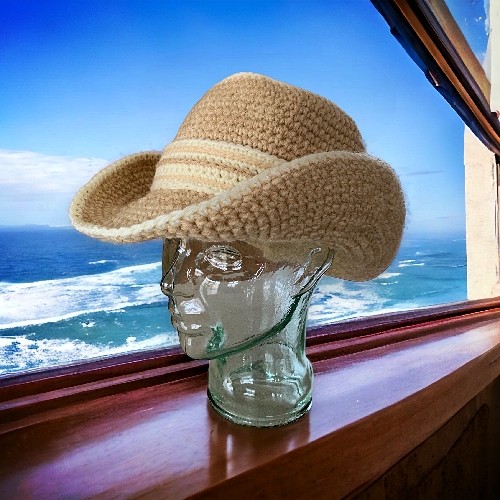
Colour choice of the 2 different worsted weight yarns can make a huge difference to your final hat. I mixed 2 tones of one colour for the cowboy/cowgirl hat, white and beige for the yellow flower hat, camo and black for the camo bucket hat. Variegated yarns should be used with a solid colour of yarn for the best effect.

Stitch markers make this so much easier. Pieces of yarn also work. I like to use a single bobby pin to note where the round starts and use regular stitch markers for where I’m making the increases. 
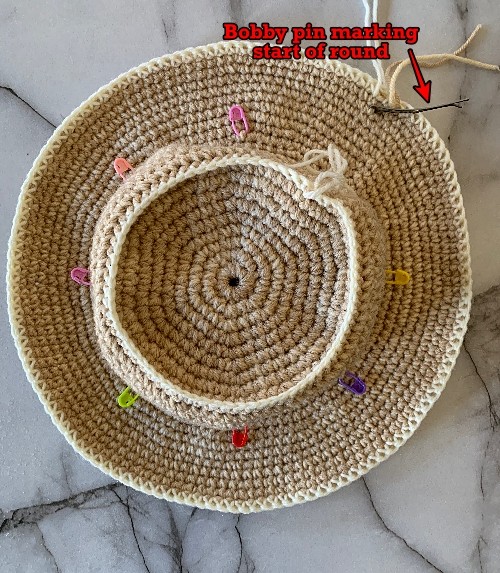
Using stitch markers for the sun hat

In regards to the stitch markers, if you don’t want to use the stitch counts given for the rows, you can use the stitch markers instead. Think of it as increase 8 times evenly around. I did the math to figure out what was even spacing and to stagger the increases between the rows around the brim for the crochet purists.

I like to move my start of the round stitch marker as I make each row (the bobby pin in the photos). I leave the increases for the brim where they are. It makes things go a little quicker and avoids keeping track of stitch counts.

Speaking of stitch counts. This is crocheted in the round, meaning if your stitch counts become a little off, too many or not enough between the increases, it will still work out in the long run. I gave the number of stitches between the increases mainly to avoid repeating increases along the brim. It looked very noticeable and unsightly to me when the increases in increases lined up, but I’m a bit of a stickler for things like that. If you could care less how it look, have at it!

Edging is done with worsted weight yarn! If you are using a double strand of worsted weight yarn, select one of the colours and go with that. If you are using Super Bulky yarn, you’ll need to use any complimentary colour of worsted weight yarn you like. You don’t need very much.

Why I made the band the way I did. It’s very easy to twist the band if you join the chain right away. It’s considerably easier to avoid this if you sc in each chain first then bring the ends together.

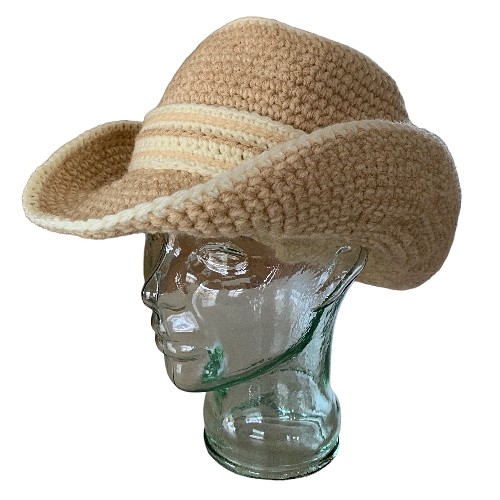
The cowboy/cowgirl hat is the sun hat but with the brim formed into a more familiar cowboy hat style. 
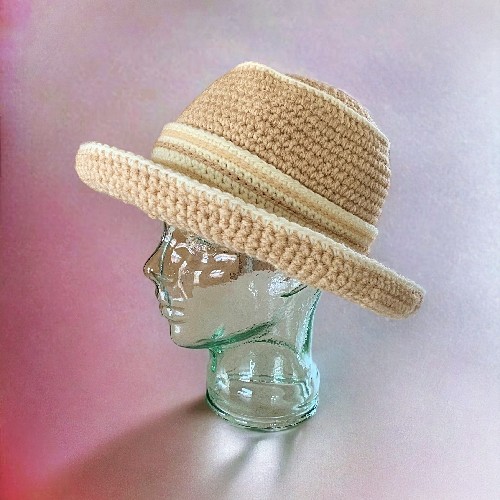
Crochet cowboy hat - free crochet pattern

The band on the cowboy/cowgirl hat has daisy chain embellishments. You can either embroider them on or use your crochet hook. Place your yarn at the back of the band and pull up a loop to the front. Push your hook through the next hole and pull up a loop. Keep going down the length of the band.
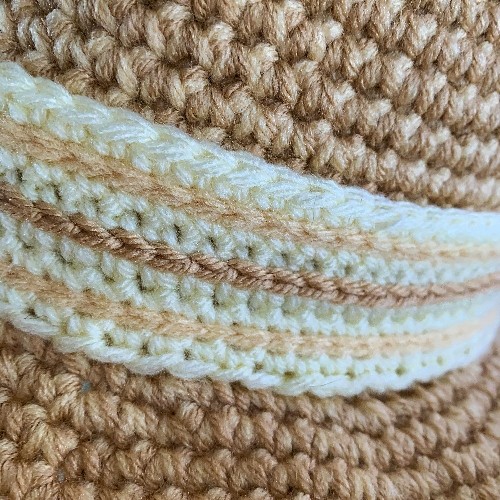
Crochet band for the cowboy and sun hat

Like all of my patterns you have my permission to sell and/or give away the physical items that you make using this pattern. You are NOT permitted to reprint this pattern in any form unless you have obtained my written permission to do so. 
Posted on 10 Comments

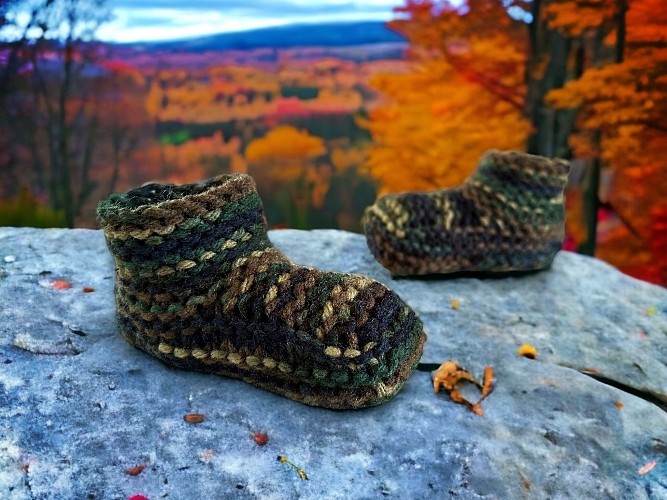
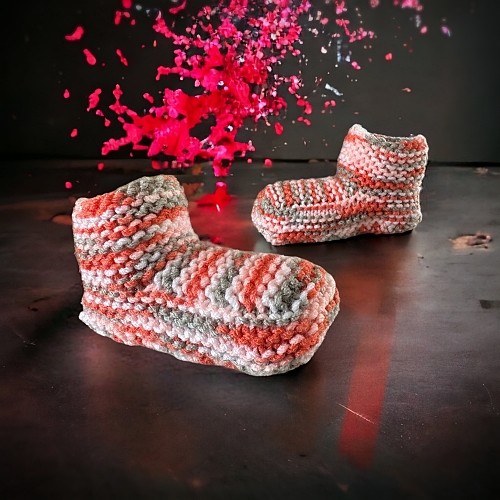
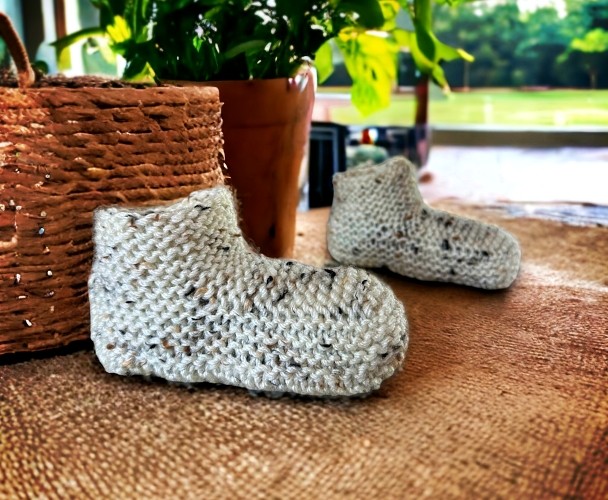
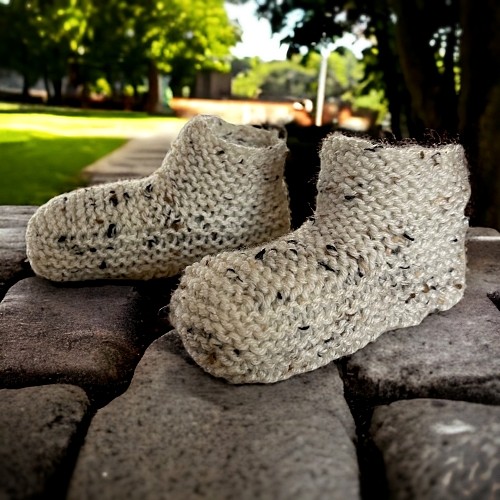
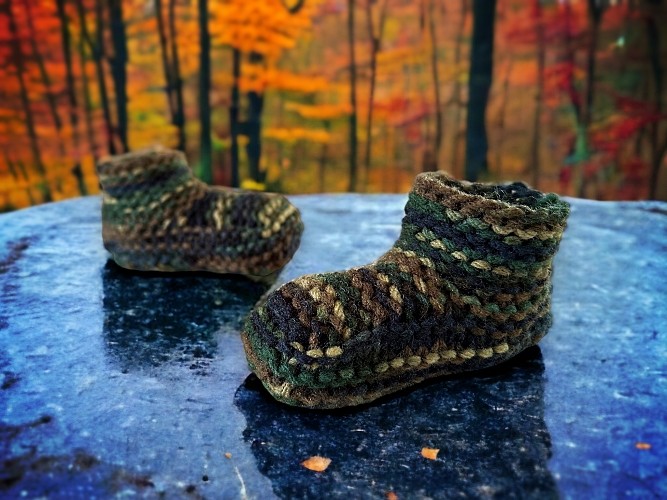
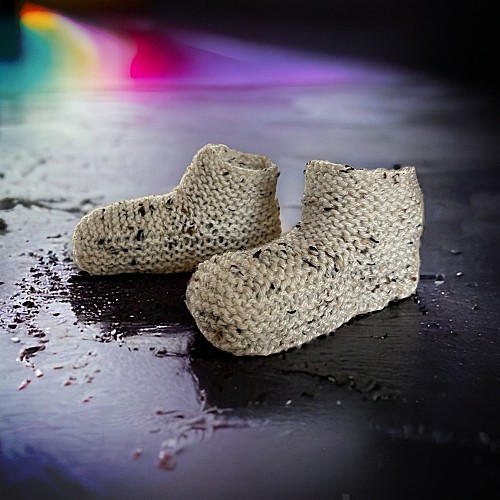
Knitted Moccasin Bootie Slippers for Children – FREE Knitting Pattern and How-to Video!

Knitted Moccasin Bootie Slippers for Children - Knit on Straight Needles

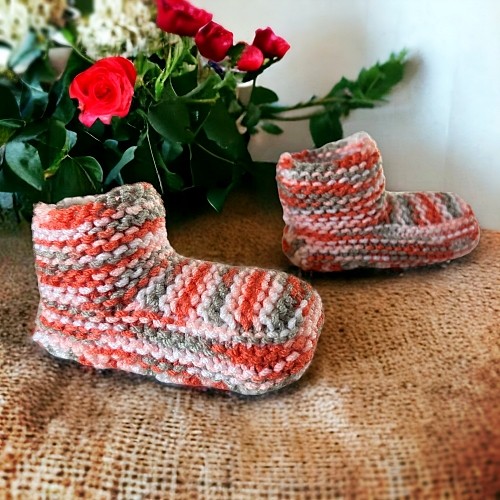
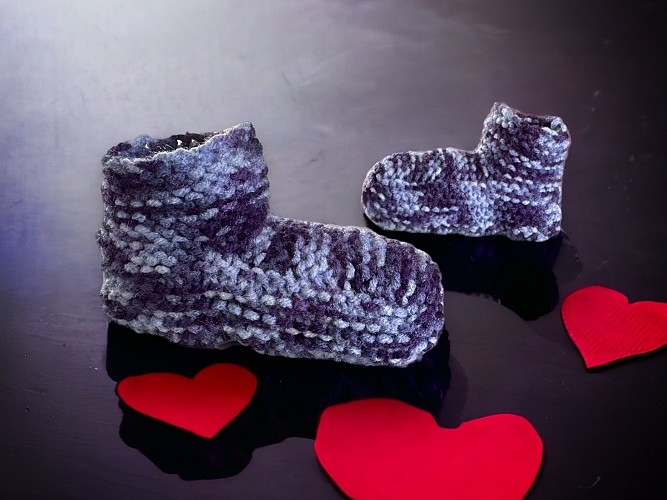
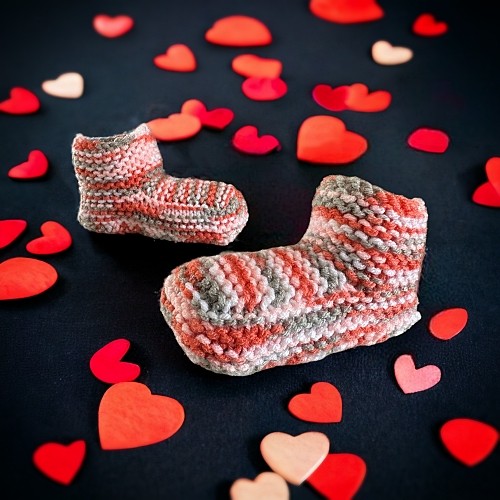
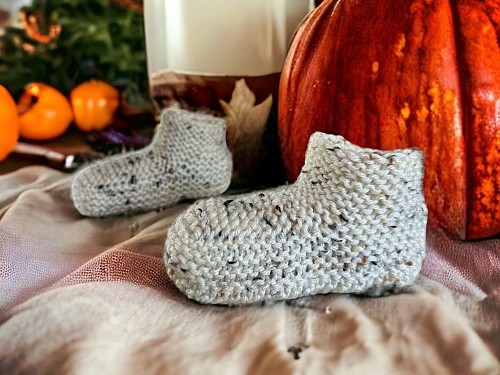
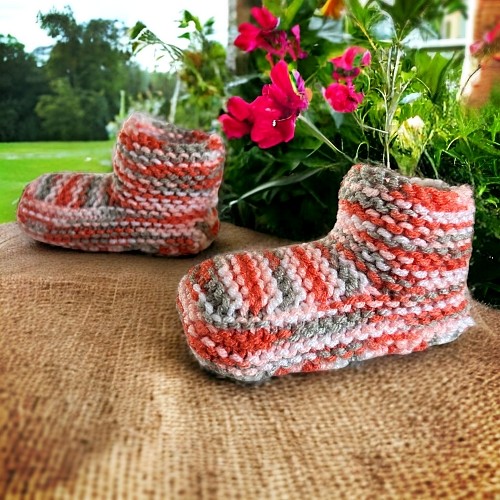
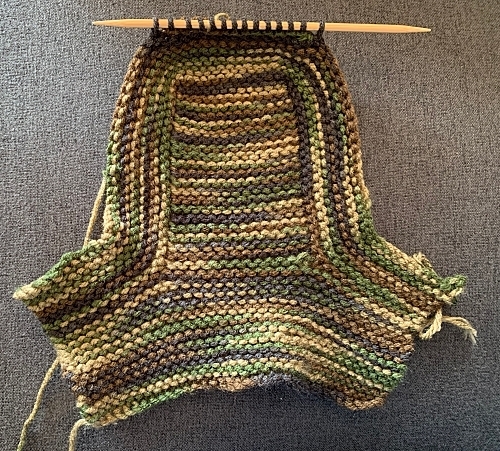
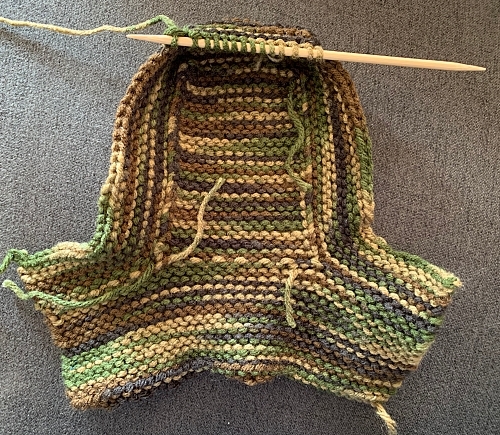
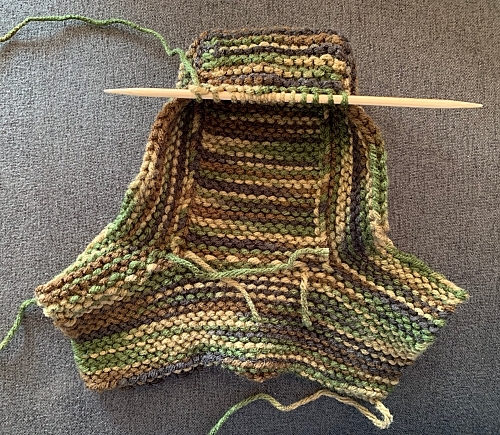
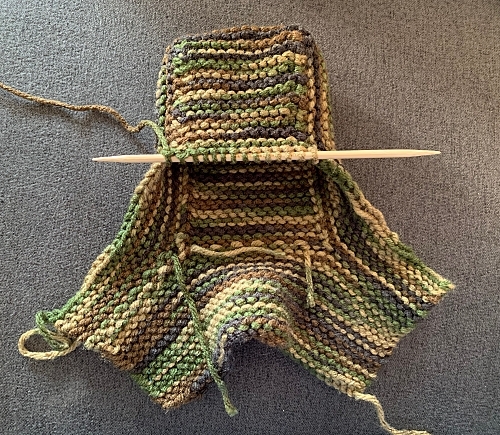
After a bit of math and a little tweaking of the results, the child sizes of the FREE Knitted Slipper Pattern is finally available! (You can click that link if you need the adult sizes). Because these are made for little feet, they often don’t need much yarn. This makes them a great way to use up the smaller leftover bits from larger projects. Not to mention, these tend to sell like hotcakes at local farmers’ markets, craft fairs and consignment shops. The smaller pairs are “so cute” making for an easy sale and the return on the investment of your time is great! They’re quick to make and since the yarn has already been bought for a larger project, anything made from the leftovers, like these child shippers, is gravy, baby!

If you stumbled upon this post looking for a finished pair of slippers, I have them for sale in my Etsy shop. Prices vary depending on size. You can use this link – CUSTOM MADE Hand Knit Camo House Slippers – Slippers for Children – Kids Moccasin Booties – Slippers with a Cuff – Handcrafted House Shoes

If you enjoy this pattern and my other free online knitting patterns, please consider making a small donation or helping me out by visiting my Help Support My Work page. If you can’t help financially, I totally get it. Sharing on your social media is the next best thing.

And yes, you have my permission to sell or give away anything you make from my patterns. You’re just not allow to redistribute any of the patterns themselves in any form. Linking to and sharing is always welcome though! You can use those buttons ?? to do so easily.


Please note, this isn’t a pattern for beginners, but if you know how to knit a stitch, pick up stitches and knit two stitches together, you should be okay. I used a very different technique involving multiple sets of needles, but no worries! I included photos and now a how-to video demonstrating how I’m using the extra set and it totally works! Trust me.

And if you are concerned with the number of ends you’ll need to weave in when done, I’ve also created a tutorial to help you with that too! It’s so much easier to work the ends in as you go, though there will be a few you’ll have to do (i.e. when you sew up the seam for the heel), but if you are interested in easing your work load, here’s the link showing you How to Weave in the Ends While Knitting. A new window will open so you won’t lose this page ?. There’s also a clickable card in the scrolling free pattern pics running across the top of this website if you need to find the page again.

If you don’t want to read it online and want to print it, this knitting pattern is available in all the usual places including this website – Knitted Moccasin Bootie Slippers for Children, Ravelry, in my Etsy shop, LoveCrafts, a paperback on Amazon, and as an ePub that you can download on your Kindle. I’ll link to all of them as I get them completed and uploaded to the retailers. If a link isn’t working, it’s on its way. I need to reformat everything to get things on Amazon…

FYI I’m working at uploading my work to a distributor that also works with libraries. I’m publishing paperbacks of the patterns that you’ll be able to borrow! Some are available right now like the slipper and fingerless glove compilations I have. The single pattern paperbacks should be available as I get them uploaded and the distributor gets them out to the libraries. If they aren’t there now, you can always ask them to get it for you ?

The printable version of this pattern will also be in the member section and at Patreon also. Here are the links where you can get it.
Abbreviations

k – knit

k2tog – knit 2 together

st – stitch

sts – stitches

Things You Need

If you are uncertain or having trouble finding what you need to make these slippers, clicking any of the links below will show you exactly what you need. And if you decide to order through Amazon, it will be delivered right to your door and help support the hosting costs of the website (I do get a small commission from sales through Amazon).

And because this pattern is so basic with no pattern of any sort, it’s a great knitting pattern to highlight the colour of your yarn. I have a weakness for variegated/shaded yarns. I really enjoying watching how the colours pool on the finished project. Little weird, I know… And In case you were thinking of trying self-striping yarn. Don’t. It looks terrible.

1 ball of worsted weight yarn (average 260 yard, 5 oz or 141 gram ball will be more than enough). I used Red Heart and Bernat worsted weight yarn when designing the pattern but any worsted weight yarn will suffice.

2 sets of size 4 mm (US size 6) single point knitting needles.

Stitch holder

Cable needle

Tapestry needle to sew in ends. You can also use this handy tutorial to show you how to work in the ends while knitting these slippers.

Use this product to help prevent slippers from sliding on slick floors

Gauge

With size 4 mm (US size 6) needles or whatever size you need to obtain the correct number of stitches and rows. Be sure to check your gauge otherwise the sizing won’t be correct.

In garter stitch

4” = 16 sts

4” = 40 rows


Sizes (are written as such)

Child’s 1-2 (3-4, 5-6, 7-8, 9-10, 11-12, 13-1, 2-3, 4-5)

I’m using a colour code to denote the number of stitches for the various sizes. I hope this helps when making the sizes of slippers.

SizeLength
1-24 inches10 cm
3-44.5 inches11.4 cm
5-65 inches12.5 cm
7-85 3/4 inches14.5 cm
9-106 inches15 cm
11-126 3/4 inches17 cm
13-17 1/4 inches18.5 cm
2-38 1/4 inches21 cm
4-58 3/4 inches22 cm
All measurements are approximate. Knitted slippers are very forgiving for size and foot shape.

To Begin

Cast on 18 (20, 22, 24, 26, 28, 30, 32, 34)

Knit across for 10 (12, 12, 14, 14, 16, 18, 20, 20) rows. Break yarn when completed last row.

Toe Flap

Next Row: With RIGHT side facing, transfer the first 6 (7, 7, 8, 8, 9, 10, 10, 11) stitches to a stitch holder. Reattach the yarn and knit the next 6 (6, 8, 8, 10, 10, 10, 12, 12) to create the toe flap. Leave the remaining 6 (7, 7, 8, 8, 9, 10, 10, 11) stitches on the needle unworked.

The following rows are worked back and forth on the 6 (6, 8, 8,10, 10, 10, 12, 12) toe flap stitches only!

Knit across for 18 (20, 22, 24, 26, 30, 32, 36, 40) rows.

Break yarn. You’ll have the 6 (6, 8, 8, 10, 10, 10, 12, 12) stitches of the toe flap on your needle and the 6 (7, 7, 8, 8, 9, 10, 10, 11) stitches you left on the needle when you started making the toe flap.

Making the Sides of the Slipper

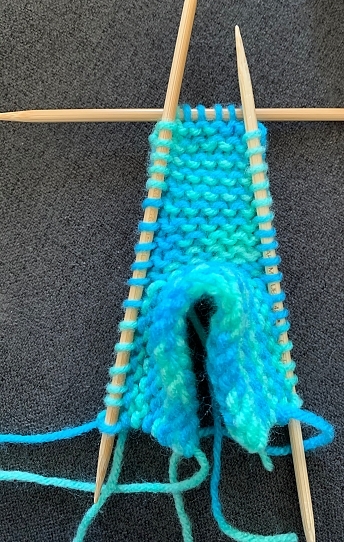
This is where you’re going to need the extra set of knitting needles. You’ll be knitting back and forth in rows but the turn around the toe is too tight to use circular needles. For this, you’ll put the toe flap stitches on one of your extra needles. It’s a little unconventional, but it works.

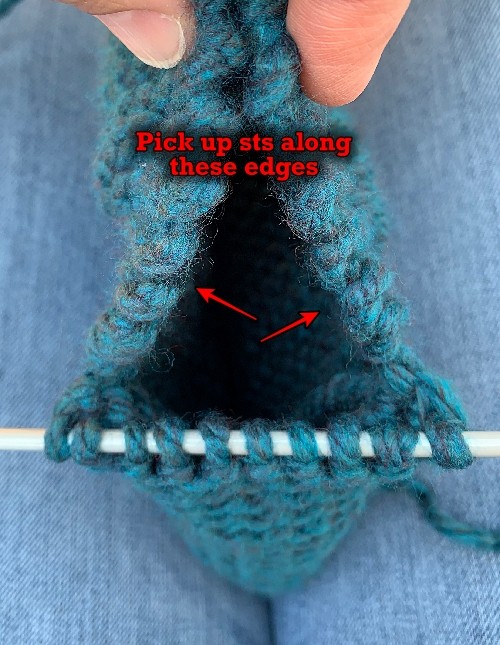
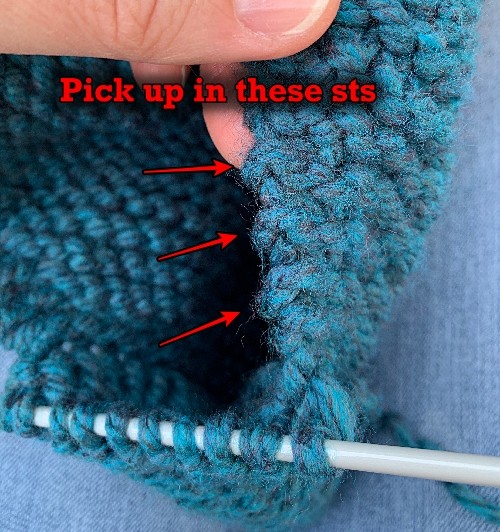
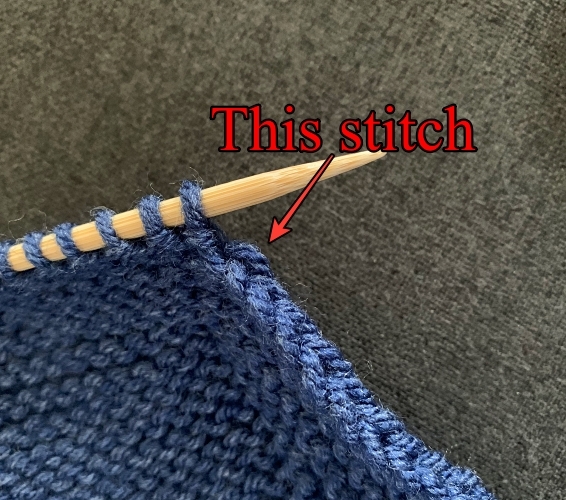
Next Row: With the RIGHT side facing, transfer the 6 (7, 7, 8, 8, 9, 10, 10, 11) stitches from the stitch holder onto one of your needles. Attach your yarn and knit these stitches. Pick up 9 (10, 11, 12, 13, 15, 16, 18, 20) stitches evenly along the edge of the toe flap. (All of these stitches are now on ONE needle – 15 (17, 18, 20, 21, 24, 26, 28, 31) stitches

With another needle, knit the 6 (6, 8, 8, 10, 10, 10, 12, 12) stitches of the toe flap. Leave the remaining 6 (7, 7, 8, 8, 9, 10, 10, 11) stitches on the other needle unworked for now.

With another needle, pick up 9 (10, 11, 12, 13, 15, 16, 18, 20) stitches evenly along the side of the toe flap. Knit the remaining 6 (7, 7, 8, 8, 9, 10, 10, 11) stitches on the next needle. There are now 15 (17, 18, 20, 21, 24, 26, 28, 31) stitches on this needle.

You should now have 3 needles holding stitches with all the points pointing as shown below when laid flat. You also have one spare needle to knit with. You are now going to knit in rows, back and forth with these three needles. Once you finish knitting all the stitches on one needle, move on to the next needle (the point of the needle is right there) until you complete the row.

Knitting on 4 Needles
I used double pointed needles because they were handy and I don’t like the longer needles flopping and waggling about while I knit. Regular knitting needles work perfectly fine, too!

Another way to say it for the following rows, knit all the stitches forming the side of the slipper, knit the stitches holding the toe flap stitches, then knit the other side of the slipper (counts as one row). Turn. Repeat.

Knit the next 4 (4, 6, 6, 8, 8, 8, 10, 10) rows.

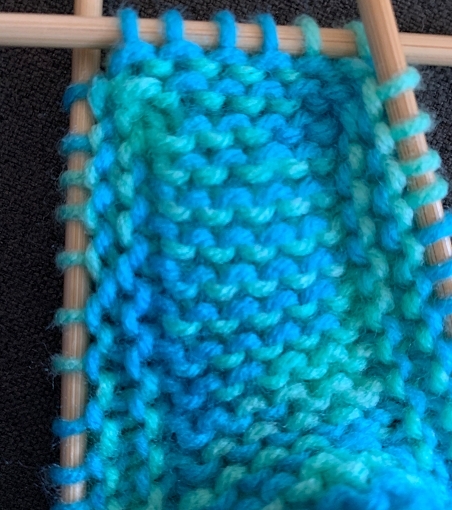
There are 2 (2, 3, 3, 4, 4, 4, 5, 5) ridges on the tip of the toe.

The photo below shows the 5 ridges for the sizes 2-3 and 4-5.

How to knit slippers
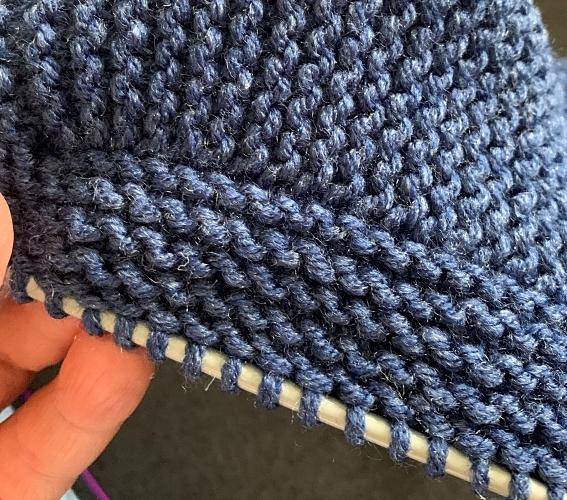
These are the ridges picked up along the toe flap
Ridges for child slippers
The 2 ridges for small size 1-2 and 3-4.

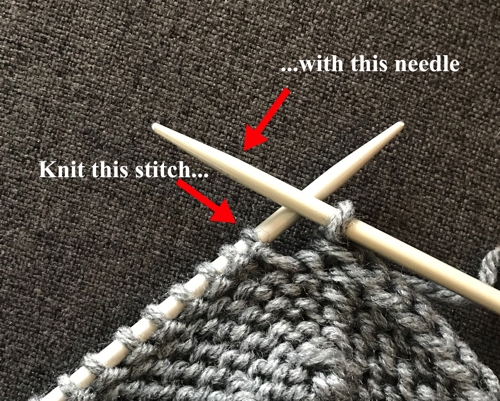
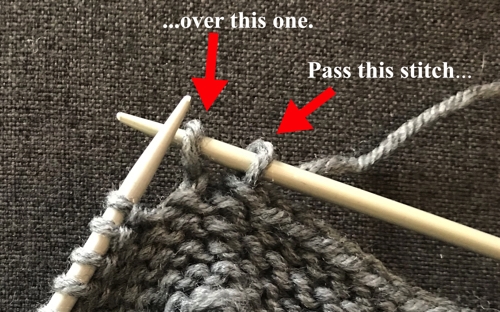
Next Row: With WRONG side facing. Cast off all the stitches from the first needle loosely. You’ll need to pass the last stitch from the first needle over the first stitch of the toe flap stitches (second needle).

Knitted Owl Slippers - Making the Sole

Using the same needle that now has one stitch, knit the remaining 5 (5, 7, 7, 9, 9, 9, 11, 11) stitches of the toe flap.

Cast off all the stitches from the third needle loosely. Break yarn.

Making the Sole

If you need help with making the sole, picking up stitches along the side etc, you can watch this video. It starts exactly where you need it to.
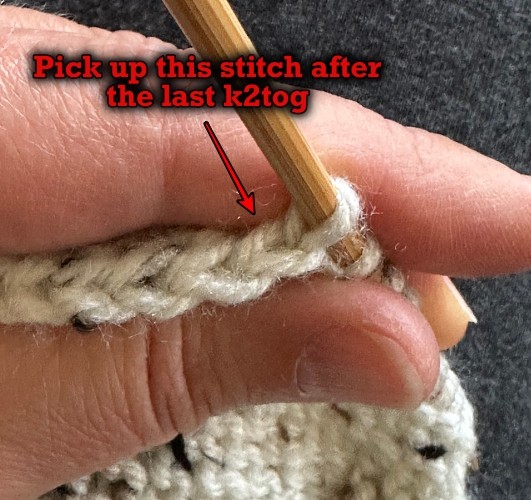
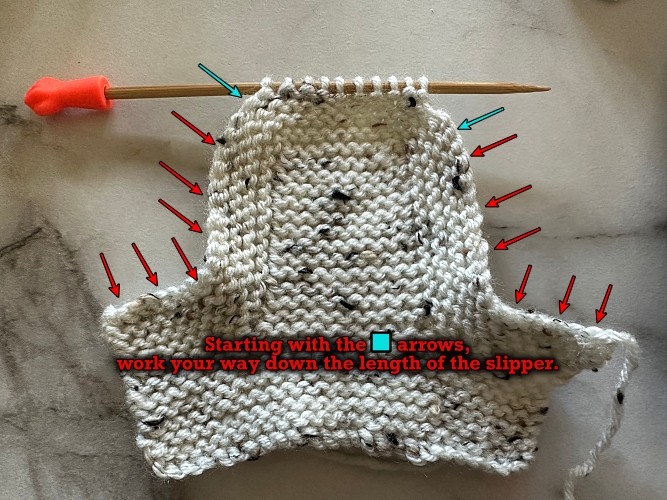
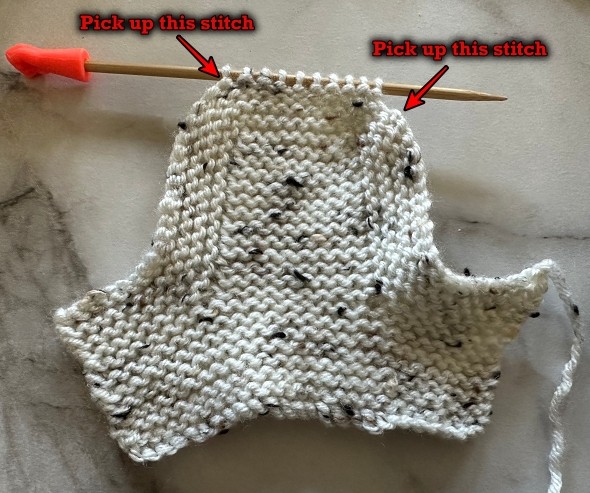
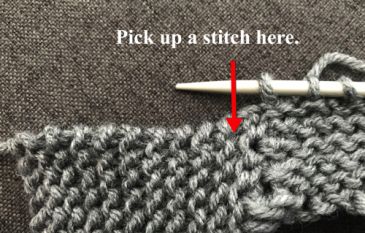
Next Row: With the RIGHT side facing, attach yarn and knit the first stitch of the cast off stitches by the toe flap (cast off stitch on the right by the point of the needle).

Knitted Moccasin Bootie Slippers for Children - picking up stitches
How to knit slippers
Pick up this stitch at the start of the row.

K2tog. Knit to the last 2 stitches K2tog. Pick up the cast off stitch by the point of your needle. – 6 (6, 8, 8, 10, 10, 10, 12, 12) stitches

Knitted Moccasin Bootie Slippers for Children - Picking up stitches
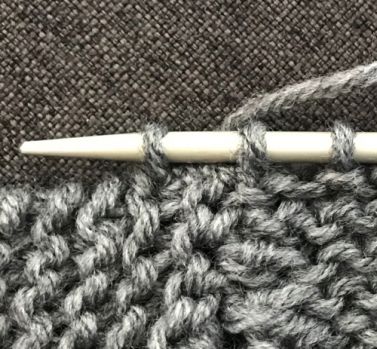
Pick up this stitch at the end of the row.

Quick tip – wrap the yarn counterclockwise around your needle and turn it down to pull the yarn through the cast off stitch on the right. If you have a hard time doing this, you can also use a crochet hook to pull the loop through and place that loop on your working needle.

You now are working back and forth along the bottom of the foot picking up one cast off stitch on each side as you go.

Next Row: Knit across.

? Next Row: Pick up the next stitch of the cast off stitches. K2tog. Knit to the last 2 stitches K2tog. Pick up the cast off stitch on the other side of the slipper by the point of your needle. – 6 (6, 8, 8, 10, 10, 10, 12, 12) stitches 

Working your way down the sides
Keep working your way down the slipper to make the sole.

Next Row: Knit across ?

Repeat from ? to ? in every stitch down the entire length of the foot. There are equal number of cast off stitches along each side. How many rows varies depending on the size of slipper you’re making. Be sure to end with a completed knit across row.

Adult Moccasin Slippers - Making the Sole
Starting the sole. Right side. This is shows the adult size but will have less stitches for child sizes.
Adult Moccasin Slippers - Making the Sole
Working your way down while making the sole. Wrong side.
Adult Moccasin Slippers - Making the Sole
Continuing to work down the length of the sole.
Adult Moccasin Slippers - Making the Sole
Still further down the sole. Note how the cast off edges are being picked up as you go. Keep working your way down the length of the sole until you’ve picked up all the cast off stitches.

More of my stuff on Etsy


You can make a widget like this for your blog or website, too.
Instructions are on my website here: How to Display Etsy Items on Your Website

Making the Heel

If you need help with making the heel, you can watch the video. It starts where you need it to. As mentioned in the video, you’ll need to follow how to decrease with the pattern as written below.

If You Have 6 Stitches

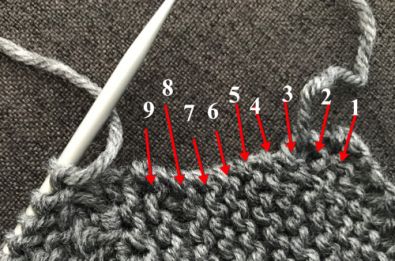
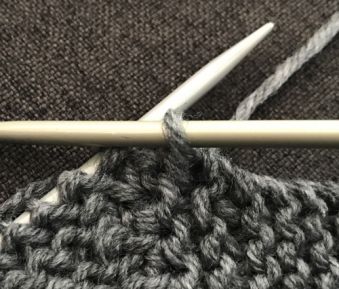
Next Row: With the RIGHT side facing, pick up a stitch in the row closest to the sole of the slipper. Count how many ridges it is for the size you are making. K2tog 3 times. Count down the same number of ridges and pick up a stitch in the space beneath it on the other side.

Child moccasin slippers - Picking up stitches to make the heel.
Owl Slippers knitting pattern
The photo above shows 9 rows of ridges. These are rows you knit to form the edges of the slipper. 
Owl Slippers - Free Knitting Pattern
Stitch picked up on the right edge in the 9th row shown above
Owl Slippers - Free Knitting Pattern
After you K2tog at the end of the row, you’ll pick up a stitch here.
Owl Slippers - Free Knitting Pattern
Stitch picked up on the left or end of the row.

Next Row: Knit across.

Next Row: K2tog, K1, K2tog. Pass the middle stitch on your working needle over the stitch on the left. Pass the stitch on the right over the stitch on the left. (Or you can turn your work and knit the 3 sts together).

Break yarn leaving a length of yarn long enough (8ish inches) to sew up the remaining seam.

Make another slipper.

If You Have 8 Stitches

Next Row: With the RIGHT side facing, pick up a stitch in the row closest to the sole of the slipper. Count how many ridges it is for the size you are making. K2tog 4 times. Count down the same number of ridges and pick up a stitch in the space beneath it on the other side. (Scroll up to the “If you have 6 stitches” section to see the photos if you need help).

Next Row: Knit across.

Next Row: Pick up a stitch beneath the next ridge. K2tog 3 times. Pick up a stitch in the space beneath the next ridge on the other side.

Next Row: Knit across.

Next Row: K2tog, K1, K2tog. Pass the middle stitch on your working needle over the stitch on the left. Pass the stitch on the right over the stitch on the left. (Or you can turn your work and knit the 3 sts together).

Break yarn leaving a length of yarn long enough (8ish inches) to sew up the remaining seam.

Make another slipper.

If you have 10 or More Stitches

♀️ Next Row: With the RIGHT side facing, pick up a stitch in the row closest to the sole of the slipper. Count how many ridges it is for the size you are making. K2tog twice. Knit to the last 4 stitches. K2tog twice. Count down the same number of ridges on the other side and pick up a stitch in the space beneath it. (Scroll up to the “If you have 6 stitches” section to see the photos if you need help).

Next Row: Knit across.

Next Row: Count down one ridge less than the previous row and pick up a stitch in the space beneath it. K2tog. Knit until the last 2 stitches. K2tog. Count down the same number of ridges and pick up a stitch in the space beneath it on the other side.

Next Row: Knit across. ♀️ Repeat from ♀️ to ♀️ until 6 stitches remain.

Next Row: Pick up a stitch beneath the next ridge. K2tog 3 times. Pick up a stitch in the space beneath the next ridge on the other side.

Next Row: Knit across.

Next Row: K2tog, K1, K2tog. Pass the middle stitch on your working needle over the stitch on the left. Pass the stitch on the right over the stitch on the left. (Or you can turn your work and knit the 3 sts together).

Break yarn leaving a length of yarn long enough (8ish inches) to sew up the remaining seam.

Make another slipper.

Yes, they do look a little boxy when they’re done and not on a foot. The stretch of the garter stitch allows these slippers to stretch around the contours of any foot easily.

Hints and Tips

If you want a longer cuff at the top, work more rows than stated at the beginning when you cast on. Because smaller kid-lettes tend to have chunkier legs (aka – cankles ?), which is so gosh-darn cute btw, don’t go too crazy with the length.

When picking up stitches from the cast off row, be sure you’re really moving on to the next cast off stitch! It’s an easy mistake to pick up a stitch in a stitch you already picked up. If in doubt, give the needle holding the stitches a bit of a tug. You’ll see the yarn move slightly at the very back, closest to the needle. Pick up a stitch at the NEXT cast off stitch.

If you don’t have the same number of stitches on both sides when you are forming the sole, you may have picked up a stitch twice in one stitch or missed one. Don’t worry! This is fixable. You can skip one cast off stitch if you need to make it even, or pick up a cast off stitch twice on the other side. There’s enough stretch in the slipper that any puckering this causes won’t be overly visible if you’re off by a stitch or two.

Picking up the stitches evenly along the toe flap is roughly 1 stitch every ridge.

To speed up finishing the slippers and not have so many ends to sew in, hold the yarn ends to the back of your work as you knit. And yes, this is the third time I’m sharing it, but I made a photo tutorial showing how to do this. You can see it here – How to Work in the Ends as You Knit.

If you have any questions, please feel free to leave a comment below or send me your questions here. If there is a typo or stitch count that’s off, let me know in the comments! I type these out from notes I make when designing the slippers. It’s easy, and embarrassingly common for me to miss something. Especially on the smaller slippers that involve so many different stitch counts for the numerous sizes.

To see how you can keep the free patterns coming, visiting this page – Help Support My Work!  A financial donation is always appreciated but a share, like and follow on social media also helps me immensely ?


Posted on Leave a comment

How to Crochet Leaves – FREE Crochet Pattern to Make a Leaf for Sun Hat

FREE Crochet Leaf Pattern

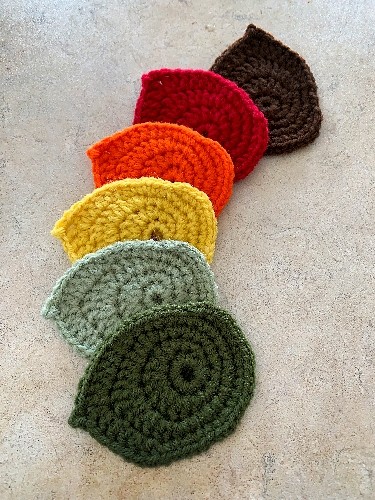
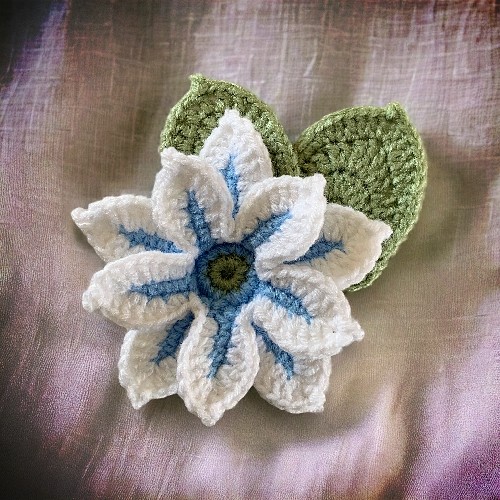
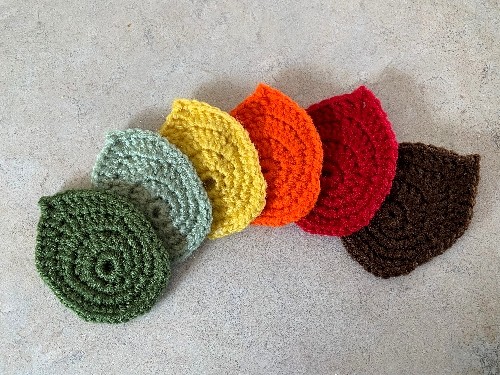
This crocheted leaf pattern was designed to go along with a flower made for my sun hat (Crochet sun hat pattern coming soon!). As I was getting the photos ready, I was thinking how these could also be used to highlight many things, especially a crocheted wreath for autumn. I like how the leaves look in the variety of fall colours.

The leaves by themselves aren’t really much to look at. I didn’t want them to be. I want them to be fill behind the flowers highlighting the flowers themselves.

I’m going to add buttons so you can easily go to the pages with the flower pattern and the hat (when it’s done).

This pattern isn’t available alone as a downloadable and printable PDF. It will be included with the sunhat/bucket hat/cowboy/cowgirl hat along with the flower. It was easier to divide the hat, flower and leaf into separate pages on the website.

If you know someone you think would like this post, by all means, share it! The more eyeballs on my work the better. If you are enjoying the free patterns, this is a great way to support my work. You can also Buy Me A Coffee or check out the other options when you check out the Help Support My Work page. If you’re looking for something new to share with your friends on your website or on social media, these links will help you do it.

The hints and tips for how to finish and press the flowers is written below the pattern. You can also ask any questions in the comments section.

Abbreviations

ch – chain 

sc – single crochet

hdc – half double crochet

dc – double crochet

trc – treble crochet

sl st – slip stitch

st – stitch

sts – stitches

Things You Need

Worsted weigh yarn (small quantities from your stash)

3.5 mm (US E or 4) crochet hook.

Stitch marker. (A piece of yarn or bobby pin will do).

The Pattern

Please note: 

The rounds end in various places on the bottom of the leaf. Regardless, the stitch counts work. Round 4 evens out the stitches giving the leaf shape.

Ch 2 (make the first chain large enough to fit in all the stitches for Round 1)

Round 1: 11sc in 2nd chain from hook. Do NOT join. Begin to work in the round.

Round 2: In the 1st sc from the last round, sc. 2sc in the next st. In the next st, sc, hdc. In the next st, hdc, dc. 2dc in the next 2 sts. In the next st, dc, hdc. In the next st, hdc, sc. 2sc in the next st. Sc.

Round 3: *2sc in the next st, sc* Repeat from * to * 2 more times. In the next st, sc, hdc. (Mark the hdc with a stitch marker). In the next st, hdc, dc. 2dc in the next st. In the next st, dc, trc. In the next st, trc, dc. 2dc in the next st. In the next st, dc, hdc. In the next st, hdc, sc. *Sc, 2sc in the next st* Repeat from * to * 2 more times.

Round 4: *2sc, 2sc in the next st* Repeat from * to * 2 more times. (Or as many sc as you need to get to the stitch marker). Sc in the stitch marked with the marker. As you normally would, proceed as follows, hdc, 4dc. In the next st (the 1st trc from the previous round), dc, trc. Ch 2 sl st in the 2nd chain from hook. In the next st, trc, dc. As you normally would, proceed as follows, 4dc, hdc, sc. *2sc, 2sc in the next st* Repeat from * to * 4 more times. 2Sc. Sl st in the next st. Break yarn. Tie off.

Work in the ends and sew into place.

More of my stuff on Etsy


You can make a widget like this for your blog or website, too.
Instructions are on my website here: How to Display Etsy Items on Your Website

Hints and Tips

Add extra embroidered details to the leaves as you see fit. Maybe some extra veining lines or stitches around the edge in a slightly darker shade? It really is up to you.

As much as I wanted to avoid pressing anything, the leaves also need to be pressed to have them lie flat. Be sure to do a test swatch BEFORE you press anything. Acrylic is notorious for melting and losing all constructive properties when pressed. It melts to give a flat, melted look. Press with your iron at the lowest setting possible. Press with a damp cloth between the iron and the leaf. Iron the leaves from the BACK only! 

Posted on Leave a comment

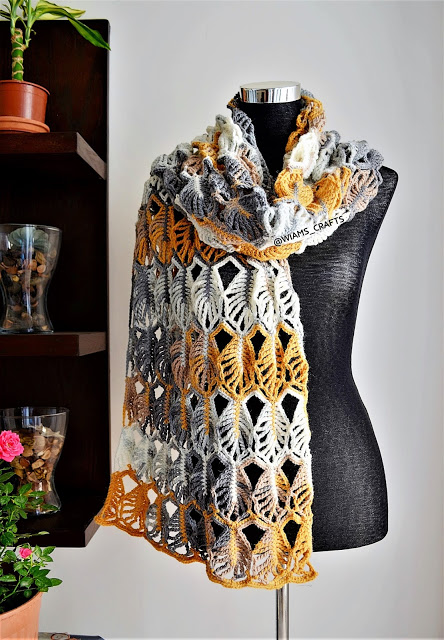
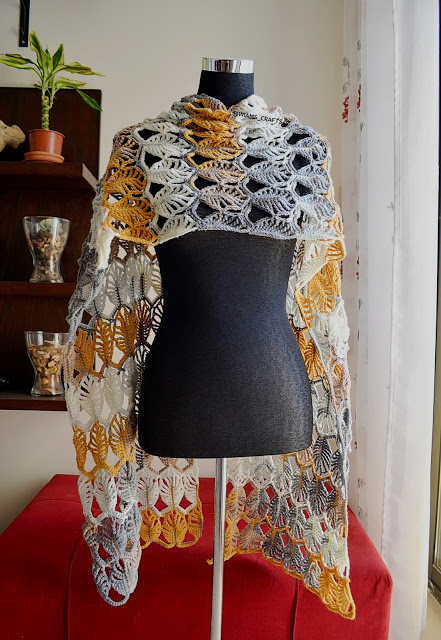
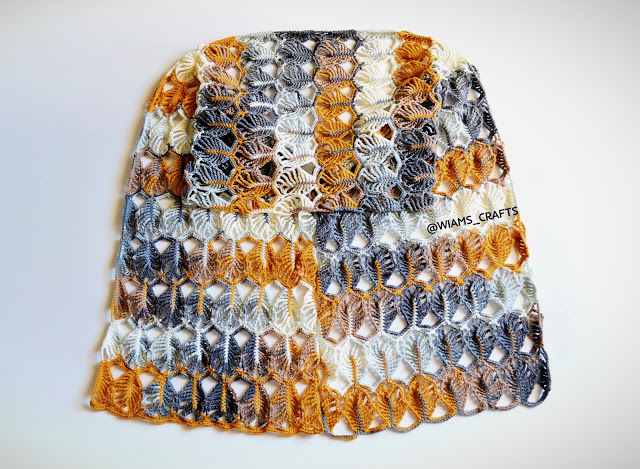
Leaf Assortment Scarf by Wiam’s Crafts

There’s not much that I don’t like about this crocheted scarf! From the great photos of the final project, to the colour of yarn chosen, to the detail of the pattern with tons of how-to photos! Not only is the pattern written out in the standard style, but the author of the blog included a crochet chart if that’s how you prefer to read patterns. Or let’s be honest. Not everyone speaks English. A crochet chart helps to solve that problem.

If you want to start crocheting your own version of this delightful scarf, here’s the link to get you there – Leaf Assortment Scarf.

If you want to add to the leaf assortment collection, there is also a headband with the same motif, and as the date of publication of my post, the matching hat is on it’s way!

Don’t miss out on all the other great crochet and knitting patterns on this site! Scroll down the page and past the comments to see a number of other popular patterns that are available.

Posted on Leave a comment

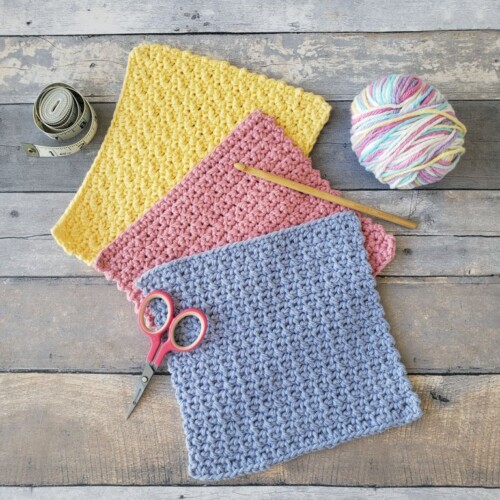
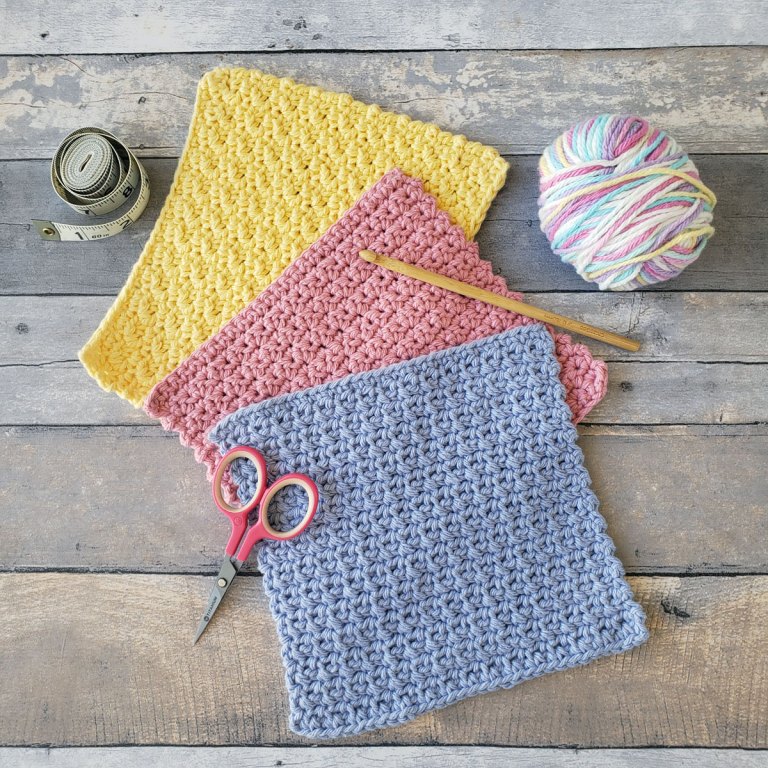
Crochet Washcloths – 3 Free Textured Patterns

Crochet washcloth pattern

Who could use more washcloths? Let’s be honest, who couldn’t.

These wonderful and easy to make crochet dishcloths are just what you need to make if you’re looking for something simple and repetitive to occupy your mind while watching TV or binging the latest series on Netflix. I’m partial to Indian Matchmaking right now myself ?

As the title and photos suggest, there are three different versions of this washcloth available on the Hands Yarn Hook website, all on one page which makes it even easier to navigate. This link will take you to the page: Crochet Washcloths – 3 Free Textured Patterns

Posted on 2 Comments

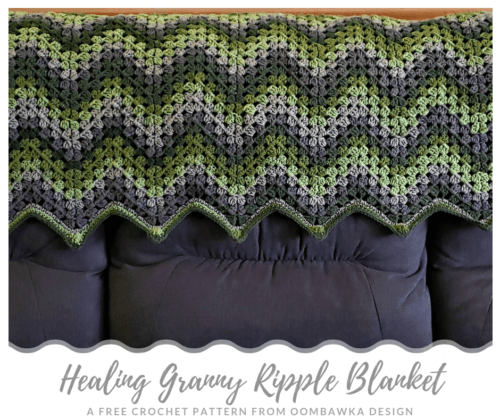
Healing Granny Ripple Crochet Blanket Pattern

Everyone likes to have a nice blanket or afghan to cuddle under on those chilly winter days or cool rainy nights. This free crochet afghan pattern is available in six standard sizes, which is great because what one person would like isn’t necessary the same for everyone. And let’s be honest…not everyone has the patience or desire to crochet a blanket the size of a king size bed when a lap blanket will suffice. I am not a bedspread of any size blanket crocheter. Just saying.

All of the pattern sizes were test crocheted so there should be no problem in stitch counts when making it. Though the designer used Caron Big Cakes to make her version, I’m certain that any worsted weight yarn colour combinations will work. The Caron Cakes and any other self striping yarn would work and result in having less ends to sew in. Standard skeins would also be ok, but the again…sewing in ends may get tedious.

On the website page ?? Healing Granny Ripple Crochet Blanket Pattern ?? there is both the standard written out crochet pattern. Further down the page, there is also a crochet chart if that is what you would prefer.

Posted on Leave a comment

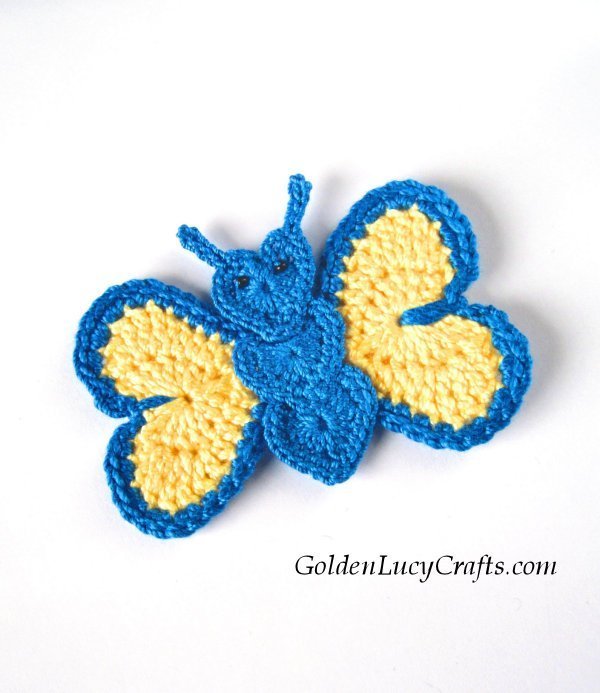
Crochet Butterfly Applique

This beautiful crochet Butterfly applique is made from crocheted hearts. Make the hearts and sew them together! It really couldn’t be much easier than that!

Be sure to check out the rest of her awesome site. She has a bunch of great free crochet patterns I’m sure you’ll enjoy!

Check out here website here:

Golden Lucy Crafts

Happy crocheting!!


Posted on Leave a comment

Excellent Blogs You Should Read

knitting pattern watermelon slippers

As a blogger and pattern creator myself, I always have a soft spot for my fellow online posters of great patterns. I think there is something to be said for folks that go out of their way to design a pattern, a ton of work btw, and then give it away for free! So here is my latest shoutout to those I’ve found on the “intertubes” that deserve a a few extra page visits, views, likes and shares thrown their way.


Watermelon Chunky Slippers

These are some super cute slippers! Designed to fit both adults and children, you can read this pattern in full on the blog here. And did I mention, it’s free ?

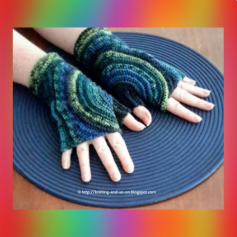
Kreisel Fingerless Gloves

I’ve always been a fan of crocheted mittens of any style, but I REALLY like the looks of these. I’m a fan of both the design and the colour. Bit of a sucker for the cooler shades… You can read the pattern on the blog here.

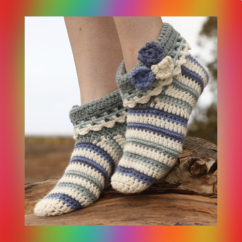
Annabelle by DROPS Design

I’m always so impressed by the number of patterns available at this site and love these crocheted slippers! You can read the pattern for this lovely design here.

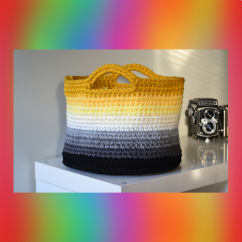
Ombre Basket Pattern

I actually like this purse/basket so much that I’m going to share this one again. I did once with another website I was running, but that’s a story for another day. The basket is going to turn out based entirely on the yarn colour selections. I know that the yarn cakes are really popular right now but the colour changes may not be short enough to get this fabulous colour transition. But enough on my views, get to making this now! Read the pattern here.

This is a great project for anyone! If you’re learning how to crochet or even if you’re an experienced crocheter (is that even a word) you’ll find the final product super useful. I have one sitting by my kitchen sink right now. And it was from a fellow crocheter (still not sure if that’s a word ?). I’m including the how to video and the link where you can read the pattern online – The Best Kitchen Scrubbie